
CS 241E - Foundations of Sequential Programs (Enriched)
| Home |
| Piazza |
| Office Hours |
| Personnel |
| Resources/Lectures |
| Tutorial Code |
| Additional Reading |
| Assignment Setup |
IntelliJ IDEA Setup |
| Assignment Policies |
| Assignments |
| Exams |
| Marks |
IntelliJ IDEA Setup
- Install the Java JDK if you don't have it installed already (Java SE JDK, at least version 11).
-
Ensure that
jdk/binis in your PATH environment variable. If you are using Windows, the environment variable settings are accessed by searching "Edit the system environment variables" in the Start Menu. The dialog will look like this:
Click on Environment Variables.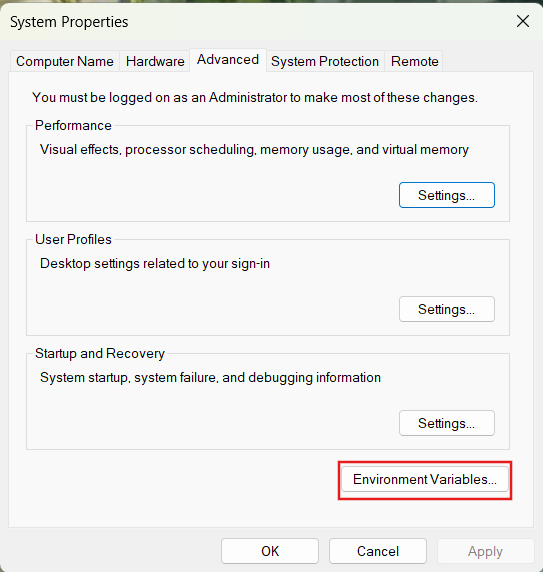
-
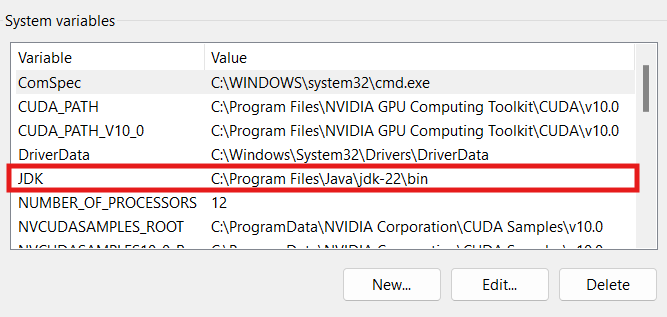
Add JDK Path to System Variables.
- Download and install the Community version of IntelliJ IDEA.
-
Install the Scala plugin from the Plugins section.
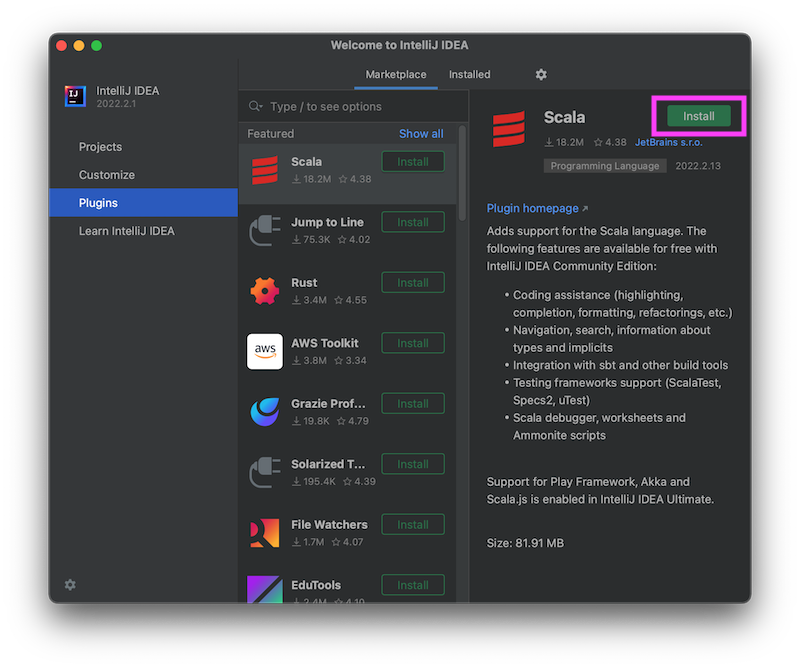
Once the Scala plugin is installed, restart IntelliJ IDEA.
-
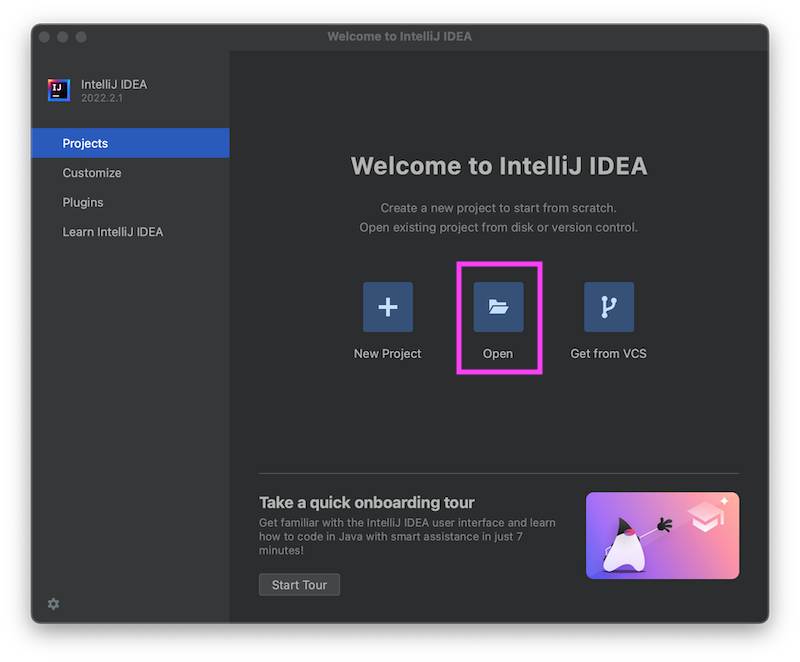
On the IntelliJ IDEA start screen, click on Open.
Find
build.sbtunder thecs241edirectory where you unzipped the assignment skeleton code. Click Open.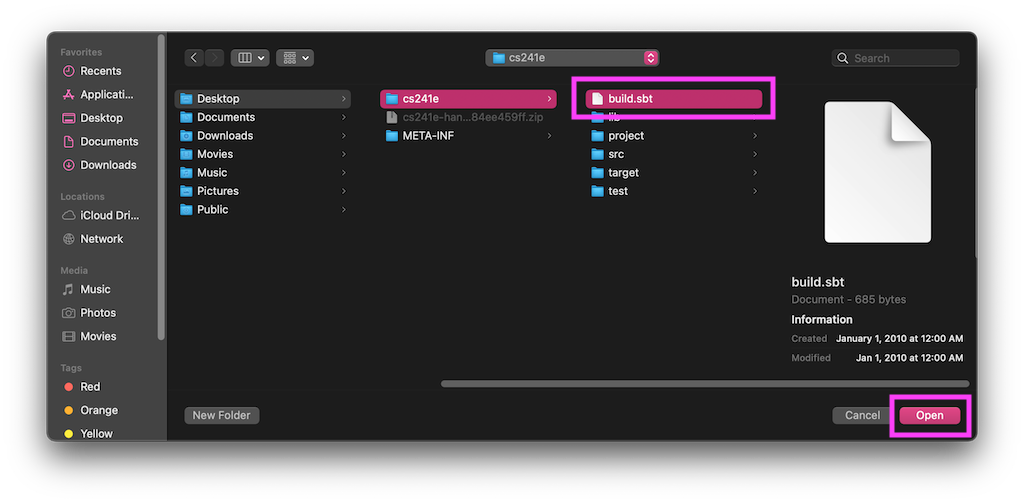
-
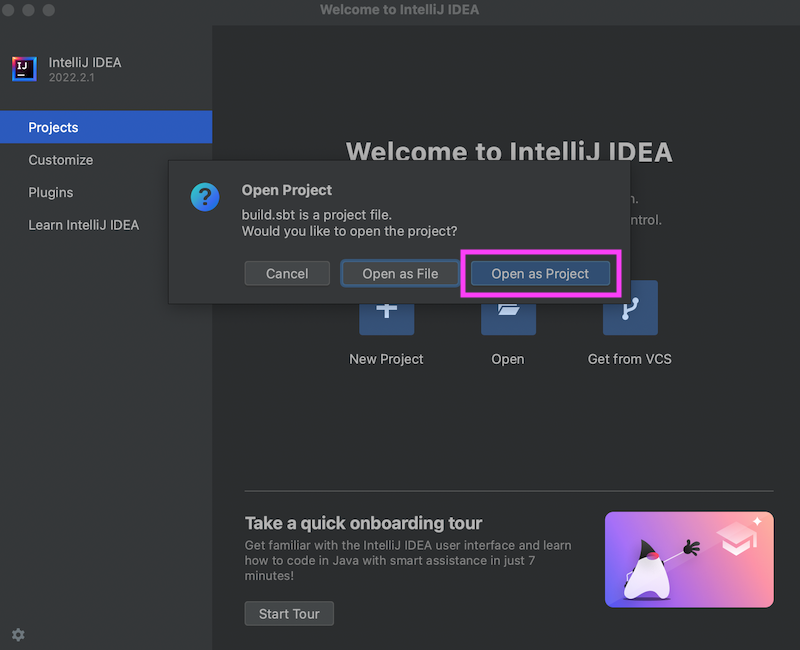
Click Open as Project on the dialog that appears.
-
Wait a few seconds for the project to build.
You should be able to see a
targetdirectory in the Project tool window once building is complete.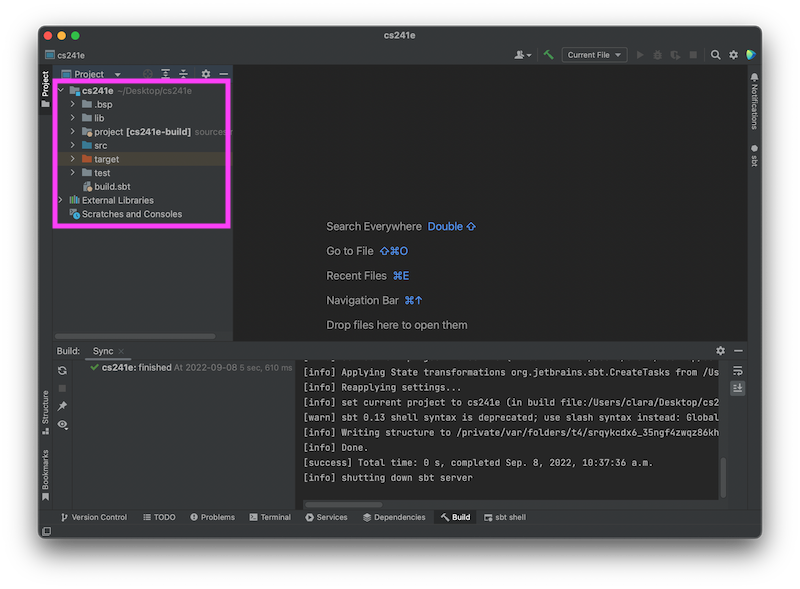
-
To ensure that the IDEA project has been set up correctly, go to the
test/srcfolder and right click onA1Tests. You should see an option to run the test.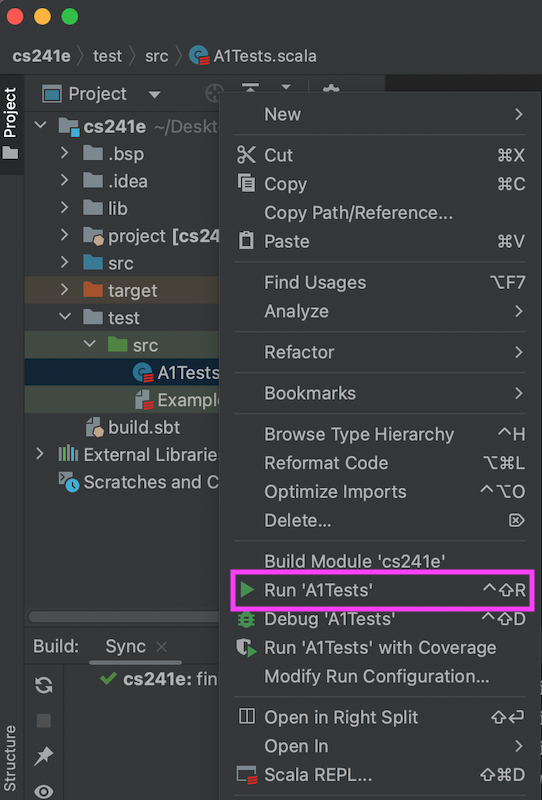
It is normal for this test to fail with a
NotImplementedErroruntil you complete part of Assignment 1.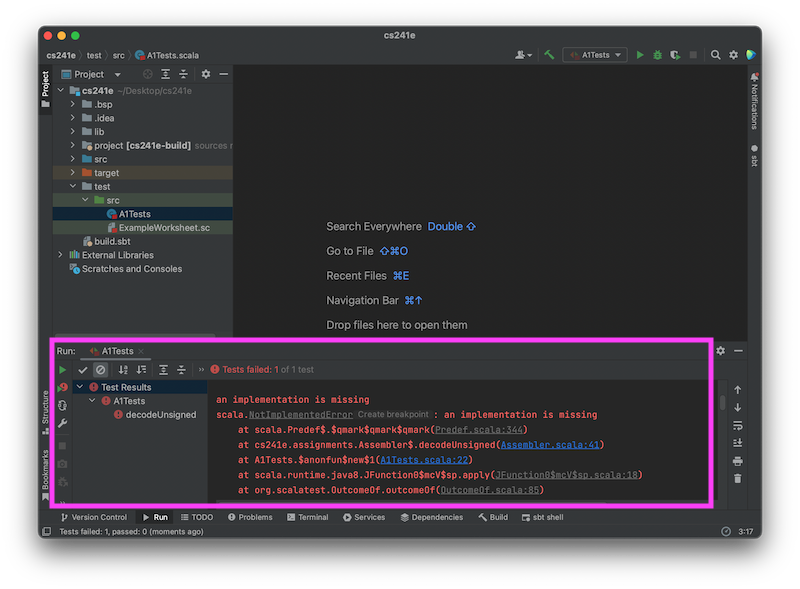
If you get the following error:
Unable to load a Suite class. This could be due to an error
                    in your runpath
, click on Invalidate Caches / Restart from the File menu, then click the Invalidate and Restart button. This should resolve the error.