#
Gradle & Build Systems
When developing applications, there is a large list of steps that need to be completed before we can release our software to users. We might need to:
- Make sure that we have the correct version of source code and libraries.
- Setup our build environment and compile everything.
- Setup our test environment, and run tests.
- Build installers to distribute to users.
Performing these steps manually is error-prone and time-consuming. Instead of doing this by-hand, we tend to rely on build systems: software that is used to build other software. There are a number of build systems on the market that attempt to simplify and propvide consistency in these tasks. These tools often language or toolchain dependent due to the specifics of each programming language. e.g. make or scons for C++; cargo for Rust, maven for Java.
Builds systems automate what would otherwise be a manual process. They provide consistency and help address issues like:
- How do I make sure that all of the steps are being handled properly?
- How do I ensure that everyone is building software the same way i.e. using the same compiler options, and libraries?
- How do I ensure that tests are being run before changes are committed?
You've used make in previous courses. Make is popular, and suitable for smaller projects. However, it has some limitations that are problematic in this course:
- Build dependencies must be explicitly defined. Libraries must be present on the build machine, and manually maintained i.e. someone needs to download, test and install them.
Makeis tied to the underlying environment of the build machine. It relies on shell scripts and environment variables to work, and uses locally installed software to build. This makes your build environment fragile and easy to break.- Performance is poor.
Makedoes not scale well to large projects. - It is challenging to fully automate and integrate with other systems.
#
Requirements
We’re going to use Gradle, a modern build system that provides more functionality than make and is more suitable for complex projects. Why Gradle and not some other build system like Maven?
- It's popular in the Kotlin and Java ecosystems.
- It’s the official Google-endorsed build tool for Android projects.
- It's cross-platform and programming language agnostic.
- It's open source and has a large community of users.
Gradle has three main pillars of functionality that we will explore:
Managing build tasks : Built-in support for discrete tasks that you will need to perform. e.g., downloading libraries; compiling code; running unit tests and so on.Build configuration : A way to define how these tasks are executed.Dependency management : A way to manage external libraries and dependencies.
We'll discuss these in more detail later in this section. First, let's setup Gradle.
#
Project Setup
Gradle is always setup in the context of a project: a specific directory structure, and a set of configuration files that define how your source code will be built. You create the Gradle project, and then your source code (and other assets) are added to that directory structure.
Project creation can be done in IntelliJ IDEA or Android Studio, or by using the gradle command-line tool.
#
Create a Project
We'll create a project using IntelliJ IDEA.
Use the File > New Project wizard in IntelliJ IDEA to create a new empty project. This will give you a top-level project with starting configuration files.
Projects can be created with a variety of configurations, but for this course, you should choose Kotlin as your programming language, Gradle for your build system, and Kotlin for your DSL language.

The result of this process is a new project with a directory structure and configuration files that are ready to use with Gradle. Note that the project will be specific to the type of project that you chose e.g., Android, Desktop, Web Service.
If you have Gradle installed on your machine, you can create a new project from the command line using the gradle init command. This will also create a new project with the default configuration files.
We tend to use the IntelliJ wizard, as it doesn't require a separate Gradle installation.
#
Using the Gradle Wrapper
At the top-level of your project's directory structure will be a script named gradlew (or gradlew.bat for Windows users). This is the Gradle wrapper: a script that you can use to run Gradle tasks without having to install Gradle on your machine. You can run it and pass it the same command-line arguments that you would normally pass to Gradle.
This allows you to run Gradle tasks as-if you had Gradle installed locally (but without needing to install it).
For example, we can invoke the Gradle wrapper with the help task to get information about how Gradle is configured and how to use it. This is the same as running gradle help if you had Gradle installed on your machine.
$ ./gradlew help
Starting a Gradle Daemon (subsequent builds will be faster)

> Task :help

Welcome to Gradle 7.5.1.

To run a build, run gradlew <task> ...
To see a list of available tasks, run gradlew tasks
To see more detail about a task, run gradlew help --task <task>
To see a list of command-line options, run gradlew --help
For more detail on using Gradle, see https://docs.gradle.org/7.5.1/userguide/command_line_interface.html
For troubleshooting, visit https://help.gradle.org
When you run a task using the Gradle wrapper, it downloads and caches the appropriate version of Gradle, and then uses that version to run your tasks. This ensures that you are running the correct version of Gradle for your project!
For this reason, if you are running tasks from the command-line, you should always use the Gradle wrapper.
#
Wrapper Configuration
The Gradle project configuration (gradle/gradle-wrapper.properties) lists the version of Gradle to be used for your project.
To change the version of Gradle being used, update the gradle-wrapper.properties file, and change the distributionURL line to the correct version e.g., Gradle 8.0.2 below.
distributionBase=GRADLE_USER_HOME
distributionPath=wrapper/dists
distributionUrl=https\://services.gradle.org/distributions/gradle-8.0.2-bin.zip
zipStoreBase=GRADLE_USER_HOME
zipStorePath=wrapper/dists
The gradle-wrapper.properties file should be stored in Git, as part of your build configuration scripts.
Check that the Kotlin and Gradle versions are compatible. You can find this information in the Kotlin compatibility matrix.
You can probably just use the version that the project wizard selected for you when the project was created.
#
Build Tasks
Projects often have complex build requirements that include a series of steps that need to be performed. For example, you might need to:
- Compile your source code,
- Run tests to make sure it built and works properly,
- Build a distributable package.
You might also have additional steps: generate documentation, run static analysis, or deploy to a server.
Any build system needs to support a wide range of steps like this, and it should allow you to define how these tasks will be performed. It should also run them in the correct order.
Gradle uses the term task to describe a set of related functions that can be applied to a particular type of project. For example, you might have a clean task to remove temporary build files, and a build task to build your Kotlin console project. Complex projects will add additional tasks that are required for that style of project e.g., build-android-application.
Often complex projects will require many different tasks to be executed in a particular order to achieve your goal. For instance, there are likely a dozen or so tasks required to be executed in order to build a working Android application. Gradle is able to manage these tasks and execute them in the correct order for you.
In this, we way that Gradle is declarative, in that you describe what you want to do, rather than how you want to do it. This is incredible useful, as it allows Gradle to manage the details of how to perform more complex tasks for you. We will discuss how to describe your project using build configuration files later in this section.
#
Running Tasks
To run Gradle tasks from the command line, use the Gradle wrapper with the appropriate the task name. We can run ./gradlew tasks to see a list of tasks that are supported in your project.
$ ./gradlew tasks

> Task :tasks

------------------------------------------------------------
Tasks runnable from root project 'gradle'
------------------------------------------------------------

Application tasks
-----------------
run - Runs this project as a JVM application

Build tasks
-----------
assemble - Assembles the outputs of this project.
build - Assembles and tests this project.
buildDependents - Assembles and tests this project and all projects that depend on it.
buildNeeded - Assembles and tests this project and all projects it depends on.
classes - Assembles main classes.
clean - Deletes the build directory.
jar - Assembles a jar archive containing the classes of the 'main' feature.
testClasses - Assembles test classes.

# many more that are not shown
You can execute any of these tasks through the Gradle wrapper. e.g. ./gradlew build or ./gradlew clean.
Commonly used tasks include:
./gradlew helpwill provide online help../gradlew taskswill list all of the tasks that are available../gradlew cleanwill remove temporary build files../gradlew buildwill build your project../gradlew runwill usually run your project (depending on the platform).
You can also run tasks from within IntelliJ. Both IntelliJ IDEA and Android Studio include a Gradle IDE plugin, which allows you to run Gradle tasks.
View > Tool Windows > Gradle will open the Gradle window. Tasks are grouped by category. You can run individual tasks by double-clicking on them.

#
Using Plugins
Gradle comes with a small number of predefined tasks. You will usually need to add additional tasks that are specific to your type of project. We do this via plugins.
A plugin is a collection of tasks that have been bundled together to perform a specific function. For example, the java plugin adds tasks for compiling Java code, running tests, and building a distributable package. Plugins can also add additional configuration options, or set defaults for existing options.
There are different types of plugins.
- Core plugins: These are the plugins that are included with Gradle by default. They provide basic functionality that is required by many projects. Core plugins include
java(which adds support for compiling Java code), andapplication(which adds support for running code, and building a distributable package).
Core plugins are listed in the Gradle documentation, and you can use them in your project by adding a line to the plugins section of your build.gradle.kts file.
plugins {
    java
}- Community Plugins: These are plugins that are created by the community and are not included with Gradle by default. They provide additional functionality that is not available in the core plugins. An example would be the 'io.github.gmazzo.codeowners.jvm' plugin, which provides some very specific functionality.
Community plugins can be found in the Gradle Plugin Portal. This is a repository of plugins that have been created by the community. You can search for plugins by name, or by category.

Under the plugin page on the Gradle Plugin Portal, you will find instructions on how to add the plugin to your project. Typically, you will need to add a line to the plugins section of your build.gradle.kts file.

Running ./gradlew tasks will list all of the tasks that are available in your project. This will include tasks that are added by plugins.
#
Build Configuration
Once you have tasks defined, you need some way to configure and control how they are executed.
It's certainly possible to write custom scripts e.g, bash shell scripts to execute these tasks, but they are challenging to maintain, and need to be written for each project.
Instead, Gradle provides a way to define tasks in build configuration files, and then run them with a single command. This makes it easy to build complex projects, and ensures that the build process is consistent across all of your projects.

Unlike other configuration-based build systems, Gradle uses a Domain Specific Language (DSL) to define build scripts; you actually write your scripts in Groovy or Kotlin. This makes Gradle extremely configurable and extensible to meet complex project requirements.
#
Directory Structure
When you create a new project with Gradle, it will create a directory structure for you.
This directory structure is opinionated: Gradle requires a specific directory structure to work correctly, so you should work within the structure that it gives you. Most of these files are configuration file, or scripts that help execute gradle. The actual source code will be placed in the app/src directory.
A standard Gradle project has the following directory structure:
.
├── build.gradle.kts
├── gradle
│   └── wrapper
├── gradle.properties
├── gradlew
├── gradlew.bat
├── settings.gradle.kts
└── src
    ├── main
    └── test
You can choose Android to build an Android project as well. It will produce an identical directory structure; only the configuration files will be different.
#
Configuration Files
build.gradle.kts and settings.kts are the configuration files for your project, describing logical structure, dependencies, and so on.
We strongly recommend that you use the New Project wizard to create your project. This will ensure that you have the correct directory structure and configuration files.
settings.gradle.kts
This is the top-level configuration file. You likely don't need to modify this for single-target projects. Later, when we discuss multi-project builds, we will modify this file to add additional modules.
plugins {
    id("org.gradle.toolchains.foojay-resolver-convention") version "0.5.0"
}

// top-level descriptive name
rootProject.name = "project-name"
build.gradle.kts
This is the detailed build configuration. You might need to modify this file to:
- Add a new dependency (i.e. library)
- Add a new plugin (i.e. set of custom tasks)
- Update the version number of a product release (
versionbelow).
Briefly, here's what each section represents:
pluginsare used to add project-specfic tasks and functionality. In this case, thejvmplugin is added to support Kotlin desktop code.repositoriesare locations where libraries are stored and made available.mavenCentral()is the standard online repository for Java and Kotlin libraries.dependenciesare external libraries that your project needs. In this case, thekotlin-testlibrary is added.- the
kotlinsection is used to specify properties for the corresponding plugins. In this case, "Java 17" is specified for your project config.
// includes jvm tasks
plugins {
    kotlin("jvm") version "1.9.21"
}

// product release info
group = "org.example"
version = "1.0-SNAPSHOT"

// location to find libraries
repositories {
    mavenCentral()
}

// add libraries here
dependencies {
    testImplementation(`org.jetbrains.kotlin:kotlin-test`)
}

tasks.test {
    useJUnitPlatform()
}

// java version
kotlin {
    jvmToolchain(17)
}
#
Multi-Project Builds
A simple build is suitable for most standalone, independent projects. Keep in mind that it is restricted to the specific project type that you chose with the New Project wizard e.g., Android, Desktop, Web Service.
What do you do if you want to build a more complex project e.g., a combination of desktop, Android, web service and so on? You could do this with multiple separate projects, but it's often beneficial to have them in the same project.
In Gradle, this is known as a multi-project build, and it allows you to build multiple projects from a single top-level project. This is useful when you have multiple projects that depend on each other, or when you want to share code between projects.
There is a specific structure that you need to follow to create a multi-project build. In the example below, we have subprojects application, models and server which represent different projects.
.
├── application
│   ├── bin
│   ├── build.gradle.kts
│   └── src
├── gradle
│   └── wrapper
├── gradle.properties
├── gradlew
├── gradlew.bat
├── local.properties
├── models
│   ├── bin
│   ├── build.gradle.kts
│   └── src
├── server
│   ├── bin
│   ├── build.gradle.kts
│   └── src
└── settings.gradle.kts
To create a multi-project build, you need to create subprojects for each project that you want to manage. Each subproject should have its own build.gradle.kts file, and a src directory containing the source code for that project. The top-level settings.gradle.kts describes common dependencies and the overall project structure.
Let's walk through an example of how to create a multi-project build.
#
Step 1: Move the application code into an application project:
To move the code:
- Create a directory named
application. - Move the
build.gradle.ktsandsrcfolder from the root into theapplicationdirectory. - Edit the top-level
settings.gradle.ktsand add the following line to the bottom of the file:
include("application")
#
Step 2: Add a server project
To add a server project:
- Create a type of project using the IntelliJ IDEA Project Wizard e.g., Ktor server.
- Place it in a subdirectory of your main project. Each subdirectory should just contain the generated
srcdirectory, and thebuild.gradle.ktsfile. You don't want anything else in the project subdirectory. - Finally, update the
settings.gradle.ktsto add each project subdirectory in theincludestatement.
include("application", "server")
#
Step 3: Add a models project
Repeat Step 2 with an empty project to hold shared models.
#
Dependency Management
The final core function is managing libraries and dependencies.
When we write software, we often rely on external libraries to provide functionality that we don't want to write ourselves. For example, we might use some library to handle networking, or to provide a user interface. These libraries are known as dependencies, and they are a critical part of modern software development.
A large challenge of any build system is managing these dependencies properly. For example, you need to make sure that you have the correct version of a library, and that any dependencies that it might need are also installed (called transitive dependencies). You also need to make sure that the library is compatible with the rest of your software, and that it doesn't introduce any security vulnerabilities.
Gradle is designed so that you can specify your dependencies in your build scripts. Gradle will download them from an online repository as part of your build process, and manage them for you.
mavenCentral is the standard online repository for Java and Kotlin libraries.

A repository is a location where libraries are stored and made available; these can be private (e.g. hosted in your company) or public (e.g. hosted and made available to everyone).
Typically, a repository will offer a large collection of libraries across many years of releases, so that a package manager is able to request a specific version of a library and all of its dependencies.
#
Setting Up Repositories
We'll use a public online repository for this course. The most popular Java/Kotlin repository is mavenCentral, and we'll use it with Gradle to import any external dependencies that we might require.
You can control the repository that Gradle uses by specifying its location in the build.gradle.kts file. By default, Maven Central should already be included.
repositories {
     mavenCentral()
}
#
Browsing Repositories
You can browse repository websites to find libraries that you might want to use. Additionally, you can use an online package directory.

Each package information page will include the details of how to import the package into your Gradle project. e.g.

Also see Resources > Libraries for links to popular libraries.
#
Add Dependencies
You add a specific module or dependency by adding it into the dependencies section of the build.gradle.kts file. Dependencies need to be specified using a "group name: module name: version number" (with a colon separating each one).
From the previous example, we can copy and paste the dependency line from the package information page directly into our build.gradle.kts
dependencies {
    implementation("io.coil-kt.coil3:coil-jvm:3.0.0-alpha06")
}
You generally want the most recent version that is available, but you can specify a specific version if you need to. Gradle will download the library and any dependencies that it needs, and make them available to your project.
The keyword implementation above indicates that this dependency is required for the application to both compile and run. There are other keywords that can be used to specify different types of dependencies e.g.,
runtimeOnlyfor dependencies that are only required at runtime.testImplementationfor dependencies that are only required for testing.apiwhen writing libraries, to indicate that transitive dependencies need to be exported (i.e. the libraries that your dependencies require).
You should use implementation for most dependencies.
#
Version Catalogs
One challenge is keeping track of the versions of libraries that you are using. It's important to keep your libraries up-to-date to ensure that you have the latest features and bug fixes. However, updating libraries can be a time-consuming process, as you need to check the library's website for new versions, update your build file, and test your application to make sure that everything still works.
Gradle has a feature called version catalogs, which is a centralized file that contains a list of libraries and their versions. When you run a Gradle build, Gradle will check the version catalog to see if there are any updates available for the libraries that you are using. If there are updates available, Gradle will automatically update the libraries in your project to the latest versions.
When using multiple related projects, this can help ensure that all projects are using the same versions of libraries. This can help prevent compatibility issues between projects.
In Gradle 7.6 or later, the version catalog is contained in a file named libs.versions.toml in your gradle project directory.
A version catalog file contains sections for versions, libraries (dependencies) and plugins.
[versions]
kotlin-version = "2.0.20-RC"
serialization-version = "1.9.0"
clikt-version = "4.4.0"
ktor-version = "2.3.4"
ktor-api-version = "2.2.4"
json-version = "1.7.1"
slf4j-version = "2.0.7"
versions-version = "0.51.0"

[libraries]
clikt = { module = "com.github.ajalt.clikt:clikt", version.ref = "clikt-version" }
ktor-core = { module = "io.ktor:ktor-client-core", version.ref = "ktor-version"}
ktor-cio = { module = "io.ktor:ktor-client-cio", version.ref = "ktor-version"}
ktor-server = { module = "io.ktor:ktor-server-default-headers", version.ref = "ktor-version"}
ktor-api = { module = "dev.forst:ktor-api-key", version.ref = "ktor-api-version" }
json = { module = "org.jetbrains.kotlinx:kotlinx-serialization-json", version.ref = "json-version" }
slf4j = { module = "org.slf4j:slf4j-simple", version.ref = "slf4j-version"}

[plugins]
ktor = { id = "io.ktor.plugin", version.ref = "ktor-version" }
kotlin-jvm = { id = "org.jetbrains.kotlin.jvm", version.ref = "kotlin-version" }
kotlin-serialization = { id = "org.jetbrains.kotlin.plugin.serialization", version.ref = "serialization-version" }
versions = {id = "com.github.ben-manes.versions", version.ref = "versions-version" }
In build.gradle.kts, we can use these library names to refer to these specific libraries and versions.
dependencies {
plugins {
    // different forms of the same plugin declaration

    // kotlin("jvm") version "1.9.10"
    // id("org.jetbrains.kotlin.jvm") version "1.9.10"
    alias(libs.plugins.kotlin.jvm) // core kotlin

    // kotlin("plugin.serialization") version "1.9.0"
    // id("org.jetbrains.kotlin.plugin.serialization") version "1.9.0"
    alias(libs.plugins.kotlin.serialization) // json-serialization

    alias(libs.plugins.ktor) // provides networking support
    alias(libs.plugins.versions) // checks versions, see help > dependencyUpdates
}

group = "ca.uwaterloo"
version = "1.2"

application {
    mainClass.set("ca.uwaterloo.ApplicationKt")
}

repositories {
    mavenCentral()
}

dependencies {
    implementation(libs.json)
    implementation(libs.clikt)
    implementation(libs.slf4j)

    implementation(libs.ktor.cio)
    implementation(libs.ktor.core)
    implementation(libs.ktor.server)
    implementation(libs.ktor.api)
}
#
Last Word
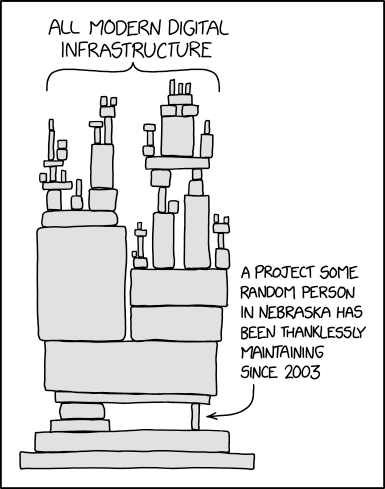
It's staggering how much software is available through package repositories…