Project setup
This section describes a project milestone. See the schedule for due dates.
Create a GitLab project
Once your team has been formed, you will need to create a project space in the University of Waterloo GitLab. You should create a single GitLab project for your team, and add the information detailed below. When done, you will need to submit your project details in Learn.
Step 1: New-project wizard
- Open the GitLab home page.
- Select
+>New project/repository>Create Blank Project. - Fill in the form:
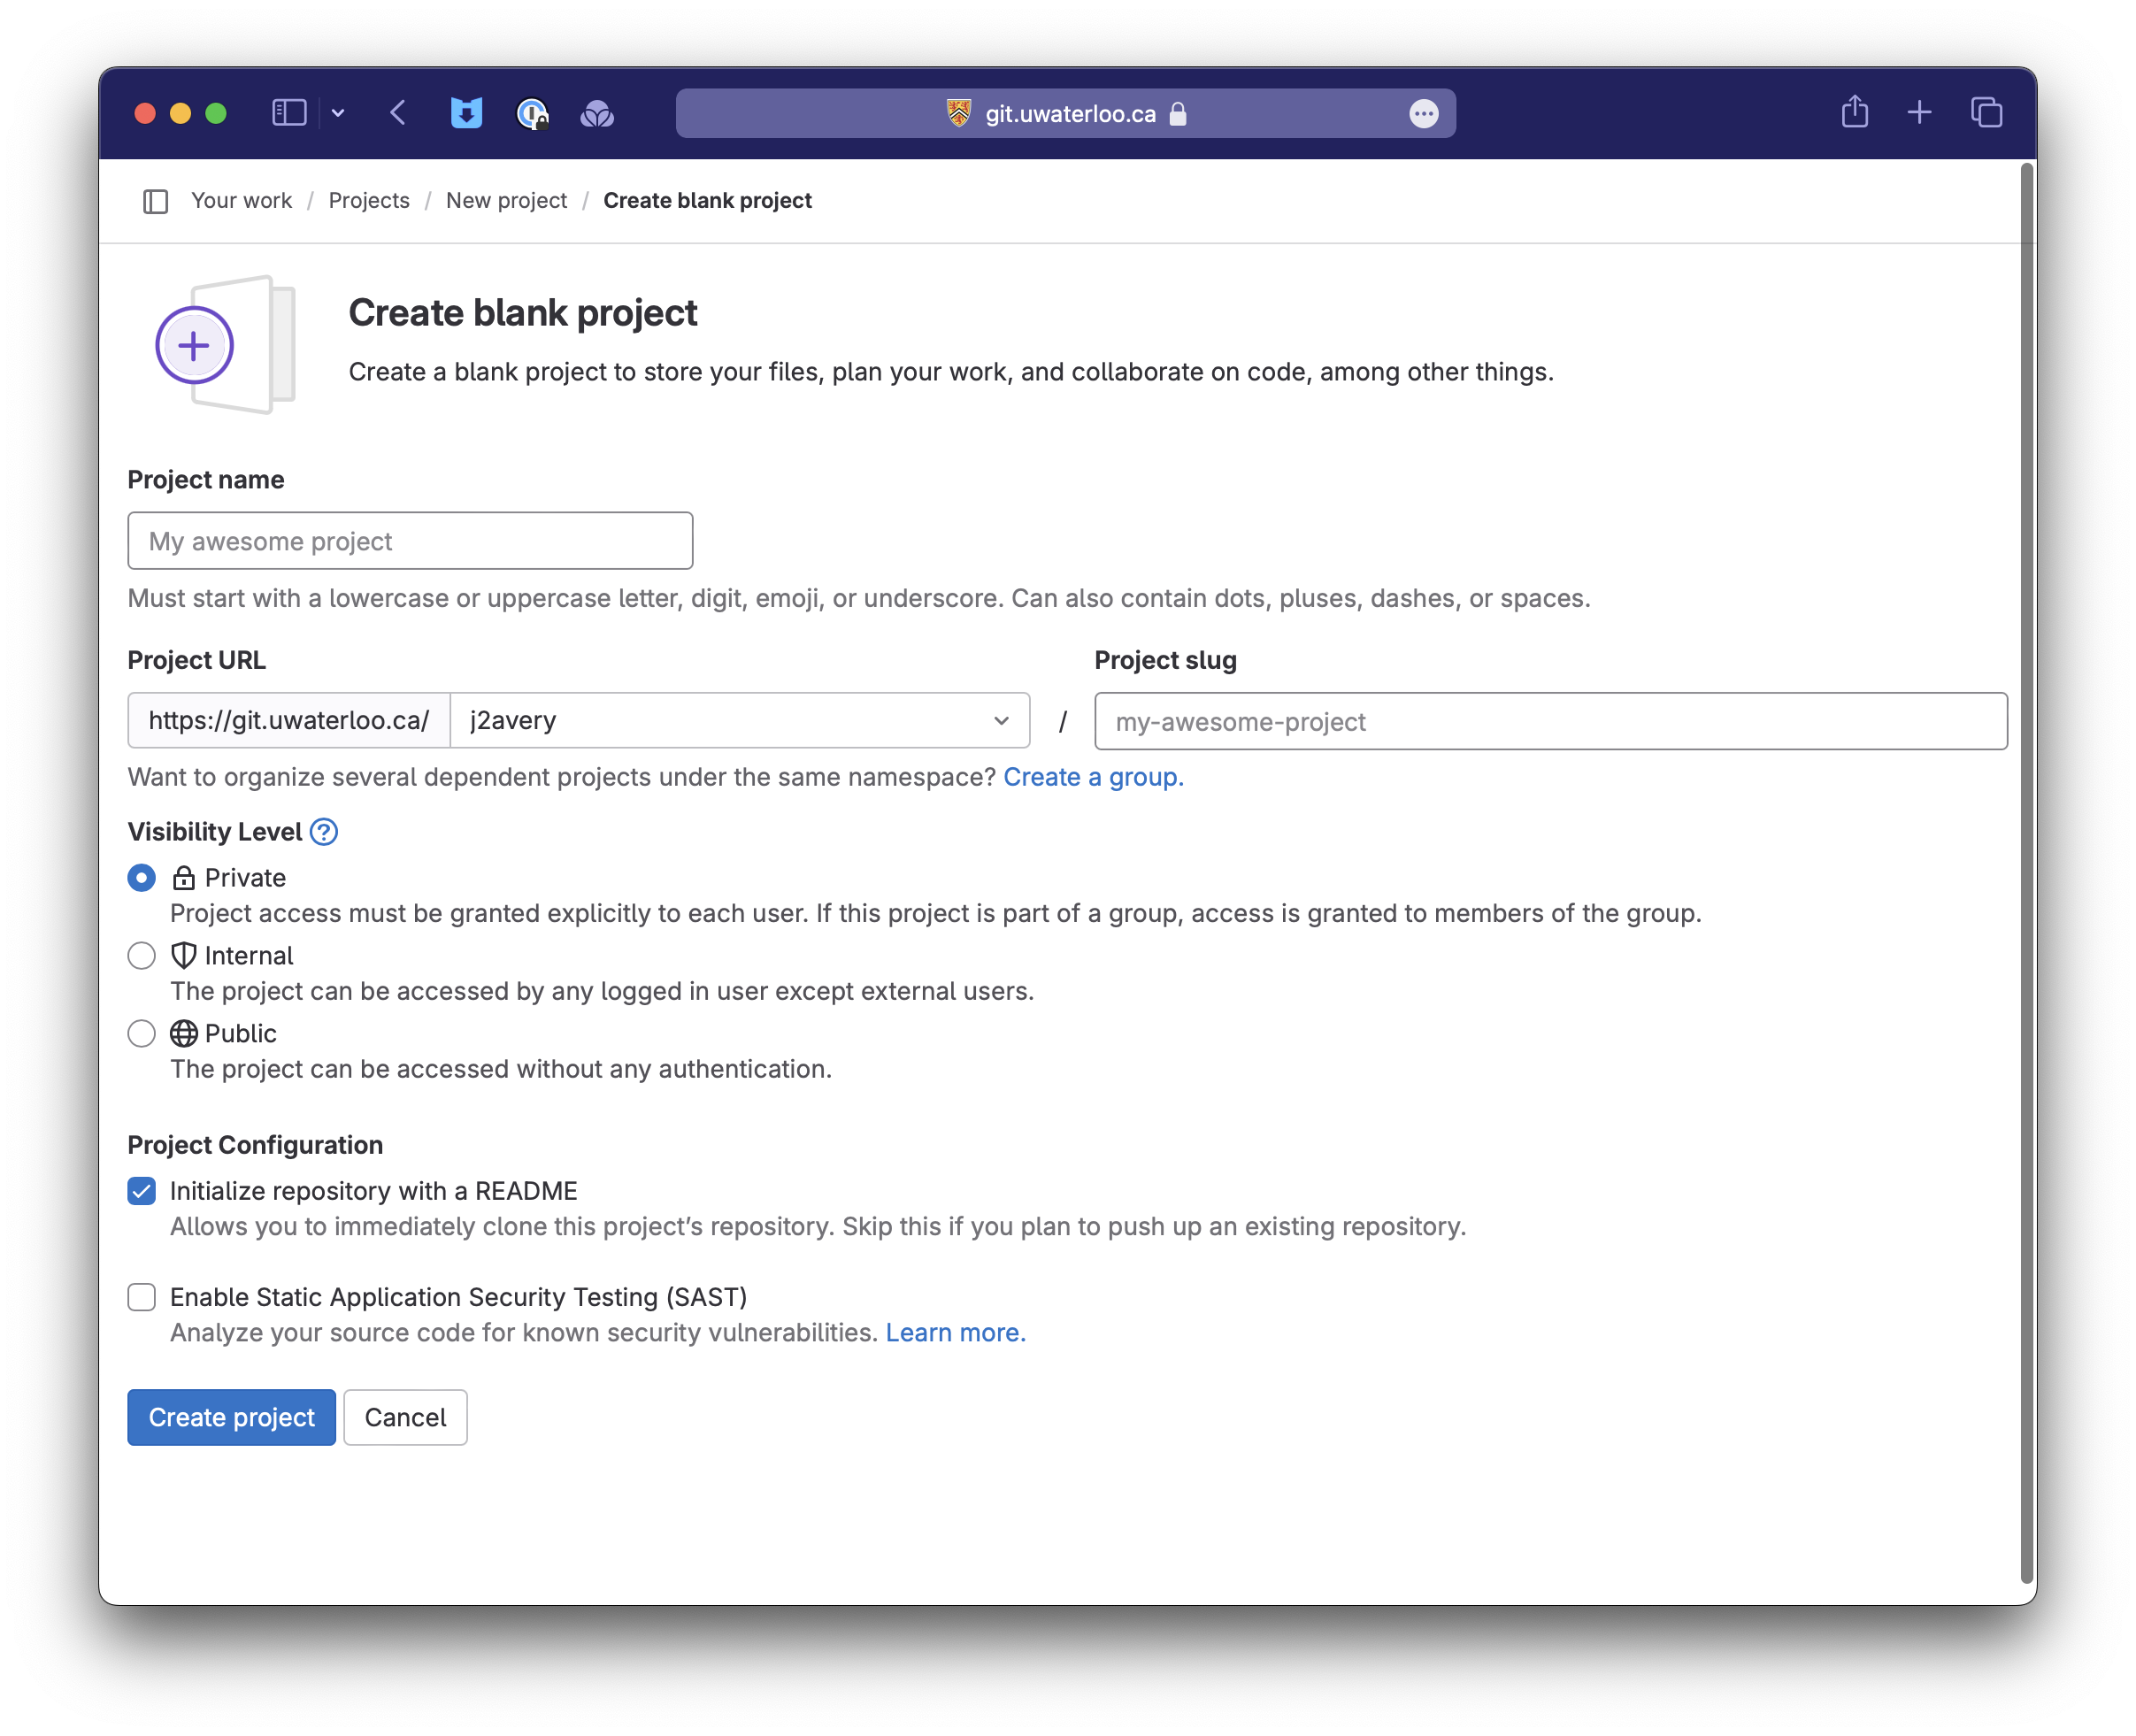
- The project should be placed under the Username of one of your team members (e.g.
j2averyin the URL example above). - Visibility should remain
Private. - Your project should have a descriptive name (see Forming a Team). e.g.,
UberTweetsorSocial Calendar.
- Select
Create projectto proceed.
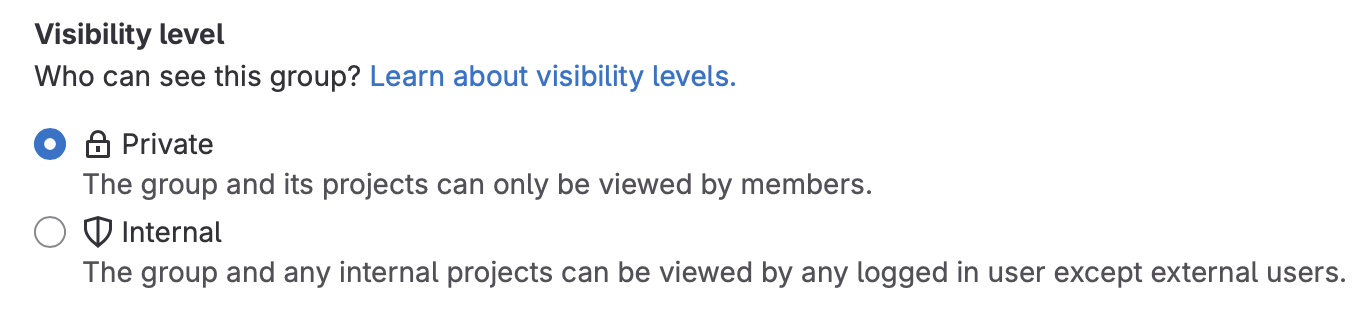
Step 2: Set project security
It’s important that you set permissions on your project. This provides access to those who need it, while preventing others from accessing it!
The person who sets up the project should make the following changes:
- Check project visibility.
Settings>General>Visibility Level- Ensure that it’s set to
Private.
- Add your teammates to the project with full access.
Manage>Members,Invite Members.- When they accept, change their role to
Owner.
- Add course staff with reduced permissions. Add the instructors and TAs to your project.
Manage>Members,Invite Membersand use each person’s email address.- When they accept, set their role to
Developer.
Teams will be assigned TAs in the middle of the second week of the term, before this deliverable is due. You can either wait for those details to be released, or just add all of the TAs and instructors to your project.
Step 3: Add project details
Optionally, you can also add a project icon, and other details.
Settings>General,Project avatar.Settings>General,Project description.
Step 4a: Create a README.md
You should have a markdown file in the root of your source tree named README.md. This will be displayed by default when users browse your project and serves as the main landing page for your project.
You must have at-least the following details included in your README.md.
Simple README.md file
# SUPER-COOL-PROJECT-NAME

## Title
A description of your project e.g., "an Uber-eats app for parakeets!".

## Team Details
Basic team information including:
* Team number
* Team members, listed in in alphabetical order. Include full names and email addresses.
* Link to your Team Contract wiki page.
Step 4b: Create a .gitignore file
Create a single file in the root of your source tree named .gitignore. It should include any directories of files that you want git to not include. This is great way to handle local config files or tmp files that you don’t want in your repository!
Simple .gitignore file
build/
out/
.DS_Store
.idea
.gradle
Step 5: Create a team contract
In your Wiki, create a page for your Team Contract and link it to your README.md under Team Details.
Minimally, your team contract needs to contain:
- Names and contact information of all team members.
- Agreement on how you will meet in-person e.g., how often, and location. You are expected to meet at least twice per week and document it.
- Agreement on how you will communicate e.g., email, Messages, WhatsApp, MS Teams. You need one agreed-up communication channel that everyone will check.
- Agreement on team roles: who is the project lead? Are people taking on specific design responsibilities?
- Agreement on how the team will make decisions. Do you vote? Do you need a majority?
How to submit
When you are done the steps above, please submit for grading.
Note that only one person on the team needs to submit team deliverables. The submission will be associated with your team, not the person that submitted it.
Login to Learn, navigate to Submit > Dropbox > Project Setup, and submit a link to your top-level project page.
This step must be completed by the listed time and date.