CS 346 Winter 2025
The Winter 2025 term is complete. Thanks to everyone that took the course!
This course is not offered in Spring terms, but will return in Fall 2025.
Welcome to the course!
CS 346 is a course about designing and building software.
Modern software is often too complex for a single person to develop on their own. By working together, you and your project team will use best-practices to design and build a commercial-quality, robust, full-featured application, using a modern technology stack. As much as possible, we aim to explore modern and effective development techniques.
If you’re taking this course, all the information that you need is available on this website.
If you’re unsure where to start, try these links first:
- Class schedule describes the high-level course structure, including all course deadlines.
- Lecture plans details each week’s agenda, with links to lecture slides.
- Course project describes the team project and how to get started.
If you need to reach course staff, including your TA, their contact information is here. You are also welcome to contact the instructor or ISC directly with questions.
Have a great term,
![]()
Description
Description
Introduction to full-stack application design and development. Students will work in project teams to design and build complete, working applications and services using standard tools. Topics include best-practices in design, development, testing, and deployment.
Units
0.50
This is third-year course, intended to be taken in 2B or 3A.
It’s a direct successor to CS 246 Object-Oriented Programming, and an informal lead-up to CS 446: Software Design and Architectures. It is one of the courses that can be applied towards the Software Engineering specialization.
Prerequisites
This course is restricted to Computer Science students.
Additionally, you must have successfully completed CS 246 prior to taking this course. From that course, you should be able to:
- Design, code and debug small C++ programs using standard tools. e.g. GCC on Windows, macOS or Unix.
- Write effective unit tests for these programs. e.g. basic I/O tests; checking for a range of valid and invalid conditions.
- Demonstrate programming proficiency in C++, which includes:
- understanding of fundamental OO concepts. e.g. abstraction, encapsulation
- knowing how to use classes, objects, method overloading, and single inheritance; polymorphism
- understanding how to use assertions, and
- knowing how to manage exceptions.
Learning Objectives
This course includes a mix of lectures, demos and project activities. The course project is a significant element of the course.
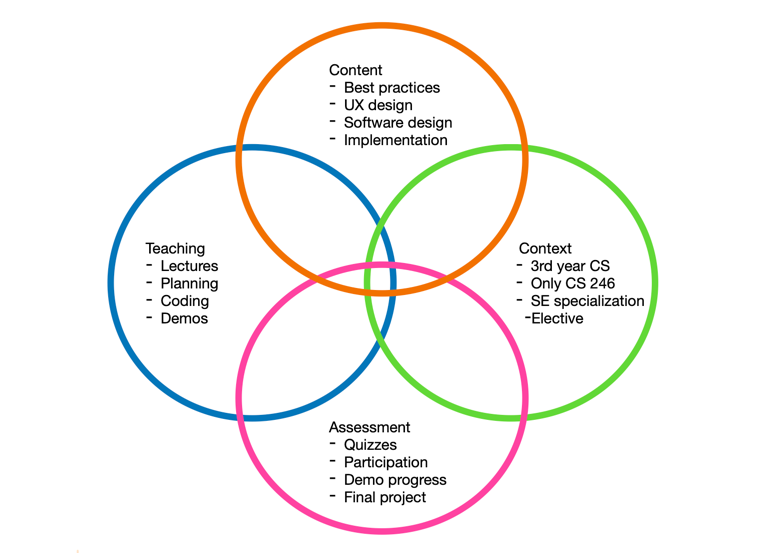
On successful completion of the course, students will be able to:
- Work effectively as a member of a software development team.
- Use an iterative process to manage the design, development and testing of software projects.
- Design and develop different styles of application software in Kotlin, with appropriate architectural choices.
- Include online and offline capabilities in your application, leveraging both local and remote data storage.
- Design services that can provide remote capabilities to your application.
- Produce automated tests as an essential part of the development process.
- Apply debugging and profiling techniques as required during development.
Assessment
This course is designed around your team project, and most activities are tied to the course project in some way. You will be assessed on both your individual work and the team project.
The course schedule lists the due dates for each component.
Individual grades (33%)
Assessments based on individual work.
| Item | What it addresses | Grade |
|---|---|---|
| Quizzes | Quizzes covering lecture content. | 10 x 2% = 20% |
| Participation | Attending and participating in the project demos. | 4 x 2% = 8% |
| Team assessment | Rating from your team members at the end of the term | 5% |
Quizzes
We have weekly quizzes for the first 10 weeks of the course. Quiz content is based entirely on material presented in lectures that week. You are responsible for all material presented, not just what is in the slides.
Quizzes are hosted in Learn (Submit > Quizzes). Each quiz opens on Fri at 6:00 PM, and includes the lecture material from the preceding week. It remains open until the following Fri at 6:00 PM (i.e. each quiz is open in Learn for a full week).
- Each quiz is 15 minutes in length. You are only allowed one attempt.
- Quizzes are open-book, meaning that you may refer to your notes while writing the quiz.
- Quizzes must be completed individually, without assistance. You are not permitted to collaborate or communicate with other students about the quiz content.
- We normally do not grant extensions for missed quizzes. See policies.
Participation
Everyone is expected to attend project demos and present their contribution. Participation marks are awarded for attending and actively participating in the process. Attendance is mandatory. See policies.
Team assessment
At the end of the course, teams members will rate each other’s performance through the term. This accounts for 5% of your grade. See team assessment for details.
Team grades (67%)
Project milestones earned by the team.
| Item | What it addresses | Grade |
|---|---|---|
| Project proposal | Project identified, requirements logged. | 5% |
| Design proposal | Detailed design document. | 5% |
| Project iterations | Features completed, release process followed, demo. | 4 x 8% = 32% |
| Final submission | Completed project including documentation. | 25% |
All project deliverables
- See the appropriate page linked above for the specifics of each milestone.
- Grading details are available for each item in
Learn>Submit>Rubric.
Policies
The following policies set expectations for how this course will be managed. Your responsibilities are outlined here, so you should take time to review them carefully.
Course Project
Participation
You are expected to participate in the course project, and all related activities, to the best of your ability. This means:
- You must be able to attend class with your team. You are not allowed to take this course remotely, or while on a work term that prevents you from attending in-person. If you attempt to take this course remotely, you may be required to withdraw from the course.
- If you fail to participate in a meaningful way during the term, you may be removed from the course. This may be done at any time prior to the start of the “Drop with WD” period. See the Important dates calendar for specific term dates.
- The instructor reserves the right to adjust grades if it is determined that a team member failed to substantially contribute to the course project. Failing to participate in team demos, without an explicit exemption from the instructor, is grounds for reassessing grades.
This course is not suitable for students on a work term. You must be physically present for demos.
Team formation
You are expected to form project teams in the first couple of weeks. The following guidelines apply:
- Students are responsible for matching up and forming teams. Teams must be formed by the end of the second week (i.e. the add-course deadline). If you fail to find a team, you must inform the instructor by this deadline.
- We do not guarantee you a team after the end of the second week. If you have not joined a team, and have not made some arrangement with the instructor, you may be required to withdraw from the course.
- Course enrolment will be managed by the instructor to encourage teams of four students. If necessary, the instructor may authorize larger or smaller teams, or modify team membership to accommodate everyone that is enrolled in the course.
Team demos
You are expected to participate in each project iteration. This includes contributing to each sprint, and attending and participating in team demos. If you fail to attend without a valid reason, you will receive a zero for that demo participation grade. At the instructors discretion, you may be exempt if:
- You have a conflicting coop interview and you are unable to reschedule it (per coop policy, rescheduling should be your first attempted course of action).
- You are ill on the day of the demo, and submit a VIF - see below for instructions.
- Other reason approved by the instructor ahead-of-time.
If an exemption is granted, it will take the form of an EXEMPT status for that component.
We do not typically allow absences from demos without a very compelling reason. e.g., “I want to study for another course”, or “I want to go home on the weekend”, or “I missed the bus” are not typically valid reasons for an exemption. Also, failure to contact us before missing the demo is an automatic zero for demo participation.
Absences
If you need to be absent and miss an assessment, please see the specific policies below.
Illness
If you are ill, and want relief from a course deliverable, you should follow the guidelines and steps outlined under Math Accommodations > Submitting a VIF.
You should also inform the instructor via email and also inform your team members so that they can make accommodations in your absence.
Religious accommodations
If you need to be absent for reasons related to a religious observance, please follow the instructions under Math Accommodations > Religious observances.
Please also inform the instructor via email.
Short-term absences
You cannot use a short-term absence (STA) to delay a team deliverable e.g., a team demo or deliverable. However, you can use it to be excused from the attendance requirement; your team will need to run the demo without you. You may also use a STA for an exemption from a quiz, if it’s submitted within 24 hours of the quiz deadline. To use a STA to request an exemption from a quiz, you need to fill out 2 forms:
- Math Accommodations > Short-Term Absence form, and
- CS 346 declaration form to inform the instructor.
Note that you MUST fill in both forms for the absence request to be considered valid.
Grading policies
Grade exemptions
If an exemption is granted for any reason (see above), it will normally take the form of an EXEMPT status for that component. The specific exempt component will not be included in your grade calculation, and grade weights will be redistributed across other components.
Regrade requests
Quizzes are marked automatically by Learn, and course grades are released by 10:00 AM on the Monday after a quiz closes. Other materials are manually graded by TAs, and grades are normally returned within 1 week of the due date.
Regrade requests for graded materials will be considered for one week after the grade has been released; we will not entertain last-minute regrade requests. If you wish to dispute a grade, email the instructor (for quizzes) or your TA (for project submissions). Contact information is here.
Incomplete (INC) grades
A grade of INC based on missed work will not normally be granted in this course.
Inclusiveness
It is our intent that students from all diverse backgrounds and perspectives are well-served by this course, and that student’s learning needs be addressed both in and out of class. We recognize the immense value of the diversity in identities, perspectives, and contributions that students bring, and the benefit it has on our educational environment. Your suggestions are encouraged and appreciated. Please let us know ways to improve the effectiveness of the course for you personally or for other students or student groups.
In particular:
- We will gladly honour your request to address you by an alternate/preferred name or pronoun. Please advise us of this preference early in the term, so we may make appropriate changes to our records.
- We will honour your religious holidays and celebrations. Please inform us of these at the start of the course.
- We will follow AccessAbility Services guidelines and protocols on how to best support students with different learning needs. Please submit these requests early in the term so that suitable accommodations can be provided.
Academic integrity
To maintain a culture of academic integrity, members of the University of Waterloo community are expected to promote honesty, trust, fairness, respect and responsibility. Contact the Office of Academic Integrity for more information.
You are expected to follow the policies outlined here for quiz and project submissions.
To ensure academic integrity, MOSS (Measure of Software Similarities) is used in this course as a means of comparing student projects. We will report suspicious activity, and penalties for plagiarism/cheating are severe. Please read the available information about academic integrity very carefully.
Ethical behaviour
Students are expected to act professionally, and engage one another in a respectful manner at all times. This expectation extends to working together in project teams. Harassment or other forms of personal attack will not be tolerated. Course staff will not referee interpersonal disputes on a project team; incidents will be dealt with according to Policy 33.
Plagiarism and third-party code
Students are expected to either work on their own (in the case of quizzes), or work with a project team (for the remaining deliverables in the course). All work submitted should either be their own original work or work created by the team for this course.
The team is also allowed to use third-party source code or libraries for their project under these specific conditions:
- Published third-party libraries in binary form may be used without restriction. This may include libraries for networking, user interfaces and other libraries that are introduced in class.
- Source code from external sources may only be used if the contribution is less than 25 lines of code from a single source. Code copied in this way must be acknowledged with a comment embedded directly in your source code in the appropriate section.
- All external sources (libraries and source code) should be identified in the project’s README file.
Failure to acknowledge a source will result in a significant penalty to your final project grade (ranging from a minor deduction to a grade of zero for the project, depending on the severity of the infraction). Note that MOSS will be used to compare student assignments, and that this rule also applies to copying from other student projects, source code found online, or projects from previous terms of this course.
Reuse of materials
You cannot base your project in part or in whole on coursework that you have completed for a different course. You cannot submit the same project to multiple courses for credit, even if you are taking the courses concurrently (i.e. CS 346 and CS 446 would require different projects to be submitted that do not share source code).
Similarly, you cannot use anything that you created prior to the start of this course without explicit written permission from the instructor. This includes code, documentation, and other materials that you may have created in previous courses or work terms, or materials that you have created on your own time.
Generative AI & LLMs
The use of Generative AI and/or Large Language Models (e.g., ChatGPT, CoPilot and similar systems) is restricted in this course. You are not allowed to use such systems when writing quizzes, or for generating any part of your written submission (e.g., design document, user instructions, final report).
You are allowed to use these tools to generate a limited amount of code towards your project, provided that you adhere to the policies described above under plagiarism. Content generated by these systems must be sourced and cited properly, just like any other third-party source code.
Improper use of these tools will be subject to Policy 71 and an investigation into academic misconduct.
Keep in mind that if you use these types of systems to generate code, you are responsible for what is produced! These models can generate incorrect or illogical code. Non-working generated code will not be an acceptable excuse for failing to meet project requirements or deadlines.
Student discipline
A student is expected to know what constitutes academic integrity to avoid committing an academic offence, and to take responsibility for his/her actions. A student who is unsure whether an action constitutes an offence, or who needs help in learning how to avoid offences (e.g., plagiarism, cheating) should seek guidance from the course instructor, academic advisor, or the undergraduate Associate Dean.
For information on categories of offences and types of penalties, students should refer to Policy 71, Student Discipline. For typical penalties, check Guidelines for the Assessment of Penalties.
Intellectual property
Students should be aware that this course contains the intellectual property of their instructor, TA, and/or the University of Waterloo. Intellectual property includes items such as:
- Lecture content, spoken and written (and any audio/video recording thereof)
- Lecture handouts, presentations, and other materials prepared for the course (e.g., PowerPoint slides)
- Questions or solution sets from various types of assessments (e.g., assignments, quizzes, tests, final exams), and
- Work protected by copyright (e.g., any work authored by the instructor or TA or used by the instructor or TA with permission of the copyright owner).
Course materials and the intellectual property contained therein, are used to enhance a student’s educational experience. However, sharing this intellectual property without the intellectual property owner’s permission is a violation of intellectual property rights. For this reason, it is necessary to ask the instructor, TA and/or the University of Waterloo for permission before uploading and sharing the intellectual property of others online (e.g., to an online repository). Permission from an instructor, TA or the University is also necessary before sharing the intellectual property of others from completed courses with students taking the same/similar courses in subsequent terms. In many cases, instructors might be happy to allow distribution of certain materials. However, doing so without expressed permission is considered a violation of intellectual property rights.
Continuity plan
As part of the University’s Continuity of Education Plan, every course should be designed with a plan that considers alternate arrangements for cancellations of classes and/or exams.
Here is how we will handle cancellations in this course, if they occur.
-
In the case of minor disruptions (e.g. one lecture), the lecture content will be reorganized to fit the remaining time. This should not have any impact on demos or deliverables.
-
Cancellation of multiple classes may result in a reduction in the number of sprints and associated deliverables to fit the remaining time. If this happens, lecture content will also be pruned to fit available time. Assessment weights will be redistributed evenly over the remaining content if required to align with the material.
-
Cancellation of in-person (midterm or final) examinations has no effect on this course, since we do not have scheduled exams and quizzes are online.
Resources
All required course materials, including lecture slides, are freely available on the course website.
We use the following additional websites.
- Piazza 🔗: Forum software. Used for course announcements, and you can ask questions.
- Learn 🔗: Used for quizzes, and project submissions. Grades are also recorded here.
- GitLab 🔗: CS 346 public repository, with sample code and templates.
Finally, you will require access to a computer to work on the course project.
- See Development > Getting-Started > Toolchain installation for details.
We use Piazza for course announcements, so please make sure to monitor that site regularly. When signing up, please use your real name (you can still post anonymously, but the course staff can see your actual name when you do so).
Contact us
You are welcome to contact us directly. Your assigned TA will be listed on the Project teams page after Week 2.
| Contact List | |
|---|---|
| Prof. Jeff Avery Course Instructor jeffery.avery@uwaterloo.ca MC 6461 |  |
| Caroline Kierstead Instructional Support Coordinator (ISC) ctkierst@uwaterloo.ca |  |
| Shaikh Shawon Arefin Shimon Teaching Assistant ssarefin@uwaterloo.ca |  |
| Rafael Ferreira Toledo Teaching Assistant rftoledo@uwaterloo.ca |  |
| Favour Kio Teaching Assistant gn2kio@uwaterloo.ca |  |
| Paul Wooseok Lee Teaching Assistant w69lee@uwaterloo.ca |  |
| Aniruddhan Murali Teaching Assistant a25mural@uwaterloo.ca |  |
| Amber Wang Teaching Assistant j2369wan@uwaterloo.ca |  |
Schedule
The course schedule for the term, with important dates.
Class Times
The class schedule is below. You must be enrolled in corresponding LEC/LAB sections. Both Wed and Fri classes are used for lectures, project activities and demos; plan to attend both classes.
| Morning Sections | Afternoon Sections | |
|---|---|---|
| Wed classes | LEC 001 @ 10:30a - 12:20p / EXP 1689 | LEC 002 @ 2:30p - 4:20p / MC 4021 |
| Fri classes | LAB 101 @ 10:30a - 12:20p / MC 2035 | LAB 102 @ 2:30p - 4:20p / MC 2038 |
Deadlines
Significant dates and deadlines for the term are listed below.
- Quizzes open at Fri @ 6:00 pm, covering that week’s lectures. They are open for a full week, and close the following Fri @ 6:00pm. Make sure to submit before the deadline.
- Project demos are conducted in-class during your scheduled demo time.
- Other deliverables are due by Fri @ 6:00pm.
| Week | Dates | Wed, Fri Lectures | Fri Submissions |
|---|---|---|---|
| 1 | Jan 8, 10 | Course outline, Introduction, Agile, Design thinking | |
| 2 | Jan 15, 17 | GitLab, Documentation, Kotlin | Project setup Q1 due from wk 1 |
| 3 | Jan 22, 24 | Gradle, Architecture & design | Project proposal Q2 due from wk 2 |
| 4 | Jan 29, 31 | User interfaces, Desktop/mobile apps | Design proposal Q3 due from wk 3 |
| 5 | Feb 5, 7 | Unit testing, Kickoff | Q4 due from wk 4 |
| 6 | Feb 12, 14 | Databases | Demo 1 (times) Q5 due from wk 5 |
| 7 | Feb 19, 21 | Reading week | - |
| 8 | Feb 26, 28 | Data formats, JSON | Q6 due from wk 6 |
| 9 | Mar 5, 7 | Web services, Cloud services | Demo 2 (times) Q7 due from wk 8 |
| 10 | Mar 12, 14 | Concurrency - room change Wed AM to AL 116 | Q8 due from wk 9 |
| 11 | Mar 19, 21 | Kotlin Multiplatform (KMP) | Demo 3 (times) Q9 due from wk 10 |
| 12 | Mar 26, 28 | Final submission overview | Q10 due from wk 11 |
| 13 | Apr 2, 4 | - | Demo 4 (times) Final submission - see below |
NOTE: the final submission is due Fri Apr 4, but can be handed in up to Sun Apr 6 @ 11:59 PM without penalty.
Lecture plans
Week-by-week lecture plans, with links to course slides and notes.
- Week 01 - Introduction, Design thinking
- Week 02 - GitLab, Kotlin programming
- Week 03 - Gradle, Architecture & Design
- Week 04 - User interfaces, Applications
- Week 05 - Unit testing, Project kickoff
- Week 06 - Databases, Demo 1
- Week 07 - Reading week
- Week 08 - Data formats
- Week 09 - Web services, Demo 2
- Week 10 - Concurrency
- Week 11 - Kotlin Multiplatform, Demo 3
- Week 12 - Final Submission Guidelines
- Week 13 - Wrapup
Week 01 - Introduction, Design thinking
Welcome to the course! We have a lot of material to cover in the first few weeks so it’s important that you attend class. Please email the instructor or post on Piazza if you have questions.
Wed
Lectures
- Course outline - slides
- Introduction - notes, slides
- Project requirements - notes
- Teamwork - notes, slides (team contract and team roles only)
Fri
Lectures
Outside of class
Your project goals this week are focused on finding a project team!
- Search for teammates in this Piazza post.
- Form a project team this week.
- Review the requirements with your team and start brainstorming project ideas.
Week 02 - GitLab, Kotlin
How to setup your GitLab project. Getting started with Kotlin!
Wed
Lectures
- Project setup in GitLab - notes, slides
- Documentation - notes, slides
- Toolchain setup - notes, slides
- Introduction to Kotlin - notes, slides
Fri
Lectures
Outside of class
You should complete your project setup. This is due Friday.
Once that is done, you should start working on your project proposal. This is the first part of the Design Thinking process, and involved identifying and interviewing users, creating personas and extracting user stories.
- Submit your project setup.
- Start working on your project proposal. Start early!
Week 03 - Gradle, Architecture & Design
How build systems work and how to configure Gradle to build your project. How your application should be structured; benefits of “good design”.
Wed
Lectures
- Gradle - notes, slides, demo project
- Architecture - notes, slides
Fri
Lectures
Outside of class
Review project setup feedback in Learn. Things to watch out for:
- Projects should open to the README.md file. It’s supposed to be the landing page and act as a TOC for other documents.
- Project documentation content should be stored in Wiki pages. If you need images, attach them directly to the document. Please don’t attach external files as links to Wiki pages e.g., Word documents.
Submit your project proposal. This is due Friday.
Start working on your design proposal! This continues from your project proposal and provides details on your proposed solution, including low-fidelity prototypes of your screens.
Week 04 - User interfaces, Applications
How to build user interfaces for desktop and mobile applications using Compose.
Wed
Lectures
Fri
Lectures
Outside of class
Review project proposal feedback. TAs have finished grading and will have provided feedback that you should consider.
Submit your design proposal, which is due Friday.
- Make sure to address feedback from the project proposal.
- You will have some time in-class to work on this.
(Optional) Prepare for project kickoff in Week 05!
- Create issues in GitLab for each of your requirements.
- At the start of Week 05, you will plan the release. This includes collectively making decisions on what to implement for the upcoming iteration, and assigning work (i.e., issues) to team members.
Week 05 - Unit testing, Project kickoff
How to add unit tests to your project; planning for Demo 1.
Wed
Lecture
Sprint 1 Kickoff - slides
- This is the kickoff for your first iteration!
- You will choose which features to work on for the next two weeks,
- Work towards a demo of these completed features to your TA on Fri Feb 14 (see the team schedule for details).
- For further details, see:
Fri
Open class
- There are no planned lectures or activities.
- The entire class time is meant for you and your team to work on your project.
- Jeff will be in class to help if you need it! When not answering questions, he’ll be live coding changes to his courses project. Plans for today include:
- Migrating API keys into a settings class and a local configuration file.
- Adding regex support to the front-end.
Here’s another sample that demonstrates setting up the MVVM structure: my TODO application from last term.
Week 06 - Databases, Demo 1
How and why to use relational (and document) databases.
Wed
Lecture
Fri
Demo day!
- Demos are conducted in your scheduled classroom.
- See the online schedule for your team’s exact time, and plan to be here 5 mins early.
- Follow the coding & demo guidelines:
- You need to have a software release built, and you should plan on demoing your application from one of your team’s computers.
- Everyone on the team must attend the demo in-person (unless you have coordinated with me ahead-of-time).
Week 07 - Reading Week!
Enjoy your week! We’ll kickoff Sprint 2 when we return on Wed Feb 26th.

Week 08 - Data formats
Wed
Lecture
Sprint 2 Kickoff
- This is the kickoff for your second iteration! Follow the planning guide on the course website
- Make sure to review the feedback from Demo 1 (see Learn: Submit > Dropbox > Project demo 1). You should plan on addressing any feedback before your next demo.
- Demo 2 is Fri Mar 7 - see the team schedule for details.
Make sure to review feedback in Learn > Submit > Dropbox.
Broad feedback:
- Follow the guidelines. Make sure you keep GitLab and issues lists up-to-date.
- Make sure that you have something to demo! User-facing features are best but if that’s not feasible, show us unit tests or diagrams, or … Do NOT show us code in the demo.
- Write unit tests for your work. They don’t have to be complete, but you should make a reasonable effort (and continue adding tests as the project progresses).
- Each person must demo their own work. You cannot have one person present everything.
Fri
Open class
- There are no planned lectures or activities.
- The entire class time is meant for you and your team to work on your project.
- Jeff will be in class to help if you need it! When not answering questions, he’ll be live coding changes to his courses project. Plans for today include:
- Automatic database caching of historical data.
- Scheduled service to automatically run queries.
Week 09 - Web Services, Demo 2
How to access web services/APIs. Using hosted services.
Wed
Lecture
Wed Mar 12: the morning class will be moved to AL 116.
Fri
Demo day!
- Demos are conducted in your scheduled classroom.
- See the online schedule for your team’s exact time, and plan to be here 5 mins early.
- Follow the coding & demo guidelines to prepare.
- Everyone on the team must attend the demo in-person (unless you have coordinated with me ahead-of-time).
Week 10 - Concurrency
Wed
Lecture
The Wed 10:30 AM lecture will be held in AL 116 for this week only. The remaining lectures are held in their regular rooms.
Sprint 3 Kickoff
- Follow the planning guide on the course website.
- Make sure to review Demo 2 feedback in Learn > Submit > Dropbox.
- Demo 3 is on Fri Mar 21 - see the team schedule for details.
Fri
Open class
- There are no planned lectures or activities.
- The entire class time is meant for you and your team to work on your project.
- Jeff will be in class to help if you need it! When not answering questions - if the projector cooperates - he’ll be live coding changes to his courses project.
Week 11 - Kotlin Multiplatform, Demo 3
Wed
Lecture
Fri
Demo day!
- Demos are conducted in your scheduled classroom.
- See the online schedule for your team’s exact time, and plan to be here 5 mins early.
- Follow the coding & demo guidelines to prepare.
- Everyone on the team must attend the demo in-person (unless you have coordinated with me ahead-of-time).
Week 12 - Final Submission Guidelines
Wed
Lecture
- Final Submission Guidelines and Hints - slides
See also
This is your last lecture of the term! The remaining time will be spent working on projects. Don’t forget to:
- Submit your final quiz before Fri @ 6 PM
- Work on your Demo 4 - remember that attendance is mandatory!
- Prepare your final submission
Fri
Open class
- There are no planned lectures or activities.
- The entire class time is meant for you and your team to work on your project.
- Jeff will be in class to help if you need it!
Week 13 - Wrapup
Wed
Open class
- There are no planned lectures or activities.
- The entire class time is meant for you and your team to work on your project.
- Jeff will be in class to help if you need it!
Fri
Demo day!
- Demos are conducted in your scheduled classroom.
- See the online schedule for your team’s exact time, and plan to be here 5 mins early.
- Follow the coding & demo guidelines to prepare.
- Everyone on the team must attend the demo in-person.
Your final submission is due by Sun at 11:59 PM. Make sure that everything is complete and submitted before then! Final grades won’t be released until the end of the exam period.
Project teams
A list of project teams, with links to their project repositories. Demo Time refers to your scheduled time for your team demos. See the course schedule for demo dates.
Morning schedule
LAB101 (Learn)
Amber, Favour, Shaikh (contact info)
| Team Number | Team Members (* TL) | Project | TA | Demo Time |
|---|---|---|---|---|
| LAB101-1 | Alara*, David, Germain, Nicklaus | Roomie | Amber | 10:30a |
| LAB101-2 | Grace, Louis, Rebecca*, Remington | KW Nest | Amber | 10:45a |
| LAB101-3 | David, Jane, Marzuk, Rachel* | Buff Buddies | Amber | 11:00a |
| LAB101-4 | Hans, Nick*, Omar, Ryan | Fantasy Investments | Amber | 11:15a |
| LAB101-5 | Jack, Kaiz, Muj*, Siyeon | WatCourse | Amber | 11:30a |
| LAB101-6 | Jonathan*, Shaili, Neha, Malvika | Flick Pics | Amber | 11:45a |
| LAB101-7 | Erfan, Raiyan, Rohan, Sara* | DuoCode | Favour | 10:30a |
| LAB101-8 | Martin, Rishi, Matthew, Jerry* | washare | Favour | 10:45a |
| LAB101-9 | Vivan, Emily*, Daniel, Christina | DineSafe | Favour | 11:00a |
| LAB101-10 | Devrshi, Nandish, Ashwin, Mehar | WatMarket | Favour | 11:15a |
| LAB101-11 | Marc, Colin, Jacky, Vincent | Recipe Organizer | Favour | 11:30a |
| LAB101-12 | Ashnoor, Nima, Nivriti, Sam* | Youtube Wrapper | Favour | 11:45a |
| LAB101-13 | Raquel*, Estefany, Kyle, Andrea | Pet Care App | Shaikh | 10:30a |
| LAB101-14 | Daniel, Justin, Nikashan, Shaun* | SmartSplit | Shaikh | 10:45a |
| LAB101-15 | Arya, Anson C, Anson Y | RepRadar | Shaikh | 11:00a |
| LAB101-16 | Alex, Gavin, Jerry | Good Samaritan | Shaikh | 11:15a |
| LAB101-17 | Alena, May, Jennifer*, Edward | Chopify | Shaikh | 11:30a |
| LAB101-18 | Joshua, Owen*, Suyeong | Jasper Clinic Flow | Shaikh | 11:45a |
Afternoon schedule
LAB102 (Learn)
Aniruddhan, Paul, Rafael (contact info)
| Team Number | Team Members (* TL) | Project | TA | Demo Time |
|---|---|---|---|---|
| LAB102-1 | Alia, Steven, Johnson, Monica | WatCourse | Aniruddhan | 2:30p |
| LAB102-3 | Anees, Jia*, Bogdan, Vanshaj | Pomodoro Timer | Aniruddhan | 3:00p |
| LAB102-4 | Justin, Hannah, Anne, Laura | Trapezoid | Aniruddhan | 3:15p |
| LAB102-5 | Jason, Saniya, Oliver, Michael* | News Aggregator | Aniruddhan | 3:30p |
| LAB102-6 | Jack*, Conor, Noah, Ashmita | WaterlooMeets | Aniruddhan | 3:45p |
| LAB102-7 | Isabella*, Justin, Jaycob, Ighoise | BudgIT | Aniruddhan | 4:00p |
| LAB102-8 | Momina, Bhaviki, Sarah*, Khadija | Ruby Calendar | Paul | 2:30p |
| LAB102-9 | Amol*, Sophia, Yiwen, Anay | ScanLink | Paul | 2:45p |
| LAB102-10 | Michelle, Ryan, Clifford*, Ted | Zuna | Paul | 3:00p |
| LAB102-11 | Rehan, Kush*, Pranav, Namdar | Housing Hub | Paul | 3:15p |
| LAB102-12 | Jeri, Cindy*, Arjun, Derek | BetterNotes | Paul | 3:30p |
| LAB102-13 | Andrei, Kelvin*, Shixiong, Larry | Student Expense Tracker | Paul | 3:45p |
| LAB102-14 | Max, Eric*, Mario, Brian | AccountaBuddy | Rafael | 2:30p |
| LAB102-15 | Steven, Brasen, Samuel, Richard* | GrubGuru | Rafael | 2:45p |
| LAB102-16 | Nora*, Nikolai, Jagan, Junyi, Gerald | SwapOut | Rafael | 3:00p |
| LAB102-17 | Vignesh, Harishan, Preesha, Ashlyn | brainrot-346 | Rafael | 3:15p |
| LAB102-18 | Daniel*, Ted, Jim, Sumeet | UW Navigation | Rafael | 3:30p |
| LAB102-19 | Jane, Daniel W, Qi kun, Daniel Z* | WATtoEat | Rafael | 3:45p |
Getting started
How do you get started with your project?
Requirements
Guidelines
We are designing and building graphical applications that leverage cloud services and remote databases. The project should be a non-trivial Android or desktop application that demonstrates your ability to design, implement, and deploy a complex, modern application.
You must use the technology stack that we present and discuss in-class:
- GitLab for storing all of your project materials, including documentation, source code and product releases. All assets and source code must be regularly committed to GitLab. See specific requirements as the course progresses.
- Kotlin as the programming language for both front-end and back-end. No other languages are allowed.
- Jetpack Compose or Compose Multiplatform must be used for building graphical user interfaces.
- Ktor for consuming a web API or general networking requirements. Note that for a hosted service, you may instead use their native SDK - see below.
- The kotlin-test classes and JUnit for writing tests.
You may choose any hosted cloud/db provider. The following have been used successfully in past offerings of this course, and are recommended: Firebase, Supabase, and MongoDB.
- To connect to these platforms, you are allowed to use either their native SDKs, or Ktor if they support it.
Additional libraries may be used, provided that you follow the course policies.
You are also expected to leverage the concepts that we discuss in class:
- You should demonstrate design principles that we discuss in lectures.
- You must build a layered architecture, using MVVM, MVI or another pattern we discuss.
- You are expected to write and include a reasonable number of unit tests for your application.
You will be assessed based on:
- How well you define the problem you are solving, and understand the users you are solving it for.
- How well you design features to address that problem and the quality of your design.
- The clarity, quality and ease-of-use of your application.
- Your ability to work as a team to incrementally deliver features over time.
Requirements
In your Project Proposal, you will define your target users, a problem to address, and a set of custom features that you intend to implement to address that problem. The details will be unique to each team, but should be non-trivial features that demonstrate your ability to design and implement complex functionality to address a problem. You should be able to articulate how these features make your product different or better than existing applications.
Your application should minimally consist of a desktop or Android application with the following requirements.
1. Graphical user interface
Your application must have a graphical user interface, created using either Jetpack Compose (Android) or Compose Multiplatform (Desktop).
Your application should include at least three different screens, and you must support navigating between them as part of your normal application functionality.
You should have a custom theme that you have produced i.e., custom colors, fonts and so on. Marks will be deducated if you simply use the default Material theme that is included in Compose.
For a desktop application:
- Your screens should be windowed.
- Users should be able to minimize, maximize and resize windows as you would expect for a desktop application, and windows should have titles.
- Your application should have a custom icon when installed.
For an Android application:
- Users should be able to use normal gestures to navigate between screens. You must support back-stack navigation.
- When rotated, your screens should rotate to match the orientation, and layouts should modify themselves to fit the screen dimensions in either orientation.
You are expected to produce prototypes for these screens as part of your initial design.
2. Multi-user support
Your application should support multiple users. Each user should be able to login, and see their own specific data and application settings.
- Each user should be able to create an account that represents their identity in the application.
- Accessing user data must be restricted by account i.e. users can only see their own data, unless a feature specifically reveals shared data e.g., sharing a recipe among friends using the application.
- You should support standard account functionality:
- Each user should be able to create their own account, and login/logout using that account.
- You should perform standard validation when creating accounts or entering information e.g., do not allow duplicate usernames; mask out the password when entered; passwords must contain special characters.
- Credentials should persist between sessions i.e., your user should not have to login each time they launch the application.
3. Networking and security
You must use either Ktor or a native platform SDK to access your hosted database/platform.
- Network requests do not need to be encrypted, but you should require authentication for any access (i.e., the user has to login before they can access any service or data).
- You should leverage existing authentication services where possible e.g., Firebase Auth or Supabase Auth. Do not “roll your own” insecure system!
4. Data storage
Your application must manipulate and store data related to your problem e.g., recipe for a recipe tracking application; user profile information needed to login; the user’s choice of theme to use in the UI.
Database requirements
- You must store your application data in a hosted database of your choice. This can be a dedicated instance e.g., one that you have installed and control yourself, or a hosted database made available through a provider like AWS, Firebase or Supabase.
- Your database must be configured for network access, and be accessible over the network i.e. not installed locally on the same machine that you use for demos.
- Use of a custom SDK to access your database is allowed, as is a database framework like Room or Exposed.
5. Custom features
Using the guidelines above, you are expected to propose, design and implement multiple features that solve a problem for your users (see the Design thinking lecture for details).
- Your application must manipulate and store some information related to your problem e.g., recipes for a cooking application, markdown documents for a journaling application.
- Your functionality must be more complex than just simple CRUD operations. e.g., your recipe app should also generate a shopping list, or store user reviews of recipes, or suggest alternate ingredients.
Stuck on what to build? See picking a project page for some project suggestions.
Changes
- Jan 8 2025: Original publication.
- Feb 13 2025: Specified that you are allowed to use platform SDKs for hosted service platforms. Removed local database requirement.
Forming Teams
The first, and most important thing to do is to find teammates! Ideally, you should form a project team in the first week of the course.
Rules around team formation
- Teams must consist of four people.
- Team members must all be enrolled in the same sections of the course.
- Everyone must commit to attending team activities, including attending in-person lectures.
Note that you CANNOT take this course if you are unable to attend in-person. This is not a course to take remotely, while on a work term.
Find other people
How do you find team members, or find an existing team to join?
- Join friends who are also taking the course! If you are in different sections, speak with the instructor to see if you can be moved to the same section.
- Use the Search for Teammates post on Piazza to introduce yourself and find teams that are looking for people.
- If you’re in-class, introduce yourself to people sitting near you! We’ll even give you time at the end of lectures to meet.
This course moves quickly, and we need everyone to participate in order for it to work. We will do our best to help you find a team, but you also need to be active participants in the process!
In extreme cases, failing to join a team may result in you being removed from the course.
Discuss how to work together
Before agreeing to work together, make sure that you agree on the basics:
- Are you all registered in the same sections?
- Are you all able to attend class? Can everyone participate equally?
- Do you have free time outside of class to meet?
Make sure to review the team contract guidelines. You will be required to complete a team contract as part of your Project Setup milestone.
Register in Learn
Once you have a team formed, register yourselves on Learn:
- Navigate to
Connect>Groupsand choose an empty team from the list - Add yourself and your team members.
Picking a topic
Before proceeding. make sure to review the project requirements!
Every term, at least one team is “surprised” to learn that they were supposed to use Kotlin, or Compose for the UI, or write unit tests. All of these things are clearly specified in the requirements, so make sure that you understand that document. Ask your instructor if anything is unclear.
We recommend the following steps:
- Have a discussion with your team about any personal goals that you might have. For example, if you’re interested in learning about a particular technology e.g., database or user interfaces, this might be a good opportunity to explore that.
- Brainstorm! Try and identify potential users, and problems that you could solve for them. If you need inspiration, look at existing applications and try and improve on those. This is important: identify the need first, and then second think of how to solve that need.
- Record all of your ideas. You want to capture everything, and as they say, “there is no bad idea” at this point!
- Discuss as a team and narrow down your ideas to a single problem/solution that you would like to address.
Public data/APIs
If you’re stuck for an idea, here are some interesting public APIs that you might be able to leverage. Build an application to track a comic-book collection, or a cool new weather app for your phone!
- Stack Overflow API: https://api.stackexchange.com/
- UWaterloo Open API: https://openapi.data.uwaterloo.ca/api-docs/index.html
- Notion API: https://developers.notion.com/
- Pokemon API: https://pokeapi.co/
- Marvel Developer Portal: https://developer.marvel.com/
- REST Countries: https://restcountries.com/
- NASA Open APIs: https://api.nasa.gov/
- Weather API: https://openweathermap.org/api
- Market Data API: https://polygon.io/
- News API: https://newsapi.org/
- YouTube API: https://developers.google.com/youtube/?ref=apilist.fun
- OMDb (Open Movie Database) API: https://www.omdbapi.com/
- DeckOfCards API: https://deckofcardsapi.com/
- Open Library API: https://openlibrary.org/developers/api
ChatGPT project ideas
More ideas, courtesy of ChatGPT. Choose an idea that aligns with your interests and skills! If you use one of these, you will likely need to add features to make your application stand out.
- Task Manager: Create a desktop task manager application that allows users to organize their tasks, set reminders, and prioritize tasks based on deadlines or importance. To make it really interesting, integrate with their Google Calendar.
- Note-taking App: Develop a note-taking application where users can create, organize, and search through their notes. Include features like rich text formatting, image embedding, tagging, and synchronization of notes across devices.
- Expense Tracker: Build a desktop expense tracker to help users manage their finances. Include features like expense categorization, budget tracking, and generating reports or visualizations. Let them export/import data from their banking application.
- Password Manager: Design a password manager application that securely stores and manages users’ login credentials for various accounts. Implement encryption and features like password generation and synchronization. Encrypt everything!
- Weather App: Create a desktop weather application that provides users with real-time weather information, forecasts, and weather alerts for their location or specified locations. Provide alerts based on conditions that they set e.g., “it’s below 10 degrees, so wear a coat”.
- Fitness Tracker: Build a fitness tracker application that helps users track their physical activity, set fitness goals, and monitor their progress over time. Include features like exercise logging, calorie tracking, and workout planning.
- Recipe Organizer: Develop a recipe organizer application where users can save, categorize, and search for recipes. Include features like meal planning, ingredient shopping lists, and recipe sharing.
- Code Snippet Manager: Design a code snippet manager application that allows developers to store, organize, and search through their code snippets. Include features like syntax highlighting, tagging, and integration with code editors.
- File Encryption Tool: Create a desktop application for encrypting and decrypting files to ensure users’ data privacy and security. Implement strong encryption algorithms and user-friendly interface.
- Screen Capture Tool: Build a screen capture tool that allows users to capture screenshots or record screen activities. Include features like annotation tools, customizable capture settings, and sharing options.
- Music Player: Develop a desktop music player application with features like playlist management, equalizer settings, and support for various audio formats. Optionally, include online streaming capabilities.
- Calendar App: Design a calendar application that helps users manage their schedules, appointments, and events. Include features like multiple calendar views, event reminders, and synchronization with other calendar services.
- Language Learning Tool: Build a desktop application to help users learn a new language, with features like flashcards, vocabulary exercises, pronunciation practice, and language learning progress tracking.
- Movie tracker: Build a mobile application to track movies that you’ve seen. Import movie data from IMDB, rate them, add comments and share reviews with your friends!
Examples
Sample Projects
Some contrived (but reasonable) examples.
Recipe tracker
Image courtesy of Recipe Keeper

Users
A group of friends that want to cook together e.g., roommates.
Problem
How do you keep track of what recipes you have tried, and which ones each person liked?
Proposal
A recipe planning and tracking application that allows users to:
- Enter recipes (imported from a recipe site or manually entered).
- Browse a collection of recipes, with pictures. Search your recipes and friends recipes.
- Rate recipes, and view what other users have rated.
- Generate a list of “most wanted” recipes, or “most popular” after the group has tried them.
- Extra: track food allergies and support automatic filtering of recipes.
Design
Technical aspects to consider.
- Android application, with screens for all of this functionality
- Multi-user, so each person has a profile (login/logout/edit).
- Local database for caching details (SQLite & file storage)
- Remote database for storing user data and recipes (Firebase)
- OAuth authentication using Google accounts (also Firebase)
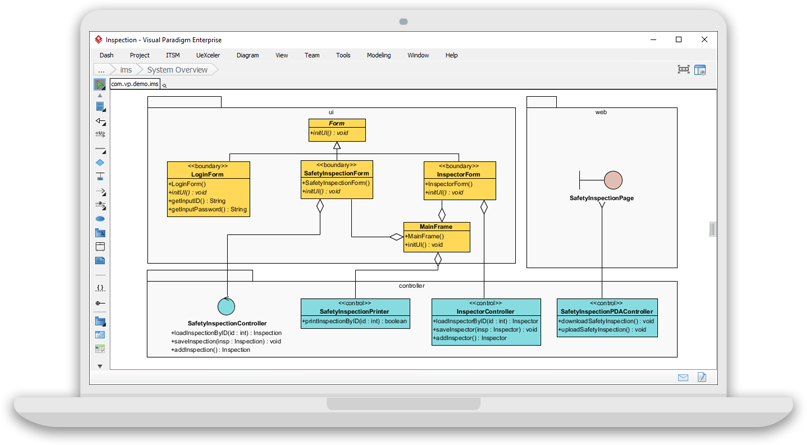
Software design tool
Image courtesy of Visual Paradigm
Users
Software developers that are interested in collaborative design.
Problem
Collaborative tools aren’t tailored towards software design, so we end up trying to create UML documents in Google Docs (awkward). UML tools often don’t support collaborative, which would be incredibly valuable!
Our goal is collaborative UML drawings.
Proposal
An online tool that lets multiple people work together to draw UML diagrams in real-time.
- Can have multiple drawing canvases; on launch choose which one to open and work on.
- Canvases should have a name, date-created, date-edited. Anyone can edit anything.
- Drawing tools: draw shapes; draw lines to connect them; move shapes; change properties.
- Export canvas to JPG (PNG, other formats) for use in other applications.
- Extra: Templates so that you can draw a plain box-arrows diagram, or a specific UML diagram e.g., class diagram, component diagram. (Do not support all UML, but a small subset; focus on infrastructure to add more later).
- Extra: Support more diagrams by expanding the templates!
Design
- Desktop tool, since it’s more precise for drawing.
- Multi-user, so each person has a profile (login/logout/edit).
- Investigate
canvasclasses in Compose for drawing arbitrary shapes. - SQL database, since we expect a large collection of templates (predefined shapes) and think that’s a better approach.
- Will likely need a way to handle real-time updates for multiple users working on a document e.g., WebSockets.
Project Gallery
Showcasing some outstanding Winter 2024 projects.
Notify
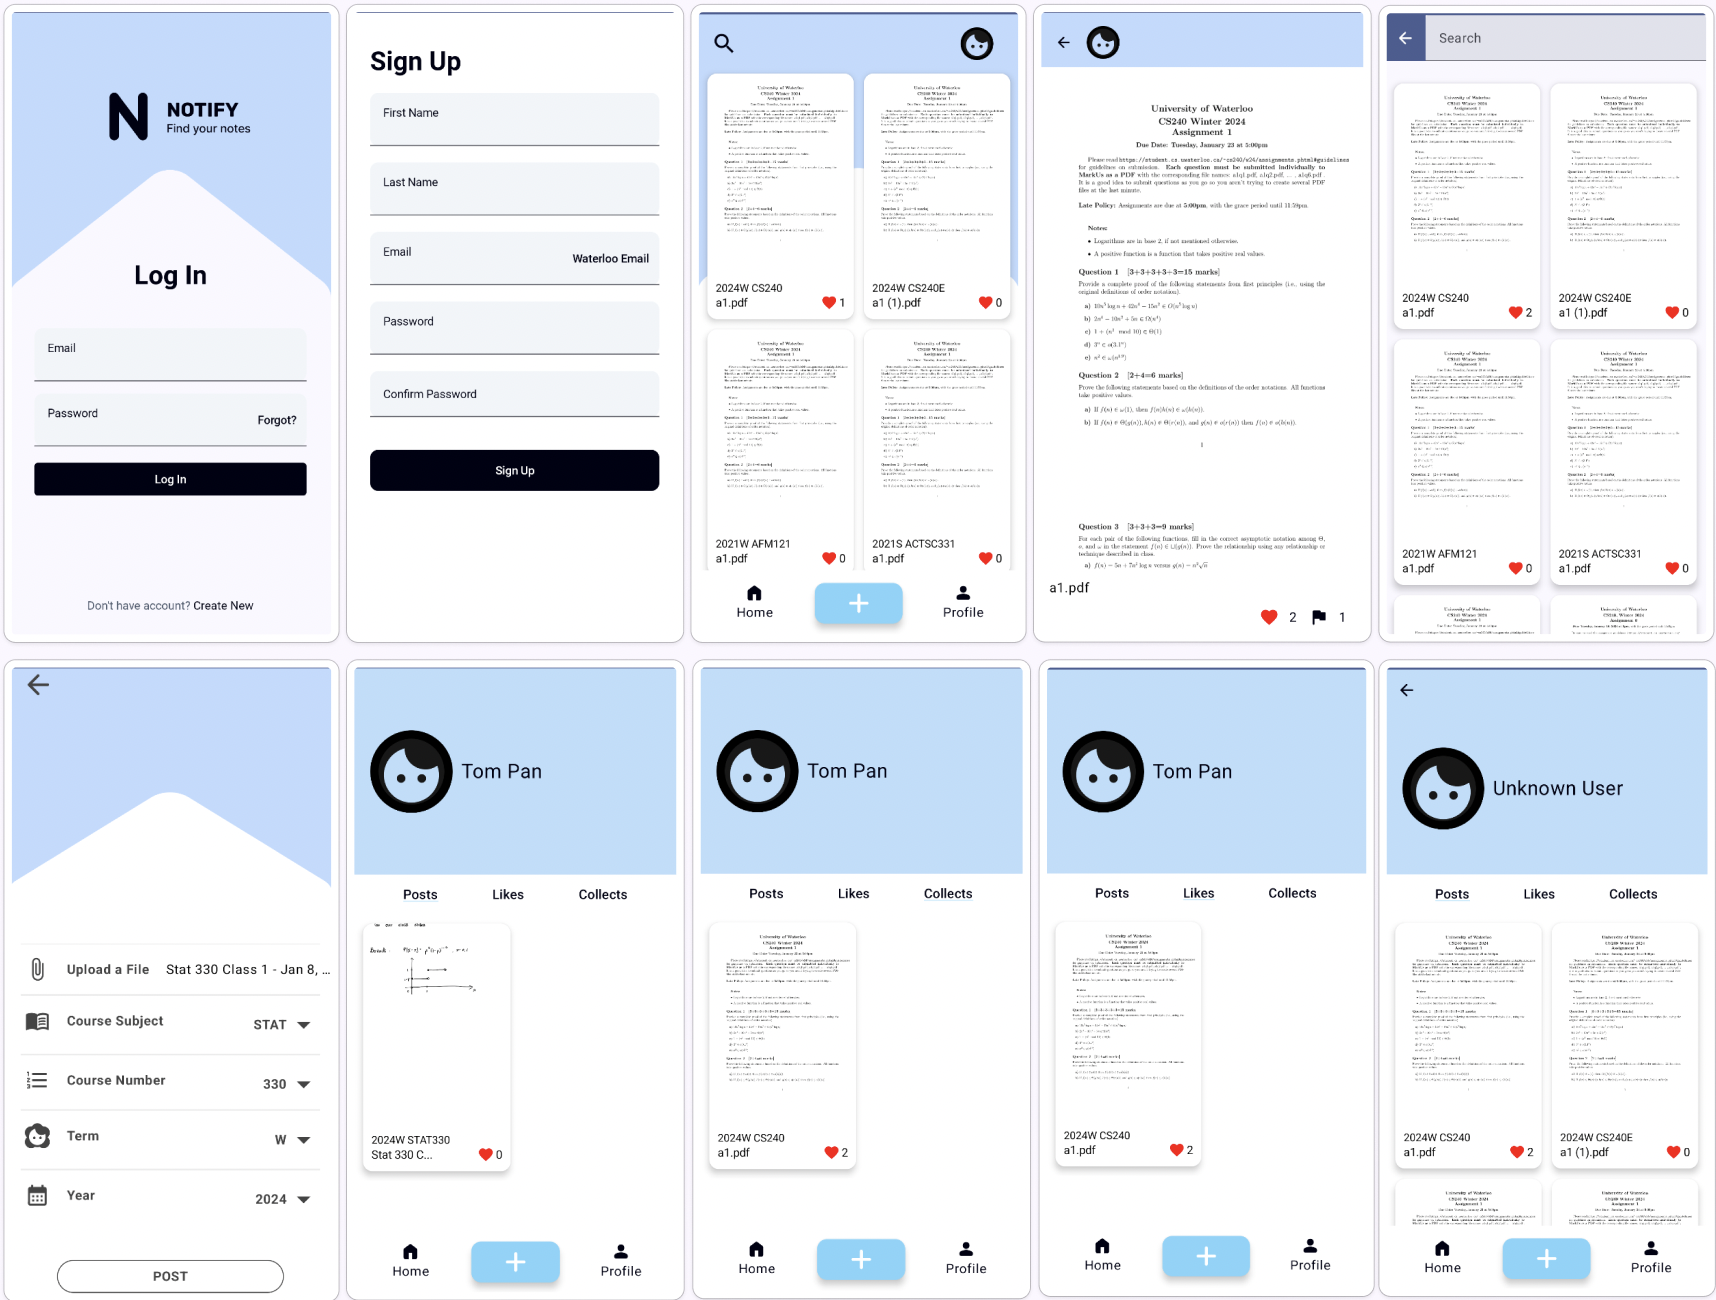
Jack Li, Tom Pan, Jenny Zhang, Kevin Zhang
Discover Notify, a note-sharing application designed specifically for the University of Waterloo student community. Notify transcends traditional learning boundaries, creating a dynamic and collaborative educational environment where students can seamlessly share, access, and manage academic content.
SweetDreams
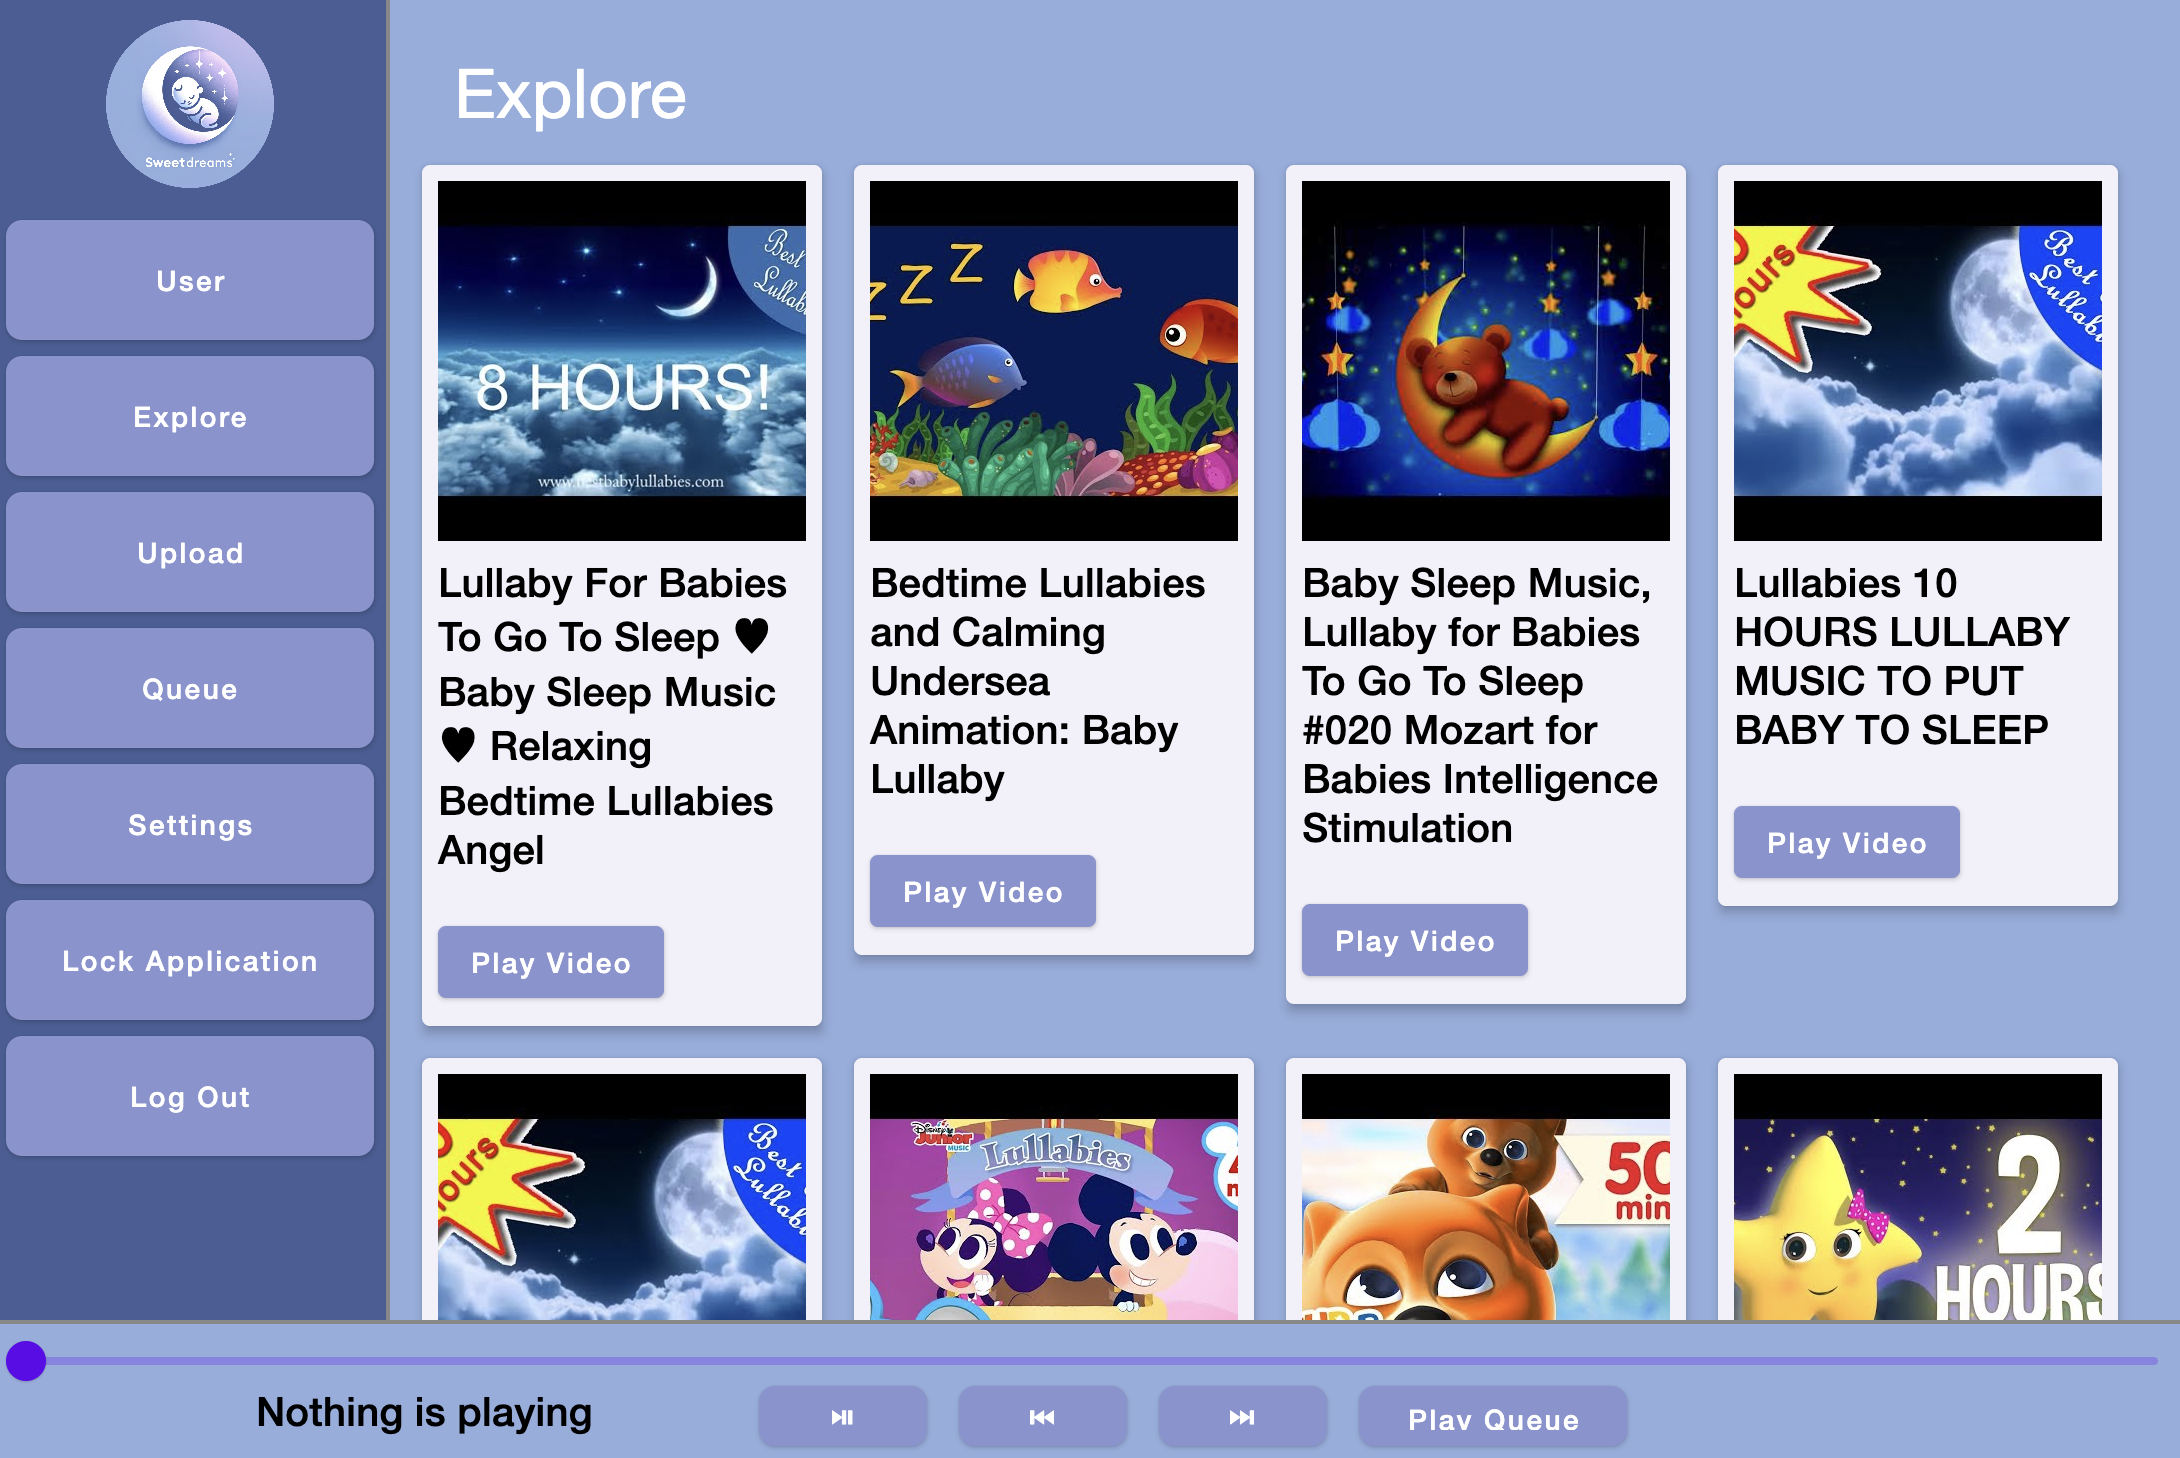
Rohun Baxi, Akshen Jasikumar, Yun Tao, Areeb Shaikh
This project intends to provide a convenient, one-stop solution for parents to upload and explore lullabies for their children, and for children to play their parents’ selected lullabies. This tool is made for parents and their young children, developed for a CS 346 project in Winter 2024. This app differes from other similar applications by adding an explore page linking lullabies from Youtube and publicly posted ones from other users. Core users will include parents who want to help their children sleep but are unavailable (busy, out of town, etc.).
Squash
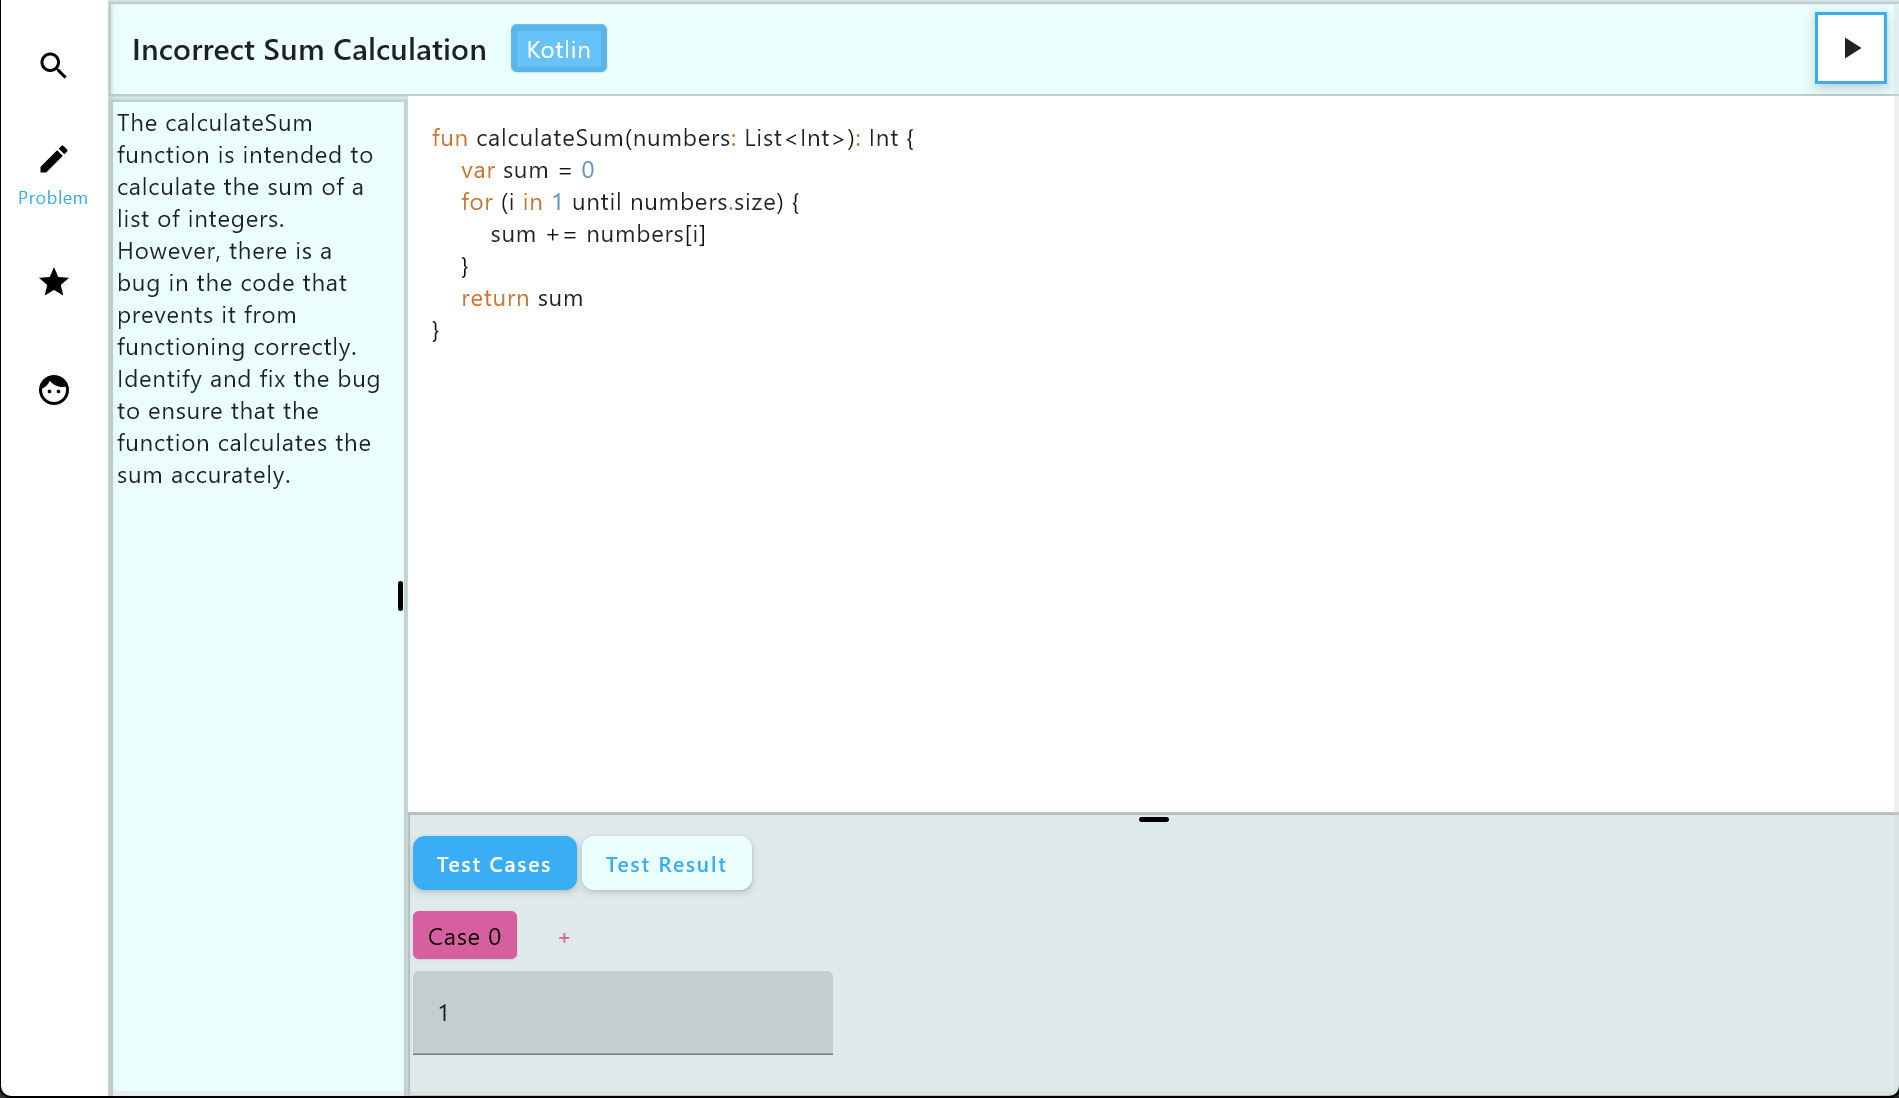
Stefan Min, Michael Huang, William Behnke, Jason Li
Squash is an app that helps developers practice their debugging skills, developed for a CS 346 project in Winter 2024. Although we are inspired by applications like Leetcode, Squash differs from such apps through its focus on reviewing already completed code.
RemindMed
Gen Nishiwaki, Jacob Im, Jason Zhang, Samir Ali
With RemindMed, never forget to take your medications. With scheduled reminders, your list of medications, your list of doctors, and information on each medication, RemindMed helps patients stay organized and on top of their medications. With support patients and doctors, doctors have the ability to add their patients, send them their prescriptions with usage details, and then have reminders automatically scheduled. As a result, medications can be properly used, leading to improved care for patients, and more time for doctors to help others.
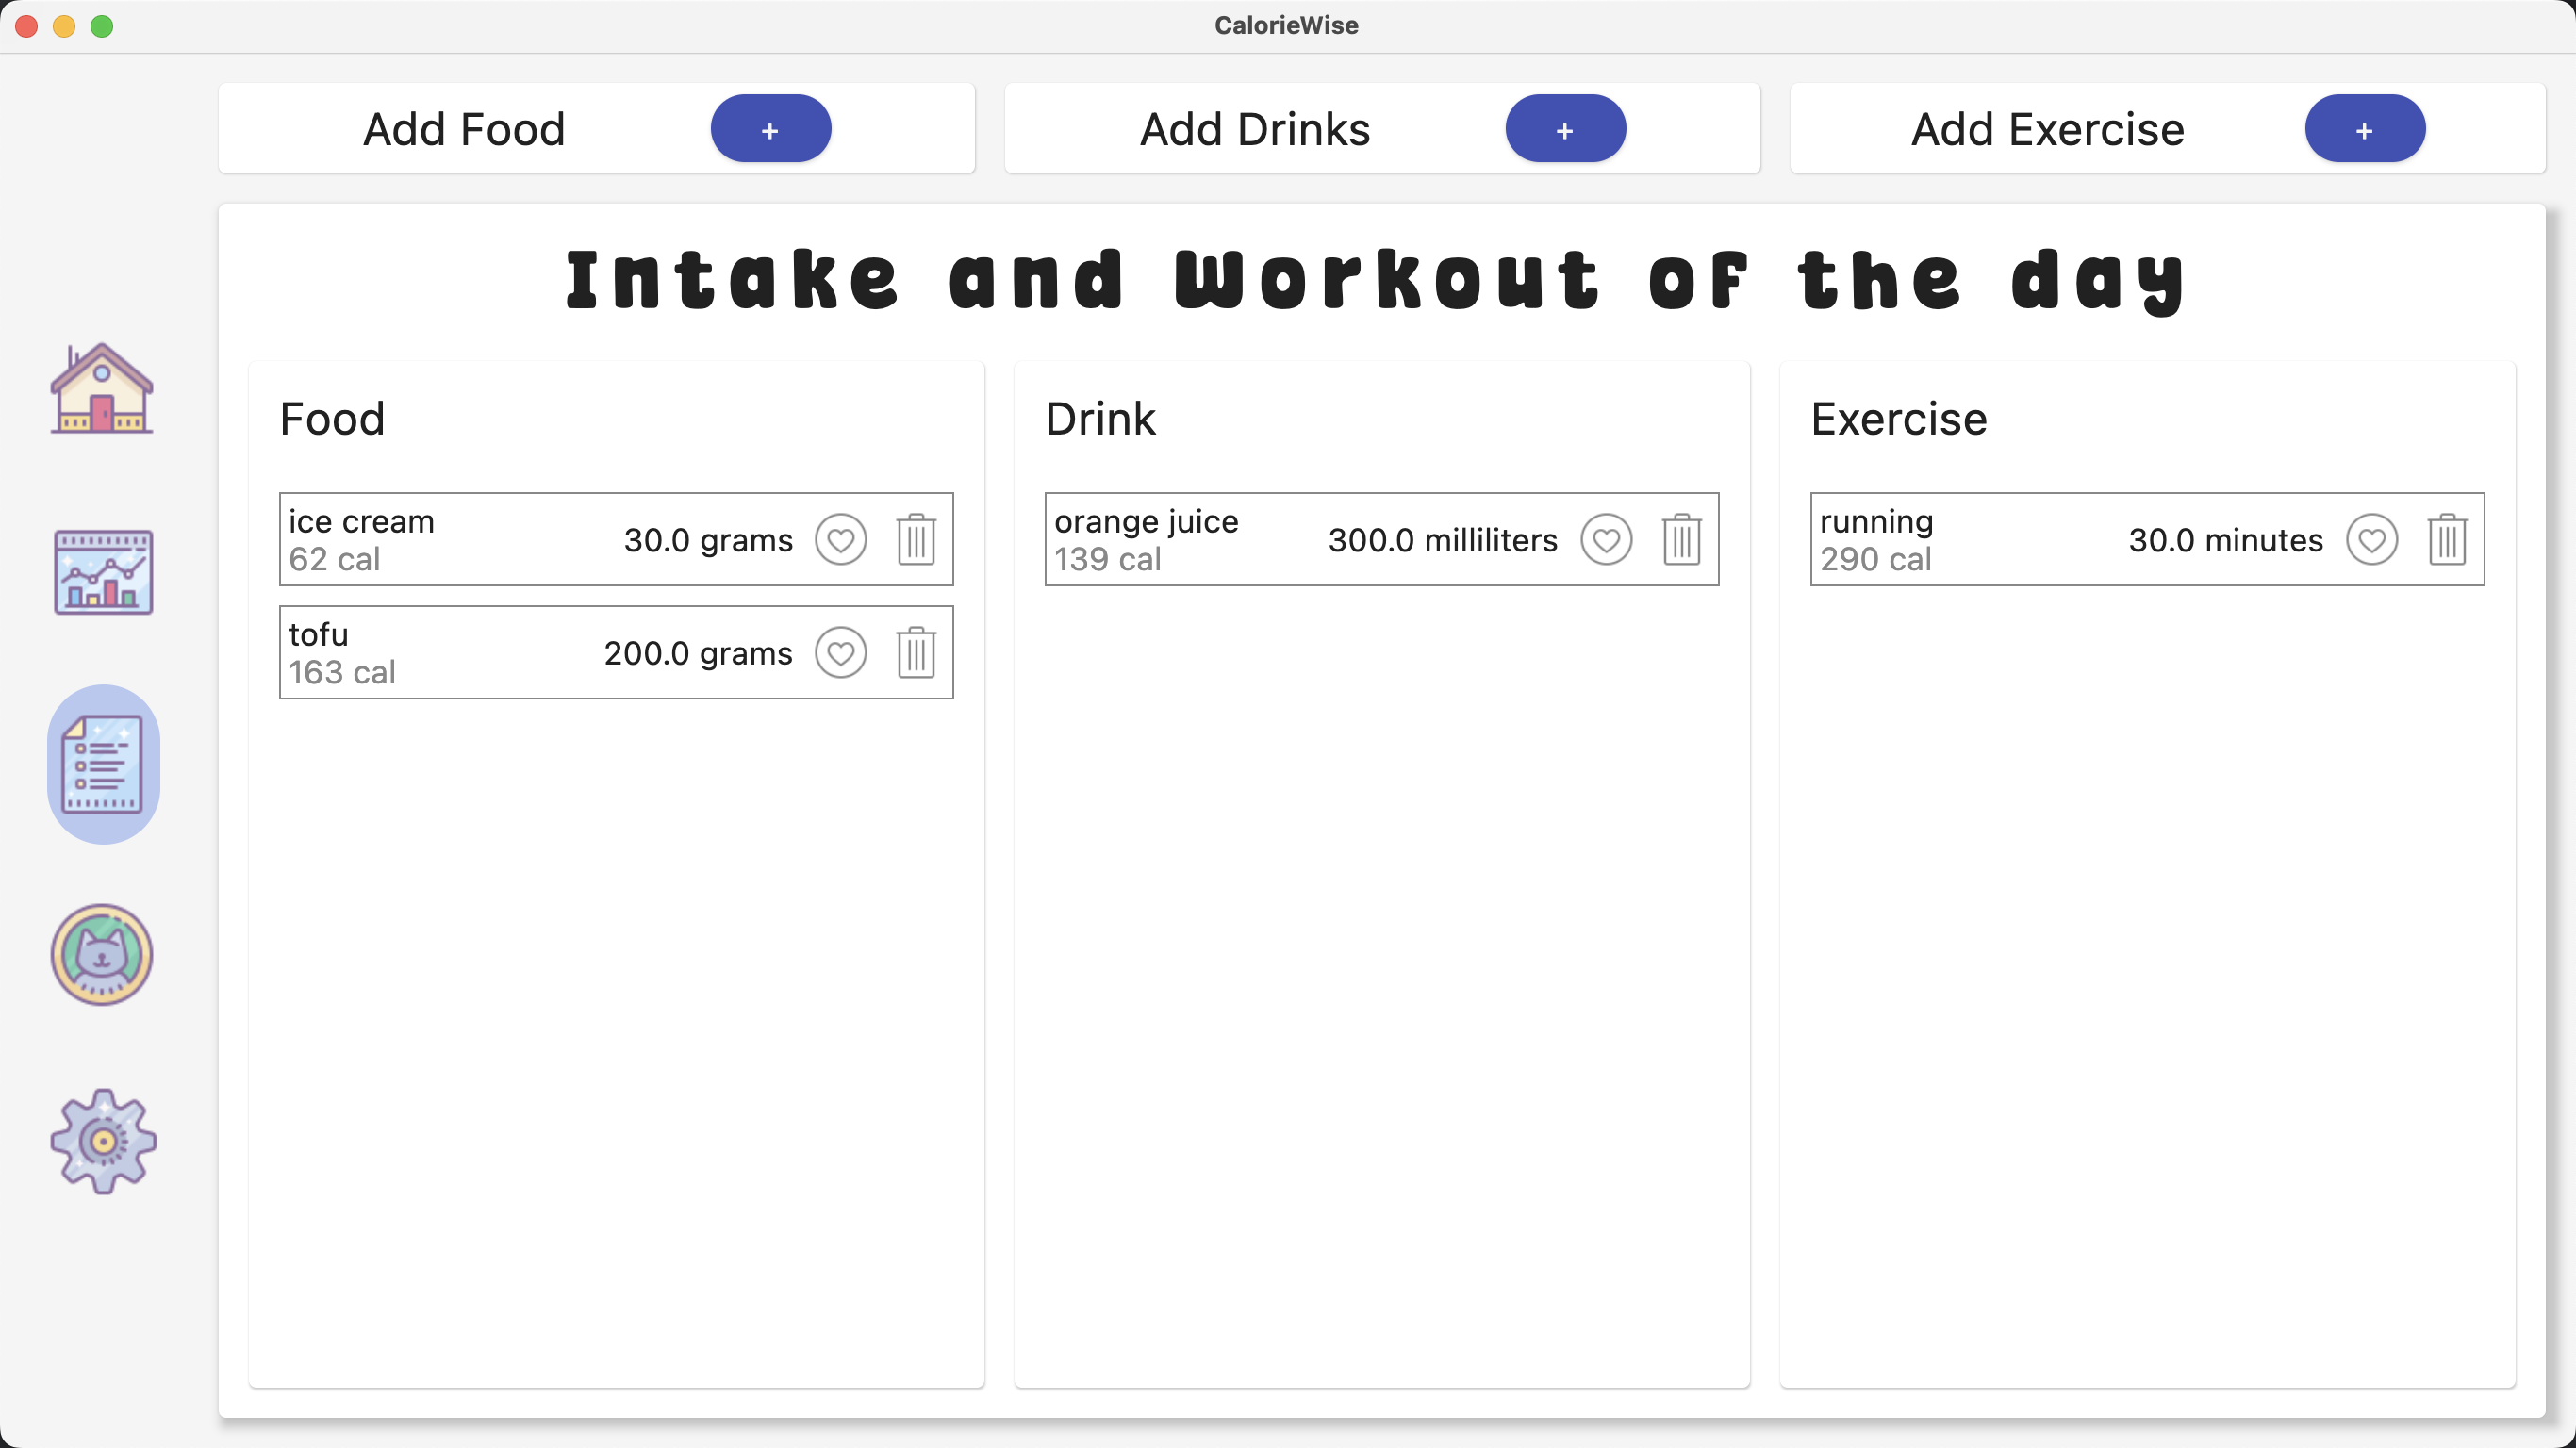
CalorieWise
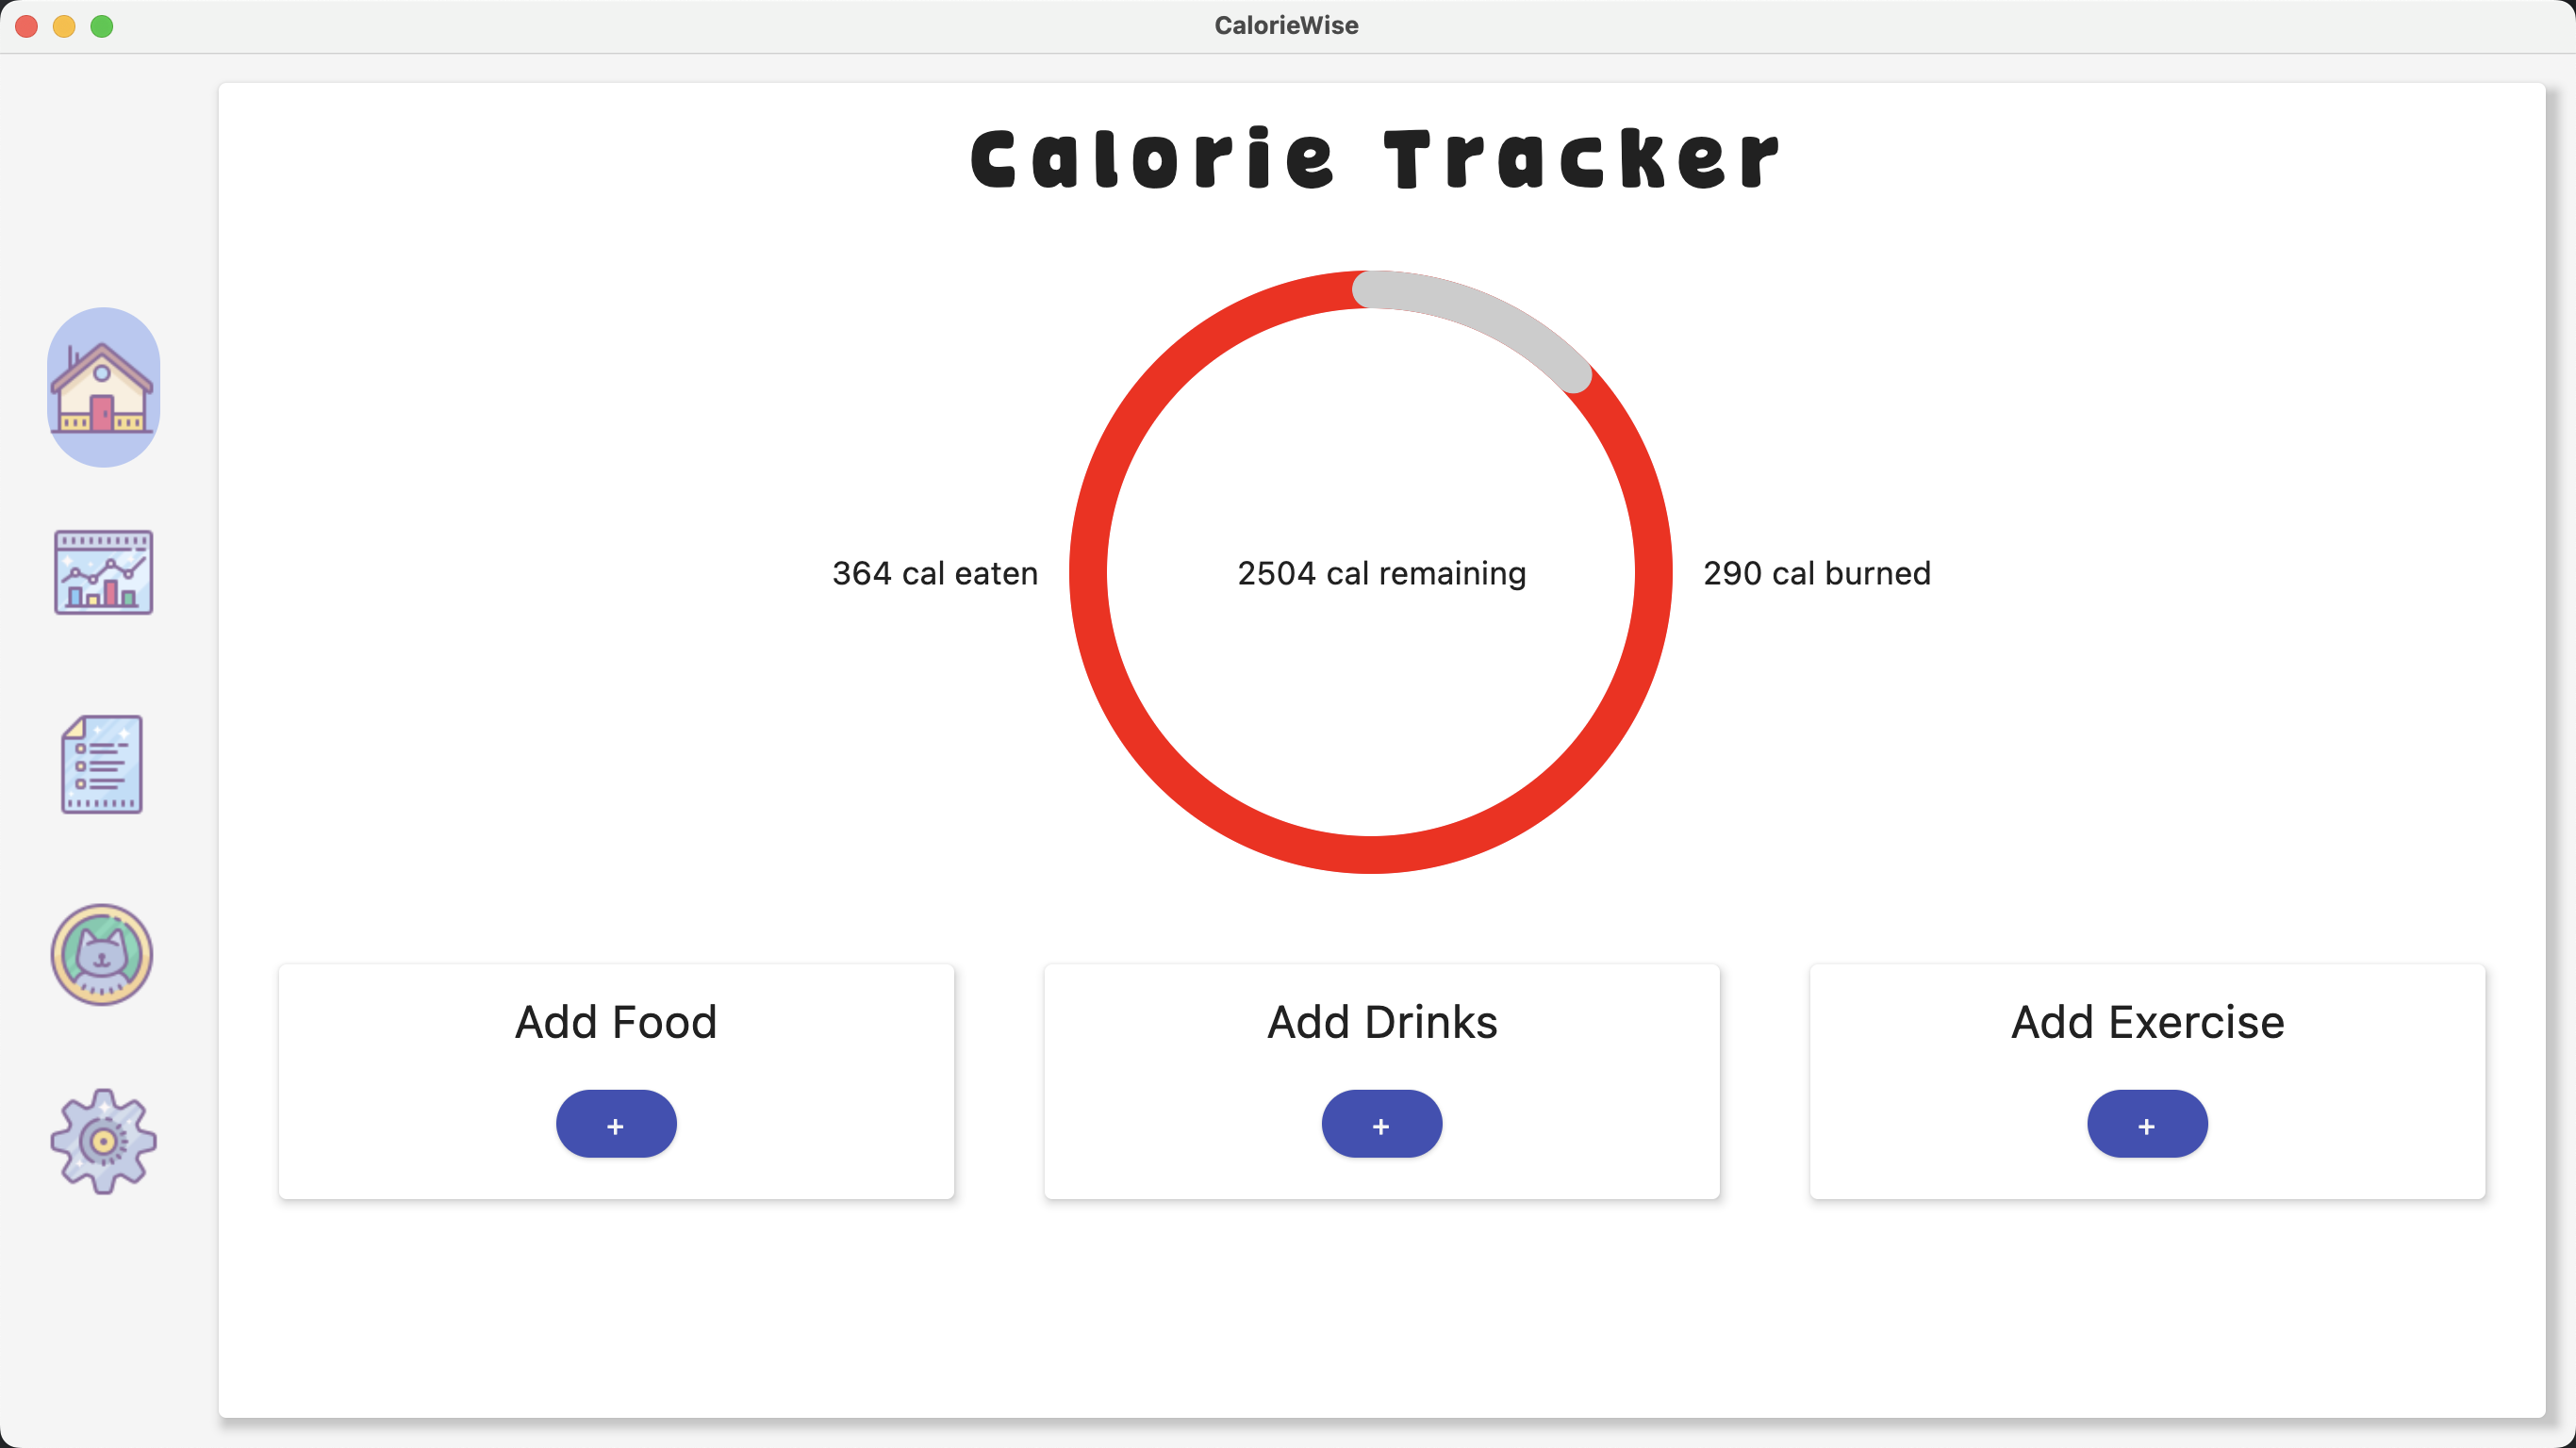
Dongni Lu, Lynn Li, Peter Li, Yingjia Zhang
CalorieWise is a desktop app that aims to help users better track their diet in order to manage their health more efficiently. The app provides an easy-to-use calorie tracker, breakdowns of your nutrient intake, and an intake/exercise entry page for you to get an overview of your daily calorie consumption. Furthermore, the app recommends a healthy calorie total to better guide you on your wellness journey, which can be updated anytime. Welcome to CalorieWise!
AceInterviewer
Ryan Maxin, Derek Maxin, Marcus Puntillo, Jia Wen Li Email
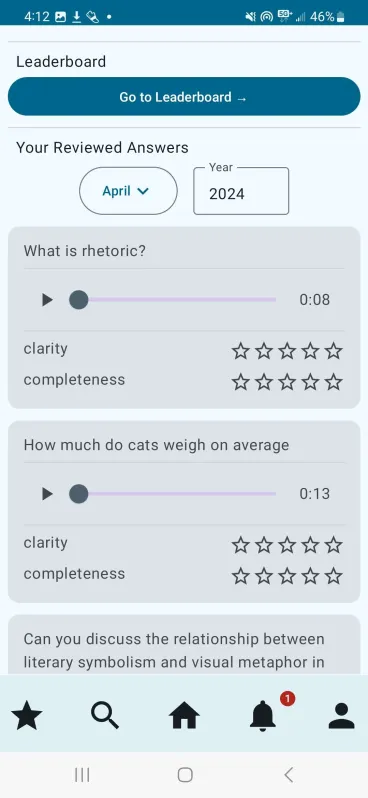
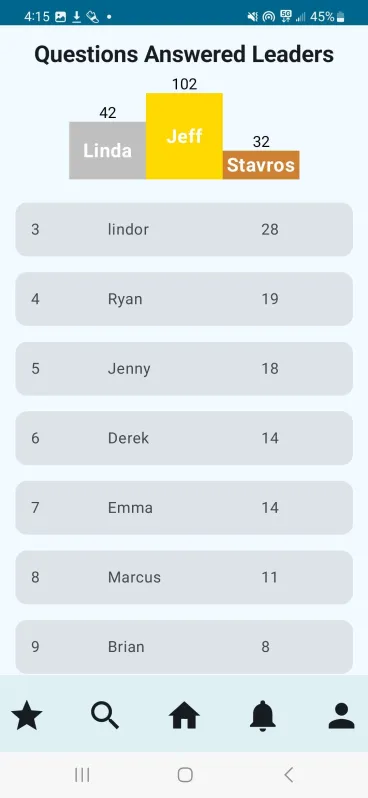
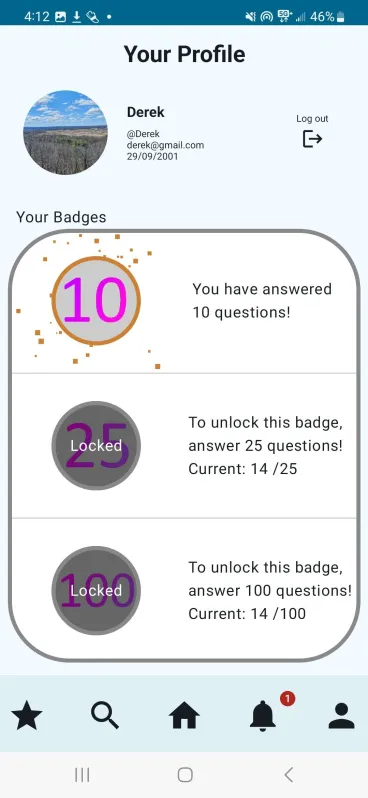
Students and professionals alike have limited access to valuable feedback on their responses to common interview questions within their discipline, often leading to solo-preparation with limited feedback on their responses. Our app serves as a forum for common interview questions, responses, and community feedback. Users can answer common industry questions and submit them publicly to be reviewed with feedback.
TasteBud
Ayush Shah, Julie Ngo, Lavan Nithianandarajah, Neel Shah
TasteBud is an application that teaches beginner cooks how to cook recipes from different cuisines, but are unsure where to start. This project is being developed for the CS 346 course project in Winter 2024. It differs from other similar applications by using a progression learning method where users can learn the basics of cooking a specific cuisine and gradually increase their expertise. It solves the problem of overwhelming online cooking information and recipes, which often assume prior knowledge of cooking and have limited information on each of the steps for preparing a dish. Youtube videos and other social media platforms are also often too fast-paced and vague. Users are searching for a quick & convenient, user friendly, and fun way to learn cooking!
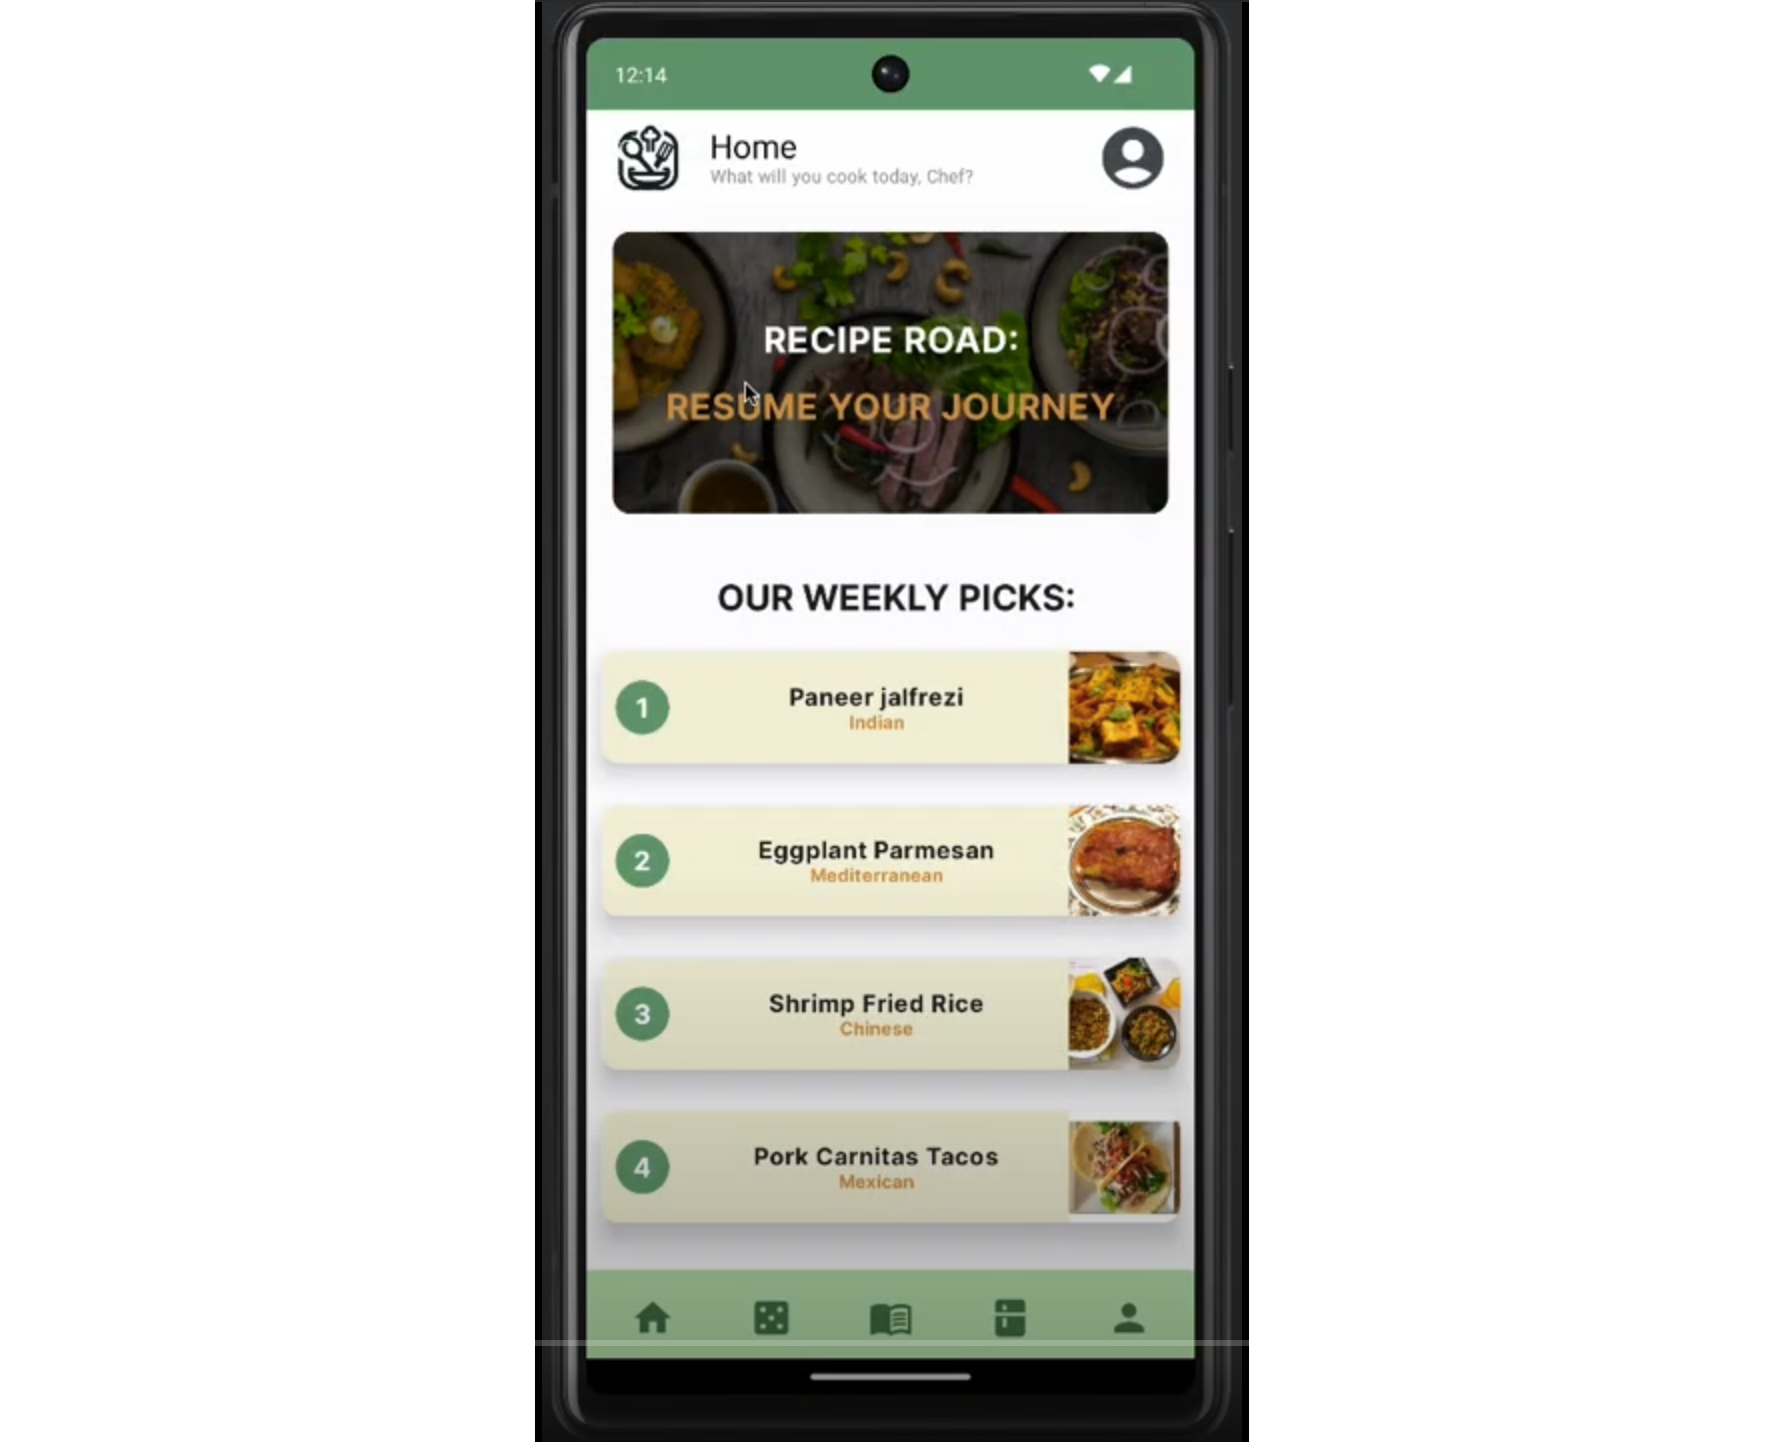
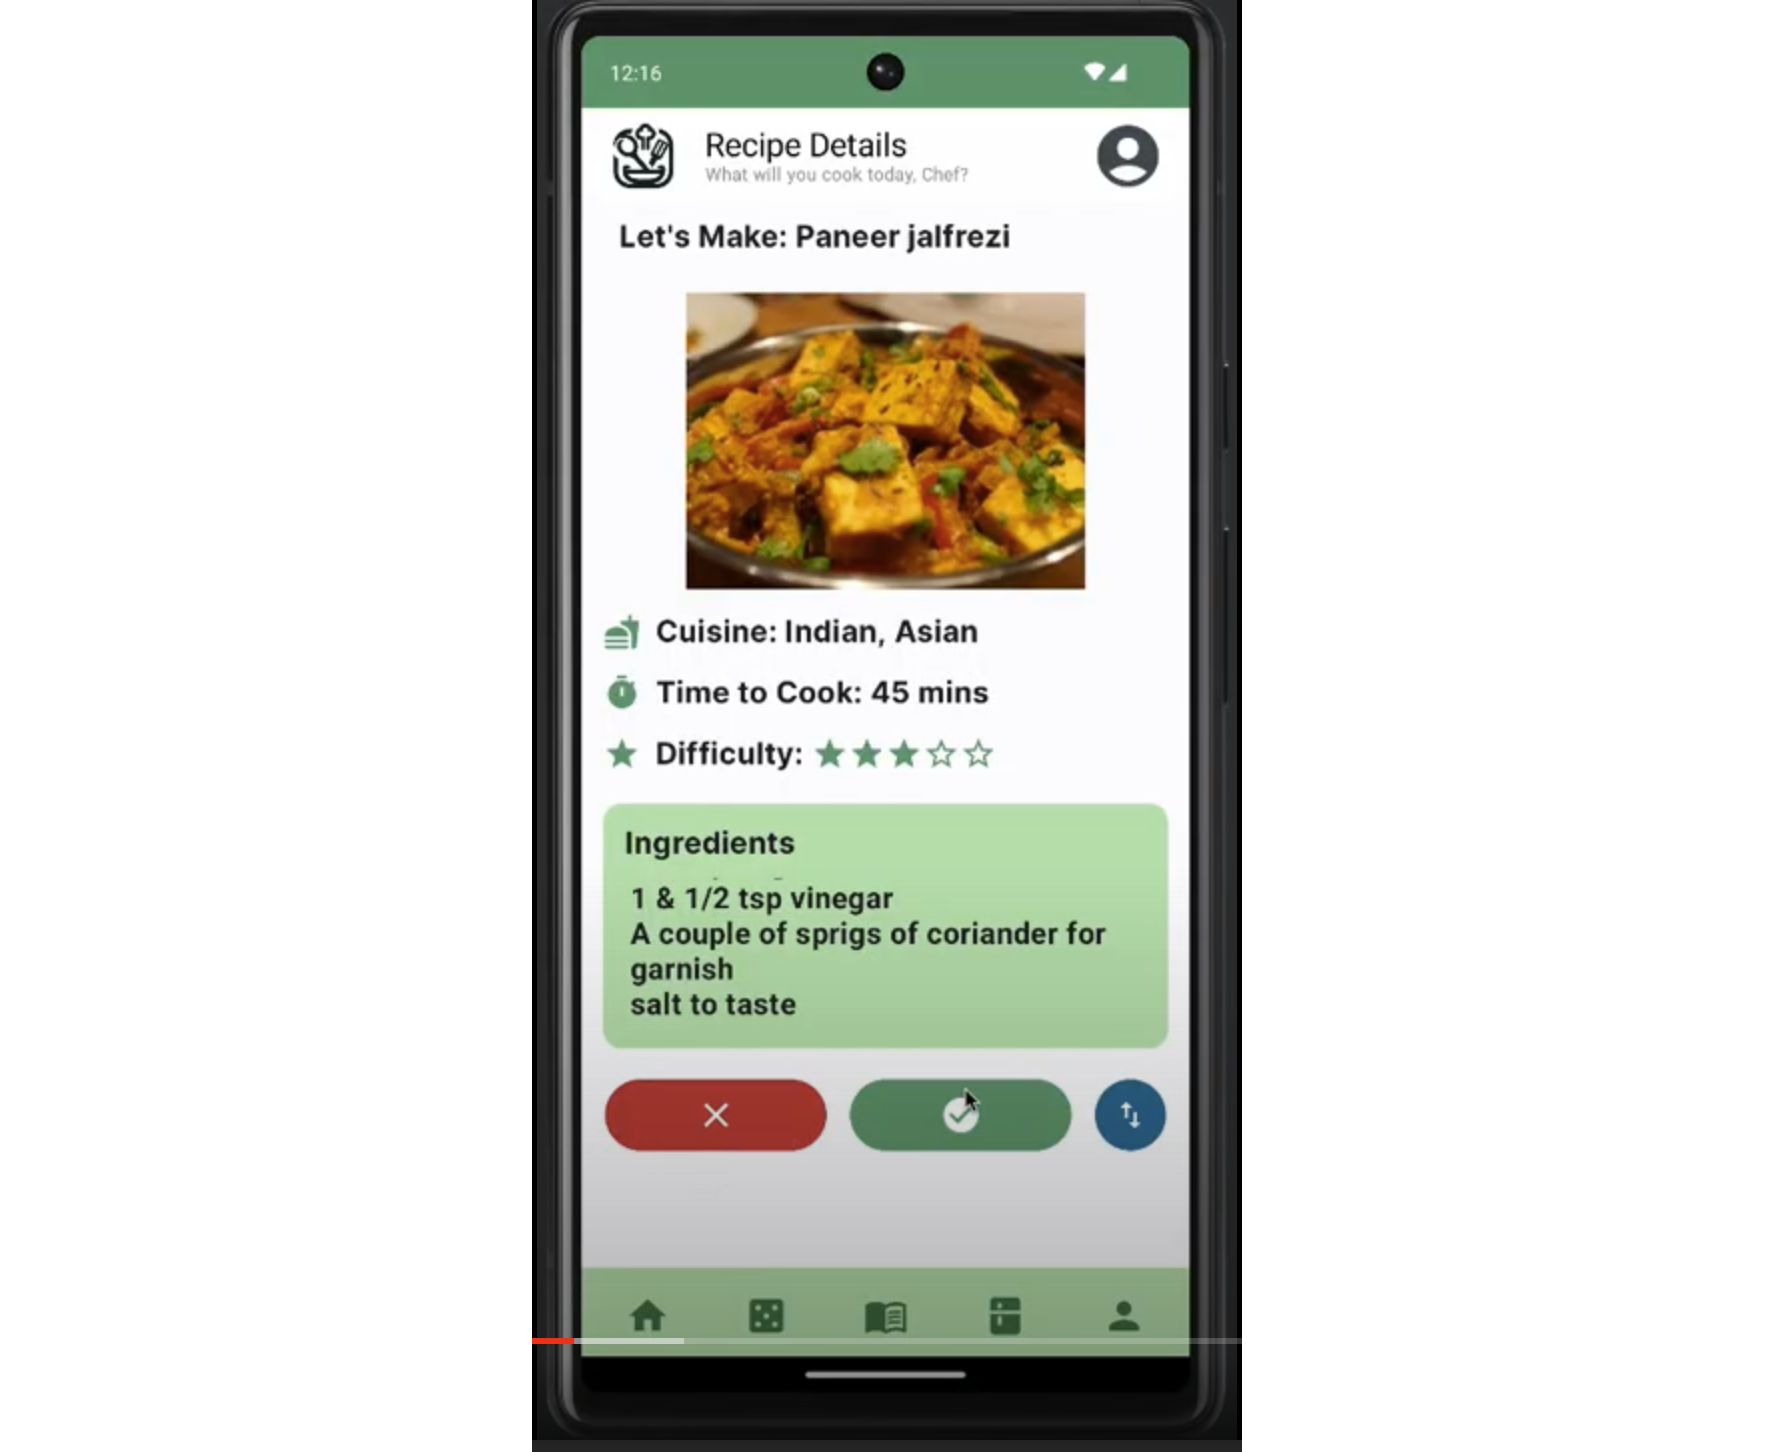
Univibe
Sowad Khan, Bahaa Desoky, Omer Faruk, Ali Faez
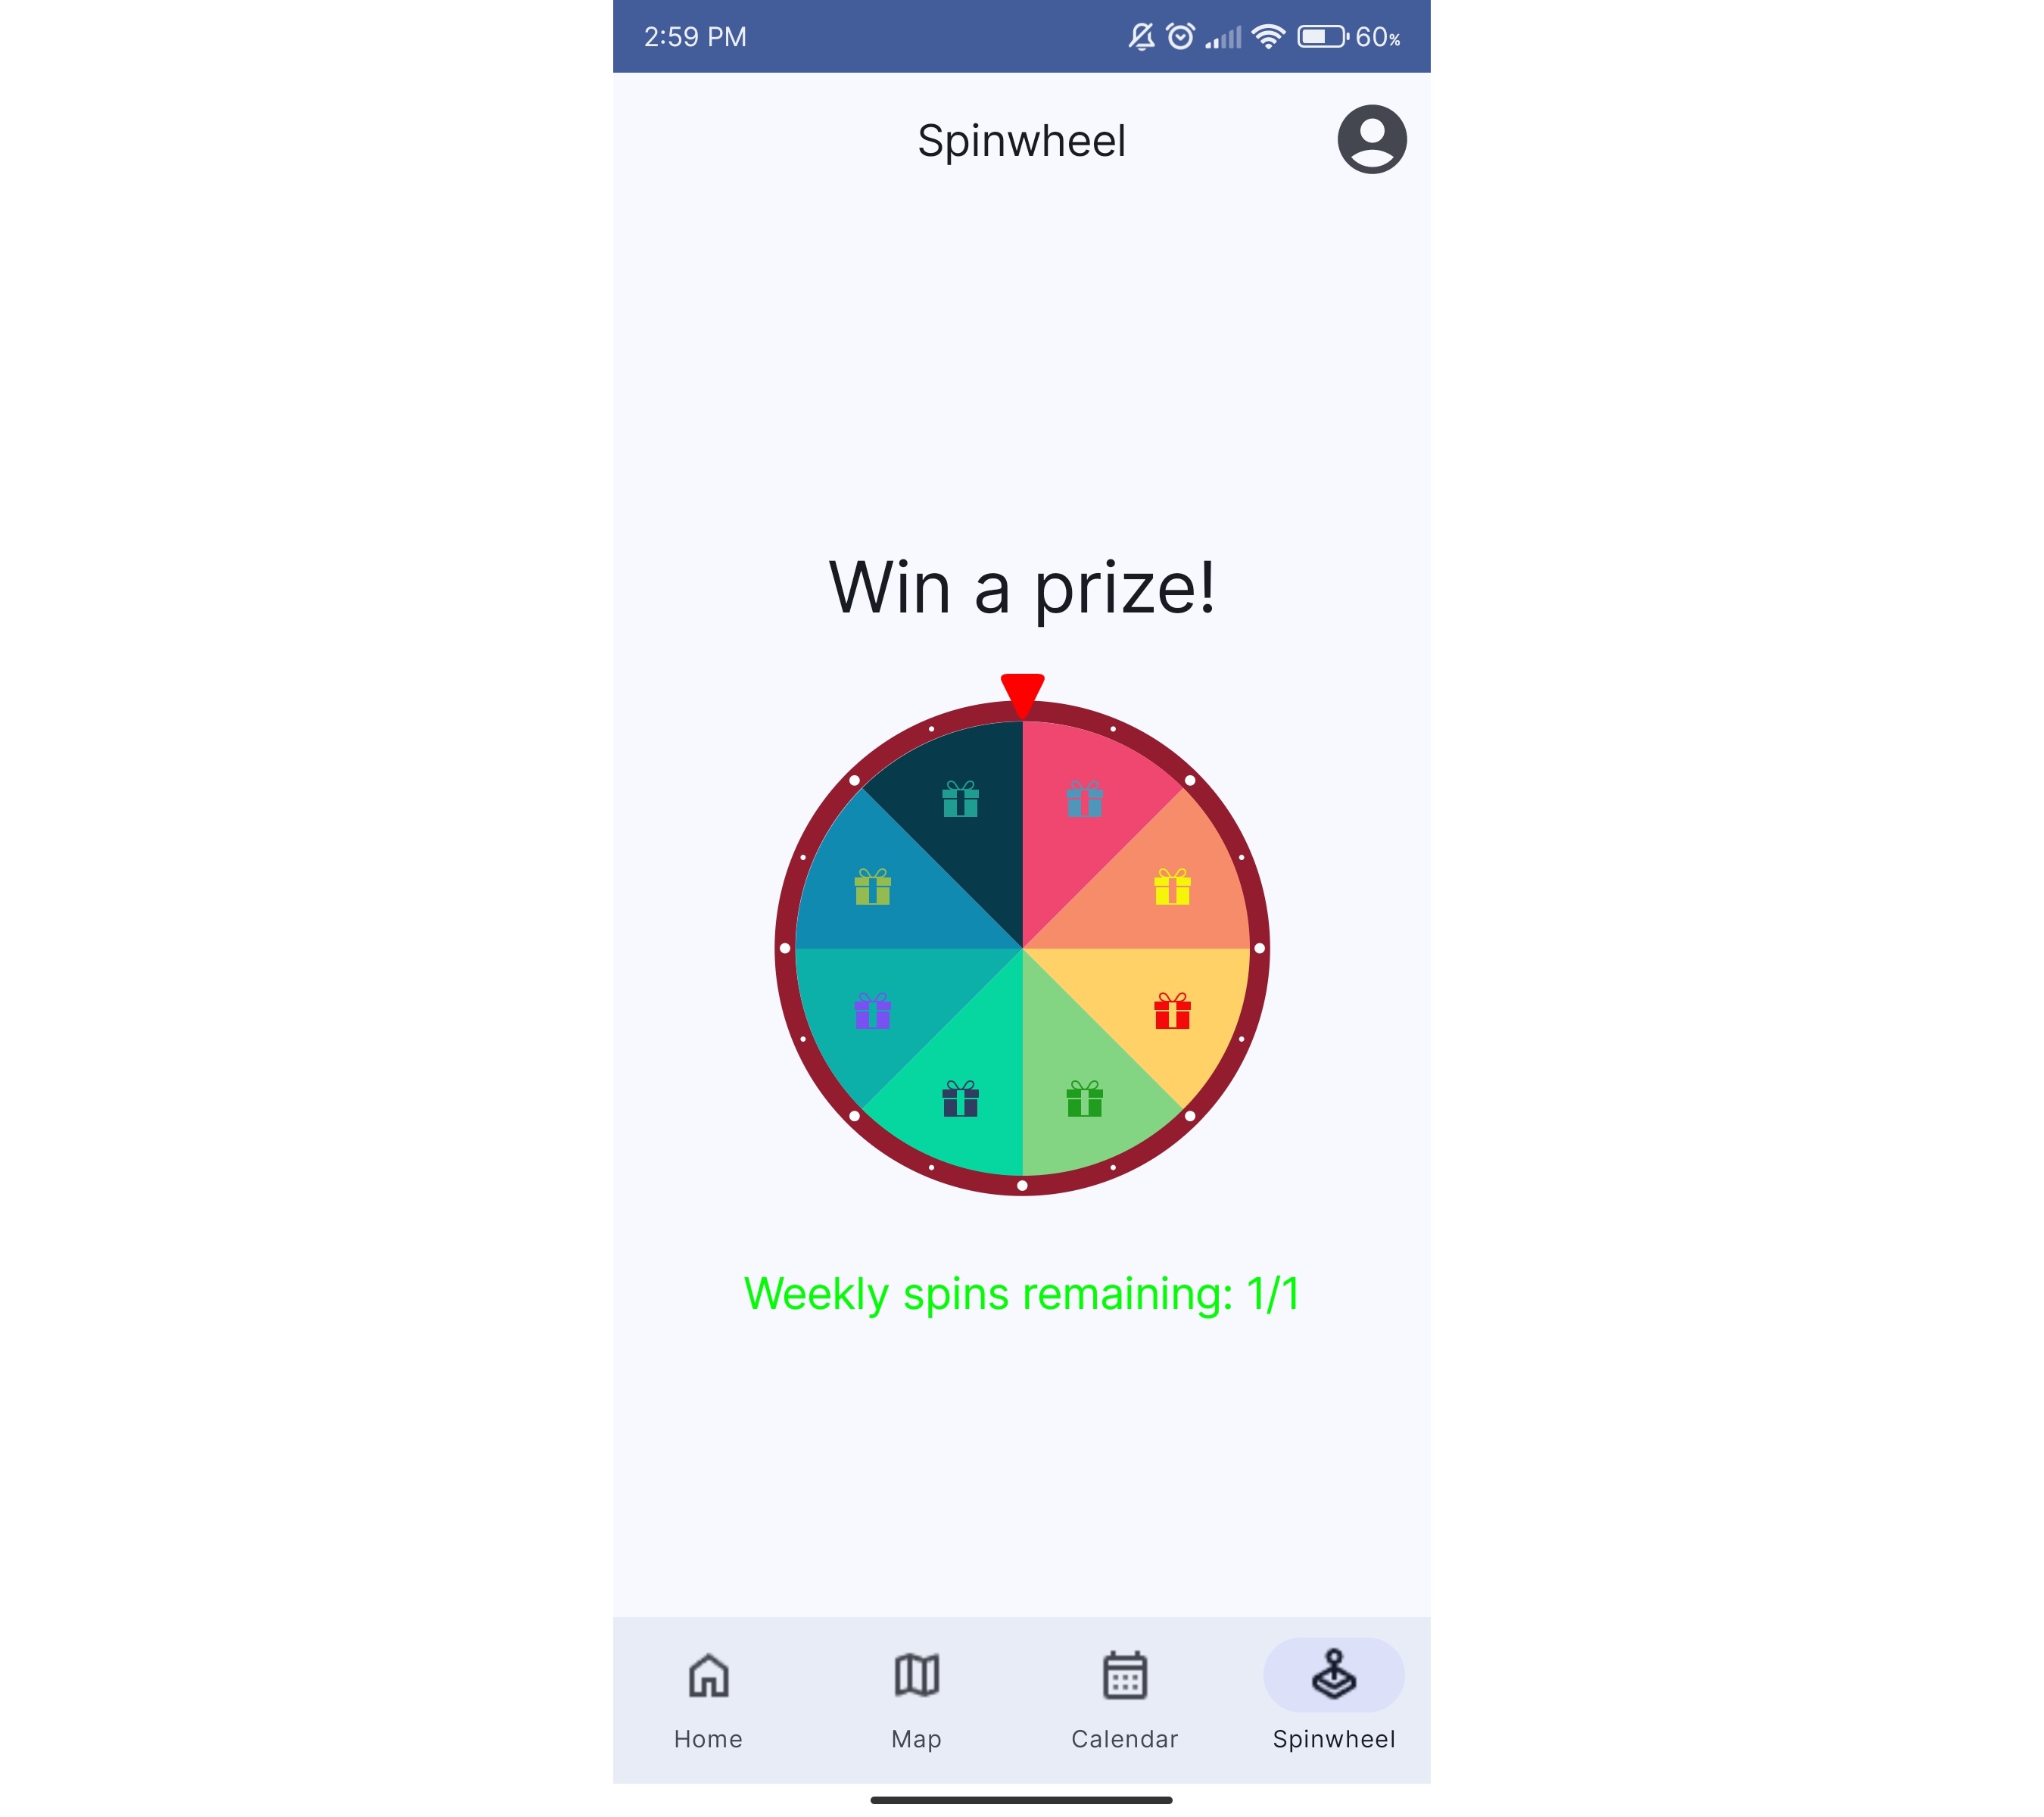
Univibe is a campus exploration app that helps students share and discover interesting places around campus, developed for a CS346 project in Winter 2024. This app will help students share their discoveries and help other students connect and learn more about their campus.
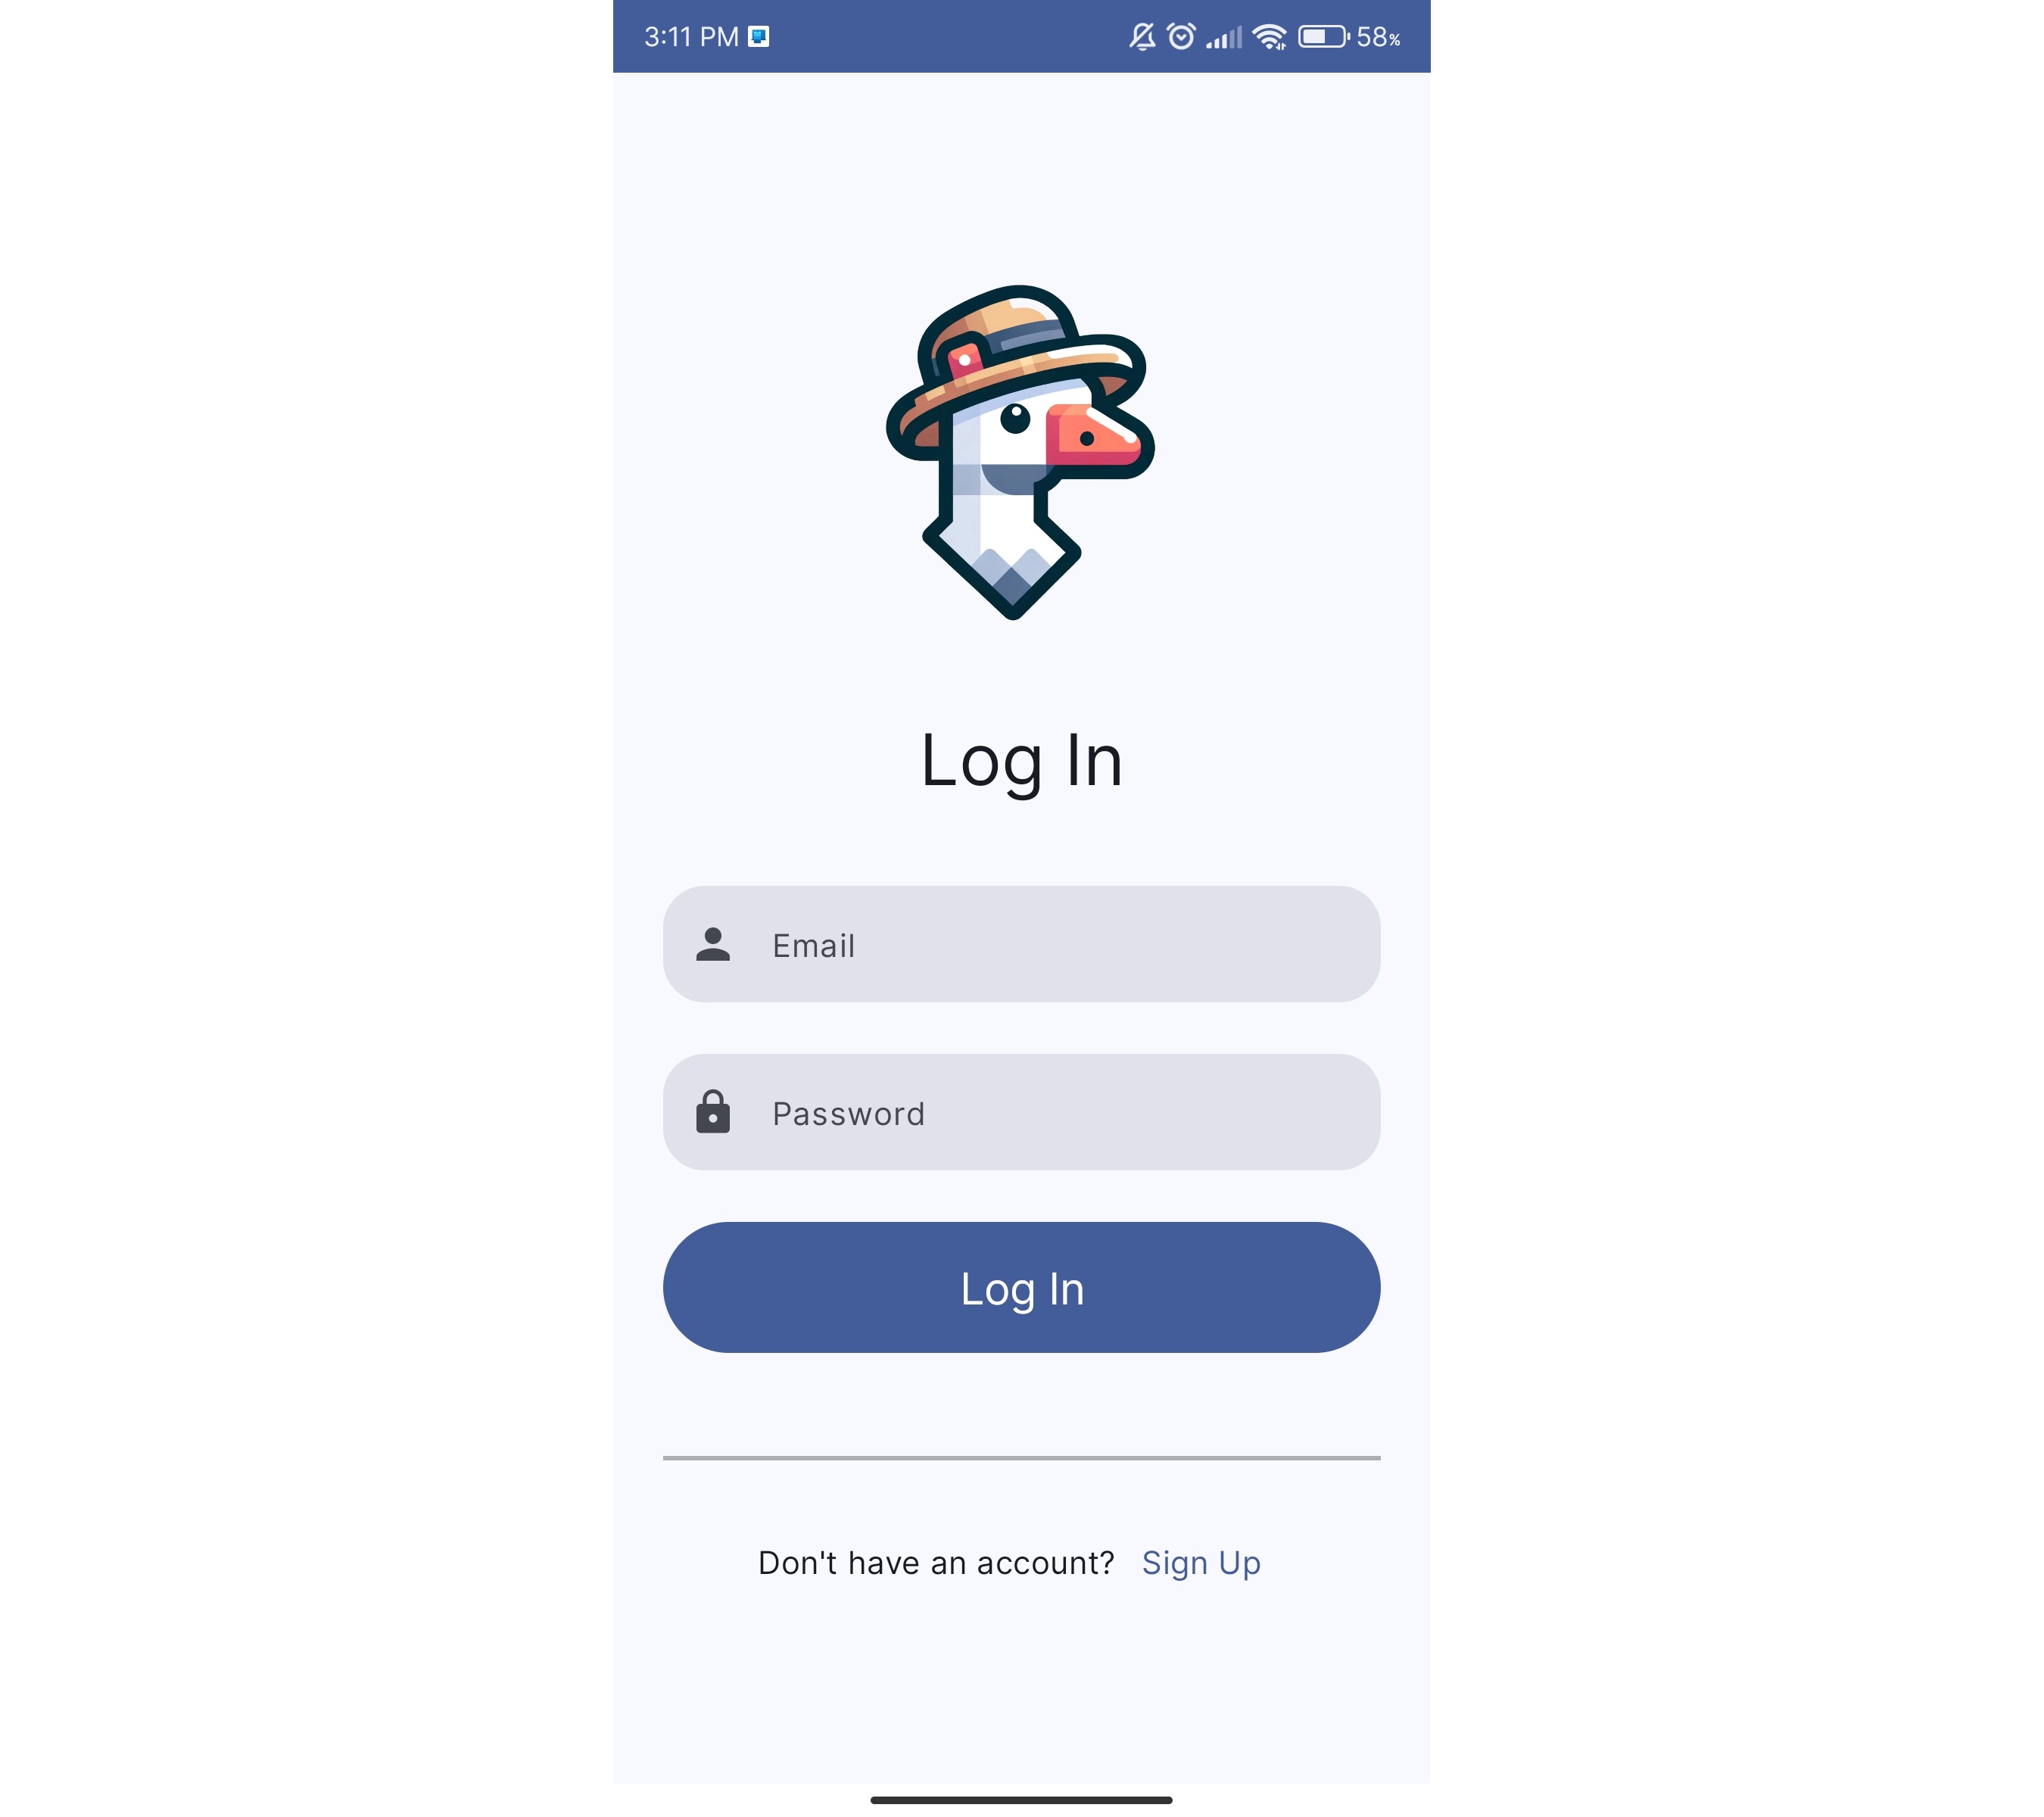

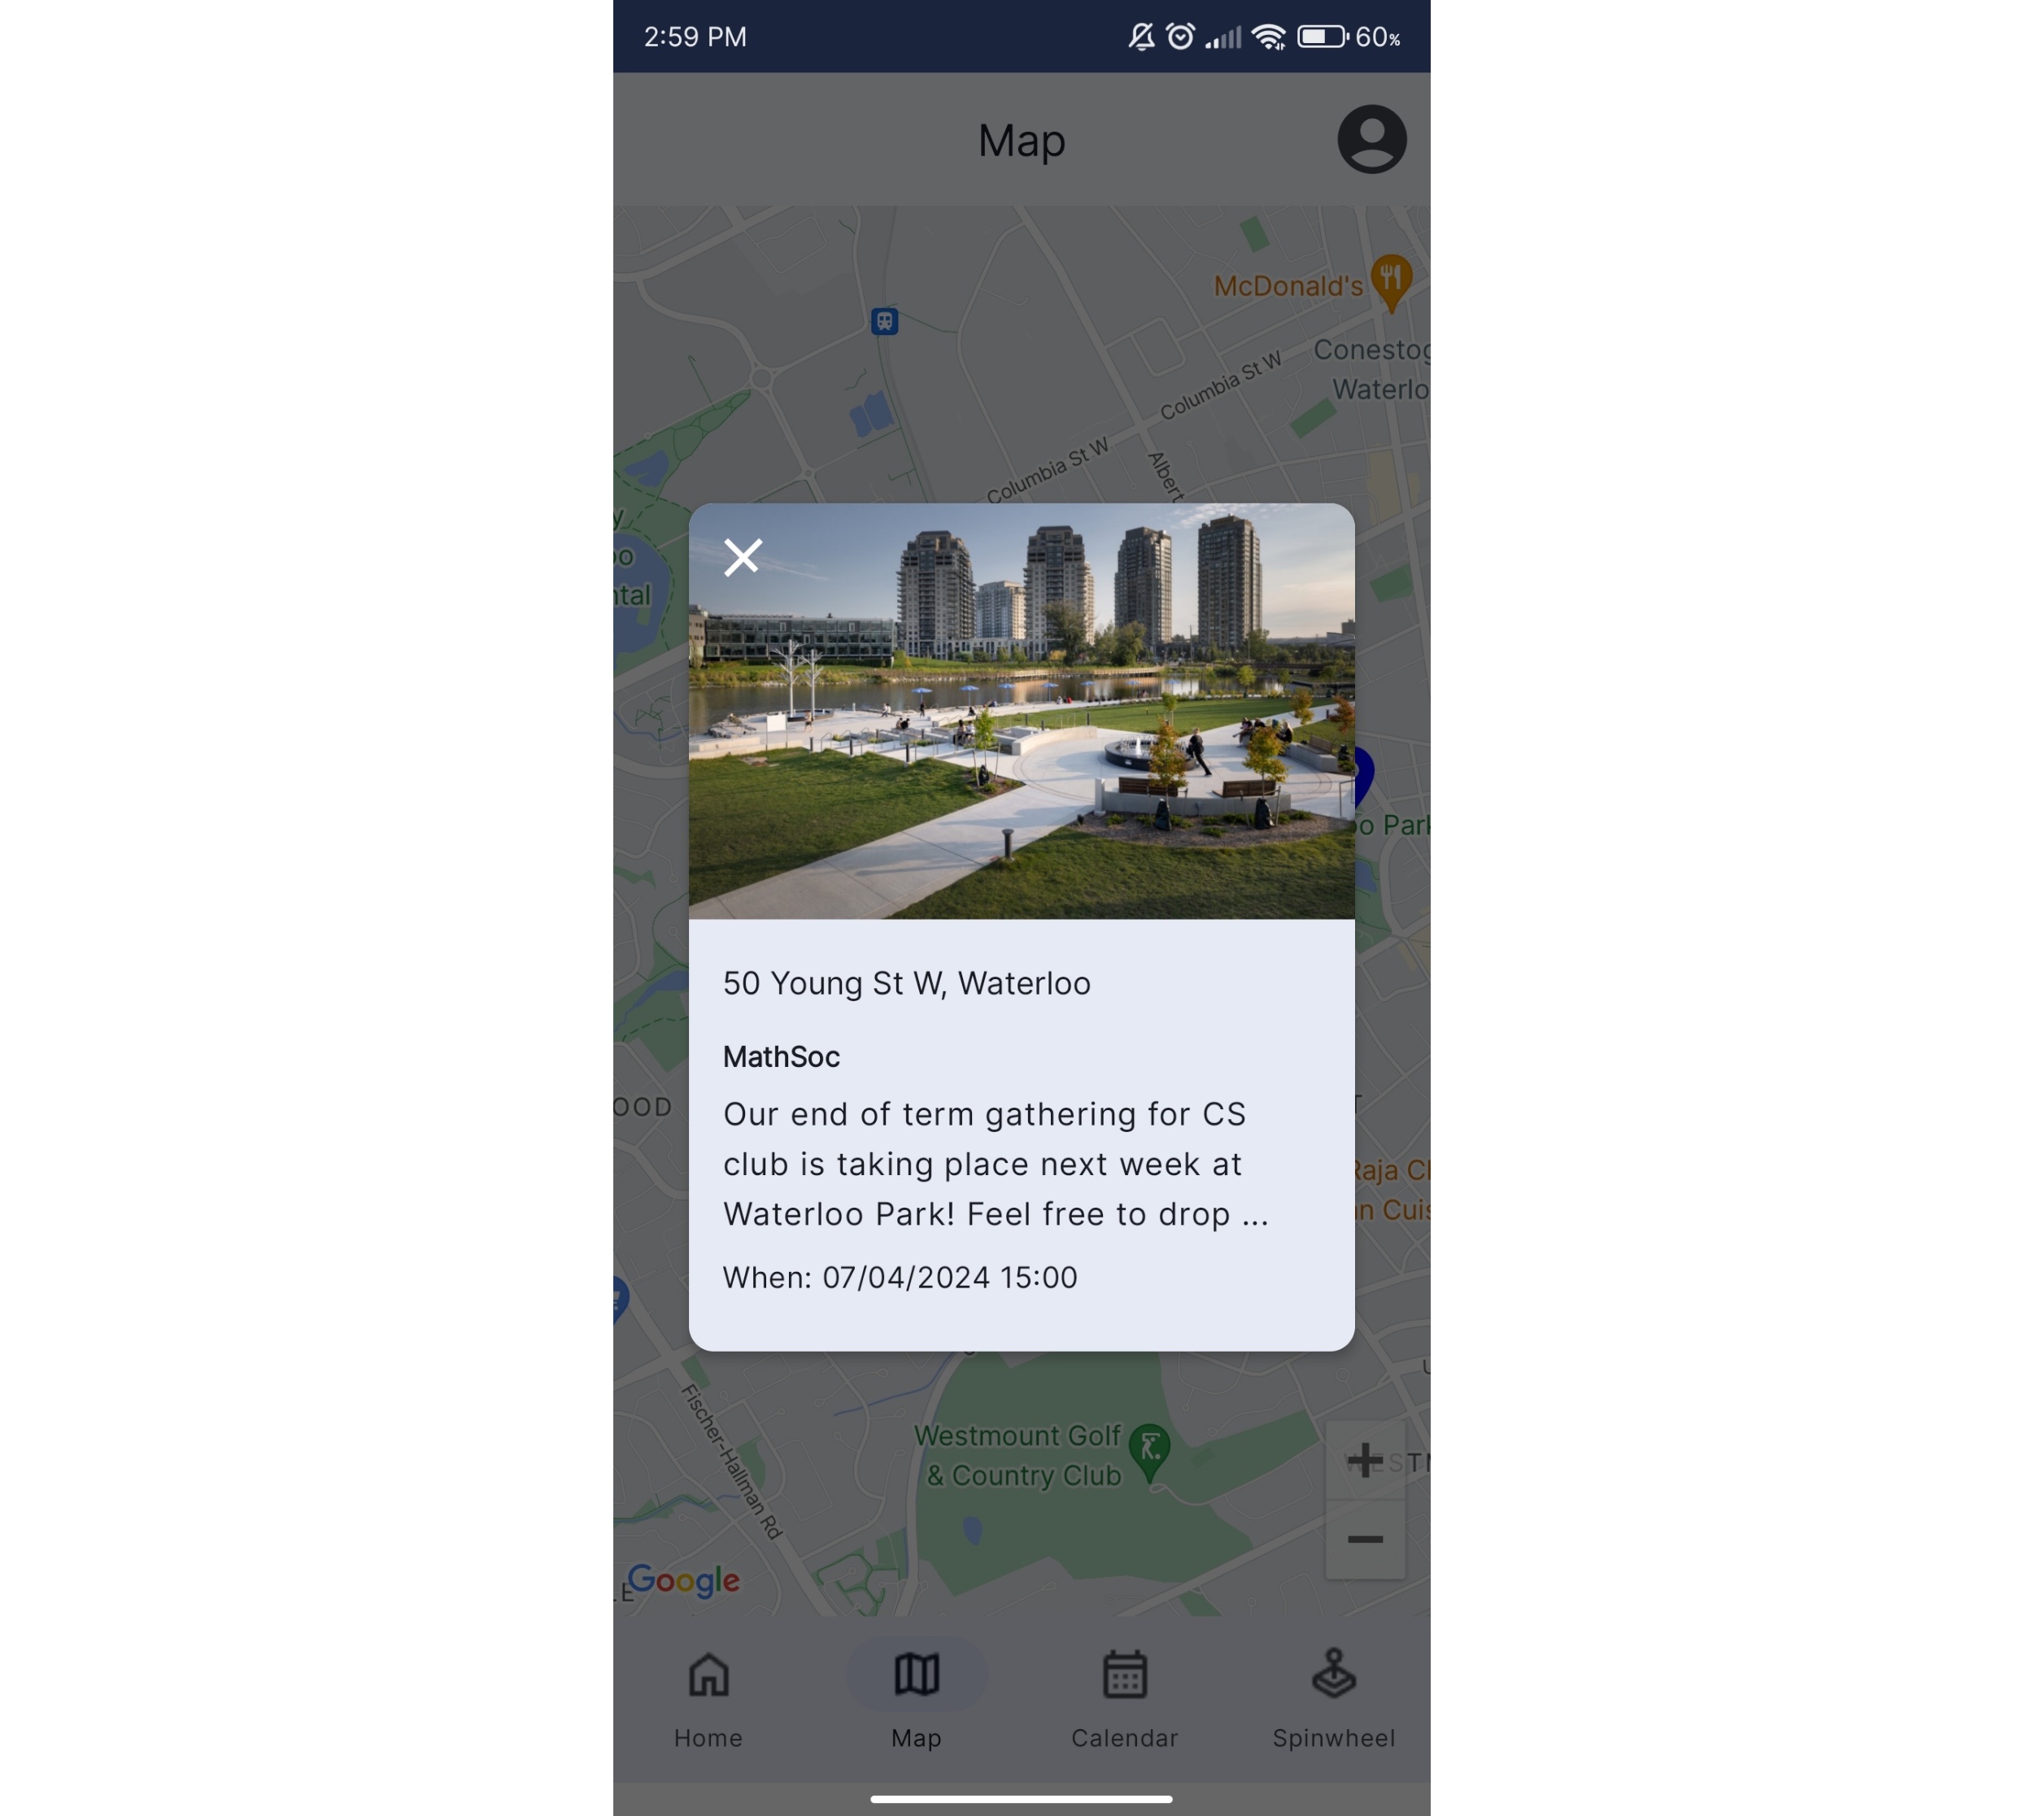
UWConnect
Sagar Patel, Ibrahim Kashif, Alex Yu, Eric Liu
UWConnect is an innovative platform designed to enhance the connectivity and collaboration among University of Waterloo students, faculty, and staff. By facilitating more direct communication and providing a centralized hub for resources and information, UWConnect aims to make campus life more integrated and accessible for everyone involved! Whether you’re looking to join a group related to your interests, find campus events, or connect with peers and professors, UWConnect is your go-to solution!
Deliverables
Items that you are required to submit for grading.
Project setup
This section describes a project milestone. See the schedule for due dates.
Create a GitLab project
Once your team has been formed, you will need to create a project space in the University of Waterloo GitLab. You should create a single GitLab project for your team, and add the information detailed below. When done, you will need to submit your project details in Learn.
Step 1: New-project wizard
- Open the GitLab home page.
- Select
+>New project/repository>Create Blank Project. - Fill in the form:
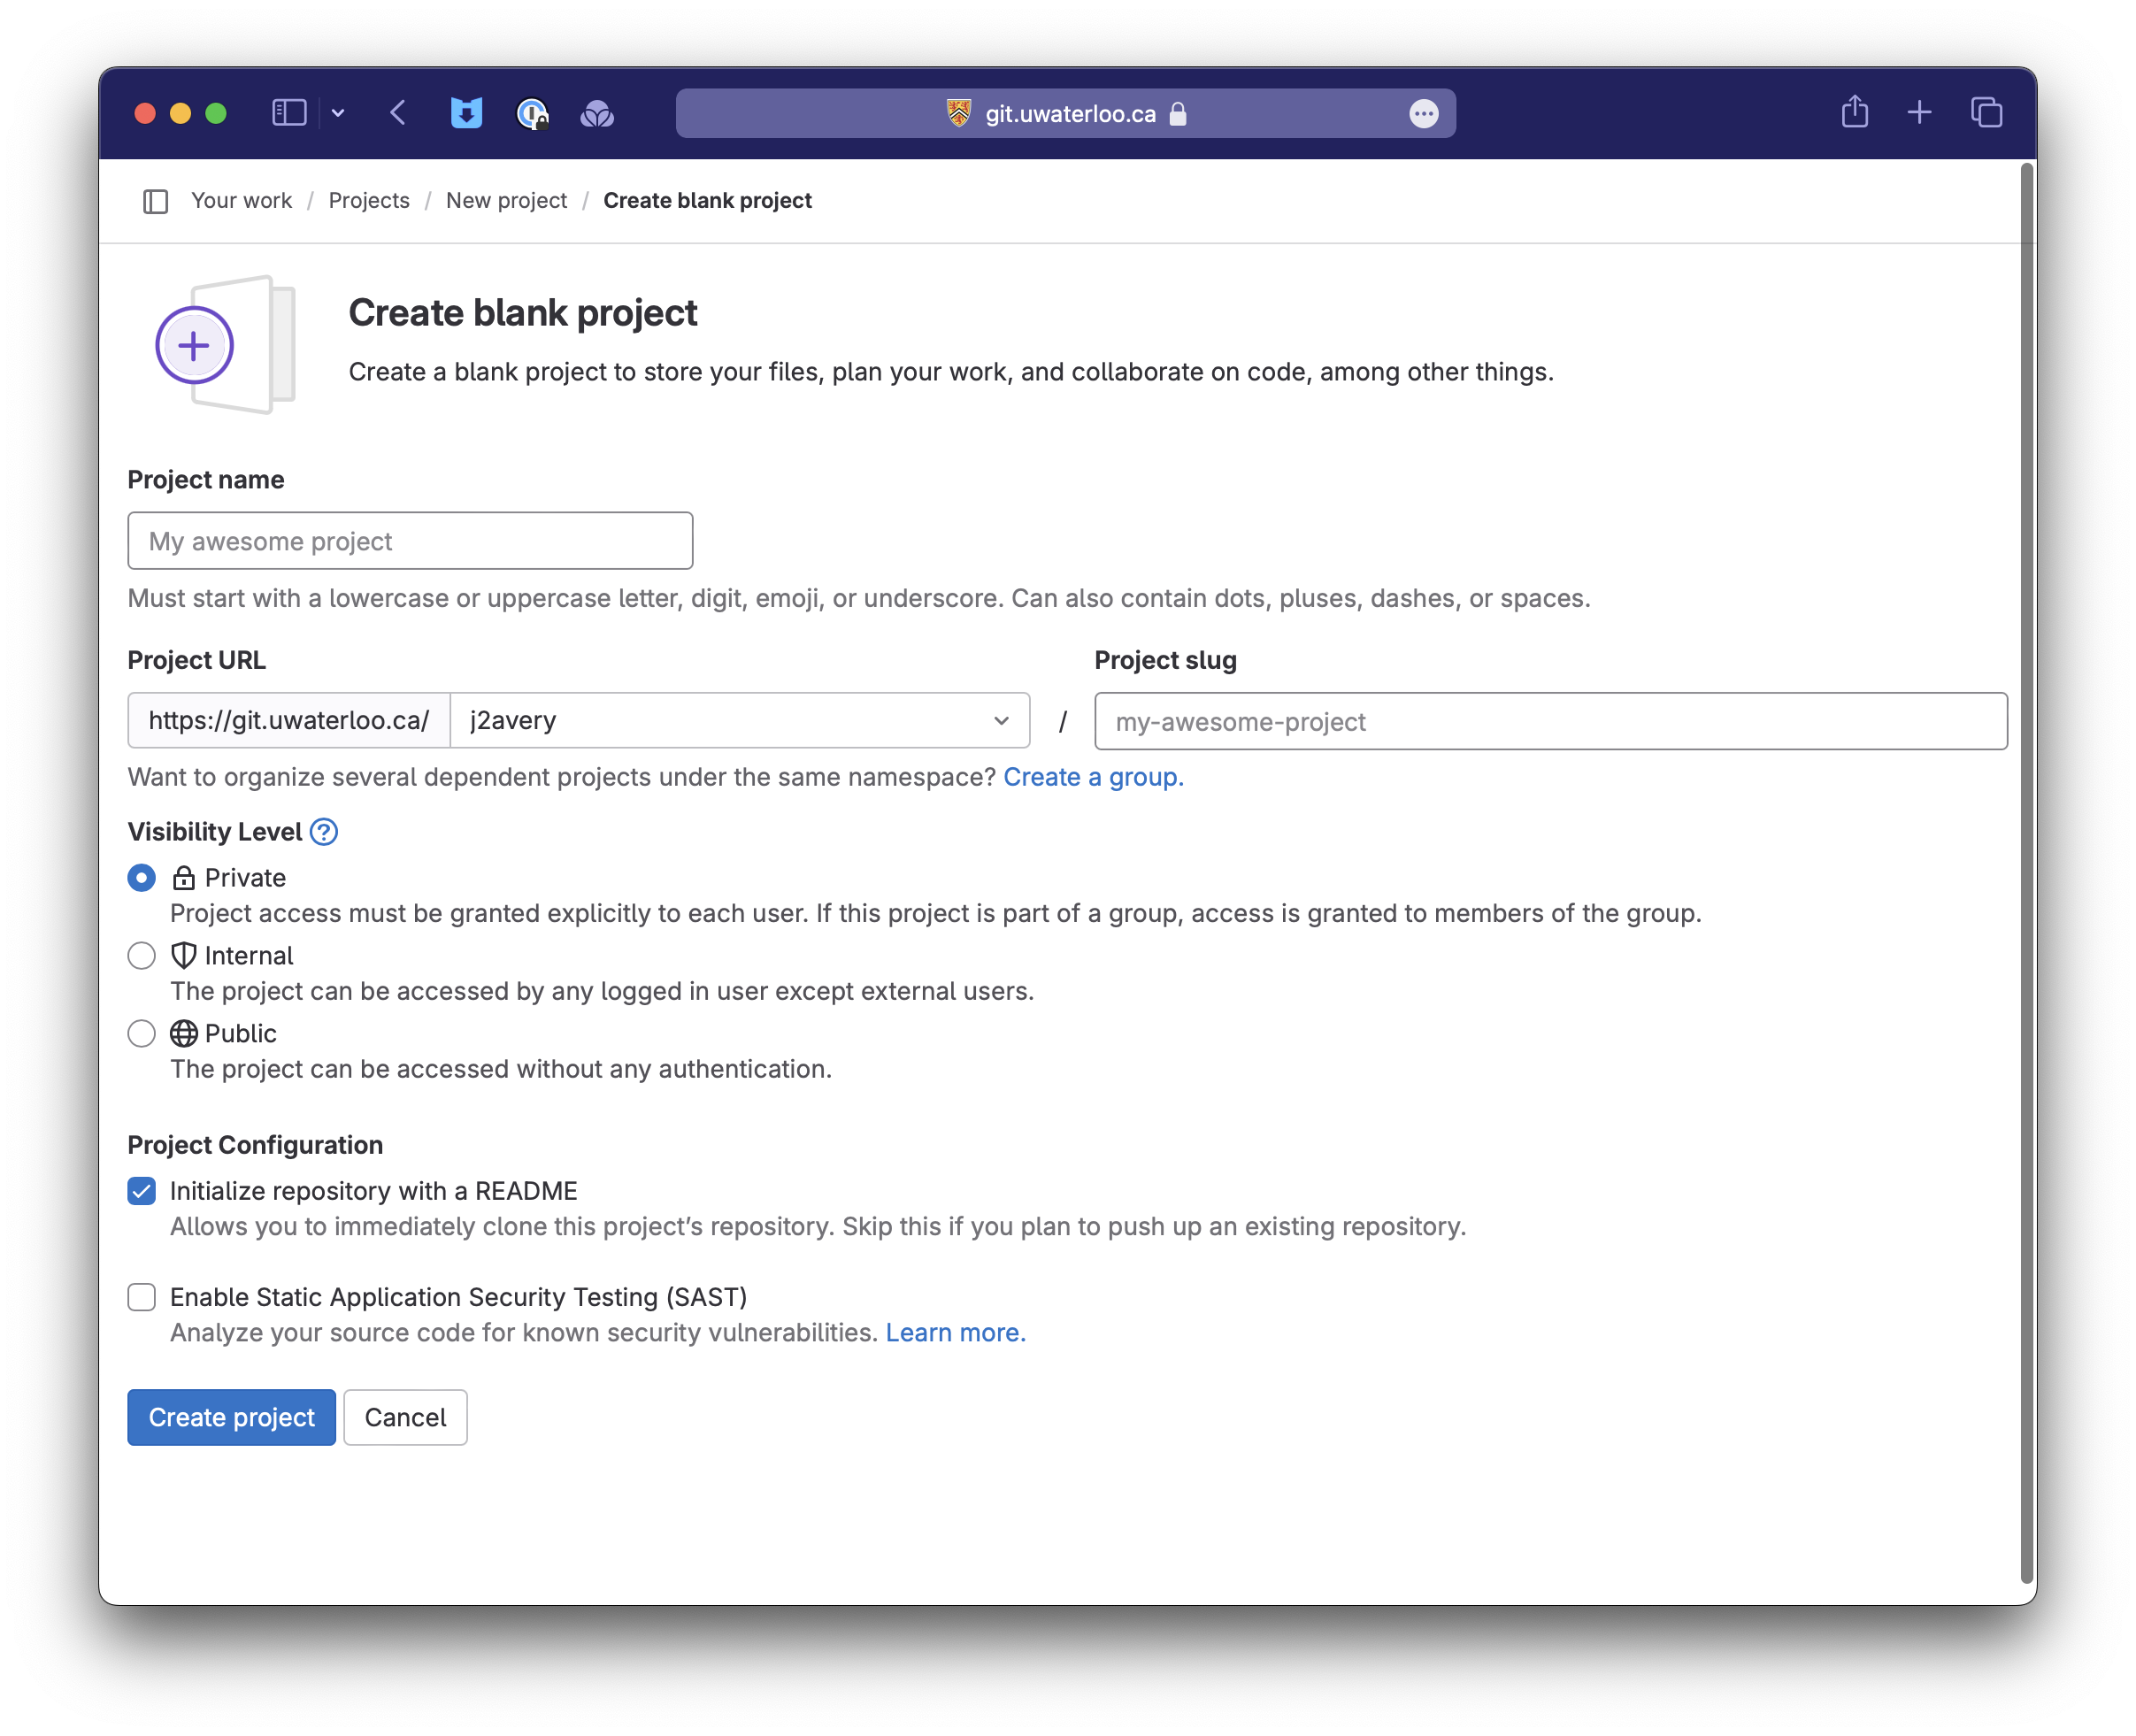
- The project should be placed under the Username of one of your team members (e.g.
j2averyin the URL example above). - Visibility should remain
Private. - Your project should have a descriptive name (see Forming a Team). e.g.,
UberTweetsorSocial Calendar.
- Select
Create projectto proceed.
Step 2: Set project security
It’s important that you set permissions on your project. This provides access to those who need it, while preventing others from accessing it!
The person who sets up the project should make the following changes:
- Check project visibility.
Settings>General>Visibility Level- Ensure that it’s set to
Private.
- Add your teammates to the project with full access.
Manage>Members,Invite Members.- When they accept, change their role to
Owner.
- Add course staff with reduced permissions. Add the instructors and TAs to your project.
Manage>Members,Invite Membersand use each person’s email address.- When they accept, set their role to
Developer.
Teams will be assigned TAs in the middle of the second week of the term, before this deliverable is due. You can either wait for those details to be released, or just add all of the TAs and instructors to your project.
Step 3: Add project details
Optionally, you can also add a project icon, and other details.
Settings>General,Project avatar.Settings>General,Project description.
Step 4a: Create a README.md
You should have a markdown file in the root of your source tree named README.md. This will be displayed by default when users browse your project and serves as the main landing page for your project.
You must have at-least the following details included in your README.md.
Simple README.md file
# SUPER-COOL-PROJECT-NAME

## Title
A description of your project e.g., "an Uber-eats app for parakeets!".

## Team Details
Basic team information including:
* Team number
* Team members, listed in in alphabetical order. Include full names and email addresses.
* Link to your Team Contract wiki page.
Step 4b: Create a .gitignore file
Create a single file in the root of your source tree named .gitignore. It should include any directories of files that you want git to not include. This is great way to handle local config files or tmp files that you don’t want in your repository!
Simple .gitignore file
build/
out/
.DS_Store
.idea
.gradle
Step 5: Create a team contract
In your Wiki, create a page for your Team Contract and link it to your README.md under Team Details.
Minimally, your team contract needs to contain:
- Names and contact information of all team members.
- Agreement on how you will meet in-person e.g., how often, and location. You are expected to meet at least twice per week and document it.
- Agreement on how you will communicate e.g., email, Messages, WhatsApp, MS Teams. You need one agreed-up communication channel that everyone will check.
- Agreement on team roles: who is the project lead? Are people taking on specific design responsibilities?
- Agreement on how the team will make decisions. Do you vote? Do you need a majority?
How to submit
When you are done the steps above, please submit for grading.
Note that only one person on the team needs to submit team deliverables. The submission will be associated with your team, not the person that submitted it.
Login to Learn, navigate to Submit > Dropbox > Project Setup, and submit a link to your top-level project page.
This step must be completed by the listed time and date.
Project proposal
This section describes a project milestone. See the schedule for due dates.
A project proposal identifies your users, and their problems or challenges, and captures some desired outcomes from the point-of-view of the user. This document reflects the Understanding Phase of the Design Thinking process.
What to include
This document should be a wiki page in your GitLab project named Project Proposal. Make sure to link this page to the README.md file so that users can easily find it.
You should include the following sections.
1. Empathize
This section should include the following.
-
A clear statement identifying your users. Be specific about who the group includes, and what specifically what role or tasks you wish to target.
Tip: it’s often helpful to have tasks in mind that you can use to guide questions. Targeting “CS students who want to plan their courses” is better (more-focused and more usable) than “CS students”.
-
Interview notes from at least 2 interviews with people that identify with your group. Write down key insights from the interviews (bullet-points of main points is fine; don’t try and transcribe everything that is said).
Tip: ask open questions either to help you identify some tasks or specifically to understand how they perform some challenging tasks. Make sure to look for things they like/dislike, and try to identify problem areas for them.
-
One or more personas that describe your users. Include goals, motivations, likes and dislikes in your profile.
Tip: the format of a persona isn’t that important, as long as you have key information captured. You can create your own layout, or use the template that is provided in the public repository
2. Define
From your interview data, you should produce the following.
-
User stories. You should be able to list at least 3-4 user stories that describe challenging tasks, problems, or “desirable functionality” from the point of view of your users. These should come directly from the interview data (above).
-
A problem statement. This should be a short paragraph summarizing the user, their context and the underlying problem you will address. We will use this as the basis of your solution.
Tip: It may be helpful to think of this as the “underlying problem” that you are addressing. I also like to think of this as the first half of the “elevator pitch” of what your product is/does, that motivates why we need to build a solution. Do NOT attempt to define a solution in detail; that’s done in the next phase.
Where to store this document
Your proposal should be contained in a Wiki page titled Project Proposal, and linked from the README.md file of your GitLab project.
How to submit
When completed, please submit for grading.
Note that only one person on the team needs to submit team deliverables. The submission will be associated with your team, not the person that submitted it.
Login to Learn, navigate to the Submit > Dropbox > Project Proposal page, and submit a link to your top-level project page.
Proposals must be submitted by the listed time and date.
Design proposal
This section describes a project milestone. See the schedule for due dates.
Your design proposal builds on your Project Proposal.
Where the Project Proposal was about understanding users and their problems, the Design Proposal is about brainstorming possible solutions and generating prototypes for feedback. This document reflects the Explore Phase of the Design Thinking process.
What to include
This document should be a Wiki page in your project named Design Proposal. Make sure to link this page to the README.md file so that users can easily find it.
You should include the following sections.
1. Ideate
This section should include the following:
-
A list of ideas to address the problem statement. You will not likely have “one solution for everything” but instead will have a bunch of ideas for each use case. Your solution will be some combination of these.
Tip: Put down everything; a bullet list is fine. This should be more ideas than you include in your solution e.g., you may initially have 10-20 broad ideas, that you will distill to a smaller number in your solution below.
-
A proposed solution. Which combination of ideas from above do you want to pursue? Which ideas together reflect the best solution to your problem statement (from the Project Proposal)?
Tip: Write a paragraph explaining why you think this combination of ideas is most suitable. You can consider technical reasons, logistical challenges, even design problems like how features will work together.
This does NOT need to be an exhaustive design document! It’s enough to have a paragraph or two explaining your thinking, and a bullet list of 5-10 sentences describing features that you expect to implement. You want enough detail to know what to prototype, but no more than that.
2. Prototype
Finally, you want to generate low-fidelity prototypes that reflect your solution.
You should have:
-
Mockups of every screen that you anticipate needing. Generally you will have one or more screen to address each user story. These should be low-fidelity or wireframe diagrams i.e., screens showing a sketch of the screen contents, with labels if necessary to make the sketch clear.
-
Some indication of progression through the application. Explain to us how the user progresses though the application (e.g., “clicking on the Create account button on this screen moves to the Create dialog”). Drawing arrows between screens is fine, as long as you label them to make it clear how and when transitions occur.
Tip: It’s highly recommended to create prototypes in Figma, or some other online wireframe tool. Make sure to include these diagrams in your actual design document i.e., as screenshots or images. You cannot just provide links to Figma!
Where to store this document
Your proposal should be contained in a Wiki page titled Design Proposal, and linked from the README.md file of your GitLab project.
How to submit
When complete, submit for grading.
Note that only one person on the team needs to submit team deliverables. The submission will be associated with your team, not the person that submitted it.
Login to Learn, navigate to the Submit > Dropbox > Design Proposal page, and submit a link to your top-level project page.
Proposals must be submitted by listed time and date.
Coding & demos
This section describes a project milestone. See the schedule for due dates.
You are working through product iterations, where you plan, design, and code in two-week cycles. You always start with planning, and end with a demo of what you accomplished.
First day: planning
The first day of an iteration should include be a planning meeting, where you:
- Review the results from the previous demo.
- Review work that was not completed and decide if you wish to continue working on it.
- Plan out the remaining work, taking into account everyone’s availability, priority of issues and so on.
By the end of your meeting on the first day, everyone should have issues and work assigned to them.
Middle days: design, coding
Over the remaining two weeks, you should meet occasionally to coordinate your work.
You and your team should meet at least twice each week to review your progress.
- Record meeting minutes and store in the wiki. Meeting minutes need to include: date, who attended, what you decided.
- See gitlab/templates for a sample of a meeting minute format.
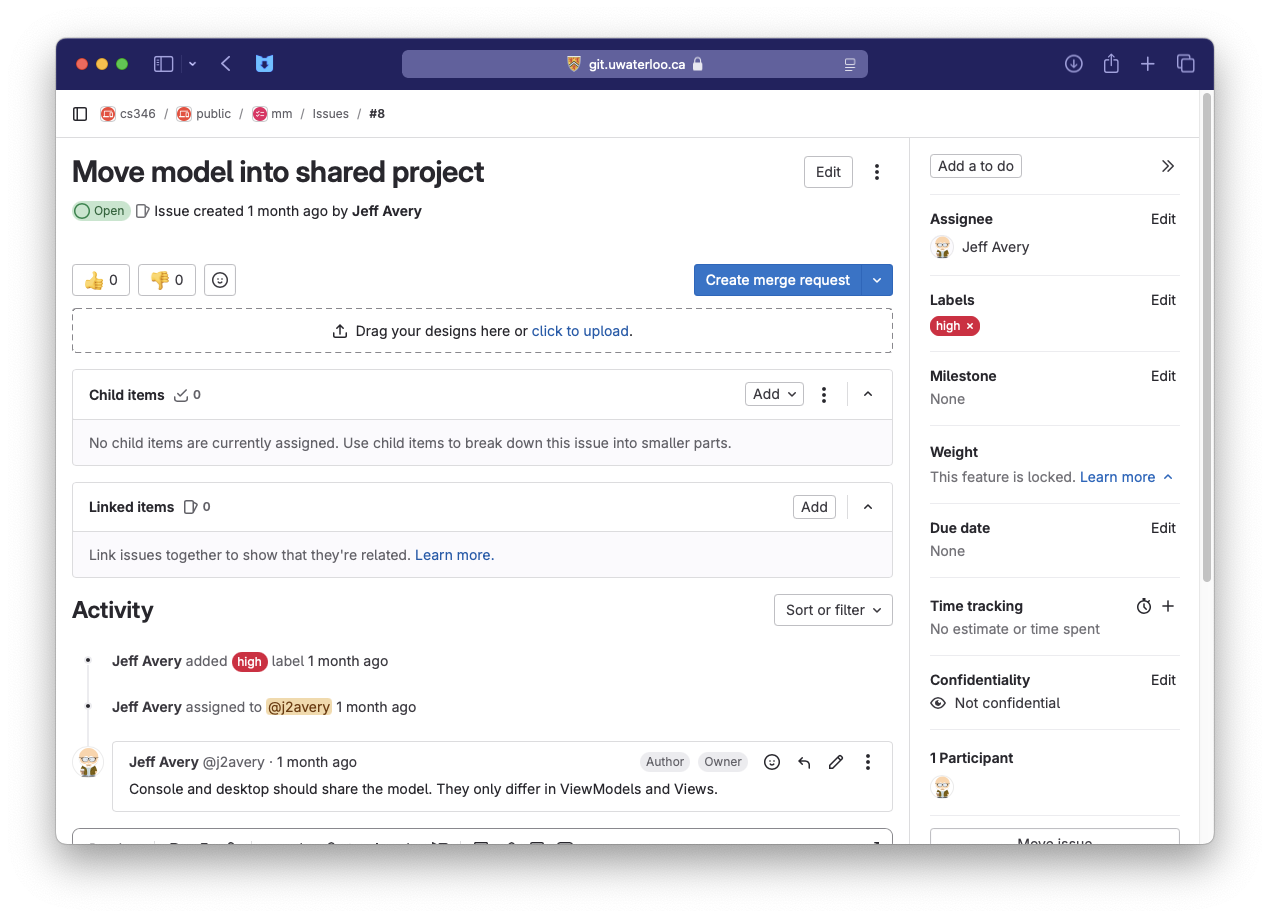
Issues must be maintained and updated as you work. Document your work indicating what was done. Use GitLab issues as the primary place to store information about what you’re working on.
- The issue list in GitLab should always reflect the state of the project.
- Issues always stay assigned to the person responsible for that work.
Last day: demo
On demo days, you will meet your TA in class and present your progress.
- See the project team schedule for your assigned timeslot.
- You only need to be there for your assigned time.
- You have 15 minutes for the demo.
Before the demo:
- Meeting minutes should be complete and posted.
- All code must be committed and changes merged back to the
mainbranch. This includes implementation code and associated unit tests (which should pass). - All issues in GitLab should be up-to-date i.e., comments added and issues closed if completed.
- You must walk through the software release process.
- This means creating Release Notes in GitLab, with a list of issues that you fixed.
- It should also include a link to an installer (or APK file if developing on Android).
During the demo:
- You must have your application installed on a computer that you bring to the demo (running from an Android Virtual Device (AVD) is acceptable for Android projects).
- Bring up the list of issues completed (
Plan>Issue Boards). - Demonstrate each feature from the list using this machine.
- Each person on the team should demonstrate what they completed.
- We want to see working functionality when possible.
- You are allowed to show GitLab documents, unit tests results, or other work that demonstrates what you accomplished (since these are things that cannot easily be demonstrated in your application).
Your demo will be graded based on the features that are working during your demo. We strongly advise that you have everything working ahead of time.
Coding in the hall before the demo is a really, really bad idea.
How to submit
You do not need to submit anything. Your grade is based on your in-class demo, and your TAs assessment of your progress.
You should expect your TA to git clone your project and run your code following the demo to review what you showed them.
Final submission
This section describes a project milestone. See the schedule for due dates.
At the end of the course, we will review your entire project. Make sure that you have completed everything listed here.
Description
At the end of the term, your GitLab project, documentation and source code should be complete and consistent with one another. This means someone reading your proposal should see the features that you describe, unit tests should run properly, code should compile and run correctly and so on.
Additionally, your project artifacts need to be updated and reflect the end of your project.
- Issues should be assigned to the appropriate sprint milestones.
- Issue status should be correct i.e. completed and merged features should be marked as closed in GitLab.
- It’s acceptable to have open issues at the end of the project, but they should not be assigned to a milestone (and incomplete code should be on a feature branch, not merged back into main).
- All code should be committed and merged back to
main. We should be able to build frommainwithout errors.
What to include
1/ Project documentation
The following project documentation should exist and be stored in your GitLab project. Everything should be written in Markdown format, using Mermaid for injecting diagrams.
You should have a top-level README.md file, and a series of Wiki pages listed here.
README (README.md file)
Your top-level document should serve as the landing page for your project, and a table-of-contents for the rest of your content.
It should include the following sections:
# SUPER-COOL-PROJECT-NAME

## Title
A description of your project e.g., "an Uber-eats app for parakeets!".

## Project Description
A short description of your project, identifying your intended users,
and the problem that you are solving. (ED: think of this as your 15
second "elevator-pitch" of what your project is about).

## Video/Screenshots
Embed a video or series of screenshots that demonstrates using your
application (maximum 1 minute in length).

## Getting Started
Instructions on how to install and launch your project. If you have any
additional instructions that the TA needs, please put them here
(e.g., how to launch from a Docker container; how to install keys so
that they can connect to your database and so on).

## Team Details
Basic team information including:
* Team number
* Team members. Include full names and email addresses.
This should be followed by a Table of Contents section, with links to your Wiki pages.
## Documentation
* Project proposal (unchanged from initial release)
* Design proposal (unchanged from initial release)
* User documentation (new, **see below**)
* Design diagrams (new, **see below**)

## Project Information
* Team contract
* Meeting minutes

## Releases
* Bullet list of software release notes
Project Proposal (Wiki page)
This should be your original project proposal. Add a section at the end titled “Revisions” and describe any deviations you made from your original proposal, to what you delivered. If there are no deviations at all, then indicate that in this section.
Design Proposal (Wiki page)
This should be your original design proposal. Add a section at the end titled “Revisions” and describe any deviations you made from your original proposal, to what you delivered. If there are no deviations at all, then indicate that in this section.
User Guide (Wiki page)
This is a new requirement. You are required to write documentation explaining to your users how to use your product. You should include:
- Installation instructions, only if more detailed instructions are required (beyond what you provided in the README file).
- Installation requirements. List the operating systems and versions (if applicable) that you support. This is a good place to indicate what you used for testing.
- Features. Describe your main features and how they work. Screenshots are very helpful for doing this.
Design Diagrams (Wiki page)
This is a new requirement. Create the following diagrams using Mermaid.
- A high-level component diagram showing your application structure e.g, layered architecture, with external systems for auth and database.
- Create class diagrams for your main classes in your application.
- Focus on the critical internal classes:
views,view models,entities,modelsandserviceclasses. You do not need to create class diagrams for external systems like your database or the user interface compose functions (which are presumably behind an API).
- Focus on the critical internal classes:
- Make sure that you illustrate where the classes “fit” in a Layered Architecture e.g., show them grouped into layers.
Team Contract (Wiki page)
This is your original contract. There is no need to update it (as long as nothing drastic changed!)
Meeting Minutes (Wiki page)
These are the minutes that you were expected to record through the term.
Software Releases
You should have produced software releases for each Demo that you did, plus optionally, one final release - see below.
2/ Source code repository
Source code and other assets required to build your application should be stored in your project’s source code repository.
1. Gradle project
Your project needs to be a Gradle project, as discussed in class. It should be buildable using standard Gradle tasks (e.g., gradle build, gradle test and so on).
For information on creating your project structure correctly, see Build configuration and Gradle documentation.
2. Unit tests
You should have “adequate” coverage of your features, supporting the main execution path for your code.
- User interfaces (i.e. Composables/views) do not require unit tests, but the ViewModels should have appropriate tests.
- External systems (e.g., databases) can be tested either by mocking, or by having your automated tests check against test data on these systems.
3/ Final software release
Your code should be frozen after Demo 4, meaning that you should not make significant changes after that release.
However, sometimes last minute changes are required. If you need to produce a final build, you may do so, provided that you
- Follow the software release process (as you did with every other build), and
- You add it to the software releases section of your README.
We will grade the most recent release that is listed in your software releases.
Assessment
You will be graded on the documents above, as well as your final product release. When evaluating your product, marks will be assigned based on how well you have met project objectives.
See the Final Release rubric in Learn for grading details.
How to submit
You do not have to explicitly submit your final. We will grade based on what was submitted by the listed time and date using the criteria above.
You should anticipate your TA grading based on what is committed in Git and in your GitLab project. Make sure everything is committed and tested by the due date!
Team assessment
What is this?
We have 5 marks left at the end of the term, and we want you provide an opportunity to tell us how it went, and award the top-performers on your team!
How does it work?
At the end of the term, after your final submission has been handed in, each person on the team needs to email the instructor, privately, with an email including:
- A few sentences describing how the term went. Did the team work well together? Did everyone contribute? If things went well, tell me what worked; if they went poorly in some area, I want to know that too! It’s private, so you may include names and details if necessary.
- Rate each team member (including yourself!) on a scale from 0-5:
- 0=never showed up
- 1=no contributions
- 2=few contributions, poor quality
- 3=average
- 4=excellent
- 5=key contributor
Rules
To avoid everyone giving all team members 5/5, we have some rules.
You have points points to distribute, where
points = (number_of_team_members x 4)
- You may divide these points any way that you like, using the ratings scale above. You cannot exceed this number of points, but you also do not have to use all of them.
e.g.,
A “typical” 4-person team would therefore have 16 points to distribute. Possible ratings from one person include:
- Team participation was great, and we’re pleased with the results! Everyone gets 4 marks (16/16 used).
- Two team members did most of the work, the others only showed up occasionally. 2x5 marks, and 2x2 marks (14/16 used).
- Three of us did everything and one team member never showed up! 3x5 marks, 1x0 marks (15/16 used).
How to submit
Email the professor with your scores. Title the email Team assessment: ${your team number}.
Introduction
Let’s introduce application development topics.
This is a course about designing and building software.
Software used to be considered a bespoke product i.e., built in-house for a specific purpose. However, with the rise of consumer electronics, personal computing, and smartphones, software has grown into a multi-trillion dollar industry. Computers and software have transitioned from niche devices into essential tools in practically every industry, intertwined in almost every task that we perform!
If you look at your phone, or your notebook computer, you can identify many different styles of software that you probably use:
- System software: software that is meant to provide services other other software e.g., Linux or other operating systems, drivers for your NVIDIA graphics card, the printer control panel on your computer.
- Application software: software that is designed to perform a task for users. e.g., your phones calendar application, Minecraft, Visual Studio Code, Google Chrome.
We also have specialized (but important!) types of software:
- Programming languages and compilers: languages and tools designed to produce other software.
- Kiosk software: software meant to be installed on an interactive kiosks, with restricted functionality outside of its intended purpose e.g., a bank machine; an interactive map at a shopping mall.
- Embedded software: meant to control systems; included in the manufacturing of a hardware based system. e.g., firmware in your phone; control systems for a robotic arm in a factory; monitoring systems in a power plant.
In this course, we’re primarily concerned with application software, or software that is used by people to perform useful, everyday tasks. Most of the software that you interact with on a daily basis would be considered application software: the weather app on your phone, the spreadsheet that you use for work, the online game that you play with your friends.
Applications aren’t restricted to a single style either; they can include console applications (e.g., vim), desktop software (e.g., MS Word for Windows), mobile software (e.g., Weather on iOS), or even web applications (e.g., Gmail).

The categories are not always this clear-cut. For example, a web browser is an application, but it also provides services to other applications e.g., rendering HTML, executing JavaScript. Similarly, an operating system is system software, but it also provides services to applications e.g., managing memory, scheduling processes. When you install your operating system, it probably comes preinstalled with a bunch of applications! These distinctions are not always obvious (of meaningful).
For us, we just want to think in terms of software that is usable by an end user for a specific task.
History of software
Computer science has a relatively short history, that mostly started in the 1940s. Let’s consider how software development itself changed over time.

1960s: Terminals & text displays
In the early days of computers, mainframe computers dominated. These were large, expensive systems, which were only available to large instututions that could afford to maintain them. This era started with batch processing dominated, where users would submit their jobs (programs), and wait for the results. By the mid 1960s, we saw the introduction of time-sharing systems, where multiple users could interact with the computer at the same time through text-based terminals.


Development snapshot
Hardware was limited to managing text, so software was (mostly) text-based. Systems were powerful enough to support interactive sessions with users, so software was either either command or menu driven (e.g., you were presented with a screen, and navigated through lists of options, and answering prompts.
Software development at this time was interesting. We started with batch processing (punch cards) and ended the 1970s with dedicated terminals connected to a time-sharing mainframe. Programing meant editing your COBOL or Fortran program on your terminal, with programs stored on bulk storage.
| Category | Examples |
|---|---|
| Programming languages | Fortran (1957), LISP (1958), Cobol (1959), Ada (1979) |
| Programming paradigm | Functional & structured programming |
| Editor of choice | Teco (1962), ED (1969) |
| Hardware | DEC VT100 terminal, IBM mainframe, DEC PDP-10/11 or VAX-11 |
| Operating System | IBM System 7, VAX VMS |
1970s: Personal computing
By the mid 1970s, the situation had changed. Small and relatively affordable computers were becoming commonplace. These personal computers were relatively inexpensive, and designed to be used by a single user i.e., hobbyists, or small businesses that couldn’t afford a mainframe or mini computer (the term personal reinforced the idea that these were single-user machines).


I remember desperately wanting one of these...
While companies were investing in these so-called personal computers, at the end of the 1970s, they will still relatively niche. They had limited capabilities, and very limited software available for them.
Development snapshot
Personal computer software was text-based and command or menu driven, with some limited ability to display color and graphics.
| Category | Examples |
|---|---|
| Programming languages | Basic, Assembler, C |
| Programming paradigm | Structured programming |
| Editor of choice | Emacs (1976), Vi (1976) |
| Hardware | IBM PC, terminal software, DEC PDP-10/11, VAX-11 |
| Operating System | IBM PC DOS, MS PC DOS, VMS |
1980s: Graphical user interfaces
The early 1980s was a time of incredible innovation in the PC industry: software was sold on cassettes, floppy disks or cartridges, and program listings were printed in books and magazines (i.e., you were expected to type in a program in order to run it). BBSes existed, where you could connect and download software.
The growth of this sector provided a huge opportunity for specialized vendors to emerge; we saw the rise of companies like Borland and Lotus. Commercial software was being distributed on cassettes or floppy disks and was more professionally produced.


| Feature | Details |
|---|---|
| Developer | International Business Machines (IBM) |
| Release Date | August 12, 1981 |
| Price | $1565 ($5240 in 2023 terms) |
| CPU | Intel 8088 @4.77 MHz |
| Memory | 16Kb - 256Kb |
| Storage | 5.25“ floppy drive, 160Kb or 320Kb |
| Display | IBM 5153 CGA Monitor (16 colors, 640 × 200, text) |
The early 1980s was a time of rapid innovation. Console applications had advanced significantly.
Released on Jan 26 1983, Lotus 1-2-3 was the world’s first spreadsheet. It was so popular that it is often considered a driving factor in the growth of the personal computer industry. Businesses were buying computers specifically to run Lotus 1-2-3. Early software companies like Microsoft were born in this era (their first products were DOS, a PC-based operating system, and BASIC, a programming language).
Applications from this era were text-based, at least for a few more years. Text-based applications still exist today: bash, git, and other tools are commonly used for system administration tasks. Many software developers also like to use console and text-based tools for software development.
The biggest shift of the 1980s (and one of the major milestones in computer history) was the introduction of the Apple Macintosh in 1984. It didn’t look that much different than other desktops, but it launched the first commercially successful graphical user interface and graphical operating system.
Other vendors e.g. Microsoft, Commodore, Sun followed with their own designs, but it took a number of years before the dust “settled”. By 1990, Microsoft and Apple were the major two platforms. Companies like Wang and Commodore were unable to compete and eventually dropped out of the market.
The move to GUI interfaces of course meant that software was ported to these environments, as software companies reimaged their software in this context.
The move towards dedicated user-based computers had a significant impact on computing:
- Dedicated hardware meant that we could move towards quick, interactive software i.e. type a command, get an immediate response.
- Multitasking operating systems arose to support applications running simultaneously.
- Graphical user interfaces became the primary interaction mechanism for most users.
In many ways, we’ve spent the last 40 years improving the performance of this interaction model. Everything has become “faster”, which for most people, translates into more applications running (and more Chrome tabs open).
- Use of a keyboard and pointing device (mouse) for interaction.
Point-and-clickto interact with graphical elements. - Windows are used as logical container for an application’s input/output.
- Cut-Copy-Paste is used as a paradigm for manipulating data (originally test, but we’re accustomed to copy-pasting images and other binary objects as well).
- Undo-Redo as a paradigm for reverting changes.
Modern desktop operating systems, including Linux, macOS and Windows, are very similar to these early designs. Little has actually changed in terms of how we interact with desktop systems.

How have graphical applications and operating systems stayed so fixed in design over almost 50 years? There are measurable benefits to having the users environment be familiar, and predictable. It turns out that most users just want things to remain the same.
Development snapshot
There was a scramble as vendors delivered tools and development environments that could deliver interactive, highly graphical applications. OO programming with C++ dominated through the early 90s, but when Java was introduced in 1996 it became an instant hit and quickly became a favorite programming language. For a few years at least 1.
| Category | Examples |
|---|---|
| Programming languages | C, C++, Pascal, Objective C |
| Programming paradigm | Structured & Object-Oriented Programming |
| Editor of choice | IBM Personal Editor (1982), Borland Turbo C++ IDE (1990) |
| Hardware | IBM PC, Apple Macintosh |
| Operating System | MS PC DOS, MS Windows, Apple Mac OS |
1990s: The Internet
Prior to about 1995, most applications were standalone. Businesses might have their own internal networks, but there was very limited ability to connect to any external computers e.g., you might be able to connect to a mainframe at work, but not to a mainframe across the country. You might have a modem at home, but it was used to connect to a local bulletin board system only. The rise of the Internet in the 1990s changed this. Suddenly, it was possible to connect to any computer in the world, and to share information with anyone, anywhere.
The Internet was originally conceived around a series of protocols e.g., FTP, Gopher. The World Wide Web (WWW) simply reflected one way that we expected to share information and services. However, it was definitely the most approachable way, and public demand led to the WWW dominating user’s experience of what a network could do. This led to the rise of web applications – applications that run in a web browser, connecting to one or more remote systems.
This shift towards the World Wide Web happened at a time when developers were struggling to figure out how to handle software distribution more effectively. It also provided a single platform (the WWW) that could be used to reach all users, regardless of operating system, as long as they had a web browser installed. For better or worse, the popularity of the WWW pushed software development towards using web technologies for application development as well. We’re still dealing with that movement today (see Electron and the rise of JS frameworks for application development).
Development Snapshot
| Category | Examples |
|---|---|
| Programming languages | C++, Objective-C, Perl, Python, JS |
| Programming paradigm | Object-Oriented Programming |
| Editor of choice | Vim, Emacs, Visual Studio |
| Hardware | IBM PC, Apple Mac |
| Operating System | Windows, OS/2, Mac OS, (IE, Netscape) |
2000s: Mobile-first
Prior to 2007, most home users had one or more home PCs, and possibly a notebook computer for work (and probably a few game consoles or other devices). Phones were just devices for making phone calls.
The iPhone was launched in 2007, and introduced the idea of a phone as a personal computing device. Society quickly adopted them as must-have devices. Today, there are more smartphone users than desktop users, and the majority of Internet traffic comes from mobile devices (99.9% of it split between iPhones and Android phones).

This has led to the notion of mobile-first design, where applications are designed primarily for mobile devices. Depending on the type of software, desktop software may be a secondary concern (and delivered as a web site, or not at all). This is a significant change from the past, where personal computers used to represent the dominant sector.
Mobile devices have changed the way we think about and deliver software. Again.
| Category | Examples |
|---|---|
| Programming languages | Objective-C, Swift, C++, Python, JS, Java, Kotlin |
| Programming paradigm | Object-oriented & functional programming |
| Editor of choice | Emacs, Vi, Visual Studio |
| Hardware | IBM PC (and comparables), iPhone, Android phone |
| Operating System | Windows, Mac OS, iOS, Android, (Chrome, Safari, Firefox) |
The business of building software
Computing environments and the context in which we run software has changed radically in the last 15 years. It used to be the case that most software was run on a desktop or notebook computer. Tasks were means to be performed at a specific location, with dedicated hardware. In the present day, most software is run on mobile devices, with desktops being relegated to more specialized functionality e.g., word processing, composing (as opposed to reading) email.
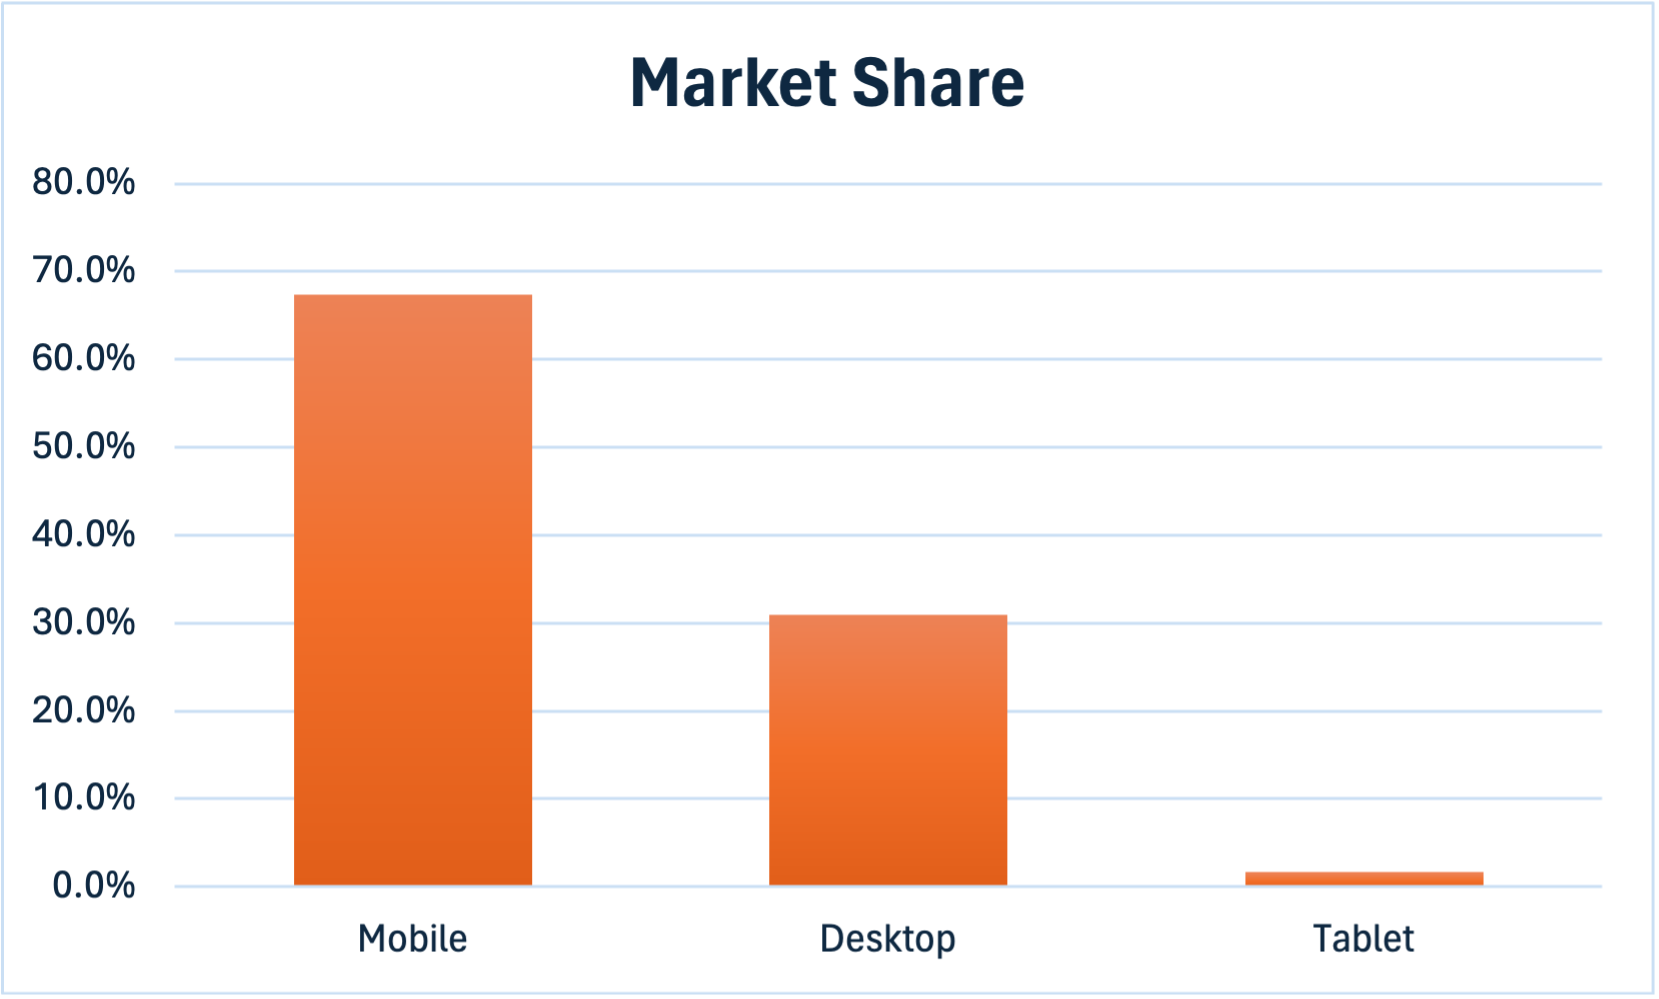
Does this mean that we can just focus on mobile devices? Probably not. Many of your users will have multiple devices: a notebook computer, a smartphone, and possibly a tablet or smartwatch, and they expect your software to run everywhere. Often simultaneously2.
Platform challenges
This means that you will produce one or more of these application styles, depending on which hardware you target first.
- Console application: Applications that are launched from a command-line, in a shell.
- Desktop application: Graphical windowed applications, launched within a graphical desktop operating system (Windows, macOS, Linux).
- Mobile application: Graphical application, hosted on a mobile operating system (iOS, Android). Interactions optimized for small form-factor, leveraging multi-touch input.
- Web applications. Launched from within a web browser. Optimized for reading short-medium block text with some images and embedded media.
Additionally, your application is expected to be online and network connected. Application data should reside in the cloud, and synchronize between devices so that you can can switch devices fluidly.
Things is a highly successful task management application that runs on desktop, phone, tablet (and even watch). It is cloud-enabled, and provides a consistent user experience across all of these devices. Multi-device support is a major contributor to its success.
I think I purchased my desktop and mobile licenses in 2012, and I haven’t paid them a penny since then. I almost feel guity.
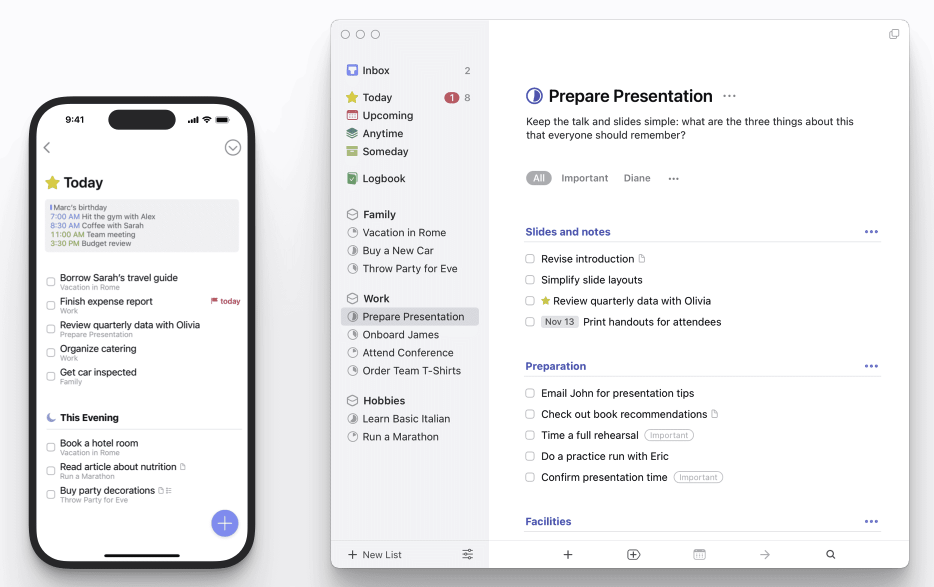
Your choice of application style should depend on:
- The requirements of your application. An application that is meant to be used casually, through the day, might make the most sense as a mobile application. Something like a desktop authoring program probably makes more sense when combined with the large screen of a desktop application.
- Market share of the platform associated with a particular style. Mobile applications are much more popular than desktop or console applications. This may be a huge consideration for a commercial application thast is concerned with reaching the largest number of users.
The “best” answer to choice of platform might actually be “all of them”. Netflix, for example, has dedicated applications for Apple TV, Roku, and other set-top boxes, as well as for desktop, phone, tablet and web. This allows users to access their content from any device, and to have a consistent experience across all of them.
How we develop applications
So, as developers, how has software development changed? It application development the same now as it was in the 1970s? 1990s? As you might expect, software development as a discipline has had to change drastically over time to keep up with these innovations.
- Console development is relatively simple, and often doesn’t need much more than a capable compiler, and standard libraries that are included with the operating system.
- Desktop development added graphical user interfaces, which in turn, require more sophisticated libraries to be included with the operating system. Eventually we needed to start adding other capabilities e.g., networking support.
- Mobile development expanded this even further, adding support for highly specific hardware capabilities e.g., cellular modem, gyroscope, fingerprint sensors.
Modern applications then, are typically graphical, networked, and capable of leveraging online resources. They must also be fast, visually appealing, and easy to use.
Let’s examine how we achieve this. We can consdier application development as the interplay between the operating system, a programming language, and libraries that bridge these two things and support our required functionality.
The role of the operating system
An operating system is the fundamental piece of software running on your computer that manages hardware and software resources, and provides services to applications which run on it. Essentially, it provides the environment in which your application can execute. The core of an operating system is the kernel, the main process which runs continuously and manages the system.
The role of an operating system includes:
- Allocating and managing resources for all applications, and controlling how they execute. This include allocating CPU time (i.e. which application is running at any given time), and memory (i.e. which application has access to which memory).
- Providing an interface that allows applications to indirectly access the underlying hardware, and does this in such as way that each application is isolated from the others.
- Providing higher-level services that applications can use e.g., file systems, networking, graphics. The OS abstracts away the underlying hardware so that applications don’t need to be concerned with the underlying implementation details i.e. you don’t need to write programs that directly interact with a hard drive, or a particular graphics card.
This illustrates the relationship between the operating system and applications running on it:
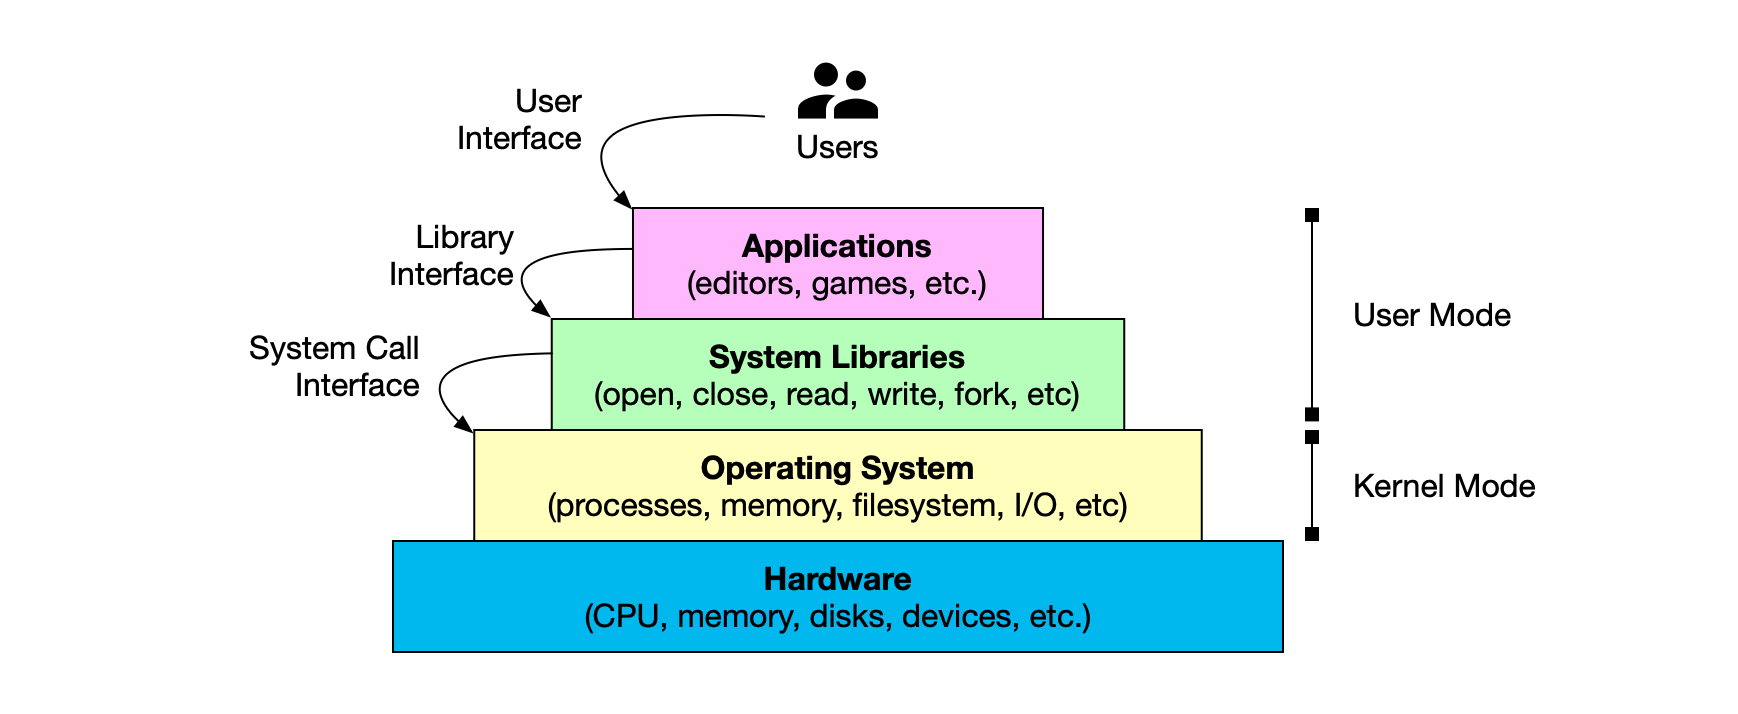
Our application stack includes multiple layers. Each layer can only call down into the layer directly below it. e.g., applications do not have direct access to hardware. Instead, they must use system libraries to request hardware capabilities from the underlying operating system (which in turn manages the hardware).
Layers are further subdivided based on their level of privilege/access:
User moderepresents code that runs in the context of an application. This code does not have direct access to the hardware, and must use system libraries and APIs to interact with the hardware. Applications and many libraries only exist and execute at this level.Kernel moderepresents private, privileged, code that runs in the context of the operating system. This code has direct access to the hardware, and is responsible for managing the hardware resources. The OS kernel is the core of the operating system, and provides the fundamental services that applications rely on. Some system-level software can also execute at this level.
Notice that the kernel of the operating system runs in a special protected mode, different from user applications. Effectively, the core operating system processes are isolated from the user applications. This is a security feature which prevents user applications from directly accessing the hardware, and potentially causing damage to the system.
Programming languages rely heavily on the underlying operating system for most of their capabilities. In many ways, you can think of them as a thin layer of abstraction over the operating system. For example, when you write a file to disk, you are actually making a system call to the operating system to write that file. When you read from the network, you are making a system call to the operating system to read that data.
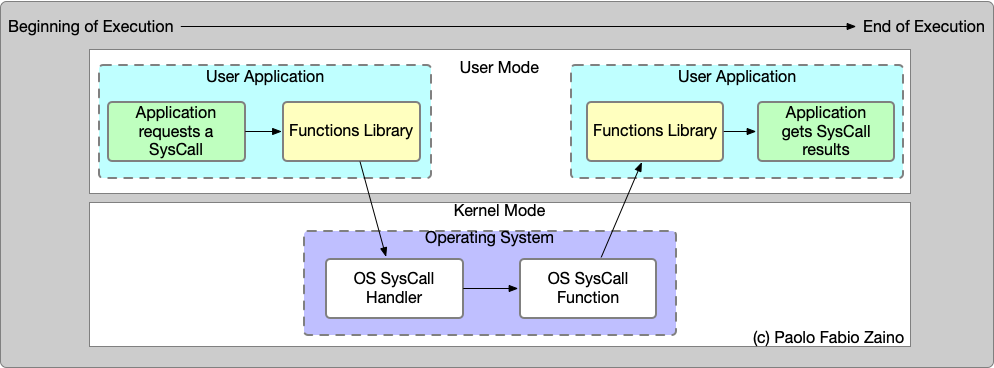
A system call is simply a function call through a specific API that the OS exposes. The actual interface will differ based on the operating system, but can typically used to perform tasks like reading from a file, writing to the console, or creating a network connection. OS vendors each provide their own “native” system call interface. You can think of it as an abstraction layer, which also enforces a security model and other concerns.
Why is this layering important?
- Applications have limited ability to affect the underlying OS, which makes the entire system more stable (and secure).
- We can abstract the hardware i.e. decouple our implementation from the exact hardware that we’re using so that our code is more portable.
Programming languages
Your choice of programming language determines the capabilities of your application. You also need to make sure that you pick a programming language that is suitable for the operating system you’re targeting.
We can (simplistically) divide programming languages into two categories: low-level and high-level languages.
Low-level languages are suitable when you are concerned with the performance of your software, and when you need to control memory usage and other low-level resources. They are often most suitable for systems programming tasks, that are concerned with delivering code that runs as fast as possible, and uses as little memory as possible. Examples of systems languages include C, C++, and Rust.
Systems programming is often used for operating systems, device drivers, and game engines. Low-level languages are obviously tightly-coupled to the underlying OS.
High-level languages are suitable when you are concerned with the speed of development, and the robustness of your solution. Performance may still be important, but you are willing to trade off some performance relative to a low-level language, for these other concerns.
High-level languages are well-suited to applications programming , which can often make performance concesssions for increased reliability, more expressive programming models, and other language features. In other words, applications tend to be less concerned with raw performance, and so we can afford to make tradeoffs like this 3.
These languages are also less coupled to the underlying OS (at least in theory).
Examples of application languages include Swift, Kotlin, and Dart. Applications programming languages are often used for web applications, mobile and desktop applications. They may also be used when creating back-end services e.g. web servers.
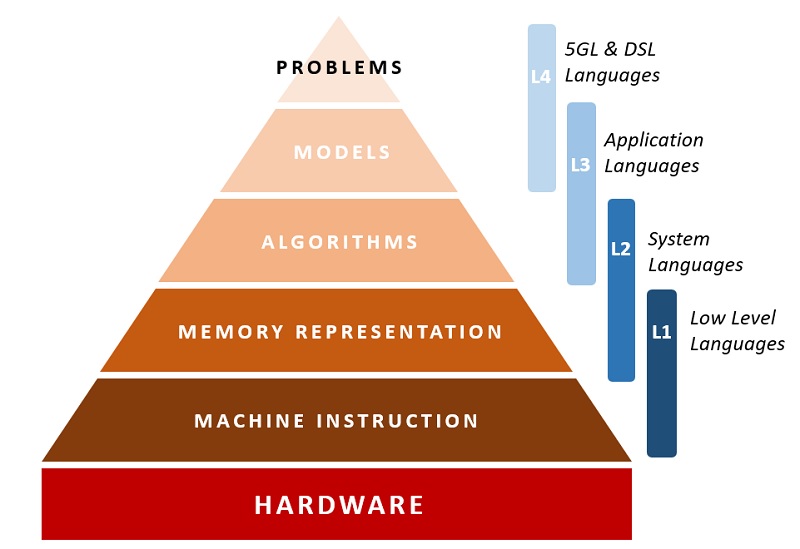
Note that is is certainly possible to develop applications in low-level languages, and to develop systems software in high-level languages. However, the choice of language is often driven by the requirements of the software you are building.
Language tradeoffs
So what kinds of benefits do we get from high-level languages?
| Language Features | Systems | Application |
|---|---|---|
| Memory management | manual | garbage collection |
| Type system | static | static or dynamic |
| Runtime performance | fast | medium |
| Executables | small, fast | large, slow |
| Portability | low | high |
Modern application languages like Swift, Kotlin and Dart share similar features that are helpful when building applications:
Functional programming features. Modern languages feature support for functional features like lambdas, higher-order functions, and immutability. These features can make your code more expressive, and easier to understand. Theses are in addition to the traditional object-oriented features that you would expect from a modern language.
Memory management. Garbage collection is common with application languages, where you want to optimize for development time and application stability over performance. Garbage collection is simply a paradigm where the language itself handles memory allocation and deallocation by periodically freeing unused memory at runtime. GC results in a system that is significantly more stable (since you’re not manually allocating/deallocating with all of the risks that entails!) but incurs a runtime performance cost. The majority of the time, the performance difference is negligible4.
NULL safety. Swift, Kotlin and Dart have null safety built in, which can prevent null pointer exceptions. For example, you cannot access uninitialized memory in Kotlin, since the compiler will catch this error at compile time.
Runtime performance. Application languages tend to be slower than systems languages, given the overhead of GC and similar language features. Practically, the difference is often negligible at least when working with application software.
Portability. Systems languages are often “close to the metal”. However, being closely tied to the underlying hardware also make it challenging to move to a different platform. Application languages can be designed in a way that leverages a common runtime library across platforms, making it simpler to achieve OS portability. Note that this is not always the case; Swift, for example, is only available on Apple platforms.
Using libraries
You could (in theory) write software that directly interacts with the operating system using system calls5. However, this is not practical for many situations, since you are then tied to that particular operating system (e.g. Windows 10). Instead, we use system libraries, which are a level of abstraction above system calls that provide a higher-level interface, to your programming language. This is the level at which most applications interact with the operating system.
The C++ standard library is an example of a system library which provides a set of C++ style functions that work on all supported operating systems. When you use std::cout to write to the console, for example, you are actually calling into the operating system using system calls to interact with the hardware. Your code compiles and runs across different operating systems because the required functionality has been implemented for that particular OS, and exposed through that standard library interface.
C++ is a special case, where industry leaders standardized this behaviour early on (making C/C++ sort of lingua-franca). However, there is a lot of other OS functionality that differs across operating systems, and doesn’t have a standard interface. For example, there is no standard library for creating a window on a desktop, or for accessing the camera on a phone. This poses challenges.
Vendors and OSS communities also usually provide user libraries, which are simply libraries that run in user-space and can be linked into your application to provide high-level functionality. Accessing a database for instance isn’t handled by the operating system directly, but by a user library that abstracts away the details of the database and provides a simple interface for your application to use.
| Library type | Example | Description |
|---|---|---|
| Programming language library | stdio | Provides low-level functionality e.g., file I/O. Abstraction over OS syscalls. |
| OS vendor library | Win32 | Provides access to specific OS functionality e.g., create a window, open a network connection. |
| Third party library | OpenGL | Provides extra capabilities that sit “on top of” the systems libraries e.g., high performance 3D graphics, database connectivity. |
We’ll make extensive use of libraries in this course! We’ll use system libraries to interact with the operating system, and user libraries to provide higher-level abstractions that make it easier to build applications.
Technology stacks
A software stack is the set of related technologies that you use to develop and deliver software. e.g., LAMP for web applications (Linux, Apache, MySQL and PHP).
Given what we now know about programming languaged and libraries: which software stack is “the best one” for building applications?
Is there a “best one”?
Let’s consider which technologies are commonly used:
| Platform | OS | Main Languages/Libraries |
|---|---|---|
| Desktop | Windows | C#, .NET, UWP |
| macOS | Swift, Objective-C, Cocoa | |
| Linux | C, C++, GTK | |
| Phone | Android | Java, Kotlin, Android SDK |
| iOS | Swift, Objective-C, Cocoa | |
| Tablet | Kindle | Java, Kotlin, Android SDK |
| iPad | Swift, Objective-C, Cocoa | |
| Web | n/a | HTML, CSS, JavaScript, TS Frontend: React, Angular, Vue Backend: Node.js, Django, Flask |
Why are there so many different technology stacks!? Why isn’t there one language (and set of libraries) that works everywhere?!
In a word, competition.
Development tools, including programming languages, are typically produced by operating system vendors (Microsoft for Windows, Apple for macOS and iOS, Google for Android). For each vendor, their focus is on producing development tools to make it easy to develop on their platforms. Apple wants consumers to run macOS and iOS, so they developed Swift and the supporting frameworks to make it easy for you to build applications on their platforms. Microsoft spend billions producing C# to make development easier for Windows easier; it would be against their interests to support it equally well on macOS.
As a result, each platform has it’s own specific application programming languages, libraries, and tools. If you want to build iOS applications, your first choice of technologies should be the Apple-produced toolchain i.e. the Swift programming language, and native iOS libraries. Similarly, for Android, you should be using Kotlin and the native Android libraries.
Why are we so focused on building native applications? Why not just build web applications instead?
Web technologies have evolved drastically over the past 20 years, and it’s possible to build practically anything as a web application (especially with modern JS, React, Svelte etc). There are a large number of fantastic applications written for the web e.g., Gmail, Netflix, D&D Beyond. For applications where you are mainly consuming data that is already residing on a remote site, web applications makes sense.
However people often choose to use native applications over web applications. Why?
- Native applications tend to be faster. We don’t incur the cost of fetching data (code, images, resources) over a network just to display the starting screen.
- Native applications can do more. We aren’t restricted by a browser’s security model. e.g., I have a file manager that I use a lot. I can’t imagine how to build this as a functional web application.
- Native applications can work offline. Web applications are fundamentally tethered to a web server, and services in the cloud. What happens when your internet is spotty? What if
eduroamisn’t working very well that day? Often the answer is that your application just doesn’t work. - We can customize interaction. How do you create a second window on a web site? How do you do popups? Keyboard shortcuts? You have limited control over interaction in a browser environment.
Here’s a quick list of my most commonly used applications, which includes a mix of native and web apps. I don’t think I would choose to replace the native applications with web applications in most cases.
Native
- Visual Studio Code, IntelliJ IDEA IDEA.
- Kotlin compiler, C++ compiler, Python interpreter.
- MS Powerpoint, MS Word, MS Excel.
- Forklift file browser.
Web applications
- Banking application
- Healthcare portal (for submitting claims)
- Configuration screen for my home RAID server
Web applications disguised as native applications, which I wish were fully native
- MS Teams
- Discord
- Slack
What do we do?
Choosing technologies is complicated! In our case, we have the luxury of picking something that is interesting (as opposed to “something that the team knows”, or “what your manager tells you to use”). We’ll stick with native applications, which provide the most flexibility.
We’ll start with a platform, and then narrow down from there:
- Pick a platform: Android (mobile).
- Pick a programming language: Kotlin (high-level, modern).
- Sprinkle in libraries to cover expected functionality.
- graphical user interfaces: Compose
- networking: Ktor
- databases, web services: specific to our cloud provider.
We’ll explore all of this as we progress through the course.
Last word
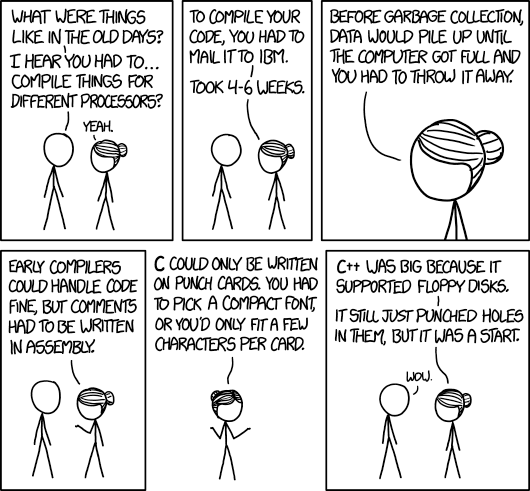
https://imgs.xkcd.com/comics/old_days.png
-
Programming languages go up and down in popularity, but Java has remained successful over time, usually sitting in the top-three since first introduced. This is mainly due to its success as a very stable back-end programming language, which runs on practically any platform. It was also the main Android language for a long time, which certainly didn’t hurt it’s ranking. ↩
-
Does this seem ridiculous? It’s not really. We all routinely read/delete email on our phones, and expect our notebooks to reflect that change immediately. ↩
-
Note that this is not always the case! Computer games, for example, are applications that are also expected to be highly performant; you are not allowed to compromise features OR performance. This is also why it can take highly skilled game developers 5+ years to develop a title. However, the rest of us rarely have that much time or budget to work with. ↩
-
Kotlin GC runs in less than 1/60th of a second, and only when necessary. Dart GC runs in less than 1/100th of a second. Users certainly don’t notice this. ↩
-
My first “real” Windows program was created in C, making system calls to the Win32 C-style API to create and manipulate windows. It was incredibly painful, and I don’t recommend it to anyone. ↩
Project management
Topics related to managing the project itself.
Teamwork
Credit for this section belongs to Michael Liu and members of the Teamwork Skills Project. Their materials have been adapted for this course.
Assembly
In this section, we’ll discuss the importance of teamwork and how to build a successful team. Why are we learning this?
- You will work in teams in this course, and likely in your future career.
- You will experience conflict at some point.
- You will have time management issues.
- You will have team motivation challenges.
We want you to be prepared for these challenges and to have the tools to overcome them.
Successful teams are built on trust, respect, and communication. We’ll discuss the steps and actions you can take to make your team successful.
What are the attributes of a successful team?
| Attribute | What does it mean? |
|---|---|
| Shared mission and goals | The team clearly understands and agrees with the mission and goals of the project. |
| Leadership | The team has a leader who can guide the team to success. Leadership tasks are performed reliably and consistently. |
| Communication | The team communicates effectively and efficiently. Team members share beliefs and expectations. |
| Decision making | The team has an agreed-upon decision-making process. |
| Team culture | The culture that you collectively build provides structure and support for team members. |
| Conflict management | The team has a process for resolving conflicts, and addresses conflict productively; it avoids personal conflict. |
| Team meetings | Meetings are held regularly to facilitate communication and group decision making. |
| Self-management | Individual team members complete individual tasks and assignments effectively. |
Phases of team development
Teams don’t come together and become effective overnight. It takes time, and deliberate effort on the part of team members to build a successful team.
One common model of team development is Scott M. Graffius’ “Five Stages of Team Development”:
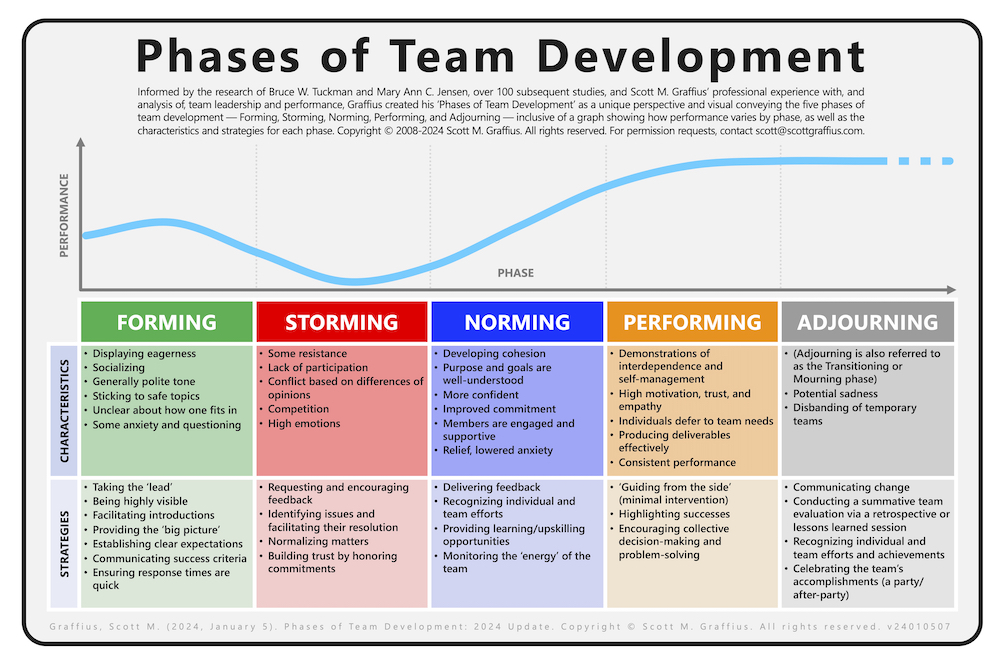
- Forming: The team comes together and gets to know each other. This is a time of excitement and anticipation.
- Storming: The team starts to work together and differences in opinion may arise. This is a time of conflict and disagreement.
- Norming: The team starts to resolve their differences and work together more effectively. This is a time of cooperation and collaboration.
- Performing: The team is now working together effectively and achieving their goals. This is a time of high productivity and success.
- Adjourning: The team has completed their project and is ready to move on. This is a time of reflection and celebration.
Team meetings and team contracts can help the team move through these stages more quickly.
Step 1: Team contract
A team contract is a document that outlines the expectations and responsibilities of each team member. It is a tool that helps the team establish a shared understanding of the project and the roles of each team member.
The exact content is decided by the team, but the contract typically addresses:
- Team leadership and communication
- Team meeting expectations
- Team & individual expectations
- Managing team challenges and conflict
- Other considerations
It may include contract clauses such as:
- “All members will attend meetings or notify the team by email or phone in advance of anticipated absences.”
- “All members will be fully engaged in team meetings and will not work on other assignments during the meeting.”
- “All members will come to meetings prepared by reading the assigned material and/or watching assigned lecture videos ahead of time.”
The most important parts of any team contract are:
- List the names and contact info of each team member.
- Identify roles (see below).
- Determine how and when you will work together. Where will you meet?
- Communications: pick a method (email, Discord, Teams) and agree to check it regularly.
See the Public Gitlab Repo > Templates for a sample team contract.
Step 2: Define team roles
It is useful to determine team roles at the start of a project, to help guide the team’s work. Roles can include:
-
Team Lead: This is the project leader, NOT the technical leader for the project. This person is responsible for keeping the team on track and ensuring that the project is completed on time. They do this by ensusing that the requirements are defined accurately, that the team is tracking work properly, and that the team is meeting its goals for each deliverable. They often define the agenda for the team meeting, take minutes and ensure that the team is following the team contract.
-
Technical Lead: This person is responsible for ensuring that the technical aspects of the project are completed correctly. They are responsible for ensuring that the team is following best practices, that the code is complete and follows course guidelines. In the way that the team lead helps manage the project, the techical leader helps manage the code contributions of the team. They often review code, help team members debug, and ensure that code is reviewed and merged properly.
-
Design Lead: Teams (at least in this course) may have a Front-End Design Lead, and a Back-End Design Lead, each of which is responsible for the design and delivery of a core part of the product.
Note that these roles are NOT prescriptive. They are meant to guide the team in their work. The team should be flexible and adapt to the needs of the project. It’s normal for someone to wear multiple hats e.g. design lead for the front-end, but also handling packaging (because they may have done that before).
This means that, for example:
- Team leads still write code. Managing the project is not a full-time job.
- Technical leads can still take meeting minutes and write code. They are not just code reviewers.
- Design leads can still help with other parts of the project outside of their immediate area of responsibility.
No single person is “the boss” of the project, and significant decisions should be made with the input of the entire team.
Step 3: Project planning
A project plan is a document that outlines the tasks, resources, and timeline for a project. It helps the team stay on track and meet deadlines. This can help with time management issues.
As an Agile team, you are not expected to plan everything up-front. Instead, you will plan in short iterations, called sprints. This allows you to adjust your plan as you learn more about the project and the team’s capabilities.
However, it is still useful to have a high-level plan that outlines the project’s goals, timeline, and resources. This plan can be used to guide the team’s work and ensure that everyone is on the same page.
Identifying project components
Identifying what needs to be done should be, at least initially, a team effort. The team should brainstorm and list all the tasks that need to be completed.
This is a good time to use a whiteboard or a shared document to list all the tasks. This can be done in a team meeting or asynchronously.
Given an Agile framework, you should expect to review and update this list regularly.
This is an ongoing activity as you learn more about your project, and make design decisions.
Creating a Gantt chart
A Gantt chart should be included in your project proposal to summarize your project components.
This type of chart lists high-level objectives down the left side and dates across the top. Each task is represented by a bar that spans the dates when the task is planned to be completed.

https://www.productplan.com/glossary/gantt-chart/
See Mermaid for an example of how to create a Gantt chart in Markdown.
Communication
Communication is the key to success in any project! This includes communication between the customer, team members, and stakeholders.

In this course, you won’t be speaking directly with the customer, but you will be communicating with your team members and other stakeholders (like your instructor and TA). It’s important to communicate effectively and efficiently to ensure that everyone is on the same page and working towards the same goals.
Team meetings
Team meetings are an essential part of any project. They provide an opportunity for team members to discuss progress, share ideas, and make decisions. Communication is most effective when it’s both written and oral, so it’s important to have regular team meetings.
However, meetings are expensive in terms of time and resources. They are most effective when you have a clear goal for the meeting. For each meeting:
- You should have an agenda: what are you going to discuss? This can be as simple as a set of bullet points for discussion, or as detailed as a design for a feature where you require input. A team lead will typically prepare and circulate the agenda ahead of time.
- Everyone should come to the meeting prepared to discuss topics on the agenda. This means reading any required materials, watching lecture videos etc.
- The project lead should keep the team organized around the agenda and ensure that the meeting stays on track. Make sure you accomplish what you intended to accomplish.
- Someone should be designated to take notes during the meeting. These notes should be circulated to the team after the meeting.
Definition of team roles and responsibilities, and the structure of your meetings, can be outlined in your team contract. See Teamwork > Team Assembly > Team Contracts for more information.
Here’s a sample of an agenda for a team meeting1:
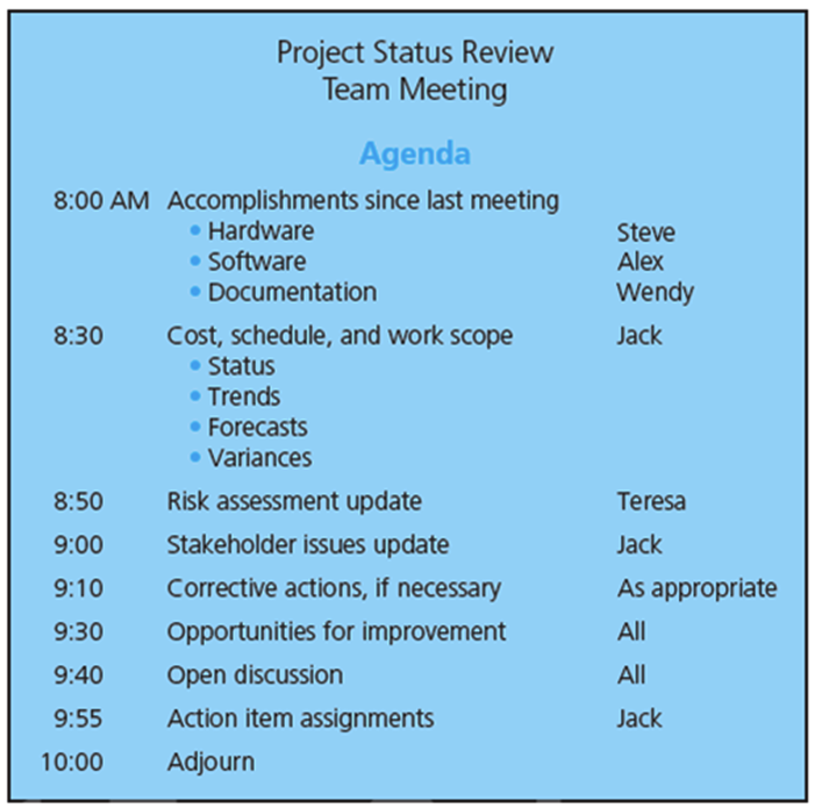
Informal communication
It’s often helpful to have other ways to communicate with your team members. This can include:
- Messaging applications e.g., Slack, Discord, Microsoft Teams.
- Shared online spaces e.g., Google Docs, MS Teams channels.
- Email. e.g., your UW email account.
These tools can be used to share information, ask questions, and discuss ideas. They can also be used to share files and other resources.
These tools are extremely helpful for day-to-day communication, but they should not replace regular team meetings. They are most effective when used in conjunction with regular meetings.
We recommend that you include a section on communication in your team contract, listing one primary method of communication (e.g., Slack). Anything more formal, like meeting minutes, should be shared in your project Wiki.
Conflict management
Conflict is a natural part of work on a team. It can arise from personality differences, differences in opinion, or differences in work style.
There are seven main sources of potential conflict on a team: t
- Work Scope: Differences of opinion on how the work should be done, how much should be done, or the appropriate level of quality.
- Resource Assignments: The particular individuals assigned to work on certain tasks, or the quantity of resources assigned to certain tasks.
- Schedule: The sequence in which the work should be completed, or about how long the work should take.
- Cost: How much the work should cost (n/a for this course).
- Priorities: People being assigned multiple conflicting tasks, or when various people need to use a limited resource at the same time.
- Organizational: Disagreement over the need for certain procedures, or ambiguous communication, or failure to make timely decisions.
- Stakeholder: Issues with certain stakeholders e.g. disagrement with the instructor.
- Personal: Differences in individual values and attitudes on the team.
Conflict can be beneficial to a team, as it can lead to better decision-making and more creative solutions. However, if not managed properly, it can also lead to stress and demotivation.
Task-related conflict (1-7) can be beneficial, but personal conflict (8) is always detrimental to the team.
Always treat other team members respectfully and professionally, even if you disagree with their viewpoint. Never let personal conflict go unresolved; it will only get worse until you address it.
Handling conflict
There are five main approaches to handling conflict:
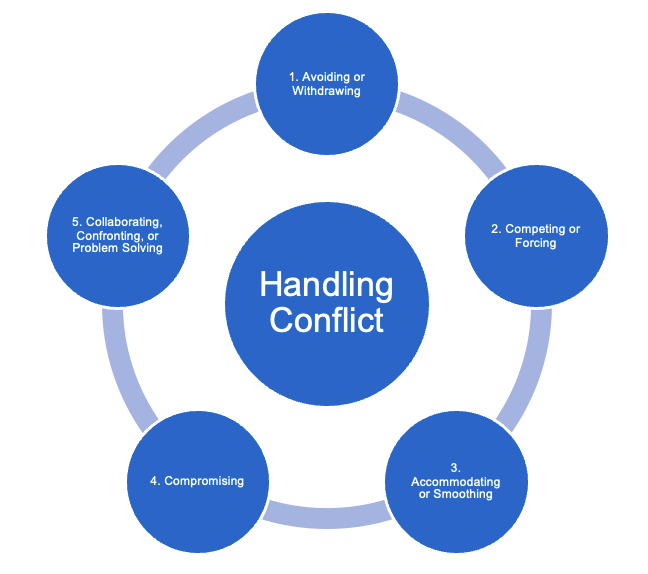
- Avoiding or Withdrawing. Individuals in conflict retreat from the situation in order to avoid an actual or potential disagreement. This approach can cause the conflict to fester and then escalate at a later time.
- Competing or Forcing. In this approach, conflict is viewed as a win–lose situation in which the value placed on winning the conflict is higher than the value placed on the relationship between the individuals. This approach to handling conflict can result in resentment and deterioration of the work climate.
- Accommodating or Smoothing. This approach emphasizes finding areas of agreement within the conflict and minimizes addressing differences. Topics that may cause hurt feelings are not discussed. Although this approach may make a conflict situation livable, it does not resolve the issue.
- Compromising. Team members search for an intermediate position. The solution may not be the optimal one.
- Collaborating, Confronting, or Problem Solving. Team members confront the issue directly, with a constructive attitude, and look for a win–win outcome. They place high value on both the outcome and the relationship between the individuals. For this approach to work, it is necessary to have a healthy project environment.
In a particular conflict situation, you will tend to have a preference for one style over the others depending on the dynamic of the team and your personality.
By understanding the consequences and impact of each of the styles, we can make more informed and productive decisions about how to approach a conflict situation.
These strategies differ along two dimensions (how much it values the individual need vs. how much it values collective need):
- Cooperation scale: value placed on maintaining relationships
- Assertiveness scale: value placed on addressing individual goals or concerns
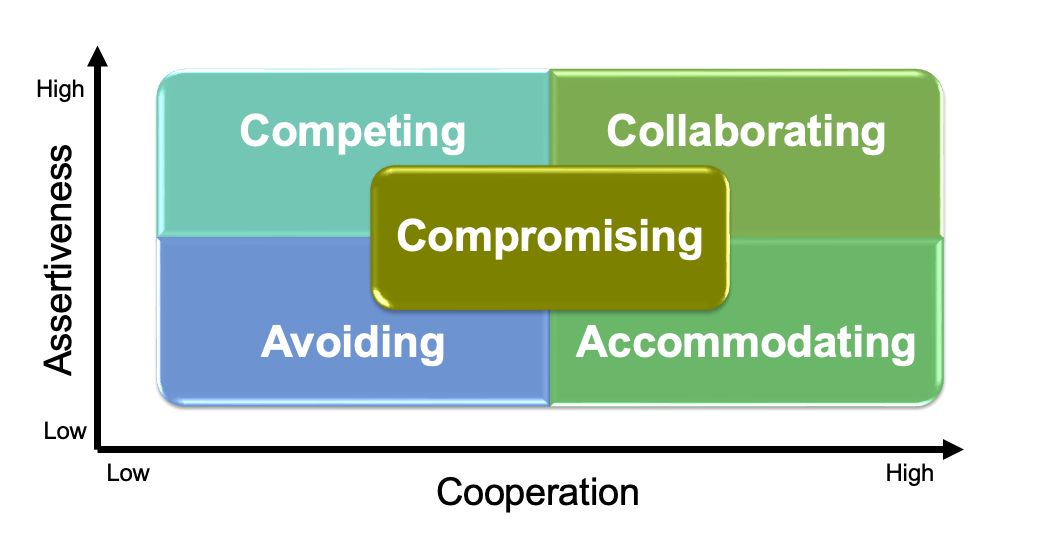
In a team environment, we recommend team-friendly stragies: accommodating, compromising or collaborating. This is in-part why we enforce regular team meetings, and decision-making by consensus; it helps ensure that everyone’s opinion is considered and that decisions are made in a way that is fair to everyone.
The end goal of a conflict resolution process is to explore different options and comes up with the best (or mutually acceptable) idea.
Members should view conflicts within the organization as conflicts between allies, not opponents. The goal is for the team to win, not for one person to win over another.
-
This is probably a longer, more detailed meeting than you would typically have in this course! ↩
Being Agile
Let’s discuss the process of developing software.
People often think that building software is like building anything else, e.g., a car. At first glance is seems reasonable: you determine some requirements for what you want to build, design it, and then build a prototype. You refine your production process, and eventually you can mass-produce as many of these cars as you want.
However, if we attempt to apply these concepts to software, they don’t work. Designing and building software is subtly different than building other products.
Software Development Lifecycle
The Software Development Lifecycle (SDLC) is a simple model that we use to describe the steps of a software project, from inception to a final working product.
The model has evolved over the last few decades, and is similar to other project tracking processes. It usually prescribes a series of activities like these:
- Planning - “What are high level goals?”, “What is our budget?”, “Who is working on the project?”
- Requirements definition - “Who are our users?”, “What problem are we solving?”
- Analysis & design - “What technical constraints exist?”
- Implementation - “How do we build it?”
- Testing - “Does it meet specifications?”
- Deployment - “How do we keep it running properly?”
Formally, we consider the SDLC to be a software process model: a collection of activities, actions and tasks that we perform when creating software.
This particular model is also referred to as a waterfall model, named for the way in which you are supposed to move through each activity in sequence.
---
title: Waterfall Model
config:
    theme: neutral
---
flowchart LR
    A[Planning] --> B[Requirements]
    B[Requirements] --> C[Analysis & Design]
    C[Analysis & Design] --> D[Implementation]
    D[Implementation] --> E[Testing]
    E[Testing] --> F[Deployment]
The implications of using a waterfall model:
- A project starts at the first activity and advances through stages. Each stage must be completed before the next stage begins.
- Stages are typically modelled after organizational units that are responsible for that particular stage (e.g. Product Management owns
Requirements, Architects ownAnalysis & Design, QA ownsTestingand so on). - There are criteria that need to be met before the project can exit one stage and enter the subsequent stage. This can be informal (e.g. an email letting everyone know that the design is “finished”), to a more formal handoff that includes artifacts (e.g. Product Requirements documents, Design documents, Test Plans and so on that must be formally approved).
This linear approach strongly suggests that you can and should define a project up-front (i.e. determine cost, time and so on before starting the project).
What’s wrong with this model?
If you’re a project manager, or a business owner, the Waterfall model is very appealing: it suggests that you can define work up-front, and plan out time, costs and other factors. This model suggests that you can work out the parameters of a project, then execute on that plan. Any failure to meet a deadline would be a failure of people to complete their stages ‘on-time’.
However, this isn’t realistic, at least not for software projects.
- Requirements can and will change as project development is underway. Often the context in which the product is being developed will change in ways we cannot anticipate (e.g., the market changes, so new features need to be added). Our understanding of the problem that we’re solving will also naturally evolve as we’re building something, which can result in unexpected requirements changes as well.
- Design and implementation activities are not that predicable! We are often building new features or combinations of features. Managing novelty is always going to be challenging and include some level of uncertainty (i.e., how long it will take, and what the solution will look like).
We knew in the 1970s that the Waterfall model didn’t work, and spent 20 years trying to come up with a better solution. By the mid-1990s, there was a widespread recognition that this way of building software just didn’t work – either for developers or for customers.
- Developers were frustrated by rigid processes and changing requirements.
- Business owners were frustrated by the inability to make changes to projects in-flight.
- Projects were being delivered late and/or over-budget. This frustrated everyone!
There are a large number of software process models that were developed at this time, including Extreme Programming (XP) (Beck 1999), Scrum (Schwaber & Sutherland 1995), Lean ( Poppendieck & Poppendieck 2003). No single model dominated.
Instead, the frustrating state of software development led to a a group of software developers, writers, and consultants meeting and delivering the Manifesto for Agile Software Development in 2001.
Agile was an attempt to find some common-ground principles across competing process models. It isn’t a process model by itself, but a set of principles that influenced the development of other models.
The Agile Manifesto

The Agile Manifesto (agilemanifesto.org)
What does it mean?
- Individuals and interactions (over processes and tools): Emphasis on communication with the user and other stakeholders.
- Working software (over comprehensive documentation): Deliver small working iterations of functionality, get feedback and revise based on feedback. You will NOT get it right the first time.
- Customer collaboration (over contract negotiation): Software is a collaboration between you and your stakeholders. Plan on meeting and reviewing progress frequently. This allows you to be responsive and correct your course early.
- Responding to change (over following a plan): Software systems live past the point where you think you’re finished. Customer requirements will change as the business changes.
Agile Software Development is used to describe any process that encompasses this philosophy. Agile encourages team structures and attitudes that make communication easier (among team members, business people, and between software engineers and their managers). It emphasizes rapid delivery of operational software, but also recognizes that planning has its limits and that a project plan must be flexible.
Iterative processes
This idea of an iterative, evolutionary development model remains central to all Agile processes (although they may present it differently). Instead of building a “complete” system and then asking for feedback, we instead attempt to deliver features in small increments, in a way that we can solicit feedback continuously though the process. Over time, we will add more features, until we reach a point where we have delivered sufficient functionality and value for the customer.
The conventional wisdom in software development is that the cost of change increases as a project progresses e.g., adding a feature may be relatively easy at the start of the project, but get increasingly difficult over time, as designs are cemented. If you wait too long, changes end up much, must more expensive (in time and cost).
Agility forces us to continually reassess the state of the project, and supports the idea that decisions can unfold over time. The most significant project benefit of Agile is that it reduces (and tries to eliminate) breaking late-project changes.
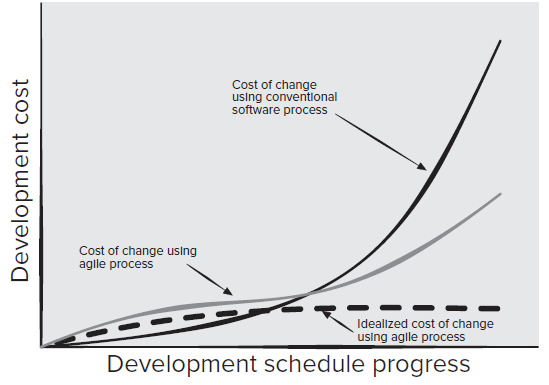
Being Agile
Although we often refer to Agile as a singular model, it is actually an umbrella: a philosophy that drives a number of other models, such as Kanban, Lean and Scrum. In practice, we often find that software teams adopt practices from different methodologies, changing them where it makes sense.
We’ll do the same thing here. We’ll reconstruct our SDLC to be a two-stage iterative model.
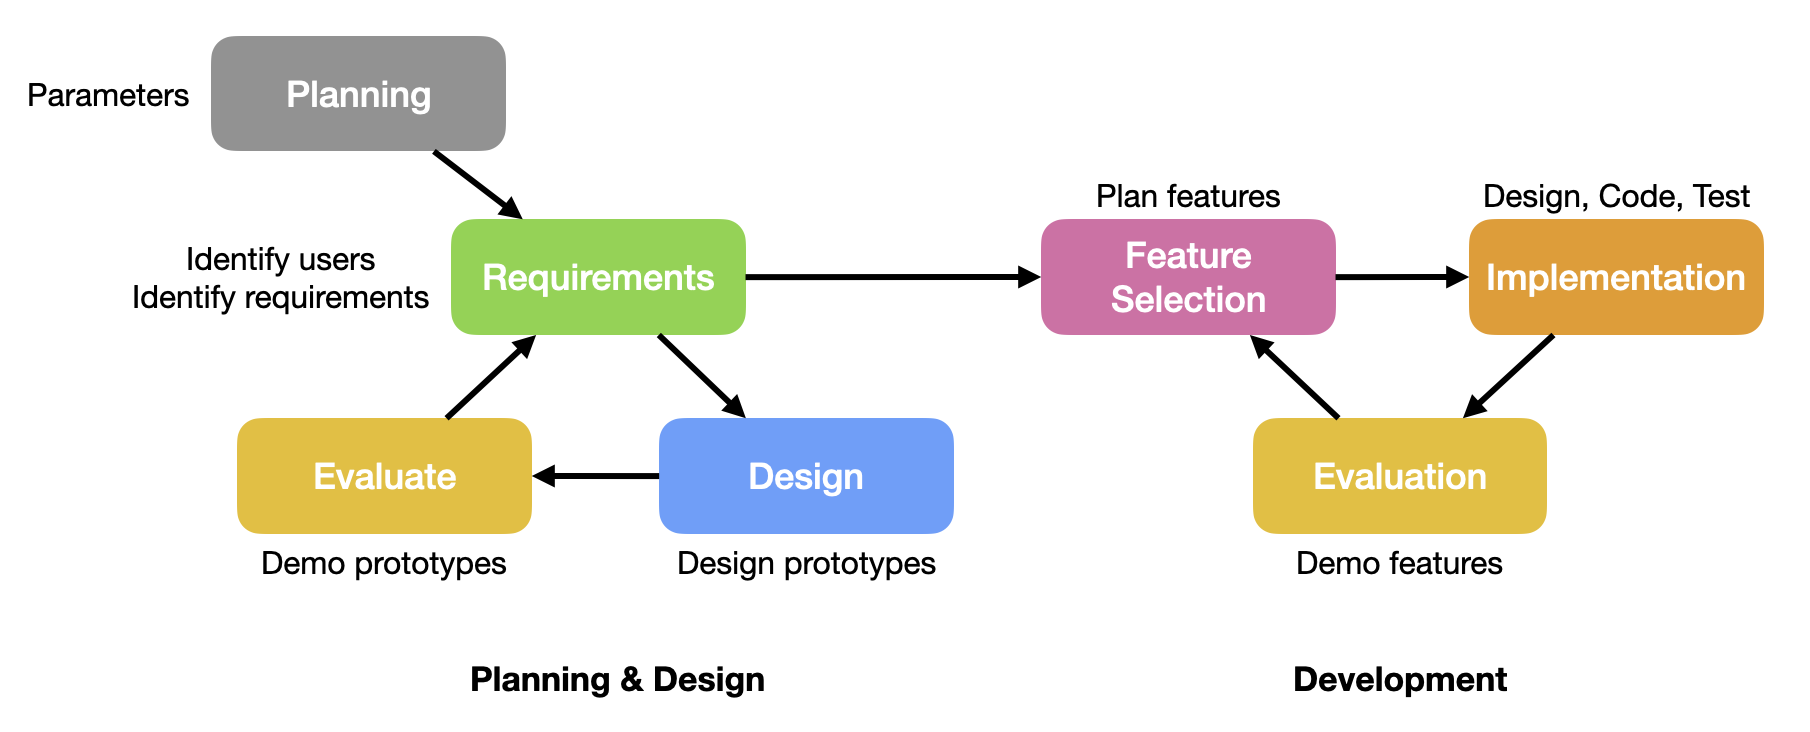
We have 2 distinct phases:
- An early planning and design phase, where we do basic project planning, define our users, and their requirements. This is also where we propose early solutions and get early feedback to narrow down our decisions. We’ll discuss this further under Design Thinking.
- A second development phase, where we deliver the functionality that we proposed in the first phase, to meet our user goals. We will spend the remainder of the course discussing topics for this phase.
GitLab projects
We want our software to be effective, useful, and long-lived. This means tracking all of the details of the project for both our own use, and for people that will maintain the project after us.
It’s normal to use Project Management Software to keep track of this information.
Typical responsibilities of this software include:
- Tracking progress: tracking the project details e.g., items in-progress, items that are complete.
- Resource management: who is on the project, what are they working on.
- Scheduling: when will items be completed.
- Information: project documents, user documentation.
GitLab
In this course, we’ll use GitLab. GitLab is a very “developer-focused” tool, which also provides support for:
- Tracking your source code in an associated Git repository.
- Storing project documents e.g., requirements, design documents, work in-progress, test results.
- Storing user documents e.g,. how to install and use it, features that are implemented.
Everything that you produce should be stored in GitLab! This includes your project proposal, design documents, meeting minutes from your sprints, software releases that you produce and any other documentation that is required.
GitLab and other development tools are capable of rendering Markdown. When possible your documents should be created in Markdown and diagrams should be done inline using Mermaid.js. FWIW, this website is created in Markdown, and includes a number of Mermaid diagrams.
Project tracking
We track the work to be done as issues, and assign groups of issues to project milestones (or deadlines).
Establish milestones
A milestone is a deadline that you are working towards. This could be a customer demo, or a product release, or any other deadline. In our course, sprints represent two-weeks worth of work, and each sprint ends with a demo. Each demo is considered a milestone in your project.
To setup your project to track milestones:
Plan>Milestones, create milestonesSprint 1throughSprint 4. Make sure to assign starting and ending dates to each of them - see the schedule for dates.
Here’s an example of milestones that have been created for a course project. Milestones are important because they allow us to track work against a particular goal. This reflects a similar structure to what you should use in this course.
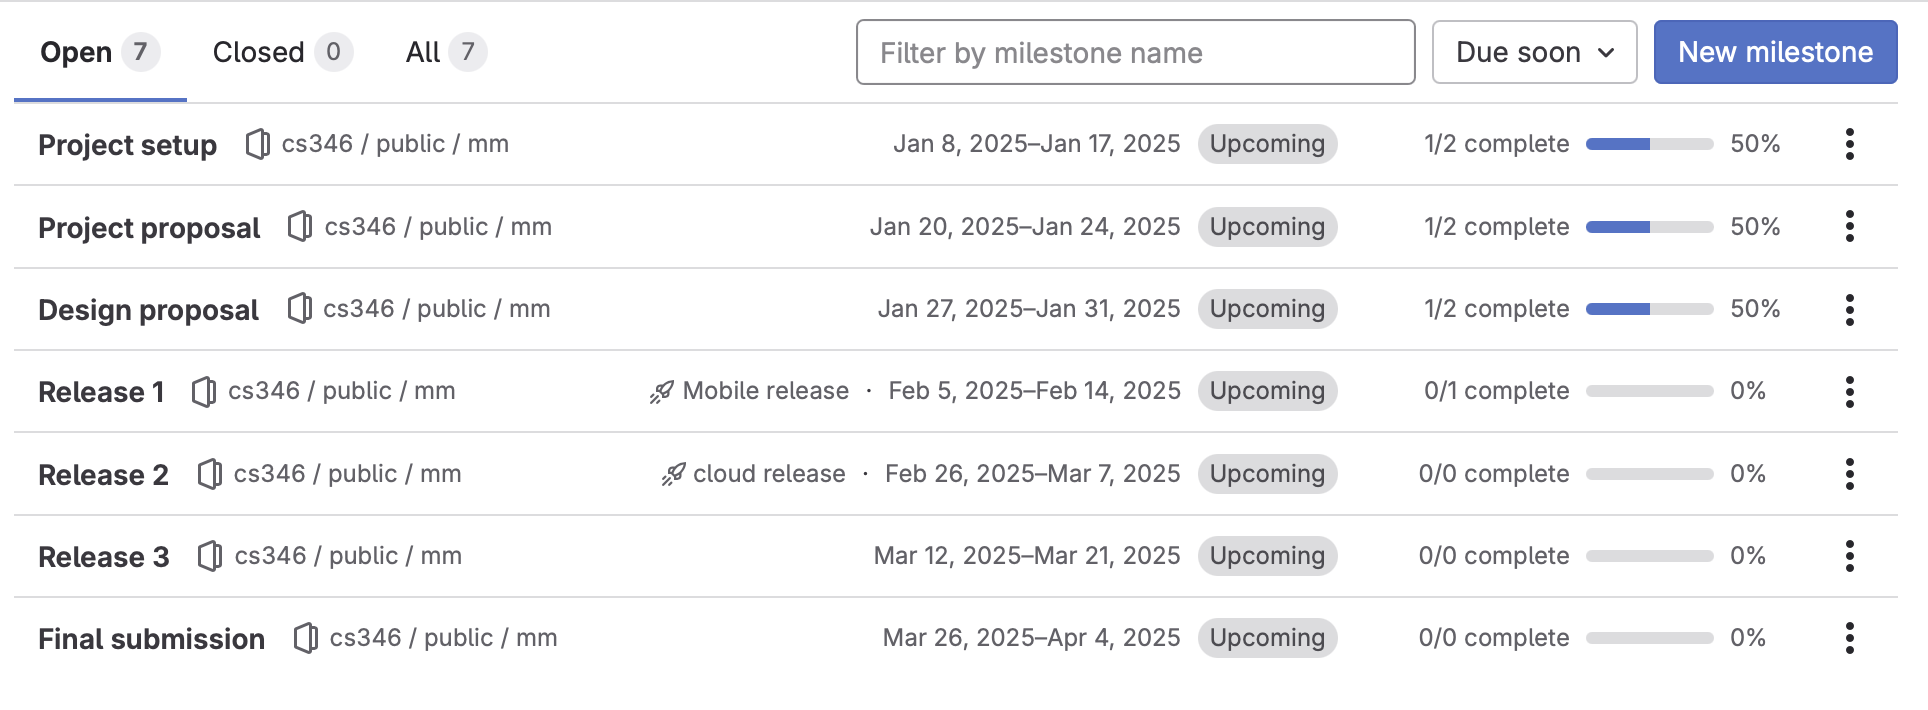
Create issues
To manage work in a project, we first define a list of activities that we need to perform (i.e. the actual “work” that needs to be done). We refer to items of work as issues in GitLab.
An issue:
- Represents one meaningful “unit of work” that needs to be performed for our project.
- Can be anything that needs to be done e.g., programming, writing unit tests.
- Should represent a complete feature (or if the requirement is complex, one of a set of related features).
- Can be completed in less than one day.
To create an issue in GitLab:
Plan>Issues,New Issue

An issue will typically have the following fields. You should make a best-effort attempt to fill these in when you create the issue:
- Title: A descriptive title that descibes the work, e.g., “Move model into shared project”.
- Comment: When you create a new issue, you are prompted to type a lengthier description. This will show as a comment in your issue at the bottom of the Activity pane. You can add additional comments as the issue unfolds, e.g., notes to yourself, or from teammates.
- Assignee: The person responsible for the work. Typically unassigned for new issues.
- Milestone: The milestone that this issue is assigned to. Typically blank for new issues.
- Due date: Can be left blank, since we’ll rely on milestone dates.
Additionally, you can link this issue to other related issues, e.g., multiple changes towards the same requirement. You can also choose to attach external files, e.g., log files for debugging, config files required to test the issue and so on.
Most issue tracking systems support the idea of a priority - some indicator of how urgent an issue is. This isn’t available with our current GitLab license, but we can add it!
Under Manage > Labels, create keywords that will help you organize your issues. We usually recommend high, medium, low as useful keywords for setting priorities. Once defined, you can set these directly in the label section of your issue.
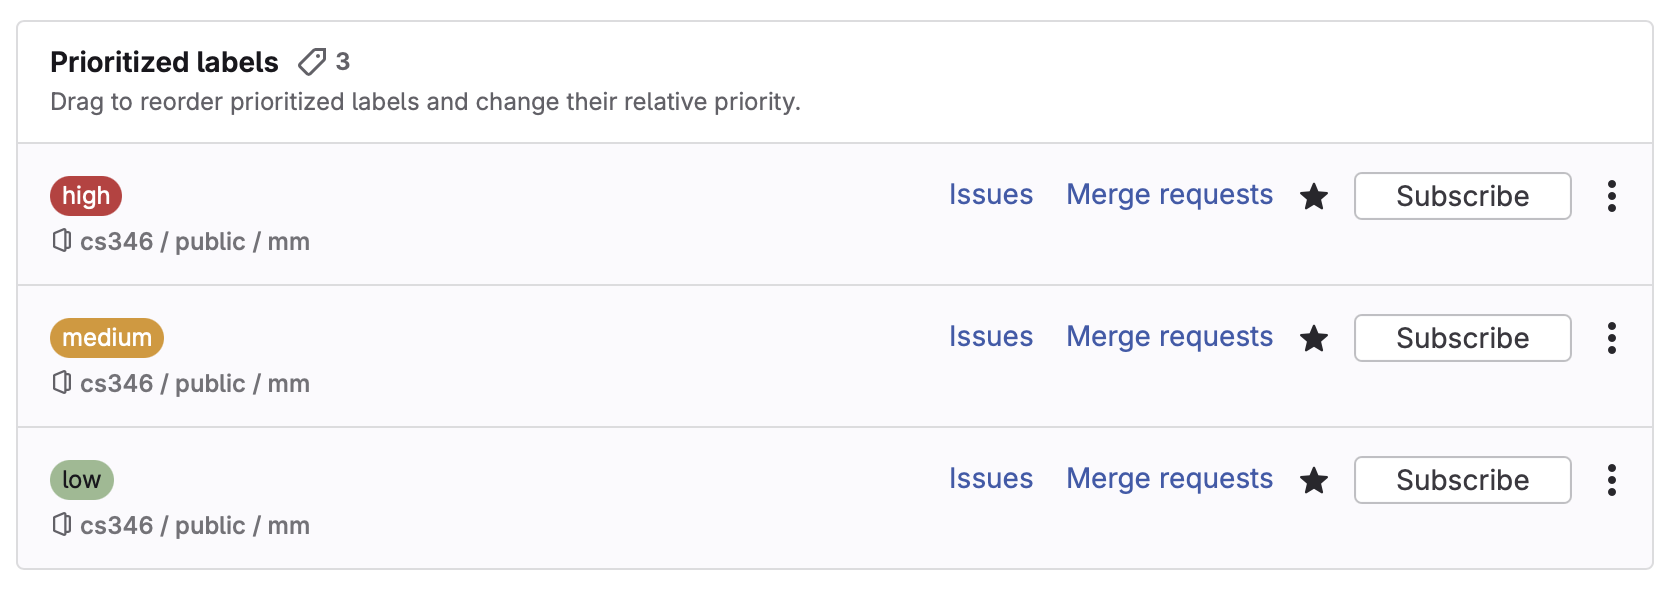
Your project will have many issues associated with it! Typically you assign issues to a milestone, and then update them as you work on them.
Updating issues
To review and update issues together, the team can use a scrum board to visualize all the work being towards a milestone. Scrum boards can have multiple steps visible in the workflow, like To Do, In Progress, and Done. This can be very helpful in planning.
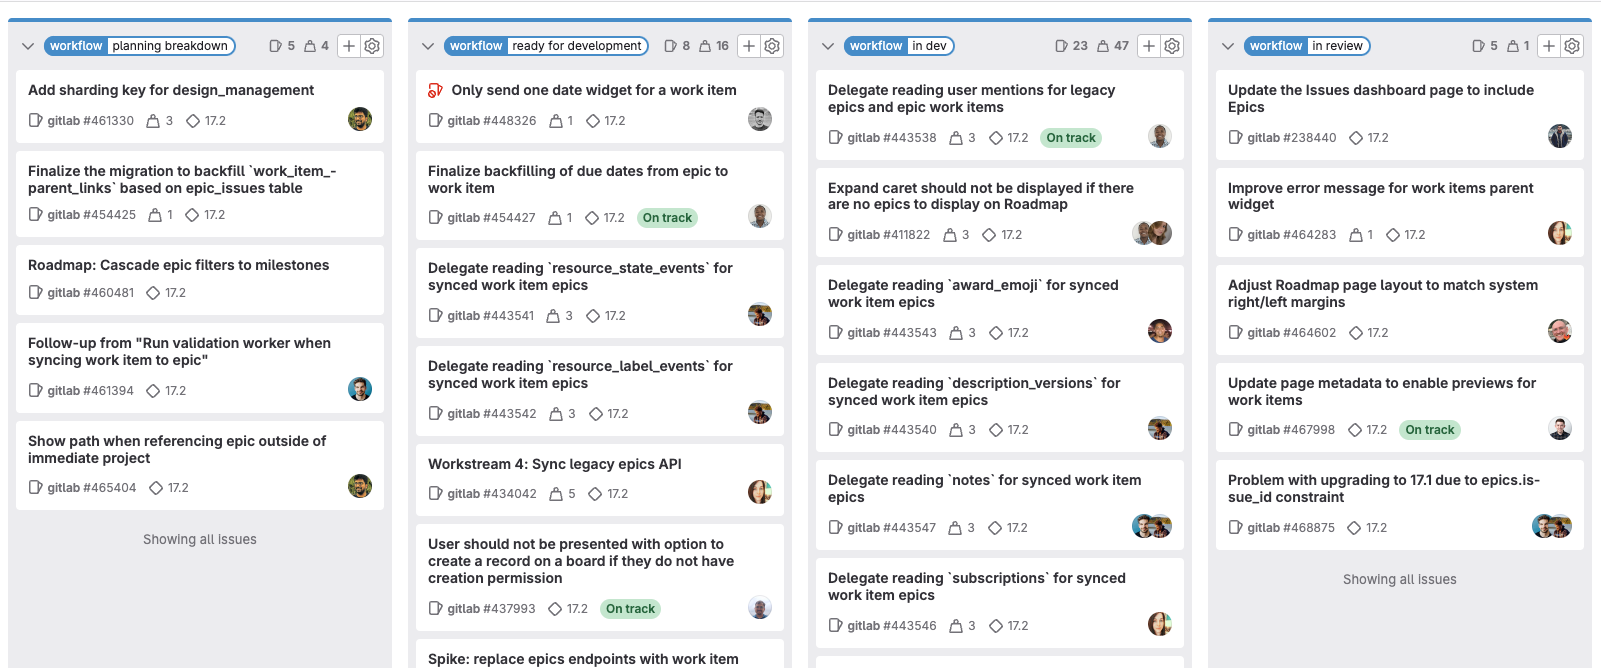
See Software development > Scrum for details on how and when you should manage your issues.
Tracking progress
Finally, you might want to use a Gantt chart to visually show your project’s progress.
A Gantt chart is a visual bar chart used to plan and track a project’s progress. It acts as a timeline that shows the list of tasks involved, their start and end dates, milestones, dependencies between tasks, and assignees. Gantt Charts typically include two sections, the left side outlines a list of tasks, while the right side shows a project timeline with schedule bars that visualize work.
From https://www.atlassian.com/agile/project-management/gantt-chart
GitLab does not support generating Gantt charts, but you can manually create them in Mermaid.js and add to your documentation.
gantt
    title A Gantt Diagram
    dateFormat  YYYY-MM-DD
    section Section
    A task           :a1, 2014-01-01, 30d
    Another task     :after a1  , 20d
    section Another
    Task in sec      :2014-01-12  , 12d
    another task      : 24d
Documentation
Technical documentation is an important part of your project! Although you aren’t expected to write exhaustive documentation most of the time, we often need to record important ideas, or communicate with other team members. Usable documentation really helps.
Examples of useful documents that you will likely encounter in a software project include:
- Project documents, detailing project constraints, timelines, and so on.
- Requirements documents, detailing the requirements that you are expected to deliver.
- Design documents that explain how some critical system works. You should be writing these when planning out features: both as a way to share your design with your team-mates, and as a way to record the details for reference later (remember: we’re always plan to maintain systems long-term).
- User documents, explaining how to use your software.
- Product release documents, including Release Notes, README files.
We’ll discuss using Markdown for technical documents, and Mermaid.js for embedding diagrams.
These are popular formats that are easy to use, and are well-supported by GitLab: you can embed markdown and mermaid diagrams in your GitLab README.md file, or directly in your project Wiki!
Markdown
Markdown is a markup language that allows you to add formatting elements to a text file. The elements that you can add are reminiscent to HTML elements, which makes sense - Markdown was designed to be easily convertable to HTML (which is itself also a markup language). The basic syntax is here.
All the content on this website is generated from Markdown using the Retype framework. Markdown has become the de-facto standard for informal technical documentation.
Syntax
Markdown supports the following tags:
| Symbol | Meaning |
|---|---|
| # | Heading 1 |
| ## | Heading 2 |
| ### | Heading 3 |
| * | Bullet |
| - | Also bullet |
| 1. | Item in a numbered list |
| (title)[URL] | Link to an online document |
| !(title)[URL] | Embed an online image |
| empty line | Denotes a paragraph break |
| *text* | Surrounding text for emphasis |
| _text_ | Also means emphasis |
| **bold** | Surrounds text to embolden |
When Markdown is used in GitLab, either in a file or a Wiki page, the renderer is able to display formatted text! This makes it beneficial when writing technical documentation.
Example
For example, in my editor I can add a paragraph with a bunch of styling:
#### Sub-sub-sub-sub-heading
I can write some:
* **bold** text
* _italicized_ text
I can even add an image.

This gets displayed in my editor’s preview window like this:
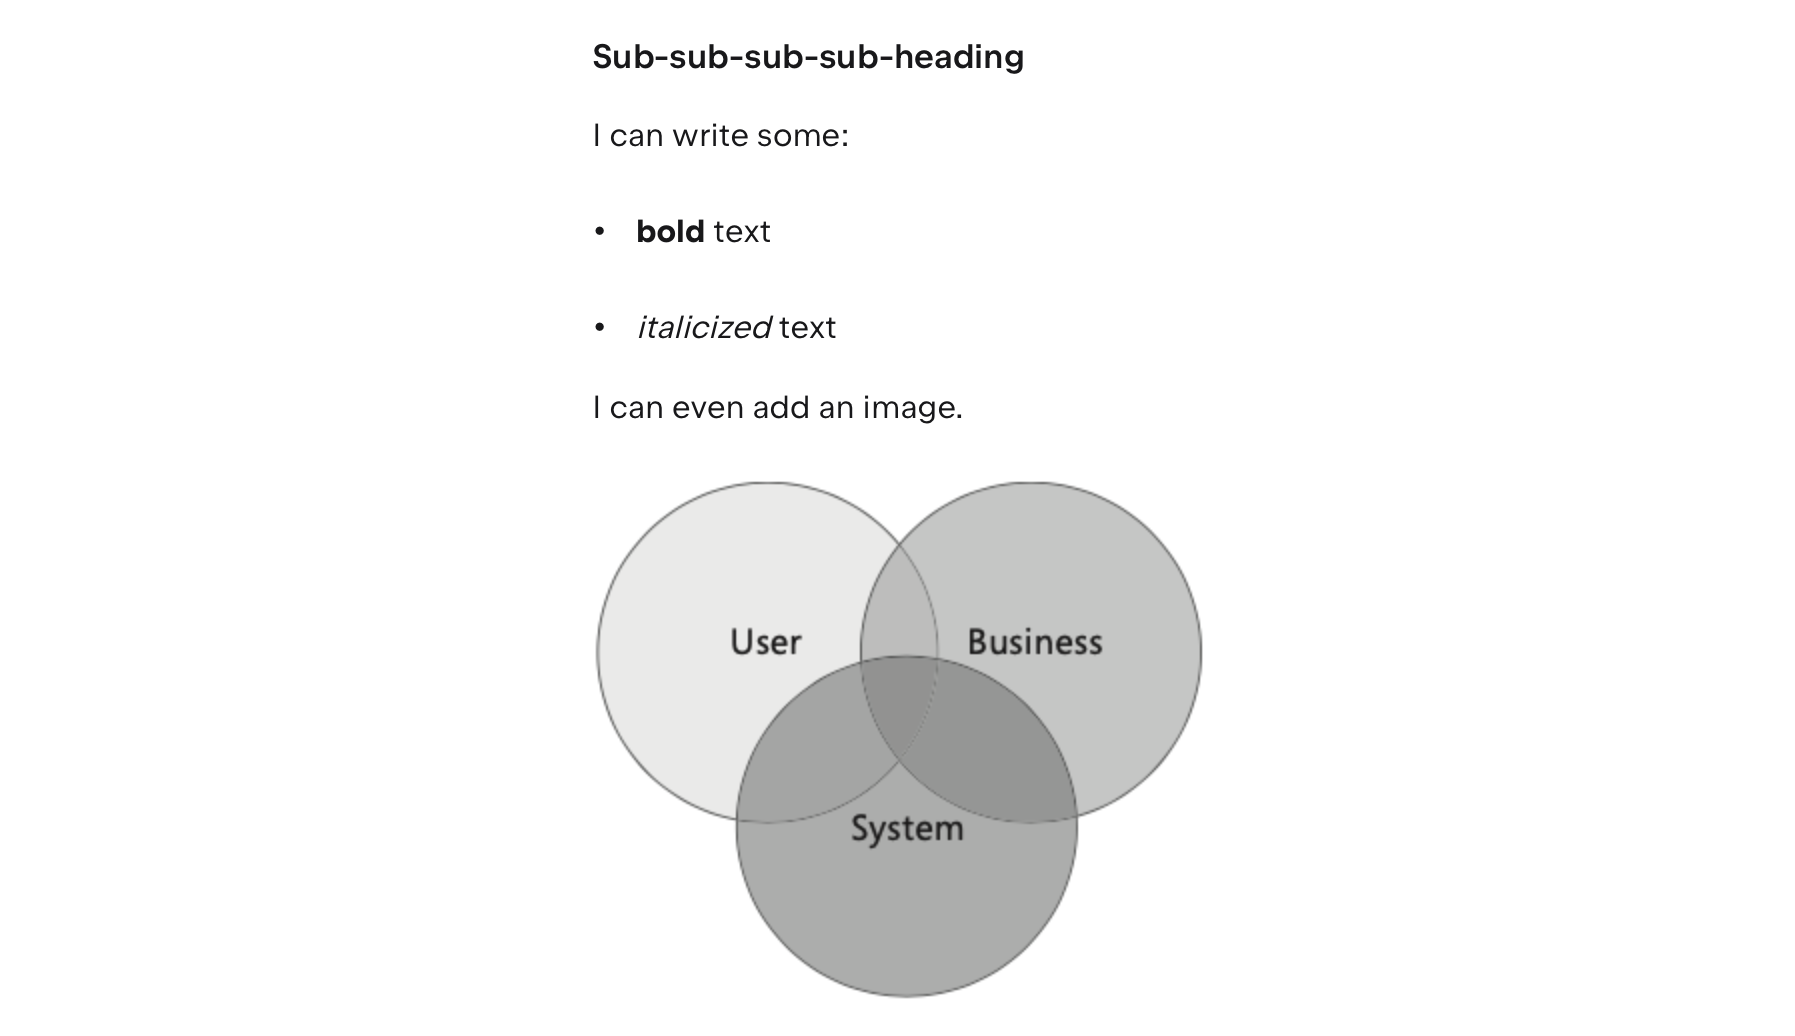
Authoring a Markdown document can be done in any text editor, but you might appreciate an editor that has syntax highlighting and a live preview. These all work well:
By convention, Markdown files should end in .md. For example, README.md in your project root should be a Markdown formatted text file.
Diagrams (Mermaid.js)
We often add diagrams to documents to clarify and communicate additional information. These can include Gantt charts or burn-down charts for project tracking; illustrative graphs when determining requirements, and a variety of diagrams during the design and implementation phases.
Mermaid is a Javascript-based charting tool that can convert Markdown diagramming notation into diagrams.
The advantage to using Mermaid.js is that your diagrams are completely described in Markdown. GitLab also renders Mermaid.js diagrams easily, so you can use them directly in your project README file, or any of your Wiki pages to render inline diagrams.
The editors described above all support Mermaid.js rendering. You might also want to try the Mermaid live editor. It generates raw mermaid syntax, which you can then add to an existing Markdown document.
The GitLab built-in Web IDE doesn’t seem to recognize Mermaid diagrams. However, if you edit the file in a supporting editor, it will display the diagram properly, and it will be rendered properly when the Markdown is viewed in GitLab.
To render diagrams in Markdown, they need to be embedded as a code block element. Markdown uses three backticks to start and end a code-block. After the first three backticks, you enter the language name, in this case mermaid, followed by the diagram syntax, and then three final backticks to close it.
The diagram syntax is a diagram type, followed by a flow indicator. e.g. flowchart LR for a flowchart flowing left-to-right (indicators include LR, RL, TB, BT). For example, here’s a simple flowchart, placed in the middle of some text in a Markdown document.
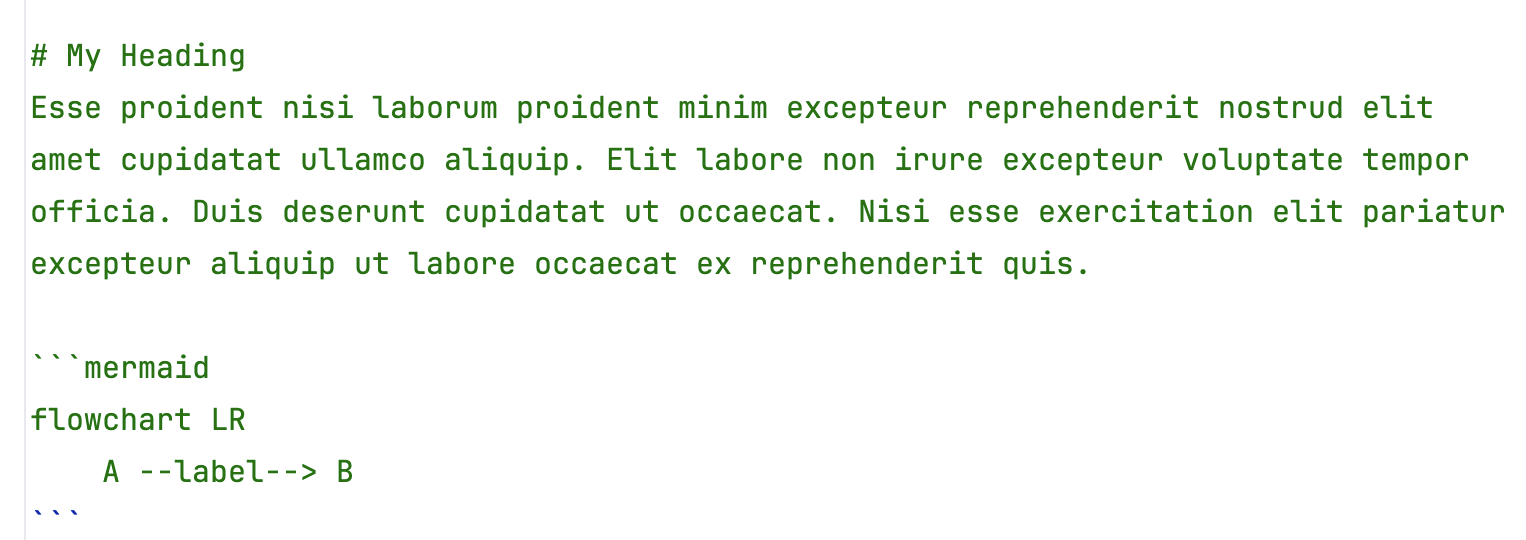
This would produce output like this:
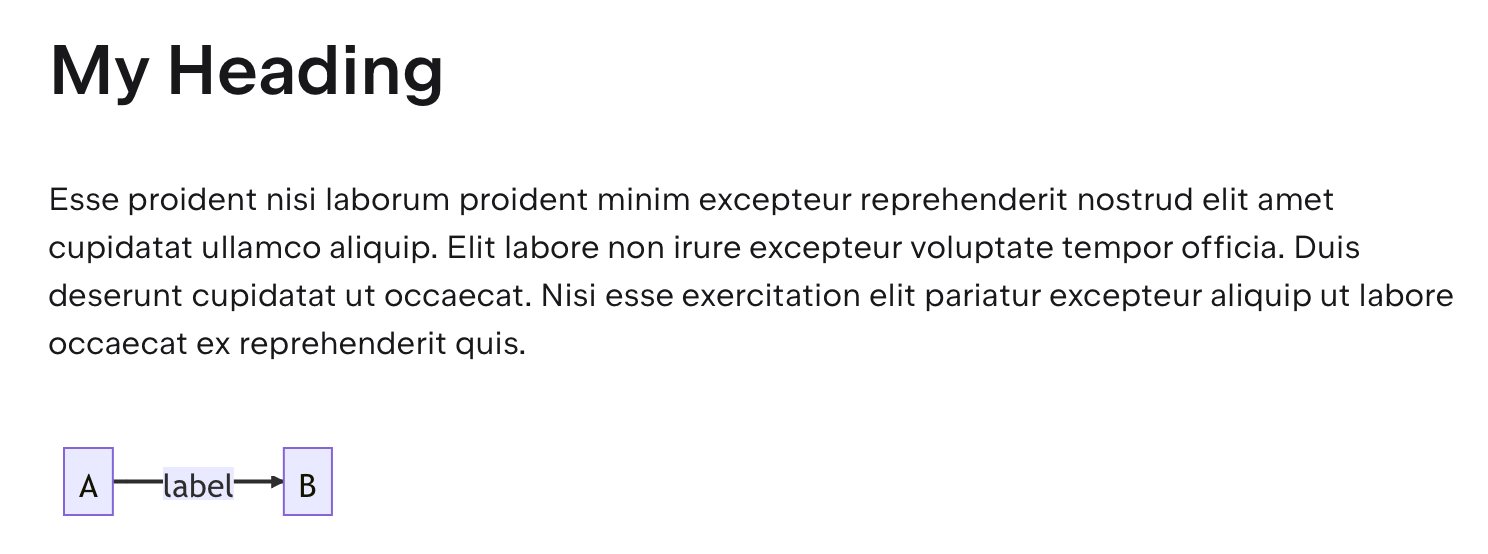
This is a short list of diagrams taken directly from the Mermaid Documentation. See that page for a more complete reference.
Flowchart
Here’s a flowchart diagram showing program execution.
flowchart LR
    A[Start] --> B{Is it?}
    B -->|Yes| C[OK]
    C --> D[Rethink]
    D --> B
    B ---->|No| E[End]
flowchart LR
    A[Start] --> B{Is it?}
    B -->|Yes| C[OK]
    C --> D[Rethink]
    D --> B
    B ---->|No| E[End]
flowchart TD
    Auth{"User Authenticated?"} -- No --> LoginScreen["Show Login Screen"]
    LoginScreen -.-> Auth
    Auth -- Yes --> MainMenu["Add"]
    MainMenu --> Logout["Details"]
    Logout --> Exit(["End"])
    Start(["Start"]) --> Auth
     Auth:::Sky
     Exit:::Rose
     Start:::Rose
     Start:::Aqua
    classDef Sky stroke-width:1px, stroke-dasharray:none, stroke:#374D7C, fill:#E2EBFF, color:#374D7C
    classDef Aqua stroke-width:1px, stroke-dasharray:none, stroke:#46EDC8, fill:#DEFFF8, color:#378E7A
    classDef Rose stroke-width:1px, stroke-dasharray:none, stroke:#FF5978, fill:#FFDFE5, color:#8E2236
User Journey Diagram
User Journey Diagrams are a useful way to show a series of steps that a user might take to perform an operation in your software. These could be used to model User Stories.
journey
    title My working day
    section Go to work
      Make tea: 5: Me
      Go upstairs: 3: Me
      Do work: 1: Me, Cat
    section Go home
      Go downstairs: 5: Me
      Sit down: 5: Me
journey
    title My working day
    section Go to work
      Make tea: 5: Me
      Go upstairs: 3: Me
      Do work: 1: Me, Cat
    section Go home
      Go downstairs: 5: Me
      Sit down: 5: Me
Gantt Chart
Here’s the Gantt chart syntax. Gantt charts are the most common project management charts, great for showing milestones and critical project dependencies.
gantt
    title A Gantt Diagram
    dateFormat  YYYY-MM-DD
    section Section
    A task           :a1, 2014-01-01, 30d
    Another task     :after a1  , 20d
    section Another
    Task in sec      :2014-01-12  , 12d
    another task      : 24d
gantt
    title A Gantt Diagram
    dateFormat  YYYY-MM-DD
    section Section
    A task           :a1, 2014-01-01, 30d
    Another task     :after a1  , 20d
    section Another
    Task in sec      :2014-01-12  , 12d
    another task      : 24d
Timeline diagram
Here’s a timeline diagram, which is also useful for project tracking.
timeline
    title History of Social Media Platform
    2002 : LinkedIn
    2004 : Facebook
         : Google
    2005 : Youtube
    2006 : Twitter
timeline
    title History of Social Media Platform
    2002 : LinkedIn
    2004 : Facebook
         : Google
    2005 : Youtube
    2006 : Twitter
Mindmap
Here’s a mindmap of the course!
mindmap
  root((Topics))
    (Design)
        Requirements
        Design thinking
        Personas
        User stories
        Prototyping
    (Practices)
        Agile
        Branching
        Build configuration
        Pair programming
        Unit testing
        Documentation
    (Technologies)
        Gradle
        JUnit
        Docker
        Markdown
        Mermaid
    (Development)
        Kotlin programming
        OO programming
        Functional programming
        Databases
        Concurrency
        Web services
        Cloud hosting
Technical Diagrams (UML)
The Unified Modelling Language (aka UML) is a modelling language consisting of an integrated set of diagrams, useful for designers and developers to specify, visualize, construct and communicate a design. UML is a notation that resulted from the unification of three competing modelling techniques:
- Object Modeling Technique OMT (James Rumbaugh 1991) - was best for analysis and data-intensive information systems.
- Booch (Grady Booch 1994) - was excellent for design and implementation. Grady Booch had worked extensively with the Ada language, and had been a major player in the development of Object-Oriented techniques for the language. Although the Booch method was strong, the notation was less popular.
- OOSE Object-Oriented Software Engineering (Ivar Jacobson 1992) - featured a model known as Use Cases.
Diagrams in this section are taken from the Visual Paradigm Guide to UML
All three designers joined Rational Software in the mid 90s, with the goal of standardizing this new method. Along with many industry partners, they drafted an initial proposal which was submitted to the Object Management Group in 1997. This led to a series of UML standards driven through this standards body, with UML 2.5 being the current version.
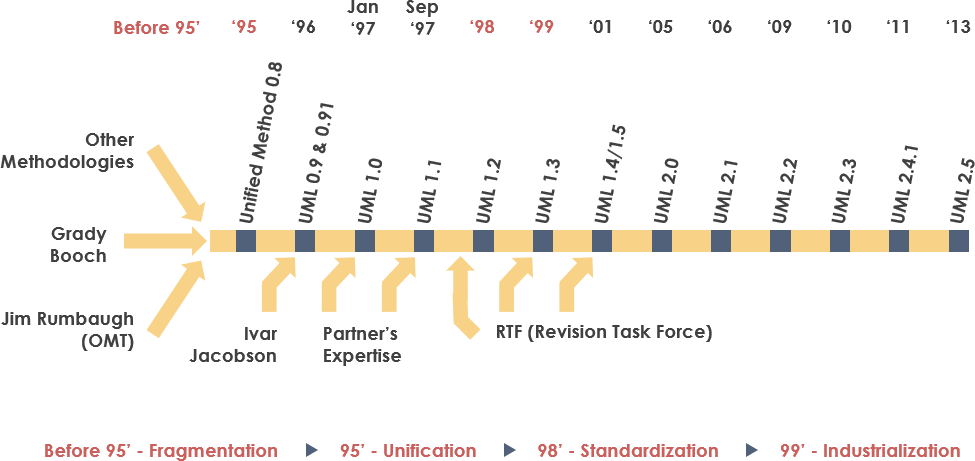
The primary goals of UML include:
- providing users with a common, expressive language that they can use to share models.
- provide mechanism to extend the language if needed.
- remain independent of any particular programming language or development process
- support higher-level organizational concepts like frameworks, patterns.
UML contains a large number of diagrams, intended to address the needs to a wide range of stakeholders. e.g. analysis, designers, coders, testers, customers.
UML contains both structure and behaviour diagrams.
- Structure diagrams show the structure of the system and its parts at different level of abstraction, and shows how they are related to one another.
- Behaviour diagrams show the changes in the system over time.
Below, we’ll highlight the most commonly used UML diagrams. For more comprehensive coverage, see Visual Paradigm or Martin Fowler’s UML Distilled (Fowler 2004).
Class Diagram
The class diagram is a central modeling technique that runs through nearly all object-oriented methods. This diagram describes the types of objects in the system and various kinds of static relationships which exist between them.
There are three principal kinds of relationships which are important to model:
- Association: Represent relationships between instances of types (a person works for a company, a company has a number of offices).
- Inheritance: The most obvious addition to ER diagrams for use in OO. It has an immediate correspondence to inheritance in OO design.
- Aggregation: Aggregation, a form of object composition in object-oriented design.
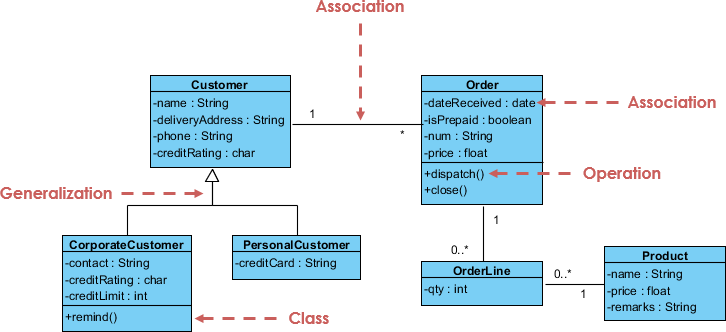
Mermaid also supports class diagrams.
classDiagram
    Animal <|-- Duck
    Animal <|-- Fish
    Animal <|-- Zebra
    Animal : +int age
    Animal : +String gender
    Animal: +isMammal()
    Animal: +mate()
    class Duck{
        +String beakColor
        +swim()
        +quack()
    }
    class Fish{
        -int sizeInFeet
        -canEat()
    }
    class Zebra{
        +bool is_wild
        +run()
    }
classDiagram
    Animal <|-- Duck
    Animal <|-- Fish
    Animal <|-- Zebra
    Animal : +int age
    Animal : +String gender
    Animal: +isMammal()
    Animal: +mate()
    class Duck{
        +String beakColor
        +swim()
        +quack()
    }
    class Fish{
        -int sizeInFeet
        -canEat()
    }
    class Zebra{
        +bool is_wild
        +run()
    }
Component Diagram
A component diagram depicts how components are wired together to form larger components or software systems. It illustrates the architectures of the software components and the dependencies between them. Those software components include run-time components, executable components, also the source code components.
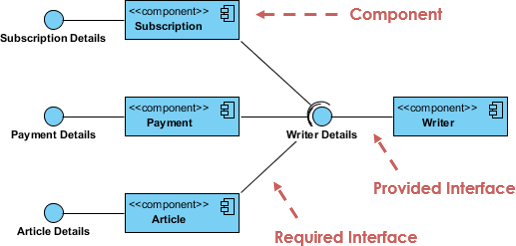
Deployment Diagram
The Deployment Diagram helps to model the physical aspect of an Object-Oriented software system. It is a structure diagram which shows the architecture of the system as deployment (distribution) of software artifacts to deployment targets. Artifacts represent concrete elements in the physical world that are the result of a development process. It models the run-time configuration in a static view and visualizes the distribution of artifacts in an application. In most cases, it involves modelling the hardware configurations together with the software components that lived on.
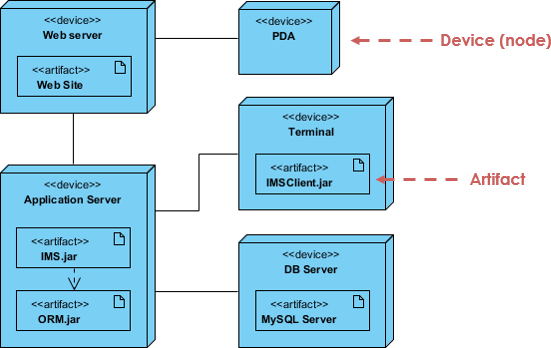
Use Case Diagram
A use-case model describes a system’s functional requirements in terms of use cases. It is a model of the system’s intended functionality (use cases) and its environment (actors). Use cases enable you to relate what you need from a system to how the system delivers on those needs. The use-case model is generally used in all phases of the development cycle by all team members and is extremely popular for that reason.
Keep in mind that UML was created before UX. Use Cases are very much like User Stories, but with more detail. Think of Use Cases == User Stories, and Actors == Personas (except that they can also model non-human actors like other systems).
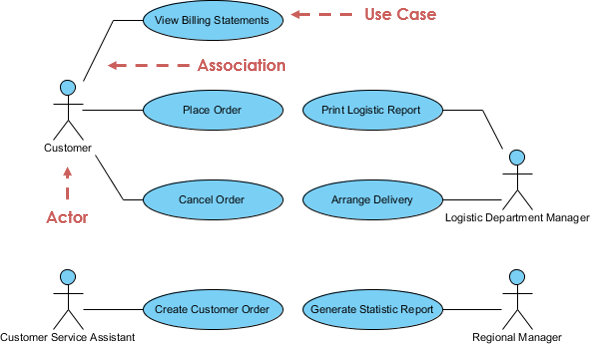
Activity Diagram
Activity diagrams are graphical representations of workflows of stepwise activities and actions with support for choice, iteration and concurrency. It describes the flow of control of the target system. Activity diagrams are intended to model both computational and organizational processes (i.e. workflows).
I use these a lot when designing interactive systems, and modelling transitions between screens or areas of functionality.
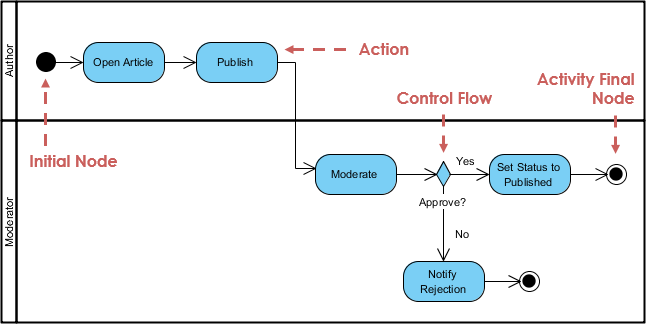
State Machine Diagram
A state diagram is a type of diagram used in UML to describe the behavior of systems. State diagrams depict the permitted states and transitions as well as the events that effect these transitions. It helps to visualize the entire lifecycle of objects.
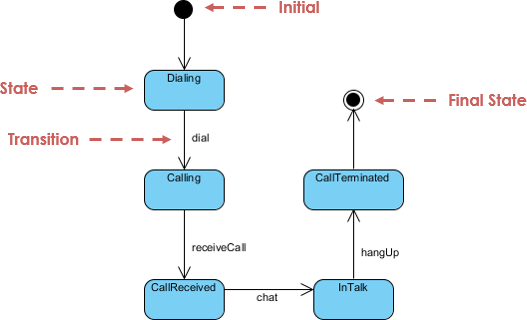
Mermaid also supports state diagrams.
stateDiagram-v2
    [*] --> Still
    Still --> [*]

    Still --> Moving
    Moving --> Still
    Moving --> Crash
    Crash --> [*]
stateDiagram-v2
    [*] --> Still
    Still --> [*]

    Still --> Moving
    Moving --> Still
    Moving --> Crash
    Crash --> [*]
Sequence Diagram
A Sequence Diagram models the collaboration of objects based on a time sequence. They show how objects interact over time and are great for showing ordering effects.
When do you use a Sequence Diagram over a more simple Activity Diagram? Use it when you have a more complex interaction between components. I’ve used these to model client-server authentication, for instance, or passing data between systems (where it might need to be encrypted/decrypted on each side).
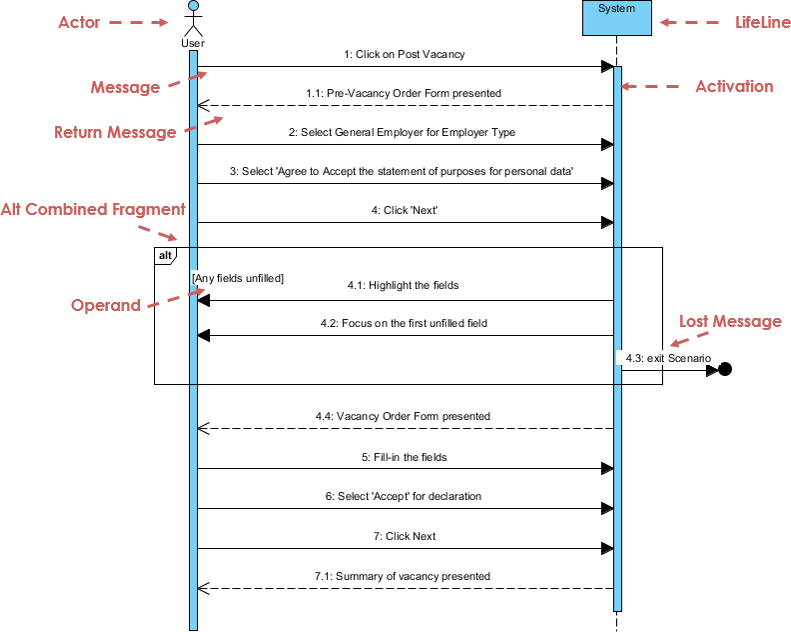
Mermaid does a great job of sequence diagrams as well.
sequenceDiagram
    Alice->>Bob: Hello Bob, how are you?
    Bob-->>Alice: Great!
    Alice-)Bob: See you later!
sequenceDiagram
    Alice->>Bob: Hello Bob, how are you?
    Bob-->>Alice: Great!
    Alice-)Bob: See you later!
There are various software packages on the market for creating UML diagrams.
- Figma: Figma Jam Boards have UML templates. They are very simple, but work for basic diagrams. Using Figma for this has the advantage of a single tool for all project diagrams.
- Mermaid.js: A library that can be used to draw inline diagrams in Markdown.
- Draw.io: A free web-based tool for drawing rich UML diagrams.
Design thinking
How do we work through the initial design decisions for our project?
We all want to produce exceptional products. What does that mean?
Of course, our product should be useful: it should satisfy a need or desire for our users. We should be able to articulate what that need is, and specifically how our product will address it.
However, that is not enough for it to be successfully adopted. We don’t want an adequate user experience, we want an outstanding user experience, both as designers and consumers.
The first requirement for an exemplary user experience is to meet the exact needs of the customer, without fuss or bother. Next comes simplicity and elegance that produce products that are a joy to own, a joy to use. True user experience goes far beyond giving customers what they say they want, or providing checklist features. – Norman & Nielsen, The Definition of User Experience (UX). 1998.
Our product needs to be approachable, easy to learn, simple to use, and ultimately satisfying to our users. In a world of competing solutions, it’s not enough for a product to just be “good enough”, it has to be outstanding and that means designing for all of our users wants and needs.
Design thinking provides a framework for doing exactly this.
The design thinking ideology asserts that a hands-on, user-centric approach to problem solving can lead to innovation, and innovation can lead to differentiation and a competitive advantage. – NNGroup, 2024.
Design thinking is a way of thinking about how to approach the problem of building something suitable for people. It’s both an ideology (designs should be human-focused and consider human-factors), and a process (how to do this efficiently and effectively by iterating over potential solutions).
Design ideology
Design thinking is a way to think about designing for people. It can be used to describe a process for building anything, from a clock-radio, to an electric vehicle, to an software application. It is commonly used when designing complex, human-centred software systems and is particularly effective when you want to solve a problem in a new and interesting way.
Don Norman characterizes design-thinking in this way:
- It’s fundamentally people-centred.
- The goal is always to solve the right problems and address the root cause.
- It considers everything as a system. You can’t solve one little piece, because everything is interconnected. You really have to look at the nature of the system altogether.
- It focuses on small and simple interventions. With complex systems, we probably won’t get everything right, so we focus on a small and simple interventions, check the results, change what we’re doing and continually improve.
Design process
The design thinking process involves these steps, all of which are done before you start implementation. As a team, you work through these steps together.
This is an iterative process; teams will often revisit earlier decisions as they progress through this process.
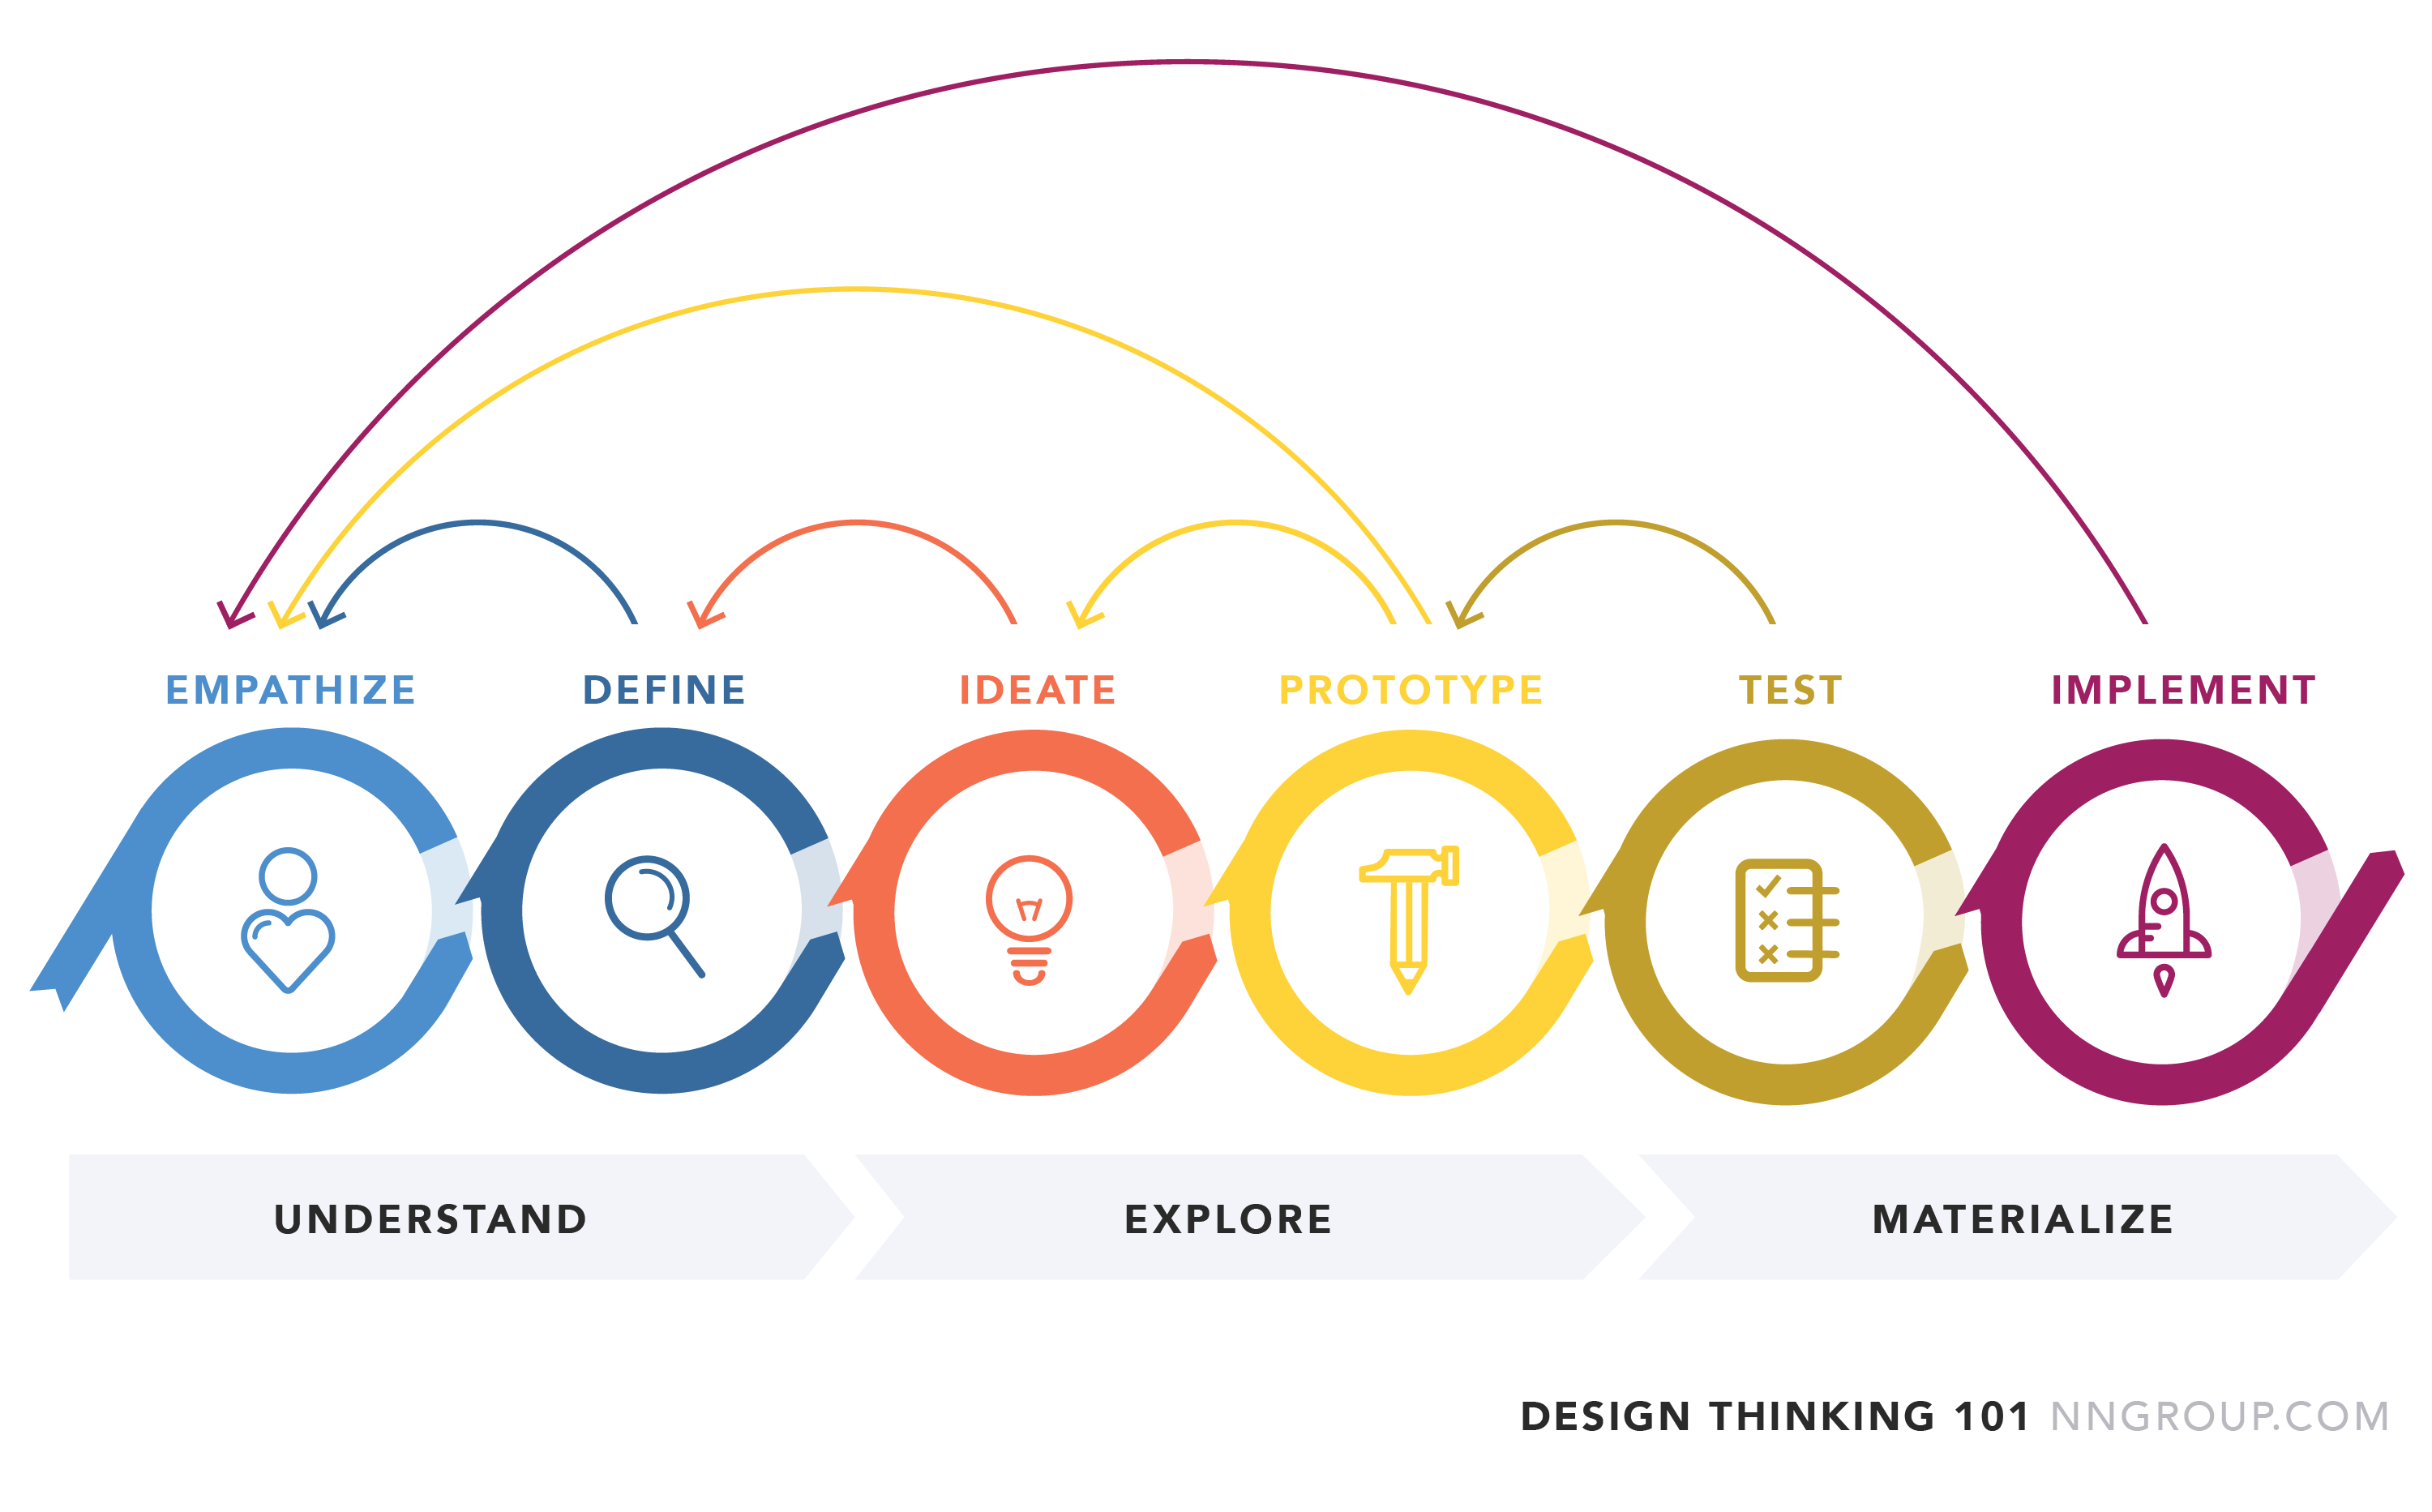
UNDERSTAND phase: We take steps to understand the user, their context and potential problems that they might be experiencing.
-
Empathize: Develop knowledge about your users, and their context. You goal is to gather enough information that you understand your users, how they work, and what motivates them.
-
Define. Look at the information that you’ve gathered, and observe where your user problems exist. Look for opportunities.
EXPLORE phase: Brainstorm ways to solve their problems. Consider alternative solutions.
-
Ideate. Brainstorm ideas to solve the problem! You want lots of ideas, from any source (including competing products, things that “sound like a good idea”, or direct suggestions from users). Discuss them all and narrow down to the ones that work best.
-
Prototype. Work together to build mockups of your “best attempt” at a solution. Use the process to determine which components of your solution work and which ones need further refinement. Some ideas might not work together, and need to be rejected - that’s ok too.
MATERIALIZE phase. Iterate over potential solutions with your users, and collect their feedback.
- Test. Test with users by showing them the prototype and collect their feedback. Identify problems and areas to improve. Iterate on your designs!
- Implement. Implement your final design solution.
We’ll explore each of these steps in further detail below.
Phase I: Understand
1. Empathize
The first step to building a solution for someone is to understand who they are, what challenges and constraints they face. You want to be able to clearly state:
- “Who are my users?”
- “What are they trying to accomplish?”
- “What motivates them?”
- “What discourages them?”
Your goal is to understand and empathize with your users and their perspectives.
There is no right/wrong answer on who you should target; just pick a group of people that (a) you have access to, and (b) you want to help in some way.
- Is your Mom a lawyer? Maybe you can build software to help her track her billable hours for clients.
- Do you know a lot of CS students? Maybe you can build something to help them in their course planning!
Just pick a group that will be interesting to you to target, and to think about. You will need to actually speak with users to figure out what they actually need.
Action: Conducting interviews
The best way to understand a set of users is to talk to them! You need to interview people to understand them, their perspective (how they work, what they like, what they dislike and so on).
You want your interview to be open-ended: you should be approaching this group without assumptions. Your goal is to gain understanding of the the role that you are targeting, and their situation (e.g., lawyers who practice family law; students who work-out after class; elementary school teachers in the classroom. The ideal outcome from interviews is an understanding of their context, what the actually need to do in that role, and problem areas you can identify and help address.
Interview guidelines
- You typically want to interview 5–6 users (Nielsen 2000). This will give you 80%+ of the expected feedback. If you have extra time, you are better off doing multiple rounds with interviewees (with increasing levels of depth).
- Ask open-ended questions to understand what they do, how they work, what motivates them. The interviewees should be doing most of the talking.
- Ask questions to clarify issues or challenges that they might have.
- Use followup questions to make sure that you understand their goals and motivations.
Good interview questions:
- Describe a problem that you have.
- How would you accomplish X?
- What do you like about this system? What do you dislike?
- How would you expect (some feature) to work?“
The outcome from interviews should be detailed interview notes! It is critical that you write down everything that the user says, so that you can analyze it in the next step.
It can also be helpful at this stage to characterize your users by creating personas.
Action: Generating personas
A persona is an archetypal description of a user of your product. Personas are often based on “real people” but are meant to be generalized descriptions that represent a category of people that share similar characteristics. We use personas a stand-ins when discussing product goals and features.
You may have multiple personas, each “type” representing users with different roles, or who you think are distinct. It’s not uncommon to have two or three personas even for a small solution.
There are some basic elements that your user persona should include:
- Personal info: Present personal information first, including (fictional) name, job title, company, job description, family status, and more. Include any details that can help your team understand the persona better.
- Demographic info: Other demographic information, such as age, gender, income, education, location, and other background information can help you create a more authentic character.
- Image: A vivid image, sketch, or cartoon can help your team picture your users clearly, and help you establish a consistent understanding of the target users. Use a photo that reminds you of this user.
- Goals: You should also make it clear what your audience wants to get or to do with your product. List all possible goals and motivations that you’ve found from your user research.
Here’s some examples:
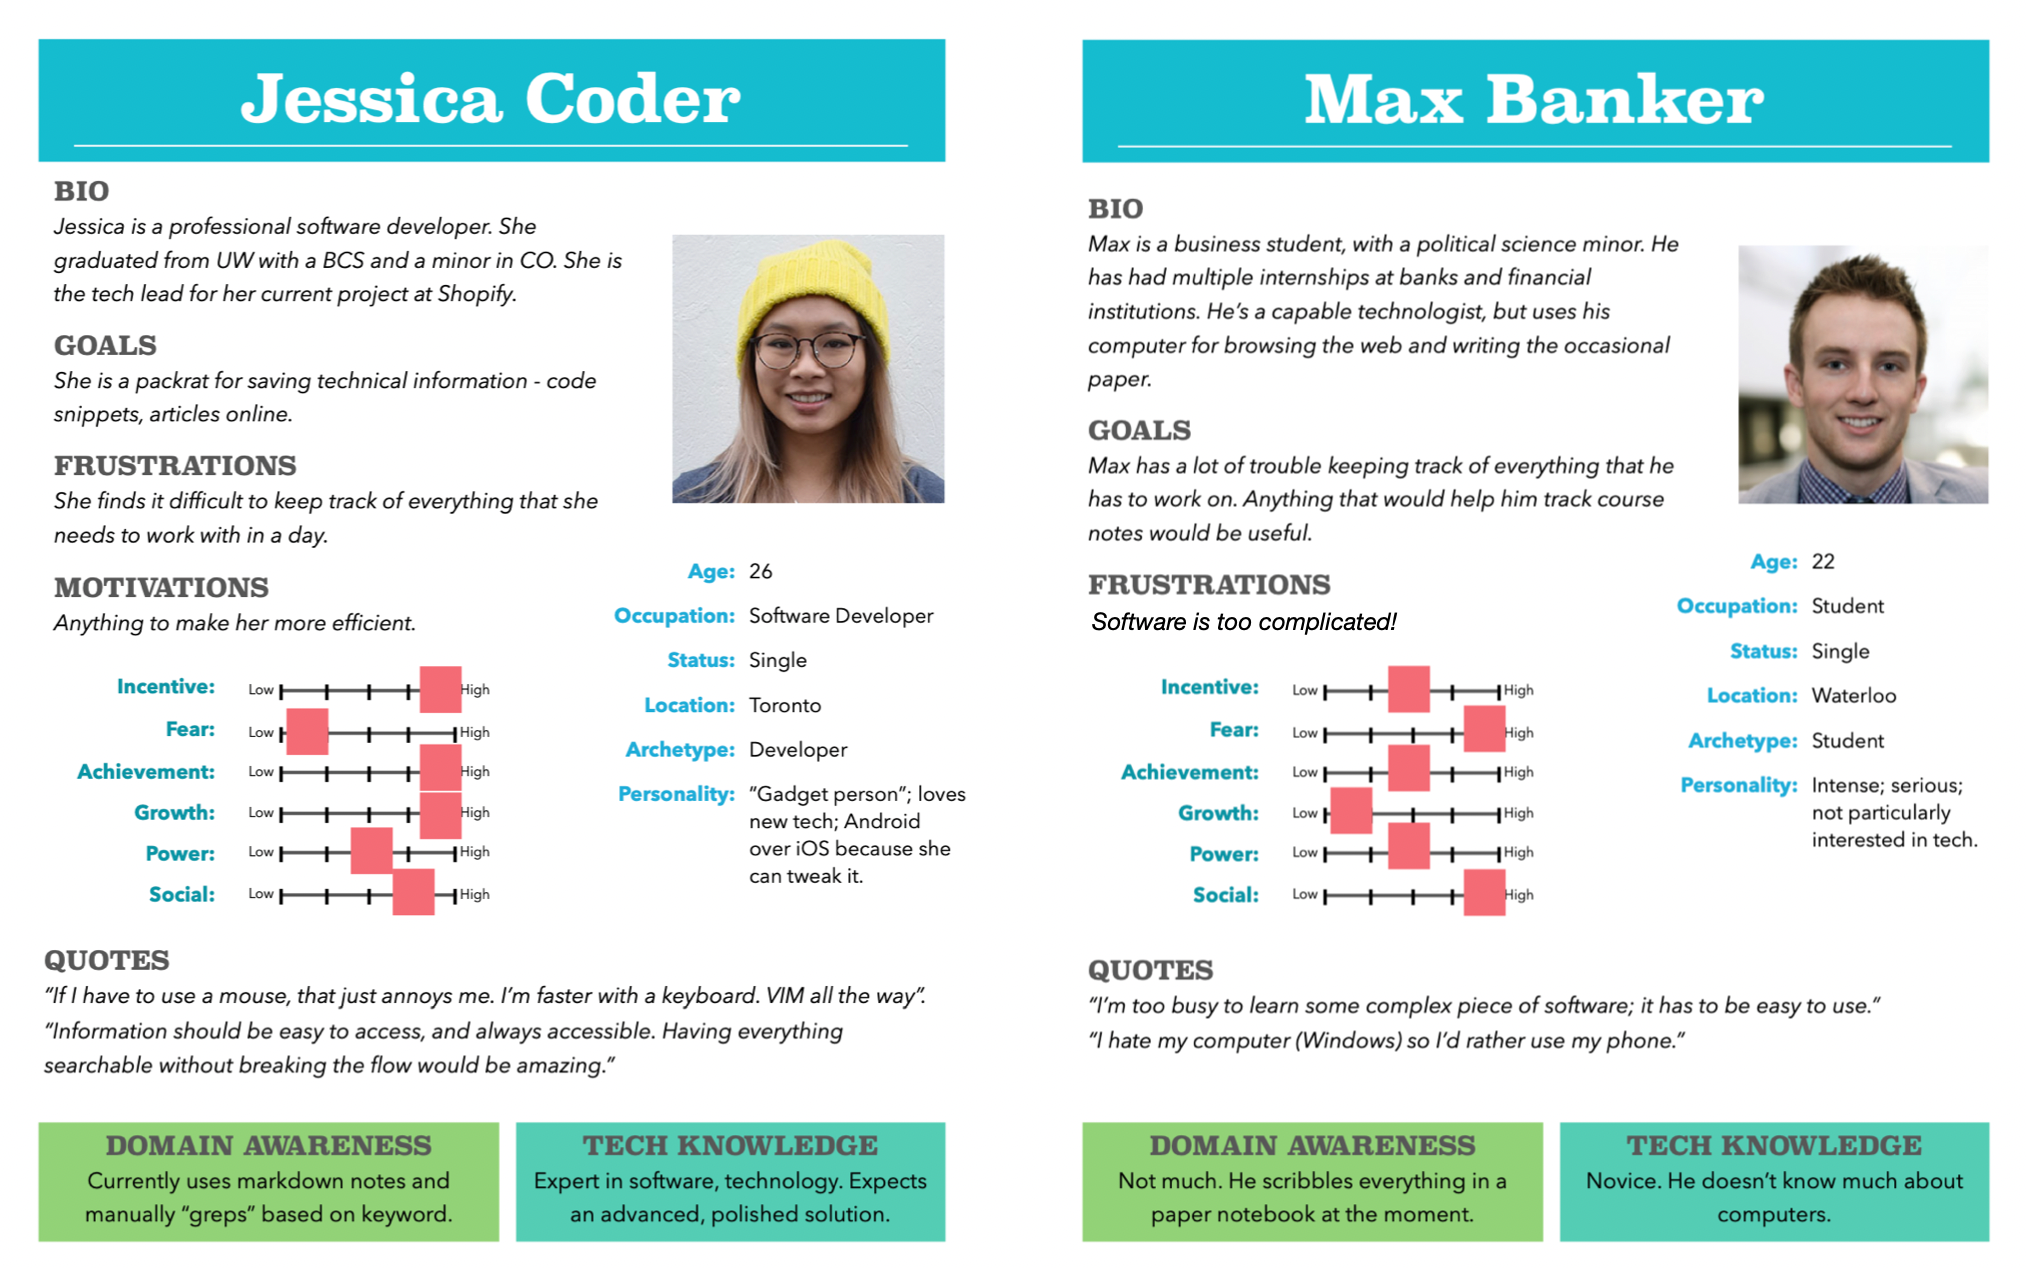
These personas were created in Microsoft Word. You can find the templates we used in the GitLab public repository. However, you might also consider using Figma for your diagrams. It has templates for all diagram types, including personas.
2. Define
This step involves identifying problems or “needs” that your users may have disclosed in the interview.
- One way to do that is to underline verbs in the interview notes. These represent activities that your user is attempting to perform. Pay attention to how they describe these actions - are they difficult or challenging to perform?
- Watch out for detailed stories that describe a software feature i.e. something that a user was trying to accomplish.
Users will often discuss their problems and desired outcomes with stories (we all do this when we try and give examples!). We call these user stories: informal explanations of a problem and the user’s desired outcome. These are incredible useful – they are basically the user telling you from their perspective, how you can solve their problem.
Action: capture user stories
Make sure you capture user stories as part of your interview process. They are the broadest expression of the problem that we want to solve from the user’s perspective.
User stories can literally be short-paragraphs of 2-3 sentences each. They should be expressed in the user’s language.
We will use these user stories later in our process to write requirements (i.e. what our software should do) and guide the features that we design (i.e. how they should work for these users). Along with personas, we can even use our user stories to check that we’ve solve the right problem. e.g., “Would Max be happy with this design as a solution to problem X that he identified in the interview?”
“As the HR manager, I want to use a screening quiz so that I can understand whether to send possible recruits to the functional manager.”
“As a user [of this backup software], I should be able to indicate folders not to back up so that my backup drive isn’t filled up with things I don’t need.”
“When I’m working out, I’d like to have a list of all of the exercises in my set, that I can use as a reference.”
“I’d love to keep track of my TODO list, but I some way to add things on-the-fly, without interrupting whatever else I’m working on. I have a program that I use now, but it takes so many steps that by the time I’ve added my new TODO item, I’ve forgotten what else I was working on.”
We will often group user stories together if they relate to performing similar tasks, or address a common problem. We do this so that we can develop and/or release them as a set of related functionality.
- Stories, also called “user stories,” are short requirements or requests written from the perspective of an end user. This is the lowest level that we think of them.
- Epics are large bodies of work that can be broken down into a number of smaller tasks (i.e. many user stories).
- Initiatives are collections of epics that drive toward a common goal.
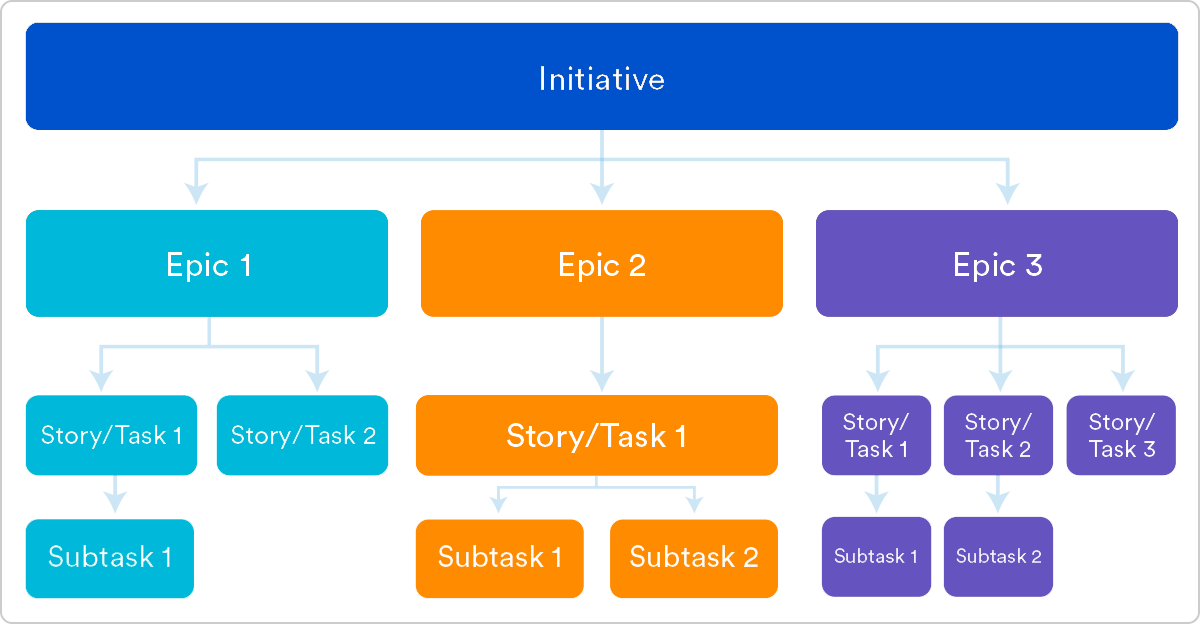
Action: Define a problem statement
You should be able to produce a detailed problem description, which matches your user with a particular problem that they need to have addressed. This should follow directly from your interviews, and is the logical output from the define stage.
This represents the problem that you are going to address. Include as much detail as you can, with a focus on the problem description, benefit for users and motivation behind this idea.
“Students at UW who workout frequently often find it challenging to use the machines in the PAC. There is no simple way for them to figure out who is waiting for which machine. We propose to address a number of related scheduling challenges for them by developing a scheduling application that specifically targets students in the PAC, and uses existing login information, while respecting their privacy concerns. “
“Knowledge workers that primarily work in front of a computer find it challenging to remember to take breaks from their work. This results in health concerns from sitting too long. From extensive interviews, some of these users would find it helpful if they had a system that would keep track of their schedule, and gently suggest breaks at suitable times e.g., between meetings, at regular intervals. We will develop an application to facilitate this.”
Phase II: Explore
3. Ideate
This is all about brainstorming solutions! Bring your team together and brainstorm all of the crazy ideas you have that could contribute towards a solution.
No idea is too far-fetched! Your (initial) goal is quantity over quality, and to uncover some unique and interesting ideas. Share ideas with one another, mixing and remixing, building on others’ ideas.
You will want to document these ideas. One option is to create an affinity diagram to collect everything.
The output from this step should be a set of features that represent your “best solution at this point”.
Action: Affinity diagrams
One popular method to collect ideas when brainstorming is to build a large affinity diagram.
- Write down each idea that the group comes up with on a sticky note.
- Put them on a whiteboard or large wall.
- Organize them into clusters of related ideas. This can help you create hierarchies, or figure out dependencies e.g., “this feature would have to be implemented first before all of these others”, or “these two features work really well together!”.
This doesn’t need to be a physical board. There are many online software platforms that let you create collaborative diagrams together. e.g., invision Freehand.
Do not throw out your Affinity diagram, or any of your notes! You might find that you want to revise your solution (it’s probably not perfect) and will need these notes later.
It’s easy to get mixed up in terminology here. To recap:
- You have user stories that reflect problems + solutions from the user’s point of view.
- You have a problem statement that summaries all of these problems, or tries to consider them as part of a larger problem to address.
- Your brainstorming is an attempt to systematically think of ways to address each problem.
Each of these should lead to the next one logically. i.e. we identify the problems first, focus in on the ones that seem most important, and then try to think of ways to address them.
4. Prototype
Next, you will build a prototype of your solution. A prototype is essentially a mockup of your solution, that is built to demonstrate functionality and elicit feedback from your users.
The goal of this phase is to understand what components of your ideas work, and which do not! In an ideal world, everything would work perfectly, but you probably will need to iterate a few times.
Note that a prototype is NOT an “early version” of release software, but an early demonstration of functionality. Compared to the full implementation, a prototype should require significantly less time to build. This makes it much easier to discard or modify as you work through design iterations.
We often characterize prototypes based on their complexity:
- A low-fidelity prototype is deliberately simple, low-tech, and represents a minimal investment of time and effort. They are shown to users to elicit early feedback on layout, navigation, and other high-level features. Low-fidelity prototypes can be sketches on paper, or non-interactive wireframe diagrams.
- A high-fidelity prototype represents a more significant effort and is intended to be close to the final product. They are suitable for demonstrating complex functionality with a high degree of interaction. Commercial products exist for this purpose, e.g., Figma, Miro or Sketch that allow you to “mock up” a user-interface in much less time that it would take to build the final product. These tools provide collaboration features, so that a designer can build up prototypes quickly, demo them to elicit feedback and even make changes on-the-fly.
This diagram shows the progression from low to high fidelity. It’s not required to build at different dimensions like this! You want to build at the lowest level that you can for maximum benefit.
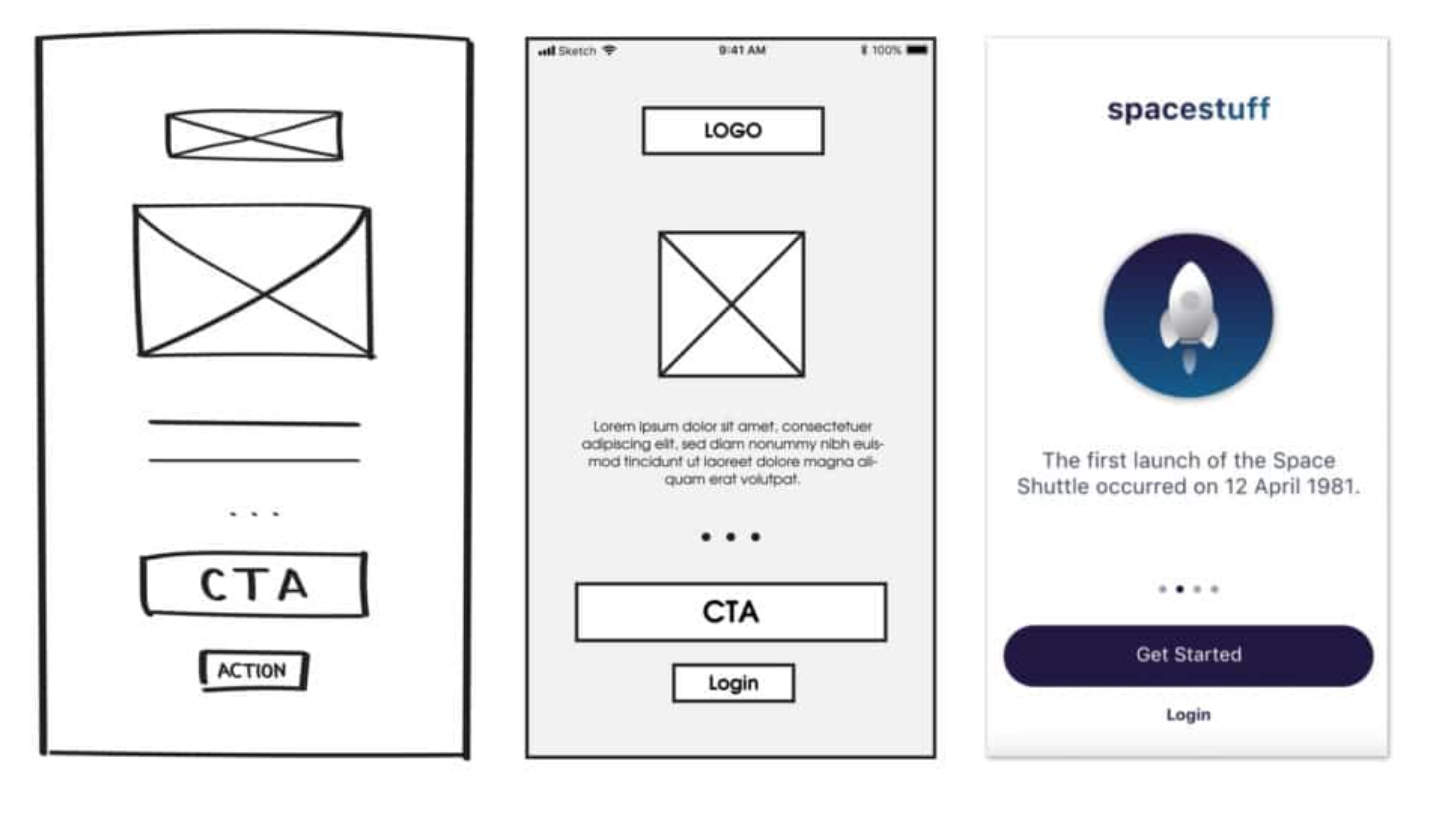
Suggestions for building prototypes:
- Create static mockups of all of your screens. Make them low-fidelity to start, but include sufficient information to identify their purpose.
- Define the relationship between screens, so that it’s clear to a user how navigation through screens will work.
- Include enough visual clues to suggest how functionality is activated. The user should be able to tell how to perform major tasks.
Action: Prototyping in Figma
Figma is a collaborative design tool that allows designers to build a range of interactive prototypes. We’ll use it to build UI prototypes, and then we can show these to potential users and stakeholders (including our team members) for feedback before we implement features.
Figma is primarily an interactive website (although it also has client applications you can install). Figma has free and paid plans. As a student, you can sign up for a Figma for Education plan for free, which provides paid functionality. Highly recommended while you are still in school!
A design in Figma is meant to encompass all interactions for a product. It consists of:
- a
frame, representing a single UI window (e.g. Android Pixel C screen, or 14“ MacBook Pro Desktop). - UI elements, represented by customizable
shapes.
Figma presents itself like a vector drawing application, letting you “build” a user interface much like you would in any drawing application. However, unlike drawing applications, it also supports adding interaction e.g. clicking buttons.
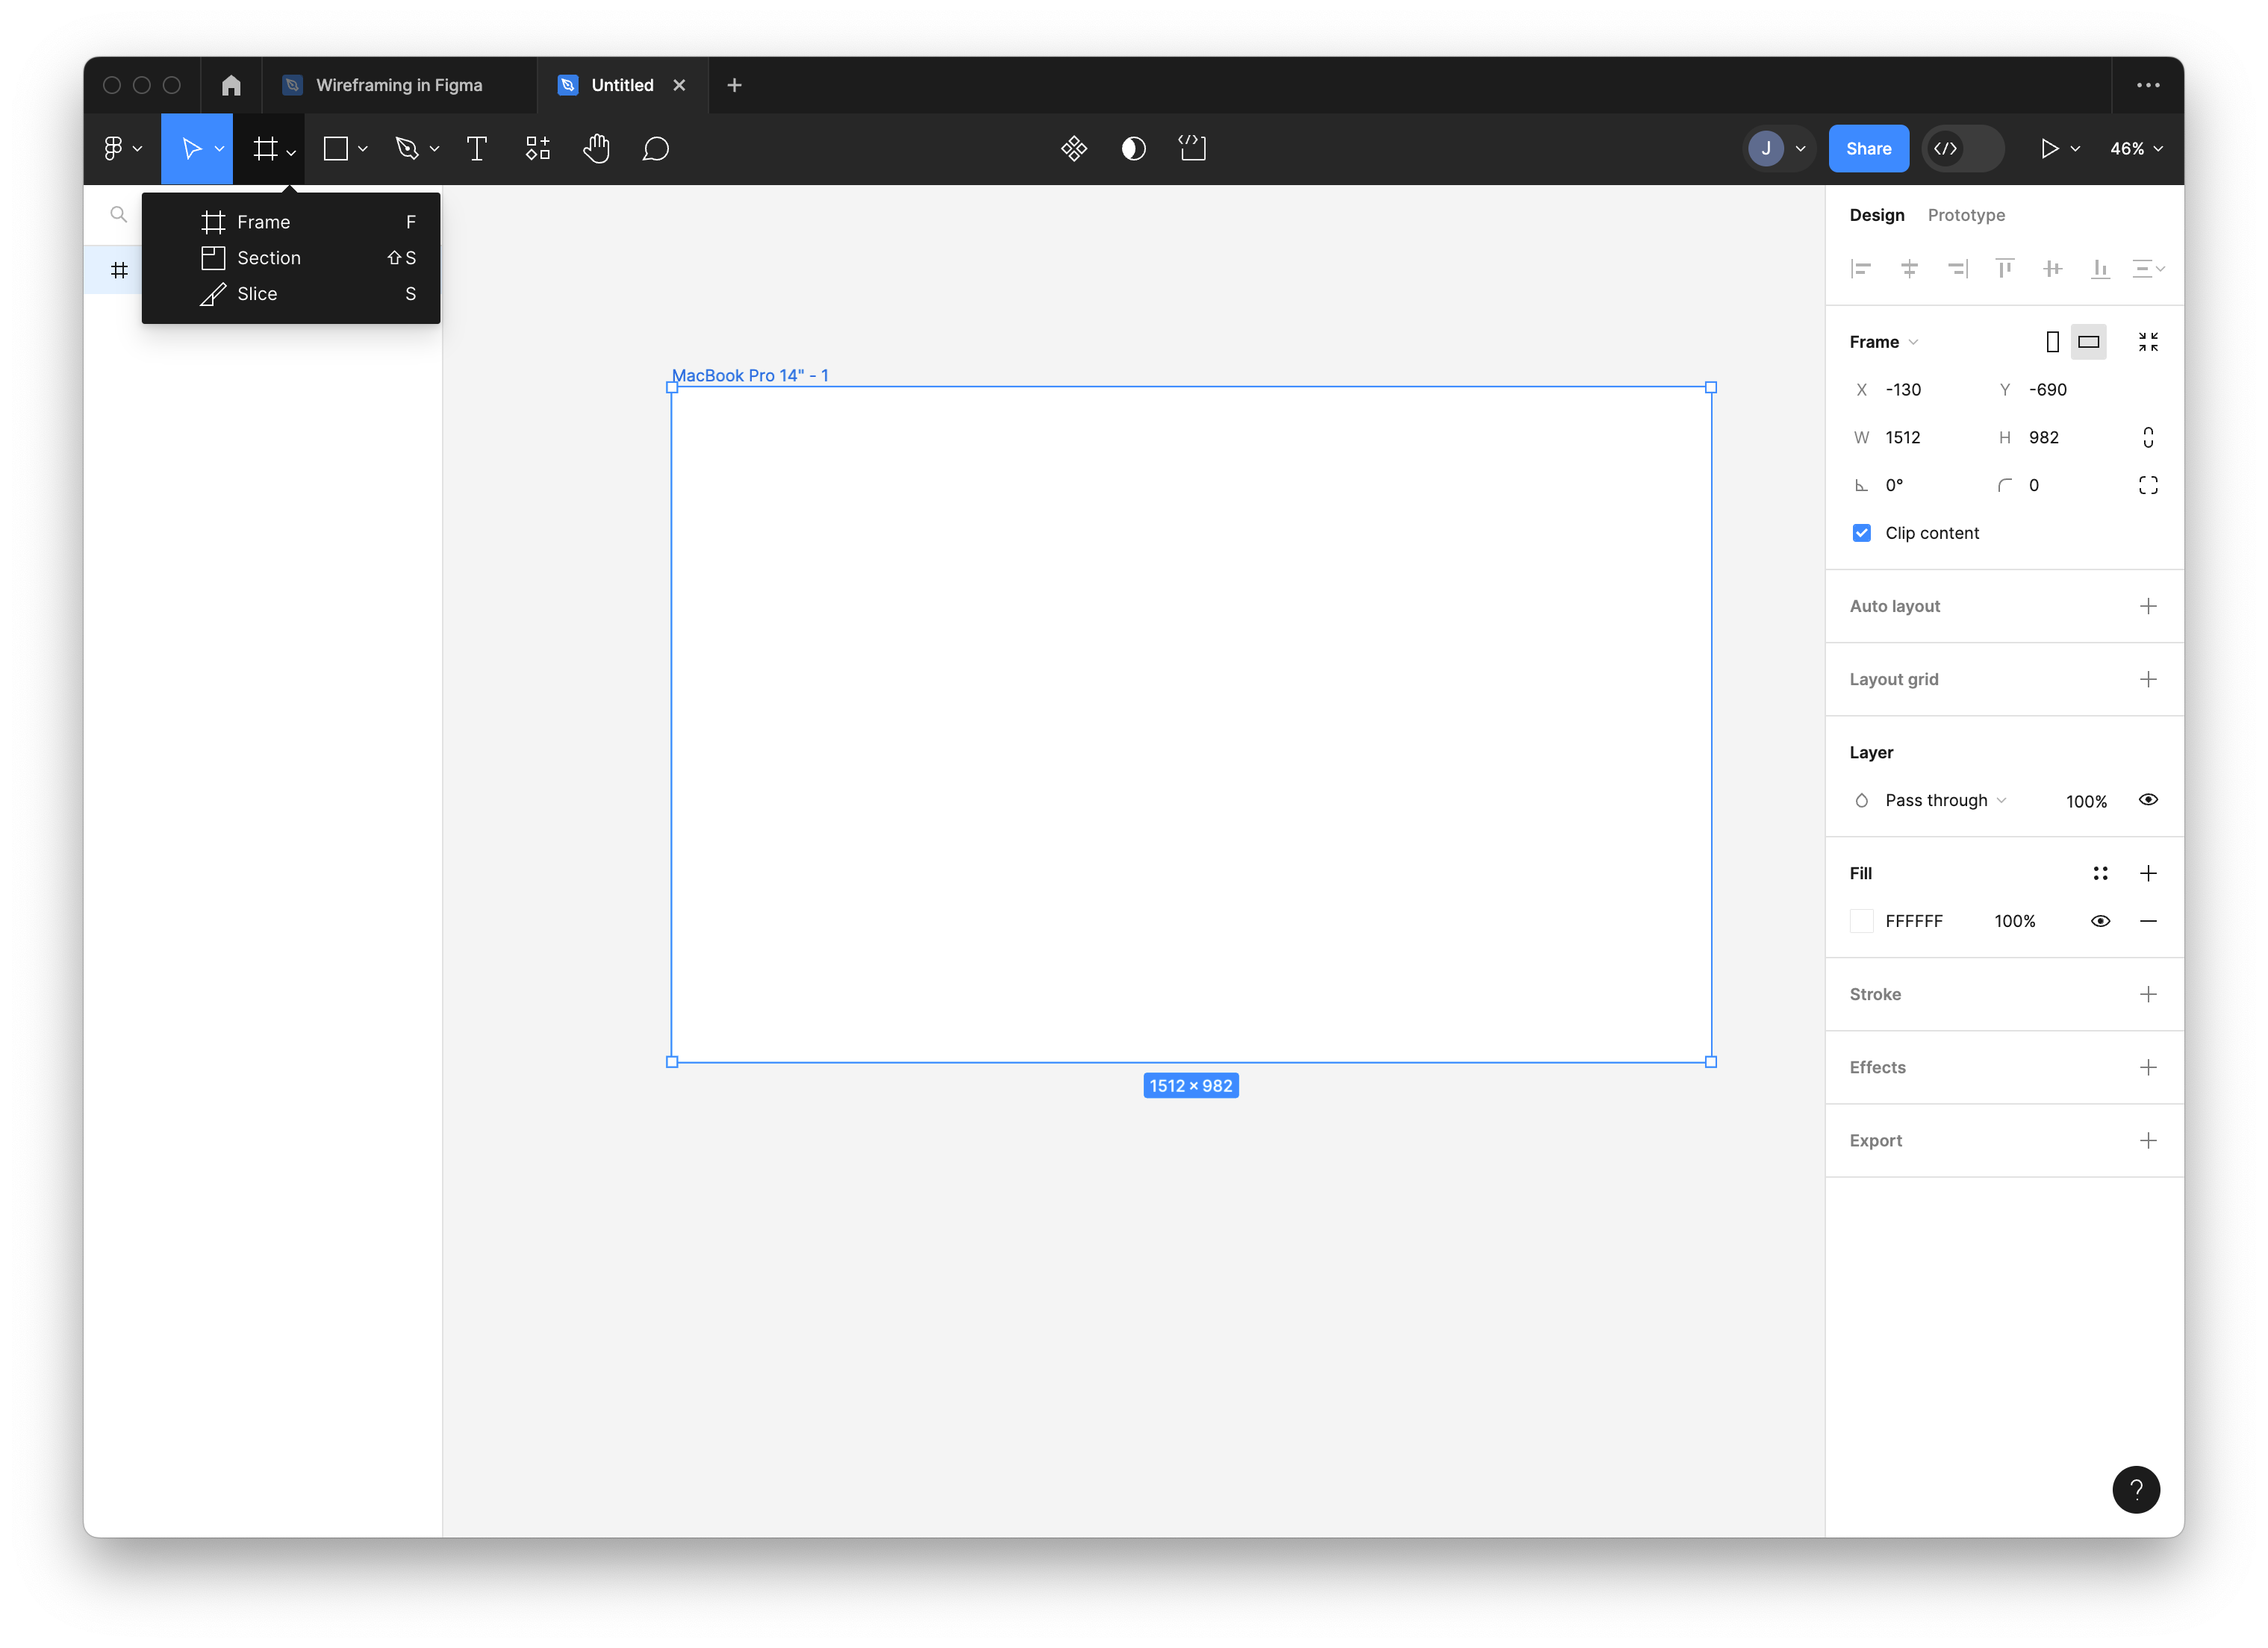
You can build your UI screen by
- Adding a frame,
- Adding primitive shapes (rectangles, circles) to represent UI elements. Use the property sheet on the right-hand side to align, change properties, and so on.
This is slow; you can also import and use Component Libraries that the Figma community has made available. In a browser, navigate to the Figma Community page. From this page, you can search and import libraries directly into your Figma account.
A library is just a set of predefined components. Using a library instead of designing your own has some advantages:
- You can save a lot of time!
- The components in a library will have a similar look-and-feel.
- You can use libraries to mimic the appearance of standard platforms e.g., iOS.
For example, here’s a sheet from the Mobile Wireframe library, which includes iOS, Android components.
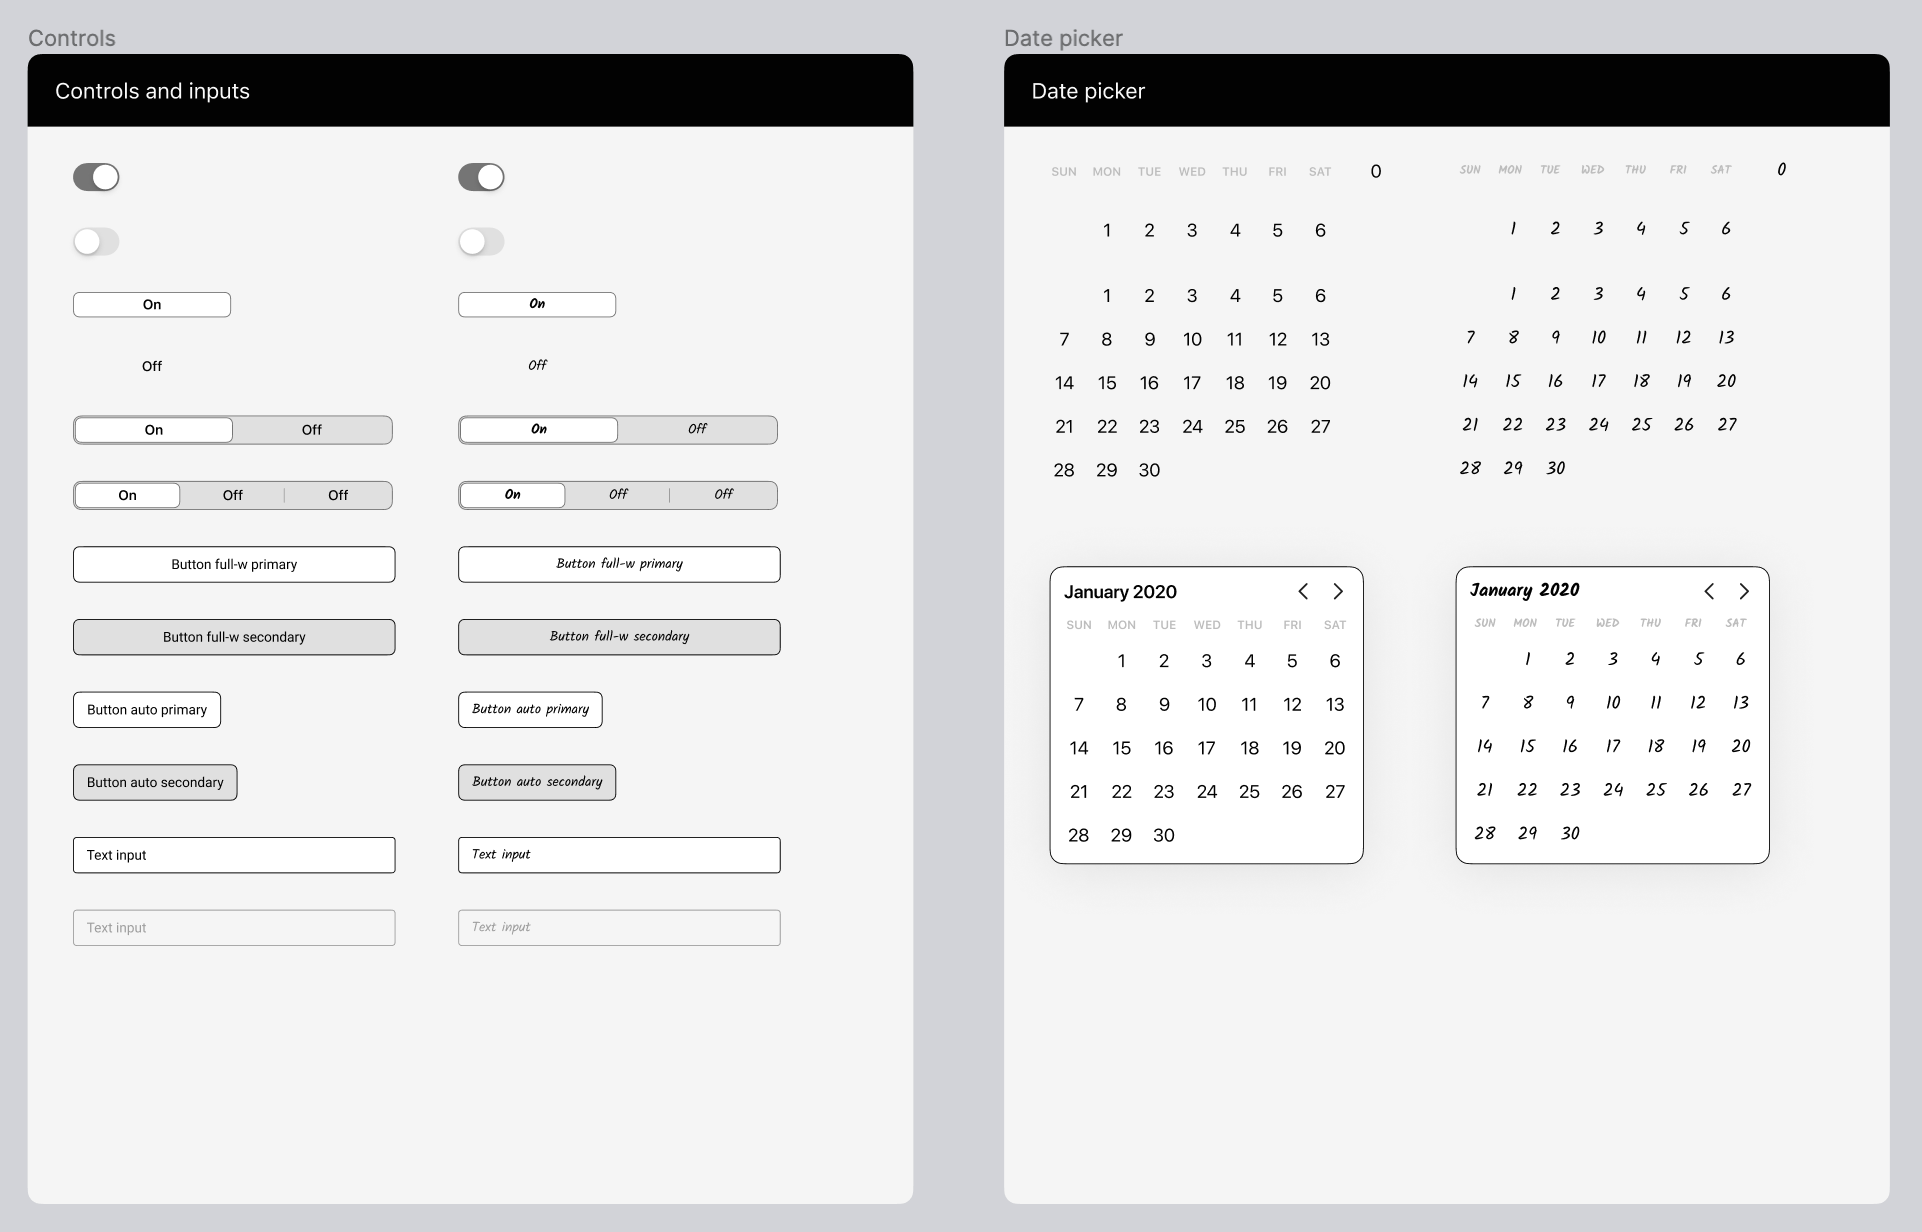
You can create a new diagram, and copy-paste these components into your screens. Minimally, your initial prototypes should include labelled wireframe diagrams for every screen (displaying the structure of your application and each of the screens).
To do anything more complicated, it’s recommended that you review the Figma Documentation or watch some introductory videos.
Phase III: Materialize
5. Test
This step involves taking your prototype back to your users, and allowing them to walk through it. Your goal is to collect their feedback! You want to address questions like:
- Does this solve your problem?
- Is it easy to understand? To use?
- Does (this functionality) make sense to you?
- What would you change?
Action: Collect feedback
Write down feedback and take it back to your team. Iterate!
6. Implement
At some point, you will have enough feedback to be able to proceed with the actual implementation. You should still demo occasionally to users, but you have enough information to proceed.
We’ll cover implementation in the development section.
Last Word
https://imgs.xkcd.com/comics/new_products.png
Software design
How should you structure software? What do we mean by “good code”?
Architecture
Before proceeding further, we should discuss how to structure an application properly. This requires a broader discussion of software architecture, and software qualities.
What is architecture?
Expert developers working on a project have a shared understanding of the system design. This shared understanding is called ‘architecture’ and includes how the system is divided into components and how the components interact through interfaces.
— Martin Fowler, Who Needs an Architect? (2003).
Architecture is the holistic understanding of how your software is structured, and the effect that structure has on it’s characteristics and qualities. Architecture as a discipline suggests that structuring software should be a deliberate action.
Decisions like “how to divide a system into components” have a huge impact on the characteristics of the software that you produce.
- Some architectural decisions are necessary for your software to work properly.
- The structure of your software will determine how well it runs, how quickly it performs essential operations, how well it handles errors.
- Well-designed software can be a joy to work with; poorly-designed software is frustrating to work with, difficult to evolve and change.
I like this quote by Bob Martin:
It doesn’t take a huge amount of knowledge and skill to get a program working. Kids in high school do it all the time… The code they produce may not be pretty; but it works. It works because getting something to work once just isn’t that hard.
Getting software right is hard. When software is done right, it requires a fraction of the human resources to create and maintain. Changes are simple and rapid. Defects are few and far between. Effort is minimized, and functionality and flexibility are maximized.
— Robert C. Martin, Clean Architecture (2016).
In Martin’s view, software should be enduring. Software that you produce should be reliable, and continue to function for a long period of time. You should expect to make adjustments over time as defects are found and fixed, and new features are introduced, but these changes should be relatively easy to make.
Building software to this level of quality does not happen accidentally, but requires deliberate action on our part.

https://www.atr.org/40-years-of-failure-irs-unable-to-fix-computer-system/
Software qualities
Let’s think about the qualities that we want in the software that we build. What would we expect from any piece of software that we produce?
1. Usability
A system must be usable for its intended purpose, and meet its design objectives. This includes both functional and non-functional requirements.
- Functional: features that are required to address the problem that the software is intended to solve; desirable features for our users.
- Non-Functional: qualities or characteristics of software that emerge from its structure. e.g., performance, reliability and other quality metrics.
Usability requires us to carefully ensure that we are meeting all reasonable requirements up-front, typically by collaborating with our users to define problems and solutions. See Process Models.
2. Extensibility
You should expect to adapt and modify your software over a lifetime of use:
- You will find errors in your code (aka bugs) that will need to be addressed.
- You might find that requirements were incomplete, so existing features may need to be modified.
- You might uncover new features that need to be implemented.
- Your operating environment might change (e.g. OS update) which necessitates updates.
We need to design systems such that you can respond and adapt your software to these changes, effectively, and with the least amount of work.
Your design goal is not to deliver software once, it’s to design in a way that supports delivering frequently and reliably over the life of your solution.
3. Scalability
Extensibility refers to handling new or changing requirements. Scalability refers to the ability to handle increased data, number of users, or features. e.g., an online system might initially need to handle hundreds of concurrent users, but could be expected to scale to tends of thousands over time. Scalability is challenging because you don’t want to incur the deployment costs up-front, but instead you want to design in a way that lets you expand your system over time. This can include replacing modules with more capable ones at a later time, e.g., swapping out a low-performance database for something more performant.
4. Robustness
The system should be able to handle error conditions gracefully, without compromising data. This includes user input errors, errors processing data from external sources, and recovering from error conditions, e.g., power outages.
5. Reusability
Software is expensive and time-consuming to produce, so anything that reduces the required cost or time is welcome. Reusability or code reuse is often positioned as the easiest way to accomplish this. Reusing code also reduces defects, since you’re presumably reusing code that is tested and known-good.
I see three levels of reuse. At the lowest level, you reuse classes: class libraries, containers, maybe some class “teams” like container/iterator.
Frameworks are at the highest level. They really try to distill your design decisions. They identify the key abstractions for solving a problem, represent them by classes and define relationships between them. JUnit is a small framework, for example. It is the “Hello, World” of frameworks. It has Test, TestCase, TestSuite and relationships defined.
A framework is typically larger-grained than just a single class. Also, you hook into frameworks by subclassing somewhere. They use the so-called Hollywood principle of “don’t call us, we’ll call you.” The framework lets you define your custom behaviour, and it will call you when it’s your turn to do something. Same with JUnit, right? It calls you when it wants to execute a test for you, but the rest happens in the framework.
There also is a middle level. This is where I see patterns. Design patterns are both smaller and more abstract than frameworks. They’re really a description about how a couple of classes can relate to and interact with.
– Shvets (citing Erich Gamma), Dive Into Design Patterns (2019).
Architectural styles
How do we produce software with these qualities? Often by examining systems that have already been built, that exhibit qualities that we like.
In the same way that software developers use design patterns to describe useful and recurring software patterns, we use architectural styles to describe useful ways of structuring your code. There are a large number of architectural styles. In this course, we will focus on the subset of patterns that are most commonly used in building applications1.
Ball-of-Mud
Architects refer to the lack of any discernible architecture structure as a Big Ball of Mud.
A Big Ball of Mud is a haphazardly structured, sprawling, sloppy, duct-tape-and-baling-wire, spaghetti-code jungle. These systems show unmistakable signs of unregulated growth, and repeated, expedient repair. Information is shared promiscuously among distant elements of the system, often to the point where nearly all the important information becomes global or duplicated. – Foote & Yoder 1997.

A Big Ball of Mud isn’t intentional—it’s the result of a system being tightly coupled, where any module can reference any other module. A system like this is extremely difficult to extend or modify.
| Quality | How it applies |
|---|---|
| Usability | Medium - it’s possible to hack something together once |
| Extensibility | Low - it’s difficult to modify |
| Scalability | Low - it’s probably not very efficient |
| Robustness | Low - likely not very reliable |
| Reusability | Low - no way that you can untangle this! |
Pipeline architecture
Simple applications may be non-interactive: they accept their initial inputs, perform some operations and return a result. Many command line applications follow this pattern e.g., commands like netstat or ls, that simply run and return results.
How would we model this type of system? One possibility would be to design it as a pipeline architecture.
A pipeline (or pipes and filters) architecture transforms data in a sequential manner. It consists of components linked together in a specific fashion:
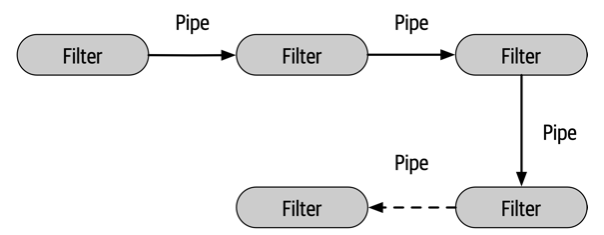
Pipes form the communication channel between filters. Each pipe is unidirectional, accepting input on one end, and producing output at the other end.
Filters are entities that perform operation on data that they are fed. Each filter performs a single operation, and they are stateless. There are different types of filters:
- Producer: The outbound starting point (also called a source).
- Transformer: Accepts input, optionally transforms it, and then forwards to a filter (this resembles a map operation).
- Tester: Accepts input, optionally transforms it based on the results of a test, and then forwards to a filter (this resembles a reduce operation).
- Consumer: The termination point, where the data can be saved, displayed etc.
These abstractions may appear familiar, as they are used in shell programming. It’s broadly applicable anytime you want to process data sequentially, according to fixed rules. Examples include: photo manipulation software, shells. Pipelines aren’t suitable for many current applications which are designed around user-interaction.
| Quality | How it applies |
|---|---|
| Usability | High - if it supports your requirements, it likely works well |
| Extensibility | High - it’s easy to add more components! |
| Scalability | Low - sequential so likely not very performant (in this form) |
| Robustness | High - high cohesion makes it robust |
| Reusability | Medium - you may be able to extract components |
Layered architecture
A layered architecture is an architectural style that attempts to handle modularity by organizing software into horizontal layers:
- Each layer is a module, containing classes with similar functionality.
- There is no limit to the number of layers, although the four illustrated below are common.
- Each layer provides services to the layers above it.
- Dependencies are top-down only. e.g. the UI depends on the underlying business layer, which depends on the persistence layer and so on.
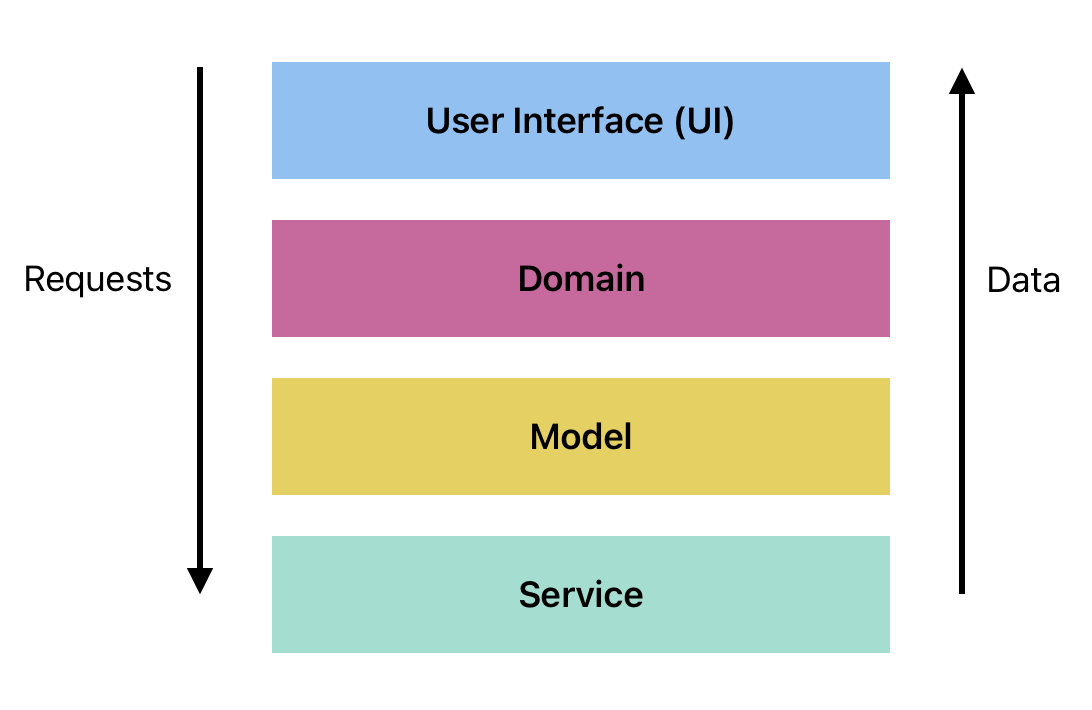
Standard layers in this style of architecture include:
- User Interface (Presentation) Layer: UI layer that the user interacts with.
- Domain (Business Logic) Layer: the application logic, or “business rules” for the application.
- Model (Persistence) Layer: describes how to manage and save application data.
- Database Layer: the underlying data store that actually stores the data.
The major characteristic of a layered architecture is that it enforces a clear separation of concerns between layers: the User Interface layer doesn’t know anything about the application state or logic, it just displays the information; the Domain layer knows how to manipulate the data, but not how it is stored and so on.
Data is passed back up the layers through dependency inversion: the use of interfaces to decouple the lowest layers from the rest of the application.
| Quality | How it applies |
|---|---|
| Usability | High - clear separation, covers many styles of application |
| Extensibility | Medium - fairly easy to extend or add new layers |
| Scalability | Low - it’s a pretty rigid structure |
| Robustness | Low - rigid structure |
| Reusability | High - layers can be repurposed! |
A layered architecture is an extremely common way to build an application. It falls out of some organizational styles quite naturally (see Conway’s Law).
- Front-end developers and designers work on the User Interface (UI) and Domain layers.
- Back-end and database developers work on the Model and Service layers.
- Full-stack developers integrate these layers.
Can we use a layered architecture for interactive, graphical applications? Can it handle all of our specific requirements?
Graphical applications
To start, let’s think about the features that every software application needs to support. Are there specific structural requirements for our applications?
1. Graphical interface All modern applications are graphical, and (practically) a lot of the application’s graphical capabilities will need to be isolated. At first glance, this is particularly well-suited to a layered architecture; we can isolate the graphical elements in the top-level presentation layer which can handle displaying them in the appropriate hardware.
2. Interactive
Practically all applications are interactive. Fundamentally, they revolve around an interaction cycle between the user and the system:
- The system launches and waits for user input.
- The user provides some input e.g., presses keys on a keyboard, moves a mouse, swipes on a screen.
- The system processes that input.
- The results e.g., output are displayed for the user.
The cycle looks something like this:
This loop is effectively the same across all interactive applications, including desktop, mobile and even console applications.
- Users perform actions with the user interface e.g., enter a command, tap/swipe on a phone, point/click with a mouse.
- The application responds to those user actions, by performing some computation, or fetching data or whatever else needs to be done.
- The results need to be sent back to the user interface to be displayed as output. This can be graphical, text, audio or any other suitable response that communications the result to the user.

We could model this simple interaction cycle as two components: one representing the user’s input-output and the second as the system that is interacting with them. Communication between them is done using events: messages between these components to represent either the user’s input, or the system’s output to display. This works fine for simple systems.
3. Multiple input sources However, systems are rarely this simple. We often have multiple sources of data, and multiple sources of input that we need to manage.
In addition to the user interaction cycle (above), we can also have other events:
- The operating system may send events to your application that are not triggered by a user action. e.g., a timer ticking to indicate that time has elapsed, or a notification being sent to your application from some other service, or window-management events from the OS itself.
- Your application might request remote data which arrives after some delay. e.g., scrolling through a list of images that are on a remote site, while the list continues to populate in the background.
- Interruptions to your applications workflow based on some other high priority event. e.g., receiving a phone call while watching a video, and the phone call “forces itself” to the foreground.
A simple interaction cycle doesn’t handle these scenarios very well. We need to consider a more robust model that can address data coming in from other sources in any order.

(resizing the window) and system events (the
clock hand moving every second).
When discussing situations like this, we often differentiate between control-flow vs. data-flow in an application.
- Control-flow refers to the path of execution: the order in which functions are called, code is executed and so on. In an event-based architecture, this is often the path that events take to flow through the system.
- Data-flow refers to the path through which data flows through the system, typically from some data source to a user-viewable output.
GUI patterns
To address these concerns, let’s dig into some specific patterns which have been developed for user applications. You can think of these as refinements to a layered architecture that we will use to address specific requirements of interactive GUI applications.
Model-View-Controller (MVC)
Model-View-Controller (MVC) was created by Trygve Reenskaug for Smalltalk-79 in the late 1970s as a method of structuring interactive applications. It suggests that an application should consist of the following components:
Model: the information or program state that you are working with,View: the visual representation of the model, andController: which lays out and coordinates multiple views on-screen, and handles routing user-input.

In a “standard MVC” implementation, input is accepted and interpreted by the Controller class, and routed to the Model, where it changes the program state (in some meaningful way). These changes are published to the View through a notification system so that the changes can be reflected to the user.
MVC is probably the most commonly used (and most heavily reworked) architectural pattern, having been used in web development since the 1990s. Many application frameworks e.g., Java Swing have adapted it as their underlying UI model.
Here’s a simple MVC implementation, using the Observer pattern for Model/View notifications. The model implements the Publisher interface, and each View is a Subscriber. There can be more than one View (just as there can be more than one UI screen) and each one can receive a notification when the state changes. The View ultimately determines how to output the results.
classDiagram
    View "1" --> "1" Controller
    Controller "1" --> "1" Model

    Subscriber "1" <|.. "1" View
    Publisher <|.. Model
    Subscriber "*" <-- "*" Publisher

    class View {
        data: Data
        +display(data)
    }

    class Controller {
        view: View
        model: Model
        +invoke(event)
    }

    class Model {
        data: Data
        +sort(data)
    }

    class Subscriber {
        <<Interface>>
        +update()
    }

    class Publisher {
        <<Interface>>
        List~Subscriber~ subscribers
        -notify()
    }
However, there are a few challenges when implementing this version of MVC.
- Graphical user interfaces bundle the input and output together into graphical “widgets” on-screen (which we will explore further in the user interfaces section). This makes input and output behaviours difficult to separate, so in-practice, the controller class is rarely implemented.
- Modern applications tend to have multiple screens (either multiple windows open, or multiple screens in -memory that the user switches between). This model does not handle screen coordination terribly well.
- A single monolithic model should usually be split into multiple models, to reflect specialized data needs of each screen.
There have been a number of variant versions of MVC (MVP, MVVM, MVI). Let’s discuss a very popular specialization: MVVM.
Model-View-ViewModel (MVVM)
Model-View-ViewModel was invented by Ken Cooper and Ted Peters in 2005. Based on Martin Fowler’s Presentation Model, it was intended to simplify event-driven programming and user interfaces in C#/.NET.
MVVM suggests two major changes from MVC:
- MVVM removes the Controller class, and
- MVVM adds a data container class named the
ViewModel, that sits between theViewandModel.
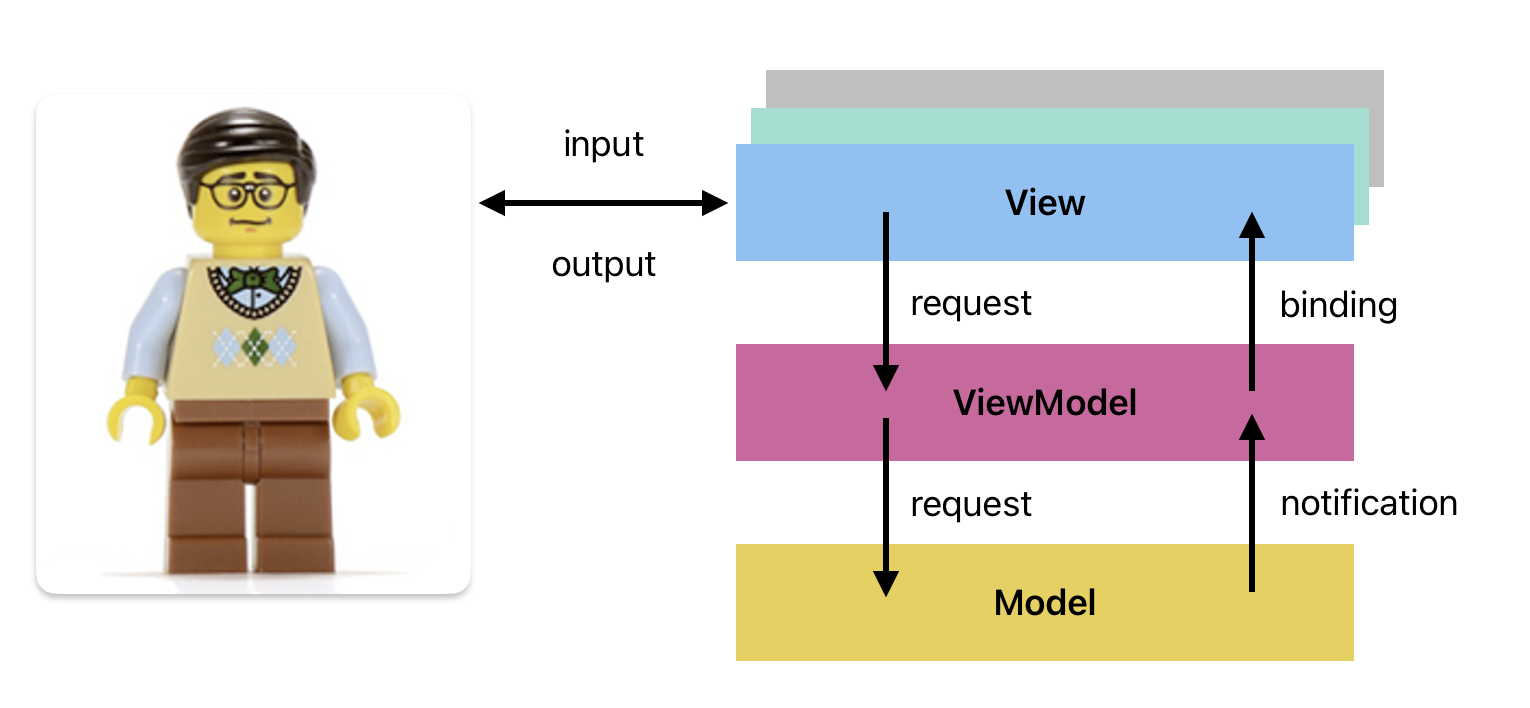
This reduces our application to the following components:
Model: As with MVC, the Model is the primary Domain object, holding the application state.View: The structure, layout and presentation of what is on-screen. With modern toolkits, the View handles both input and output i.e. the complete user experience.ViewModel: A component that stores data that is relevant to the View to which it is associated. This may be a simple subset of Model data, but is more often a reinterpretation of that data in a way that makes sense to the View e.g., dollar amounts in USD in the Model may be reflected in a local currently in the ViewModel.
One interesting trend that works in favor of MVVM is the idea of reactive programming, where changes in one component are automatically published to other interested components. MVVM is often implemented in a way where we can use a binding mechanism to map variables in the ViewModel directly to widgets in the View, so that updating one directly updates the other.
What is the benefit of a ViewModel?
- We will often want to pull “raw” data from the Model and modify it before displaying it in a View e.g., currency that is stored in USD but should be displayed using a local currency.
- We sometimes want to make local changes to data, but not push them automatically to the Model e.g., undo-redo where you don’t persist the changes until the user clicks a Save button.
MVVM recommends that you have one ViewModel for each View, and that ViewModel manages all data for that View. It looks something like this:
classDiagram
    ISubscriber "1" <|.. "1" ViewModel
    IPublisher <|.. Model
    ISubscriber "*" <.. "*" IPublisher

    View "1" --> "1" ViewModel
    View "1" <-- "1" ViewModel
    ViewModel "*" <.. "*" Model

    class View {
        -Model model
        -ViewModel viewModel
    }

    class ISubscriber {
        <<Interface>>
        +update()
    }

    class ViewModel {
        -View view
        -Model model
        +update()
    }

    class IPublisher {
        <<Interface>>
        -List~Subscriber~ subscribers
        +notify()
    }

    class Model {
        +var data
        +subscribe(ISubscriber)
        +unsubscribe(ISubscriber)
    }
MVVM is common in modern languages and toolkits, but it’s just one variant of MVC. There are many other variants (e.g. Model-View-ViewController) which deviate from “standard” MVC, usually in an attempt to solve a particular problem in a more elegant fashion. They all build on the same observer foundation.
MVVM is an elegant solution to our first requirement: it handles the interaction cycle pretty well!
However it doesn’t handle our second requirement: multiple data sources. How could MVVM handle inputs from multiple sources? What if you needed to access other resources like files, databases, APIs. How do you integrate these?
Layered architecture
The trick to getting MVC to work properly, in meeting all of our requirements is to merge it with the classic layered architecture. There are many variations to a layered architecture that attempt to handle GUI interaction. The critical part of this pattern isn’t the number of layers, or even the names of the layers; it’s the way that the layers communicate, how control and data is passed between layers.
We’ll use a layered architecture with the following four layers:
User Interface: This is the same layer we introduced in the MVVM section above. (In fact, we will implement it using View and ViewModel classes, since that was such a useful idea).Domain: Classes that model your particular problem/user stories. These are often your data classes or representational classes that are specific to your application. e.g., if you are building a Recipe tracking application, your Domain layer would include classes like Recipe, RecipeList, RecipeFolder and so on. Domain-specific logic typically goes here.Model: This is the same layer that we introduced in MVVM, that stores the primary application state. It’s the “source of truth” for your application.Service: This is an API or interface to a system that will retrieve data for our application. This could be called a Database layer or Repository layer in other layered architectures. I prefer the termService layerbecause in modern applications, we’re as likely to be pulling in data from a remote API as we are from a remote database. Fundamentally, there are data providers for the Model.

The characteristics of this approach:
- Each layer contains one or more classes with similar functionality. Classes can freely communicate within their layer.
- Dependencies between layers are top-down. i.e., the UI has a reference to the Domain layer, and can pass requests down to it; the Domain layer in turn can only communicate down to the Model layer. Layers call “down” to perform some service.
- As a rule, requests (messages) flow down, and notifications (data) flow back up.
For example, if the user interacts with the User Interface layer to direct it to perform some action, a message is generated that represents that action. This message flows down through each successive layer, triggering behaviour in each layers. In response, data flows back up. e.g., imagine clicking on a button to request details on a customer record; a message would be sent to the Domain layer, which would work a query directing the Model to get data, and return it to the User Interface layer.
Let’s discuss the layers and how they relate to one another.
Layers
User Interface (UI) layer
The User Interface, or Presentation layer, is the part of your application that the user interacts with (i.e. the “person” side of the interaction diagram). This is responsible for handling user input, and expressing output. This layer can be quite complex since it handles IO for all devices (keyboards, mice, touchpads) as well as the UI that the user interacts with (console, graphical).
Graphical interfaces typically consist of multiple screens, each with their own interaction support and visual representation. The layer itself will commonly include a large number of specialized classes (which we will discuss further below).
Domain layer
The Domain layer describes the application logic for our program. e.g., rules for managing customer data, or bank transactions, or how to combine ingredients in a recipe, or whatever else is needed. It serves as an intermediate layer between the raw data (e.g., records from the Model) and how that data is presented (e.g., screens in the UI layer).
Small applications sometime omit the domain layer (so that the architecture simply consists of user-interface and model layers). In this course, we will keep the domain layer; it makes SoC and testing much easier to achieve, even if our Domain layer just ends up being a few data classes.
Model layer
The actual application data being stored in memory, is often pulled from different sources e.g., bank transactions fetched from a database, user profile information stored in a preferences file. The model is meant to be the primary representation of the data in our application (the “single source of truth” in our application). The model is ultimately responsible for consolidation and presenting data to the rest of the application.
Service layer
This is a representation of the storage mechanism that actually retrieves or persists data. This can take many forms, from files on a file-system, to records in a relational database, or a bytestream from a DVD or some form of storage. The model interacts directly with service layer to fetch and manage this data and present it to other layers.
Sometimes, in simple architectures, this layer will not be shown, and is instead collapsed into the Model layer. In this course (and in general), we prefer to keep it as a separate layer, since it’s not unusual to have multiple forms of storage at-play in our application e.g., imagine a Twitter client that pulls tweets from a remote API (one source), uses a local data file to store application preferences (a second source) and a remote database to store account information (a third source).
Data is passed back up the layers through dependency inversion: the use of interfaces keeps layers isolated.
Dependencies (down)
What do we mean by dependencies being directed down?
Imagine that we have simple classes for a CustomerView (e.g., a customer record screen in the user interface layer) and a CustomerModel (e.g., a class in the model layer that stores customer information). Dependencies being directed down means that the View classes can reference the Model classes directly, but not the other way around.
In the example below, we show part of an application (simplified, using the layers as class names for illustration). The UI layer can use (depend) on the Domain layer and any classes it contains. This is a one-way dependency; the Domain classes are not allowed to have any reference back to the UI layer.
classDiagram
    UI "*" --> "*" Domain
    Domain "*" --> "1" Model
    Model "1" --> "*" Service

    class UI {
        data: Data
        +display(data)
    }

    class Domain {
        data: Data
        +sort(data)
    }

    class Model {
        data: Data
        +add(data)
        +del(data)
    }

    class Service {
        data: Data
        +load() data
        +save(data)
    }
Notifications (up)
What do we mean by data being directed up?
The Model needs to have some way of notifying the View that the data has changed, without a direct reference to that view (“loose coupling”, remember?).
The Model doesn’t have a directly reference to the View, so what do we do? We use a loose coupling mechanism to send messages to the View. This is effectively the Observer design pattern, where the View (ISubscriber interface) is registers itself with the Model (IPublisher). The Model publishes changes to all registered Views when they occur.
This mechanism works for any data change in the model e.g., a system event causes the data to change, or data changes in the database, or the user changes data in one window causing a second window to update).
Here’s a simple example with notifications using the Publisher/Subscriber interfaces.
classDiagram

    Subscriber "1" <|.. "1" UI
    Publisher <|.. Model
    Subscriber "*" <-- "*" Publisher

    class UI {
        data: Data
        +display(data)
    }

    class Subscriber {
        <<Interface>>
        +update()
    }

    class Publisher {
        <<Interface>>
        List~Subscriber~ subscribers
        -notify()
    }

    class Model {
        data: Data
        +add(data)
        +del(data)
        +subscribe(Subscriber)
        +unsubscribe(Subscriber)
    }
Abstraction
Finally, one important piece of this approach is the use of Interfaces to promote loose coupling. By describing component relationships in terms of behaviours we have the flexibility to swap in new implementations at any time (abstractions not concretions).
This is especially important for
Subscribers: we want any form of user interface to be able to receive notifications, not just GUI screens. e.g., we might send output to a voice dictation system, or a printer. I once worked on a project where the build output would trigger a lava lamp to light up (green for a passed build, red for a failed one!).Publishers: we want the flexibility of multiple models. We may not do this in production, but we can certainly do it when testing.Services: finally, we want to be able to request data and save data to a variety of services without knowing the implementation details. e.g., your model shouldn’t know the details of how to save to a SQL database, it should rely on an abstraction that exposes save behaviour. This let us swap databases, or even just save data to a file for testing instead of our remote DB.
Implementation
Full diagram
Here’s the full diagram, with all of the required classes for a layered architecture (including View/ViewModels and Services).
Notice that I’m reverting back to View and ViewModel for terminology; I think it sounds more coherent compared to ViewModel and UI.
classDiagram

    View "1" --> "1" ViewModel
    ViewModel "1" --> "*" Domain
    Domain "*" --> "1" Model
    Model "1" --> "*" Servicer

    Subscriber "1" <|.. "1" ViewModel
    Publisher <|.. Model
    Subscriber "*" <-- "*" Publisher
    Servicer <|.. Service

    class View {
        data: Data
        +display(data)
    }

    class ViewModel {
        model: Model
        +update()
    }

    class Domain {
        data: Data
        +sort(data)
    }

    class Subscriber {
        <<Interface>>
        +update()
    }

    class Publisher {
        <<Interface>>
        List~Subscriber~ subscribers
        -notify()
    }

    class Servicer {
        <<Interface>>
        data: Data
        +load()
        +save()
    }

    class Model {
        data: Data
        +add(data)
        +del(data)
        +subscribe(Subscriber)
        +unsubscribe(Subscriber)
    }

    class Service {
        data: Data
        +load()
        +save()
    }
Sample code
The diagrams in the previous section above are treating each layer as if it was a single class named for that layer e.g., a UI class, a Domain class and so on. This is almost never going to be true; layers will usually consists of a number of related classes, each responsible for different parts of that layer.
Let’s imagine a simple application with a single View, ViewModel and Model. Here’s what the code would look like.
In our Main class, we instantiate classes and use dependency injection to connect our class instances. These should mirror the relationships on our diagram above.
// main class
class Main {
    val model = Model()
    val viewModel = ViewModel(model)
    val view = View(viewModel)
    model.add(viewModel)
}
The Subscriber interface is an abstraction for any class that wants to be notified of model changes. Any class can act like a view as long as it supports the appropriate method to allow notifications from the model. In this case, our ViewModel is the Subscriber. It will be subscribed for Model updates, and will take care of notifying its associated View as needed.
// UI classes
interface Subscriber {
  fun update()
}

class View(val viewModel: ViewModel) {
    // some user interface class that relies in the viewModel for its state
    // assume it can pull state from the viewModel and display it
}

class ViewModel(val model: Model) : Subscriber {
    override fun update() {
        // this method is called by the Publisher (aka Model) when data updates
        // fetch data from model when the model updates
    }
}
The Publisher (aka Model) maintains a list of all Subscribers (aka ViewModels), and notifies each one of them when its state changes. The Publisher has no control over how they react; each Subscriber must decide what to do with the update basd on whether the data is relevant to them. i.e., they might ignore the notification if it’s data they don’t use, or they might choose to fetch updated data from the Model.
In the code below, the Publisher is an abstract class (vs. an interface) so that we can add default implementation code for managing the Subscriber list.
abstract class Publisher {
    val views: List<Subscriber> = emptyList()

    fun addView(view: Subscriber) {
        views.add(view)
    }

    fun update() {
        for (view : views) {
            view.update()
        }
    }
}

class Model {
    fun fetchData() {
        // do something that causes data to change
        update() // notify subscribers
    }
}
Benefits
Layering our architecture really helps to address our earlier goals (reducing coupling, setting the right level of abstraction). Additionally, it provides these other specific benefits to our application:
- Independence from frameworks. The architecture does not depend on a particular set of libraries for its functionality. This allows you to use such frameworks as tools, rather than forcing you to cram your system into their limited constraints.
- It becomes more testable. Layers can be tested independently of one another. e.g., the business rules can be tested without the UI, database, web server, or any other external element.
- Independence from the UI. The UI can be changed without changing the rest of the system. A web UI could be replaced with a console UI, for example, without changing the business rules.
- Independence from the data sources. You can swap out Oracle or SQL Server for Mongo, BigTable, CouchDB, or something else. Your business rules are not bound to the database or to the source of your data.
-
I highly recommend taking CS 446 as a followup course; it introduces many of these styles. ↩
Design principles
Now that we’ve discussed high-level principles of software architecture, we should review lower-level concerns aka design issues. Let’s start by reviewing SOLID principles.
SOLID principles
SOLID was introduced by Robert (“Uncle Bob”) Martin around 2002. Some ideas were inspired by other practitioners, but he was the first to codify them.
The SOLID Principles tell us how to arrange our functions and data structures into classes, and how those classes should be interconnected. The goal of the principles is the creation of mid-level software structures that:
- Tolerate change (extensibility),
- Are easy to understand (readability), and
- Are the basis of components that can be used in many software systems (reusability).
If there is one principle that Martin emphasizes, it’s the notion that software is ever-changing. There are always bugs to fix, features to add. In his approach, a well-architected system has features that facilitate rapid but reliable change.
The SOLID principles are as follows. The diagrams and examples are from Ugonna Thelma’s Medium post “The S.O.L.I.D. Principles in Pictures.”
1. Single Responsibility
“A module should be responsible to one, and only one, user or stakeholder.”
– Robert C. Martin (2002)
The Single Responsibility Principle (SRP) claims to result in code that is easier to maintain. The principle states that we want classes to do a single thing. This is meant to ensure that are classes are focused, but also to reduce pressure to expand or change that class. In other words:
- A class has responsibility over a single functionality.
- There is only one single reason for a class to change.
- There should only be one “driver” of change for a module.
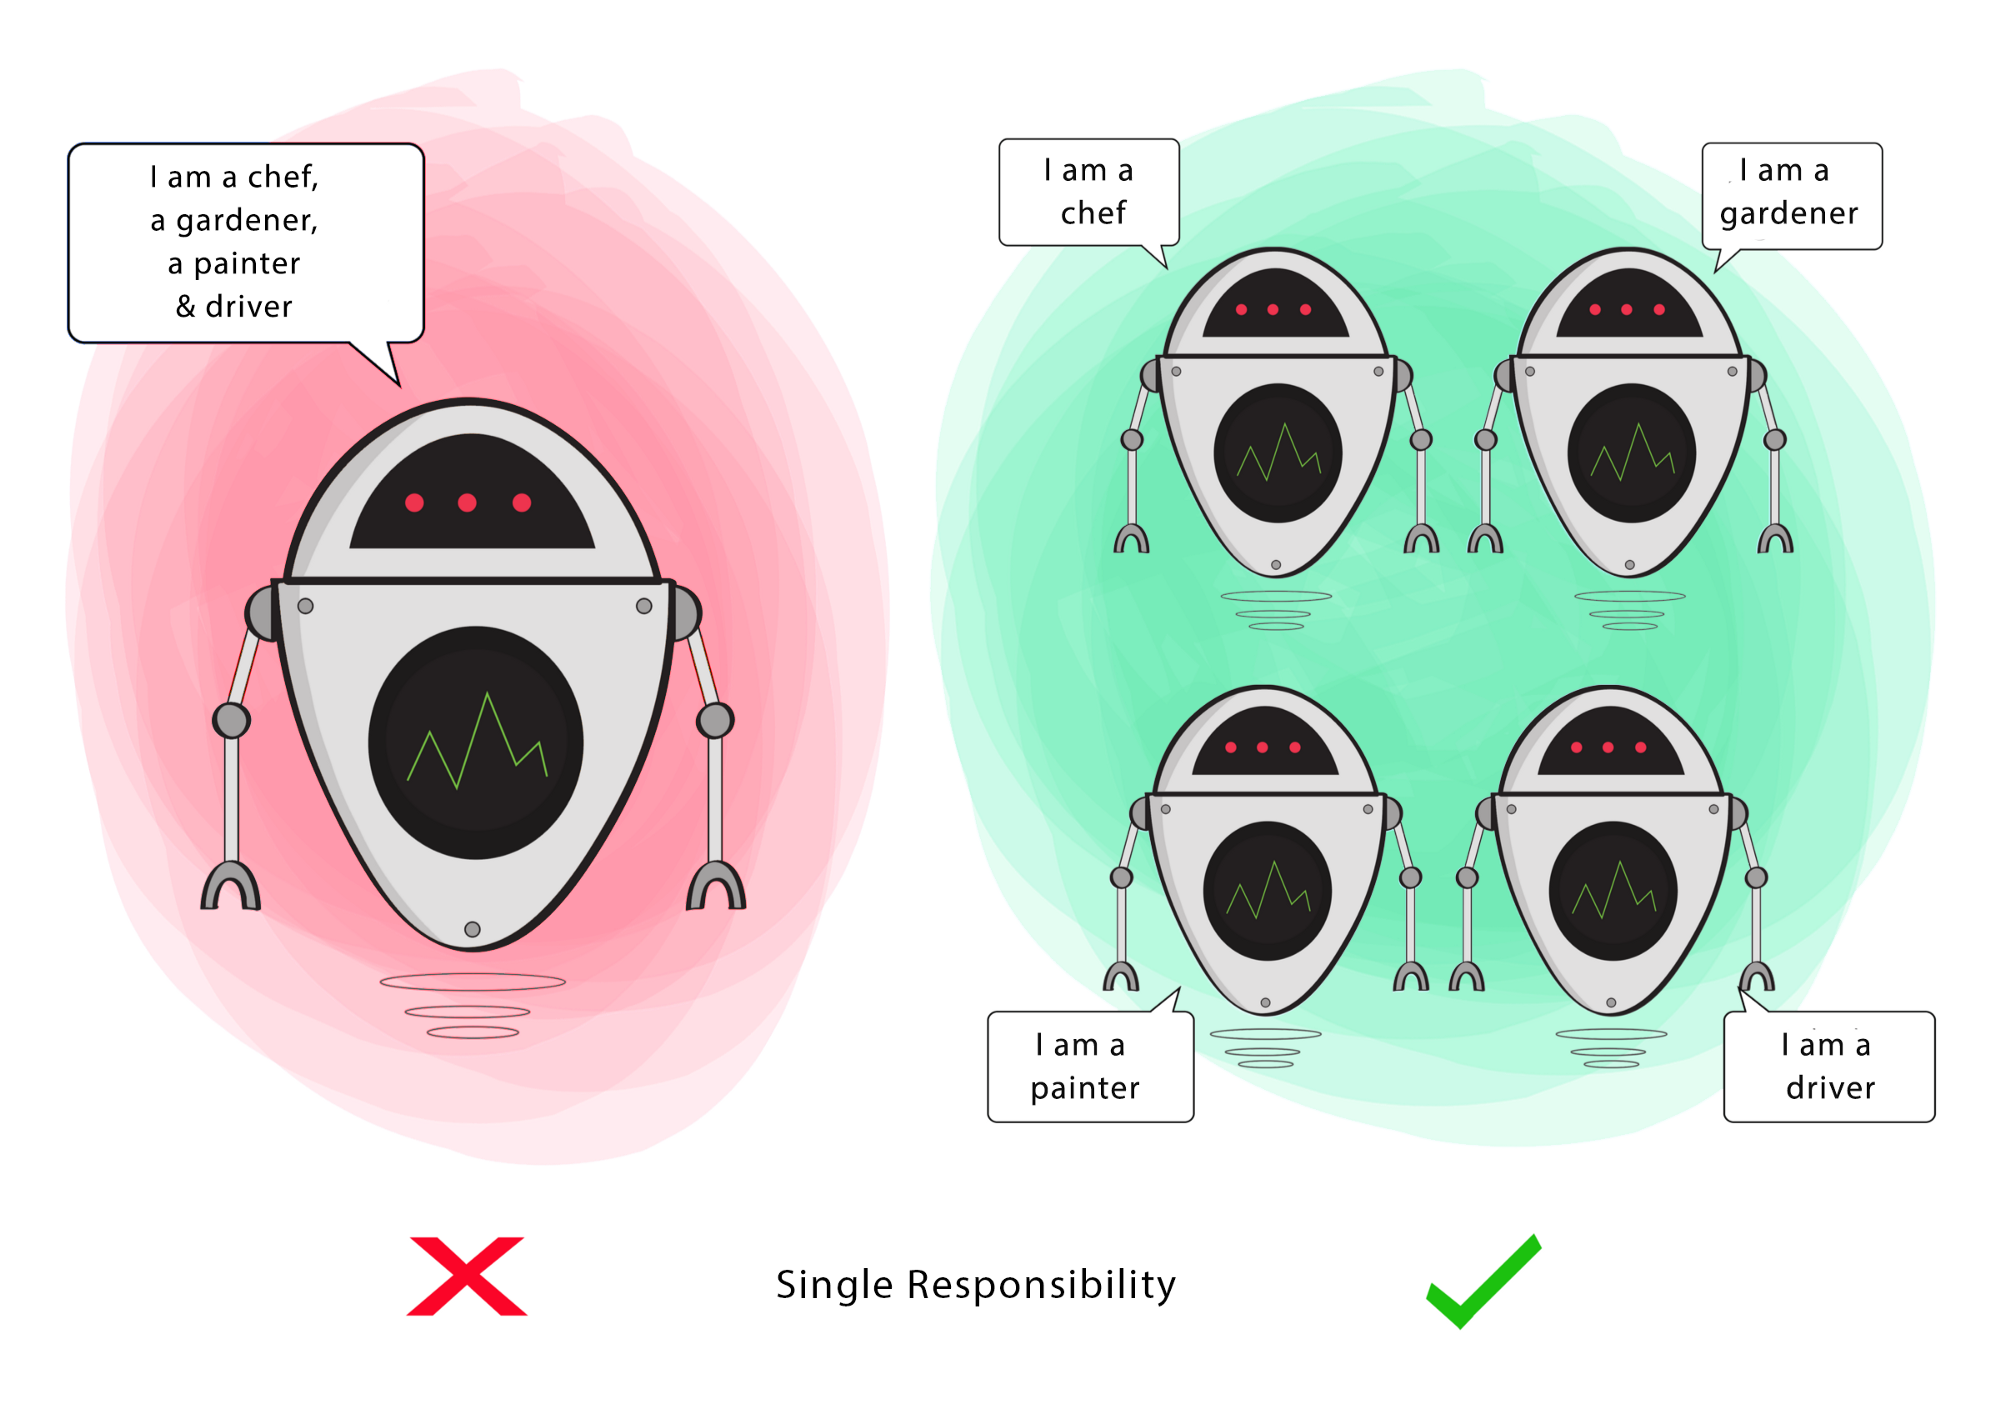
Single-responsibility can also apply to a module, or component or any other unit. Cohesion!
2. Open-Closed Principle
“A software artifact should be open for extension but closed for modification. In other words, the behavior of a software artifact ought to be extensible, without having to modify that artifact.” – Bertrand Meyers (1988)
This principle champions sub-classing as the primary form of code reuse.
- A particular module (or class) should be reusable without needing to change its implementation.
- Often used to justify class hierarchies (i.e. derive to specialize).
This principle is also warning against changing classes in a hierarchy, since any behavior changes will also be inherited by that class’s children! In other words, if you need different behavior, create a new subclass and leave the existing classes alone.
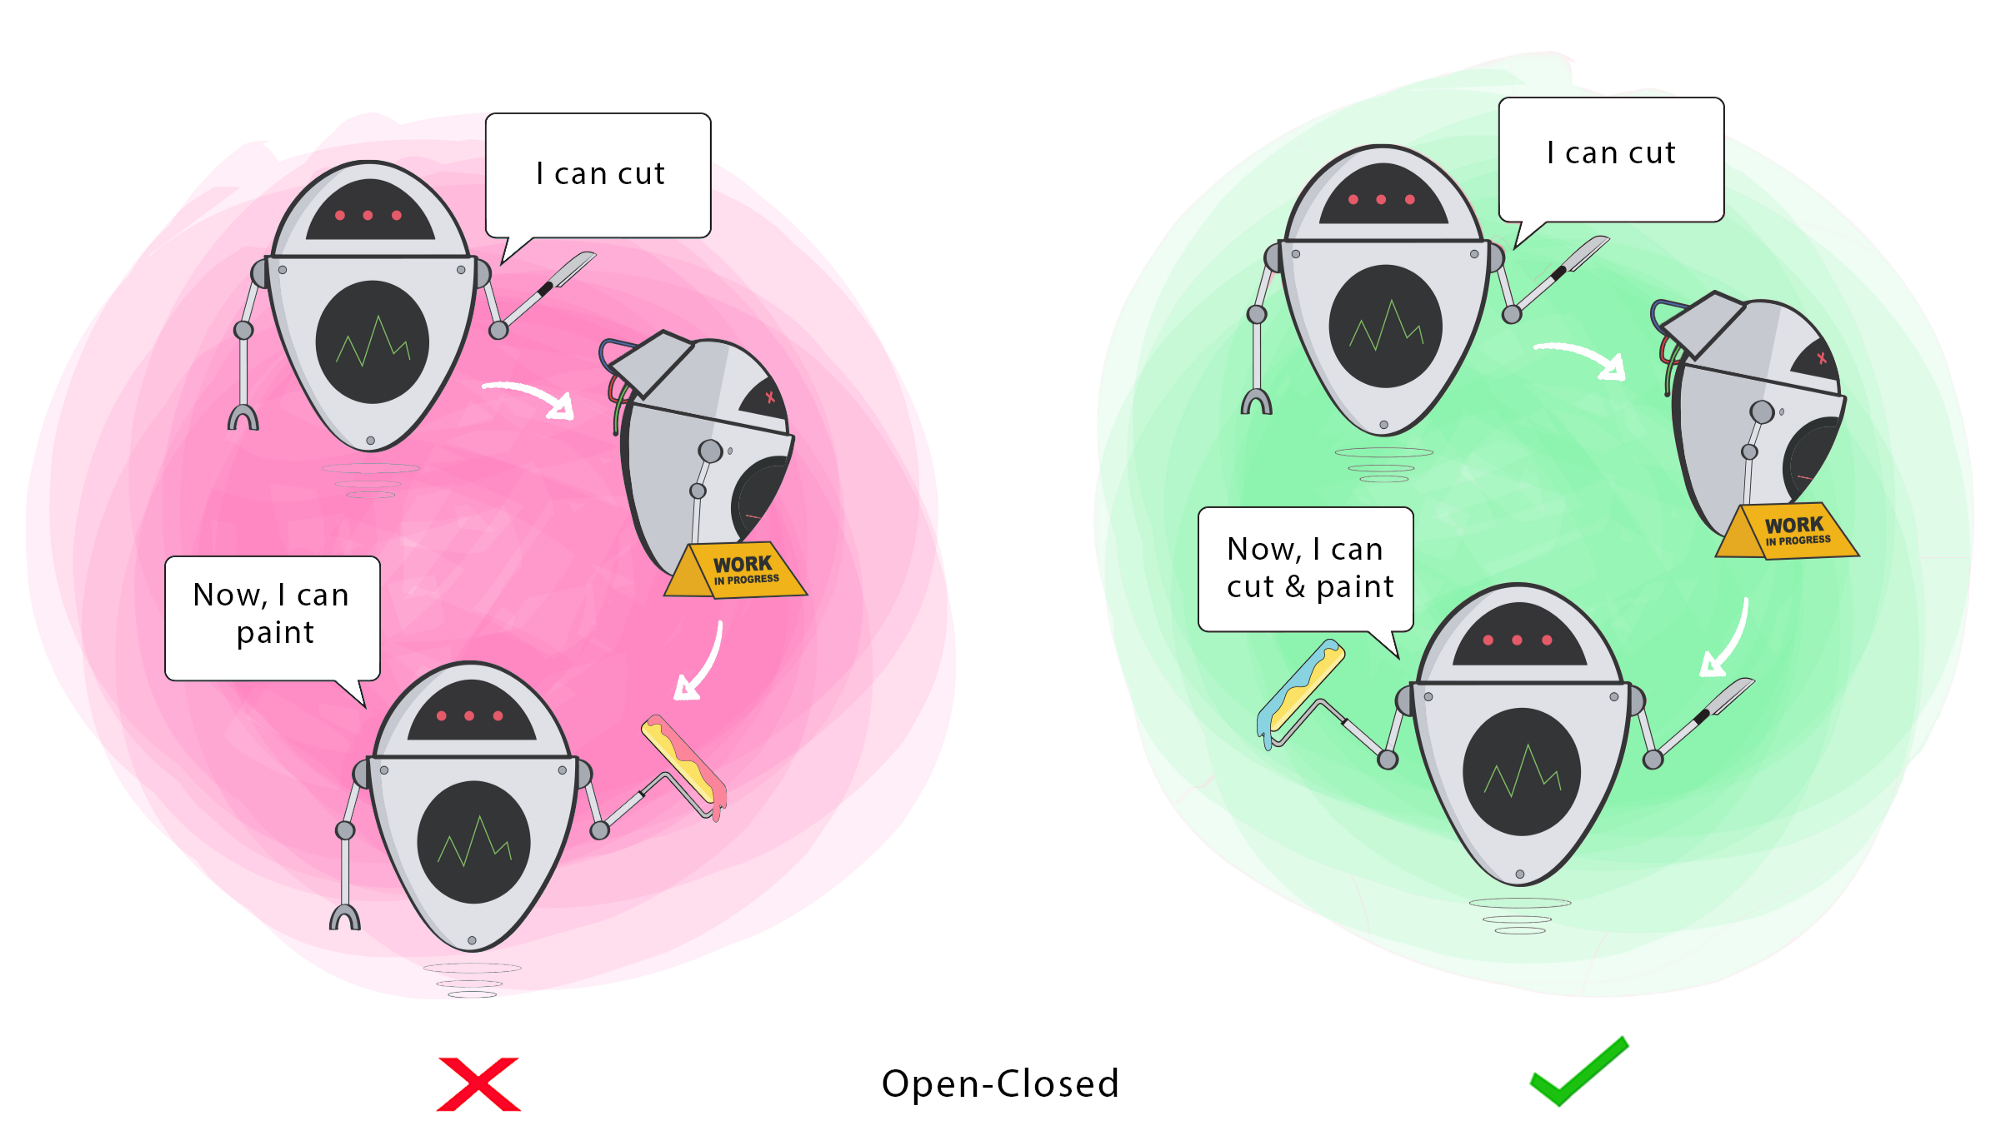
The Design Pattern principle of Composition over inheritance runs counter to this, suggesting instead that code reuse through composition is often more suitable.
3. Liskov-Substitution Principle
“If for each object o1 of type S there is an object o2 of type T such that for all programs P defined in terms of T, the behaviour of P is unchanged when o1 is substituted for o2, then S is a subtype of T.” – Barbara Liskov (1988)
It should be possible to substitute a derived class for a base class, since the derived class should still be capable of all the base class functionality. In other words, a child should always be able to substitute for its parent.
In the example below, if Sam can make coffee but Eden cannot, then you’ve modelled the wrong relationship between them.
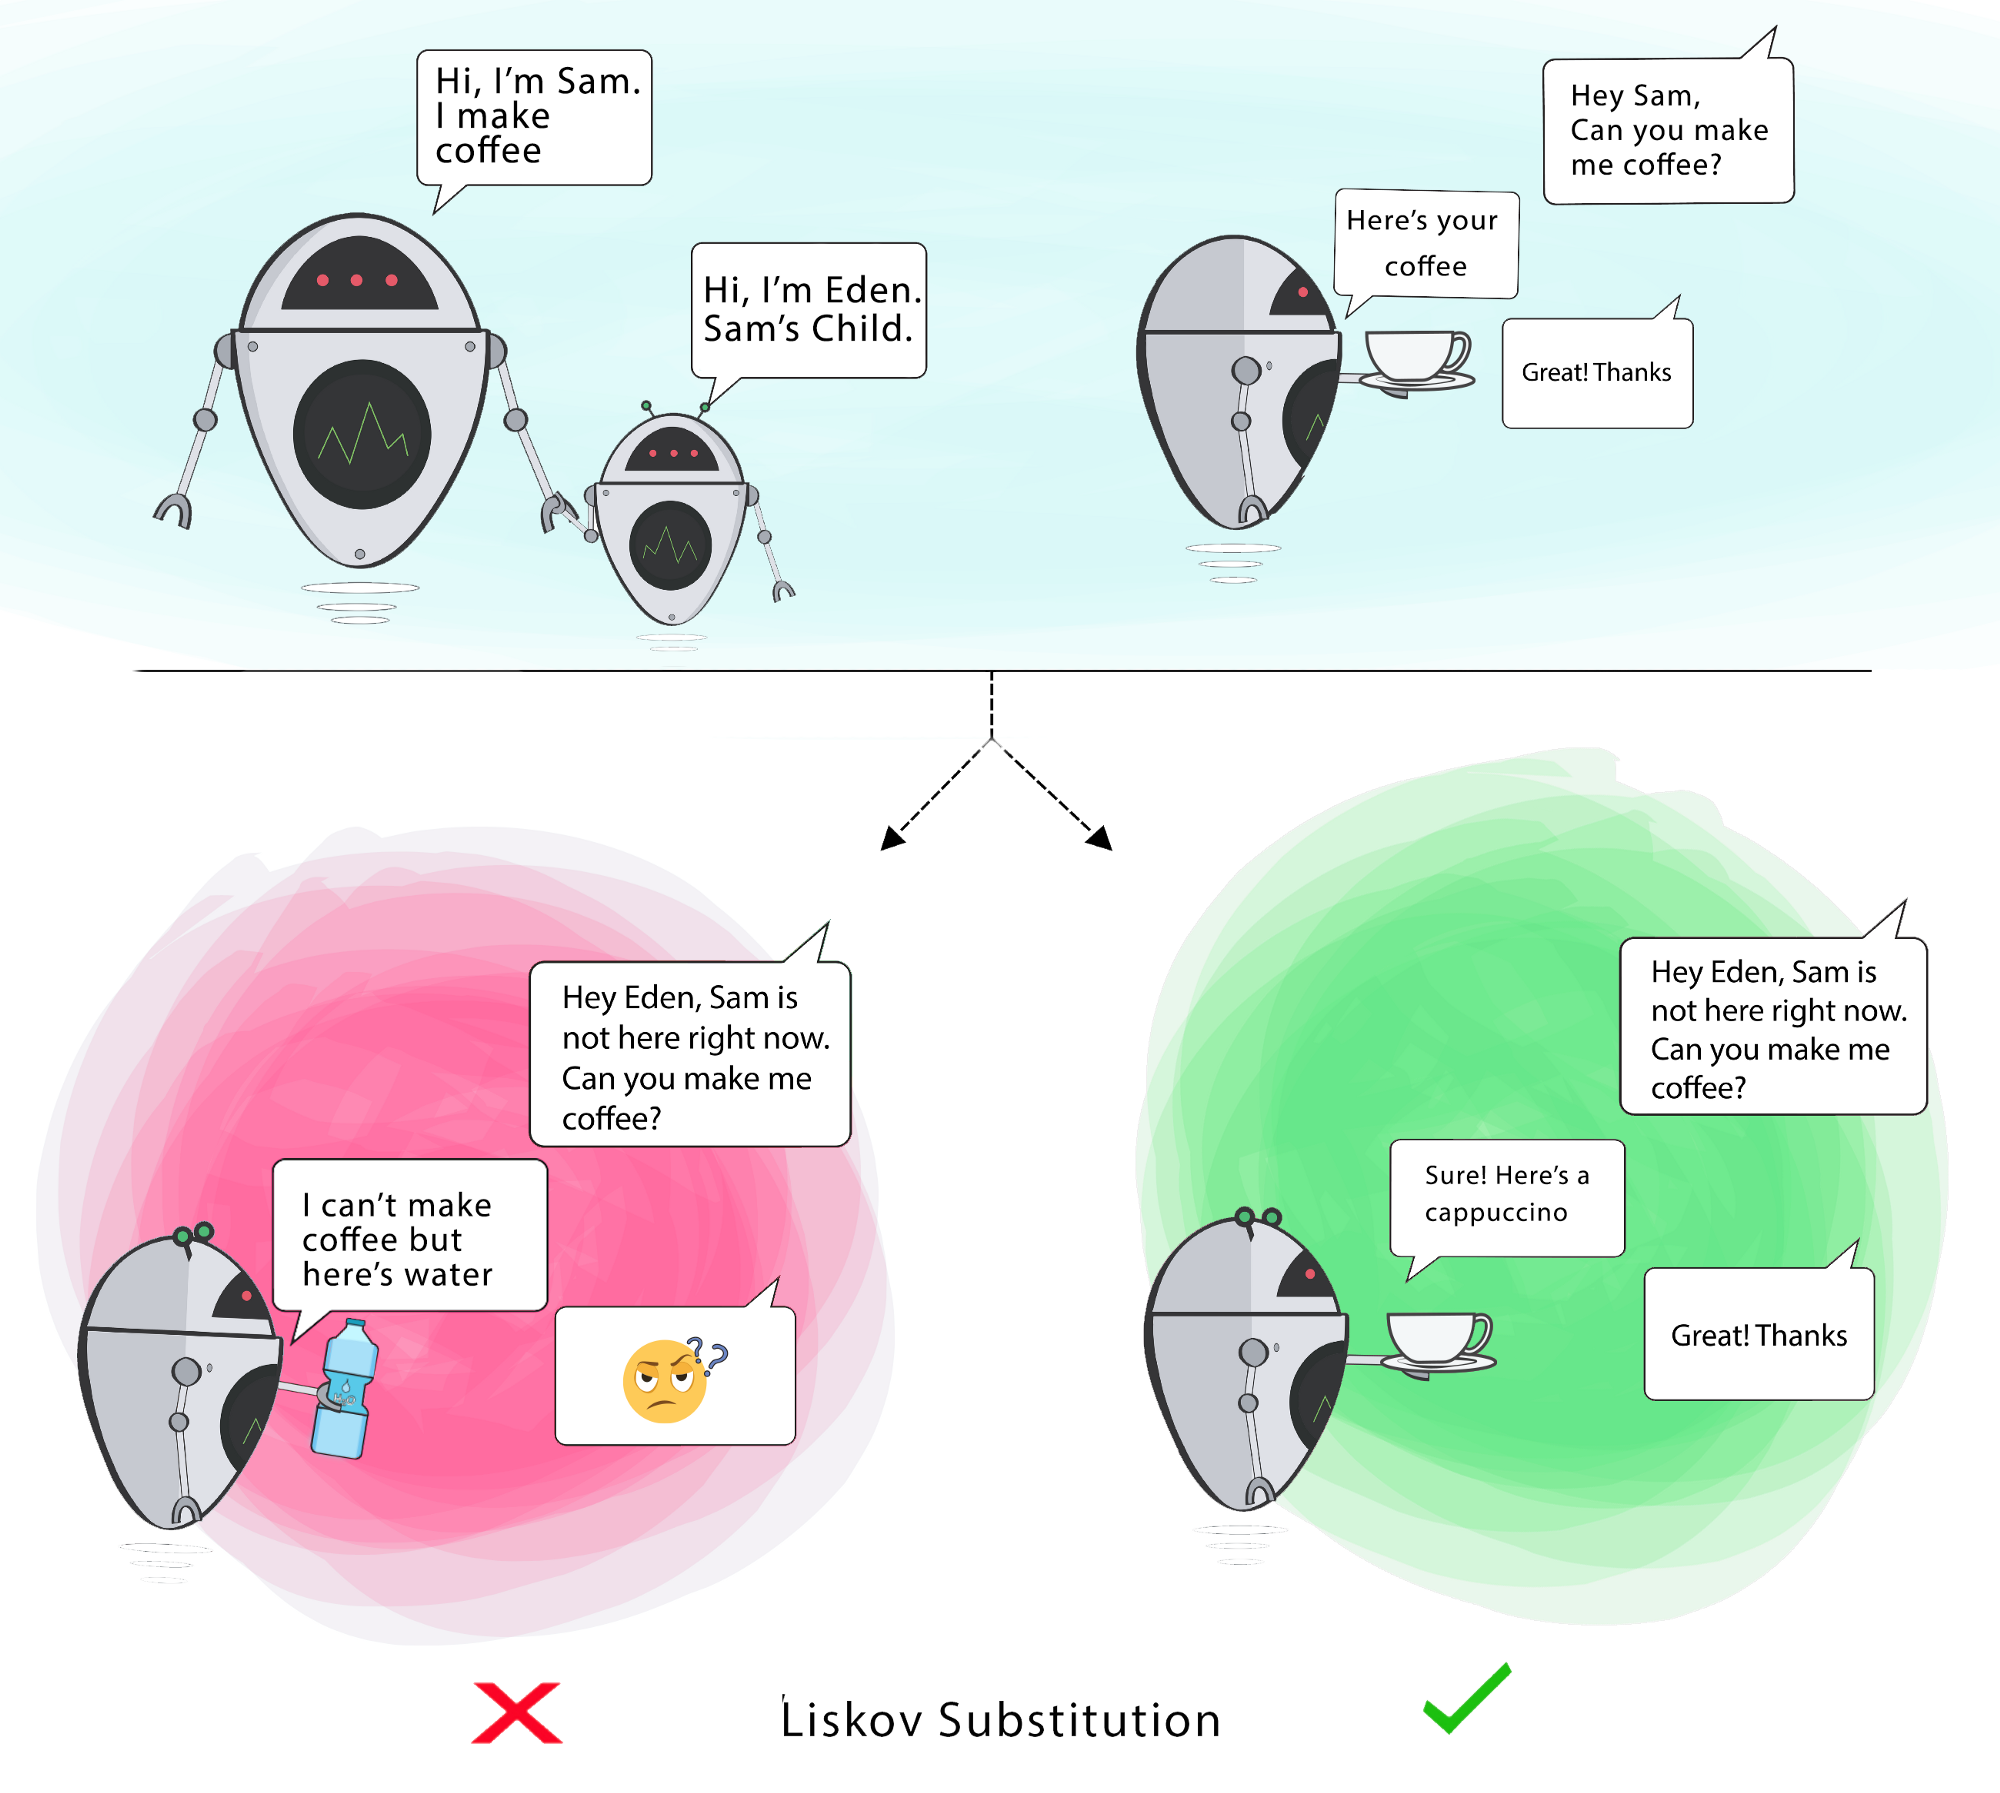
Don’t get hung up on the “subclass” part of this principle. It applies to any type-of relationships. Remember interfaces? They effectively act as a
super-typeby specifying behaviors that all of their concretions promise to implement.
4. Interface Substitution
It should be possible to substitute classes based on their interface; behavior should be independently of the implementation classes.
Also described as “program to an interface, not an implementation.” This means focusing your design on what the code is doing, not how it does it. Never make assumptions about what the underlying code is doing—if you code to the interface, it allows flexibility, and the ability to substitute other valid implementations that meet the functional needs.
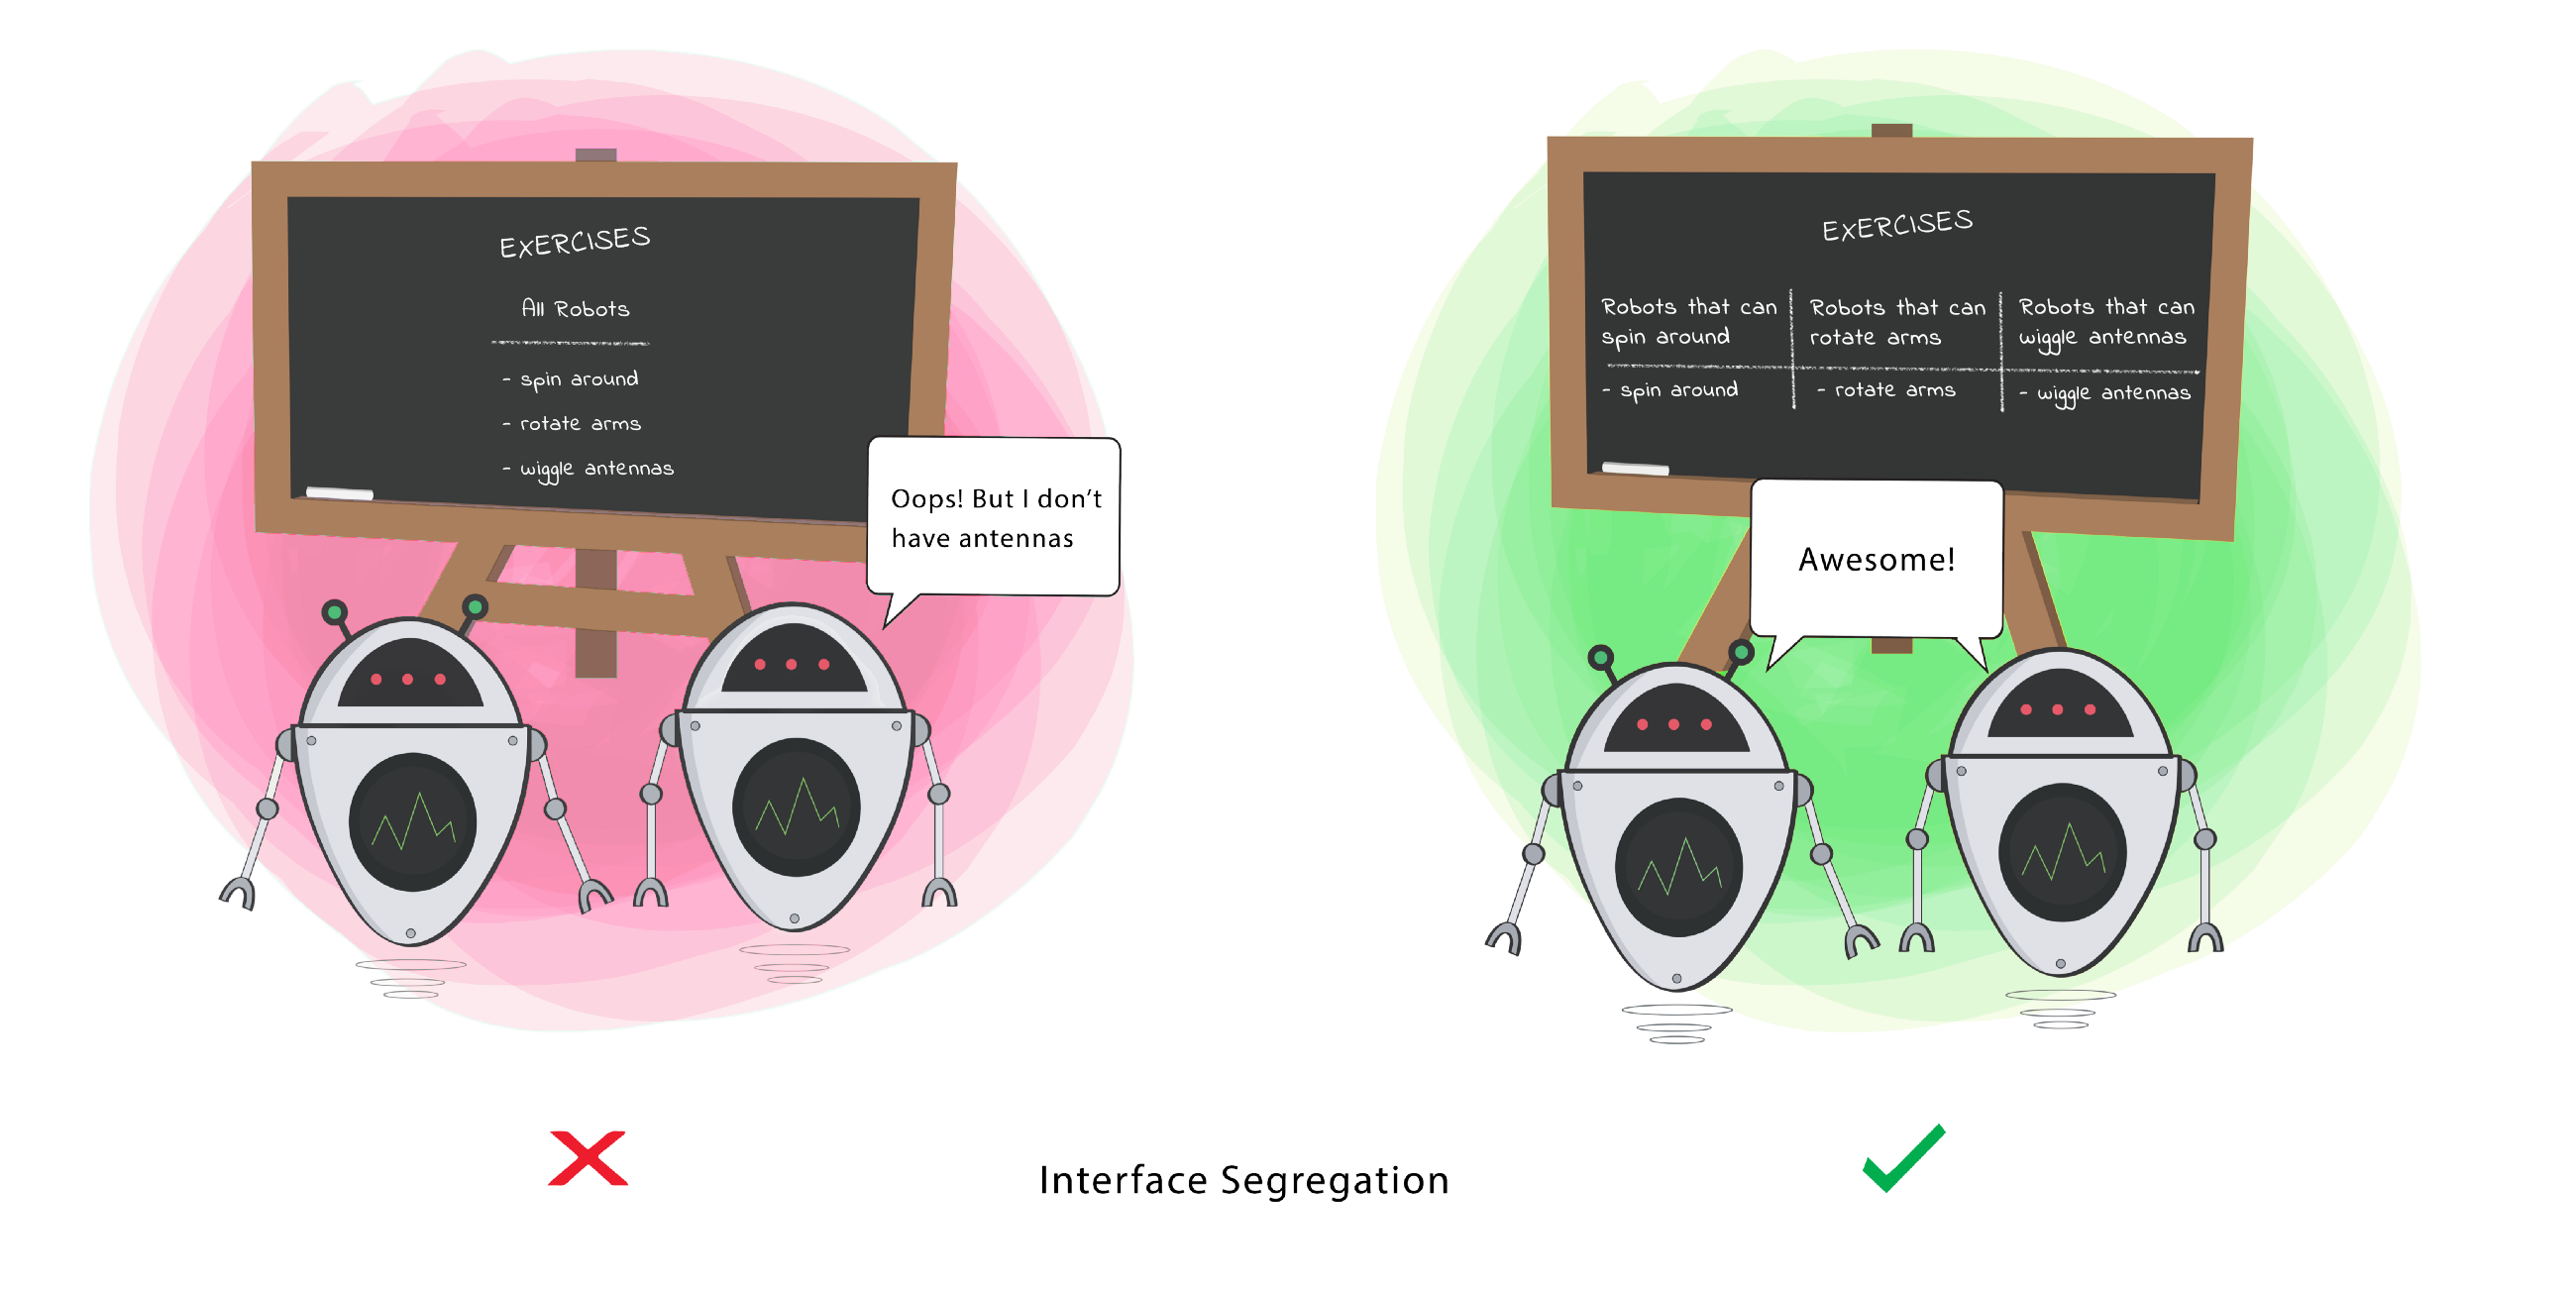
5. Dependency Inversion Principle
The most flexible systems are those in which source code dependencies refer to abstractions (interfaces) rather than concretions (implementations). This reduces the dependency between these two classes.
- High-level modules should not import from low-level modules. Both should depend on abstractions (e.g., interfaces).
- Abstractions should not depend on details. Details (concrete implementations) should depend on abstractions.
This is valuable because it reduces coupling between two classes, and allows for more effective reuse.
In the example below, the PizzaCutterBot should be able to cut with any tool (class) provided to it that meets the requirements of able-to-cut-pizza. This might include a pizza cutter, knife or any other sharp implement. PizzaCutterBot should be designed to work with the able-to-cut interface, not a specific tool.
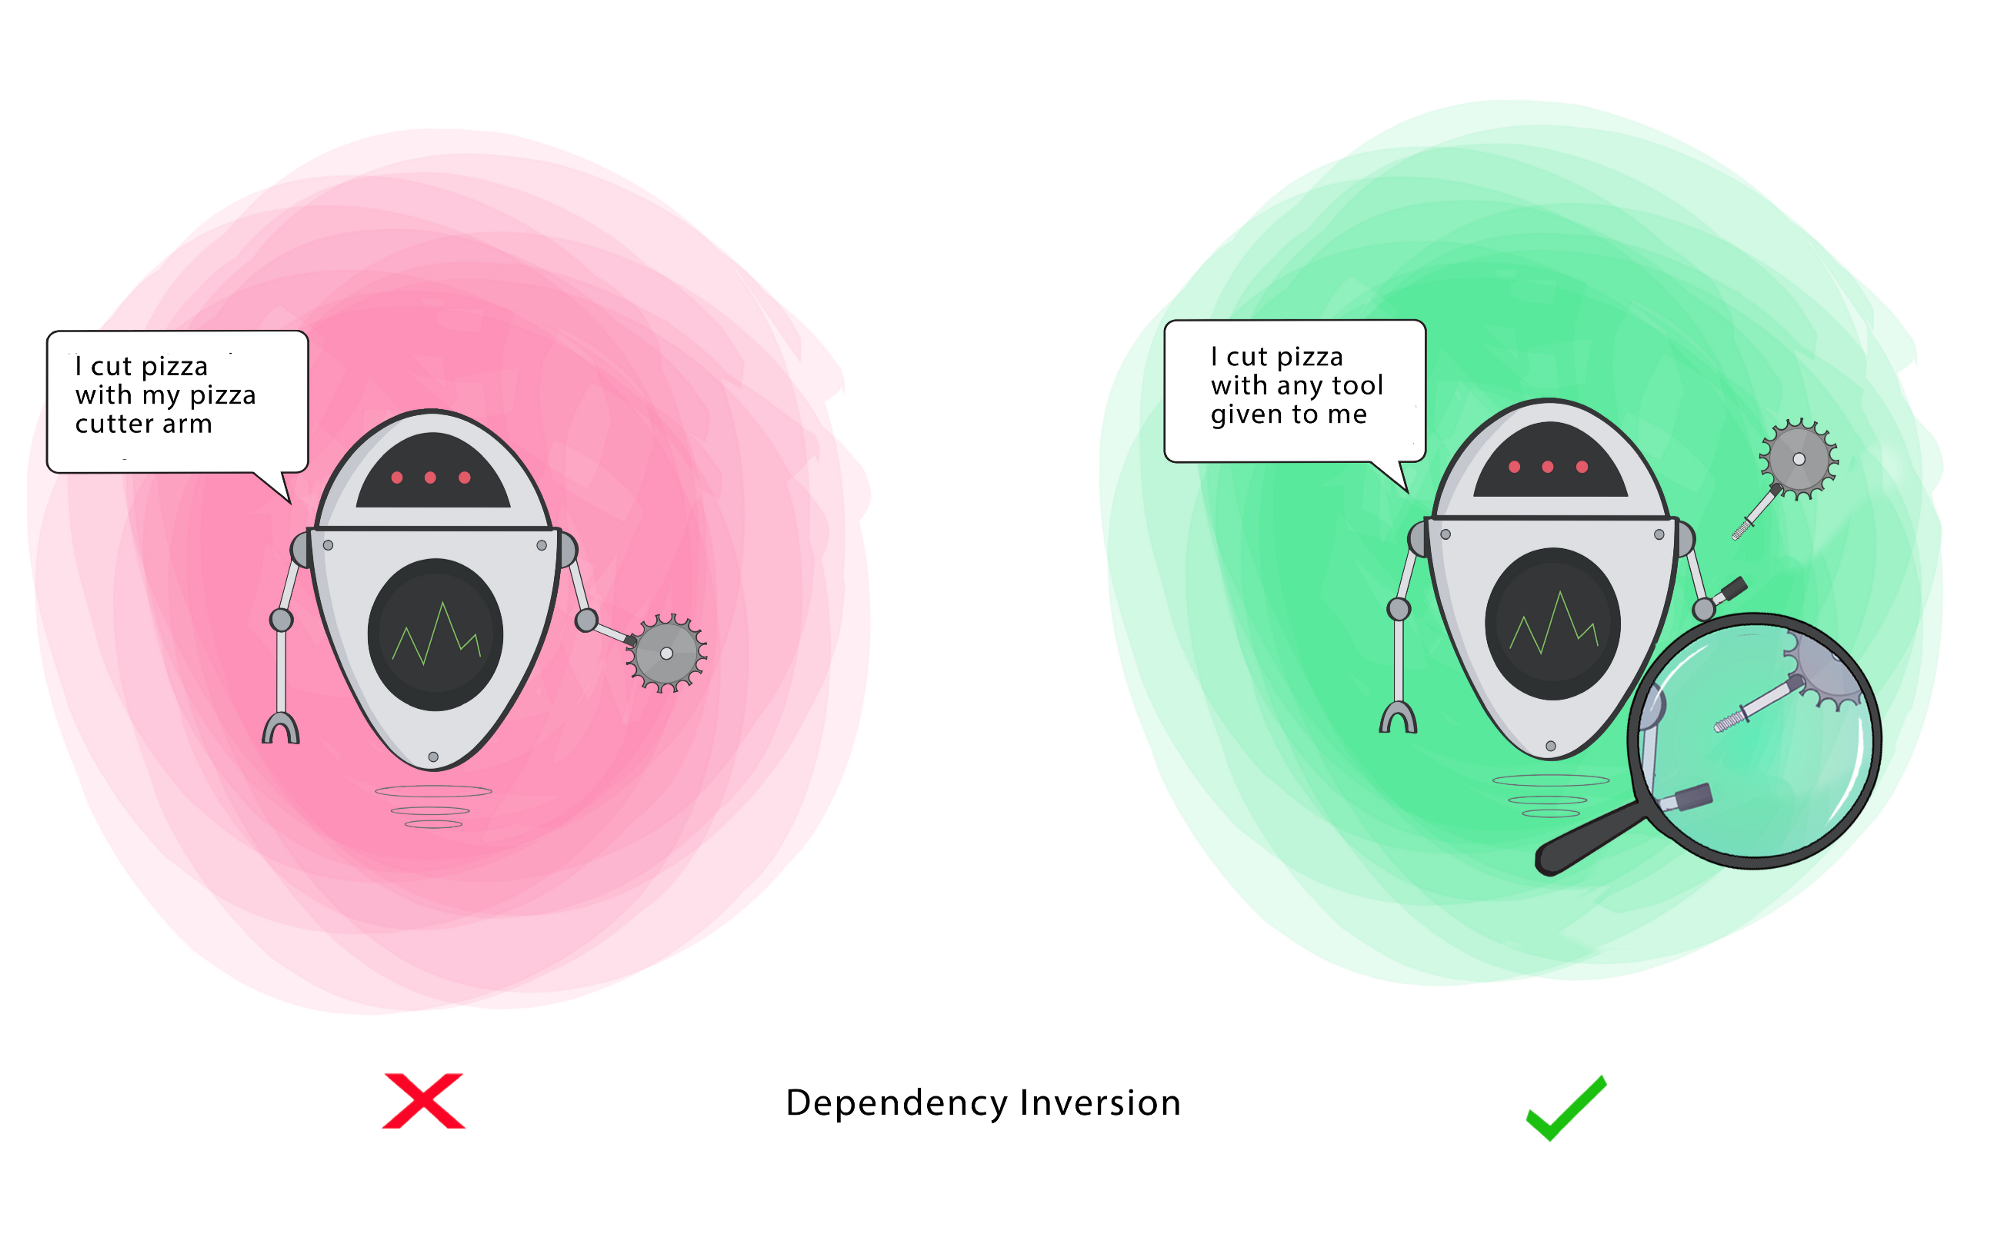
Generalized principles
Can we generalize from these? What if we’re not building a pure OO system; are they still applicable?
Enforce separation of concerns
“A module should be responsible to one, and only one, user or stakeholder.“ - Single Responsibility Principle
It follows from the SOLID principles that our software should be written as a set of components, where each one has specific responsibilities. By component, we can mean a single class, or a set of classes that work closely together, or even a function that delivers functionality.
Modularity refers to the logical grouping of source code into these areas of responsibility. Modularity can be implemented through namespaces (C++), packages (Java or Kotlin). When discussing modularity, we often use two related and probably familiar concepts: cohesion, and coupling.
Cohesion is a measure of how related the parts of a module are to one another. A good indication that the classes or other components belong in the same module is that there are few, if any, calls to source code outside the module (and removing anything from the module would necessitate calls to it outside the module).
Coupling refers to the calls that are made between components; they are said to be tightly coupled based on their dependency on one another for their functionality. Loosely coupled means that there is little coupling, or it could be avoided in practice; tight coupling suggests that the components probably belong in the same module, or perhaps even as part of a larger component.
When designing modules, we want high cohesion (where components in a module belong together) and low coupling between modules (meaning fewer dependencies). This increases the flexibility of our software, and makes it easier to achieve desirable characteristics, e.g. scalability.
Diagrams courtesy of Buketa & Balint, [Jetpack Compose by Tutorials](https://www.kodeco.com/books/ jetpack-compose-by-tutorials/v1.0#) (2021).
Interface vs. implementation
“Program to an interface, not an implementation. Depend on abstractions, not on concretions.” - Interface Substitution
When classes rely on one another, you want to minimize the dependency—we say that you want loose coupling between the classes. This allows for maximum flexibility. To accomplish this, you extract an abstract interface, and use that interface to describe the desired behavior between the classes.
For example, in the diagram below, our cat on the left can eat sausage, but only sausage. The cat on the right can eat anything that provides nutrition, including sausage. The introduction of the food interface complicates the model, but provides much more flexibility to our classes.
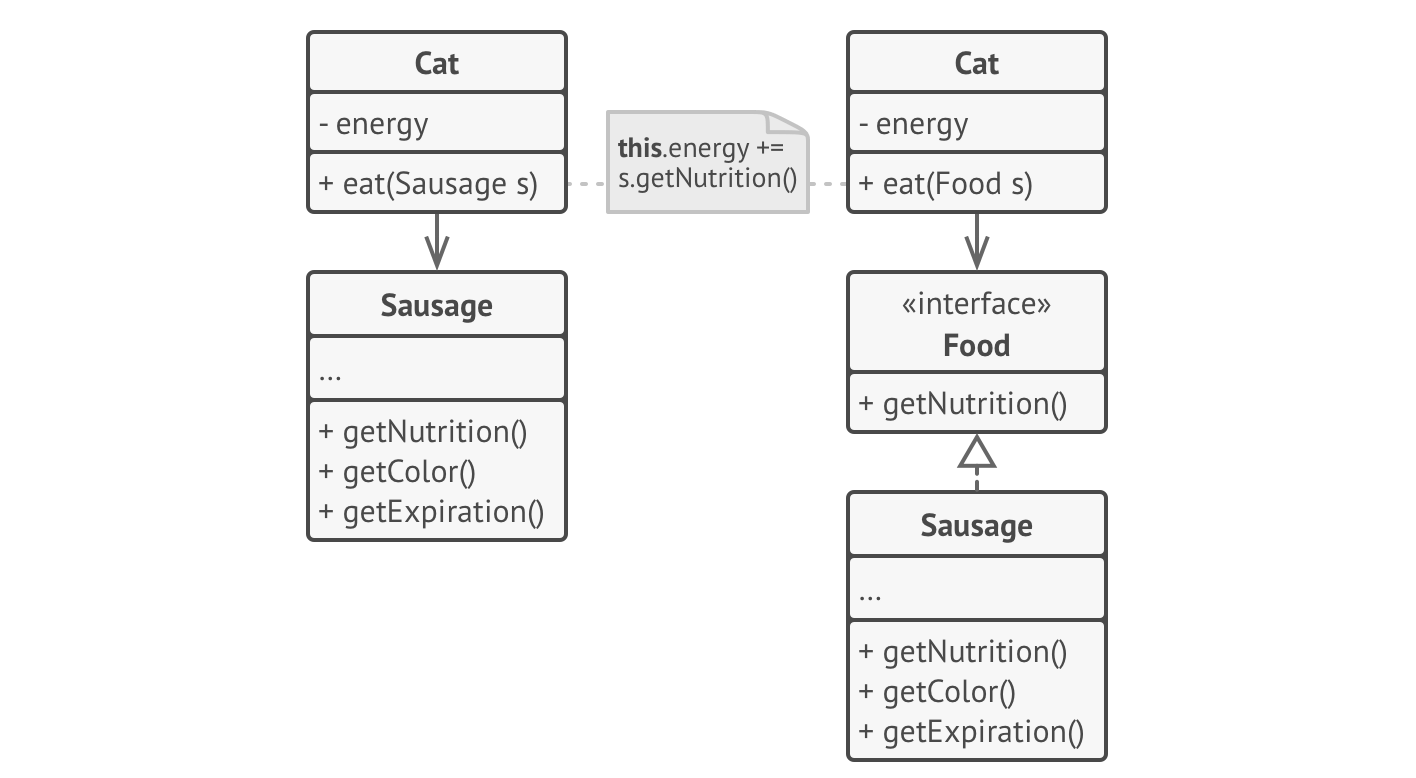
Avoid unnecessary inheritance
Multiple inheritance is terrible. Who thought of this? - Prof. Avery
Inheritance is a useful tool for reusing code. In principle, it sounds great: derive from a base class, and you get all of its behavior for free! Unfortunately, it’s rarely that simple. There are sometimes negative side effects of inheritance.
- A subclass cannot reduce the interface of the base class. You have to implement all abstract methods, even if you don’t need them.
- When overriding methods, you need to make sure that your new behavior is compatible with the old behavior. In other words, the derived class needs to act like the base class.
- Inheritance breaks encapsulation because the details of the parent class are potentially exposed to the derived class.
- Subclasses are tightly coupled to superclasses. A change in the superclass can break subclasses.
- Reusing code through inheritance can lead to parallel inheritance hierarchies, and an explosion of classes. See below for an example.
A useful alternative to inheritance is composition.
Where inheritance represents an is-a relationship (a car is a vehicle), composition represents a has-a relationship (a car has an engine).
Imagine a catalog application for cars and trucks:
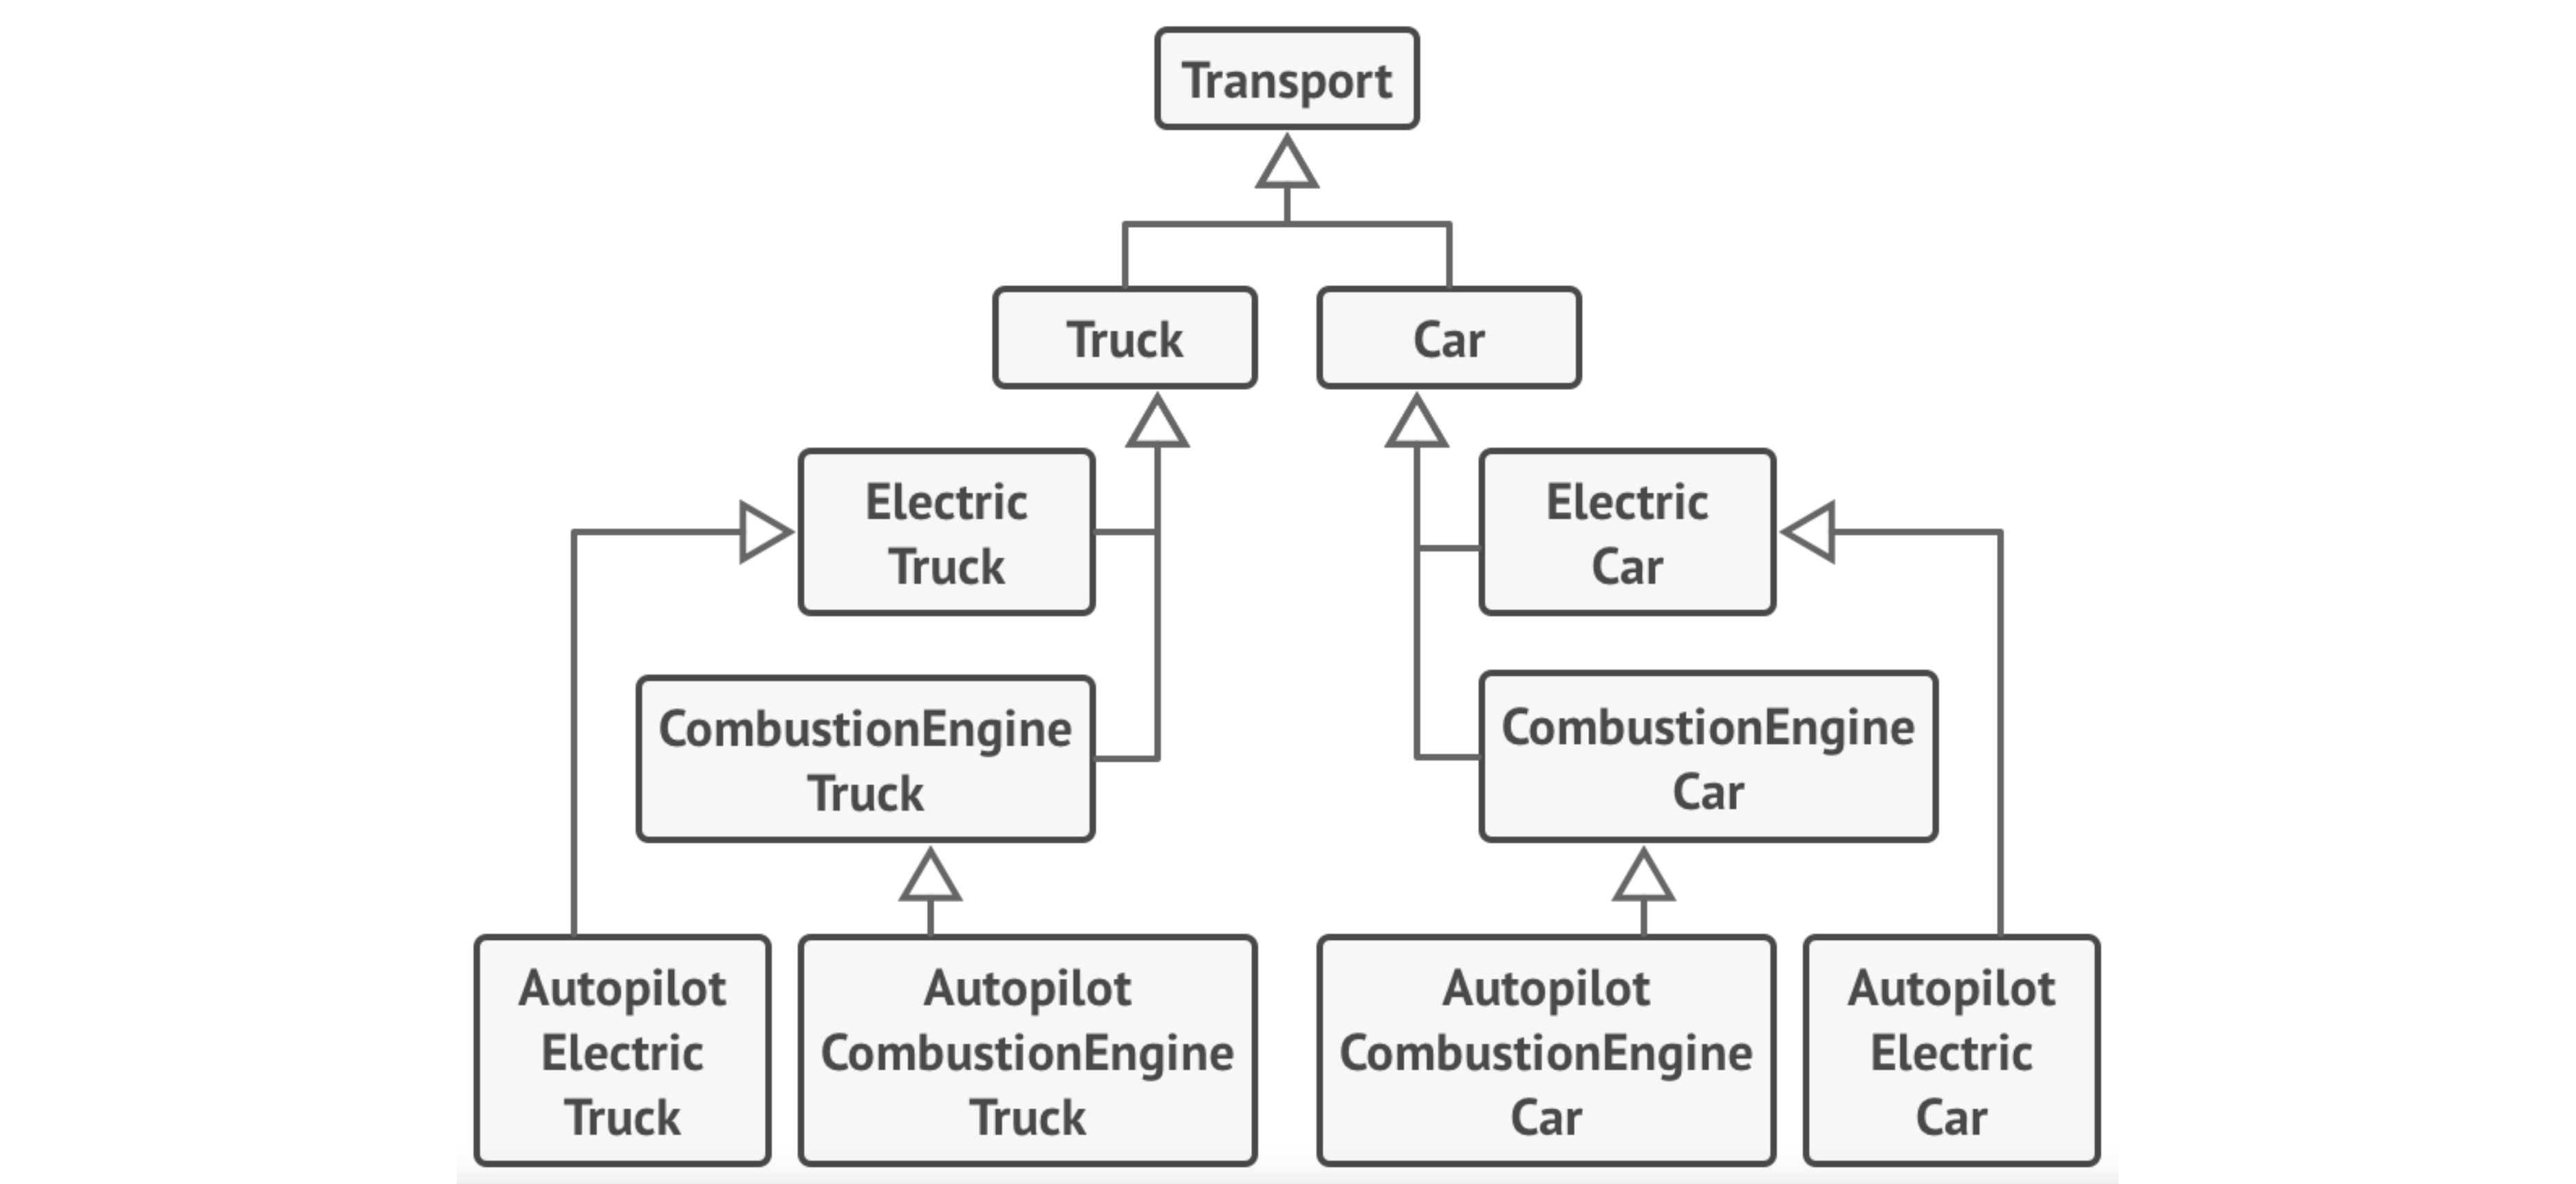
Here’s the same application using composition. We can create unique classes representing each vehicle which just implement the appropriate interfaces, without the intervening abstract classes.
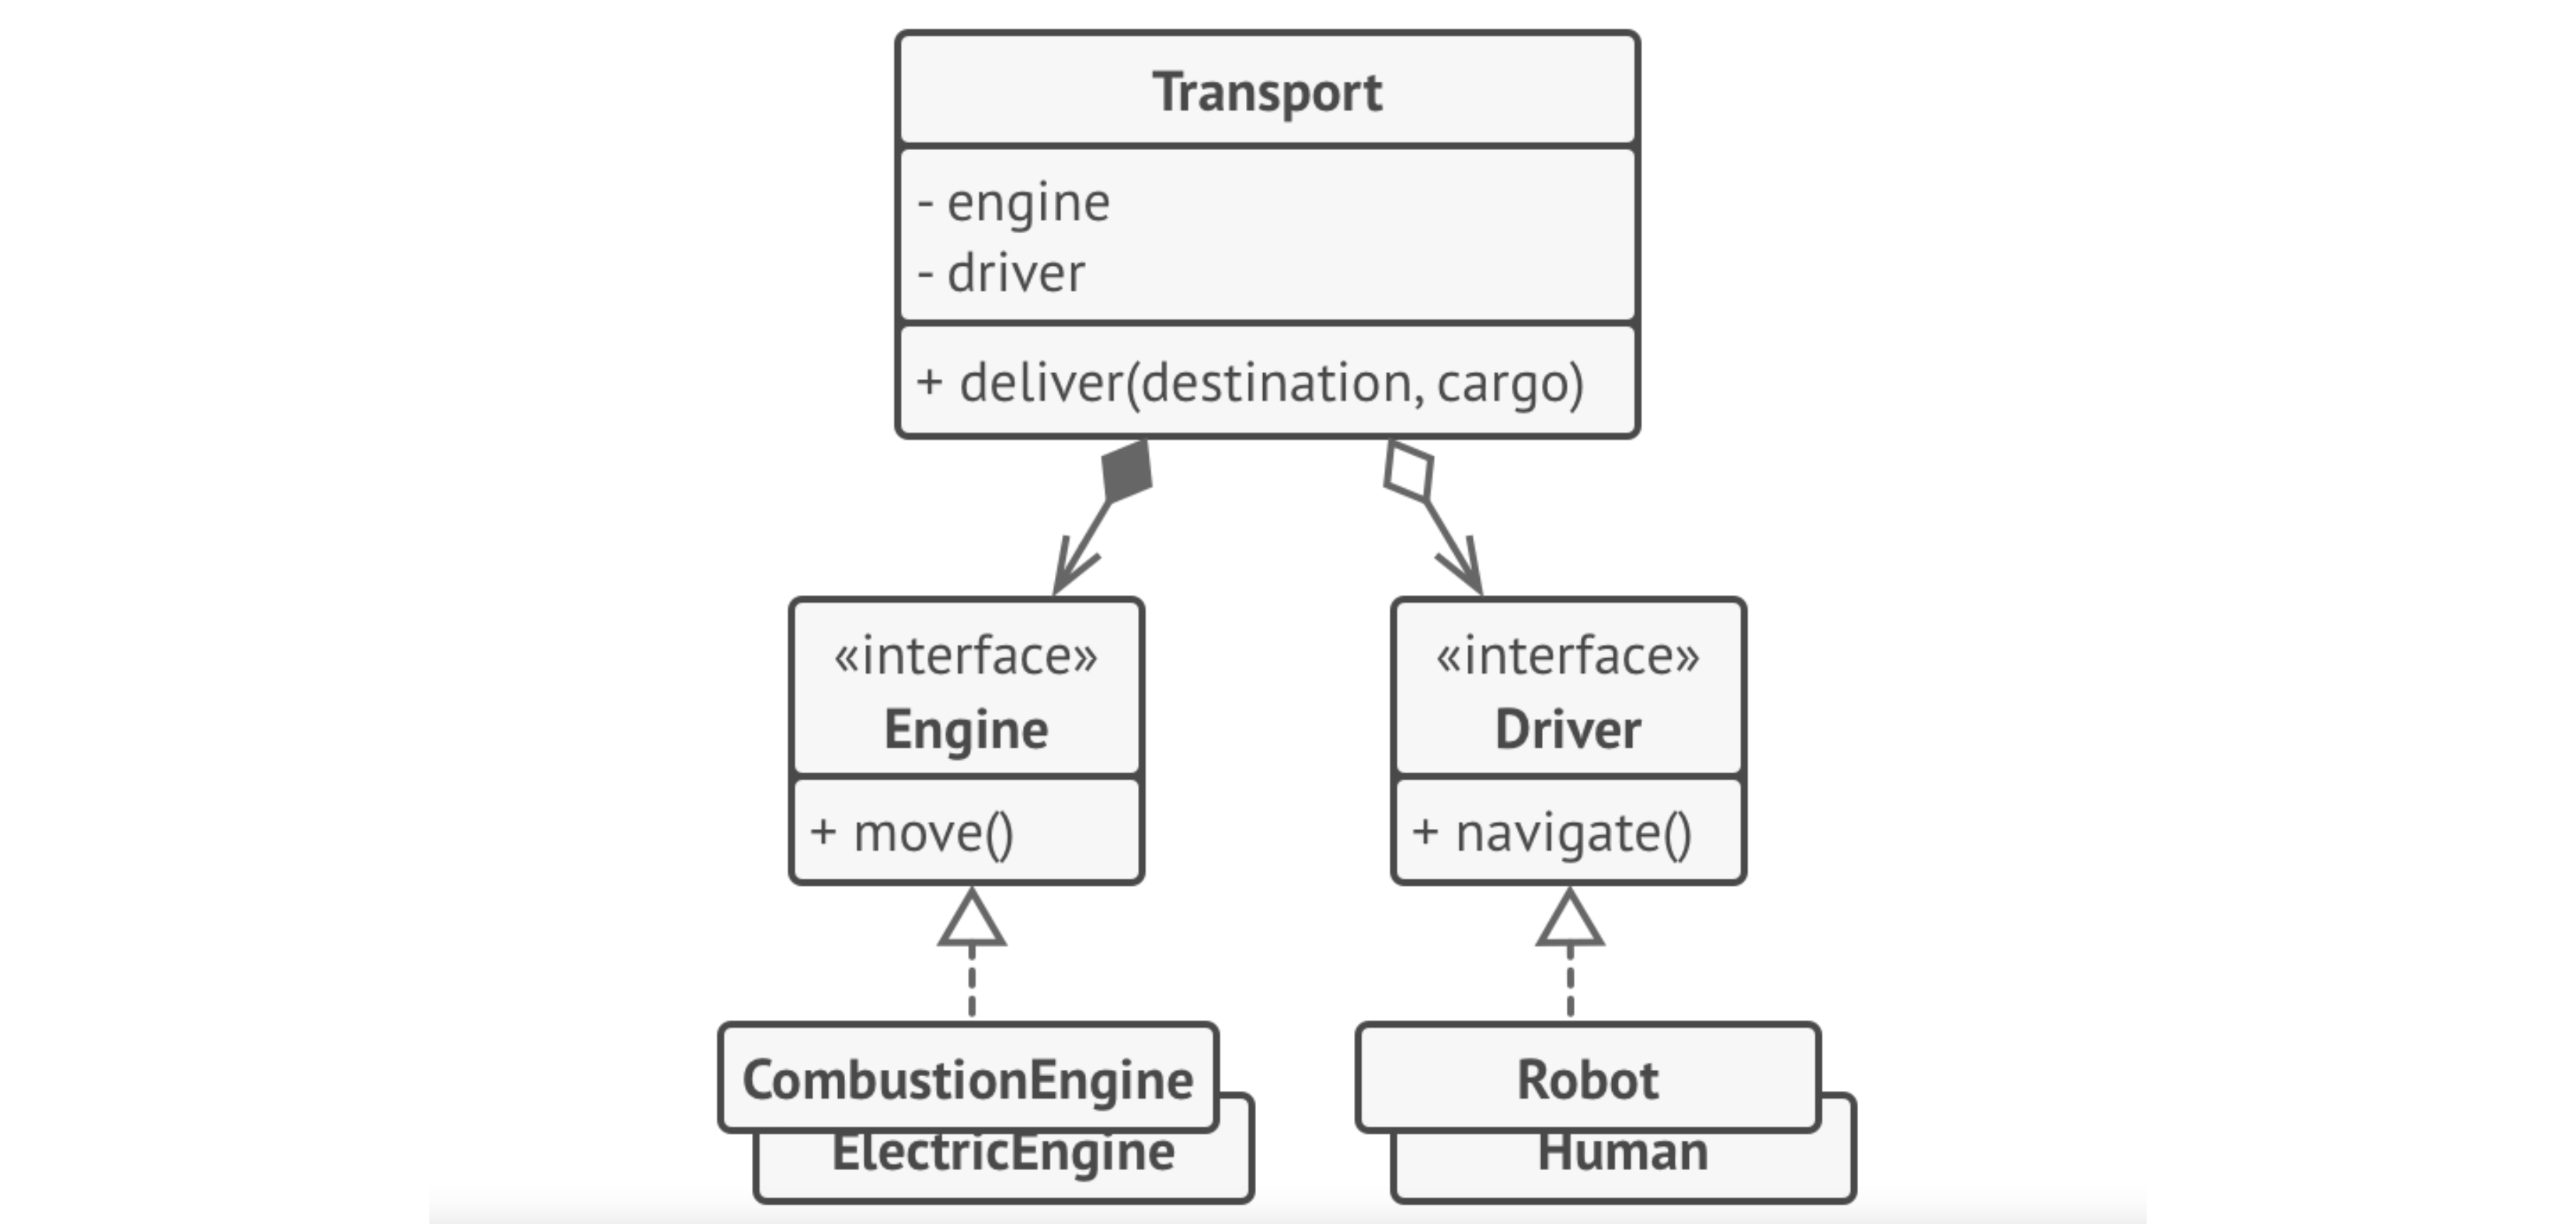
Avoid side effects
At a high-level, functional programming emphasizes a number of principles:
- Functions as first-class citizens
- Pure functions, with no side effects
- Favouring immutable data
Although Kotlin is not a “pure functional language” (however, you care to define that), we can certainly adopt some of these principles.
The easiest, and perhaps the most important to program stability is the idea of avoiding side effects in your code. What is a side effect? It is an unintended change to your program’s state that is not expected when you call a function. In other words, it’s the characteristic of a function that does more than it should.
An obvious example of this is the use of global variables, when are then mutated in a function. As your program grows, you may find more and more functions that update these variables, to the point where it is often challenging to determine what caused them to change! Side effects make your code brittle, more difficult to debug and much more difficult to scale.
The opposite are functions that do just what they are designed to do. A function should:
- Use parameters as its only inputs (i.e. don’t look to any external state when determining a function’s behaviour)
- Mutate that data and return consistent results based solely on the input.
We’ll discuss functional approaches in Kotlin a little later in these notes.
Find the “right” abstractions
Part of the value of an object-oriented approach is that you can model “real-world objects”. We often decompose our context and problem space to identify entities that we wish to model in our software, and build classes reflecting those objects. Then, we can add logical behaviors to our objects to reflect how these objects would react in the real-world.
It’s important to keep in mind a few things when taking this approach:
- Not all software objects need to have corresponding real-world objects (e.g., a software doesn’t need to operate under the same rules as a real factory).
- Conversely, you don’t need to convert every real-world object into a software entity. There is nothing wrong with your models differing from the real-world.
Design patterns
A design pattern is a generalizable solution to a common problem that we’re attempting to address. Design patterns in software development are one case of formalized best practices, specifically around how to structure your code to address specific, recurring design problems in software development.
We include design patterns in a discussion of software development because this is where they tend to be applied: they’re more detailed that architecture styles, but more abstract than source code. Often you will find that when you are working through high-level design, and describing the problem to address, you will recognize a problem as similar to something else that you’ve encountered. A design pattern is a way to formalize that idea of a common, reusable solution, and give you a standard terminology to use when discussing this design with your peers.
Patterns originated with Christopher Alexander, an architect, in 1977 [Alexandar 1977]. Design patterns in software gained popularity with the book Design Patterns: Elements of Reusable Object-Oriented Software, published in 1994 [Gamma 1994]. There have been many books and articles published since then, and during the early 2000s there was a strong push to expand Design Patterns and promote their use.
Design patterns have seen mixed success. Some criticisms levelled:
- They are not comprehensive and do not reflect all styles of software or all problems encountered.
- They are old-fashioned and do not reflect current software practices.
- They add flexibility, at the cost of increased code complexity.
Broad criticisms are likely unfair. While it’s true that not all patterns are used, many of them are commonly used in professional practice, and new patterns continue to be identified. Design patterns certainly can add complexity to code, but they also encourage designs that can help avoid subtle bugs later on.
In this section, we’ll outline the more common patterns, and indicate where they may be useful. The original set of patterns were subdivided based on the types of problems they addressed.
We’ll examine a number of the patterns below.
The original patterns and categories are taken from Eric Gamma et al. 1994. Design Patterns: Elements of Reusable Object-Oriented Software (link).
Examples and some explanations are from Alexander Shvets. 2019. Dive Into Design Patterns (link).
Creational Patterns
Creational Patterns control the dynamic creation of objects.
| Pattern | Description |
|---|---|
| Abstract Factory | Provide an interface for creating families of related or dependent objects without specifying their concrete classes. |
| Builder | Separate the construction of a complex object from its representation, allowing the same construction process to create various representations. |
| Factory Method | Provide an interface for creating objects in a superclass, but allows subclasses to alter the type of objects that will be created. |
| Prototype | Specify the kinds of objects to create using a prototypical instance, and create new objects from the ‘skeleton’ of an existing object, thus boosting performance and keeping memory footprints to a minimum. |
| Singleton | Ensure a class has only one instance, and provide a global point of access to it. |
Builder
Builder is a creational design pattern that lets you construct complex objects step by step. The pattern allows you to produce different types and representations of an object using the same construction code.
Imagine that you have a class with a large number of variables that need to be specified when it is created. e.g. a house class, where you might have 15-20 different parameters to take into account, like style, floors, rooms, and so on. How would you model this?
You could create a single class to do this, but you would then need a huge constructor to take into account all the different parameters.
- You would then need to either provide a long parameter list, or call other methods to help set it up after it was instantiated (in which case you have construction code scattered around).
- You could create subclasses, but then you have a potentially huge number of subclasses, some of which you may not actually use.
The builder pattern suggests that you put the object construction code into separate objects called builders. The pattern organizes construction into a series of steps. After calling the constructor, you call methods to invoke the steps in the correct order (and the object prevents calls until it is constructed). You only call the steps that you require, which are relevant to what you are building.
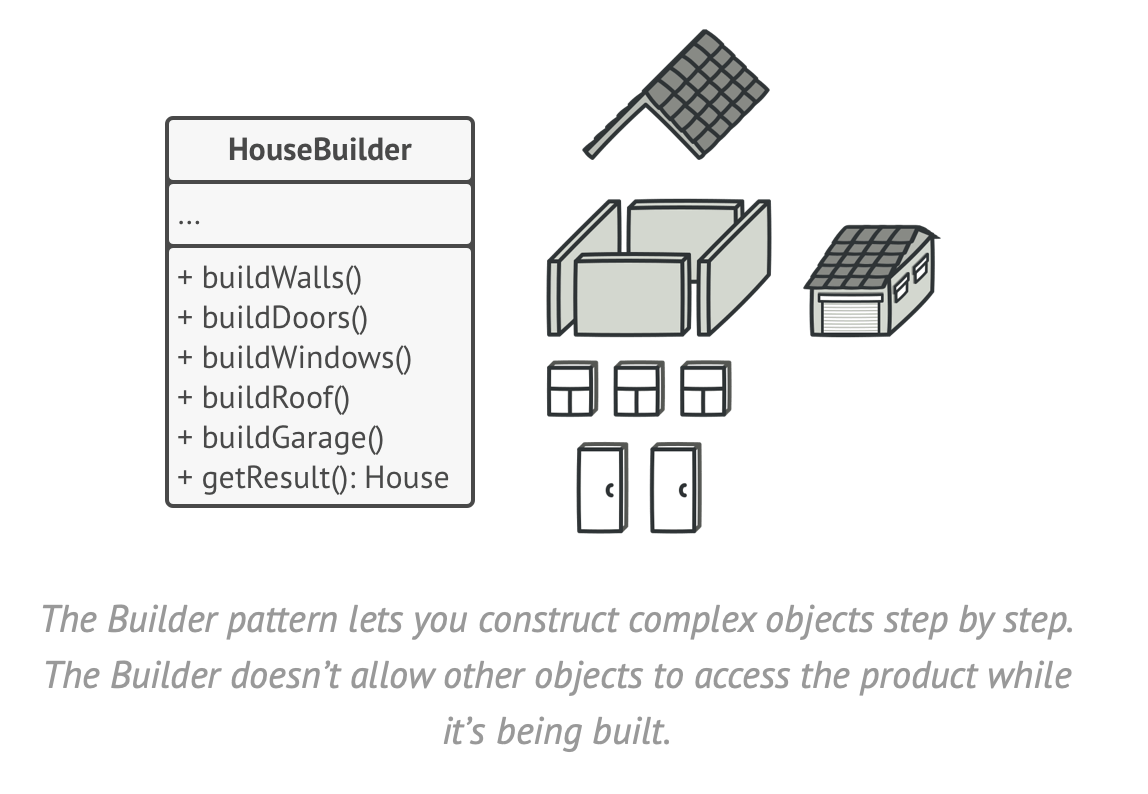
Even if you never utilize the Builder pattern directly, it’s used in a lot of complex Kotlin and Android libraries. e.g. the Alert dialogs in Android.
val dialog = AlertDialog.Builder(this)
	.setTitle("Title")
    .setIcon(R.mipmap.ic_launcher)
    .show()
Singleton
Singleton is a creational design pattern that lets you ensure that a class has only one instance, while providing a global access point to this instance.
Why is this pattern useful?
- Ensure that a class has just a single instance. The most common reason for this is to control access to some shared resource—for example, a database or a file.
- Provide a global access point to that instance. Just like a global variable, the Singleton pattern lets you access some object from anywhere in the program. However, it also protects that instance from being overwritten by other code.
All implementations of the Singleton have these two steps in common:
- Make the default constructor private, to prevent other objects from using the new operator with the Singleton class.
- Create a static creation method that acts as a constructor.
In languages like Java, you would express the implementation in this way:
public class Singleton {

    private static Singleton instance = null;
    private Singleton() {
    }

    public static Singleton getInstance() {
        if (instance == null) {
            synchronized (Singleton.class) {
                if (instance == null) {
                    instance = new Singleton();
                }
            }
        }
        return instance;
    }
}
In Kotlin, it’s significantly easier.
object Singleton{
    init {
        println("Singleton class invoked.")
    }
    fun print(){
        println("Print method called")
    }
}

fun main(args: Array<String>) {
    Singleton.print()
    // echos "Print method called" to the screen
}
The object keyword in Kotlin creates an instance of a generic class., i.e. it’s instantiated automatically. Like any other class, you can add properties and methods if you wish.
Singletons are useful for times when you want a single, easily accessible instance of a class. e.g. Database object to access your database, Configuration object to store runtime parameters, and so on. You should also consider it instead of extensively using global variables.
Factory Method
The Factory Method is intended to solve the issue of not knowing which subclass to create (i.e. need to defer to runtime, often because of runtime conditions).
The Factory Method defines a way to decide which subclasses to instantiate by defining method whose role is to examine conditions and make that decision for the caller. i.e. instantiation is deferred to a Factory Method.
How to use it?
- Create a class hierarchy for the classes that you need to instantiate, including a base class (or interface) and all subclasses.
- Create a Factory class that instantiates and returns the correct subclass.
Here’s an example of using the Factory Method pattern to read the pieces of a chess board from a data file, and instantiate each object as it’s read.
sealed class Piece(val position: String)                          // base class
class Pawn(position: String) : Piece(position)                    // derived classes
class Queen(position: String) : Piece(position)

fun generatePieces(notation: List<String>): List<Piece> {         // factory method
    return notation.map { piece ->
        val pieceType = piece.get(0)
        val position = piece.drop(1)
        when(pieceType) {
            'p' -> Pawn(position)
            'q' -> Queen(position)
            else -> error("Unknown piece")
        }
    }
}

val notation = listOf("pa3", “qc5")                               // method returns list of pieces
val list = generatePieces(notation)
Structural Patterns
Structural Patterns are about organizing classes to form new structures.
| Pattern | Description |
|---|---|
| Adapter, Wrapper | Convert the interface of a class into another interface clients expect. An adapter lets classes work together that could not otherwise because of incompatible interfaces. |
| Bridge | Decouple an abstraction from its implementation allowing the two to vary independently. |
| Composite | Compose objects into tree structures to represent part-whole hierarchies. Composite lets clients treat individual objects and compositions of objects uniformly. |
| Decorator | Attach additional responsibilities to an object dynamically keeping the same interface. Decorators provide a flexible alternative to subclassing for extending functionality. |
| Proxy | Provide a surrogate or placeholder for another object to control access to it. |
Decorator
The decorator pattern allows you to describe combinations of parameters or classes, without the complexity of having a subclass for each combination.
A decorator allows you to chain together the classes that you want to process a request.
e.g. You are building a message notifier, which allows your application to send out messages.
It’s easy to see how to create a specialized notifier, but what if you want to have a message that is sent to multiple notifiers at the same time? This would be messy as a set of classes, but simpler to compose using a decorator.
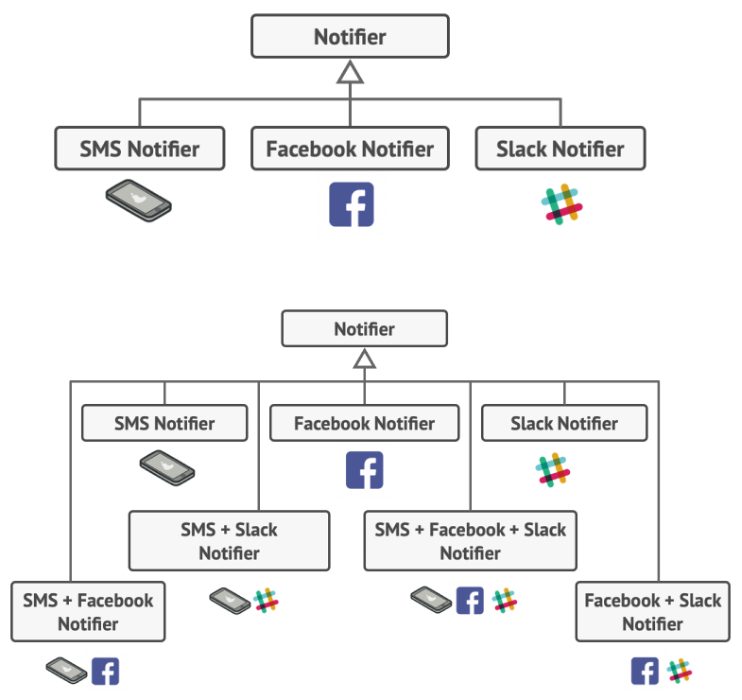
Example of a decorator being used.
fun main() {
    val logger = Logger()
    val cache = Cache()
    val request = Request("http://example.com")
    val response = processRequest(request, logger, cache)
    println("Results: ${response}")
}

// what if I don’t want all of these processors to run?
fun processRequest(request: Request, logger: Logger, cache: Cache): Response {
    logger.log(request.toString())
    val cached = cache.get(request) ?: run {
        val response = Response("You called ${request.endpoint}")
        cache.put(request, response)
        response
    }
    return cached
}

fun main() {
   val request = Request("http://example.com")
 val processor: Processor = LoggingProcessor(Logger, RequestProcessor()))
   println("Results: ${processor.process(request)}")
}

interface Processor { fun process(request: Request): Response }

class LoggingProcessor(val logger: Logger, val processor: Processor) : Processor {
    override fun process(request: Request): Response {
        logger.log(request.toString())                      // do appropriate work
        return processor.process(request)                   // pass to next Processor
    }
}

class RequestProcessor(): Processor {
    override fun process(request: Request): Response {
        return Response("You called ${request.endpoint}”)   // do appropriate work
    }
}
Adapter
Adapter is a structural design pattern that allows objects with incompatible interfaces to collaborate.
Imagine that you have a data source in XML, but you want to use a charting library that only consumes JSON data. You could try and extend one of those libraries to work with a different type of data, but that’s risky and may not even be possible if it’s a third-party library.
An adapter is an intermediate component that converts from one interface to another. In this case, it could handle the complexities of converting data between formats. Here’s a great example from Shvets (2019):
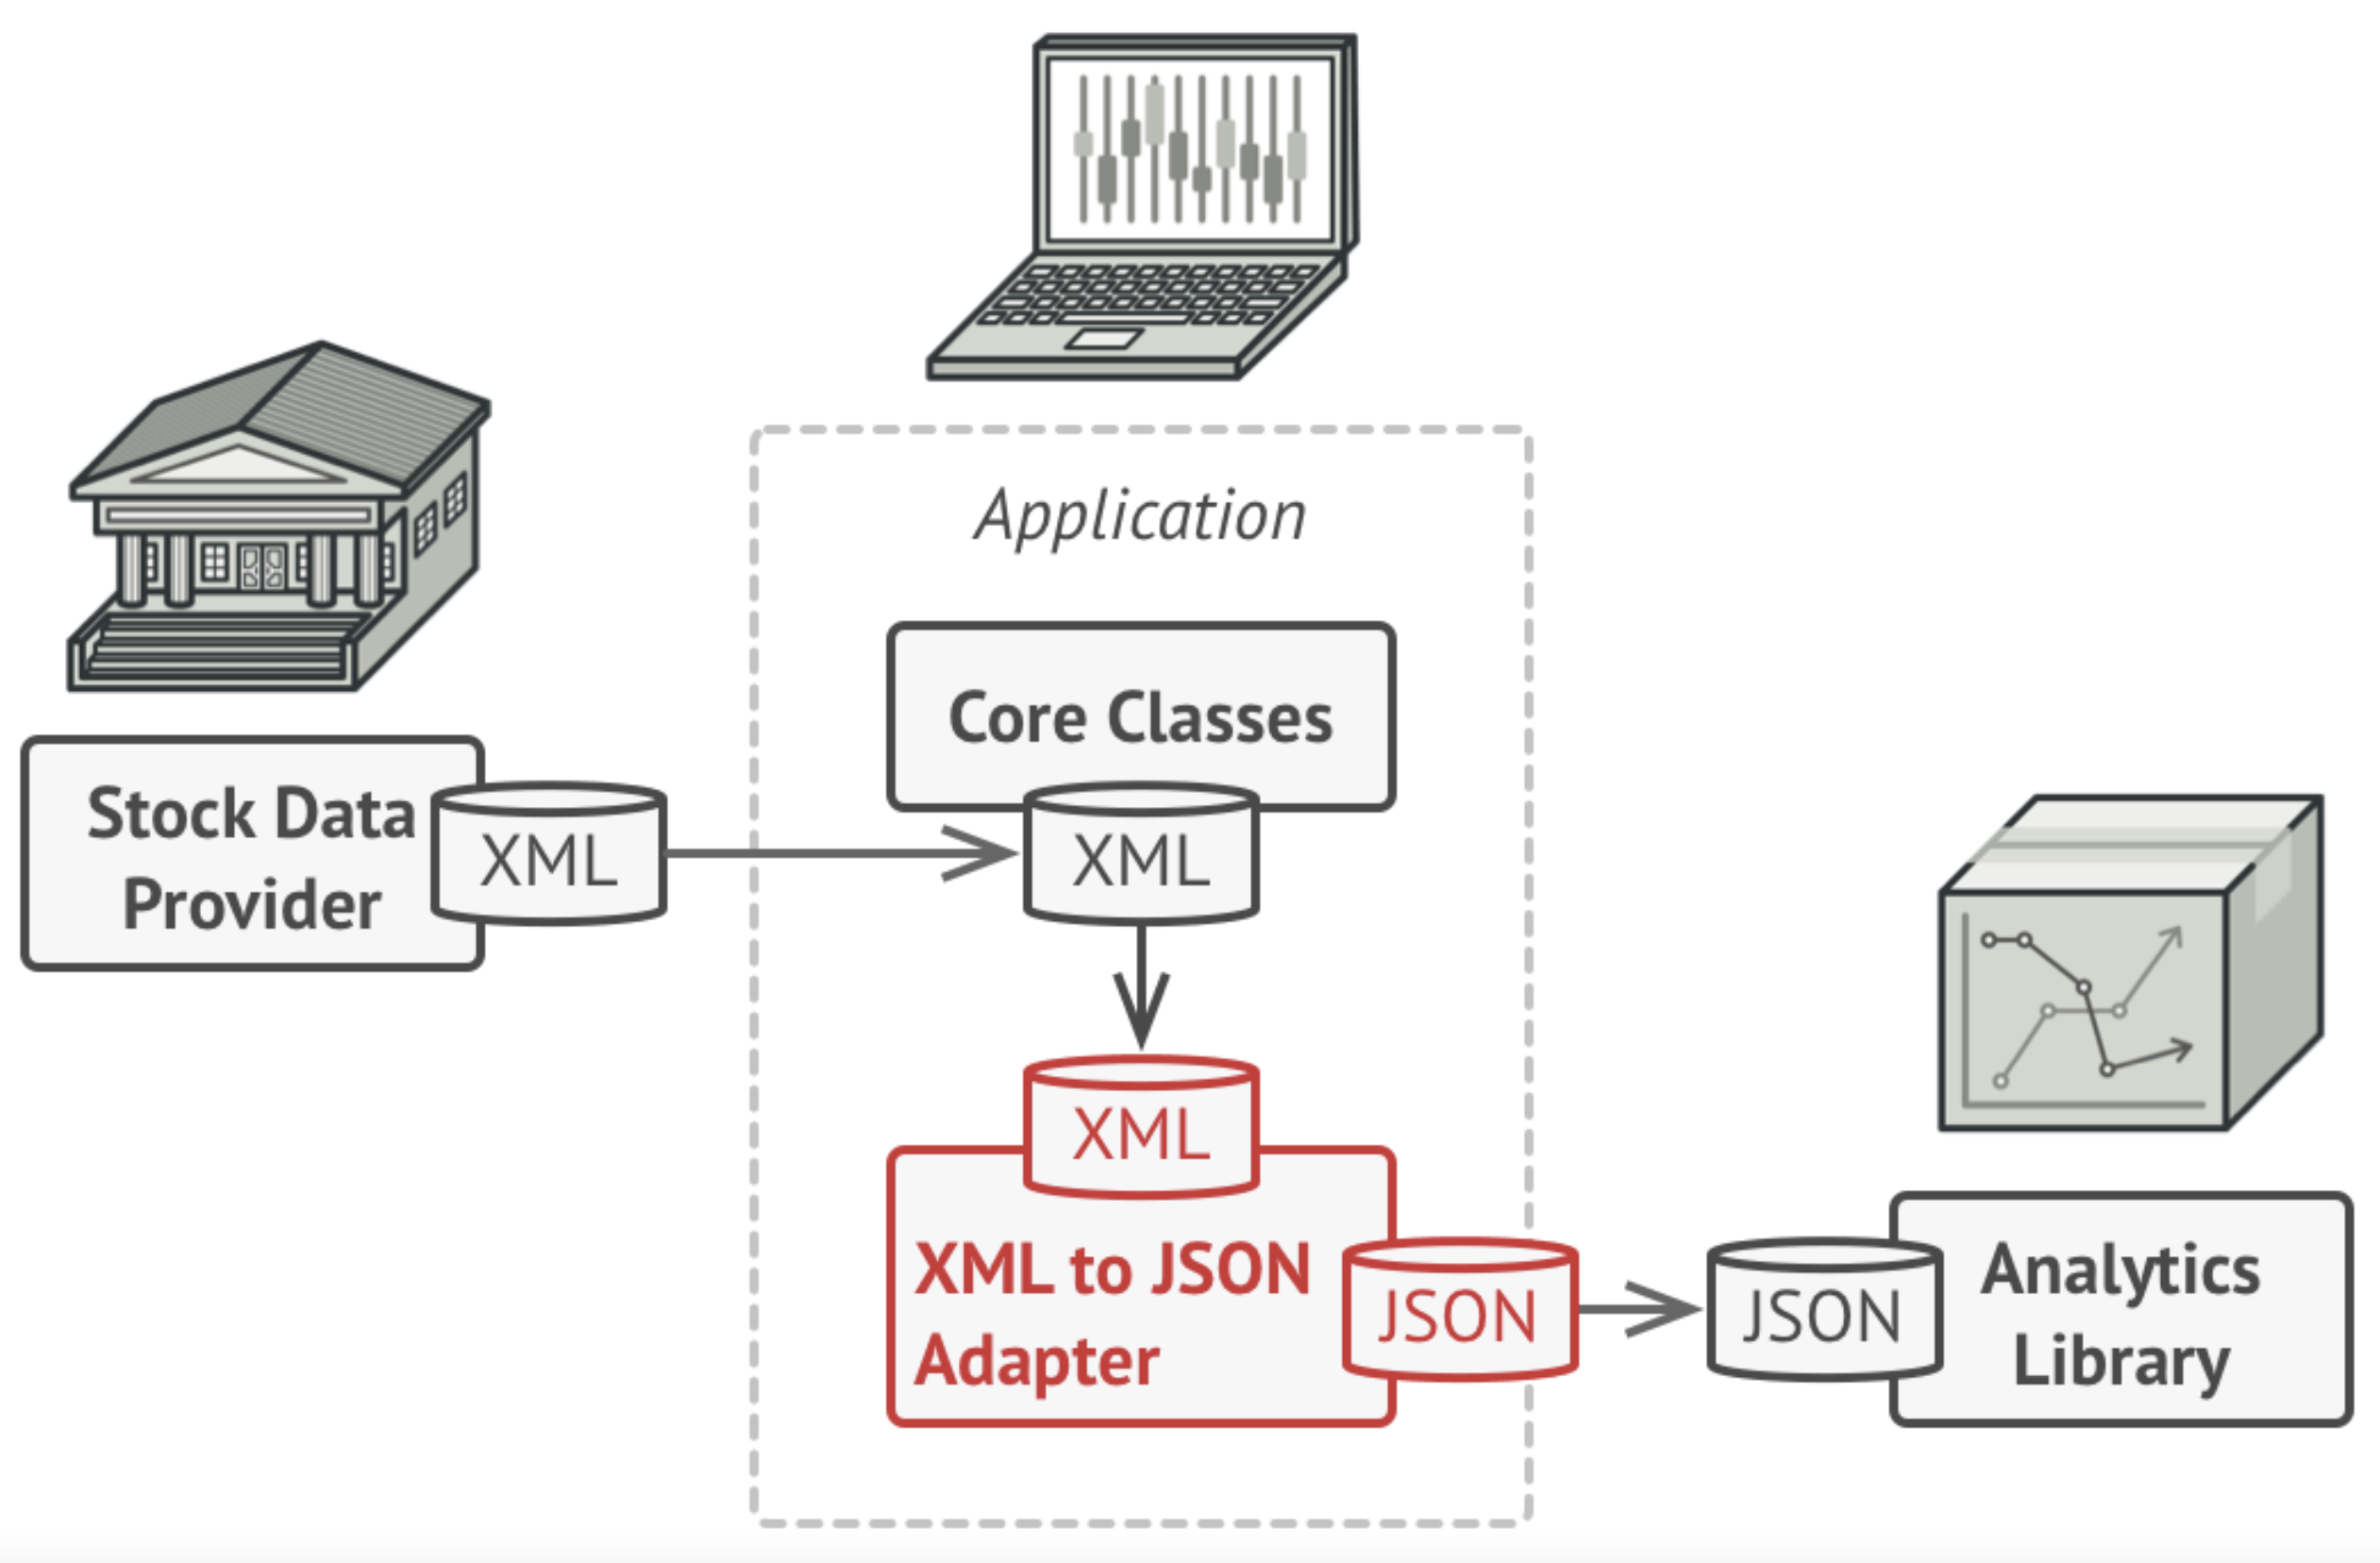
The simplest way to implement this is using object composition: the adapter is a class that exposes an interface to the main application (client). The client makes calls using that interface, and the adapter performs necessary actions through the service (which is often a library, or something whose interface you cannot control).
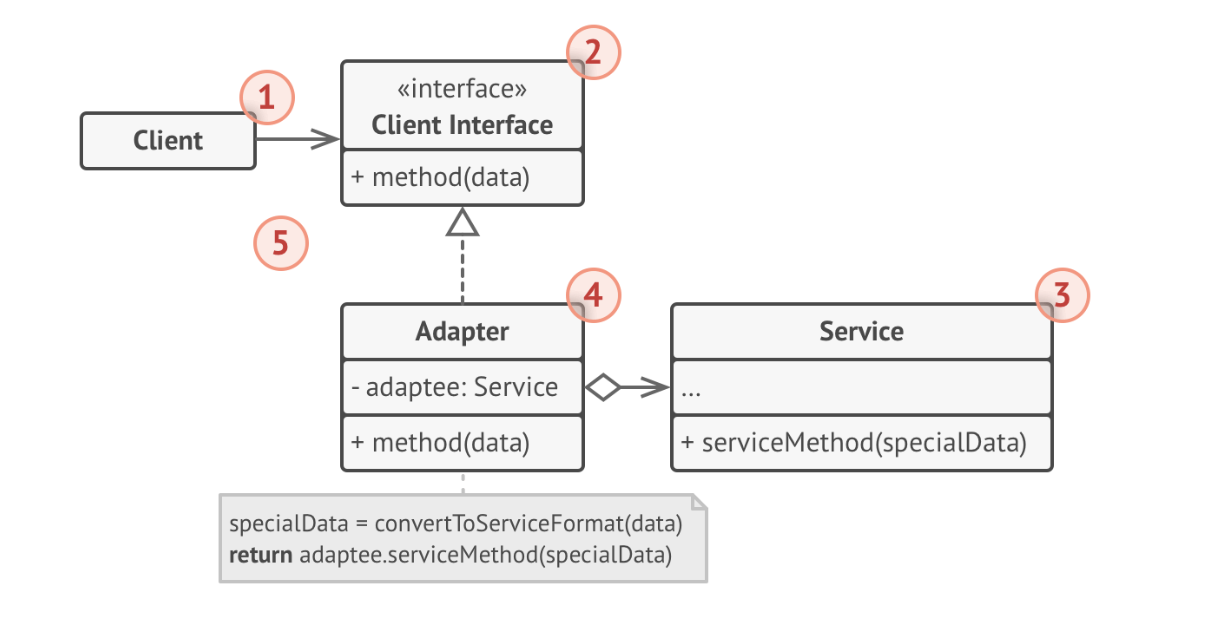
- The client is the class containing business logic (i.e. an application class that you control).
- The client interface describes the interface that you have designed for your application to communicate with that class.
- The service is some useful library or service (typically which is closed to you), which you want to leverage.
- The adapter is the class that you create to serve as an intermediary between these interfaces.
- The client application isn’t coupled to the adapter because it works through the client interface.
Behavioural Patterns
Behavioural Patterns are about identifying common communication patterns between objects.
| Pattern | Description |
|---|---|
| Command | Encapsulate a request as an object, thereby allowing for the parameterization of clients with different requests, and the queuing or logging of requests. It also allows for the support of undoable operations. |
| Iterator | Provide a way to access the elements of an aggregate object sequentially without exposing its underlying representation. |
| Memento | Without violating encapsulation, capture and externalize an object’s internal state allowing the object to be restored to this state later. |
| Observer | Define a one-to-many dependency between objects where a state change in one object results in all its dependents being notified and updated automatically. |
| Strategy | Define a family of algorithms, encapsulate each one, and make them interchangeable. Strategy lets the algorithm vary independently from clients that use it. |
| Visitor | Represent an operation to be performed on the elements of an object structure. Visitor lets a new operation be defined without changing the classes of the elements on which it operates. |
Command
Command is a behavioural design pattern that turns a request into a stand-alone object that contains all information about the request (a command could also be thought of as an action to perform).
Imagine that you are writing a user interface, and you want to support a common action like Save. You might invoke Save from the menu, or a toolbar, or a button. Where do you put the code that actually handles saving the data?
If you attach it to the object that the user is interacting with, then you risk duplicating the code. e.g.

The Command pattern suggests that you encapsulate the details of the command that you want executed into a separate request, which is then sent to the business logic layer of the application to process.
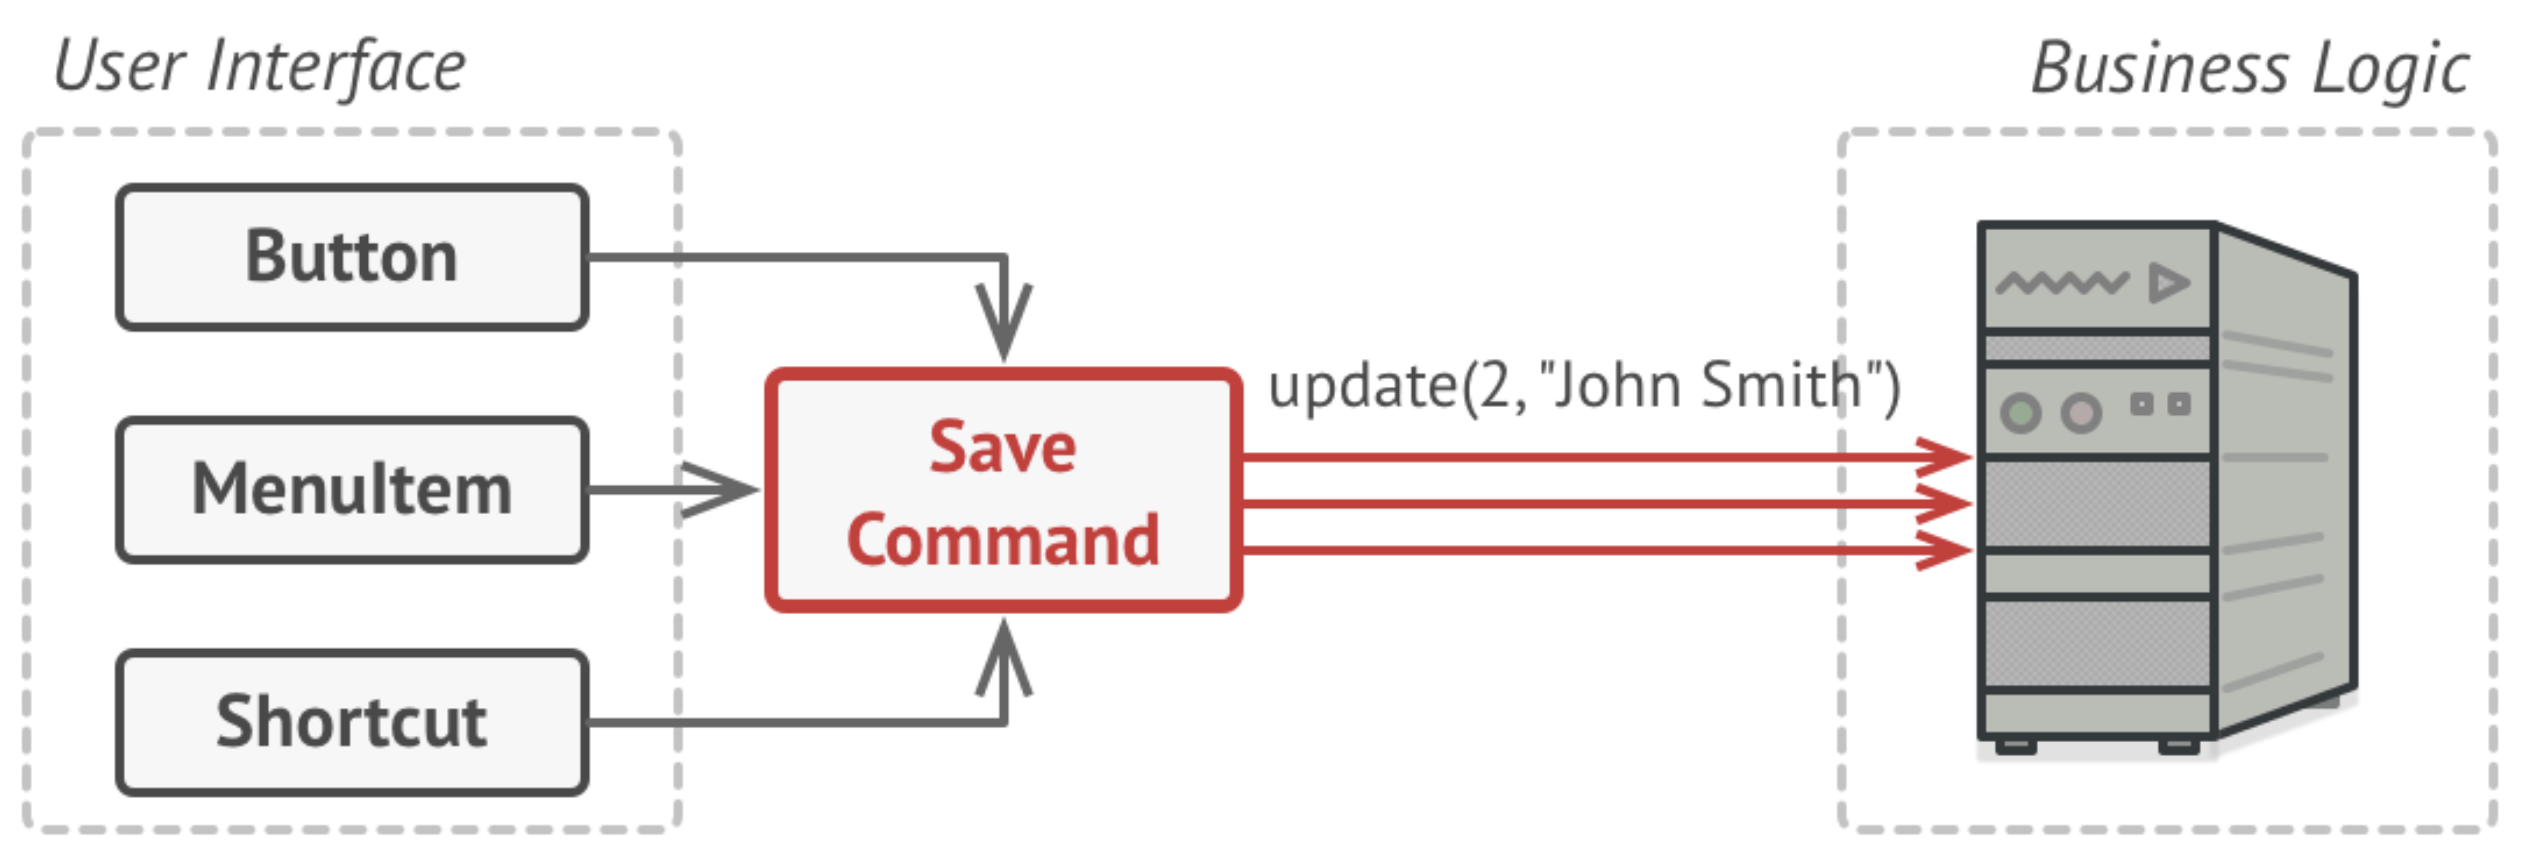
The command class relationship to other classes:
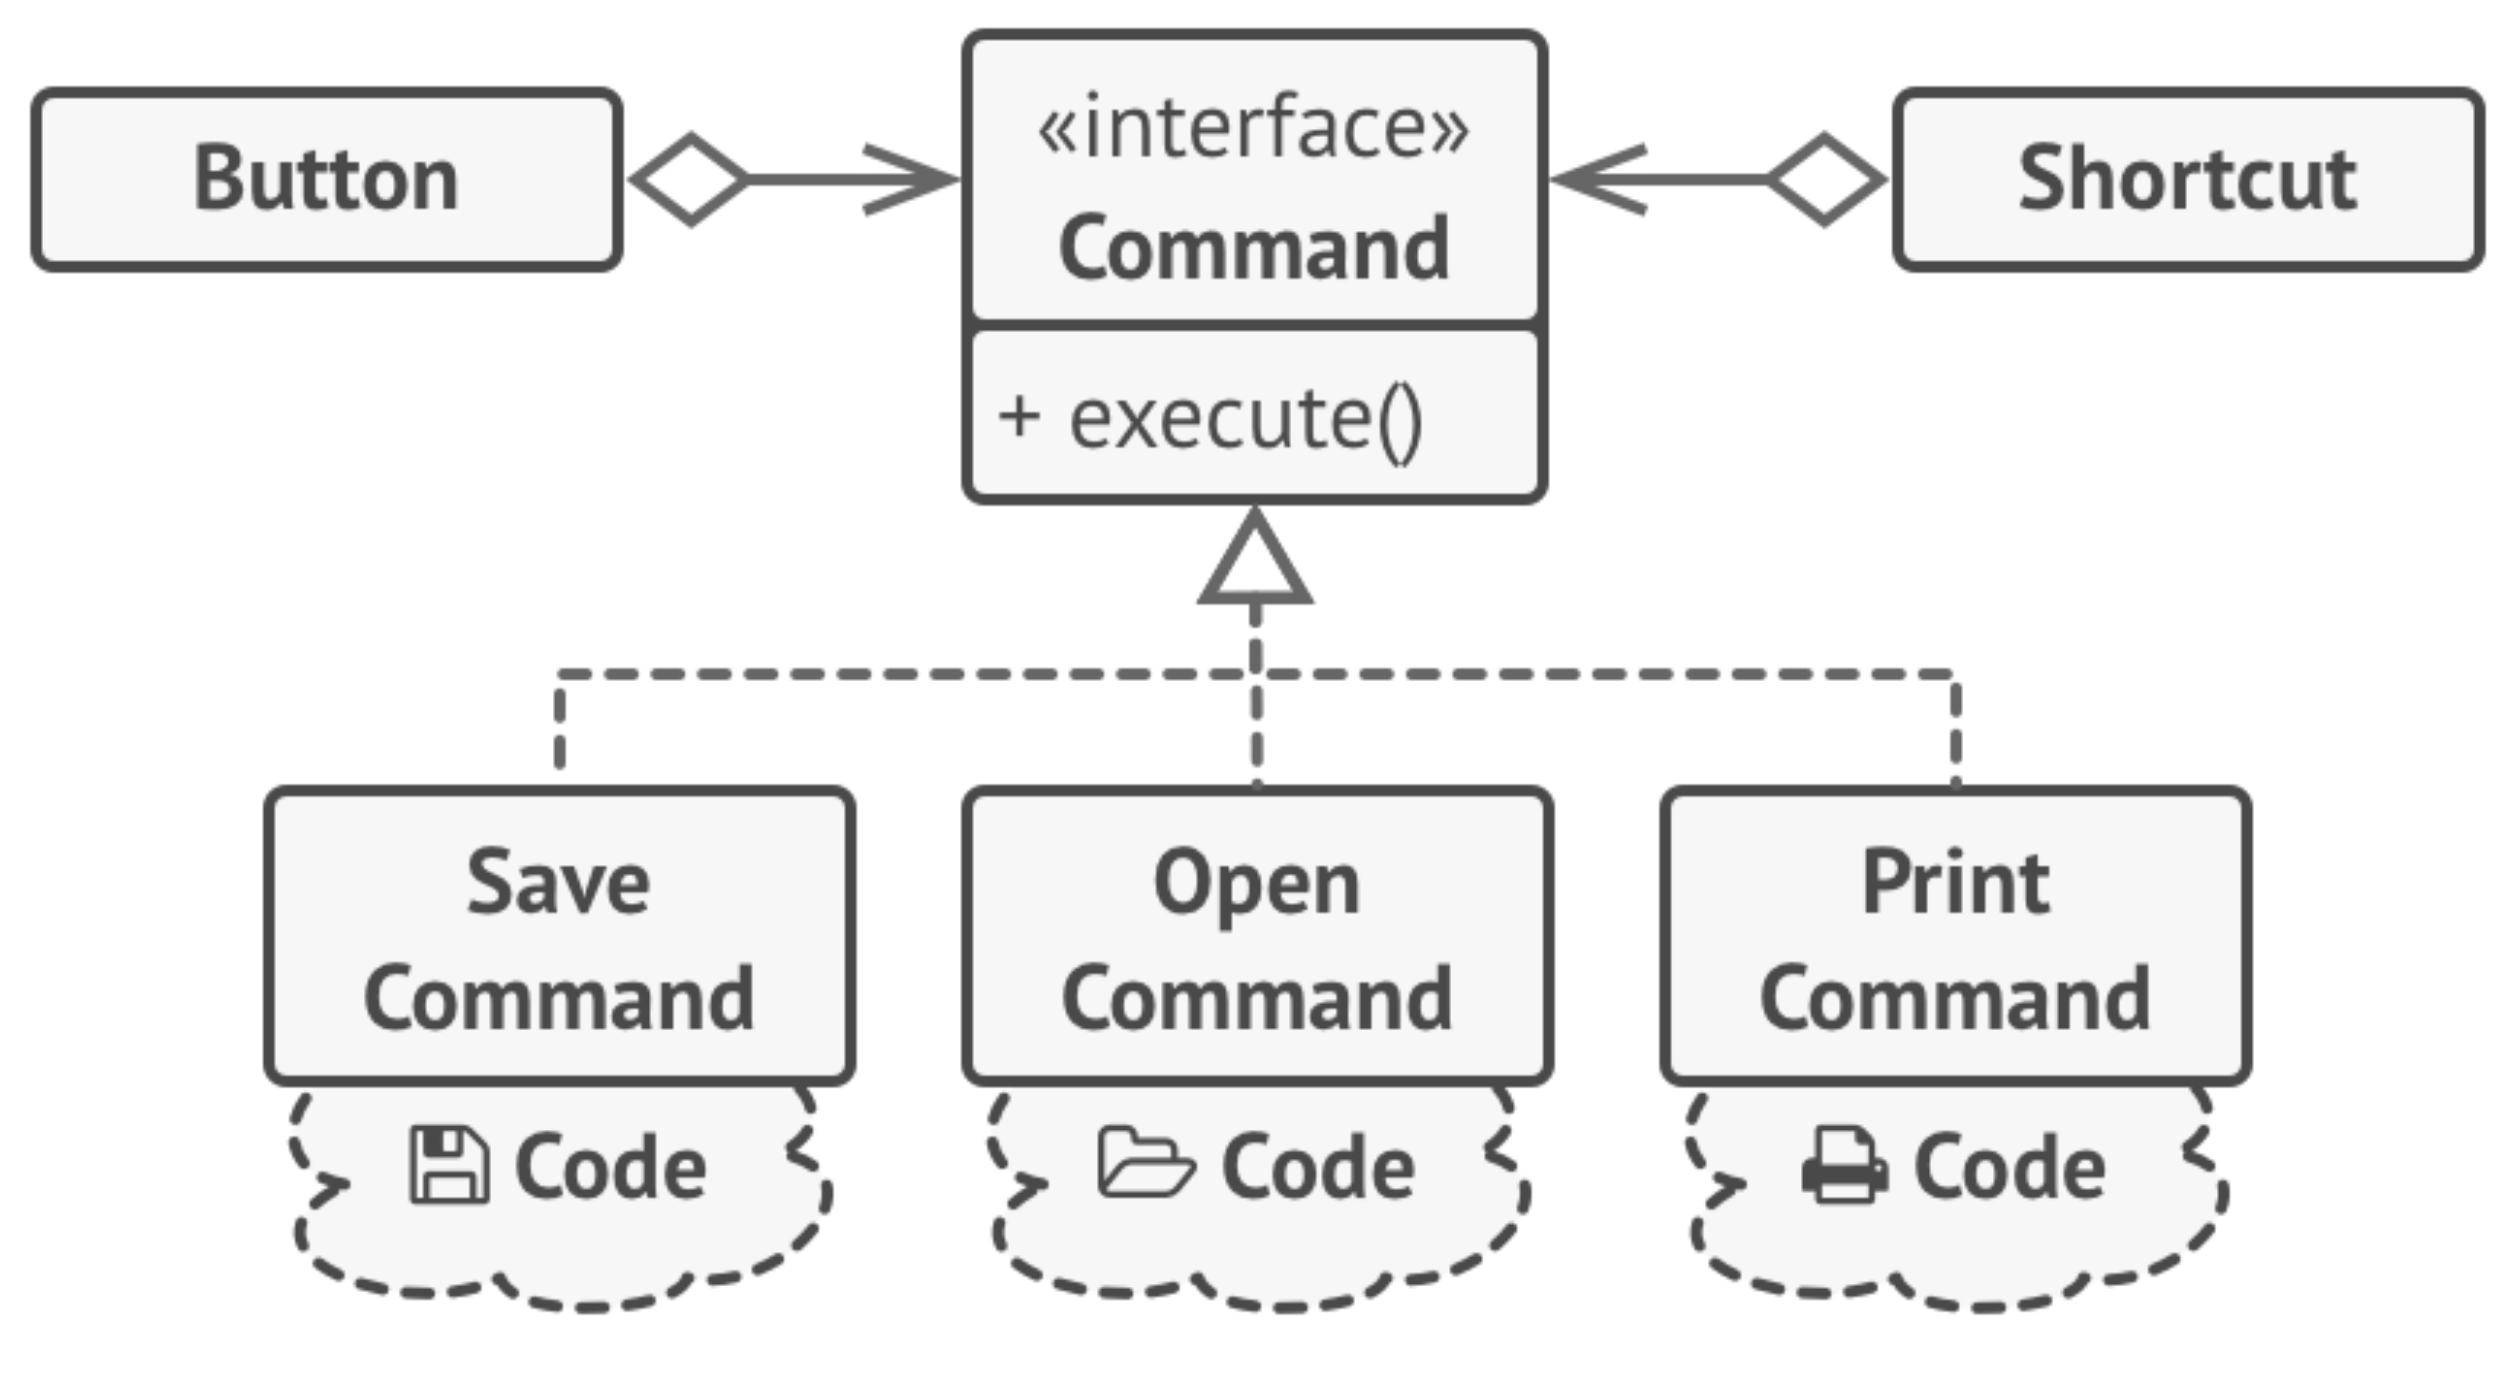
Strategy
The strategy pattern is a way to swap algorithms at runtime. It’s often modelled as a set of interchangeable classes.
Why is this pattern useful? It allows you to add new algorithms or modify existing ones without modifying existing code. It can provides extensibility and flexibility to your solution.
How does it work? Extract algorithms into separate classes called strategies. The original class, called context, must have a field for storing a reference to one of the strategies. The context delegates the work to a linked strategy object.
Here’s an example of some UI fields that we want to extend. We’ll use the strategy pattern to do this.
Here’s a simple example without using this pattern. We have specific specialized classes for each field.
// starting code
interface FormField {
    val name: String
    val value: String
    fun isValid(): Boolean
}

class EmailField(override val value: String) : FormField {
    override val name = "email"
    override fun isValid(): Boolean {
        return value.contains("@") && value.contains(".")
    }
}

class UsernameField(override val value: String) : FormField {
    override val name = "username"
    override fun isValid(): Boolean {
        return value.isNotEmpty()
    }
}

class PasswordField(override val value: String) : FormField {
    override val name = "password"
    override fun isValid(): Boolean {
        return value.length >= 8
    }
}

fun main() {
    val emailForm = EmailField("nobody@email.com")
    val usernameForm = UsernameField("none"
    val passwordForm = PasswordField("*")
}
Let’s refactor this to use the pattern. Our validator interface/classes represent the interchangeable strategies.
// ending code
fun interface Validator {
    fun isValid(value: String): Boolean
}

val emailValidator = Validator { it.contains("@") && it.contains(".") }
val usernameValidator = Validator { it.isNotEmpty() }
val passwordValidator = Validator { it.length >= 8 }

class FormField(val name: String, val value: String, private val validator: Validator) {
    fun isValid(): Boolean {
        return validator.isValid(value)
    }
}

fun main() {
    val emailForm = FormField("email", "nobody@email.com", emailValidator)
    val usernameForm = FormField("username", "empty", usernameValidator)
    val passwordForm = FormField("email", "***", passwordValidator)
}
Observer
Observer is a behavioural design pattern that lets you define a subscription mechanism to notify multiple objects about any events that happen to the object they’re observing. This is also called publish-subscribe.
The object that has some interesting state is often called subject, but since it’s also going to notify other objects about the changes to its state, we’ll call it publisher. All other objects that want to track changes to the publisher’s state are called subscribers, or observers of the state of the publisher.
Subscribers register their interest in the subject, who adds them to an internal subscriber list. When something interest happens, the publisher notifies the subscribers through a provided interface.
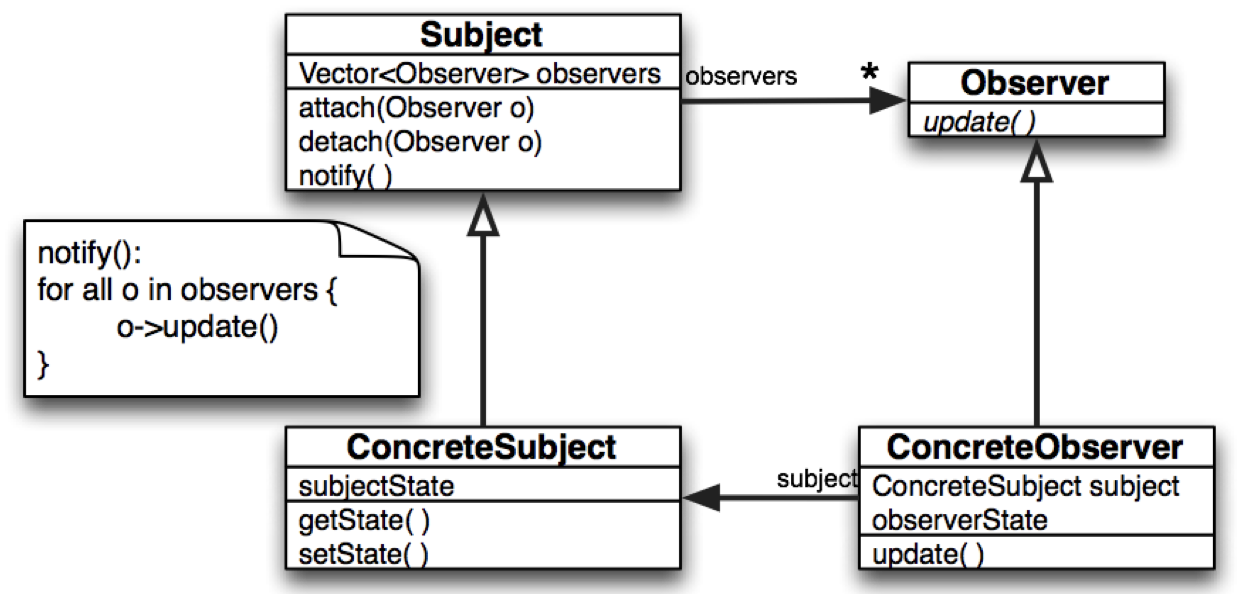
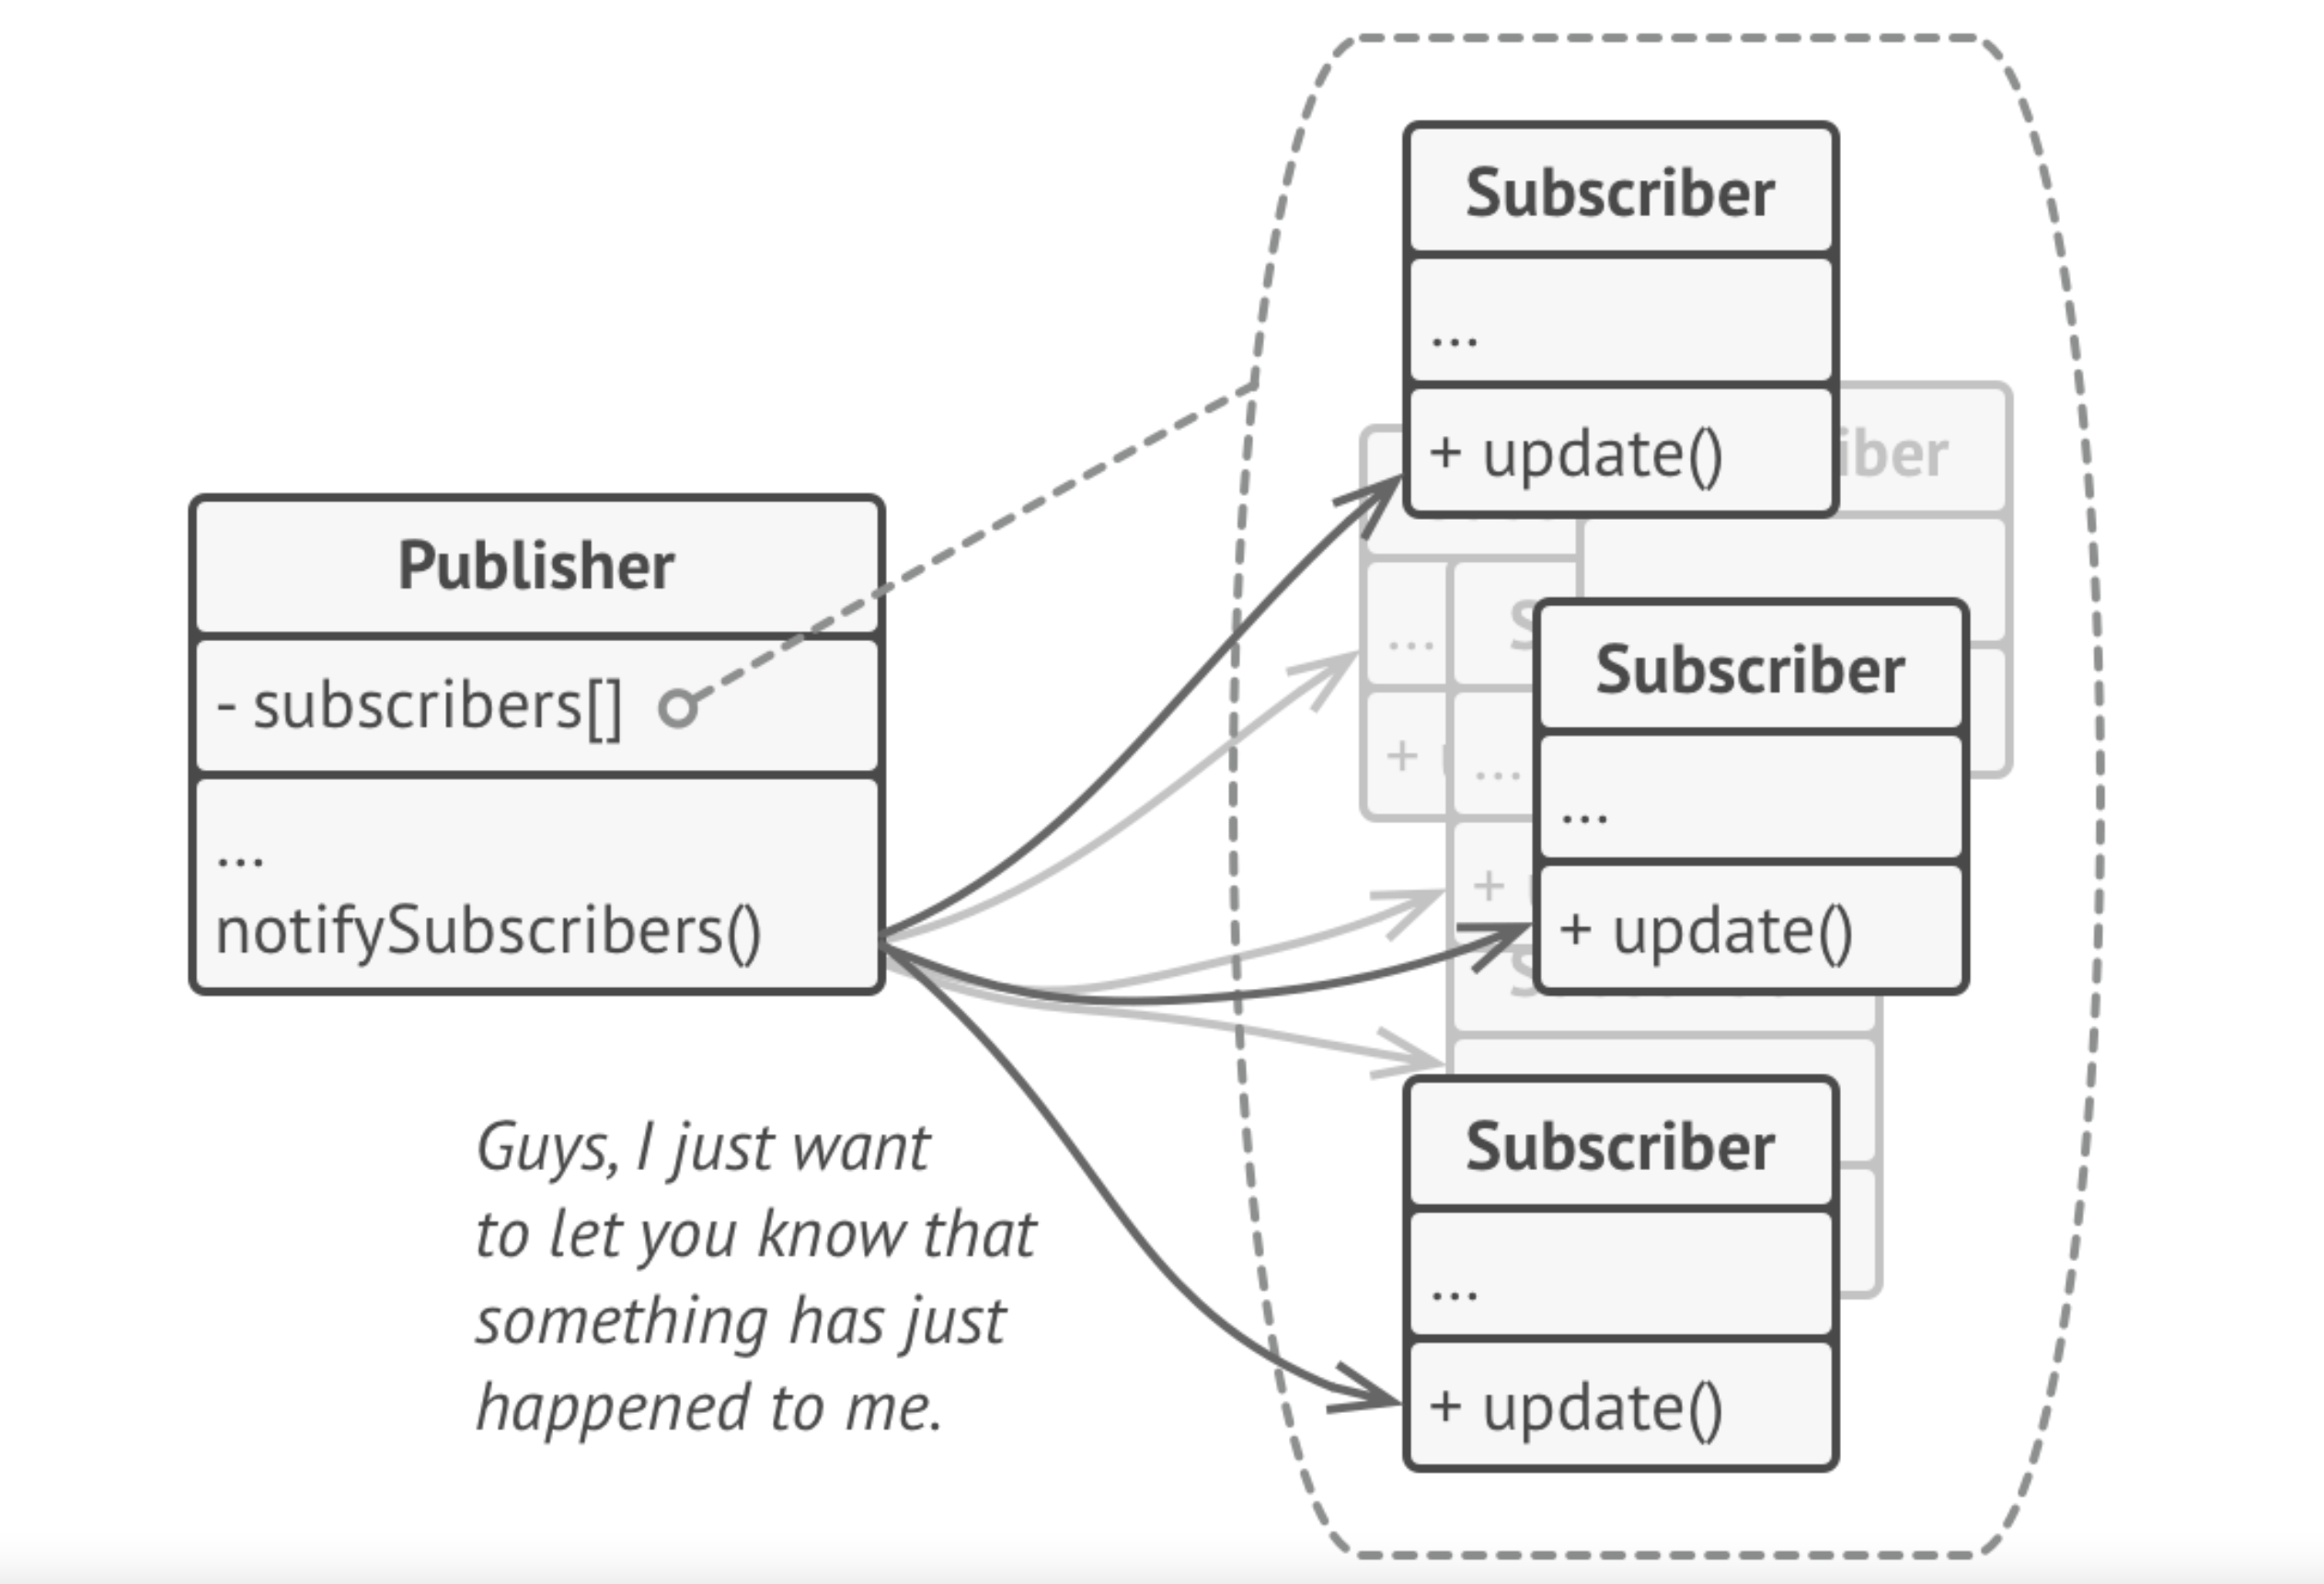
The subscribers can then react to the changes.
A modified version of Observer is the Model-View-Controller (MVC) pattern, which puts a third intermediate layer—the Controller—between the Publisher and Subscriber to handle user input. We’l review this further in User Interfaces.
Last Word
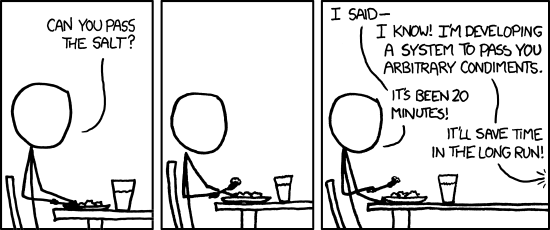
Software modelling
Imagine that you’ve defined your requirements. You know who your users are, what they need (which may be different from what they want). You’ve identified a problem and the components of a solution. What comes next?
You need to start modelling your application, determining how to structure your application to meet these requirements.
What is software modeling?
Software modeling involves creating abstract representations of the most significant aspects of the software under study. It provides a means for software engineers, the development team and other stakeholders to analyze, reason about, and understand key elements of the structure, behavior, intended use, and assembly considerations of the software. Modeling facilitates making important decisions about the software or components. It also enables effective communication of software information to various stakeholders.
Models are abstractions and, as such, do not usually encompass every feature or nuance of the software under every possible condition. Modeling typically focuses on capturing aspects or characteristics of the software that are most relevant to addressing specific issues or questions.
There are three overarching principles that guide software modeling activities:
-
Model the essentials: Good models do not represent every minor feature for all scenarios. Modeling involves the most salient aspects needed to address the specific issues or questions. Trivial details are abstracted away to keep the model understandable and wieldy. This focuses on key characteristics for informed decision-making.
-
Provide perspective: Modeling constructs different views using defined rules to express each within the chosen modeling language and tools. This multifaceted, perspective-driven approach brings dimensionality. For example, models may provide structural, behavioral, temporal or organizational views. Organizing into separate views focuses on modeling for each view on specific concerns.
-
Enable effective communication: Diligent, uniform modeling facilitates straightforwardly conveying software information to stakeholders. Careful use of domain terminology and modeling language semantics enables articulation in a familiar vocabulary. Strict syntactic and semantic adherence also improves expression. Explicit notation contributes to communicative models, while modeling pragmatics helps share unambiguous meaning.
What does each model typically consist of?
A typical software model consists of an aggregation of multiple submodels. Each submodel provides a partial, simplified description and representation of some aspect or perspective of the software under consideration.
What is behavioral modeling?
Behavioral modeling is a model type that focuses on identifying and defining the dynamic behavioral aspects of software components. The goal is to represent how software functions, features, and system elements behave when in operation.
Behavioral models generally take one of three basic forms:
- State machine representations – These models depict software behavior in terms of defined states that the software or components can be in, along with events that can trigger transitions between those states. State machine modeling is valuable for elucidating complex workflows, protocols, lifecycles, and user interaction flows.
- Control flow models – These behavioral models illustrate software behavior through sequences of events, triggers, and messages that cause software processes to be dynamically activated or deactivated over time. Control flows are useful for expressing orchestration and coordination logic.
- Data flow models – This form represents software behavior in terms of how data moves through various processes, transformations, and mappings in route to its ultimate destination in data stores or data sinks. Data flow modeling helps clarify throughput and signal processing behavior.
Domain-Driven Design
Domain-Driven Design (DDD) is all about building a model that reflects the real-world domain (aka “problem area” in which your working). As a software developer, your goal is to build an understanding of the problem domain, and then building classes and functionality that reflect the real-world domain. You may even go so far as to define a Domain Specific Language to reflect the problem domain using domain-specific terminology.
For example, in a DDD model of a banking system:
- You might have classes like
Customer,Account,Transaction. - Your class methods would be actions in the business domain, like
withdraw,deposit,authorize.
DDD excels in building up a system that needs to accurately reflect a real-world system or process, along with all of it’s constraints and rules. e.g., a medical imaging system that stores and manipulates medical images is very likely going to be build to accommodate an existing process within a hospital. Getting the domain correct is critical for this type of software!
Goals of DDD
Domain-driven design is predicated on the following goals:
- Placing the project’s primary focus on the core domain and domain logic layer;
- Basing complex designs on a model of the domain;
- Initiating a creative collaboration between technical and domain experts to iteratively refine a conceptual model that addresses particular domain problems.
When to use it?
When should you use this?
- Your problem domain is extremely complex and you need to ensure that you are “following the rules” of the domain.
- You need to engage domain experts, and require their input in your design to encode these rules. DDD provides you with a common set of terminology that you can use e.g., you can discuss the behaviour of your design in terms of the problem domain.
- Your business domain is growing and evolving. DDD is suitable since you can grow the system as your understanding of the domain grows.
- You need to split development across a large number of teams or developers. With DDD it may be easier to isolate parts of the system to be developed independently.
When should you not use this?
- It doesn’t suit more abstract problems.
- Your problem isn’t modelling a real-world system.
Last Word
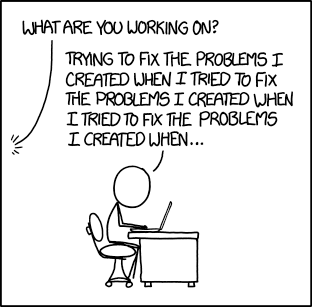
Code structure
Where do I start?
Now you know what your goals should be, how it should be structured as a layered architecture, and you’ve thought about some design principles to guide your implementation…
What’s next? How do you actually get started?
You know that:
- You need layers for your user-interface, domain and model.
- You have features that are orthogonal to these layers e.g., your recipe application will probably need to fetch data (model and persistance), modify and repackage it into a useful structure (domain) and display it (view).
Do you write all of your views first? Do you build models first? What to do?
Vertical slicing
In software development, vertical slicing is an approach where a feature or functionality is developed and delivered end-to-end in a single iteration. Unlike traditional methods that focus on building software layer by layer (horizontal slicing), vertical slicing carves out a fully functional piece across all layers or aspects of the application – right from the user interface down to the data access layer.
We recommend vertical slicing.
Why do this?
- It aligns your design and code with your user stories and features. You can build related features together, which will result in a more cohesive design.
- You are delivering working functionality each iteration. You can demonstrate (and get feedback) on a specific feature set.
- You have working code faster, which reduces risk in your project (compare this to horizontial scaling, where you might build an entire layer, but can’t actually demonstrate features until you integrate all of the changes later in the project).

Horizontal slicing
The counter to veritical slicing is horizontal slicing where you build entire layers at a time. This approach would suggest that you build the entire model + persistance layer, separate from the user-interface layer. You would leave integrating these layers (and adding user features) later in the project.
There is a time and place for horizontal slicing, typically when you’re building a library or framework to address specific technical needs. For example, maybe your data is so complex that you need a robust model in place to do anything. That might warrant building out most of the Model ASAP. However, even in this scenario, I would recommend dividing your labour: have some people continue building features (vertically) and they can provide API feedback while the Model is being built.
In most cases, vertical slicing will give you better results since it focuses on delivering testable features.
How do I structure my source code?
This is a vertical structure.
Each feature is a top-level package, and within that package, you have sub-packages for the different architectural layers.
e.g. a recipe application with both a card (detail) view and a list (summary) view of recipe data. The lowest level packages would contain the relevant classes for that package.
.
├── main
│   └── kotlin
│       ├── recipe-card
│       │   ├── domain
│       │   ├── model
│       │   └── userinterface
│       └── recipe-list
│           ├── domain
│           ├── model
│           └── userinterface
This has a major advantage in that each feature is isolated and testable within its own namespace. i.e., you can write unit tests that check the model, domain and UI classes for a particular feature and ensure that they work well together.
Best practices
Useful software engineering practices.
Version control
A Version Control System (VCS) is a software system designed to track changes to source code over time. This allows you to carefully track what changes have been made, merge changes from diferent people on a software team, and make sure that only desired changes make it to production.
Common VCS systems include Mercurial (hg), Subversion (SVN), and Perforce. We’ll be using Git, a very popular VCS, in this course. A VCS provides some significant benefits:
History A VCS provides a long-term history of every file. This includes tracking when files were added, or deleted, and every modification that has been made. Did you break something? You can always unwind back to the “last good” change that was saved, or ever compare your current code with the previously working version to identify an issue.
Versioning Software evolves over time, and we often have multiple relevant versions of code e.g., multiple releases that we have provided to customers. Versioning refers to our ability to track sets of changes over time, and assign them semantically meaningful labels or version numbers.
Collaboration
A VCS provides the necessary capabilities for multiple people to work on the same code simultaneously. Changes need to be isolated while features are being developed, and then merged together carefully. We’ll discuss the use of branches, a Git feature, to support this.
Distributed Early VCS systems required near-constant coordination between your working environment and a remote server that hosted the code. Git is different; it was designed as a distributed VCS. This means that you can work on changes to source code without any need to access a central server. Decoupling local and remote changes was one of the major drivers to Git’s early success.
Installation
Git can be installed from the Git home page or through a package manager (e.g. Homebrew on Mac). Although there are graphical clients that you can install, Git is primarily a command-line tool.
Once installed, you will want to make sure that the git executable (git or git.exe) is in your path. You can check this by typing git --version on the command-line.
$ git --version
git version 2.39.3 (Apple Git-146)
Concepts
Version control is designed around the concept of a changeset: a grouping of files that together represent a change to the software that you’re tracking (e.g. a feature that you’ve implemented may impact multiple source files).
Git is designed around these core concepts:
Repository The location of your source code. This can be local (where you are only storing source code on your own machine) or a remote server (e.g., GitHub, where source code is stored in a central location). Git operates perfectly well in either of theses situations. A remote server adds some additional functionality: the ability to perform backups and other maintainance, and more importantly, it simplifies sharing your repository with other people.
Anything you work on with a group of people should be stored in a remote repository like GitLab or GitHub. However, you might have small projects that you never intend to share, and you can also use Git to track changes locally.
Working Directory A copy of the repository, on your local system, where you will make your changes before saving them in the repository. Your working directory contains all of the source code; this is required so that you can build, run your code locally.
Staging Area A collection of changes that you wish to track in Git as a changeset. This should be a set of related changed, reflecting a single feature, bug fix or other logical grouping.
Git works by operating on a set of files (aka changeset): we git add files in the working directory to add them to the change set; we git commit to save the changeset to the local repository. We use git push and git pull to keep the local and remote repositories synchronized.
Git basics
Standard Git functionality is accessed through the command-line. You can use a graphical client, but you will need to understand the command-line concepts to work with Git effectively.
Git commands
Git commands are of the form git <command>. Use git help to get a full list of commands.
$ git --help
usage: git [-v | --version] [-h | --help] [-C <path>] [-c <name>=<value>]
           [--exec-path[=<path>]] [--html-path] [--man-path] [--info-path]
           [-p | --paginate | -P | --no-pager] [--no-replace-objects] [--bare]
           [--git-dir=<path>] [--work-tree=<path>] [--namespace=<name>]
           [--super-prefix=<path>] [--config-env=<name>=<envvar>]
           <command> [<args>]

These are common Git commands used in various situations:

start a working area (see also: git help tutorial)
   clone     Clone a repository into a new directory
   init      Create an empty Git repository or reinitialize an existing one

work on the current change (see also: git help everyday)
   add       Add file contents to the index
   mv        Move or rename a file, a directory, or a symlink
   restore   Restore working tree files
   rm        Remove files from the working tree and from the index

examine the history and state (see also: git help revisions)
   bisect    Use binary search to find the commit that introduced a bug
   diff      Show changes between commits, commit and working tree, etc
   grep      Print lines matching a pattern
   log       Show commit logs
   show      Show various types of objects
   status    Show the working tree status

grow, mark and tweak your common history
   branch    List, create, or delete branches
   commit    Record changes to the repository
   merge     Join two or more development histories together
   rebase    Reapply commits on top of another base tip
   reset     Reset current HEAD to the specified state
   switch    Switch branches
   tag       Create, list, delete or verify a tag object signed with GPG

collaborate (see also: git help workflows)
   fetch     Download objects and refs from another repository
   pull      Fetch from and integrate with another repository or a local branch
   push      Update remote refs along with associated objects
You can also type git help on each sub-command to get detailed assistance.
$ git help commit
GIT-COMMIT(1)                   Git Manual                  GIT-COMMIT(1)

NAME
       git-commit - Record changes to the repository

SYNOPSIS
       git commit [-a | --interactive | --patch] [-s] [-v] [-u<mode>] [--amend]
                  [--dry-run] [(-c | -C | --squash) <commit> | --fixup [(amend|reword):]<commit>)]
                  [-F <file> | -m <msg>] [--reset-author] [--allow-empty]
                  [--allow-empty-message] [--no-verify] [-e] [--author=<author>]
                  [--date=<date>] [--cleanup=<mode>] [--[no-]status]
                  [-i | -o] [--pathspec-from-file=<file> [--pathspec-file-nul]]
                  [(--trailer <token>[(=|:)<value>])...] [-S[<keyid>]]
                  [--] [<pathspec>...]
Setup a local repository
To create a local repository that will not need to be shared:
- Create a repository. Create a directory, and then use the
git initcommand to initialize it. This will create a hidden.gitdirectory (where Git stores information about the repository).
$ mkdir repo
$ cd repo
$ git init
Initialized empty Git repository in ./repo/.git/
$ ls -a
.    ..   .git
- Make any changes that you want to your repository. You can add or remove files, or make change to existing files.
$ vim file1.txt
ls -a
.         ..        .git      file1.txt
- Stage the changes that you want to keep. Use the
git addcommand to indicate which files or changes you wish to keep. This adds them to the “staging area”.git statuswill show you what changes you have pending.
$ git add file1.txt
$ git status
On branch master

No commits yet

Changes to be committed:
  (use "git rm --cached <file>..." to unstage)
new file:   file1.txt
- Commit your staging area.
git commitassigns a version number to these changes, and stores them in your local repository as a single changeset. The-margument lets you specify a commit message. If you don’t provide one here, your editor will open so that you can type in a commit message. Commit messages are mandatory, and should describe the purpose of this change.
$ git commit -m "Added a new file"
Setup a remote repository
A remote workflow is almost the same, except that you start by making a local copy of a repository from a remote system.
- Clone a remote repository. This creates a new local repository which is a copy of a remote repository. It also establishes a link between them so that you can manually push new changes to the remote repo, or pull new changes that someone else has placed there.
# create a copy of the CS 346 public repository
$ git clone https://git.uwaterloo.ca/j2avery/cs346.git ./cs346
Making changes and saving/committing them is the same as the local workflow (above).
- Push to a remote repository to save any local changes to the remote system.
$ git push
- Pull from remote repository to get a copy of any changes that someone else may have saved remotely since you last checked.
$ git pull
- Status will show you the status of your repository; log will show you a history of changes.
# status when local and remote repositories are in sync
$ git status
On branch master
Your branch is up to date with 'origin/master'.

nothing to commit, working tree clean

# condensed history of a sample repository
$ git log --oneline
b750c10 (HEAD -> master, origin/master, origin/HEAD) Update readme.md
fcc065c Deleted unused jar file
d12a838 Added readme
5106558 Added gitignore
Suggestions for using Git
- Work iteratively. Learn to solve a problem in small steps: define the interface, write tests against that interface, and get the smallest functionality tested and working.
- Commit often! Once you have something work (even partly working) commit it! This gives you the freedom to experiment and always revert back to a known-good version.
- Branch as needed. Think of a branch as an efficient way to go down an alternate path with your code. Need to make a major change and not sure how it will work out? Branch and work on it without impacting your main branch.
Tags
A tag is a label that you can apply to a particular point in a repositories history. They are useful to track specific important points in time e.g., a software-release point.
Git supports lightweight and annotated tags:
- A
lightweight tagis just a pointer to a specific commit. Annotated tagsare stored as full objects. They’re checksummed; contain the tagger name, email, and date and have a tagging message.
Useful commands:
git tagto display the tags that have been applied.git tag -a Xto add annotated tag X to the current branch/head.git checkout Xto checkout a branch based on a tag. This is useful with a versioned commit history!
See Git basics tagging for more information.
Branching
The biggest challenge when working with multiple people on the same code is that you all may want to make changes to the code at the same time. Git is designed to simplify this process.
Git uses branches to isolate changes from one another. You think of your source code as a tree, with one main trunk. By default, everyone in git is working from the “trunk”, typically named master or main (you can see this when we used git status above).

A branch is a fork in the tree, where we “split off” work and diverge from one of the commits (typically from a point where everything is working as expected)! Once we have our feature implemented and tested, we can merge our changes back into the main branch.
Notice that there is nothing preventing multiple users from doing this. Because we only merge changes back into main, when they’re tested, the trunk should be relatively stable code.
We have a lot of branching commands:
$ git status	// see the current branch
On branch master

$ git branch test // create a branch named test
Created branch test

$ git checkout test  // switch to it
Switched to a new branch 'test'

$ git checkout master //switch back to master
Switched to branch 'master'

$ git branch -d test // delete branch
Deleted branch test (was 09e1947).
When you branch, you inherit changes from your starting branch. Any change that you make on that branch are isolated until you choose to merge them.
See Basic Branching and Merging and Branching Worklows for more information.
Advanced Git
Commit guidelines
-
Include just what you need in a commit.
Make sure that you are only including related changes, for a single issue. You should aim to have a single commit for every significant feature or bug fix.
If you have multiple, unrelated changes to a file, you can choose which changes to include:
git add -p <file>will prompt you (y,n) for each change to include. -
Write a detailed commit message. You should include:
- Title: The first line of the commit. This should be a concise summary.
- Body: Leave a blank line after the title, and then a block of test. You should include more details, including reasons for the change or other information that will be useful. You should also include an issue number if the commit is related to an issue in GitLab (which it should be).
Branching strategies
Option 1: Mainline development
This is a strategy where the most up-to-date changes are kept on main.
- Relatively few branches from main; only created as needed.
- Merge and integrate features to
mainas they are completed. - Requires diligent testing and care!
- Releases done from
mainbranch.

Option 2: Release and feature branches
More complex strategies will use separate branches for individual work. Merges are done back to an intermediate release branch, where releases are staged and performed. Main is where all release branches are ultimately integrated.
- Multiple branches, at different levels.
- Merge back to
releasebranches as needed. - Provides the ability to have multiple, independent releases.
- More resilient to changes, at the cost of complexity.

This model also illustrates the idea of short-lived vs. long-lived branches. Feature branches are created as needed, but are relatively short-lived: once the feature is integrated/merged back into the long-lived release branch, the feature branch can be deleted.
Feature branches
We’ll standardize on a simpler model, closer to Option 1, where we create feature branches for individual work and integrate changes back to main.
Use this workflow for adding a feature:
- Create a feature branch for that feature.
- Make changes on that branch only. Test everything.
- Code review it with the team.
- Switch back to
mainandgit mergefrom your feature branch to the master branch. If there are no conflicts with other change on themainbranch, your changes will be automatically merged by git. If your changes conflict (e.g. multiple people changed the same file) then git may ask you to manually merge them.
$ git checkout -b test // create branch
Switched to a new branch 'test'

$ vim file1.md // make some changes
$ git add file1.md
$ git commit -m "Committing changed to file1.md"

$ git checkout main // switch to main
$ git merge test // merge changes from test
Updating 09e1947..ebb5838
Fast-forward
 file1.md                   | 136 ++++++++++++++++++++++++++++++++++++++++++++++++++++++++++++++++++++++++++++++++
 1 file changed, 118 insertions(+), 18 deletions(-)

$  git branch -d test // remove branch (optional)
Deleted branch test (was ebb5838).
When you merge, Git examines your copy of each file, and attempts to apply any other changes that may have been committed to main since you created the branch. In many cases, as long as there are no conflicts, Git will merge the changes together. However, if Git is unable to do so, then you will be prompted to manually merge the changes together.
Pull requests (PRs)
One way to avoid merge issues is to review changes before they are merged into main (this also lets you review the code, manually run tests etc). The standard mechanism for this is a Pull Request (PR). A PR is simply a request to another developer (possibly the person responsible for maintaining the main branch) to git pull your feature branch and review it before merging.

We will not force PRs in this course, but you might find them useful within your team.
GitLab also calls these Merge Requests.

Last Word

Build configuration
Build requirements
When developing applications, there is a large list of steps that need to be completed before we can release our software to users. We might need to:
- Make sure that we have the correct version of source code and libraries.
- Setup our build environment and compile everything.
- Setup our test environment, and run tests.
- Build installers to distribute to users.
Performing these steps manually is error-prone and time-consuming. Instead of doing this by-hand, we tend to rely on build systems: software that is used to build other software. There are a number of build systems on the market that attempt to simplify and propvide consistency in these tasks. These tools often language or toolchain dependent due to the specifics of each programming language. e.g. make or scons for C++; cargo for Rust, maven for Java.
Builds systems automate what would otherwise be a manual process. They provide consistency and help address issues like:
- How do I make sure that all of the steps are being handled properly?
- How do I ensure that everyone is building software the same way i.e. using the same compiler options, and libraries?
- How do I ensure that tests are being run before changes are committed?
You’ve used make in previous courses. Make is popular, and suitable for smaller projects. However, it has some limitations that are problematic in this course:
- Build dependencies must be explicitly defined. Libraries must be present on the build machine, and manually maintained i.e. someone needs to download, test and install them.
Makeis tied to the underlying environment of the build machine. It relies on shell scripts and environment variables to work, and uses locally installed software to build. This makes your build environment fragile and easy to break.- Performance is poor.
Makedoes not scale well to large projects. - It is challenging to fully automate and integrate with other systems.
Gradle setup
We’re going to use Gradle, a modern build system that provides more functionality than make and is more suitable for complex projects. Why Gradle and not some other build system like Maven?
- It’s popular in the Kotlin and Java ecosystems.
- It’s the official Google-endorsed build tool for Android projects.
- It’s cross-platform and programming language agnostic.
- It’s open source and has a large community of users.
Gradle has three main pillars of functionality that we will explore:
- Managing build tasks: Built-in support for discrete tasks that you will need to perform. e.g., downloading libraries; compiling code; running unit tests and so on.
- Build configuration: A way to define how these tasks are executed.
- Dependency management: A way to manage external libraries and dependencies.
We’ll discuss these in more detail later in this section. First, let’s setup Gradle.
Project setup
Gradle is always setup in the context of a project: a specific directory structure, and a set of configuration files that define how your source code will be built. You create the Gradle project, and then your source code (and other assets) are added to that directory structure.
Project creation can be done in IntelliJ IDEA or Android Studio, or by using the gradle command-line tool.
Create a project
We’ll create a project using IntelliJ IDEA.
Use the File > New Project wizard in IntelliJ IDEA to create a new empty project. This will give you a top-level project with starting configuration files.
Projects can be created with a variety of configurations, but for this course, you should choose Kotlin as your programming language, Gradle for your build system, and Kotlin for your DSL language.

The result of this process is a new project with a directory structure and configuration files that are ready to use with Gradle. Note that the project will be specific to the type of project that you chose e.g., Android, Desktop, Web Service.
If you have Gradle installed on your machine, you can create a new project from the command line using the gradle init command. This will also create a new project with the default configuration files.
We tend to use the IntelliJ wizard, as it doesn’t require a separate Gradle installation.
Using the gradle wrapper
At the top-level of your project’s directory structure will be a script named gradlew (or gradlew.bat for Windows users). This is the Gradle wrapper: a script that you can use to run Gradle tasks without having to install Gradle on your machine. You can run it and pass it the same command-line arguments that you would normally pass to Gradle.
This allows you to run Gradle tasks as-if you had Gradle installed locally (but without needing to install it).
For example, we can invoke the Gradle wrapper with the help task to get information about how Gradle is configured and how to use it. This is the same as running gradle help if you had Gradle installed on your machine.
$ ./gradlew help
Starting a Gradle Daemon (subsequent builds will be faster)

> Task :help

Welcome to Gradle 7.5.1.

To run a build, run gradlew <task> ...
To see a list of available tasks, run gradlew tasks
To see more detail about a task, run gradlew help --task <task>
To see a list of command-line options, run gradlew --help
For more detail on using Gradle, see https://docs.gradle.org/7.5.1/userguide/command_line_interface.html
For troubleshooting, visit https://help.gradle.org
When you run a task using the Gradle wrapper, it downloads and caches the appropriate version of Gradle, and then uses that version to run your tasks. This ensures that you are running the correct version of Gradle for your project!
For this reason, if you are running tasks from the command-line, you should always use the Gradle wrapper.
Wrapper configuration
The Gradle project configuration (gradle/gradle-wrapper.properties) lists the version of Gradle to be used for your project.
To change the version of Gradle being used, update the gradle-wrapper.properties file, and change the distributionURL line to the correct version e.g., Gradle 8.0.2 below.
distributionBase=GRADLE_USER_HOME
distributionPath=wrapper/dists
distributionUrl=https\://services.gradle.org/distributions/gradle-8.0.2-bin.zip
zipStoreBase=GRADLE_USER_HOME
zipStorePath=wrapper/dists
The gradle-wrapper.properties file should be stored in Git, as part of your build configuration scripts.
Check that the Kotlin and Gradle versions are compatible. You can find this information in the Kotlin compatibility matrix.
You can probably just use the version that the project wizard selected for you when the project was created.
Gradle tasks
Projects often have complex build requirements that include a series of steps that need to be performed. For example, you might need to:
- Compile your source code,
- Run tests to make sure it built and works properly,
- Build a distributable package.
You might also have additional steps: generate documentation, run static analysis, or deploy to a server.
Any build system needs to support a wide range of steps like this, and it should allow you to define how these tasks will be performed. It should also run them in the correct order.
Gradle uses the term task to describe a set of related functions that can be applied to a particular type of project. For example, you might have a clean task to remove temporary build files, and a build task to build your Kotlin console project. Complex projects will add additional tasks that are required for that style of project e.g., build-android-application.
Often complex projects will require many different tasks to be executed in a particular order to achieve your goal. For instance, there are likely a dozen or so tasks required to be executed in order to build a working Android application. Gradle is able to manage these tasks and execute them in the correct order for you.
In this, we way that Gradle is declarative, in that you describe what you want to do, rather than how you want to do it. This is incredible useful, as it allows Gradle to manage the details of how to perform more complex tasks for you. We will discuss how to describe your project using build configuration files later in this section.
Running tasks
To run Gradle tasks from the command line, use the Gradle wrapper with the appropriate the task name. We can run ./gradlew tasks to see a list of tasks that are supported in your project.
$ ./gradlew tasks

> Task :tasks

------------------------------------------------------------
Tasks runnable from root project 'gradle'
------------------------------------------------------------

Application tasks
-----------------
run - Runs this project as a JVM application

Build tasks
-----------
assemble - Assembles the outputs of this project.
build - Assembles and tests this project.
buildDependents - Assembles and tests this project and all projects that depend on it.
buildNeeded - Assembles and tests this project and all projects it depends on.
classes - Assembles main classes.
clean - Deletes the build directory.
jar - Assembles a jar archive containing the classes of the 'main' feature.
testClasses - Assembles test classes.

# many more that are not shown
You can execute any of these tasks through the Gradle wrapper. e.g. ./gradlew build or ./gradlew clean.
Commonly used tasks include:
./gradlew helpwill provide online help../gradlew taskswill list all of the tasks that are available../gradlew cleanwill remove temporary build files../gradlew buildwill build your project../gradlew runwill usually run your project (depending on the platform).
You can also run tasks from within IntelliJ. Both IntelliJ IDEA and Android Studio include a Gradle IDE plugin, which allows you to run Gradle tasks.
View > Tool Windows > Gradle will open the Gradle window. Tasks are grouped by category. You can run individual tasks by double-clicking on them.
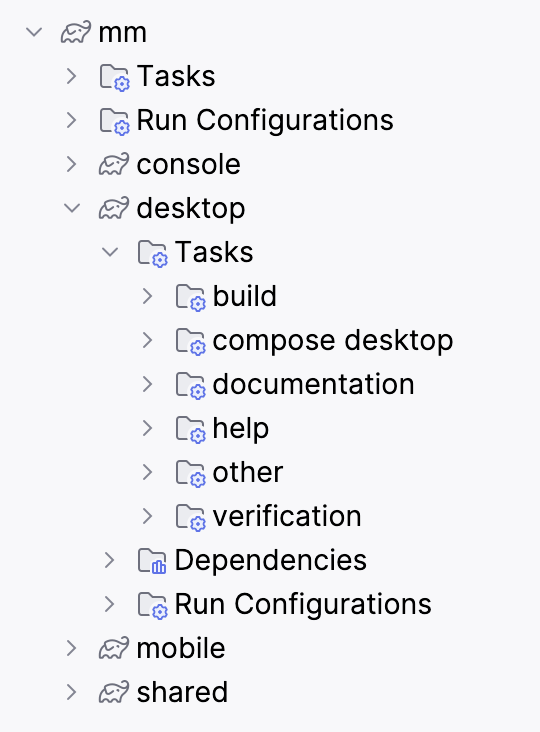
Using plugins
Gradle comes with a small number of predefined tasks. You will usually need to add additional tasks that are specific to your type of project. We do this via plugins.
A plugin is a collection of tasks that have been bundled together to perform a specific function. For example, the java plugin adds tasks for compiling Java code, running tests, and building a distributable package. Plugins can also add additional configuration options, or set defaults for existing options.
There are different types of plugins.
- Core plugins: These are the plugins that are included with Gradle by default. They provide basic functionality that is required by many projects. Core plugins include
java(which adds support for compiling Java code), andapplication(which adds support for running code, and building a distributable package).
Core plugins are listed in the Gradle documentation, and you can use them in your project by adding a line to the plugins section of your build.gradle.kts file.
plugins {
    java
}
- Community Plugins: These are plugins that are created by the community and are not included with Gradle by default. They provide additional functionality that is not available in the core plugins. An example would be the ‘io.github.gmazzo.codeowners.jvm’ plugin, which provides some very specific functionality.
Community plugins can be found in the Gradle Plugin Portal. This is a repository of plugins that have been created by the community. You can search for plugins by name, or by category.

Gradle plugin search (gradle.org)
Under the plugin page on the Gradle Plugin Portal, you will find instructions on how to add the plugin to your project. Typically, you will need to add a line to the plugins section of your build.gradle.kts file.

Running ./gradlew tasks will list all of the tasks that are available in your project. This will include tasks that are added by plugins.
Build configuration
Once you have tasks defined, you need some way to configure and control how they are executed.
It’s certainly possible to write custom scripts e.g, bash shell scripts to execute these tasks, but they are challenging to maintain, and need to be written for each project.
Instead, Gradle provides a way to define tasks in build configuration files, and then run them with a single command. This makes it easy to build complex projects, and ensures that the build process is consistent across all of your projects.

Build configuration (gradle.org)
Unlike other configuration-based build systems, Gradle uses a Domain Specific Language (DSL) to define build scripts; you actually write your scripts in Groovy or Kotlin. This makes Gradle extremely configurable and extensible to meet complex project requirements.
Directory structure
When you create a new project with Gradle, it will create a directory structure for you.
This directory structure is opinionated: Gradle requires a specific directory structure to work correctly, so you should work within the structure that it gives you. Most of these files are configuration file, or scripts that help execute gradle. The actual source code will be placed in the app/src directory.
A standard Gradle project has the following directory structure:
.
├── build.gradle.kts
├── gradle
│   └── wrapper
├── gradle.properties
├── gradlew
├── gradlew.bat
├── settings.gradle.kts
└── src
    ├── main
    └── test
You can choose Android to build an Android project as well. It will produce an nearly-identical directory structure; only the configuration files will be different.
Configuration files
build.gradle.kts and settings.kts are the configuration files for your project, describing logical structure, dependencies, and so on.
!!! warning We strongly recommend that you use the New Project wizard to create your project. This will ensure that you have the correct directory structure and configuration files. !!!
settings.gradle.kts
This is the top-level configuration file. You likely don’t need to modify this for single-target projects. Later, when we discuss multi-project builds, we will modify this file to add additional modules.
plugins {
    id("org.gradle.toolchains.foojay-resolver-convention") version "0.5.0"
}

// top-level descriptive name
rootProject.name = "project-name"
build.gradle.kts
This is the detailed build configuration. You might need to modify this file to:
- Add a new dependency (i.e. library)
- Add a new plugin (i.e. set of custom tasks)
- Update the version number of a product release (
versionbelow).
Briefly, here’s what each section represents:
pluginsare used to add project-specfic tasks and functionality. In this case, thejvmplugin is added to support Kotlin desktop code.repositoriesare locations where libraries are stored and made available.mavenCentral()is the standard online repository for Java and Kotlin libraries.dependenciesare external libraries that your project needs. In this case, thekotlin-testlibrary is added.- the
kotlinsection is used to specify properties for the corresponding plugins. In this case, “Java 17” is specified for your project config.
// includes jvm tasks
plugins {
    kotlin("jvm") version "1.9.21"
}

// product release info
group = "org.example"
version = "1.0-SNAPSHOT"

// location to find libraries
repositories {
    mavenCentral()
}

// add libraries here
dependencies {
    testImplementation(`org.jetbrains.kotlin:kotlin-test`)
}

tasks.test {
    useJUnitPlatform()
}

// java version
kotlin {
    jvmToolchain(17)
}
Multi-project builds
A simple build is suitable for most standalone, independent projects. Keep in mind that it is restricted to the specific project type that you chose with the New Project wizard e.g., Android, Desktop, Web Service.
What do you do if you want to build a more complex project e.g., a combination of desktop, Android, web service and so on? You could do this with multiple separate projects, but it’s often beneficial to have them in the same project.
In Gradle, this is known as a multi-project build, and it allows you to build multiple projects from a single top-level project. This is useful when you have multiple projects that depend on each other, or when you want to share code between projects.
This is not required unless you specifically have 2 or more different projects to build e.g., a client AND a web service. If you just have a client connecting to a remote database, this is unecessary.
There is a specific structure that you need to follow to create a multi-project build. In the example below, we have subprojects application, models and server which represent different projects.
.
├── application
│   ├── bin
│   ├── build.gradle.kts
│   └── src
├── gradle
│   └── wrapper
├── gradle.properties
├── gradlew
├── gradlew.bat
├── local.properties
├── models
│   ├── bin
│   ├── build.gradle.kts
│   └── src
├── server
│   ├── bin
│   ├── build.gradle.kts
│   └── src
└── settings.gradle.kts
To create a multi-project build, you need to create subprojects for each project that you want to manage. Each subproject should have its own build.gradle.kts file, and a src directory containing the source code for that project. The top-level settings.gradle.kts describes common dependencies and the overall project structure.
Let’s walk through an example of how to create a multi-project build.
Step 1: Move the application code into an application project:
To move the code:
- Create a directory named
application. - Move the
build.gradle.ktsandsrcfolder from the root into theapplicationdirectory. - Edit the top-level
settings.gradle.ktsand add the following line to the bottom of the file:
include("application")
Step 2: Add a server project
To add a server project:
- Create a type of project using the IntelliJ IDEA Project Wizard e.g., Ktor server.
- Place it in a subdirectory of your main project. Each subdirectory should just contain the generated
srcdirectory, and thebuild.gradle.ktsfile. You don’t want anything else in the project subdirectory. - Finally, update the
settings.gradle.ktsto add each project subdirectory in theincludestatement.
include("application", "server")
Step 3: Add a models project
Repeat Step 2 with an empty project to hold shared models.
Dependency management
The final core function is managing libraries and dependencies.
When we write software, we often rely on external libraries to provide functionality that we don’t want to write ourselves. For example, we might use some library to handle networking, or to provide a user interface. These libraries are known as dependencies, and they are a critical part of modern software development.
A large challenge of any build system is managing these dependencies properly. For example, you need to make sure that you have the correct version of a library, and that any dependencies that it might need are also installed (called transitive dependencies). You also need to make sure that the library is compatible with the rest of your software, and that it doesn’t introduce any security vulnerabilities.
Gradle is designed so that you can specify your dependencies in your build scripts. Gradle will download them from an online repository as part of your build process, and manage them for you.
mavenCentral is the standard online repository for Java and Kotlin libraries.
A repository is a location where libraries are stored and made available; these can be private (e.g. hosted in your company) or public (e.g. hosted and made available to everyone).
Typically, a repository will offer a large collection of libraries across many years of releases, so that a package manager is able to request a specific version of a library and all of its dependencies.
Setting up repositories
We’ll use a public online repository for this course. The most popular Java/Kotlin repository is mavenCentral, and we’ll use it with Gradle to import any external dependencies that we might require.
You can control the repository that Gradle uses by specifying its location in the build.gradle.kts file. By default, Maven Central should already be included.
repositories {
     mavenCentral()
}
Browsing repositories
You can browse repository websites to find libraries that you might want to use. Additionally, you can use an online package directory.

Package search (jetbrains.com)
Each package information page will include the details of how to import the package into your Gradle project. e.g.
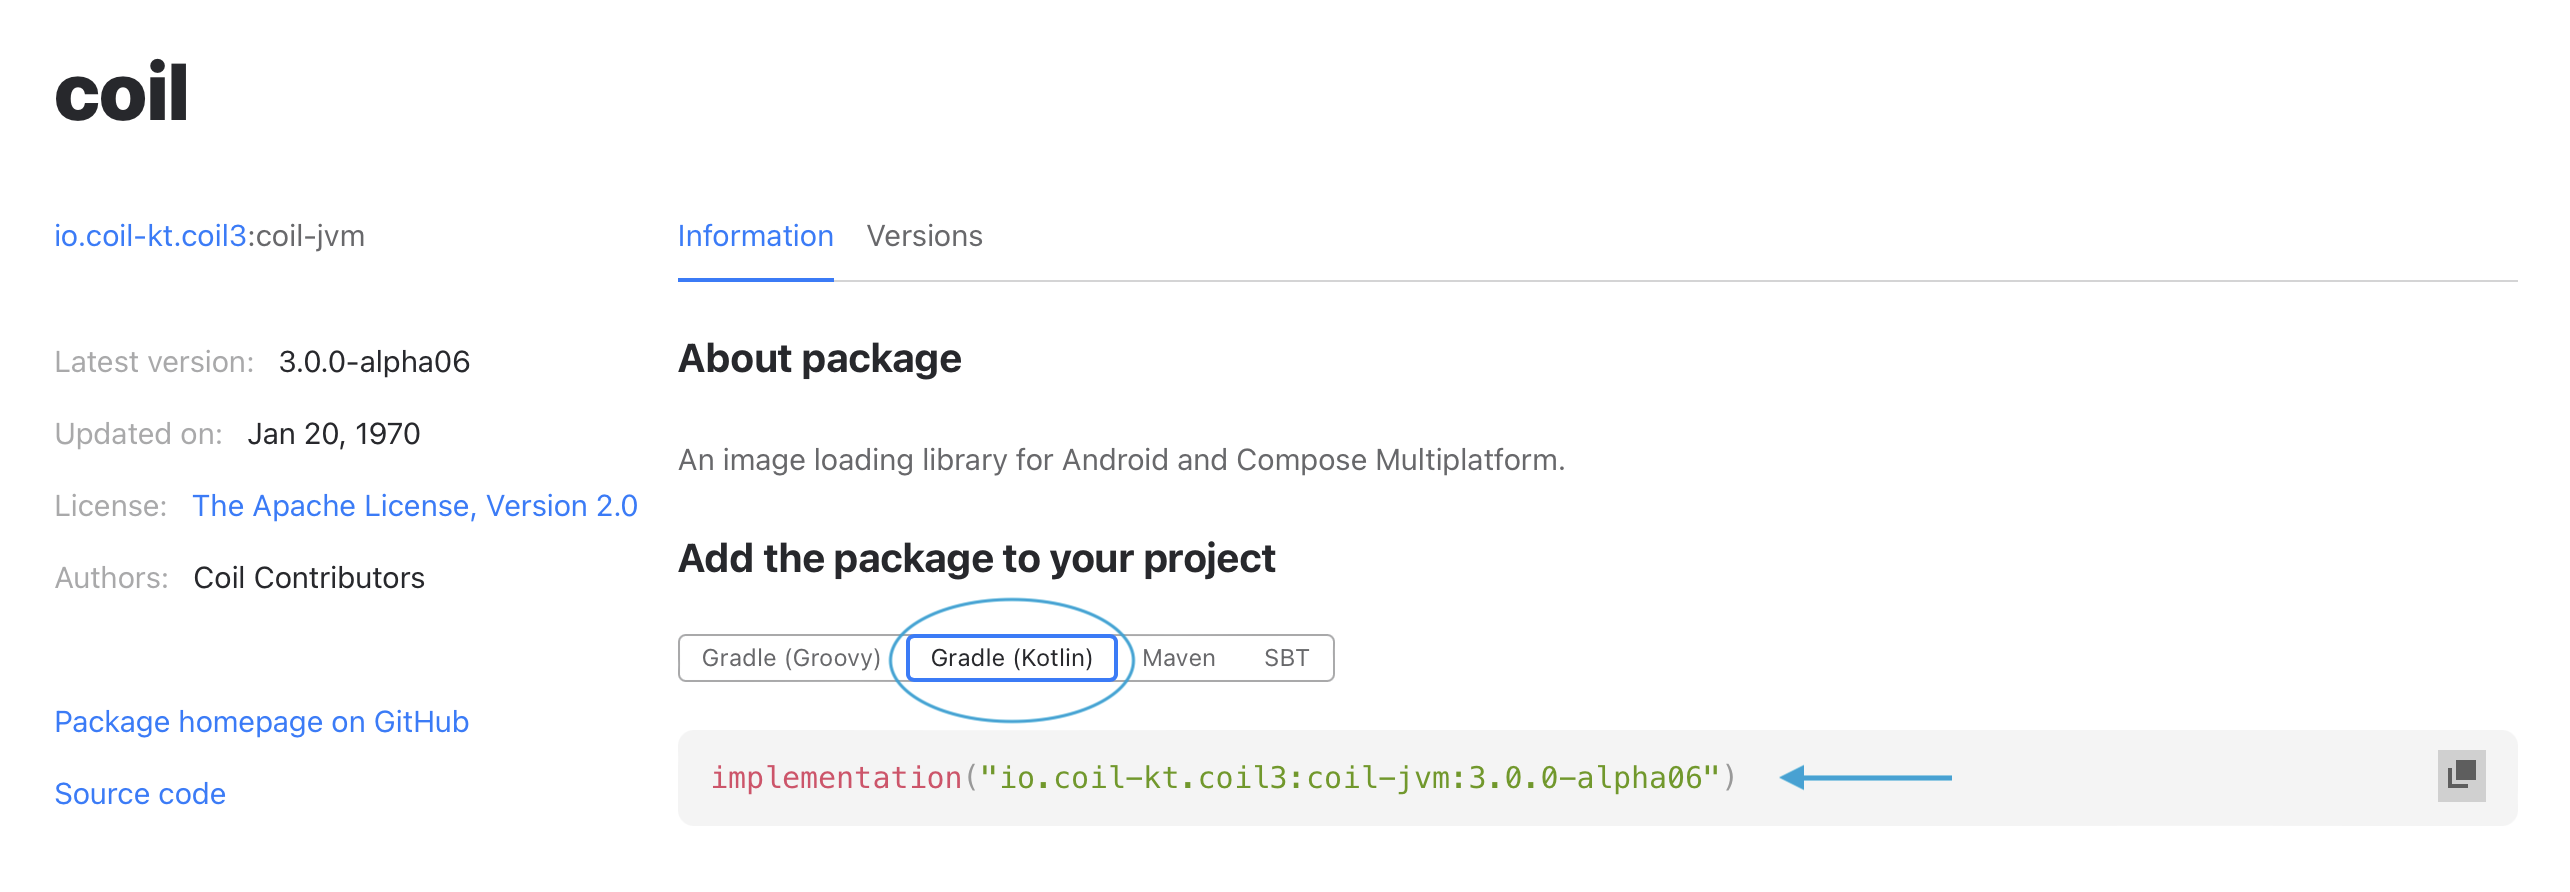
Also see Resources > Libraries for links to popular libraries.
Add dependencies
You add a specific module or dependency by adding it into the dependencies section of the build.gradle.kts file. Dependencies need to be specified using a “group name: module name: version number” (with a colon separating each one).
From the previous example, we can copy and paste the dependency line from the package information page directly into our build.gradle.kts
dependencies {
    implementation("io.coil-kt.coil3:coil-jvm:3.0.0-alpha06")
}
You generally want the most recent version that is available, but you can specify a specific version if you need to. Gradle will download the library and any dependencies that it needs, and make them available to your project.
The keyword implementation above indicates that this dependency is required for the application to both compile and run. There are other keywords that can be used to specify different types of dependencies e.g.,
runtimeOnlyfor dependencies that are only required at runtime.testImplementationfor dependencies that are only required for testing.apiwhen writing libraries, to indicate that transitive dependencies need to be exported (i.e. the libraries that your dependencies require).
You should use implementation for most dependencies.
Version catalogs
One challenge is keeping track of the versions of libraries that you are using. It’s important to keep your libraries up-to-date to ensure that you have the latest features and bug fixes. However, updating libraries can be a time-consuming process, as you need to check the library’s website for new versions, update your build file, and test your application to make sure that everything still works.
Gradle has a feature called version catalogs, which is a centralized file that contains a list of libraries and their versions. When you run a Gradle build, Gradle will check the version catalog to see if there are any updates available for the libraries that you are using. If there are updates available, Gradle will automatically update the libraries in your project to the latest versions.
When using multiple related projects, this can help ensure that all projects are using the same versions of libraries. This can help prevent compatibility issues between projects.
In Gradle 7.6 or later, the version catalog is contained in a file named libs.versions.toml in your gradle project directory.
A version catalog file contains sections for versions, libraries (dependencies) and plugins.
[versions]
kotlin-version = "2.0.20-RC"
serialization-version = "1.9.0"
clikt-version = "4.4.0"
ktor-version = "2.3.4"
ktor-api-version = "2.2.4"
json-version = "1.7.1"
slf4j-version = "2.0.7"
versions-version = "0.51.0"

[libraries]
clikt = { module = "com.github.ajalt.clikt:clikt", version.ref = "clikt-version" }
ktor-core = { module = "io.ktor:ktor-client-core", version.ref = "ktor-version"}
ktor-cio = { module = "io.ktor:ktor-client-cio", version.ref = "ktor-version"}
ktor-server = { module = "io.ktor:ktor-server-default-headers", version.ref = "ktor-version"}
ktor-api = { module = "dev.forst:ktor-api-key", version.ref = "ktor-api-version" }
json = { module = "org.jetbrains.kotlinx:kotlinx-serialization-json", version.ref = "json-version" }
slf4j = { module = "org.slf4j:slf4j-simple", version.ref = "slf4j-version"}

[plugins]
ktor = { id = "io.ktor.plugin", version.ref = "ktor-version" }
kotlin-jvm = { id = "org.jetbrains.kotlin.jvm", version.ref = "kotlin-version" }
kotlin-serialization = { id = "org.jetbrains.kotlin.plugin.serialization", version.ref = "serialization-version" }
versions = {id = "com.github.ben-manes.versions", version.ref = "versions-version" }
In build.gradle.kts, we can use these library names to refer to these specific libraries and versions.
dependencies {
plugins {
    // different forms of the same plugin declaration

    // kotlin("jvm") version "1.9.10"
    // id("org.jetbrains.kotlin.jvm") version "1.9.10"
    alias(libs.plugins.kotlin.jvm) // core kotlin

    // kotlin("plugin.serialization") version "1.9.0"
    // id("org.jetbrains.kotlin.plugin.serialization") version "1.9.0"
    alias(libs.plugins.kotlin.serialization) // json-serialization

    alias(libs.plugins.ktor) // provides networking support
    alias(libs.plugins.versions) // checks versions, see help > dependencyUpdates
}

group = "ca.uwaterloo"
version = "1.2"

application {
    mainClass.set("ca.uwaterloo.ApplicationKt")
}

repositories {
    mavenCentral()
}

dependencies {
    implementation(libs.json)
    implementation(libs.clikt)
    implementation(libs.slf4j)

    implementation(libs.ktor.cio)
    implementation(libs.ktor.core)
    implementation(libs.ktor.server)
    implementation(libs.ktor.api)
}
Last word
It’s staggering how much software is available through package repositories…
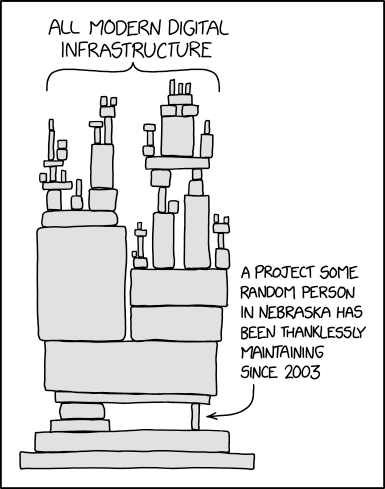
Pair programming
Pair programming (‘pairing’) means that two people design and implement code together, on a single machine.
Pairing is a very collaborative way of working that involves a lot of communication and collaboration between team members. While a pair of developers work on tasks together, they do not only write code, they also plan and discuss their work. They clarify ideas, discuss approaches and come to better solutions.
Originally an Extreme Programming practice, it is considered a best-practice today, and used successfully by many programming teams.
Benefits
There are tangible benefits to pair programming—both to the organization and project team, and to the quality of the work produced.
For the organization:
- remove knowledge silos to increase team resiliency
- build collective code ownership
- help with team building
- accelerate on-boarding
- serve as a short feedback loop, similar to a code review happening live
For the team, and the developers:
- improve learning
- increase efficiency
- improve software design
- improve software quality
- reduce the incidence of bugs
- increase satisfaction
- increase the safety and trust of developers pairing
- increase developer confidence
Research supports the idea that a pair of programmers working together will produce higher quality software, in the same or less time as the developers working independently (Williams et al. 2000).
Surprisingly, research also suggests that there is no loss in productivity when pair programming. In other words, they produce at least the same amount of code as if they were working independently, but it tends to be higher quality than if they worked alone.
Styles of Pairing
Styles adapted from Martin Fowler’s article on How to Pair.
Driver and Navigator
This is the classic form of pair programming.
The Driver is the person at the wheel, i.e. the keyboard. She is focussed on completing the tiny goal at hand, ignoring larger issues for the moment. A driver should always talk through what she is doing while doing it.
The Navigator is in the observer position, while the driver is typing. She reviews the code on-the-go, gives directions and shares thoughts. The navigator also has an eye on the larger issues, bugs, and makes notes of potential next steps or obstacles.
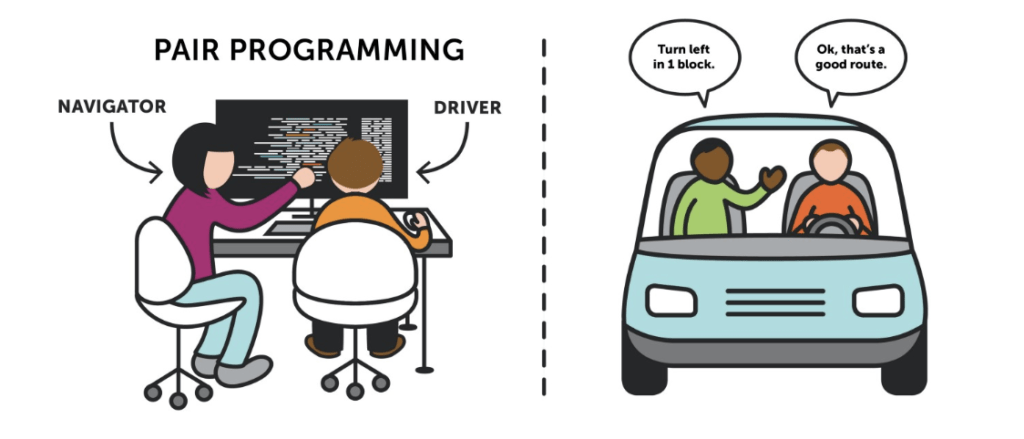
Remember that pair programming is a collaboration. A common flow goes like this:
- Start with a reasonably well-defined task. Pick a requirement or user story, for example.
- Agree on one tiny goal at a time. This can be defined by a unit test, or by a commit message, or some goal that you’ve written down.
- Switch keyboard and roles regularly. Alternating roles keeps things exciting and fresh.
- As a navigator, leave the details of the coding to the driver—your job is to take a step back and complement your pair’s more tactical mode with medium-term thinking. Park next steps, potential obstacles and ideas on sticky notes and discuss them after the tiny goal is done, so as not to interrupt the driver’s flow.
Ping-Pong
This technique is ideal when you have a clearly defined task that can be implemented in a test-driven way.
- “Ping”: Developer A writes a failing test
- “Pong”: Developer B writes the implementation to make it pass.
- Developer B then starts the next “Ping”, i.e. the next failing test.
- Each “Pong” can also be followed by refactoring the code together, before you move on to the next failing test.
Strong-Style Pairing
This is a technique particularly useful for knowledge transfer. In this style, the navigator is usually the person much more experienced with the setup or task at hand, while the driver is a novice (with the language, the tool, the codebase, …). The experienced person mostly stays in the navigator role and guides the novice.
An important aspect of this is the idea that the driver totally trusts the navigator and should be “comfortable with incomplete understanding.” Questions of “why,” and challenges to the solution should be discussed after the implementation session.
Switching Roles
Here are some suggestions on role-switching from Shopify Engineering.
Switching roles while pairing is essential to the process—it’s also one of the trickiest things to do correctly. The navigator and driver have very different frames of reference.
The Wrong Way
Pairing is about working together. Anything that impedes one of the people from contributing or breaks their flow is bad. Two of the more obvious wrong ways are to “grab the keyboard” or “push the keyboard”.
Grabbing the keyboard: Sometimes when working as the navigator it’s tempting to take the keyboard control away to quickly do something. This puts the current driver in a bad position. Not only are they now not contributing, but such a forceful role change is likely to lead to conflict.
Pushing the keyboard: Other times, the driver feels a strong need to direct the strategy. It’s very tempting to just “push” the keyboard to the navigator, forcing them to take the driver’s seat, and start telling them what to do. This sudden context switch can be jarring and confusing to the unsuspecting navigator. It can lead to resentment and conflict as the navigator feels invalidated or ignored.
Finally, even a consensual role switch can be jarring and confusing if done too quickly and without structure.
The Right Way
The first step to switching roles is always to ask. The navigator needs to ask if they can grab the keyboard before doing so. The driver needs to ask if the navigator is willing to drive before starting to direct them. Sometimes, switching without asking works out, but these situations are the exception.
It’s important to take some time when switching as well. Both pairers need to time to acclimatize to their new roles. This time can be reduced somewhat by having a structure around switching (e.g. Ping-pong pairing) which allows the pairers to be mentally prepared for the switch to happen.
Pair Rotation
If a feature takes a long time, you might consider rotating people into and out of the pair over time (e.g. one person swaps out, and a new person codes). You don’t want to do this frequently, no more than once per day over a full working day. It’s helpful to prevent the duo from becoming stale or frustrated with one another, and may help with knowledge transfer.
In a small team, with brief cycles, this may not be practical or necessary.
Setup for Pairing
Physical Setup
Ideally, you would work together in the same space. It is worth spending some time figuring out a comfortable setup for both of you.
- Make sure both of you have enough space, and that both of you can sit facing the computer.
- Agree on the computer setup (key bindings, IDE etc). Check if your partner has any particular preferences or needs (e.g. larger font size, higher contrast, …)
- It’s common to have a single keyboard, mouse for the driver, but some pairs setup with two keyboards.
Remote Setup
If you’re working remotely, you may not be able to physically sit together. Luckily, there are practical solutions to pairing remotely. For remote pairing, you need a screen-sharing solution that allows you to not only see, but also control the other person’s machine, so that you are able to switch the keyboard.
There’s a number of solutions that help you pair remotely: JetBrains CodeWithMe or Microsoft’s VS Code Liveshare.
Challenges
The biggest challenges with pair programming are not code related, but issues with communication and understanding one another. Don’t be afraid to switch roles or take breaks when required, and be patient with one another!
Post-Mortem
If possible, spend some time reflecting on the pairing session when its over. Ask yourself what went well, and what you can improve. This can help clear the air of any tension or issues that came up during the session, and help you improve as a team.
Code reviews
A code review is a peer review of code that helps developers ensure or improve the code quality before they merge and ship it. - gitlab.com
Code reviews are typically done as part of your software process, prior to merging code from a feature branch to the main branch.
Why perform code reviews?
When done correctly, code reviews provide benefits to both the project and the team. Let’s consider some of the commonly suggested reasons for code reviews.
Benefits to the code
There is value in ensuring that code is written to a standard. We definitely want
- Consistency in design and implementation.
- Optimal code (“more eyes on the problem”).
Benefits to the team
We want collective ownership of our code, so familiarizing the team which a design/implementation is a great idea.
- Collaborating and sharing new techniques.
- Reinforces mutual understanding of the code (team ownership vs. individual ownership).
However, a code review may not be the best format for this. A better approach is to ask for feedback at different points in the cycle e.g., informal review of your design, or a “brown-bag” presentation of your feature as it’s being developed.
Why NOT perform code reviews?
Code reviews are stressful
Code reviews are challenging for both the person who has produced the code, and the reviewer providing feedback.
As the code producer, it’s stressful to have someone critique your work (“maybe I’m terrible at this?!”). This is especially true if the code review consists of being asked to walk through your code, on a projector, in front of your team (who may or may not be eager to be there).
Code reviews are a LOT of work
As the reviewer: code reviews are time-consuming. You need to:
- Understand the problem (i.e. the underlying requirements).
- Understand the design (i.e. “is this the best way to approach it? what are the tradeoffs?”).
- Review the code well enough to understand the implementation.
Realistically, preparing for even a simple code review is hours of work.
Code reviews are performed too-late in the cycle
Finally, code reviews are usually done at the worst possible time in a development cycle i.e. the end of the iteration! This means that, in-practice, significant feedback from a code review is often ignored (because it’s “too late” and costly to redesign or rework something this late).
As a general practice, you want feedback as early as possible, so that you can act on it. For this reason, we recommend that you adopt strategies that let you get feedback earlier in the process.
Sometimes teams will claim that inexperienced developers should have all of their code reviewed in large meetings. This is an incredibly bad idea! It turns out that letting people fail and then correcting them publicly is an inefficient and demoralizing to an inexperienced team member.
A better approach would be the foster a mentoring relationship with a senior team member. They could use pair programming to provide guidance during feature development, so that you can have confidence that the feature was correctly designed and implemented.
When to conduct them
A best-practice is to save code reviews for when they are “needed”.
Here’s some guidance on when to use them.
- Only code review features that are complex, or highly impactful e.g., adding authentication to an application.
- Do not wait until the code review to review the design! Plan to have multiple checkpoints and opportunities for feedback prior to the code review. Treat the code review as the “final pass” (ideally “here is the final version based on your feedback”).
- Code reviews should be rare and there should be no “surprises” from anyone. The outcome of the code review should be (a) shared understanding, (b) small, last minute feedback that was missed earlier in the cycle.
How to conduct them
Given all of the above… here’s some guidance for times when you really need a code review.
For the developer
Document your design
- Write down a summary of the issue you’re solving, and your technical approach.
- Explicitly state any assumptions that you’ve made; list all internal and external dependencies required.
- Explicitly state any known issues or limitations with your approach.
- Make it clear how you are addressing the business need/feature.
Document your code
- Provide written guidance on how the code is structured; what has changed.
- Code comments should only be injected to help readability and understanding.
- Add inline explanations for why something is designed the way that it is.
- Say “no” to formulaic design recipes (unless required to generate documentation).
For the reviewer
Review the materials that the code producer has created!
- This includes reviewing the code ahead of time.
Write a summary of your feedback.
- It’s ok to provide details verbally in the session.
- Be respectful of the effort that someone has put in.
- Never be condescending about someone’s solution.
- Don’t just point out flaws; point out what they did well and what you like about the design!
Code reviews can be a learning opportunity. Look to learn from the code you’re reviewing.
Running the code review session
Book a meeting time. Online (MS teams is fine).
- The code producer and reviewer are required attendees; all other team members are optional. If it’s just the producer/reviewer in attendance, they can walk through the feedback and discuss.
If other team members are present, I’d suggest the following format:
- The code producer presents the design (goals, high-level design).
- The code producer presents the code (ideally, with UML diagrams and not the actual code).
- The reviewer then presents their feedback. If necessary, code can be presented (projector, or shared screen).
- Each suggested change is discussed, and the team decides what changes to make.
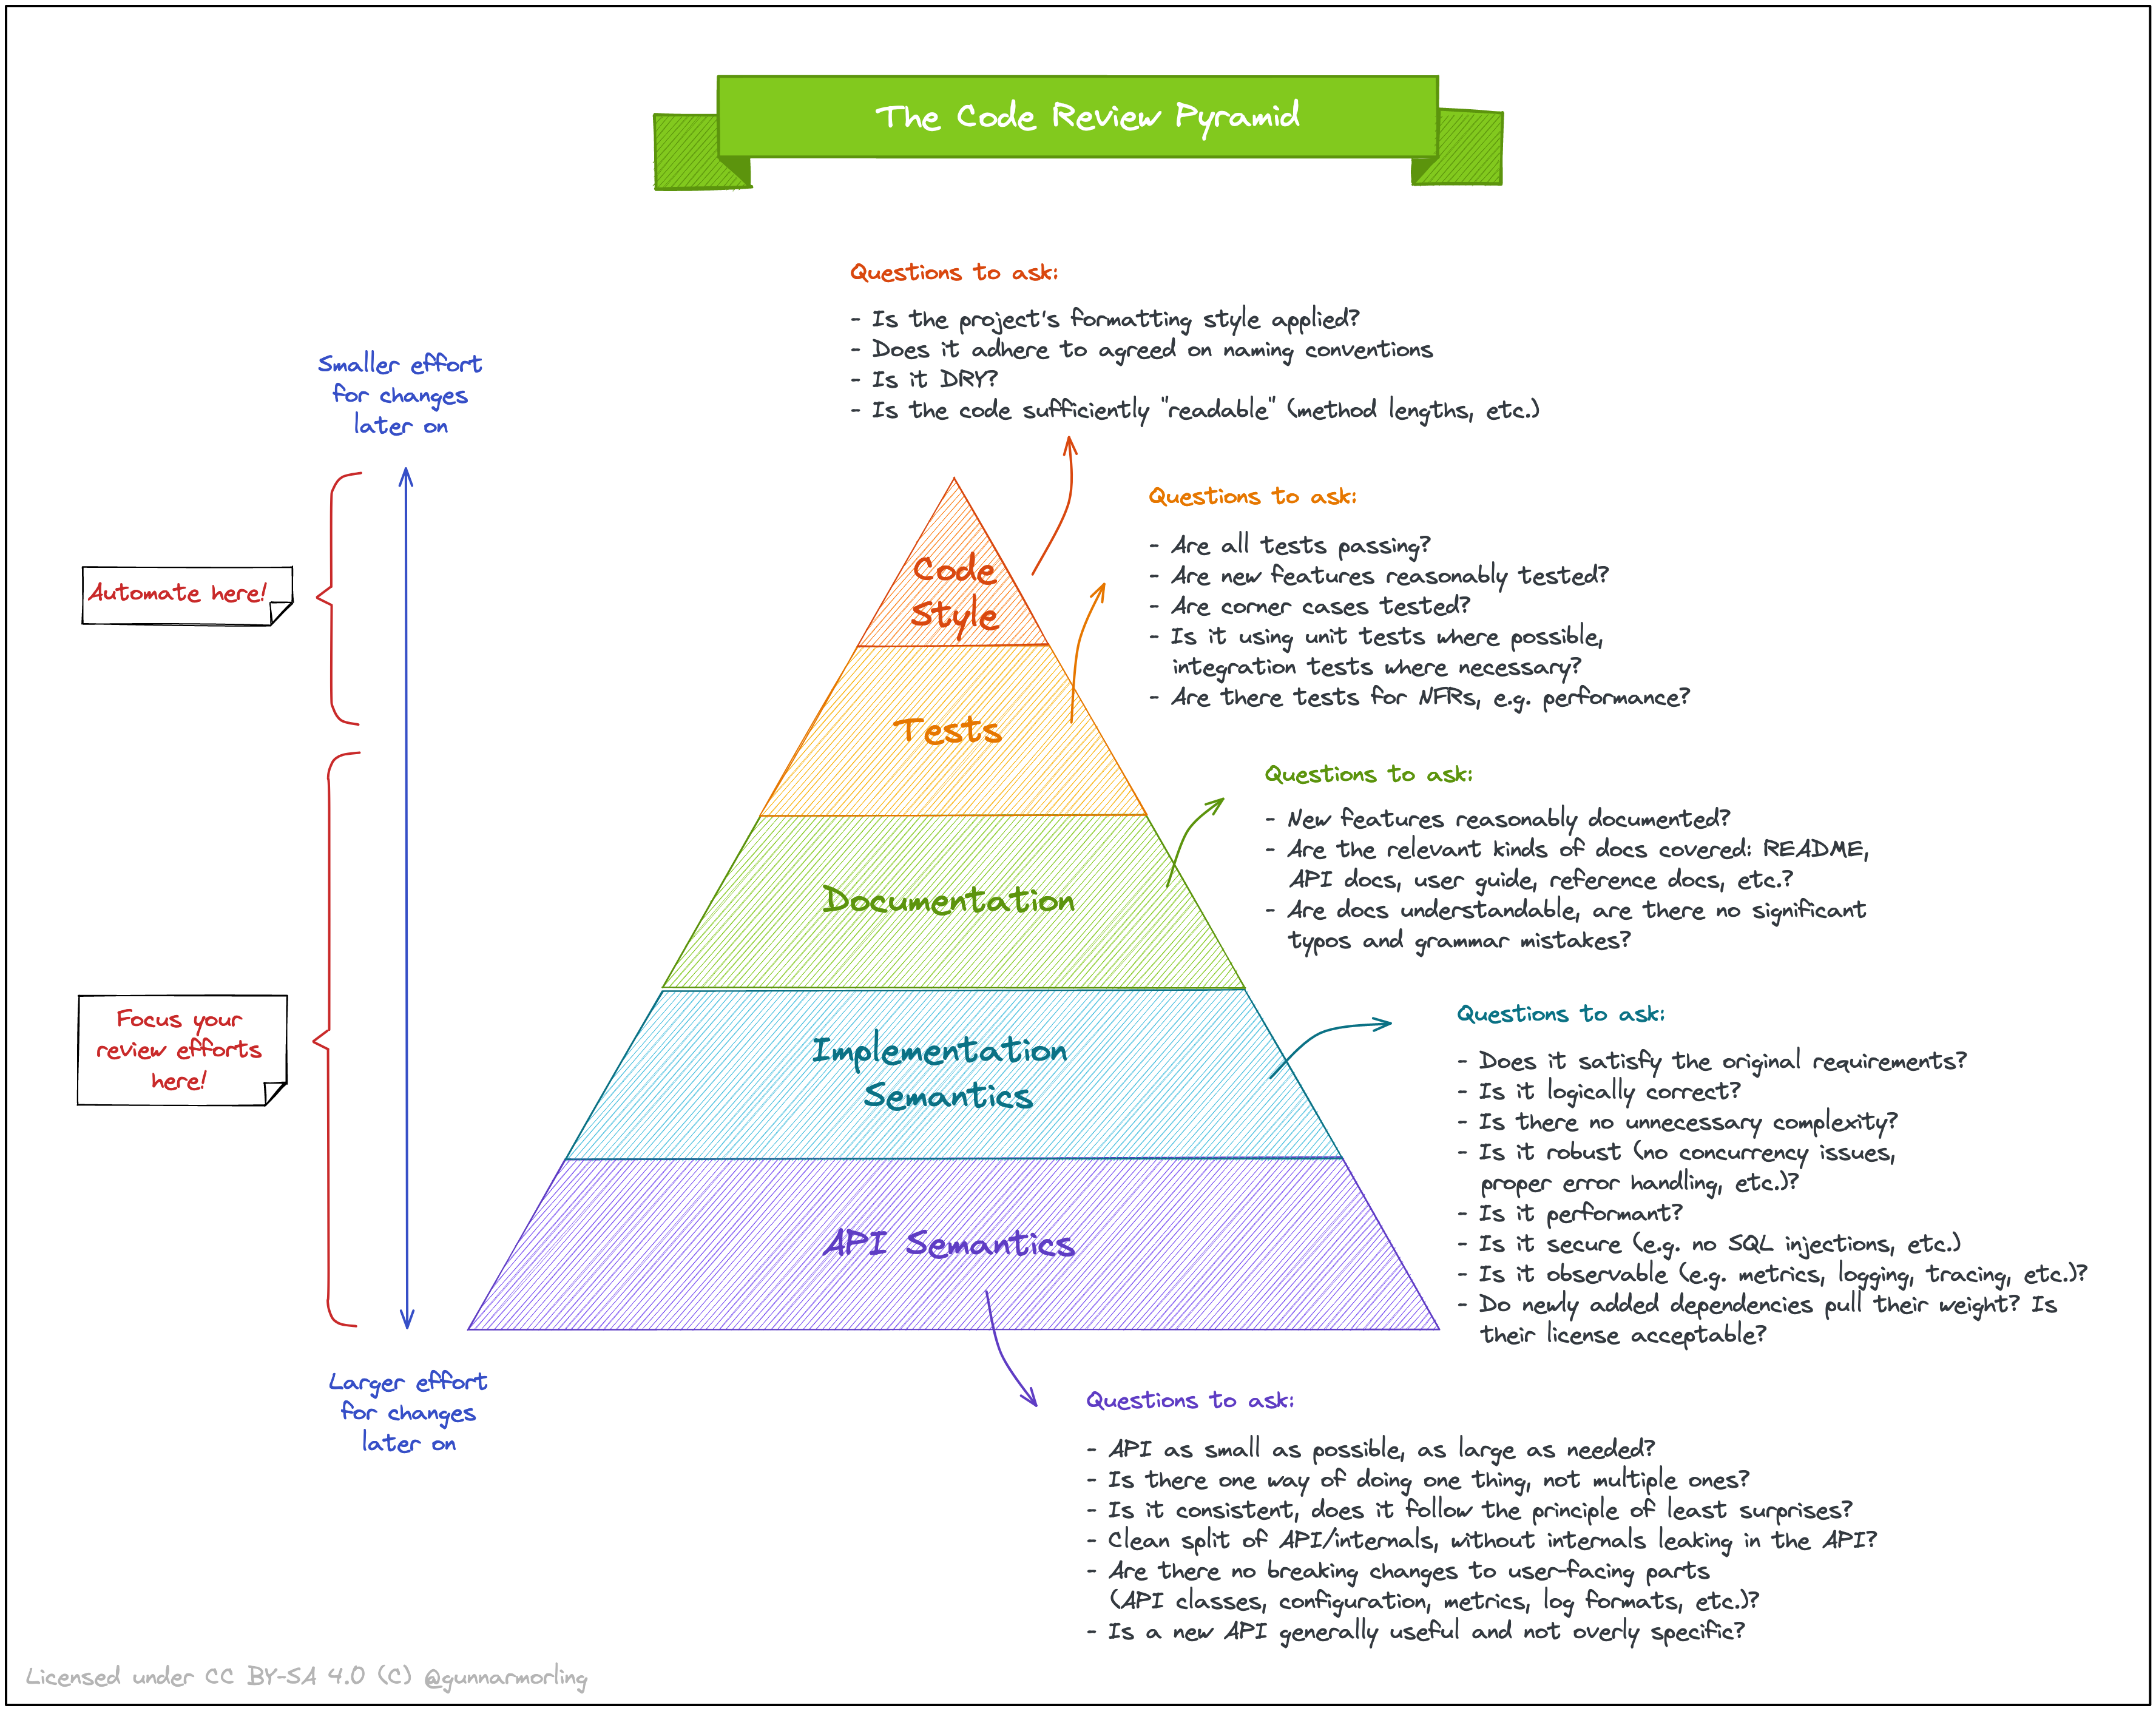
Code Reviews in GitLab
Code reviews are tied to the Merge Request workflow.
- When you “Create a Merge Branch”, you select a single Reviewer.
- GitLab (ATM) only supports a single reviewer.
- Reviewer and Coder communicate by adding comments to the issue.
- Coder can close the merge request when any problems have been addressed.
Code reviews are optional in this course. They are available as a tool if you think they are beneficial to your specific project.
Refactoring
Refactoring is a controlled technique for improving the design of an existing code base over time.
We all want to write perfect code, but given the challenges in software development, we often end-up with less-than-perfect solutions.
- Rushed features: Sometimes we don’t have enough time, so we cut corners, complete things “on-time”.
- Lack of tests: We might think that the code is ready, but we haven’t tested it adequately.
- Lack of communication: Perhaps we misunderstood requirements, or how a feature would integrate into the larger product.
- Poor design: Possibly our design is rigid and makes adding or modifying features difficult.
These are all actions that may cost us time later. We may need to stop and redesign a rushed feature, or we may need to fix bugs later.
We refer to this as technical debt — the deferred cost of doing something poorly.
What is refactoring?
Martin Fowler (2000) also introduced the notion of refactoring: systematically transforming your working code base into a cleaner, improved version of itself that is easier to read, maintain and extend.
Refactoring is a controlled technique for improving the design of an existing code base. Its essence is applying a series of small behavior-preserving transformations, each of which “too small to be worth doing”. However the cumulative effect of each of these transformations is quite significant. – Martin Fowler, 2018.
Refactoring suggests that code must be continually improved as we work with it. We need to be in a process of perpetual, small improvements.
The goal of refactoring is to reduce technical debt by making small continual improvements to our code. It doesn’t reduce the likelihood of technical debt, but it amortizes that debt over many small improvements.
Refactoring your code means doing things like:
- Cleaning up class interfaces and relationships.
- Fixing issues with class cohesion.
- Reducing or removing unnecessary dependencies.
- Simplifying code to reduce unnecessary complexity.
- Making code more understandable and readable.
- Adding more exhaustive tests.
In other words, refactoring involves code improvement not related to adding functionality.
TDD and Refactoring work together. You continually refactor as you expand your code, and you rely on the tests to guarantee that you aren’t making any breaking changes to your code.
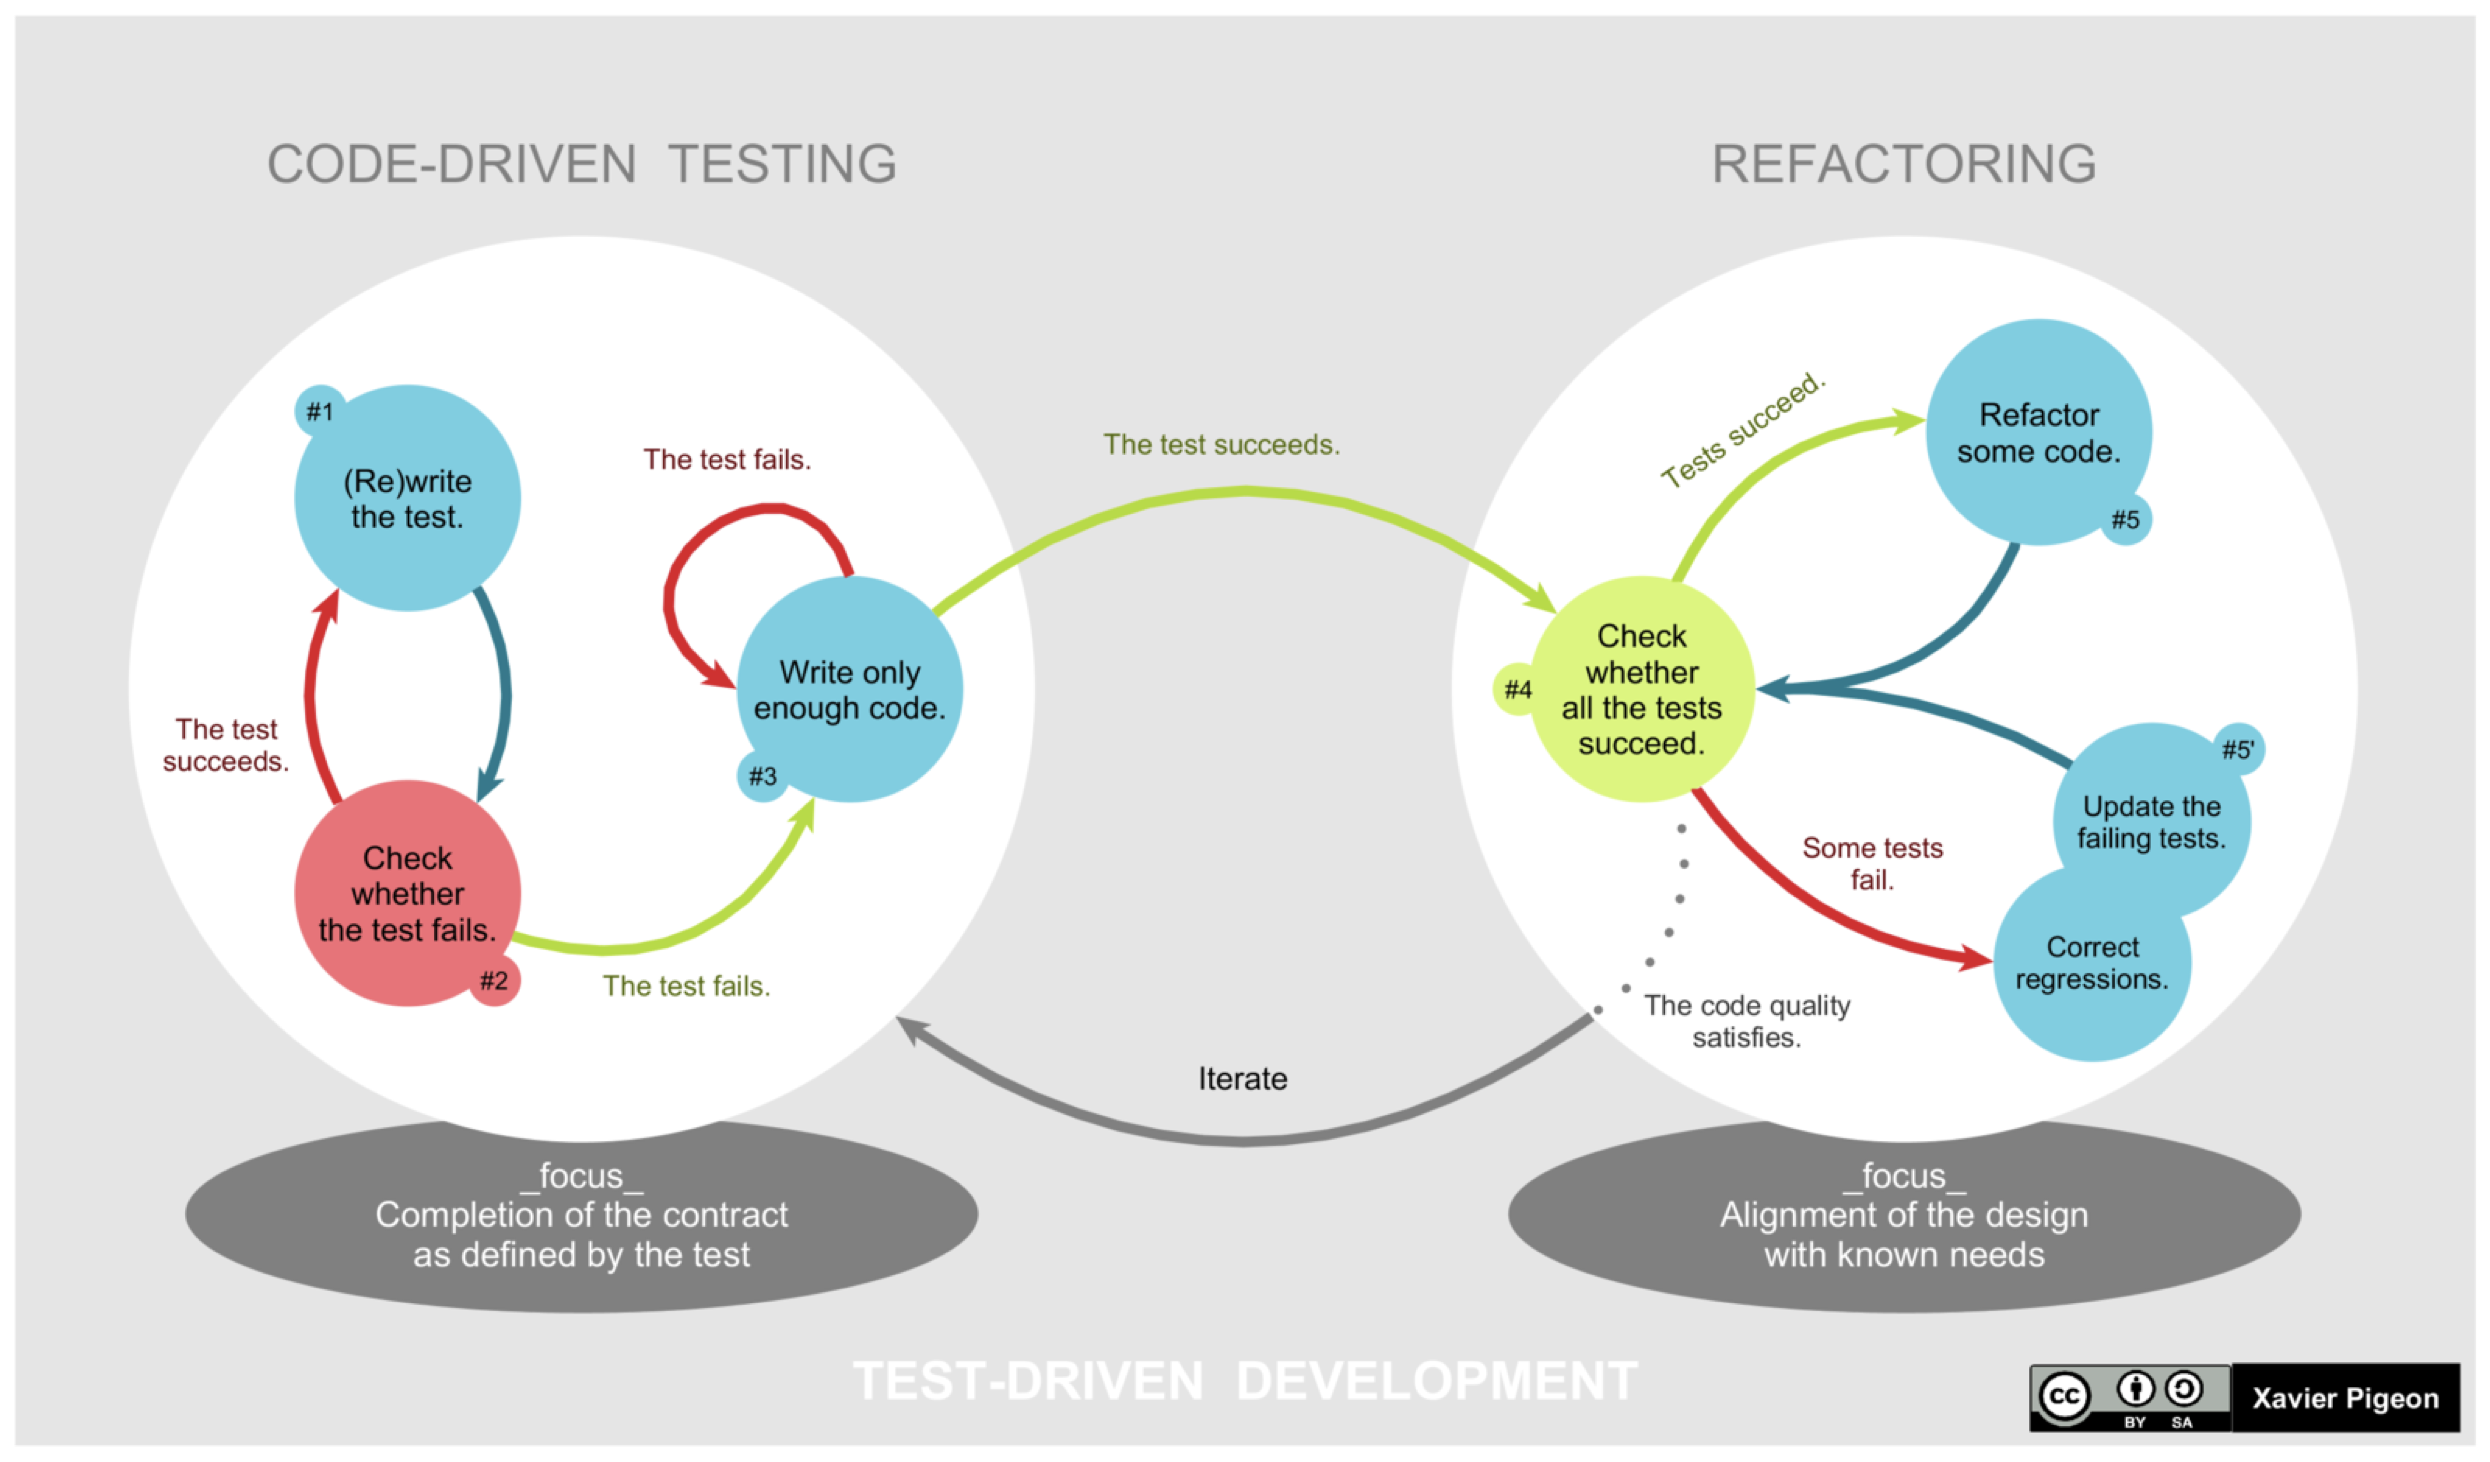
TDD gives you the confidence to refactor. Tests should fail if you introduce an error into code.
When to refactor code?
The Rule of Three
- When you’re doing something for the first time, just get it done.
- When you’re doing something similar for the second time, do the same thing again.
- When you’re doing something for the third time, start refactoring.
When adding a feature
Refactor existing code before you add a new feature, since it’s much easier to make changes to clean code. Also, you will improve it not only for yourself but also for those who use it after you.
When fixing a bug
If you find or suspect a bug, refactoring to simplify the existing code can often reveal logic errors.
During a code review
The code review may be the last chance to tidy up the code before it becomes available to the public.
Refactoring actions
Fowler lists a series of refactoring actions in his original book. He has also made them available at: https://refactoring.com/catalog/
IntelliJ IDEA makes refactoring easy by providing automated ways of safely transforming your code. These refactorings often involve operations that would be tricky to do by-hand but easy for a tool to perform for you (e.g. renaming a method that is called from multiple locations).
To invoke refactorings, select an item in your source code (e.g. variable or function name) and press Ctrl-T to invoke the refactoring menu. You can also access this from the application menu.
JetBrains also offers a free online course on advanced code refactorings with IntelliJ IDEA.
There is a complete list of refactorings in the IntelliJ IDEA documentation. Refactorings include:
| Refactoring | Purpose |
|---|---|
| Rename | Change an identifier to something that is more meaningful or memorable. |
| Move | Move classes or functions to different packages; move methods between classes. |
| Extract method | Take a code fragment that can be grouped, move it into a separated method, and replace the old code with a call to the method |
| Extract field | Extract an expression into a variable, and insert the expression dynamically. |
| Safe delete | Check for usage of a symbol before you are allowed to delete it. |
| Change signature | Change the method name, add, remove, reorder, and rename parameters and exceptions. |
| Type migration | Change a member type (e.g. from integer to string), method return types, local variables, parameters etc. across the entire project. |
| Replace constructor with factory | Modify class the become a singleton (returns a single instance). |
Code Smells
A “code smell” is a sign that a chunk of code is badly designed or implemented. It’s a great indication that you may need to refactor the code. Adjectives commonly used to describe code include:
- “neat”, “clean”, “clear”, “beautiful”, “elegant” <— the reactions that we want
- “messy”, “disorganized”, “ugly”, “awkward” <— the reactions we want to avoid
A negative emotional reaction is a flag that your brain doesn’t like something about the organization of the code - even you can’t immediately identify what that is. Conversely, a positive reaction indicates that your brain can easily perceive and following the underlying structure.
The following categories and examples are taken from refactoring.guru.
Bloaters
Bloaters are code, methods and classes that have increased to such gargantuan proportions that they are hard to work with. These smells accumulate over time as the program evolves (and especially when nobody makes an effort to eradicate them).
- Long method: A method contains too many lines of code. Generally, any method longer than ten lines should make you start asking questions.
- Large class: A class contains many fields/methods/lines of code. This suggests that it may be doing too much. Consider breaking out a new class, or interface.
- Primitive obsession: Use of related primitives instead of small objects for simple tasks (such as currency, ranges, special strings for phone numbers, etc.). Consider creating a data class, or small class instead.
- Long parameters list: More than three or four parameters for a method. Consider passing an object that owns all of these. If many of them are optional, consider a builder pattern instead.
Object-Oriented Abusers
All these smells are incomplete or incorrect application of object-oriented programming principles.
- Alternative Classes with Different Interfaces: Two classes perform identical functions but have different method names. Consolidate methods into a single class instead, with support for both interfaces.
- Refused bequest: If a subclass uses only some of the methods and properties inherited from its parents, the hierarchy is off-kilter. The unneeded methods may simply go unused or be redefined and give off exceptions. This violates the Liskov-substitution principle! Add missing behaviour, or replace inheritance with delegation.
- Switch Statement: You have a complex switch operator or sequence of if statements. This sometimes indicates that you are switching on type, something that should be handled by polymorphism instead. Consider whether a class structure and polymorphism makes more sense in this case.
- Temporary Field: Temporary fields get their values (and thus are needed by objects) only under certain circumstances. Outside of these circumstances, they’re empty. This may be a place to introduce nullable types, to make it very clear what is actually happening (vs. constantly checking fields for the presence of data).
Dispensibles
A dispensable is something pointless and unneeded whose absence would make the code cleaner, more efficient and easier to understand.
- Comments: A method is filled with explanatory comments. These are usually well-intentioned, but they’re not a substitute for well-structured code. Comments are a maintenance burden. Replace or remove excessive comments.
- Duplicate Code: Two code fragments look almost identical. Typically, done accidentally by different programmers. Extract the methods into a single common method that is used instead. Alternately, if the methods solve the same problem in different ways, pick and keep the most efficient algorithm.
- Dead Code: A variable, parameter, field, method or class is no longer used (usually because it’s obsolete). Delete unused code and unneeded files. You can always find it in Git history.
- Lazy Class: Understanding and maintaining classes always costs time and money. So if a class doesn’t do enough to earn your attention, it should be deleted. This is tricky: sometimes a small data class is clearer than using primitives (e.g. a Point class, vs using x and y stored as doubles).
Couplers
All the smells in this group contribute to excessive coupling between classes or show what happens if coupling is replaced by excessive delegation.
- Feature envy: A method accesses the data of another object more than its own data. This smell may occur after fields are moved to a data class. If this is the case, you may want to move the operations on data to this class as well.
- Inappropriate intimacy: One class uses the internal fields and methods of another class. Either move those fields and methods to the second class, or extract a separate class that can handle that functionality.
- Middle man: If a class performs only one action, delegating work to another class, why does it exist at all? It can be the result of the useful work of a class being gradually moved to other classes. The class remains as an empty shell that doesn’t do anything other than delegate. Remove it.
Last Word
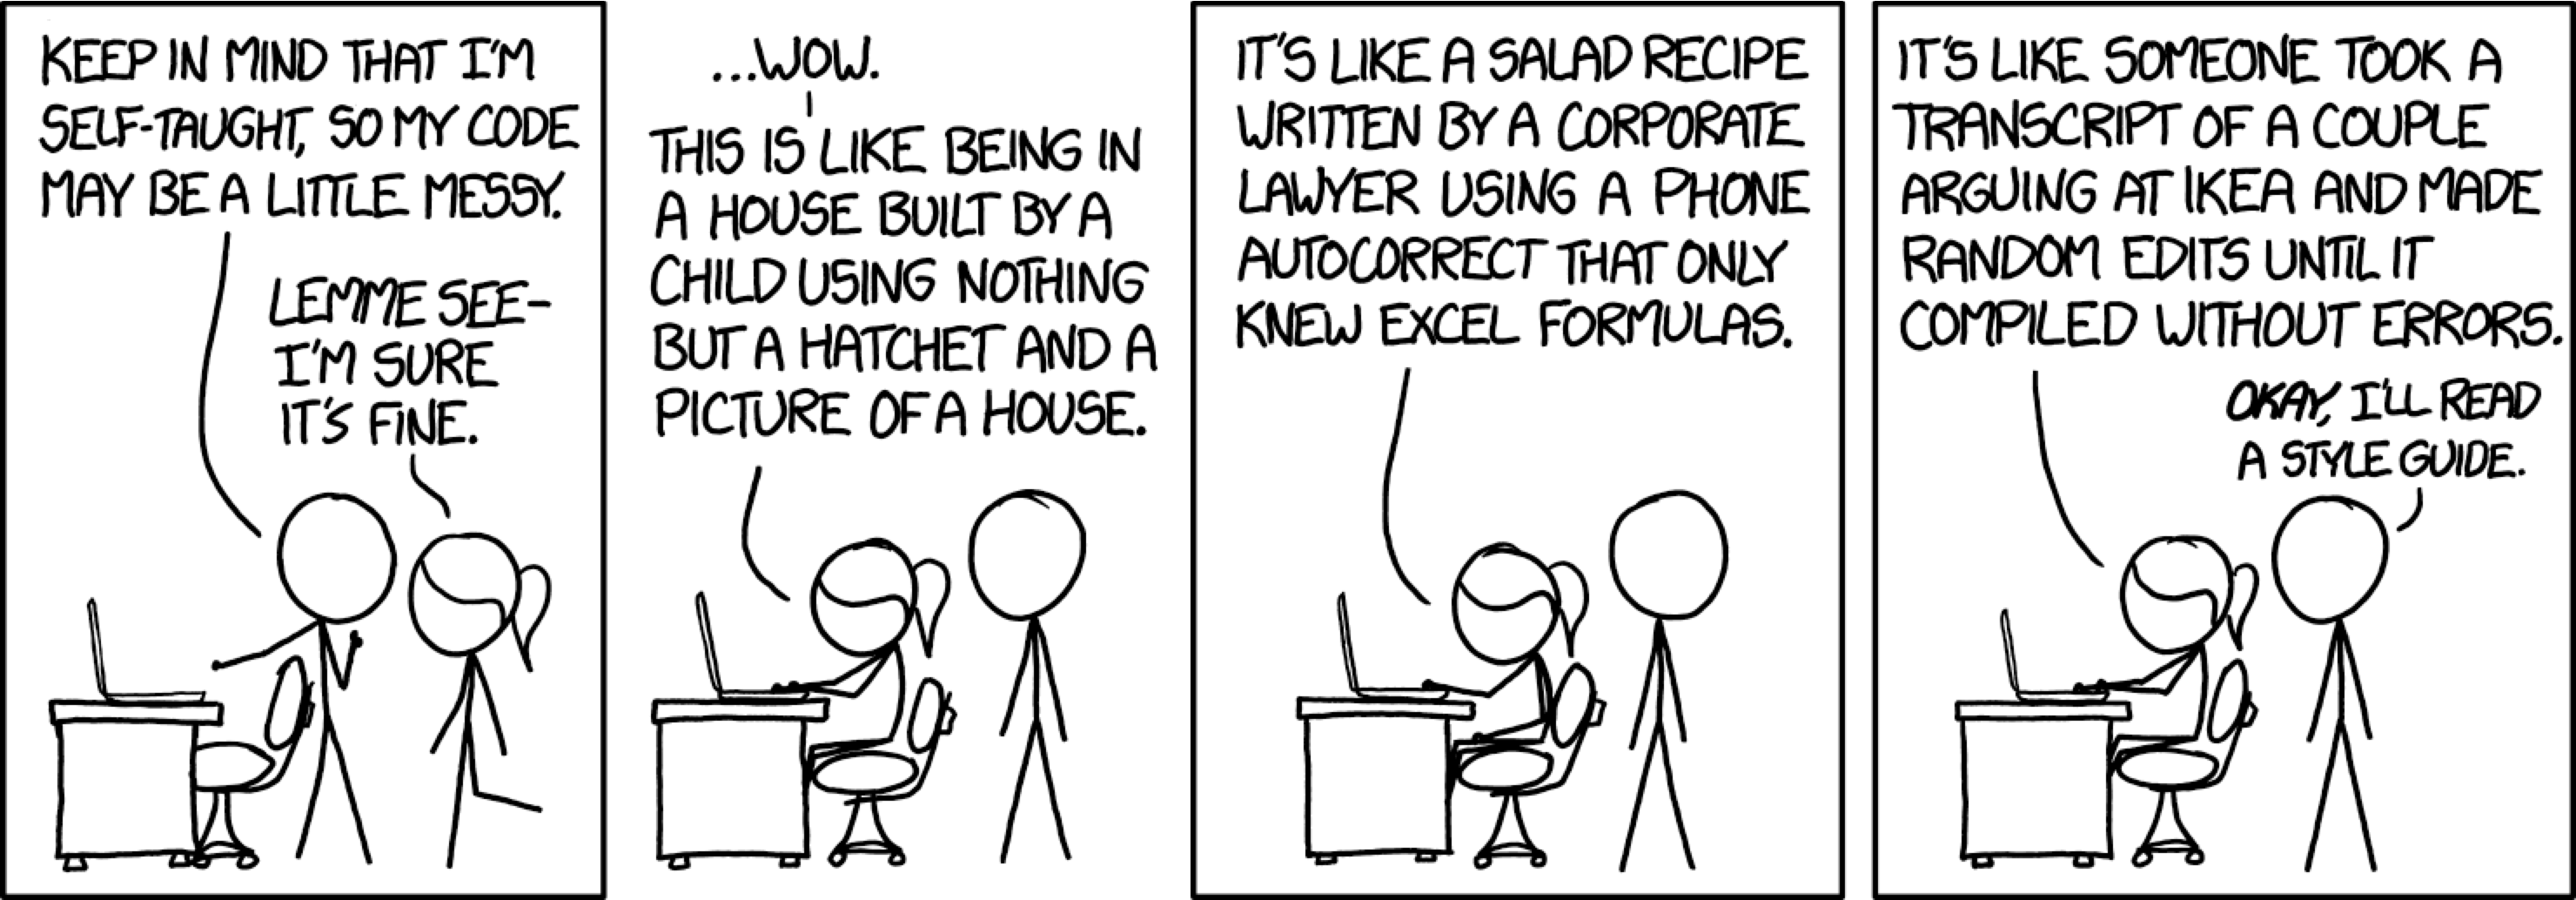
Unit testing
Introduction
We can characterize tests in terms of the type of testing, types of tests and phase where they are executed (see Types of Automation Testing: A Beginner’s Guide).
Forms of Testing
There are two distinct types of requirements that we can identify when specifying a project: functional requirements, related to features or product requirements, and non-functional requirements or qualities of the system that we can measure.
- Functional: test the features and functonality; determine usability, fit-for-purpose.
- Non-functional: examine qualities of a system: performance, scalability, robustness.
When testing applications, both of these are valid. You should be measuring against the initial requirements that you defined for this product, to ensure that requirements are being met.
Types of Tests
There are different purposes to run tests.
- Smoke tests: functional tests only cover crucial functionality; a quick “sanity check” to ensure that the build ran, for instance.
- Integration tests: tests interrelated functionalities to ensure that they work together.
- Regression tests: tests that ensure that software hasn’t gotten “worse” over time (degraded performance, or functionality no longer working).
- Security tests: test the system for any vulnerabilities.
- Performance tests: non-functional tests that evaluate measurable criteria like performance, stability.
- Acceptance tests: functional tests that must be met for software to meet the minimum acceptable bar for users.
Phases of Testing
Finally, there are different areas of testing.
- Unit test: small functional tests, designed to check behaviour at the class-level.
- API test: test the “outer edges” of your architecture; check that APIs work as expected.
- UI test: check that interaction with the user interface functions properly. May be done by-hand, or automated (see mocking).
Are we expected to write all of these tests?!? No, at least not in this course.
You are expected to write a reasonable subset: unit tests and API tests for your architecture. You should be running these tests every time you build, so they can be considered both smoke tests and integration tests (if you run after integrating branches).
Setup JUnit
We’re going to use JUnit, a popular testing framework to create and execute tests. It can be installed in number of ways: directly from the JUnit home page, or one of the many package managers for your platform.
We will rely on Gradle to install it for us as a project dependency. Include this line in the dependencies of your build.gradle.kts configuration file.
dependencies {
    testImplementation('org.jetbrains.kotlin:kotlin-test')
}
Unit Testing
Unit testing involves writing low-level, class-specific tests.
A unit test is a test that meets the following three requirements (Khorikov 2020):
- Verifies a single unit of behavior,
- Does it quickly, and
- Does it in isolation from other tests.
Unit tests should target classes or other low-level components in your program. They should be small, very focused, and quick to execute and return results.
Testing in isolation means removing the effects of any dependencies on other code, libraries or systems. This means that when you test the behaviour of your class, you are assured that nothing else is contributing to the results that you are observing.
This is also why designing cohesive, loosely coupled classes is critical: it makes testing them so much easier if they work independently!
Unit tests are just Kotlin functions that execute and check the results returned from other functions. Ideally, you would produce one unit or more unit tests for each function. You would then have a set of unit tests to check all of the methods in a class, and multiple sets of units tests to cover all of your implementation classes.
Your goal should be to have unit tests for every critical class and function that you produce.
You will NOT likely get 100% code coverage. You should focus on testing entities/data models, and related features. You do NOT have to unit test user interfaces directly (there are ways to do it, but they are outside-scope of this course).
Why (not) TDD?
Test-Driven Development (TDD) is a strategy introduced by Kent Beck, which suggests writing tests first, before you start coding. You write tests against expected behaviour, and then write code which works without breaking the tests. TDD suggests this process:
- Think about the function (or class) that you need to create.
- Write tests that describe the behaviour of that function or class. As above, start with valid and invalid input.
- Your test will fail (since the implementation code doesn’t exist yet). Write just enough code to make the tests pass.
- Repeat until you can’t think of any more tests to write.
Running out of tests means that there is no more behaviour to implement… and you’re done, with the benefit of fully testable code.
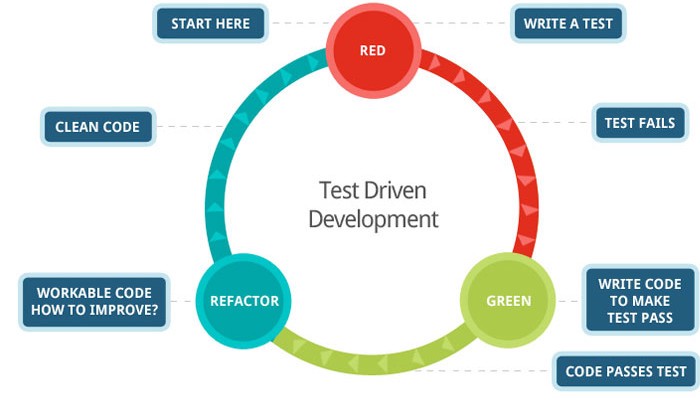
https://medium.com/@tunkhine126/red-green-refactor-42b5b643b506
The IntelliJ IDEA docs also have a section on testing: Tutorial: Test-driven development with Kotlin.
There are some clear benefits to testing early:
- Early bug detection. You are building up a set of tests that can verify that your code works as expected.
- Better designs. Making your code testable often means improving your interfaces, having clean separation of concerns, and cohesive classes. Testable code is by necessity better code.
- Confidence to refactor. You can make changes to your code and be confident that the tests will tell you if you have made a mistake.
- Simplicity. Code that is built up over time this way tends to be simpler to maintain and modify.
Structure
A typical unit test uses a very particular pattern, known as the arrange, act, assert pattern. This suggests that each unit test should consist of these three parts:
- Arrange: bring the system under test (SUT) to the starting state.
- Act: call the method or methods that you want to test.
- Assert: verify the outcome of the above action. This can be based on return values, or some other conditions that you can check.
Note that your Act section should have a single action, reflecting that it’s testing a single behaviour. If you have multiple actions taking place, that’s a sign that this is probably an integration test (see below). As much as possible, you want to ensure that you are writing minimal-scope unit tests.
Another anti-pattern is an
ifstatement in a test. If you are branching, it means that you are testing multiple things, and you should really consider breaking that one test into multiple tests instead.
Writing tests
A unit test is just a Kotlin class, with annotated methods that tell the compiler to treat the code as a test. It’s best practice to have one test class for each implementation class that you want to test e.g., class Main has a test class MainTest. This test class would contain multiple methods, each representing a single unit test.
Tests should be placed in a special test folder in the Gradle directory structure. When building, Gradle will automatically execute any tests that are placed in this directory structure.
Android has two test folders: src/test is used for tests that can run on your development machine, and src/androidTest is used for tests that need to run on an Android device (e.g. the AVD where you are testing).
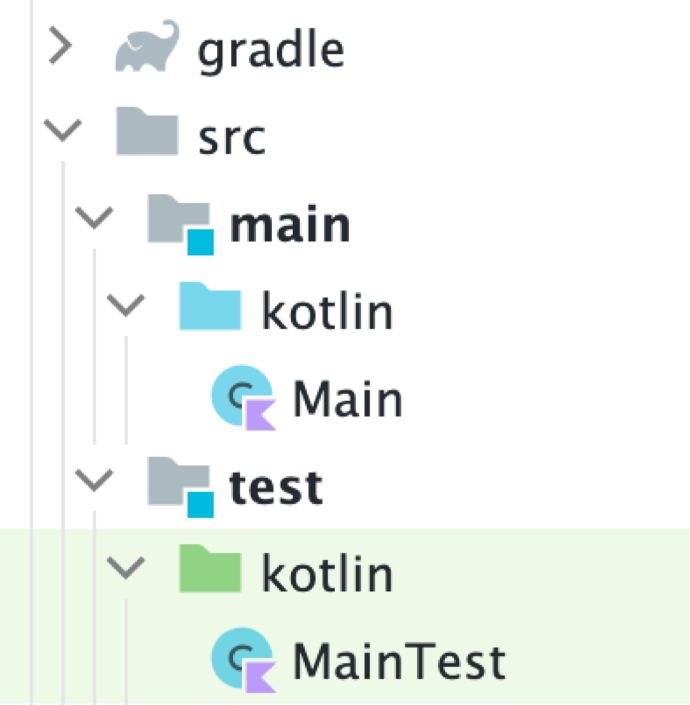
Your unit tests should be structured to create instances of the classes that they want to test, and check the results of each function to confirm that they meet expected behaviour.
For example, here’s a unit test that checks that the Model class can add an Observer properly. The addObserver() method is the test (you can tell because it’s annotated with @Test). The @Before method runs before the test, to setup the environment. We could also have an @After method if needed to tear down any test structures.
class ObserverTests() {
    lateinit var model: Model
    lateinit var view: IView

    class MockView() : IView {
        override fun update() {
        }
    }

    @Before
    fun setup() {
        model = Model()
        view = MockView()
    }

    @Test
    fun addObserver() {
        val old = model.observers.count()
        model.addObserver(view)
        assertEquals(old+1, model.observers.count())
    }
Gradle will automatically execute and display the test results when you build your project.
Lets walkthrough creating a test.
To do this in IntelliJ, select a class in the editor, press Alt-Enter, and select “Create Test” from the popup menu. This will create a unit test using JUnit, the default test framwork. There is a detailed walkthrough on the IntelliJ support site.
You can also just create the test files by-hand. Just make sure to save them in the correct location!
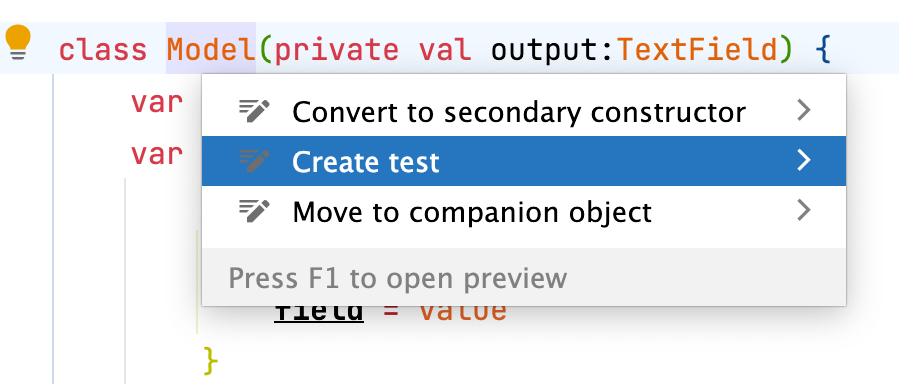
The convention is to name unit tests after their class they’re testing, with “Test” added as a suffix. In this example, we’re creating a test for a Model class so the test is automatically named ModelTest. This is just a convention—you can name it anything that you want.
We’ve manually added the addition() function. We can add as many functions as we want within this class. By convention, they should do something useful with that particular class.
Below, class ModelTest serves as a container for our test functions. In it, we have two unit tests that will be automatically executed when we built. NOTE that you would need more than these two tests to adequately test this class—this is just an example.
import org.junit.After
import org.junit.Assert.assertEquals
import org.junit.Before
import org.junit.Test

class ModelTests {
    lateinit var model: Model

    @Before
    fun setup() {
        model = Model()
        model.counter = 10
    }

    @Test
    fun checkAddition() {
        val original = model.counter
        model.counter++
        assertEquals(original+1, model.counter)
    }

    @Test
    fun checkSubtraction() {
        val original = model.counter
        model.counter--
        assertEquals(original-1, model.counter)
    }

    @After
    fun teardown() {
    }
}
The kotlin.test package provides annotations to mark test functions, and denote how they are managed:
| Annotation | Purpose |
|---|---|
| @Test | Marks a function as a test to be executed |
| @BeforeTest | Marks a function to be invoked before each test |
| @AfterTest | Marks a function to be invoked after each test |
| @Ignore | Mark a function to be ignored |
| @Test | Marks a function as a test |
In our test, we call utility functions to perform assertions of how the function should successfully perform.
| Function | Purpose |
|---|---|
| assertEquals | Provided value matches the actual value |
| assertNotEquals | The provided and actual values do not match |
| assertFalse | The given block returns false |
| assertTrue | The given block returns true |
Running tests
Tests will be run automatically with gradle build or we can execute gradle test to just execute the tests.
$ gradle test
BUILD SUCCESSFUL in 760ms
3 actionable tasks: 3 up-to-date
Gradle will report the test results, including which tests - if any - have failed.
You can also click on the arrow beside the test class or name in the editor. For example, clicking on the arrow in the gutter would run this addObserver() test.

Integration Testing
Unit tests are great at verifying business logic, but it’s not enough to check that logic in a vacuum. You have to validate how different parts of it integrate with each other and external systems: the database, the message bus, and so on. – Khorikov, 2020.
A unit test is a test that meets these criteria (from the previous chapter):
- Verifies a single unit of behaviour (typically a class),
- Does it quickly, and
- Does this in isolation from other dependencies and other tests.
An integration test is a test that fails to meet one or more of these criteria. In other words, if you determine that you need to test something outside the scope of a unit test, it’s considered an integration test (typically because it’s integrating behaviours from multiple components). Performance tests, system tests, etc. are all kinds of integration tests.
There are a lot of different nuanced tests that are used in computer science, but we’ll focus on building generic integration tests.
Typically, an integration test is one where you leave in selected dependencies so that you can test the combination of classes together. Integration tests are also suitable in cases where it is difficult to completely remove a dependency. This can happen with some critical, external dependencies like an external database.
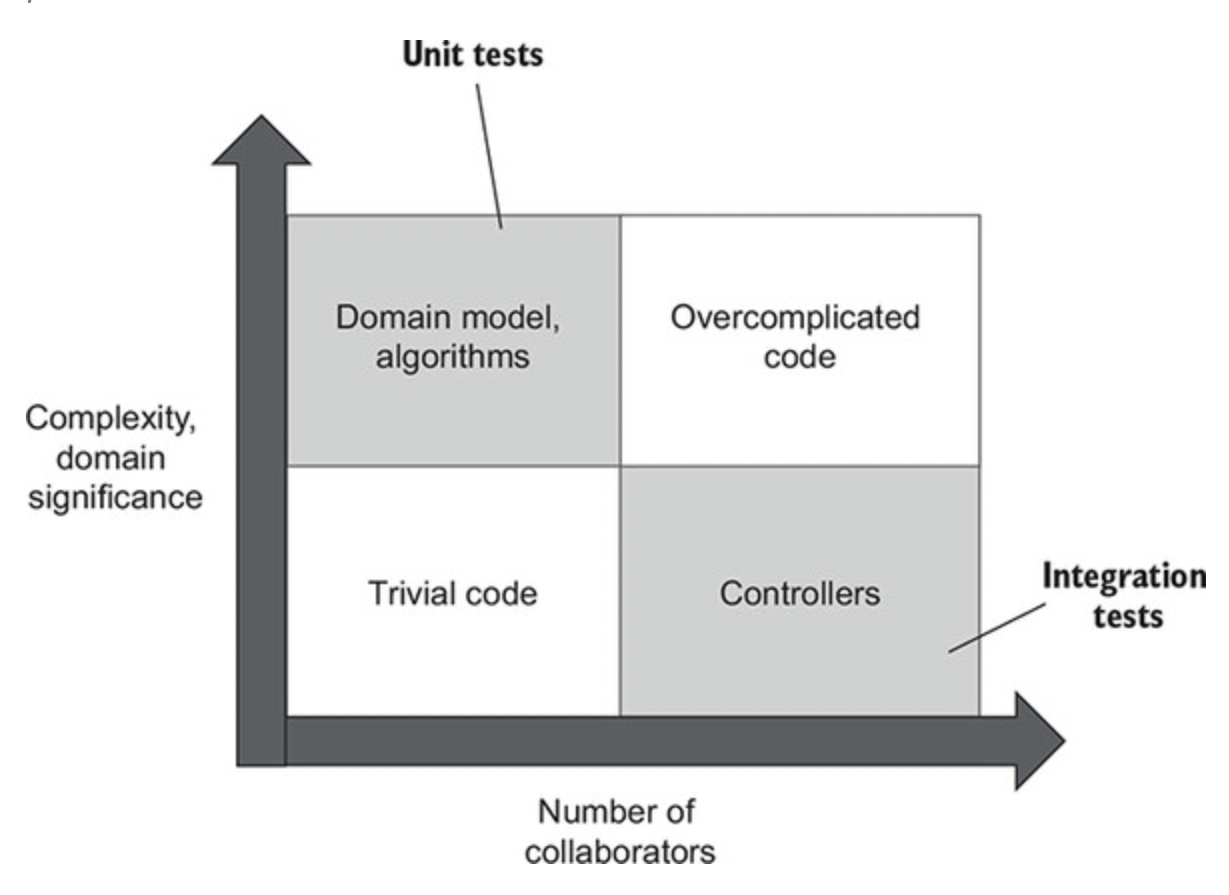
This diagram demonstrates how unit tests primarily test the domain model, or business logic classes. Integration tests focus on the point where these business logic classes interact with external systems or dependencies.
Note that in this diagram, we’re also identifying code that we should not bother testing. Trivial code is low complexity, and typically has no dependencies or external impact, so it doesn’t require extensive testing. Overcomplicated code likely has so many dependencies that it’s nearly impossible to test - and it should likely be refactored into something similar and more manageable before you attempt to add tests to it.
Guidelines
Here’s some guidelines for creating integration tests.
- Make domain model boundaries explicit.
Try to always have an explicit, well-known place for the domain model in your code base. The domain model is the collection of domain knowledge about the problem your project is meant to solve. This can be a separate class, or even a package reserved for the model.
- Reduce the number of layers of abstraction
“All problems in computer science can be solved by another layer of indirection, except for the problem of too many layers of indirection.” – David J. Wheeler
Try to have as few layers of indirection as possible. In most backend systems, you can get away with just three: the domain model, application services layer (controllers), and infrastructure layer. Having excessive layers of abstraction can lead to bloated and confusing code.
- Eliminate circular dependencies
Try to keep dependencies flowing in a single direction. i.e. don’t have class A call into class B, and class B call back into class A with results. Circular dependencies like this create a huge cognitive load for the person reading the code, and make testing much more difficult.
Dependencies
The idea of a dependency is central to our understanding of how to isolate a particular class or set of classes for testing.
When you are examining a software component, we say that your component may be dependent on one or more other software entities to be able to run successfully. For example, you may need to link in another library, or import other classes, or connect to another software system (like a database). Each of these represents code that affects how the code being tested will execute.
We often call the external software component or class a dependency. That word describes the relationship (classes dependent on one another), and the type of component (a dependency with respect to the original class).
A key strategy when testing is to figure out how to control these dependencies, so that you’re exercising your class independently of the influence of other components.
Concepts
We can further differentiate these types of dependencies:
Managed vs. Unmanaged dependencies. There is a difference between those that we control directly (managed), vs. those that may be shared with other software. A managed dependency suggests that we control the state of that system.
- Examples: a library that is statically linked is managed; a dynamically linked library is not. A database could be single-file and used only for your application (managed) or shared among different applications (unmanaged).
Internal vs. External dependencies. Running in the context of our process (internal) or out-of-process (external). A library is internal, a database is typically external.
- Examples: A library, regardless of whether it is managed, is internal. A database, as a separate process is always external.
It is important to think about these distinctions for our dependencies because they affect what we can and cannot control during testing. For example, an unmanaged dependency means that we do not control it’s state and we may not be able to test that specific component or dependency. The best we could do it test our interface against it, since we may not be able to trust the results of any actions that we take against it.
Generally speaking, we cannot test unmanaged dependencies since we cannot control them. We also tend to be limited in our ability to test external systems, since we do not manage their state.
Test doubles
To achieve isolation in testing, we often create test doubles — classes that are meant to look like a dependent class, but that don’t actually implement all of the underlying behaviour. This lets us swap in these “fake” classes for testing.
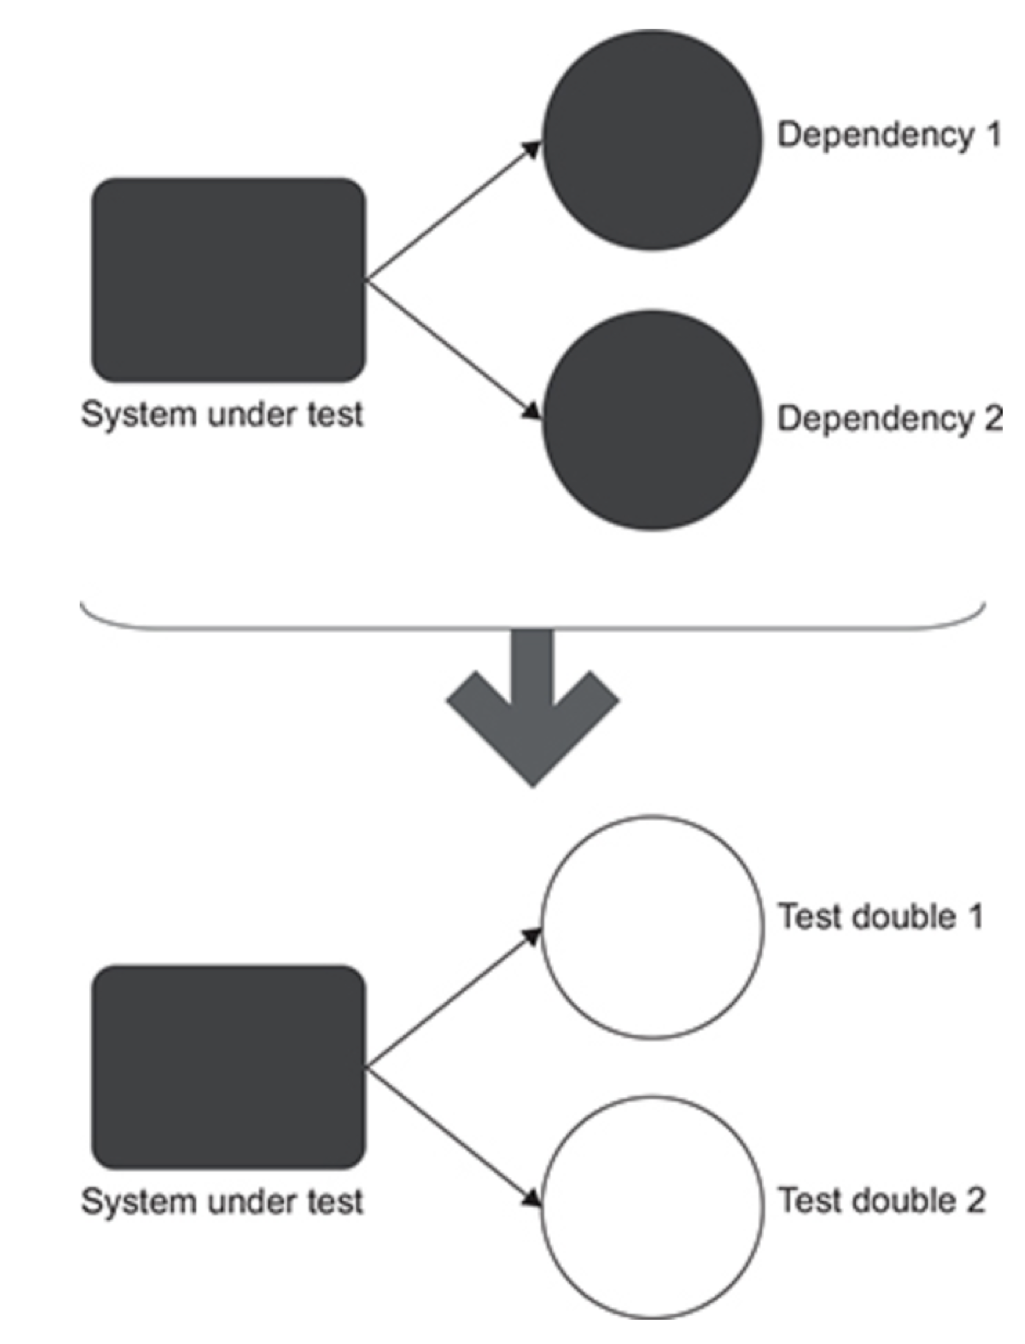
Mocks are “objects pre-programmed with expectations which form a specification of the calls they are expected to receive.” - Martin Fowler, 2006.
A mock is a fake object that holds the expected behaviour of a real object but without any genuine implementation. For example, we can have a mocked File System that would report a file as saved, but would not actually modify the underlying file system.
You can fairly easily create these mock classes yourself for code domain objects.
Several libraries have also been established to help create mocks of objects. Mockito is one of the most famous, and it can be complemented with Mockito-Kotlin. Here’s an example of a mock File that reports a path, but doesn’t actually do anything else.
private val mockedFile: File {
	return mock { on { absolutePath} doReturn "/random"}
}
The value in mocks is that they break the dependency between your method-under-test (MUT) and any external classes, by replacing the external dependency with a “fake class” with predetermined behaviour that helps you test.
The value of interfaces
One important recommendation is that you introduce interfaces for out-of-class dependencies. For instance, you will often see code like this:
public interface IUserRepository
public class UserRepository : IUserRepository
This is common when testing, even in cases when that class may represent the only realization of an interface. This allows you to easily write mocks against the interface, where it’s relatively easy to determine what expected behaviour should be.
Dependency injection
The second half of this is dependency injection. This is the practice of supplying dependencies to an object in it’s argument list instead of allowing the object to create them itself. If you design your classes this way, then it’s easy to create an instance of a mock and provide that to your function, instead of allowing the function to instantiate the object itself.
Dependency injection is basically providing the objects that an object needs (its dependencies) instead of having it construct them itself. It’s a very useful technique for testing, since it allows dependencies to be mocked or stubbed out.
https://stackoverflow.com/questions/130794/what-is-dependency-injection
For instance, we might have a class that uses a database for persistence:
class Persistence {
  val repo = UserRepository() // dependency

  fun saveUserProfile(val user: User) {
    repo.save(user)
  }
}

val persist = Persistence()
persist.saveUserProfile(user) // save using the real database
Imagine that we want to test our saveUserProfile method. This would be extremely difficult to do cleanly, since we have a dependency on the repo that our Persistance class creates.
We could instead change our Persistence class so that we pass in the dependency. This allows us to control how it is created, and even replace the UserRepository() with a mock.
class Persistence(val repo: IUserRepository) {
    fun saveUserProfile(val user: User) {
    repo.save(user)
  }
}

class MockRepo : IUserRepository {
	// body with functions that mirror how the repo would work
  // but no real implementation
}
val mock = MockRepo()
val persist = Persistance(mock)
persist.saveUserProfile(user) // save using the mock database
Obviously you don’t want to mock everything - that would turn this into a unit test! However, you should use this technique to isolate the classes that you are using, and test just the intended path.
How many tests?
When discussing unit tests, we suggested that you should focus on core classes and their behaviours. This is reasonable for unit tests.
We can expand this to suggest that you should “check as many of the business scenario’s edge cases as possible with unit tests; use integration tests to cover one happy path, as well as any edge cases that can’t be covered by unit tests.”
A “happy path” in testing is a successful execution of some functionality. In other words, once your unit tests are done, you should write an integration tests that exercises the functionality that a customer would likely exercise if they were using your software with common features and a common workflow. Focus on that first and only add more integration tests once you have the main execution path identified and tested.
The primary purpose of integration tests is to exercise dependencies, so that should be your main goal. Your main integration test (the “happy path test”) should exercise all external dependencies (libraries, database etc). If it cannot satisfy this requirement, add more integration tests to satisfy this constraint.
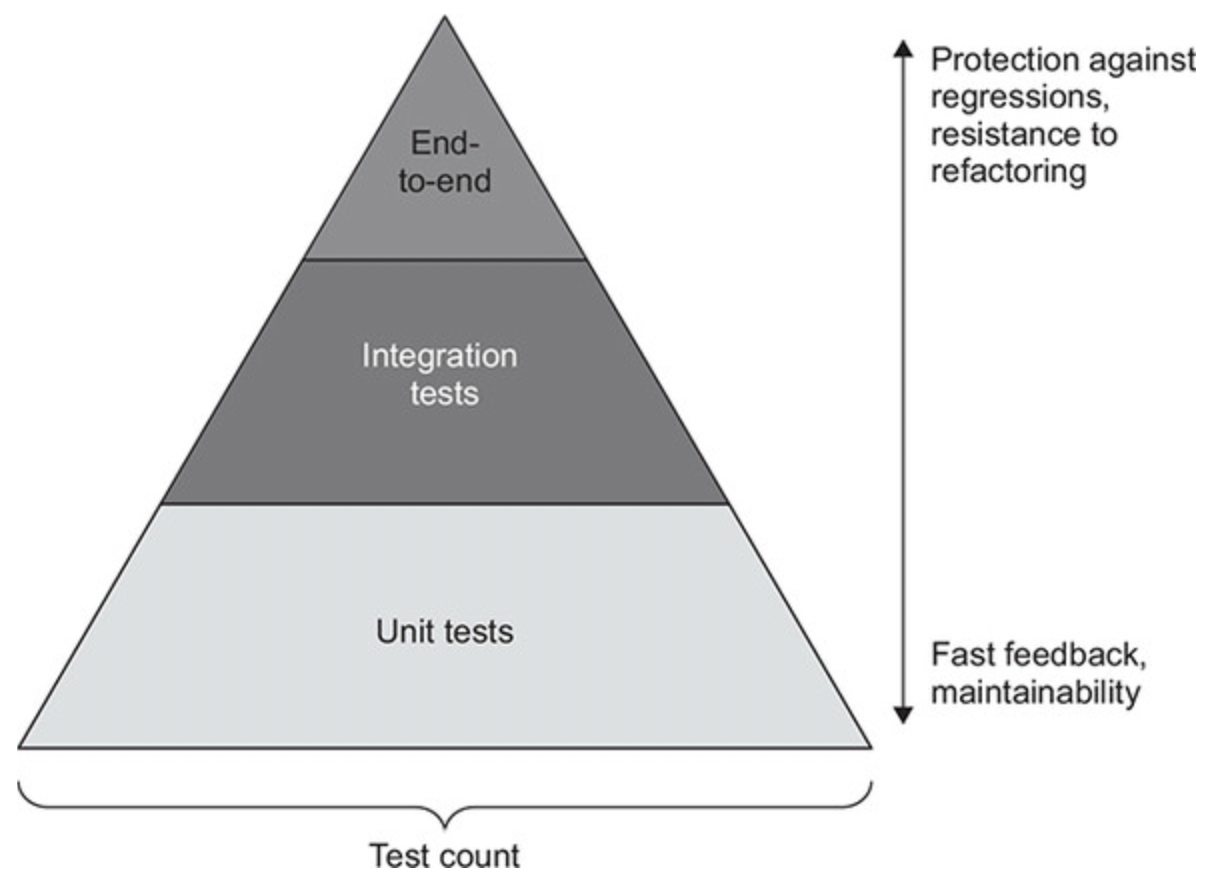
Code coverage
Tests shouldn’t verify units of code. Rather, they should verify units of behaviour: something that is meaningful for the problem domain and, ideally, something that a business person can recognize as useful. The number of classes it takes to implement such a unit of behaviour is irrelevant. — Khorikov (2020)
Code coverage is a metric comparing the number of lines of code with the number of lines of code that have unit tests covering their execution. In other words, what “percentage” of your code is tested?
This is a misleading statistic at the best of times (we can easily contrive cases where code will never be executed or tested).
TDD would suggest that you should have 100% unit test coverage but this is impractical and not that valuable. You should focus instead on covering key functionality. e.g. domain objects, critical paths of your source code.
One recommendation is to look at the coverage tools in IntelliJ, which will tell you how your code is being executed, as well as what parts of your code are covered by unit tests. Use this to determine which parts of the code should be tested more completely.
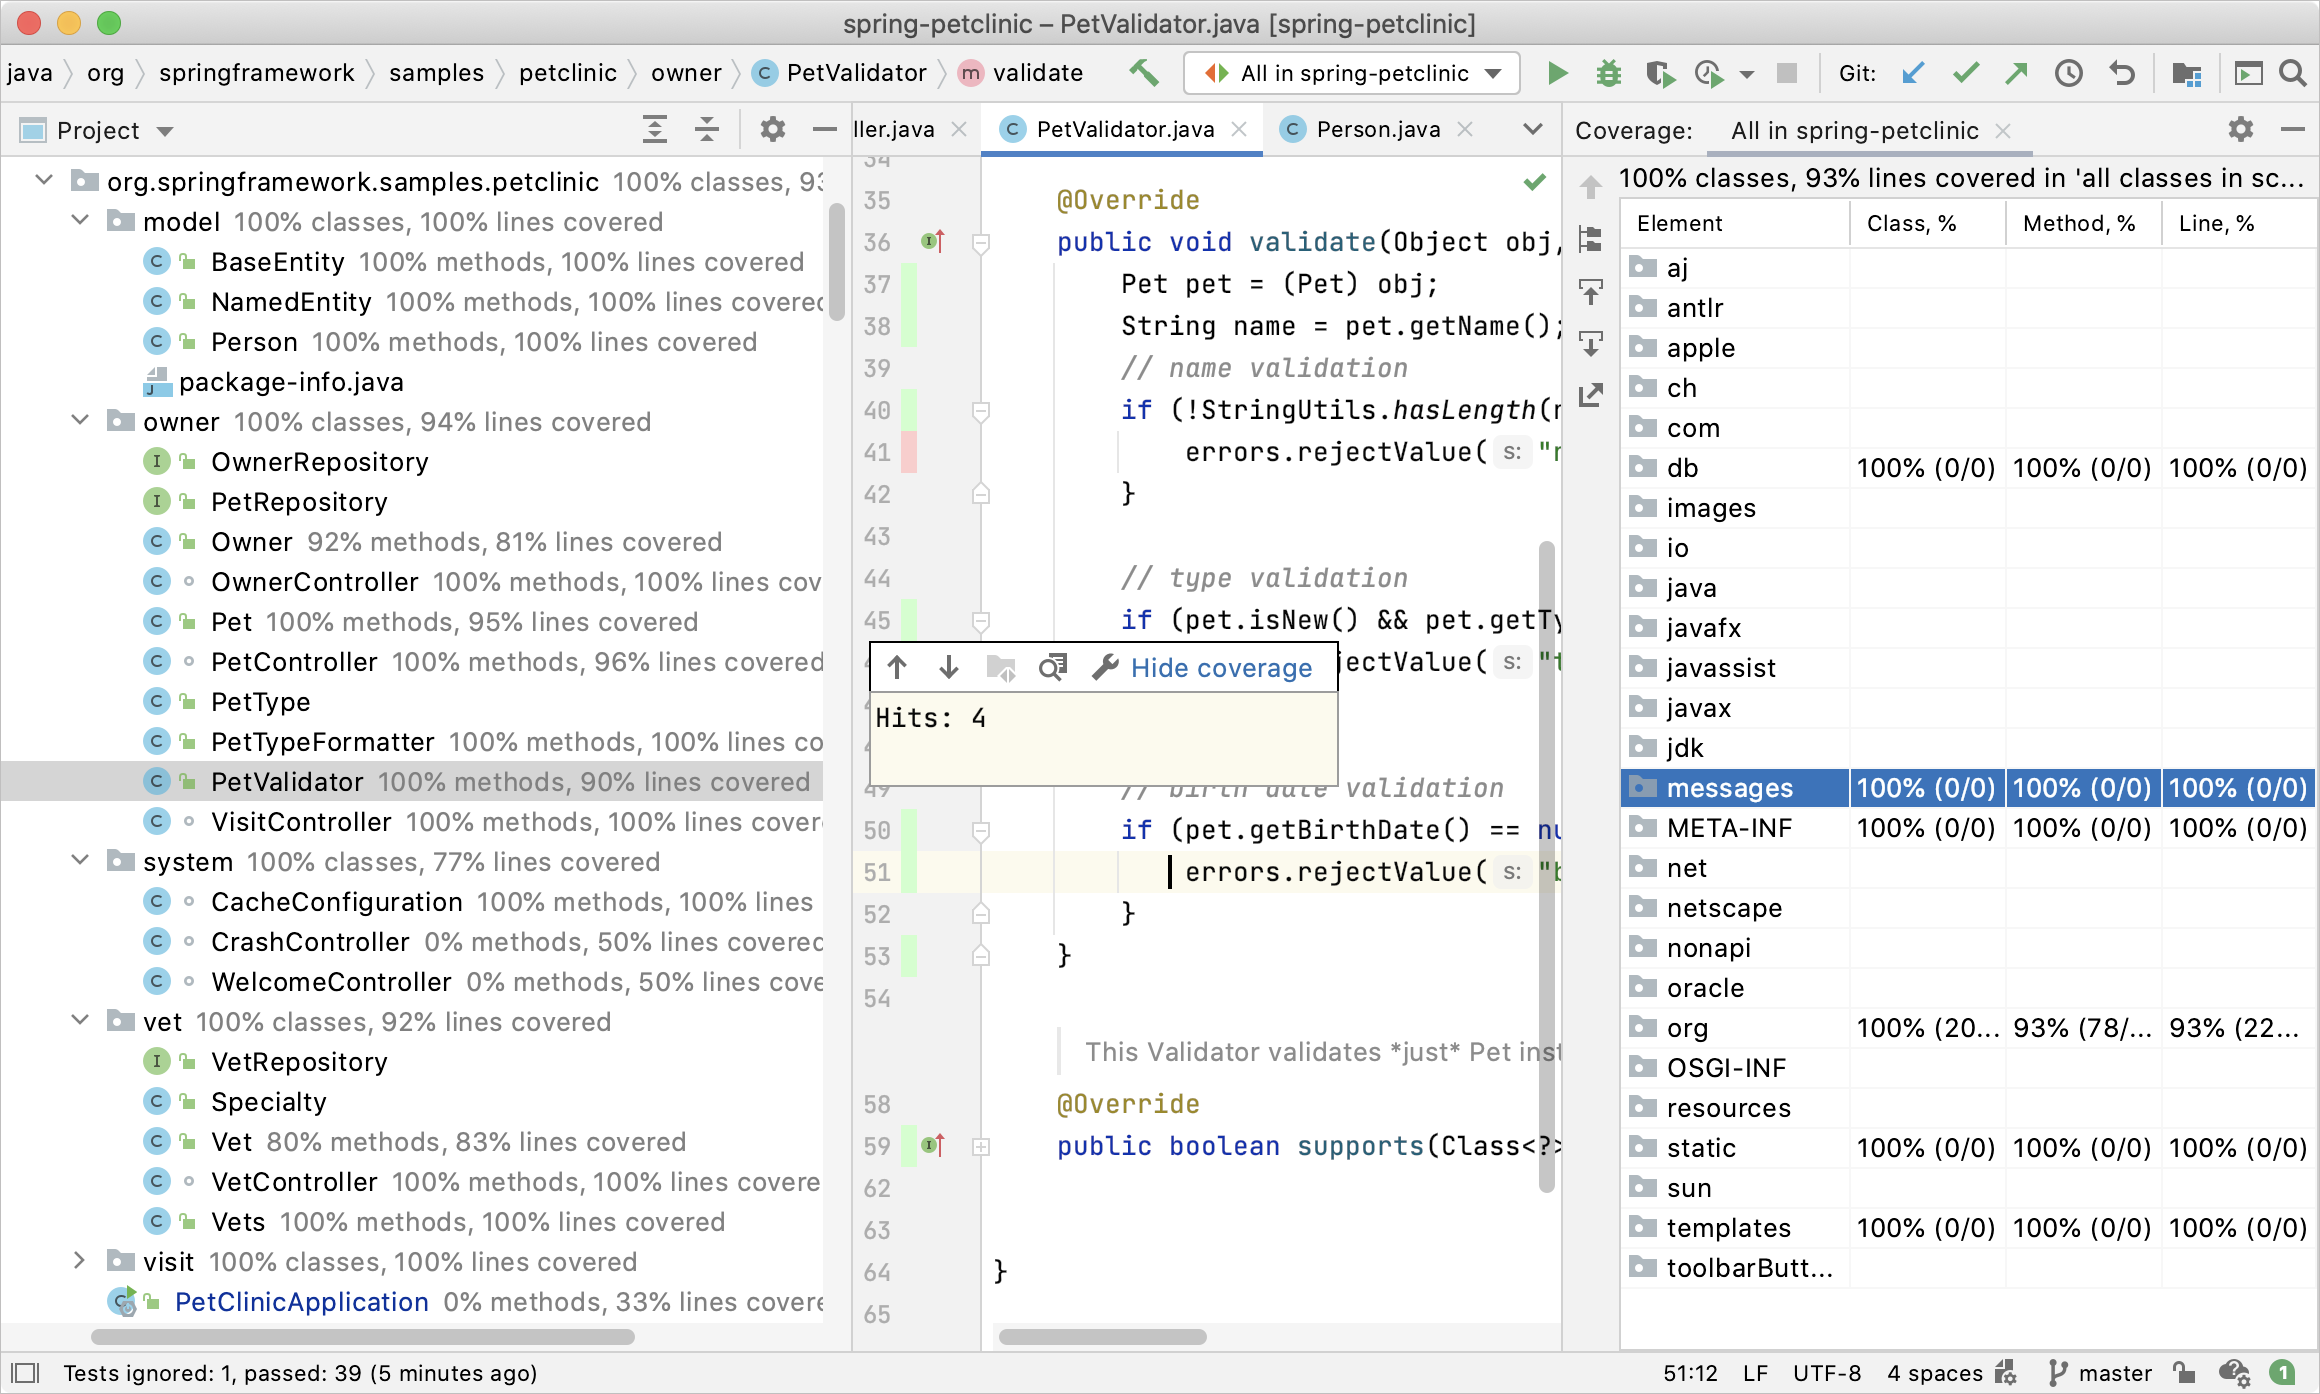
See also
Last Word

Software release
At the end of each iteration, you should be producing a software release, and publishing it on your project page.
What is a software release?
A software release is process where you halt development, and generate an installable version of your product that contains specific, known and tested functionality. Typically this is done so that you can provide them with a working copy of your software either for further testing, or actual use/deployment.
Producing a release
Here’s what you should do each release.
-
Assign a version number. In your
build.gradle.kts, you should change the VERSION to the next valid product version number.- We recommend incrementing the second digit for a beta release; your final release would be version 1.0.
- e.g., Demo 1 is 0.10, Demo 2 is 0.20, …, final release is 1.0. See semantic versioning.
-
Consolidate code changes. Commit all completed code changes and merge back to your release branch (
mainunless you are told otherwise). Make sure that all unit tests pass. -
Generate a release in GitLab (docs). You can start this through
Deploy>Release. This will (a) tag your code at this point in time, (b) create an archive of your source code from that tag. -
Write release notes. Each software release should be documented in a Wiki page, named according to the release number e.g.,
Version 1.0.0 Release. You should have a section titledReleasesin yourREADME.mdwith a link to this page (and all previous releases).The Wiki page for a release needs to include:
- The release date, which should be the date that the installer was generated. e.g., 12-May-2023
- The version of this release (which you increment for each release. e.g., 1.1.0 for your first sprint.
- A bullet list of the major changes that were included in the release, and a link to the issues list in GitLab.
-
Add installer images. The installer should be a packaged version of your application that a user could use to install it. If your application consists of multiple components that need to be installed separately (e.g. Android AND desktop) then you need to provide installers for each one.
Acceptable forms of packaging include:
- Android: an
apkfile generated from IntelliJ IDEA or Android Studio that can be side-loaded into a virtual device (Build > Build/APK). - Desktop: an
exe,dmg,pkgormsifile that installs the application (In Gradle, Compose Desktop > packageInstaller). - Service: a Docker image that contains your service, with instructions on how to run it. If you are hosting it in the cloud, then you don’t need a Docker image.
The last step is to attach these images to the wiki page, so that user can locate them in the wiki and install them directly. (If the file is too large to attach, you can also place it in your Git repository and provide a link the repo in your Release Notes).
- Android: an
Software development
Topics related to application development.
Getting started
Technology choices
We need to consider the environments in which we’re operating! This includes both our development and deployment tech stacks (operating system, programming language, libraries).
What’s Next?
We have some additional considerations, since this is an academic environment (and not a commercial product for example).
- We want you to have the option of mobile or desktop development, so we need a tech stack that supports both.
- We also need to make sure that everyone in the course can run the development tools. This means that we cannot use Apple-specific toolchain (which are only available to people using macOS).
Given all of above, we’re going to use Kotlin and build Android applications and desktop applications.
Kotlin is the main programming language for Android development, and really useful when targeting that platform. JetBrains, the company behind the language design, is working with Google to expand support to desktop, web and eventually iOS! The goal is to have a single programming language that can target all of these platforms!
Kotlin is a modern, application focused programming language with a lot of amazing features. We’ll learn how to use Kotlin to build well-designed applications that meet the goals we’ve outlined. This includes discussions of architectural styles, useful design principles, design patterns and best practices like pair programming, unit testing and code reviews.
We’ll also discuss how to implement key features like user-interfaces, database connectivity and web services using industry-standard toolkits e.g. Compose for UI.
Finally, we will do all of this in the context of best team practices. We will take steps to ensure effective team communication and collaboration, and identify things that you can do to work effectively together. These are extremely important skills to develop as we start building larger and more complex systems.
Final Word
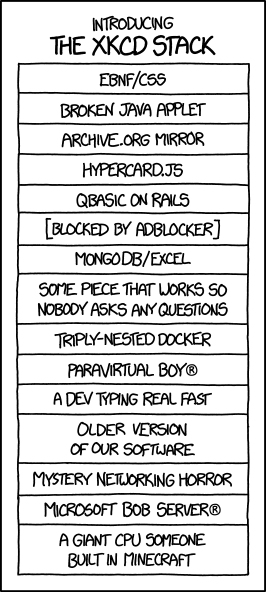
https://imgs.xkcd.com/comics/xkcd_stack.png
Toolchain installation
This section describes the software that you will to install in order to work on your project.
Minimum Requirements
To participate in coding and other activities, each person on your team requires access to a modern computer running Windows, Linux or macOS. 8GB of RAM or more is recommended, and you must have administrative rights on this machine (which disqualifies the use of lab computers). A notebook computer is preferred, since you will be working on your project in-class.
Note that a physical phone is NOT required for Android development, since you can use a virtual device (AVD). This will be demonstrated in-class.
What to Install?
The following software is used in this course and represents the minimum tech stack that you must use.
Install manuallyindicates that you should install from the link provided.IntelliJ pluginindicates that this is bundled with the IntelliJ IDEA IDE. Once the IDE is installed, you can check that this plugin is installed fromSettings>Plugins. You should always use the most recent version of any plugin.Installed by Gradlemeans that we will configure our build system to automatically download and manage this dependency. You don’t need to install it manually.
Desktop Development
| Software | Category | Version | How to install? |
|---|---|---|---|
| Git | Tool | 2.45+ | Install manually |
| Java JDK | Library | 21.0.4 | Install manually |
| IntelliJ IDEA | Tool | 2024.2.1 - releases | Install manually |
| Compose Multiplatform | Library | 1.6.11 - releases | IntelliJ plugin |
| Ktor client/server | Library | 2.3.12 - releases | Installed by Gradle |
| JUnit | Library | 5.x | Installed by Gradle |
Android Development
| Software | Category | Version | How to install? |
|---|---|---|---|
| Git | Tool | 2.45+ | Install manually |
| Android Studio | Tool | Latest version | Install manually |
| Jetpack Compose | Library | 1.6.7 - releases | Installed by Gradle |
| Ktor client/server | Library | 2.3.12 - releases | Installed by Gradle |
| JUnit | Library | 5.x | Installed by Gradle |
Installing the newest version of any library is usually the best strategy, but be careful about compiler/library compatibility. The Kotlin and JDK versions in particular need to be compatible versions.
See our Libraries reference for more information on libraries that you can import.
We recommend IntelliJ IDEA for desktop development ,and Android Studio for Android development (one is a fork of the other, but Android Studio also includes the Android SDK which you need for Android development).
If you are going to use IntelliJ IDEA, I would recommend the Ultimate version over the Community version.It has a number of features that are not available in the Community Edition, such as support for Java EE, Spring, and it even supports other languages like JS/TS and Python. The educational license is free, so there is no reason not to use it while you are a student.
Configuration
There are two types of settings in your IDE.
IDE product settings
- Changes you make in your editor/IDE preferences, typically in the Settings dialog. Examples: font size, code style, key bindings, etc.
- Saved in your
.idea.directory in your project folder. - Normally should NOT be saved to Git, since these represent your personal preferences.
Project settings
- Settings that affect how your project builds and executes. Examples: JDK version, Gradle settings.
- Saved in your
build.gradle.ktsfile or other project files. - These absolutely SHOULD be saved to Git, since they affect how your project is built.
My Settings
I always recommend setting up a few things in IntelliJ IDEA to make it easier to use.
The first thing I tend to do is to specify how much memory the IDE can use. I have 16 GB of RAM, so I can dedicate 4 GB to IntelliJ IDEA. This drastically increases performance.
Help>Change Memory Settings>4096 MB
Next, I setup the environment to maximize my editing window (and I use hotkeys to toggle windows and navigate).
View>Appearance>Compact ModeView>Appearance>ToolbarONView>Appearance>Tool Window BarsOFFView>Appearance>Navigation Bar>In Status Bar
Finally, I install a few plugins that I find useful. You can install plugins from the JetBrains Plugin Repository, under Settings > Plugins.
Required for desktop:
- Compose Multiplatform IDE support
Required for Android:
- Android // android only
- Android Design Tools // android only
- Jetpack Compose
Recommended:
- Mermaid.js
- Rainbow Brackets
- Database Tools and SQL
- Docker
Last Word
We recommend an IDE like IntelliJ IDEA or Android Studio, but hey, you do you.

Source code setup
Before you can proceed you should have completed the following:
- Setup your project in GitLab. Details on how to do this are under Course Project > Project Setup.
- Installed the toolchain, including a suitable IDE. See Toolchain installation for details.
Setup your Source Code
Step 1. Getting a working copy of your Git repository
First, you need to git clone your GitLab repository to your local machine so that you have a working copy.
Open the web page for your GitLab project. Click on the Code button, and copy the URL from Clone with HTTPS.

In a terminal, on your computer, cd to the location where you want to keep your source code. git clone the URL.
$ git clone https://git.uwaterloo.ca/cs346/public/mm.git
This would produce a folder named mm that contains the contents of my Git repository.
Step 2. Create an empty project.
You will want to create a project directly in your Git working copy from the previous step.
IntelliJ IDEA and Android Studio both fully support Gradle, and we can create a new project directly in the IDE.
IntelliJ IDEA (Desktop)
From the Splash screen, select New Project.
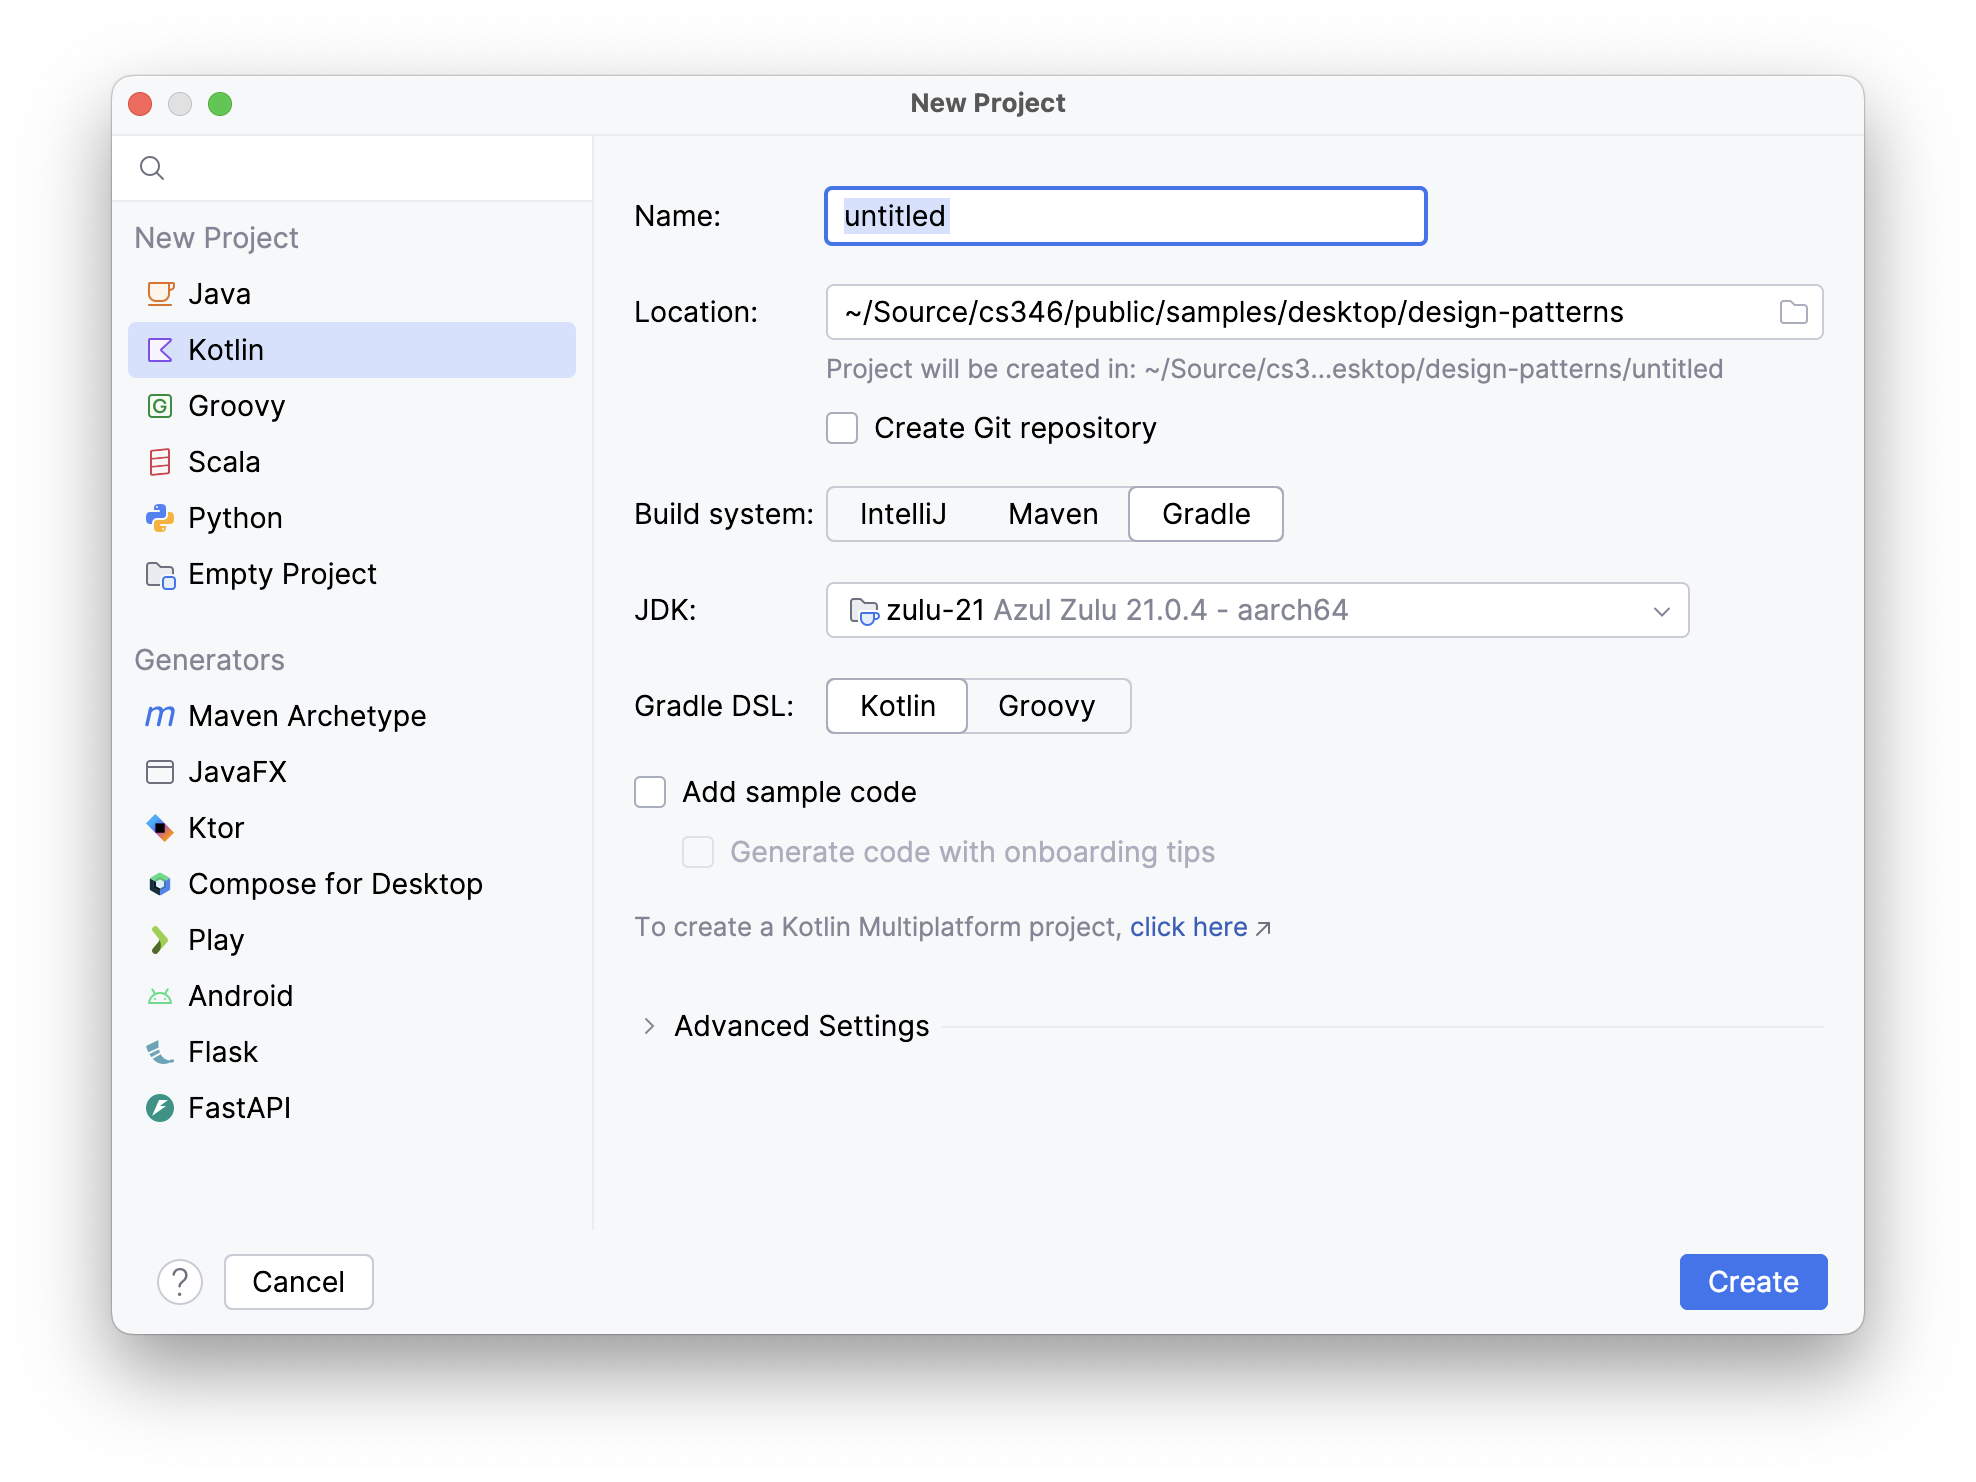
In the project wizard, choose New Project and supply the following project parameters.
Kotlinas your language (from the list on the left).Nameis the name of the folder that will contain your source code. e.g., source.Locationis the location of your working copy (from Step 1 above).Gradlefor your build systemJDKshould point to your JDK installation (see toolchain).Gradle DSLshould be Kotlin as well.
Click Create to proceed. If successful, IntelliJ IDEA will open into the main window to an empty project.
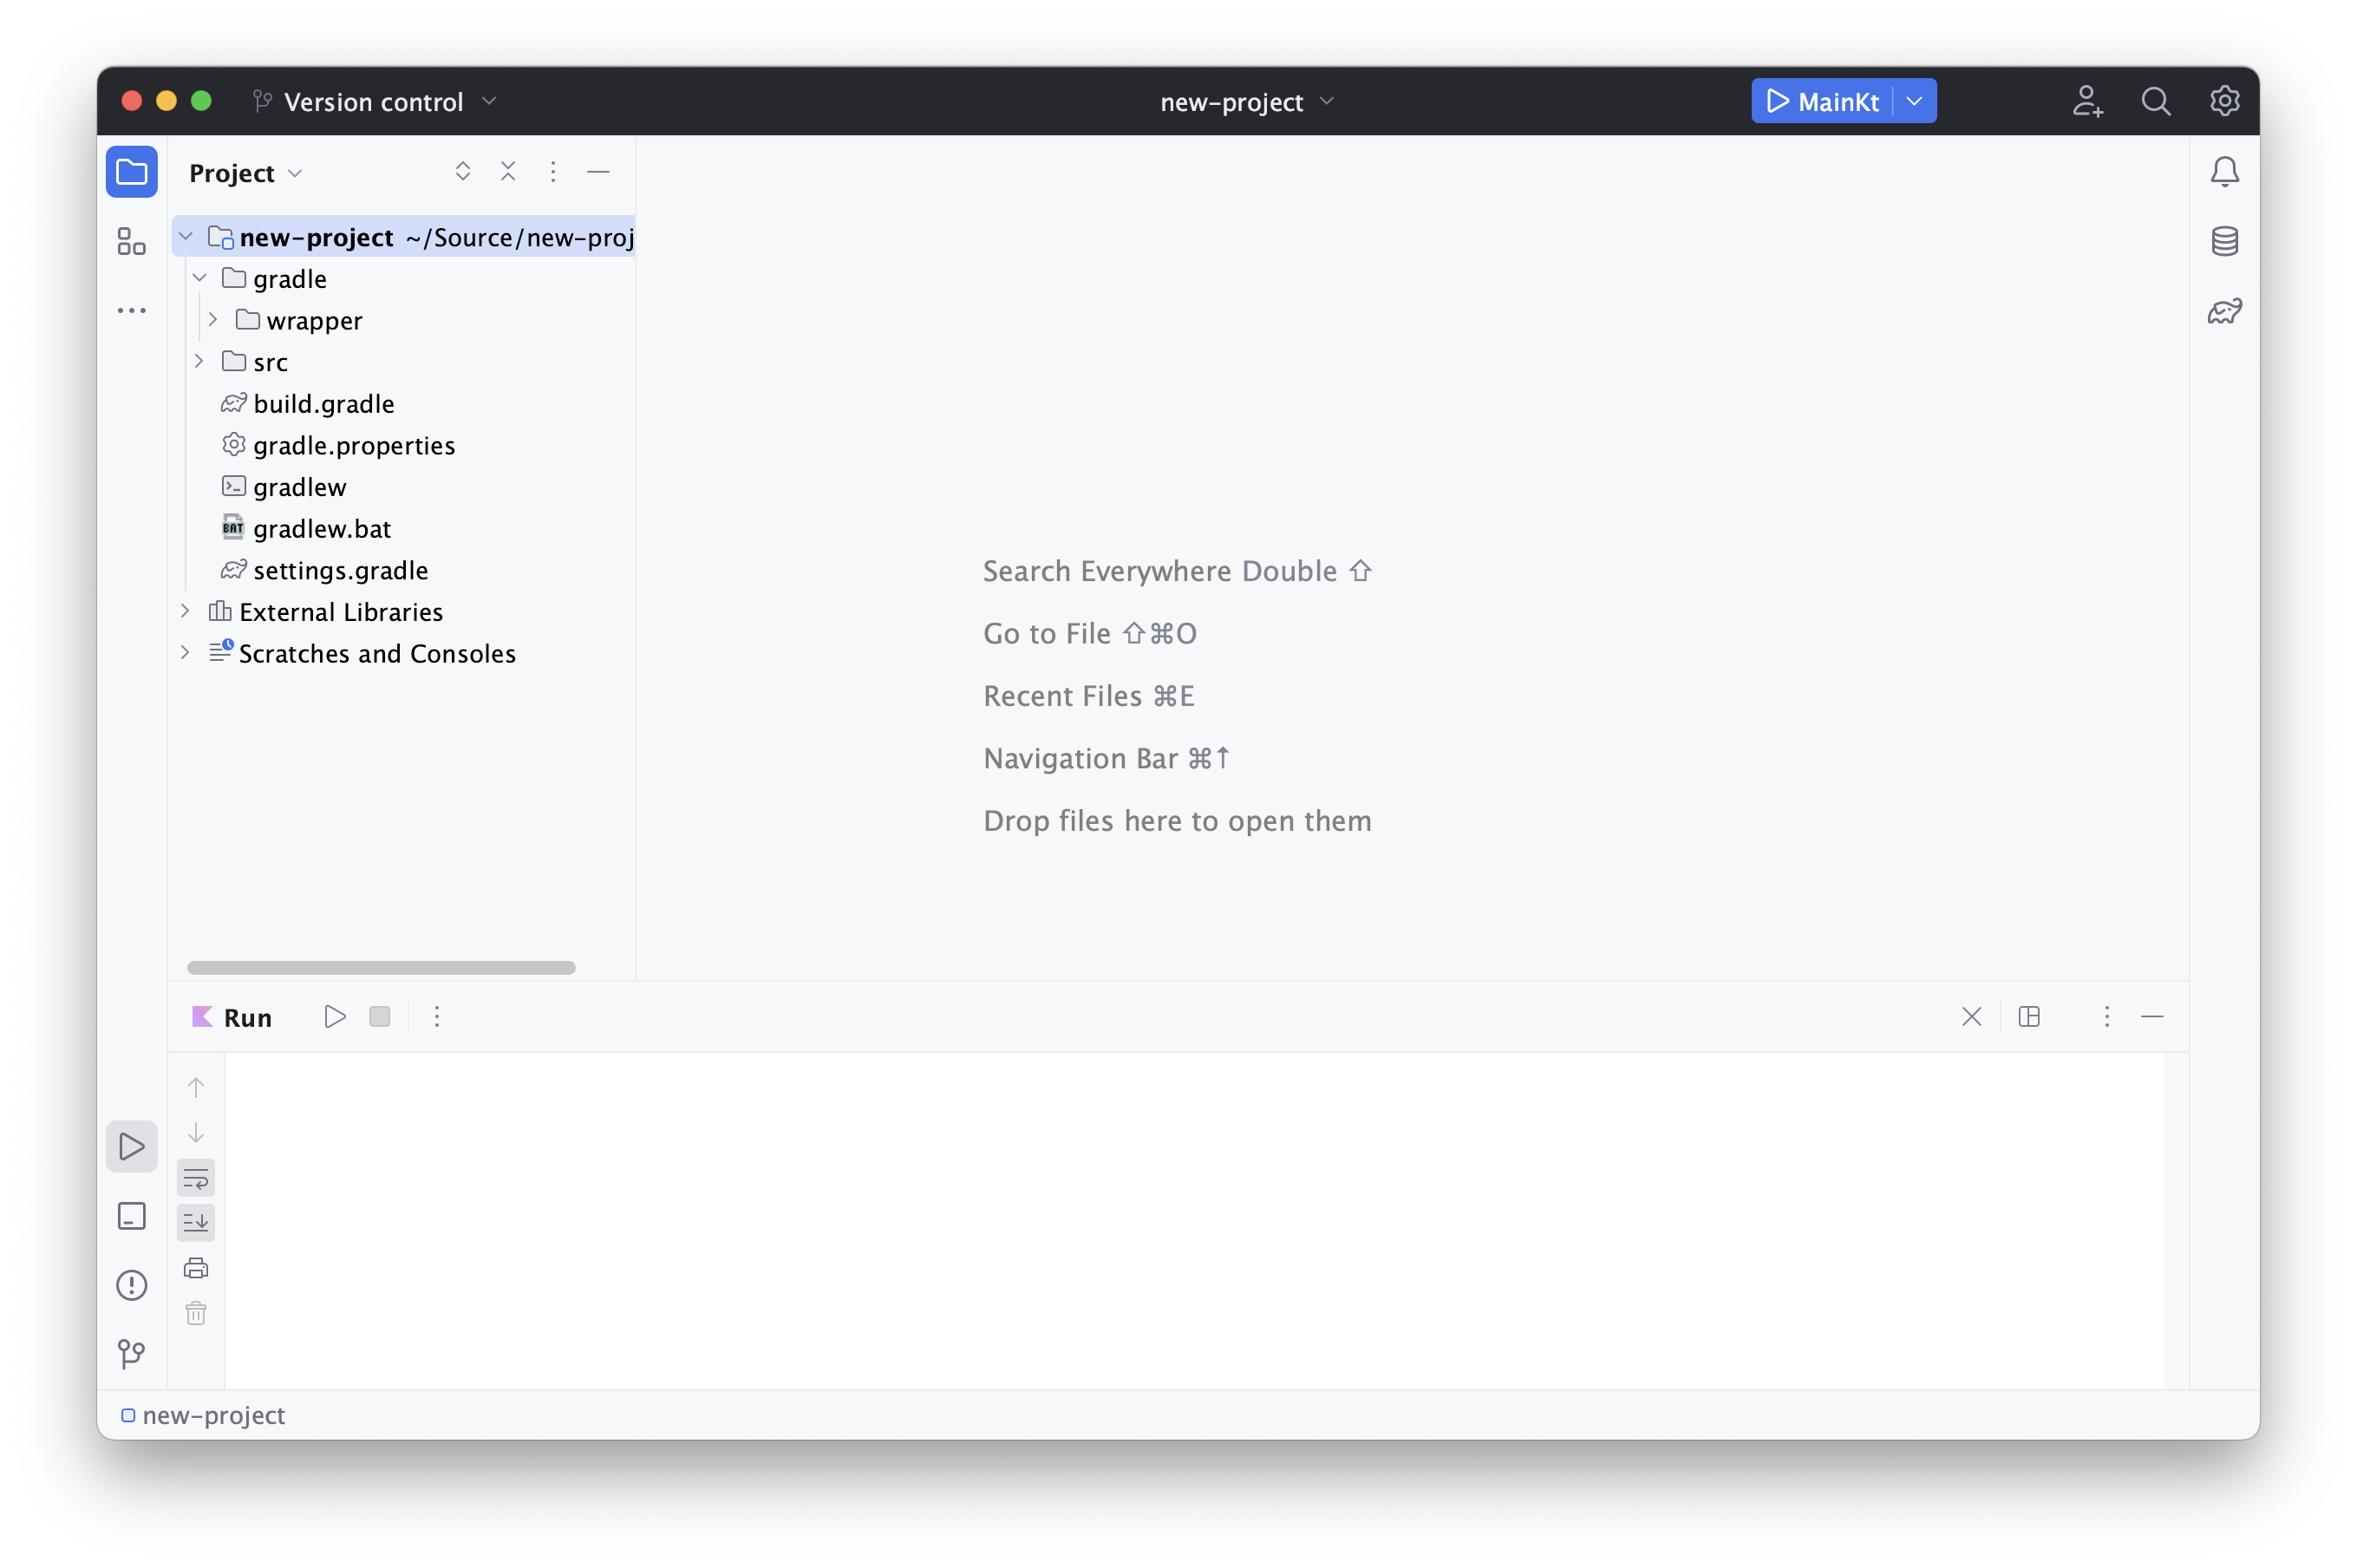
You should be able to click the Run button in the toolbar to execute it.
Android Studio (Android)
From the Splash screen, select New Project.
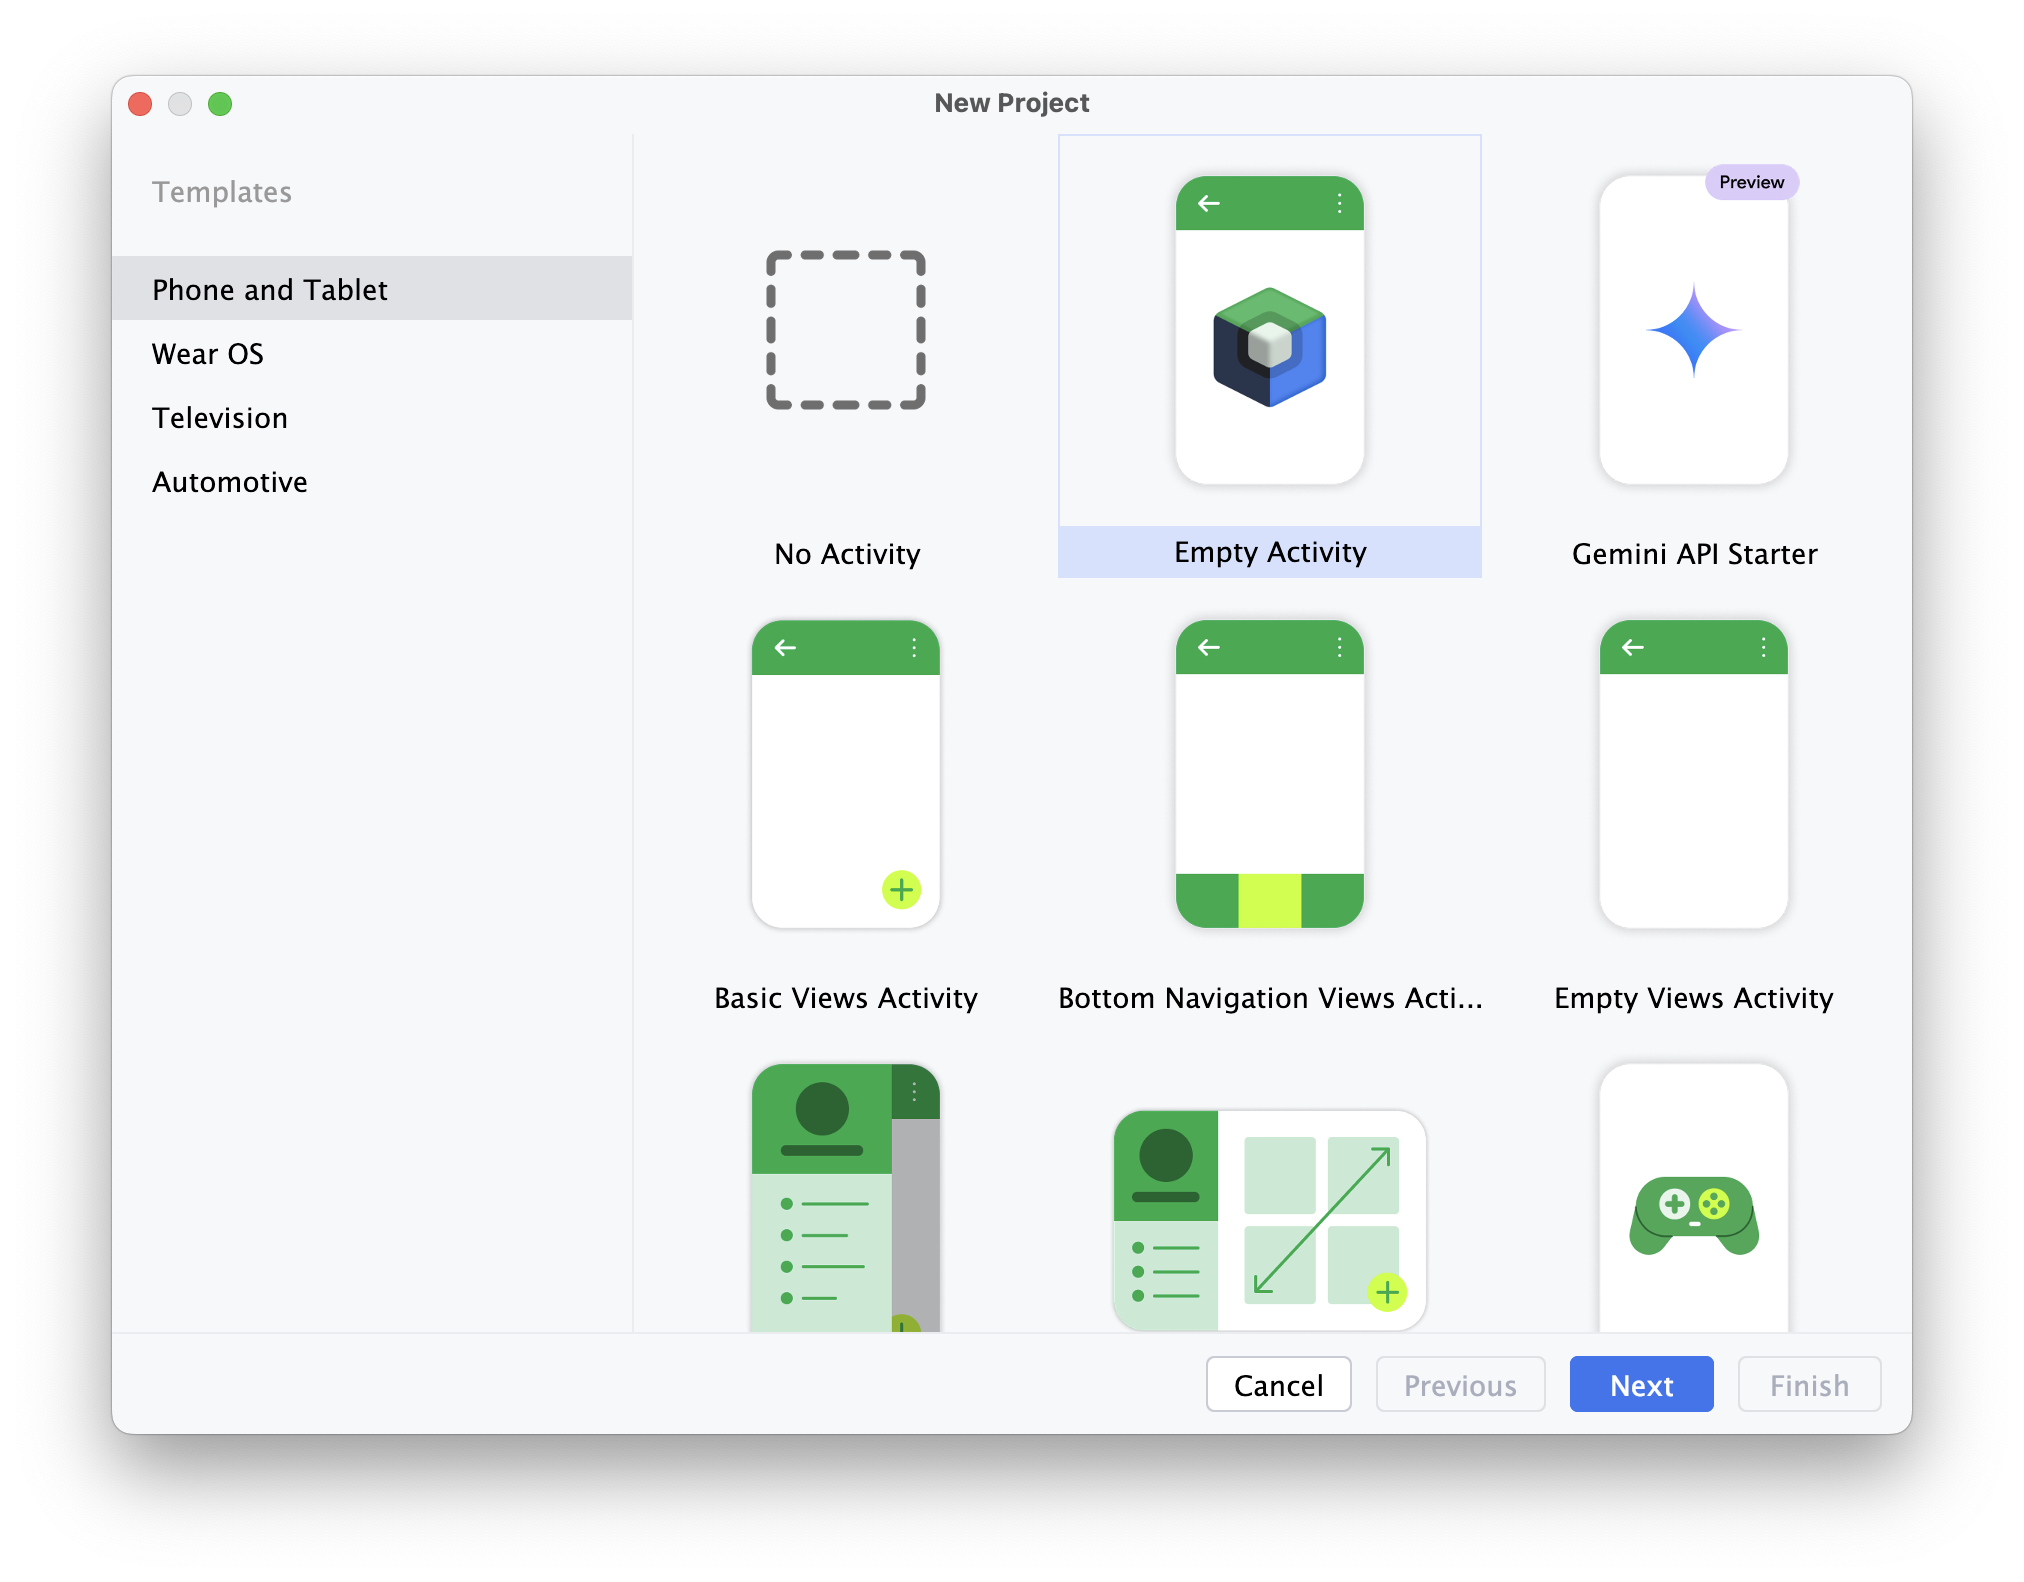
Select Empty Activity and Next. A second screen will prompt you for project parameters.
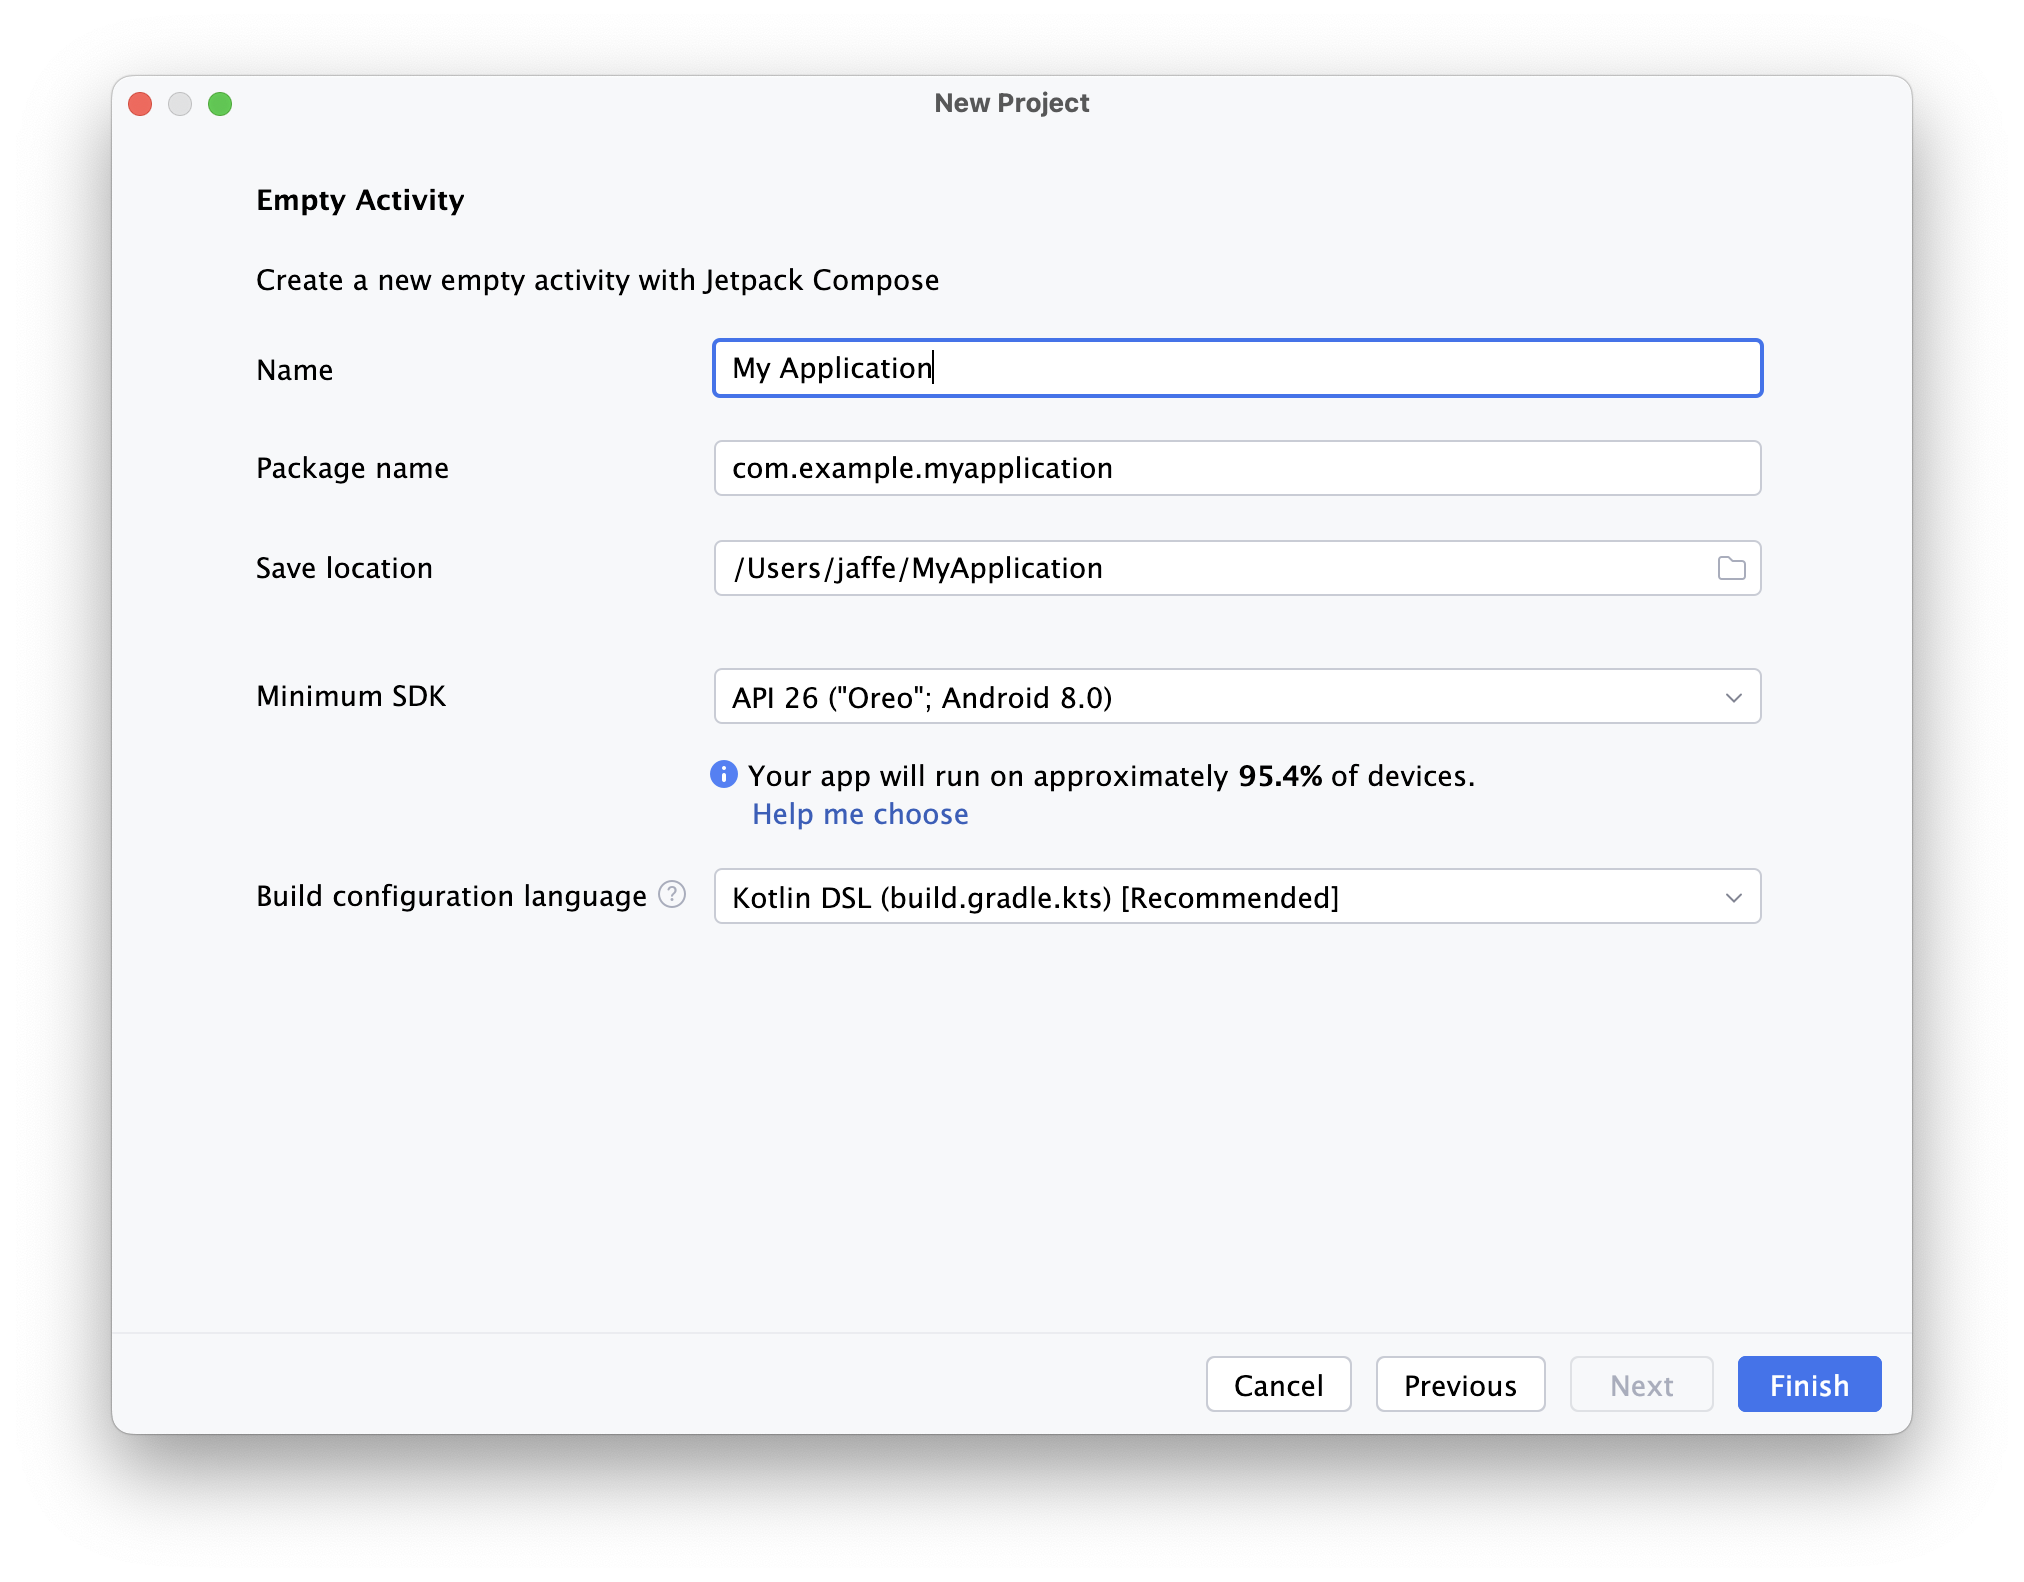
Name: Your application namePackage name: A unique package name.Save location: Your working copy location.Minimum SDK: API 26 or later.Build configuration language: Kotlin DSL.
Click Finish and your project should be created.
You will need to add an Android Virtual Device for testing:
Tools>Device Manager+,Create Virtual Deviceand walk through the wizard to add an emulated device for testing.
Step 3. Add a gitignore file
You should probably add a .gitignore file to the top level of your project, specifying which files to NOT include in your repository.
Typically this would be a list of temporary build directories of any local configuration files. For example.
$ cat .gitignore
build/
out/
*.class
*.tmp
.DS_Store
.idea
Step 4. Push changes to the repository
Once you have confirmed that your project is working, you can commit and push the changes.
$ git add *
$ git commit -m "Initial commit"
$ git push
Your teammates should now be able to git pull to fetch your changes!
Navigating Projects
IntelliJ has a number of windows that it will display by default. You can toggle project windows.
- Project: a list of all files (
Cmd+1 ). - Structure: methods and properties of the current open class/source file (
Cmd+7 ). - Source: the current source files (no hotkey).
- Git: Git status and log (
Cmd+9 ) - not shown. - Gradle: tasks that are available to run (no hotkey) - not shown.
Running Sample Code
We maintain a public Git repository of the source code shown in lectures. To get a copy, git clone the repository URL. This command, for instance, would create a copy of the course materials in a directory named cs346.
$ git clone https://git.uwaterloo.ca/cs346/ cs346
The slides folder contains sample code to accompany some of the slide decks. You can build and execute these projects directly in IntelliJ:
- File -> Open and navigate to the top-level directory containing the
build.gradle.ktsfile. Do NOT open a specific file, just the directory. Click Ok. - Click on the
Runbutton in either IntelliJ or Android Studio to run the project.
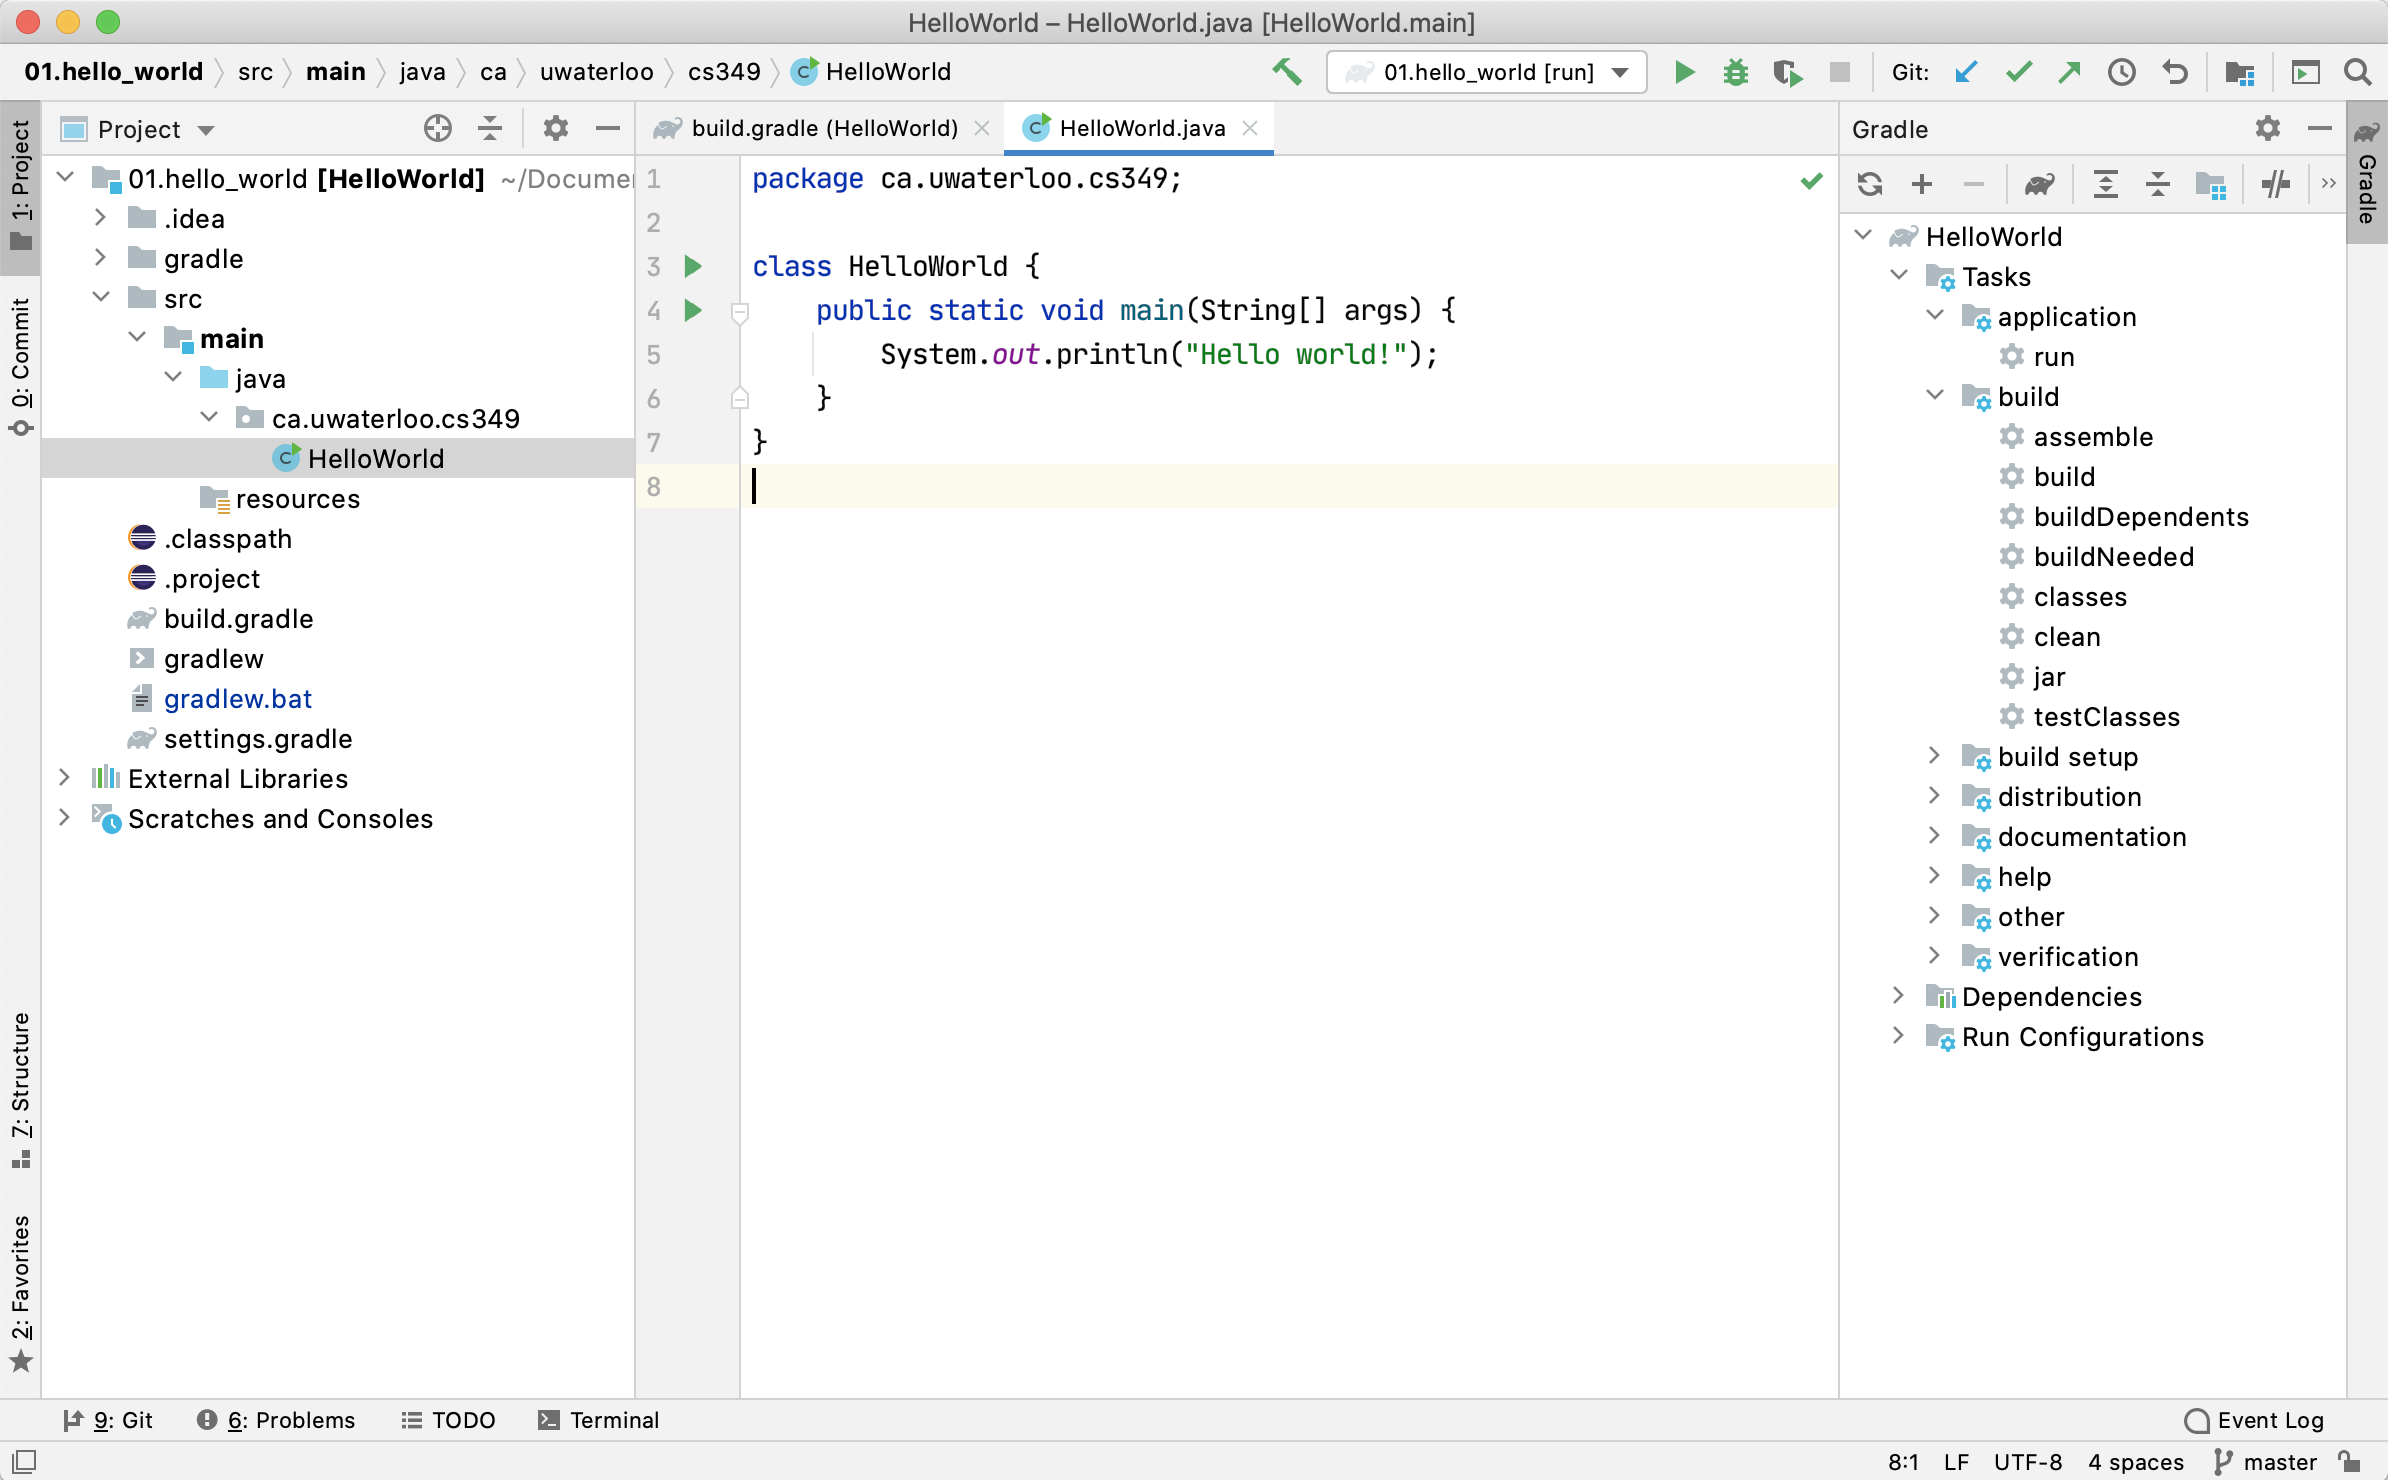
Further Help
There are many excellent online resources for using IntelliJ. I’d suggest starting with the JetBrains IntelliJ Documentation and online help.
Kotlin programming
Kotlin basics
Why Kotlin?
Kotlin is a modern, general-purpose programming language designed by JetBrains as a drop-in replacement for Java. It has full compatibility with Java source code, and is 100% compatible with that ecosystem.
Over time, it has extended far past it’s original goals. It’s seen broad industry support, and has proven to be a versatile language for full-stack development.
- As of 2019, it’s Google’s recommended language for building Android applications. Android development, including third-party libraries, is done in Kotlin1.
- It’s fully capable back-end language for building servers and services, and it’s compatibile with existing service frameworks e.g., Spring Boot, Ktor.
- Finally, it’s designed as a cross-platform language, with native compilers for many platforms . We use it in this course for desktop and Android. iOS support is in beta2, and WASM/web is also on the horizon.
The following sections introduce Kotlin, focusing on features that you will use in this course. Other recommended resources for learning Kotlin include:
For a more comprehensive list of resources, see the reading-list and sample code pages.
Compiling
The Kotlin programming language includes a set of compilers that can be used to target different platforms.
flowchart LR
    kotlin([Kotlin Code])
    jvm([Kotlin/JVM])
    native([Kotlin/Native])
    js([Kotlin/JS])
    wasm([Kotlin/WASM])
    kotlin --> jvm
    kotlin --> native
    kotlin --> js
    kotlin --> wasm
Kotlin/JVMcompiles Kotlin to JVM bytecode, which can be interpreted on a Java virtual machine. This supports running Kotlin code anywhere a JVM is supported (typically desktop, server).Kotlin/Nativecompiles Kotlin to native executables. This provides support for iOS and other targets.Kotlin/JStranspiles Kotlin to JavaScript. The current implementation targets ECMAScript 5.1.Kotlin/WASMadds support for WASM virtual machine standard, allowing Kotlin to run on the web.
Kotlin/JVM and Kotlin/Native for Android are the best-supported targets at this time, and what we will focus on in this course.
A Kotlin application can be compiled to JVM or native code. Kotlin’s application code looks a little like C, or Java. Here’s the world’s simplest Kotlin program, consisting of a single main method.
fun main() {
	val message="Hello Kotlin!"
	println(message)
}
To compile from the command-line, we can use the Kotlin compiler, kotlinc. By default, it takes Kotlin source files (.kt) and compiles them into corresponding class files (.class) that can be executed on the JVM.
$ kotlinc Hello.kt

$ ls
Hello.kt HelloKt.class

$ kotlin HelloKt
Hello Kotlin!
Notice that the compiled class is named slightly differently than the source file. If your code isn’t contained in a class, Kotlin wraps it in an artificial class so that the JVM (which requires a class) can load it properly. Later when we use classes, this won’t be necessary.
This example compiles Hello.kt into Hello.jar and then executes it:
$ kotlinc Hello.kt -include-runtime -d Hello.jar

$ ls
Hello.jar Hello.kt

$ java -jar Hello.jar
Hello Kotlin!
Most of the time, we won’t compile from the command-line; instead, we will use a build system to generate an installable package for our platform e.g., desktop or Android. See Gradle.
Modularity
Packages
When defining related classes or functions within an application, it’s best to group them together in a package.
Packages are meant to be a collection of related classes. e.g. graphics classes. They are conceptually similar to namepsaces in C++. We use them to enforce a clear separation of concerns within code.
Packages are named using a reverse DNS name, typically the reverse-domain name of company that owns the code, followed by a unique name related to the code’s functionality. e.g. com.sun.graphics for a graphics package developed at Sun Microsystems, or ca.uwaterloo.cs346 for code related to this course.
Package names are always lowercase, and dot-separated with no underscores. This convention arose from the Java language, and is used in Kotlin as well.
To create and use a package, you need to:
- Add the
packagedeclaration to the top of a source file to assign that file to a namespace. Classes or modules in the same package have full visibility to each other.
For example, we have declared this file to be included in the cs.uwaterloo.cs346 package. This means that any classes in this file will be included in that package, and will be visible to any other functions or classes in that package, even if they are in different files.
package ca.uwaterloo.cs346

data class Point(x: Float, y: Float) { }
data class Vector(x: Float, y: Float, m: Float) { }
- Use the
importkeyword to bring classes from other packages into the current namespace. This allows you to use classes from other packages in your code.
For example, to use our Point class in another file, we would import it like this. Note that the Vector class isn’t imported, so it won’t be available in this file.
import ca.uwaterloo.cs346.Point

fun main() {
  val p1 = Point(5.0, 10.0)
  val p2 = Point(15.0, 20.0)
}
To include all classes in a package, you can use the * wildcard. This would make both Point and Vector visible.
import ca.uwaterloo.cs346.*
Modules
Modules serve a different purpose than packages: they are intended to expose permissions for external dependencies. Using modules, you can create higher-level constructs (modules) and have higher-level permissions that describe how that module can be reused. Modules are intended to support a more rigorous separation of concerns that you can obtain with packages.
A simple application would be represented as a single module containing one or more packages, representing different parts of our application.
JAR Files
A Kotlin application might consist of many classes, each compiled into it’s own .class file. To make these more manageable, the Java platform includes the jar utility, which can be used to combine your classes into a single archive file i.e. a jar file. Your application can be executed directly from that jar file. This is the standard mechanism in the Java ecosystem for distributing applications.
A jar file is just a compressed file (like a zip file) which has a specific structure and contents, and is created using the jar utility. This example compiles Hello.kt, and packages the output in a Hello.jar file.
$ kotlinc Hello.kt -include-runtime -d Hello.jar

$ ls
Hello.jar Hello.kt
The -d option tells the compiler to package all of the required classes into our jar file. The -include-runtime flag tells the compiler to also include the Kotlin runtime classes (which contain things like the Garbage Collector).
These classes are needed for all Kotlin applications, and they’re small, so you should always include them in your distribution (if you fail to include them, you app won’t run unless your user has Kotlin installed).
To run from a jar file, use the java command.
$ java -jar Hello.jar
Hello Kotlin!
In the same way that the Java compiler compiles Java code into IR code that will run on the JVM, the Kotlin compiler also compiles Kotlin code into compatible IR code. The java command will execute any IR code, regardless of which programming language and compiler was used to produce it.
Our JAR file from above looks like this if you uncompress it:
$ unzip Hello.jar -d contents
Archive:  Hello.jar
  inflating: contents/META-INF/MANIFEST.MF
  inflating: contents/HelloKt.class
  inflating: contents/META-INF/main.kotlin_module
  inflating: contents/kotlin/collections/ArraysUtilJVM.class
  ...

$ tree -L 2 contents/
.
├── META-INF
│   ├── MANIFEST.MF
│   ├── main.kotlin_module
│   └── versions
└── kotlin
    ├── ArrayIntrinsicsKt.class
    ├── BuilderInference.class
    ├── DeepRecursiveFunction.class
    ├── DeepRecursiveKt.class
    ├── DeepRecursiveScope.class
    ...
The JAR file contains these main features:
HelloKt.class– a class wrapper generated by the compilerMETA-INF/MANIFEST.MF– a file containing metadata.kotlin/– Kotlin runtime classes not included in the JDK.
The MANIFEST.MF file is autogenerated by the compiler, and included in the JAR file. It tells the runtime which main method to execute. e.g. HelloKt.main().
$ cat contents/META-INF/MANIFEST.MF
Manifest-Version: 1.0
Created-By: JetBrains Kotlin
Main-Class: HelloKt
Library support
Kotlin benefits from some of the best library support in the industry, since it can leverage any existing Java libraries as well as Kotlin standard libraries. This means that you can use any Java library in your Kotlin code, and you can also use any Kotlin library that has been developed.
Kotlin Standard Library
The Kotlin Standard Library is included with the Kotlin language, and contained in the kotlin package. This is automatically imported and does not need to be specified in an import statement.
Some of the features that will be discussed below are actually part of the standard library (and not part of the core language). This includes essential classes, such as:
- Higher-order scope functions that implement idiomatic patterns (let, apply, use, etc).
- Extension functions for collections (eager) and sequences (lazy).
- Various utilities for working with strings and char sequences.
- Extensions for JDK classes making it convenient to work with files, IO, and threading.
Java Standard Library
Kotlin is completely 100% interoperable with Java, so all of the classes available in Java/JVM can also be imported and used in Kotlin.
// import all classes in the java.io package
// this allows us to reference any classes in this namespace
import java.io.*

// we can also just import a single class
// this allows us to refer to just the ListView class in code
import javafx.scene.control.ListView

// Kotlin code calling Java IO libraries
import java.io.FileReader
import java.io.BufferedReader
import java.io.FileNotFoundException
import java.io.IOException
import java.io.FileWriter
import java.io.BufferedWriter

if (writer != null) {
	writer.write(
  	row.toString() + delimiter +
    	s + row + delimiter +
      pi + endl
  )
Importing a class requires your compiler to locate the file containing these classes! The Kotlin Standard Library can always be referenced by the compiler, and as long as you’re compiling to the JVM, the Java class libraries will also be made available.
Third-Party Libraries
To use any other Java or Kotlin library, you will to add it to your Gradle dependencies in your build.gradle.kts. This makes them available to import in your source code
// build.gradle.kts

dependencies {
  implementation("com.github.ajalt.clikt:clikt:4.2.2")
}
Once the library is added to your dependencies, you can import it in your source code:
import com.github.ajalt.clikt.core.CliktCommand

fun process() {
  val command = object : CliktCommand() {
    override fun run() {
      echo("Hello, world!")
    }
  }
  command.main(arrayOf())
}
See Gradle > Dependency Management for more information on how to manage dependencies in Kotlin.
Kotlin Basics
Kotlin is a general-purpose, class-based object-oriented language. Although not a functional language, it includes some functional design elements (e.g. higher order functions). Syntactically, it is similar to other C-style programming languages, with a number of modern advances.
Practically, it is an excellent general-purpose language that can replace Java in production environments.
Types
A type system is the set of rules that are applied to expressions in a propgramming language language. We differentiate different type systems by the types of rules that they apply:
- Strong typing: The language has strict typing rules, which are typically enforced at compile-time. The exact type of variable must be declared or fixed before the variable is used. This has the advantage of catching many types of errors at compile-time (e.g. type-mismatch).
- Weak typing: These languages have looser typing rules, and will often attempt to infer types based on runtime usage. This means that some categories of errors are only caught at runtime.
Kotlin is a strongly typed language, where variables need to be declared, or the type known, at compile time. If a type isn’t strictly provided, Kotlin will infer the type at compile time (similar to ‘auto‘ in C++). The compiler is strict about this: if the type cannot be inferred at compile-time, an error will be thrown.
Variables
Kotlin uses the var keyword to indicate a variable, and Kotlin expects variables to be declared before use. Types are always placed to the right of the variable name. Types can be declared explicitly, but will be inferred if the type isn’t provided.
fun main() {
  var a:Int = 10
  var b:String = "Jeff"
  var c:Boolean = false

  var d = "abc"	   // inferred as a String
  var e = 5        // inferred as Int
  var f = 1.5      // inferred as Float
}
All standard data-types are supported, and unlike Java, all types are objects with properties and behaviours. This means that your variables are objects with methods! E.g. "10".toInt() does what you would expect.
Supported Types
Integers
| Type | Size (bits) | Min value | Max value |
|---|---|---|---|
| Byte | 8 | -128 | 127 |
| Short | 16 | -32768 | 32767 |
| Int | 32 | -2,147,483,648 (-2 31) | 2,147,483,647 (2 31- 1) |
| Long | 64 | -9,223,372,036,854,775,808 (-2 63) | 9,223,372,036,854,775,807 (2 63- 1) |
Floating Point Types
| Type | Size (bits) | Significant bits | Exponent bits | Decimal digits |
|---|---|---|---|---|
| Float | 32 | 24 | 8 | 6-7 |
| Double | 64 | 53 | 11 | 15-16 |
Boolean
The type Boolean represents boolean objects that can have two values: true and false. Boolean has a nullable counterpart Boolean? that also has the null value.
Built-in operations on booleans include:
||– disjunction (logical OR)&&– conjunction (logical AND)!- negation (logical NOT)
||and&&work lazily.
Strings
Strings are often a more complex data type to work with. In Kotlin, they are represented by the String type, and are immutable. Elements of a string are characters that can be accessed by the indexing operation: s[i], and you can iterate over a string with a for-loop:
fun main() {
  val str = "Sam"
  for (c in str) {
      println(c)
  }
}
You can concatenate strings using the + operator. This also works for concatenating strings with values of other types, as long as the first element in the expression is a string (in which case the other element will be case to a String automatically):
fun main() {
  val s = "abc" + 1
  println(s + "def")
}
Kotlin supports the use of string templates, so we can perform variable substitution directly in strings. It’s a minor but incredibly useful feature that replaces the need to concatenate and build up strings to display them.
fun main() {
  println("> Kotlin ${KotlinVersion.CURRENT}")

  val str = "abc"
  println("$str.length is ${str.length}")

  var n = 5
  println("n is ${if(n > 0) "positive" else "negative"}")
}
is and !is operator
To perform a runtime check whether an object conforms to a given type, use the is operator or its negated form !is:
fun main() {
  val obj = "abc"

  if (obj is String) {
    print("String of length ${obj.length}")
  } else {
    print("Not a String")
  }
}
In most cases, you don’t need to use explicit cast operators in Kotlin because the compiler tracks the is checks and explicit casts for immutable values and inserts (safe) casts automatically when needed:
fun main() {
  val x = "abc"
  if (x !is String) return
  println("x=${x.length}") // x is automatically cast to String

  val y = "defghi"
  // y is automatically cast to string on the right-hand side of `||`
  if (y !is String || y.length == 0) return
  println("y=${y.length}") // y must be a string with length > 0
}
Immutability
Kotlin supports the use of immutable variables and data structures (mutable means that it can be changed; immutable structures cannot be changed after they are initialized). This follows best-practices in other languages (e.g. use of final in Java, const in C++), where we use immutable structures to avoid accidental mutation.
var: a standard mutable variable that can be changed or reassigned.val: an immutable variable that cannot be changed once initialized.
var a = 0       // type inferred as Int
a = 5           // a is mutable, so reassignment is ok

val b = 1	    // type inferred as Int as well
// b = 2	    // error because b is immutable

var c:Int = 10  // explicit type provided in this case
Operators
Kotlin supports a wide range of operators. The full set can be found on the Kotlin Language Guide.
+,-,*,/,%- mathematical operators=assignment operator&&,||,!- logical ‘and,’ ‘or,’ ‘not’ operators==,!=— structural equality operators compare members of two objects for equality===,!==- referential equality operators are true when both sides point to the same object.[,]— indexed access operator (translated to calls ofgetandset)
NULL Safety
NULL is a special value that indicates that there is no data present (often indicated by the null keyword in other languages). NULL values can be difficult to work with in other programming languages, because once you accept that a value can be NULL, you need to check all uses of that variable against the possibility of it being NULL.
NULL values are incredibly difficult to manage, because to address them properly means doing constant checks against NULL in return values, data, and so on. They add inherent instability to any type system.
Tony Hoare invented the idea of a NULL reference. In 2009, he apologized for this, famously calling it his “billion-dollar mistake.”
In Kotlin, every type is non-nullable by default. This means that if you attempt to assign a NULL to a normal data type, the compiler is able to check against this and report it as a compile-time error. If you need to work with NULL data, you can declare a nullable variable using the ? annotation. Once you do this, you need to use specific ? methods. You may also need to take steps to handle NULL data when appropriate.
Conventions
- By default, a variable cannot be assigned a NULL value.
?suffix on the type indicates that it’s NULL-able.?.accesses properties/methods if the object is not NULL (“safe call operator”)?:elvis operator is a ternary operator for NULL data!!override operator (calls a method without checking for NULL, bad idea)
fun main() {
	// name is nullable
	var name:String? = null

	// only returns value if name is not null
	var length = name?.length
	println(length) // null

	// elvis operator provides an `else` value
	length = name?.length ?: 0
	println(length) // 0
}
Generics
Generics are extensions to the type system that allows us to parameterize classes or functions across different types. Generics expand the reusability of your class definitions because they allow your definitions to work with many types.
We’ve already seen generics when dealing with collections:
val list: List<Int> = listOf(5, 10, 15, 20)
In this example, <Int> is specifying the type that is being stored in the list. Kotlin infers types where it can, so we typically write this as:
val list = listOf(5, 10, 15, 20)
We can use a generic type parameter in the place of a specific type in many places, which allows us to write code towards a generic type instead of a specific type. This prevents us from writing methods that might only differ by parameter or return type.
A generic type is a class that accepts an input of any type in its constructor. For instance, we can create a Table class that can hold differing values.
You define the class and make it generic by specifying a generic type to use in that class, written in angle brackets < >. The convention is to use T as a placeholder for the actual type that will be used.
fun main() {
	class Table<T>(t: T) {
	    var value = t
	}

	val table1: Table<Int> = Table<Int>(5)
	val table2 = Table<Float>(3.14f)
}
A more complete example:
import java.util.*

class Timeline<T>() {
    val events : MutableMap<Date, T> = mutableMapOf()

    fun add(element: T) {
        events.put(Date(), element)
    }

    fun getLast(): T {
        return events.values.last()
    }
}

fun main() {
	val timeline = Timeline<Int>()
	timeline.add(5)
	timeline.add(10)
}
Control Flow
Kotlin supports the style of control flow that you would expect in an imperative language, but it uses more modern forms of these constructs
if then else
if... then has both a statement form (no return value) and an expression form (return value).
fun main() {
  val a=5
  val b=7

  // we don't return anything, so this is a statement
  println("a=$a, b=$b")
  if (a > b) {
      println("a is larger")
  } else {
      println("b is larger")
  }

  val number = 6

  // the value from each branch is considered a return value
  // this is an expression that returns a result
  println("number=$number")
  val result =
    if (number > 0)
      "$number is positive"
    else if (number < 0)
      "$number is negative"
    else
      "$number is zero"

  println(result)
}

// a=5, b=7
// b is larger
// number=6
// 6 is positive
This is why Kotlin does not have a ternary operator:
ifused as an expression serves the same purpose.
for in
A for in loop steps through any collection that provides an iterator. This is equivalent to the for each loop in languages like C#.
fun main() {
  val items = listOf("apple", "banana", "kiwifruit")
  for (item in items) {
  	println(item)
  }

  for (index in items.indices) {
  	println("item $index is ${items[index]}")
  }

  for (c in "Kotlin") {
    print("$c ")
  }
}

// apple
// banana
// kiwifruit
// item 0 is apple
// item 1 is banana
// item 2 is kiwifruit
// K o t l i n
Kotlin doesn’t support a C/Java style for loop. Instead, we use a range collection .. that generates a sequence of values.
fun main() {
  // invalid in Kotlin
  // for (int i=0; i < 10; ++i)

  // range provides the same funtionality
  for (i in 1..3) {
    print(i)
  }
  println() // space out our answers

  // descending through a range, with an optional step
  for (i in 6 downTo 0 step 2) {
    print("$i ")
  }
  println()

  // we can step through character ranges too
  for (c in 'A'..'E') {
    print("$c ")
  }
  println()

  // Check if a number is within range:
  val x = 10
  val y = 9
  if (x in 1..y+1) {
    println("fits in range")
  }
}

// 123
// 6 4 2 0
// A B C D E
// fits in range
while
while and do... while exist and use familiar syntax.
fun main() {
  var i = 1
  while ( i <= 10) {
    print("$i ")
    i++
  }
}

// 1 2 3 4 5 6 7 8 9 10
when
when replaces the switch operator of C-like languages:
fun main() {
  val x = 2
  when (x) {
    1 -> print("x == 1")
    2 -> print("x == 2")
    else -> print("x is neither 1 nor 2")
  }
}

// x == 2
fun main() {
    val x = 13
    val validNumbers = listOf(11,13,17,19)

    when (x) {
    	0, 1 -> print("x == 0 or x == 1")
    	in 2..10 -> print("x is in the range")
    	in validNumbers -> print("x is valid")
    	!in 10..20 -> print("x is outside the range")
    	else -> print("none of the above")
  }
}

// x is valid
We can also return a value from when. Here’s a modified version of this example:
fun main() {
    val x = 13
    val validNumbers = listOf(11,13,17,19)

    val response = when (x) {
        0, 1 -> "x == 0 or x == 1"
        in 2..10 -> "x is in the range"
        in validNumbers -> "x is valid"
        !in 10..20 -> "x is outside the range"
        else -> "none of the above"
    }
    println(response)
}

// x is valid
When is flexible. To evaluate any expression, you can move the comparison expressions into when statement itself:
fun main() {
    val x = 13

    val response = when {
        x < 0 -> "negative"
        x >= 0 && x <= 9 -> "small"
        x >=10 -> "large"
        else -> "how do we get here?"
    }
    println(response)
}

// large
return
Kotlin has three structural jump expressions:
returnby default returns from the nearest enclosing function or anonymous functionbreakterminates the nearest enclosing loopcontinueproceeds to the next step of the nearest enclosing loop
Functions
Functions are preceded with the fun keyword. Function parameters require types, and are immutable. Return types should be supplied after the function name, but in some cases may also be inferred by the compiler.
Named Functions
Named functions has a name assigned to them that can be used to invoke them directly (this is the expected form of a “function” in most cases, and the form that you’re probably expecting).
// no parameters required
fun main() {
    println(sum1(1, 2))
    println(sum1(3,4))
}

// parameters which require type annotations
fun sum1(a: Int, b: Int): Int {
    return a + b
}

// return types can be inferred based on the value you return
// it's better form to explicitly include the return type in the signature
fun sum2(a: Int, b: Int) {
    a + b // Kotlin knows that (Int + Int) -> Int
}

// 3
// 7
Single-Expression Functions
Simple functions in Kotlin can sometimes be reduced to a single line aka a single-expression function.
// previous example
fun sumOf(a: Int, b: Int):Int {
    return a + b
}

// this works since we evaluate a single expression
fun minOf(a: Int, b: Int) = if (a < b) a else b

fun main() {
    println(sumOf(5,10))
    println(minOf(10,20))
}

// 15
// 10
Default arguments
We can use default arguments for function parameters. When called, a parameter with a default value is optional; if the caller does not provide the value, then the default will be used.
// Second parameter has a default value, so it’s optional
fun mult(a:Int, b:Int = 5): Int {
	return a * b
}

fun main() {
	println(mult(1)) // a=1, b=5 default
	println(mult(5,2)) // a=5, b=2
	// mult() would throw an error, since `a` must be provided
}
Named parameters
You can (optionally) provide the parameter names when you call a function. If you do this, you can even change the calling order!
fun repeat(str:String="*", count:Int=1):String {
    return str.repeat(count)
}

fun main() {
	println(repeat()) // *
	println(repeat(str="#")) // *
	println(repeat(count=3)) // ***
	println(repeat(str="#", count=5)) // #####
	println(repeat(count=5, str="#")) // #####
}

// *
// #
// ***
// #####
// #####
Variable-length arguments
Finally, we can have a variable length list of arguments:
fun sum(vararg numbers: Int): Int {
    var sum = 0
    for(number in numbers) {
        sum += number
    }
  return sum
}

fun main() {
    println(sum(1)) // 1
    println(sum(1,2,3)) // 6
    println(sum(1,2,3,4,5,6,7,8,9,10)) // 55
}

// 1
// 6
// 55
Collections
A collection is a finite group of some variable numbers of items (possibly zero) of the same type. Objects in a collection are called elements.
Collections in Kotlin are contained in the kotlin.collections package, which is part of the Kotlin Standard Library.
These collection classes exist as generic containers for a group of elements of the same type e.g. List<Int> would be an ordered list of integers. Collections have a finite size, and are eagerly evaluated.
Kotlin offers functional processing operations (e.g. filter, map and so on) on each of these collections.
fun main() {
  val list = (1..10).toList() // generate list of 1..10
  println( list.take(5).map{it * it} ) // square the first 5 elements
}

// [1, 4, 9, 16, 25]
Under-the-hood, Kotlin uses Java collection classes, but provides mutable and immutable interfaces to these classes. Kotlin best-practice is to use immutable for read-only collections whenever possible (since mutating collections is often very costly in performance).
{.compact}
| Collection Class | Description |
|---|---|
| Pair | A tuple of two values. |
| Triple | A tuple of three values. |
| List | An ordered collection of objects. |
| Set | An unordered collection of objects. |
| Map | An associative dictionary of keys and values. |
| Array | An indexed, fixed-size collection of objects. |
A tuple is a data structure representing a sequence of n elements.
Pair
A Pair is a tuple of two values. Use var or val to indicate mutability. Theto keyword can be used to indicate a Pair.
fun main() {
  // mutable
  var nova_scotia = "Halifax Airport" to "YHZ"
  var newfoundland = Pair("Gander Airport", "YQX")
  var ontario = Pair("Toronto Pearson", "YYZ")
  ontario = Pair("Billy Bishop", "YTZ") // reassignment is ok

  // accessing elements
  val canadian_exchange = Pair("CDN", 1.38)
  println(canadian_exchange.first) // CDN
  println(canadian_exchange.second) // 1.38

  // destructuring
  val (first, second) = Pair("Calvin", "Hobbes") // split a Pair
  println(first) // Calvin
  println(second) // Hobbes
}

// CDN
// 1.38
// Calvin
// Hobbes
Pairs are extremely useful when working with data that is logically grouped into tuples, but where you don’t need the overhead of a custom class., e.g. Pair for 2D points.
List
A List is an ordered collection of objects.
fun main() {
  // define an immutable list
  var fruits = listOf( "advocado", "banana")
  println(fruits.get(0))
  // advocado

  // add elements
  var mfruits = mutableListOf( "advocado", "banana")
  mfruits.add("cantaloupe")
  mfruits.forEach { println(it) }

  // sorted/sortedBy returns ordered collection
  val list = listOf(2,3,1,4).sorted() // [1, 2, 3, 4]
  list.sortedBy { it % 2 } // [2, 4, 1, 3]

  // groupBy groups elements on collection by key
  list.groupBy { it % 2 } // Map: {1=[1, 3], 0=[2, 4]}

  // distinct/distinctBy returns unique elements
  listOf(1,1,2,2).distinct() // [1, 2]
}

// advocado
// advocado
// banana
// cantaloupe
Set
A Set is a generic unordered collection of unique elements (i.e. it does not support duplicates, unlike a List which does). Sets are commonly constructed with helper functions:
fun main() {
	val numbersSet = setOf("one", "two", "three", "four")
    println(numbersSet)

	val emptySet = mutableSetOf<String>()
    println(emptySet)
}

// [one, two, three, four]
// []
Map
A Map is an associative dictionary containing Pairs of keys and values.
fun main() {
  // immutable reference, immutable map
  val imap = mapOf(Pair(1, "a"), Pair(2, "b"), Pair(3, "c"))
  println(imap)
  // {1=a, 2=b, 3=c}

  // immutable reference, mutable map (so contents can change)
  val mmap = mutableMapOf(5 to "d", 6 to "e")
  mmap.put(7,"f")
  println(mmap)
  // {5=d, 6=e, 7=f}

  // lookup a value
  println(mmap.get(5))
  // d

  // iterate over key and value
  for ((k, v) in imap) {
    print("$k=$v ")
  }
  // 1=a 2=b 3=c

  // alternate syntax
  imap.forEach { k, v -> print("$k=$v ") }
  // 1=a 2=b 3=c

  // `it` represents an implicit iterator
  imap.forEach {
    print("${it.key}=${it.value} ")
  }
  // 1=a 2=b 3=c
}

// {1=a, 2=b, 3=c}
// {5=d, 6=e, 7=f}
// d
// 1=a 2=b 3=c 1=a 2=b 3=c 1=a 2=b 3=c
Functions
Collection classes (e.g. List, Set, Map, Array) have built-in functions for working with the data that they contain. These functions frequently accept other functions as parameters.
Filter
filter produces a new list of those elements that return true from a predicate function.
fun main() {
	val list = (1..100).toList()
	val filtered = list.filter { it % 5 == 0 }
    println(filtered)
	// 5 10 15 20 ... 100

	val below50 = filtered.filter { it in 0..49 }
    println(below50)
	// [5, 10, 15, 20]
}

// [5, 10, 15, 20, 25, 30, 35, 40, 45, 50, 55, 60, 65, 70, 75, 80, 85, 90, 95, 100]
// [5, 10, 15, 20, 25, 30, 35, 40, 45]
Map
map produces a new list that is the results of applying a function to every element that it contains.
fun main() {
	val list = (1..100).toList()
	val doubled = list.map { it * 2 }
    println(doubled)
}

// 2 4 6 8 ... 200
Reduce
reduce accumulates values starting with the first element and applying an operation to each element from left to right.
fun main() {
	val strings = listOf("a", "b", "c", "d")
	println(strings.reduce { acc, string -> acc + string }) // abcd
}

// abcd
Zip
zip combines two collections, associating their respective pairwise elements.
fun main() {
	val foods = listOf("apple", "kiwi", "broccoli", "carrots")
	val fruit = listOf(true, true, false, false)
    println(fruit)

	val results = foods.zip(fruit)
	println(results)
}

// [true, true, false, false]
// [(apple, true), (kiwi, true), (broccoli, false), (carrots, false)]
A more realistic scenario might be where you want to generate a pair based on the results of the list elements:
fun main() {
	val list = listOf("123", "", "456", "def")
	val exists = list.zip(list.map { !it.isBlank() })
    println(exists)

	val numeric = list.zip(list.map { !it.isEmpty() && it[0] in ('0'..'9') })
    println(numeric)
}

// [(123, true), (, false), (456, true), (def, true)]
// [(123, true), (, false), (456, true), (def, false)]
ForEach
forEach calls a function for every element in the collection.
fun main() {
	val fruits = listOf("advocado", "banana", "cantaloupe" )
	fruits.forEach { print("$it ") }
}

// advocado banana cantaloupe
We also have helper functions to extract specific elements from a list.
Take
take returns a collection containing just the first n elements. drop returns a new collection with the first n elements removed.
fun main() {
	val list = (1..50)
	val first10 = list.take(10)
	println(first10)

	val last40 = list.drop(10)
	println(last40)
}

// [1, 2, 3, 4, 5, 6, 7, 8, 9, 10]
// [11, 12, 13, 14, 15, 16, 17, 18, 19, ...]
First, Last, Slice
first and last return those respective elements. slice allows us to extract a range of elements into a new collection.
fun main() {
	val list = (1..50)
	val even = list.filter { it % 2 == 0 }

	println(even.first()) // 2
	println(even.last()) // 50
	println(even.slice(1..3)) // 4 6 8
}

// 2
// 50
// [4, 6, 8]
-
More than 90% of the top 1000 apps on the Google Play Store are written in Kotlin. ↩
-
We won’t be building iOS applications in this course, mainly because iOS support requires dedicated Apple hardware, which is not available to all students. Android development tools will work on Windows, macOS and Linux, so there are no barriers to entry. ↩
Object-Oriented Kotlin
Object-oriented programming is a refinement of the structured programming model that was discovered in 1966 by Ole-Johan Dahl and Kristen Nygaard.
It is characterized by the use of classes as a template for common behaviour (methods) and data (state) required to model that behaviour.
- Abstraction: Model entities in the system to match real world objects. Each object exposes a stable high-level interface that can be used to access its data and behaviours. “Changing the implementation should not break anything.”
- Encapsulation: Keep state and implementation private.
- Inheritance: Specialization of classes. Create a specialized (child) class by deriving from another (parent) class, and reusing the parent’s fields and methods.
- Polymorphism: Base and derived classes share an interface, but have specialized implementations.
Object-oriented programming has benefits over iterative programming:
- It supports abstraction and allows us to express computation in a way that models our problem domain (e.g. customer classes, file classes).
- It handles complex state more effectively, by delegating to classes.
- It’s also a method of organizing your code. This is critical as programs grow.
- There is some suggestion that it makes code reuse easier (debatable).
- It became the dominant programming model in the 80s, and our most used languages are OO languages. e.g. C++, Java, Swift, Kotlin.
Classes
Kotlin is a class-based object-oriented language, with some advanced features that it shares with some other recent languages. The class keyword is used to define a Class. You create an instance of the class using the class name (no new keyword required!)
 // define class
 class Person

 // create two instances and assign to p, q
 // note that we have an implicit no-arg constructor
 val p = Person()
 val q = Person()
Classes include properties (values) and methods.
Properties
A property is a variable declared in a class, but outside methods or functions. They are analogous to class members, or fields in other languages.
class Person() {
   var firstName = "Vanilla"
   var lastName = "Ice"
}

fun main() {
	val p = Person()

    // we can access properties directly
    // this calls an implicit get() method; default returns the value
    println("${p.firstName} ${p.lastName} ${p.lastName} Baby")
}
Properties have implicit backing fields that store their data. We can override the get() and set methods to determine how our properties interact with the backing fields.
For example, for a City class, we can decide that we want the city name always reported in uppercase, and we want the population always stored as thousands.
 // the backing field is just referred to as `field`
 // in the set() method, we use `value` as the argument
 class City() {
   var name = ""
     get() = field.uppercase()
     set(value) {
       field = value
     }
   var population = 0
     set(value) {
       field = value/1_000
     }
 }

 fun main() {
     // create our city, using properties to access values
     val city = City()
     city.name = "Halifax"
     city.population = 431_000
     println("${city.name} has a population of ${city.population} thousand people")
 }
Behind-the-scenes, Kotlin is actually creating getter and setter methods, using the convention of getField and setField. In other words, you always have corresponding methods that are created for you. If you directly access the field name, these methods are actually getting called in the background.
Venkat Subramaniam has an excellent example of this (Subramaniam 2019). Write the class Car in a separate file named Car.kt:
class Car(val yearOfMake: Int, var color: String)
Then compile the code and take a look at the bytecode using the javap tool, by running these commands:
 $ kotlinc-jvm Car.kt
 $ javap -p Car.class
This will display the bytecode generated by the Kotlin Compiler for the Car class:
 public final class Car {
   private final int yearOfMake;
   private java.lang.String color;
   public final int getYearOfMake();
   public final java.lang.String getColor();
   public final void setColor(java.lang.String);
   public Car(int, java.lang.String);
 }
That concise single line of Kotlin code for the Car class resulted in the creation of two fields—the backing fields for properties, a constructor, two getters, and a setter.
Constructors
Like other OO languages, Kotlin supports explicit constructors that are called when objects are created.
Primary Constructors
A primary constructor is the main constructor that your class will support (representing how you want it to be instantiated most of the time). You define it by expanding the class definition:
 // class definition includes the primary constructor
 class Person constructor() { }

 // we can collapse this to define an explicit no-arg constructor
 class Person() {}
In the example above, the primary constructor is called when this class is instantiated.
Optionally, you can include parameters in the primary constructor, and use these to initialize parameters in the constructor body.
 // constructor with arguments
 // this uses the parameters to initialize properties (i.e. variables)
 class Person (first:String, last:String) {
   val firstName = first.take(1).uppercase() + first.drop(1).lowercase()
   val lastName = last.take(1).uppercase() + last.drop(1).lowercase()

   // adding a statement like this will prevent the code from compiling
   // println("${firstname} ${lastname}")  // will not compile
 }

 fun main() {
	 // this does not work! we do not have a no-arg constructor
	 // val person = Person() // error since no matching constructor

	 // this works and demonstrates the properties
	 val person = Person("JEFF", "AVERY")
	 println("${person.firstName} ${person.lastName}") // Jeff Avery
 }
Constructors are designed to be minimal:
- Parameters can only be used to initialize properties. They go out of scope immediately after the constructor executes.
- You cannot invoke any other code in your constructor (there are other ways to handle that, which we will discuss below).
Secondary Constructors
What if you need more than a single constructor?
You can define secondary constructors in your class. Secondary constructors must delegate to the primary constructor. Let’s rewrite this class to have a primary no-arg constructor, and a second constructor with parameters.
// primary constructor
class Person() {
	// initialize properties
   	var firstName = "PAULA"
   	var lastName = "ABDUL"

   	// secondary constructor
   	// delegates to the no-arg constructor, which will be executed first
   	constructor(first: String, last: String) : this() {
   		// assign to the properties defined in the primary constructor
   		firstName = first.take(1).uppercase() + first.drop(1).lowercase()
   		lastName = last.take(1).uppercase() + last.drop(1).lowercase()
   	}
}

fun main() {
	val person1 = Person() // primary constructor using default property values
	println("${person1.firstName} ${person1.lastName}")

	val person2 = Person("JEFF", "AVERY") // secondary constructor
	println("${person2.firstName} ${person2.lastName}")
}
Init Blocks
How do we execute code in the constructor? We often want to do more than initialize properties.
Kotlin has a special method called init() that is used to manage initialization code. You can have one or more of these init blocks in your code, which will be called in order after the primary constructor (they’re actually considered part of the primary constructor). The order of initialization is (1) primary constructor, (2) init blocks in listed order, and then finally (3) secondary constructor.
class InitOrderDemo(name: String) {
   val first = "$name".also(::println)

   init {
     println("First init: ${first.length}")
   }

   val second = "$name".also(::println)
   init {
     println("Second init: ${second.length}")
     }
 }

fun main() {
    InitOrderDemo("Jeff")
}
Why does Kotlin split the constructor up like this? It’s a way to enforce that initialization MUST happen first, which results in cleaner and safer code.
Class Methods
Similarly to other programming languages, functions defined inside a class are called methods.
class Person(var firstName: String, var lastName: String) {
   fun greet() {
     println("Hello! My name is $firstName")
   }
 }

 fun main() {
 	val person = Person ("Jeff", "Avery")
 	println("${person.firstName} ${person.lastName}")
 }
Inheritance
To derive a class from a supertype, we use the colon : operator. We also need to delegate to the base class constructor using ().
By default, classes and methods are closed to inheritance. If you want to extend a class or method, you need to explicitly mark it as open for inheritance.
 class Base
 class Derived : Base() // error!

 open class Base
 class Derived : Base() // ok
Kotlin supports single-inheritance.
open class Person(val name: String) {
   open fun hello() = "Hello, I am $name"
 }

 class PolishPerson(name: String) : Person(name) {
   override fun hello() = "Dzien dobry, jestem $name"
 }

 fun main() {
     val p1 = Person("Jerry")
     val p2 = PolishPerson("Beth")
     println(p1.hello())
     println(p2.hello())
 }
If the derived class has a primary constructor, the base class can (and must) be initialized, using the parameters of the primary constructor. If the derived class has no primary constructor, then each secondary constructor has to initialize the base type using the super keyword, or to delegate to another constructor which does that.
 class MyView : View {
     constructor(ctx: Context) : super(ctx)
     constructor(ctx: Context, attrs: AttributeSet) : super(ctx, attrs)
 }
All classes in Kotlin have a common superclass
Any, that is the default superclass for a class with no supertypes declared:class Example // Implicitly inherits from Any
Anyhas three methods:equals(),hashCode()andtoString(). Thus, they are defined for all Kotlin classes.
Abstract Classes
Classes can be declared abstract, which means that they cannot be instantiated, only used as a supertype. The abstract class can contain a mix of implemented methods (which will be inherited by subclasses) and abstract methods, which do not have an implementation.
// useful way to represent a 2D point
 data class Point(val x:Int, val y:Int)

 abstract class Shape() {
   // we can have a single representation of position
   var x = 0
   var y = 0

   fun position(): Point {
     return Point(x, y)
   }
   // subtypes will have their own calculations for area
   abstract fun area():Int
 }

 class Rectangle (var width: Int, var height: Int): Shape() {
   constructor(x: Int, y: Int, width: Int, height: Int): this(width, height) {
     this.x = x
     this.y = y
   }
   // must be overridden since our base is abstract
   override fun area():Int {
     return width * height
   }
 }

 fun main() {
	// this won't compile, since Shape() is abstract
	// val shape = Shape()

	// this of course is fine
	val rect = Rectangle(10, 20, 50, 10)
	println("Rectangle at (${rect.position().x},${rect.position().y}) with area ${rect.area()}")
	// => Rectangle at (10,20) with area 500
 }
Interfaces
Interfaces in Kotlin are similar to abstract classes, in that they can contain a mix of abstract and implemented methods. What makes them different from abstract classes is that they cannot store state. They can have properties but these need to be abstract or to provide accessor implementations.
Data Classes
A data class is a special type of class, which primarily exists to hold data, and does not have custom methods. Classes like this are more common than you expect – we often create trivial classes to just hold data, and Kotlin makes them simple to create.
Why would you use a data class over a regular class? It generates a lot of useful methods for you:
- hashCode()
- equals() // compares fields
- toString()
- copy() // using fields
- destructuring
Here’s an example of how useful this can be:
data class Person(val name: String, var age: Int)

fun main() {
	val mike = Person("Mike", 23)

	// toString() displays all properties
	println(mike.toString())

	// structural equality (==) compares properties
	println(mike == Person("Mike", 23)) // True
	println(mike == Person("Mike", 21)) // False

	// referential equality (===) compares object references
	println(mike === Person("Mike", 23)) // False

	// hashCode based on primary constructor properties
	println(mike.hashCode() == Person("Mike", 23).hashCode()) // True
	println(mike.hashCode() == Person("Mike", 21).hashCode()) // False

	// destructuring based on properties
	val (name, age) = mike
	println("$name $age") // Mike 23

	// copy that returns a copy of the object
	// with concrete properties changed
	val jake = mike.copy(name = "Jake") // copy
}
Enum Classes
Enums in Kotlin are classes, so enum classes support type safety.
We can use them in expected ways. Enum num constants are separated with commas. We can also do interesting things with our enums, e.g. use them in when clauses (Example from Sommerhoff 2020).
 enum class Suits {
     HEARTS, SPADES, DIAMONDS, CLUBS
 }

fun main() {
 	val color = when(Suits.SPADES) {
   		Suits.HEARTS, Suits.DIAMONDS -> "red"
   		Suits.SPADES, Suits.CLUBS -> "black"
 	}
 	println(color)
}
Each enum constant is an object, and can be instantiated.
enum class Direction(val degrees: Double) {
	NORTH(0.0), SOUTH(180.0), WEST(270.0), EAST(90.0)
}

fun main() {
	val direction = Direction.EAST
	print(direction.degrees)
}
Visibility Modifiers
Classes, objects, interfaces, constructors, functions, properties and their setters can have visibility modifiers. Getters always have the same visibility as the property. Kotlin defaults to public access if no visibility modifier is provided.
The possible visibility modifiers are:
public: visible to any other code.private: visible inside this class only (including all its members).protected: visible to any derived class, otherwise private.internal: visible within the same module, where a module is a set of Kotlin files compiled together.
Operator Overloading
Kotlin allows you to provide custom implementations for the predefined set of operators. These operators have predefined symbolic representation (like + or *) and precedence if you combine them.
Basically, you use the operator keyword to define a function, and provide a member function or an extension function with a specific name for the corresponding type. This type becomes the left-hand side type for binary operations and the argument type for the unary ones.
Here’s an example that extends a class named ClassName by overloading the + operator.
data class Point(val x: Double, val y: Double)

// -point
operator fun Point.unaryMinus() = Point(-x, -y)

// p1+p2
operator fun Point.plus(other: Point) = Point(this.x + other.x, this.y + other.y)

// p1*5
operator fun Point.times(scalar: Int) = Point(this.x * scalar, this.y * scalar)
operator fun Point.times(scalar: Double) = Point(this.x * scalar, this.y * scalar)

fun main() {
    val p1 = Point(5.0, 10.0)
	val p2 = Point(10.0, 12.0)

    println("p1=${p1}")
    println("p2=${p2}\n")
    println("-p1=${-p1}")
    println("p1+p2=${p1+p2}")
    print("p2*5=${p2*5}")
}
We can override any operators by using the keyword that corresponds to the symbol we want to override.
Note that this is the reference object on which we are calling the appropriate method. Parameters are available as usual.
| Description | Expression | Translated to |
|---|---|---|
| Unary prefix | +a | a.unaryPlus() |
| -a | a.unaryMinus() | |
| !a | a.not() | |
| Increments, decrements | a++ | a.inc() |
| a– | a.dec() | |
| Arithmetic | a+b | a.plus(b) |
| a-b | a.minus(b) | |
| a*b | a.times(b) | |
| a/b | a.div(b) | |
| a%b | a.rem(b) | |
| a..b | a.rangeTo(b) | |
| In | a in b | b.contains(a) |
| Augmented assignment | a+=b | a.plusAssign(b) |
| a-=b | a.minusAssign(b) | |
| a*=b | a.timesAssign(b) | |
| a/=b | a.divAssign(b) | |
| a%b | a.remAssign(b) | |
| Equality | a==b | a?.equals(b) ?: (b === null) |
| a!=b | !(a?.equals(b) ?: (b === null)) | |
| Comparison | a>b | a.compareTo(b) > 0 |
| a<b | a.compareTo(b) < 0 | |
| a>=b | a.compareTo(b) >= 0 | |
| a<=b | a.compareTo(b) <= 0 |
Infix Functions
Functions marked with the infix keyword can also be called using the infix notation (omitting the dot and the parentheses for the call). Infix functions must meet the following requirements:
- They must be member functions or extension functions.
- They must have a single parameter.
- The parameter must not accept variable number of arguments and must have no default value.
For example, we can add a “shift left” function to the built-in Int class:
infix fun Int.shl(x: Int): Int {
	return (this shl x)
}

fun main() {
	// calling the function using the infix notation
	// shl 1 multiples an int by 2
 	println(212 shl 1)

 	// is the same as
 	println(212.shl(1))
}
Extension Functions
Kotlin supports extension functions: the ability to add functions to existing classes, even when you don’t have access to the original class’s source code, or cannot modify the class for some reason. This is also a great alternative to inheritance when you cannot extend a class.
For a simple example, imagine that you want to determine if an integer is even. The “traditional” way to handle this is to write a function:
fun isEven(n: Int): Boolean = n % 2 == 0

fun main() {
	println(isEven(4))
	println(isEven(5))
}
In Kotlin, the Int class already has a lot of built-in functionality. It would be a lot more consistent to add this as an extension function to that class.
fun Int.isEven() = this % 2 == 0

fun main() {
    println(4.isEven())
    println(5.isEven())
}
You can use extensions with your own types and also types you do not control, like List, String, and other types from the Kotlin standard library.
Extension functions are defined in the same way as other functions, with one major difference: When you specify an extension function, you also specify the type the extension adds functionality to, known as the receiver type. In our earlier example, Int.isEven(), we need to include the class that the function extends, or Int.
Note that in the extension body, this refers to the instance of the type (or the receiver for this method invocation).
fun String.addEnthusiasm(enthusiasmLevel: Int = 1) = this + "!".repeat(enthusiasmLevel)

fun main() {
    val s1 = "I'm so excited"
    val s2 = s1.addEnthusiasm(5)
    println(s2)
}
Defining an extension on a superclass
Extensions do not rely on inheritance, but they can be combined with inheritance to expand their scope. If you extend a superclass, all of its subclasses will inherit the extension method that you defined.
Define an extension on the Any class called print. Because it is defined on Any, it will be directly callable on all types.
// Any is the top-level class from which all classes derive i.e. the ultimate superclass.

fun Any.print() {
  println(this)
}

fun main() {
	"string".print()
	42.print()
}
Extension Properties
In addition to adding functionality to a type by specifying extension functions, you can also define extension properties.
For example, here is an extension property that counts a string’s vowels:
val String.numVowels
    get() = count { it.lowercase() in "aeiou" }

fun main() {
    println("abcd".numVowels)
}
Destructuring
Sometimes it is convenient to destructure an object into a number of variables. This syntax is called a destructuring declaration. A destructuring declaration creates multiple variables at once. In the example below, you declared two new variables: name and age, and can use them independently:
data class Person(val name: String, val age: Int)

fun main() {
  val p = Person("Janine", 38)
	val (name, age) = p  // destructuring
	println(name)
	println(age)
}
A destructuring declaration is compiled down to the following code:
 val name = person.component1()
 val age = person.component2()
component1(), component2() are aliases to the named properties in this class, in the order they were declared (and, of course, there can be component3() and component4() and so on). You would never normally refer to them using these aliases.
Here’s an example from the Kotlin documentation on how to use this to return multiple values from a function:
 // data class with properties `result` and `status`
 data class Result(val result: Int, val status: Status)

 fun function(...): Result {
     // computations
     return Result(result, status)
 }

 // Destructure into result and status
 val (result, status) = function(...)

 // We can also choose to not assign fields
 // e.g. we could just return `result` and discard `status`
 val (result, _) = function(...)
Companion Objects
OO languages typically have some idea of static members: methods that are associated with a class instead of an instance of a class. Static methods can be useful when attempting to implement the singleton pattern, for instance.
Kotlin doesn’t support static members directly. To get something comparable in Kotlin, you need to declare a companion object as an inner class of an existing class. Any methods that are created as part of the companion object are considered to be static methods in the enclosing class.
The examples below are taken from: https://livevideo.manning.com/module/59_5_16/kotlin-for-android-and-java-developers
class House(val numberOfRooms: Int, val price: Double) {
   companion object {
     val HOUSES_FOR_SALE = 10
     fun getNormalHouse() = House(6, 599_000.00)
     fun getLuxuryHouse() = House(42, 7_000_000.00)
   }
 }

 fun main() {
   val normalHouse = House.getNormalHouse()  // works
   println(normalHouse.price)
   println(House.HOUSES_FOR_SALE)
 }
We can also use object types to implement singletons. All we need to do is use the object keyword.
 class Country(val name:String) {
     var area = 0.0
 }

 // there can be only one
 object CountryFactory {
     fun createCountry() = Country("Canada")
 }

 fun main() {
     val obj = CountryFactory.createCountry()
     println(obj.name)
 }
``
Functional Kotlin
Functional programming is a programming style where programs are constructed by compositing functions together. Functional programming treats functions as first-class citizens: they can be assigned to a variable, passed as parameters, or returned from a function.
Functional programming also specifically avoids mutation: functions transform inputs to produce outputs, with no internal state. Functional programming can be described as declarative (describe what you want) instead of imperative (describe how to accomplish a result).
Functional programming constrains assignment, and therefore constrains side effects. – Bob Martin, 2003.
Kotlin is considered a hybrid language: it provides mechanisms for you to write in a functional style, but it also doesn’t prevent you from doing non-functional things. As a developer, it’s up to you to determine the most appropriate approach to a given problem.
Here are some common properties that we talk about when referring to “functional programming”:
-
First-class functions means that functions are treated as first-class citizens. We can pass them as to another function as a parameter, return functions from other functions, and even assign functions to variables. This allows us to treat functions much as we would treat any other variable.
-
Pure functions are functions that have no side effects. More formally, the return values of a pure function are identical for identical arguments (i.e. they don’t depend on any external state). Also, by having no side effects, they do not cause any changes to the system, outside their return value. Functional programming attempts to reduce program state, unlike other programming paradigms (imperative or object-oriented) which are based on careful control of program state.
-
Immutable data means that we do not modify data in-place. We prefer immutable data that cannot be accidentally changed, especially as a side effect of a function. Instead, if we need to mutate data, we pass it to a function that will return a new data structure containing the modified data, leaving the original data intact. This avoids unintended state changes.
-
Lazy evaluation is the notion that we only evaluate an expression when we need to operate on it (and we only evaluate what we need to evaluate at the moment!) This allows us to express and manipulate some expressions that would be extremely difficult to actually represent in other paradigms.
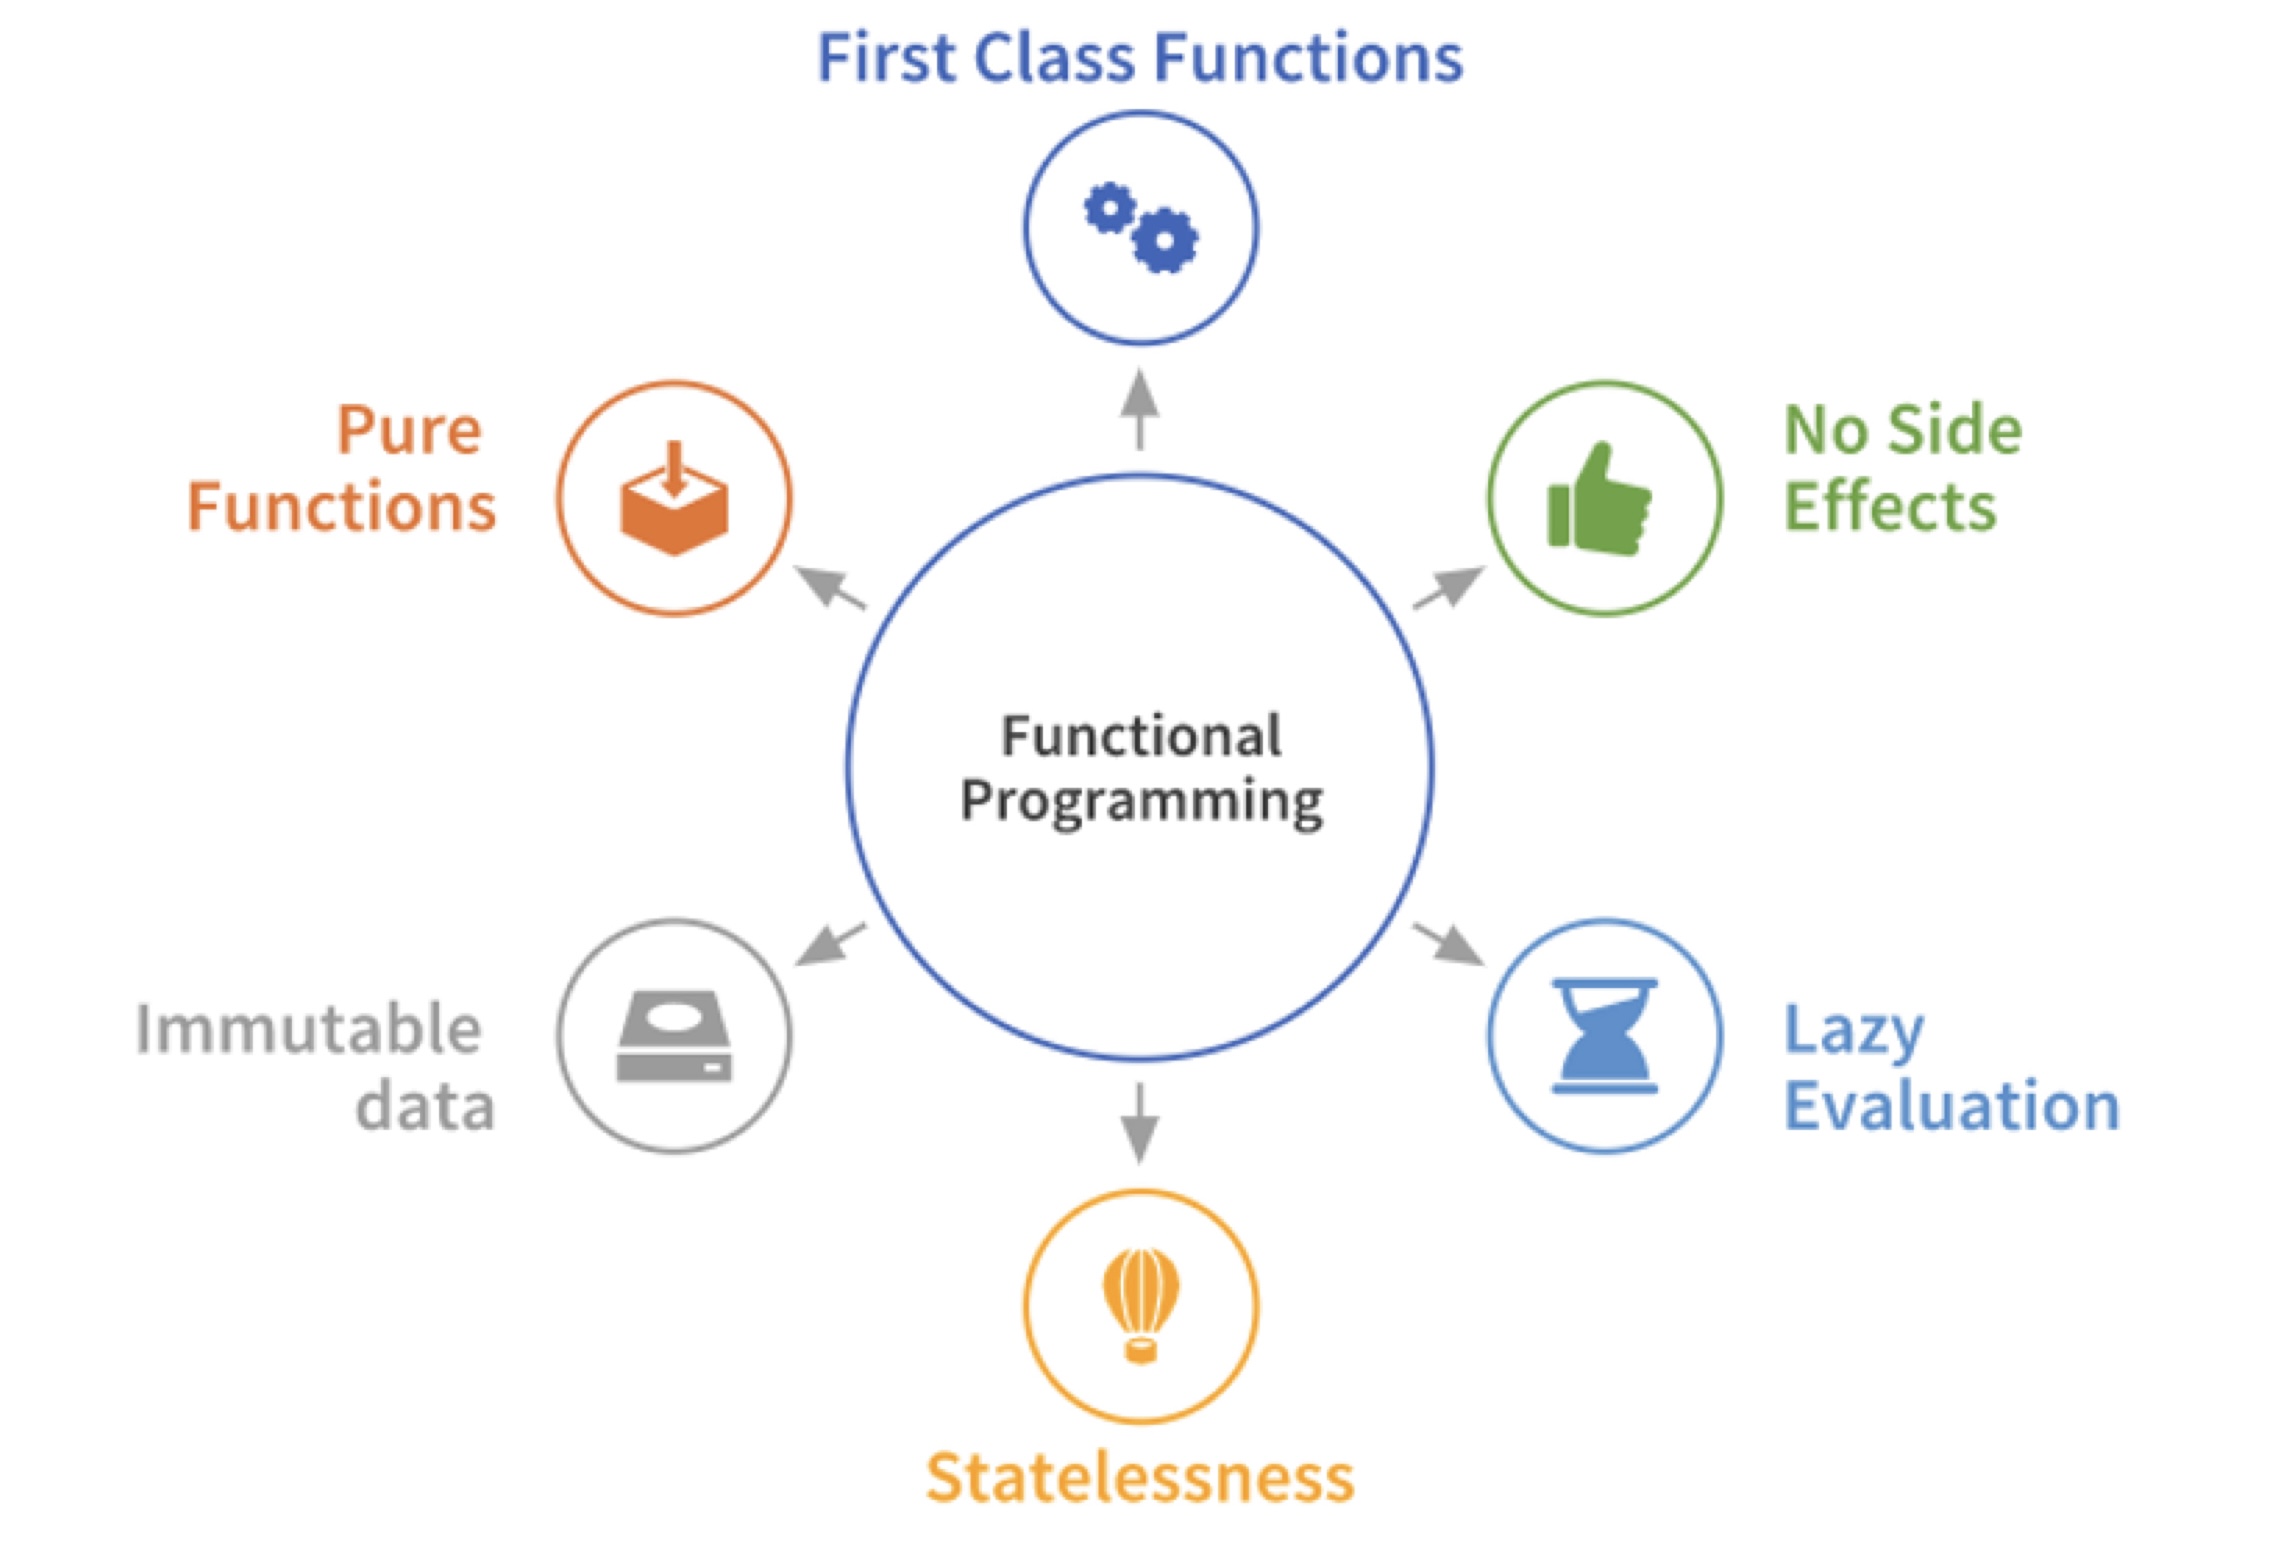
Function Types
Functions in Kotlin are “first-class citizens” of the language. This means that we can define functions, assign them to variables, pass functions as arguments to other functions, or return functions! Functions are types in Kotlin, and we can use them anywhere we would expect to use a regular type.
Dave Leeds on Kotlin presents the following excellent example: Bert’s Barber shop is creating a program to calculate the cost of a haircut, and they end up with 2 almost-identical functions.
fun main() {
    val taxMultiplier = 1.10

    fun calculateTotalWithFiveDollarDiscount(initialPrice: Double): Double {
      val	priceAfterDiscount = initialPrice - 5.0
      val total = priceAfterDiscount * taxMultiplier
      return total
    }

    fun calculateTotalWithTenPercentDiscount(initialPrice: Double): Double {
      val priceAfterDiscount = initialPrice * 0.9
      val total = priceAfterDiscount * taxMultiplier
      return total
    }
}
These functions are identical except for the line that calculates priceAfterDiscount. If we could somehow pass in that line of code as an argument, then we could replace both with a single function that looks like this, where applyDiscount() represents the code that we would dynamically replace:
// applyDiscount = initialPrice * 0.9, or
// applyDiscount = initialPrice - 5.0
fun calculateTotal(initialPrice: Double, applyDiscount: ???): Double {
    val priceAfterDiscount = applyDiscount(initialPrice)
    val total = priceAfterDiscount * taxMultiplier
    return total
}
This is a perfect scenario for passing in a function!
Assign a function to a variable
fun discountFiveDollars(price: Double): Double = price - 5.0
val applyDiscount = ::discountFiveDollars
In this example, applyDiscount is now a reference to the discountFiveDollars function (note the :: notation when we have a function on the RHS of an assignment). We can even call it.
val discountedPrice = applyDiscount(20.0) // Result is 15.0
So what is the type of our function? The type of function is the function signature, but with a different syntax that you might be accustomed to seeing.
// this is the original function signature
fun discountFiveDollars(price: Double): Double = price - 5.0
val applyDiscount = ::discountFiveDollars

// applyDiscount accepts a Double as an argument and returns a Double
// we use this format when specifying the type
val applyDiscount: (Double) -> Double
For functions with multiple parameters, separate them with a comma.
We can use this notation when explicitly specifying type.
fun discountFiveDollars(price: Double): Double = price - 5.0

// specifying type is not necessary since type inference works too
// we'll just do it here to demonstrate how it would appear
val applyDiscount : (Double) -> Double = ::discountFiveDollars
Pass a function to a function
We can use this information to modify the earlier example, and have Bert’s calculation function passed into the second function.
fun discountFiveDollars(price: Double): Double = price - 5.0
fun discountTenPercent(price: Double): Double = price * 0.9
fun noDiscount(price: Double): Double = price

fun calculateTotal(initialPrice: Double, applyDiscount: (Double) -> Double): Double {
    val priceAfterDiscount = applyDiscount(initialPrice)
    val total = priceAfterDiscount * taxMultiplier
    return total
}

val withFiveDollarsOff = calculateTotal(20.0, ::discountFiveDollars) // $16.35
val withTenPercentOff  = calculateTotal(20.0, ::discountTenPercent)  // $19.62
val fullPrice          = calculateTotal(20.0, ::noDiscount)          // $21.80
Returning Functions from Functions
Instead of typing in the name of the function each time he calls calculateTotal(), Bert would like to just enter the coupon code from the bottom of the coupon that he receives from the customer. To do this, he just needs a function that accepts the coupon code and returns the right discount function.
fun discountForCouponCode(couponCode: String): (Double) -> Double = when (couponCode) {
    "FIVE_BUCKS" -> ::discountFiveDollars
    "TAKE_10"    -> ::discountTenPercent
    else         -> ::noDiscount
}
I’ve taken liberties with Dave Leed’s example, but my notes can’t do it justice. I’d highly recommend a read through his site - he’s building an outstanding Kotlin book chapter-by-chapter with cartoons and illustrations.
Lambdas
We can use this same notation to express the idea of a function literal, or a function as a value.
val applyDiscount: (Double) -> Double = { price: Double -> price - 5.0 }
The code on the RHS of this expression is a function literal, which captures the body of this function. We also call this a lambda. A lambda is just a function, but written in this form:
- the function is enclosed in curly braces { }
- the parameters are listed, followed by an arrow
- the body comes after the arrow
What makes a lambda different from a traditional function is that it doesn’t have a name. In the expression above, we assigned the lambda to a variable, which we could them use to reference it, but the function itself isn’t named.
Note that due to type inference, we could rewrite this example without the type specified on the LHS. This is the same thing!
val applyDiscount = { price: Double -> price - 5.0 }
The implicit ‘it’ parameter
In cases where there’s only a single parameter for a lambda, you can omit the parameter name and the arrow. When you do this, Kotlin will automatically make the name of the parameter it.
val applyDiscount: (Double) -> Double = { it - 5.0 }
Lambdas and Higher-Order Functions
Passing Lambdas as Arguments
Higher-order functions have a function as an input or output. We can rewrite our earlier example to use lambdas instead of function references:
// fun discountFiveDollars(price: Double): Double = price - 5.0
// fun discountTenPercent(price: Double): Double = price * 0.9
// fun noDiscount(price: Double): Double = price

fun calculateTotal(initialPrice: Double, applyDiscount: (Double) -> Double): Double {
    val priceAfterDiscount = applyDiscount(initialPrice)
    val total = priceAfterDiscount * taxMultiplier
    return total
}

val withFiveDollarsOff = calculateTotal(20.0, { price - 5.0 }) // $16.35
val withTenPercentOff  = calculateTotal(20.0, { price * 0.9 }) // $19.62
val fullPrice          = calculateTotal(20.0, { price })       // $21.80
In cases where function’s last parameter is a function type, you can move the lambda argument outside of the parentheses to the right, like this:
val withFiveDollarsOff = calculateTotal(20.0) { price -> price - 5.0 }
val withTenPercentOff  = calculateTotal(20.0) { price -> price * 0.9 }
val fullPrice          = calculateTotal(20.0) { price -> price }
This is meant to be read as two arguments: one inside the brackets, and the lambda as the second parameter.
Returning Lambdas as Function Results
We can easily modify our earlier function to return a lambda as well.
fun discountForCouponCode(couponCode: String): (Double) -> Double = when (couponCode) {
    "FIVE_BUCKS" -> { price -> price - 5.0 }
    "TAKE_10"    -> { price -> price * 0.9 }
    else         -> { price -> price }
}
Scope Functions
The Kotlin standard library contains several functions whose sole purpose is to execute a block of code on an object. When you call such a function on an object with a lambda expression, it forms a temporary scope, and applies the lambda to that object.
There are five of these scope functions: let, run, with, apply, and also, and each of them has a slightly different purpose.
Here’s an example where we do not use one of these scope functions. There is a great deal of repetition, since we need a temporary variable, and then have to act on that object.
val alice = Person("Alice", 20, "Amsterdam")
println(alice)
alice.moveTo("London")
alice.incrementAge()
println(alice)
With a scope function, we can refer to the object without using a name. This is greatly simplified!
Person("Alice", 20, "Amsterdam").let {
    println(it)
    it.moveTo("London")
    it.incrementAge()
    println(it)
}
The scope functions have subtle differences in how they work, summarized from the Kotlin Standard Library documentation. Inside the lambda of a scope function, the context object is available by a short reference instead of its actual name. Each scope function uses one of two ways to access the context object: as a lambda receiver (this) or as a lambda argument (it).
| Function | Object reference | Return value | Is extension function |
|---|---|---|---|
let | it | Lambda result | Yes |
run | this | Lambda result | Yes |
run | - | Lambda result | No: called without the context object |
with | this | Lambda result | No: takes the context object as an argument. |
apply | this | Context object | Yes |
also | it | Context object | Yes |
let
The context object is available as an argument (it). The return value is the lambda result.
let can be used to invoke one or more functions on results of call chains. For example, the following code prints the results of two operations on a collection:
val numbers = mutableListOf("one", "two", "three", "four", "five")
val resultList = numbers.map { it.length }.filter { it > 3 }
println(resultList)
With let, you can rewrite it:
val numbers = mutableListOf("one", "two", "three", "four", "five")
numbers.map { it.length }.filter { it > 3 }.let {
    println(it)
    // and more function calls if needed
}
with
A non-extension function: the context object is passed as an argument, but inside the lambda, it’s available as a receiver (this). The return value is the lambda result. We recommend with for calling functions on the context object without providing the lambda result. In the code, with can be read as “with this object, do the following.”
val numbers = mutableListOf("one", "two", "three")
with(numbers) {
    println("'with' is called with argument $this")
    println("It contains $size elements")
}
run
The context object is available as a receiver (this). The return value is the lambda result. run does the same as with but invokes as let - as an extension function of the context object. run is useful when your lambda contains both the object initialization and the computation of the return value.
val service = MultiportService("https://example.kotlinlang.org", 80)

val result = service.run {
    port = 8080
    query(prepareRequest() + " to port $port")
}
// the same code written with let() function:
val letResult = service.let {
    it.port = 8080
    it.query(it.prepareRequest() + " to port ${it.port}")
}
apply
The context object is available as a receiver (this). The return value is the object itself. Use apply for code blocks that don’t return a value and mainly operate on the members of the receiver object. The common case for apply is the object configuration. Such calls can be read as “apply the following assignments to the object.”
val adam = Person("Adam").apply {
    age = 32
    city = "London"
}
println(adam)
Having the receiver as the return value, you can easily include apply into call chains for more complex processing.
also
The context object is available as an argument (it). The return value is the object itself. also is good for performing some actions that take the context object as an argument. Use also for actions that need a reference to the object rather than its properties and functions, or when you don’t want to shadow this reference from an outer scope. When you see also in the code, you can read it as “and also do the following with the object.”
val numbers = mutableListOf("one", "two", "three")
numbers
    .also { println("The list elements before adding new one: $it") }
    .add("four")
Recursion
As a hybrid language, Kotlin supports a number of paradigms. Recursion is less likely than other languages, given that we have loops and other mechanisms to handle iteration.
However, the compiler certainly supports recursion, and can even optimize for tail recursion. To qualify, a function needs to:
- be structured so that the last statement is a call to the function, with state being passed in the function call.
- use the
tailreckeyword.
import java.math.BigInteger

tailrec fun fibonacci(n: Int, a: BigInteger, b: BigInteger): BigInteger {
    return if (n == 0) a else fibonacci(n-1, b, a+b)
}

fun main(args: Array<String>) {
    println(fibonacci(100, BigInteger("0"), BigInteger("1")))
}
// 354224848179261915075
Last Word

Idiomatic Kotlin
This section summarizes a talk by Urs Peters, presented on Kotlin Dev Day 2022. it’s a very interesting talk and worth watching in its entirety!
Why Idiomatic Kotlin?
It’s possible to use Kotlin as a “better Java”, but you would be missing out on some of the features that make Kotlin unique and interesting.
Principles
1. Favour immutability over mutability.
Kotlin favors immutability by providing various immutable constucts and defaults.
data class Programmer(val name: String,
                      val languages: List<String>)
fun known(language:String) = languages.contains(language)

val urs = Programmer("Urs", listOf("Kotlin", "Scale", "Java"))
val joe = urs.copy(name = "Joe")
What is so good about immutability?
- Immutability: exactly one state that will never change.
- Mutable: an infinite amount of potential states.
| Criteria | Immutable | Mutable |
|---|---|---|
| Reasoning | Simple: one state only | Hard: many possible states |
| Safety | Safer: state remains the same and valid | Unsafe: accidental errors due to state changes |
| Testability | No side effects which makes tests deterministic | Side effects: can lead to unexpected failures |
| Thread-safety | Inherently thread-safe | Manual synchronization required |
How to leverage it?
- prefer
valsovervars - prefer read-only collections (
listOfinstead ofmutableListOf) - use immutable value objects instead of mutable ones (e.g. data classes over classes)
Local mutability that does not leak outside is ok (e.g. a var within a function is ok if nothing external to the function relies on it).
2. Use Nullability
Think twice before using !!
val uri = URI("...")
val res = loadResource(uri)
val lines = res!!read() // bad!
val lines = res?.read() ?: throw IAE("$uri invalid") // more reasonable
Stick to nullable types only
public Optional<Goody> findGoodyForAmount(amount:Double)

val goody = findGoodyForAmount(100)
if(goody.isPresent()) goody.get() ... else ... // bad

val goody = findGoodyForAmount(100).orElse(null)
if(goody != null) goody ... else ... // good uses null consistently
Use nullability where applicable but don’t overuse it.
data class Order(
	val id: Int? = null,
  val items: List<LineItem>? = null,
  val state: OrderState? = null,
  val goody: Goody? = null
) // too much!

data class Order(
	val id: Int? = null,
	val items: List<LineItem> = emptyList()),
	val state: OrderState = UNPAID,
	val goody: Goody? = null
)	// some types made more sense as not-null values
Avoid using nullable types in Collections
val items: List<LineItem?> = emptyList()
val items: List<LineItem>? = null,
val items: Lilst<LineItem?>? = null // all terribad

val items: List<LineItem> = emptyList() // that's what this is for
Use lateinit var for late initialization rather than nullability
// bad
class CatalogService(): ResourceAware {
  var catalog: Catalog? = null
  override fun onCreate(resource: Bundle) {
    this.catalog = Catalog(resource)
  }
  fun message(key: Int, lang: String) =
  	catalog?.productDescription(key, lang) ?: throw IllegalStateException("Impossible")
}

// good
class CatalogService(): ResourceAware {
  lateinit var catalog: Catalog
  override fun onCreate(resource: Bundle) {
    this.catalog = Catalog(resource)
  }
  fun message(key: Int, lang: String) =
  	catalog.productDescription(key, lang)
3. Get The Most Out Of Classes and Objects
Use immutable data classes for value classes, config classes etc.
class Person(val name: String, val age: Int)
val p1 = Person("Joe", 42)
val p2 = Person("Joe", 42)
p1 == p2 // false

data class Person(val name: String, val age: Int)
val p1 = Person("Joe", 42)
val p2 = Person("Joe", 42)
p1 == p2 // true
Use normal classes instead of data classes for services etc.
class PersonService(val dao: PersonDao) {
  fun create(p: Person) {
    if (op.age >= MAX_AGE)
    	LOG.warn("$p ${bornInYear(p.age)} too old")
    dao.save(p)
  }
  companion object {
    val LOG = LogFactory.getLogger()
    val MAX_AGE = 120
    fun bornInYear(age: Int) = ...
  }
}
Use value classes for domain specific types instead of common types.
value class Email(val value: String)
value class Password(val value: String)

fun login(email: Email, pwd: Password) // no performance impact! type erased in bytecode
Seal classes for exhaustive branch checks
// problematic
data class Square(val length: Double)
data class Circle(val radius: Double)

when (shape) {
  is Circle -> "..."
  is Rectangle -> "..."
  else -> throw IAE("unknown shape $shape") // annoying
}

// fixed
sealed interface Shape // prevents additions
data class Square(val length: Double)
data class Circle(val radius: Double)

when (shape) {
  is Circle -> "..."
  is Rectangle -> "..."
}
4. Use Available Extensions
// bad
val fis = FileInputStream("path")
val text = try {
  val sb = StringBuilder()
  var line: String?
  while(fis.readLine().apply {line = this} != null) {
    sb.append(line).append(System.lineSeparator())
  }
  sb.toString()
} finally {
  try { fis.close() } catch (ex:Throwable) { }
}

// good, via extension functions
val text = FileInputStream("path").use { it.reader().readText() }
Extend third party classes
// bad
fun toDateString(dr: LocalDateTime) = dt.format(DateTimeFormatter.ofPattern("yyyy-MM-dd"))

// good, works with code completion!
fun LocalDateTime.toDateString() = this.format(DateTimeFormatter.ofPattern("yyyy-MM-dd"))
5. Use Control-Flow Appropriately
Use if/else for single branch conditions rather than when
// too verbose
val reduction = when {
  customer.isVip() -> 0.05
  else -> 0.0
}

// better
val reduction = if (customer.isVip()) 0.05 else 0.0
Use when with multi-branch conditions.
fun reduction(customerType: CustomerTypeEnum) = when (customerType) {
	REGULAR -> 0
	GOLD -> 0.1
	PLATINUM -> 0.3
}
6. Expression Oriented Programming
Imperative Programming
Imperative programming relies on declaring variables that are mutated along the way.
var kotlinDevs = mutableListOf<Person>()
for (person in persons) {
  if (person.langs.contains("Kotlin"))
  	kotlinDevs.add(person)
}
kotlinDevs.sort()
Think of
- var, lops, mutable collections
- Mutating data, side effects
Expression Oriented Programming (on the way to Functional Programming!)
Expression oriented programming relies on thinking in functions where every input results in an output.
persons.filter { it.langs.contains("Kotlin") }.sorted()
Think of:
- Val, (higher-order) functions, functional + read-only collections
- Input/Output, transforming data
This is better because it results in more concise, deterministic, more easily testable and clearly scoped code that is easy to reason about compared to the imperative style.
if/else is an expression returning a result.
// imperative style
var result: String
if(number % 2 == 0)
	result = "EVEN"
else
	result = "ODD"

// expression style, better
val result = if(number % 2 == 0) "EVEN" else "ODD"
when is an expression too, returning a result.
// imperative style
var hi: String
when(lang) {
  "NL" -> hi = "Goede dag"
  "FR" -> hi = "Bonjour"
  else -> hi = "Good day"
}

// expression style, better
val hi = when(lang) {
  "NL" -> "Goede dag"
  "FR" -> "Bonjour"
  else -> "Good day"
}
try/catch also.
// imperative style
var text: String
try {
  text = File("path").readText()
} catch (ex: Exception) {
  text = ""
}

// expression style, better
val text = try {
	File("path").readText()
} catch (ex: IOException) {
  ""
}
Most functional collections return a result, so the return keyword is rarely needed!
fun firstAdult(ps: List<Person>, age: Int) =
	ps.firstOrNull{ it.age >= 18 }
7. Favor Functional Collections Over For-Loops
Program on a higher abstraction level with (chained) higher-order functions from the collection.
// bad!
val kids = mutableSetOf<Person>()
for(person in persons) {
  if(person.age < 18) kids.add(person)
}
names.sorted()

// better!
val kids: mutableSetOf<Person> = persons.filter{ it.age < 18}
You are actually programming at a higher-level of abstraction, since you’re manipulating the collection directly instead of considering each of its elements. e.g. it’s obvious in the second example that we’re filtering, instead of needing to read the implementation to figure it out.
For readability, write multiple chained functions from top-down instead of left-right.
// bad!
val names = mutableSetOf<String>()
for(person in persons) {
  if(person.age < 18)
  	names.add(person.name)
}
names.sorted()

// better!
val names = persons.filter{ it.age < 18}
															.map{ it.name }
															.sorted()
Use intermediate variables when chaining more than ~3-5 operators.
// bad!
val sortedAgeGroupNames = persons
	.filter{ it.age >= 18 }
	.groupBy{ it.age / 10 * 10 }
	.mapValues{ it.value.map{ it.name }}
	.toList()
	.sortedBy{ it.first }

// better, more readable
val ageGroups = persons.filter{ it.age >= 18 }
											 .groupBy{ it.age / 10 * 10 }
val sortedNamesByAgeGroup = ageGroups
	.mapValues{ (_, group) -> group.map(Person::name) }
	.toList()
	.sortedBy{ (ageGroup, _) -> ageGroup }
8. Scope Your Code
Use apply/with to configure a mutable object.
// old way
fun client(): RestClient {
  val client = RestClient()
  client.username = "xyz"
  client.secret = "secret"
  client.url = "https://..../employees"
  return client
}

// better way
fun client() = RestClient().apply {
  username = "xyz"
  secret = "secret"
  url = "https://..../employee"
}
Use let/run to manipulate the context object and return a different type.
// old way
val file = File("/path")
file.setReadOnly(true)
val created = file.createNewFile()

// new way
val created = File("/path").run {
	setReadOnly(true)
  createNewFile() // last expression so result from this function is returned
}
Use also to execute a side-effect.
// old way
if(amount <= 0) {
  val msg = "Payment amount is < 0"
  LOGGER.warn(msg)
  throw IAE(msg)
} else ...

// new way
require(amount > 0) {
  "Payment amount is < 0".also(LOGGER::warn)
}
9. Embrace Coroutines
// No coroutines
// Using Mono from Sprint React and many combinators (flatMap)
// Standard constructs like if/else cannot be used
// Business intent cannot be derived from this code
@PutMapping("/users")
@ResponseBody
fun upsertUser(@RequestBody user: User): Mono<User> =
	userByEmail(user.email)
		.switchIfEmpty{
      verifyEmail(user.email).flatMap{ valid ->
				if(valid) Mono.just(user)
				else Mono.error(ResponseStatusException(BAD_REQUEST, "Bad Email"))
			}
    }.flatMap{ toUpsert -> save(toUpsert) }

// Coroutines clean this up
// Common language constructs can be used
// Reads like synchronous code
@PutMapping("/users")
@ResponseBody
fun upsertUser(@RequestBody user: User): User =
	userByEmail(user.email).awaitSingle() ?:
		if (verifyEmail(user.email)) user else
		throw ResponseStatusException(BAD_REQUEST, "Bad Email")).let{
      toUpsert -> save(toUpsert)}
Project Loom will (eventually) result in support for coroutines running on the JVM. This will greatly simplify running coroutines and will provide benefits that can extend to Kotlin as well.
Concurrency
Using coroutines to manage concurrency.
Programs typically consist of functions, or subroutines, that we call in order to perform some operations. One underlying assumption is that subroutines will run to completion before returning control to the calling function. Subroutines don’t save state between executions, and can be called multiple times to produce a result. For example:
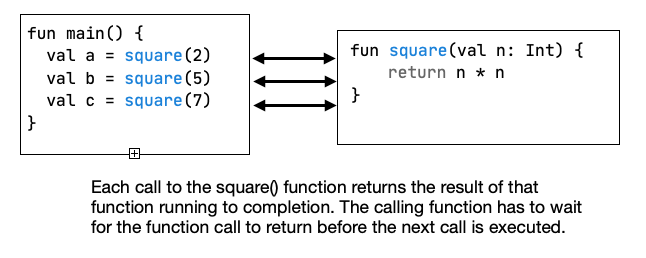
Because they run to completion, a subroutine will block your program from executing any further until the subroutine completes. This may not matter with very quick functions, but in some cases, this can cause your application to appear to “lock up” waiting for a result.
Yes, the OS can preemptively task switch to a different program, but this particular program will remain blocked by default.
This is not an unusual situation: applications often connect with outside resources to download data, query a database, or make a request to a web API, all of which take considerable time and can cause blocking behaviours. Delays like this are unacceptable.
The solution is to design software so that long-running tasks can be run in the background, or asynchronously. Kotlin has support for a number of mechanisms that support this. The most common approach involves manipulating threads.
Threads
A thread is the smallest unit of execution in an application. Typically, an application will have a “main” thread, but we can also create threads to do other work that execute independently of this main thread. Every thread has its own instructions that it executes, and the processor is responsible for allocating time for each thread to run.
Diagrams from https://www.backblaze.com/blog/whats-the-diff-programs-processes-and-threads/
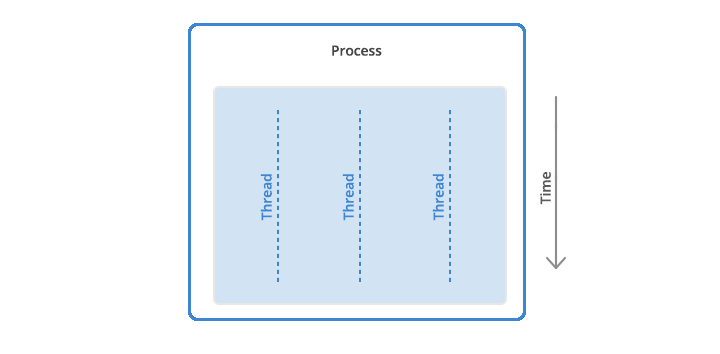
Multi-threading is the idea of splitting up computation across threads – having multiple threads running in-parallel to complete work more quickly. This is also a potential solution to the blocking problem, since one thread can wait for the blocking operation to complete, while the other threads continue processing. Threads like this are also called background threads.
Note from the diagram below that threads have a common heap, but each thread has its own registers and stack. Care must be taken to ensure that threads aren’t modifying the same memory at the same time! I’d recommend taking a course that covers concurrency in greater detail.
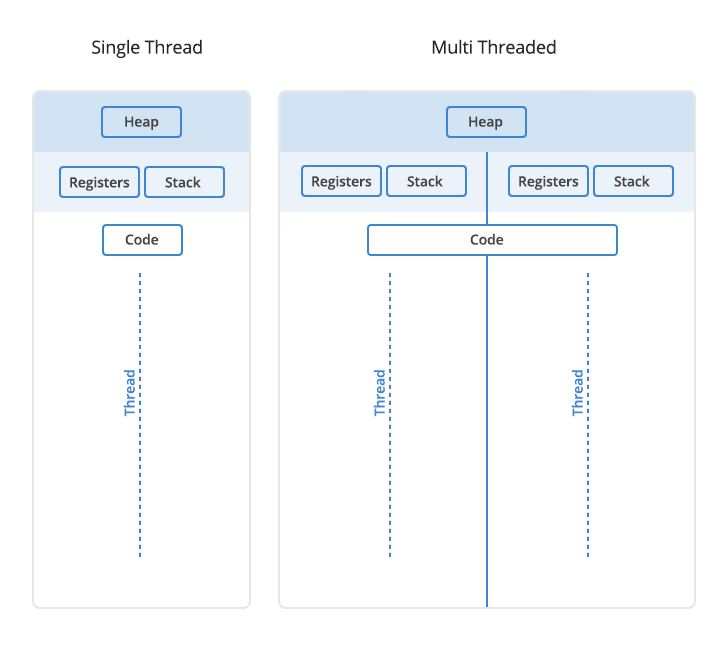
Concurrent vs. Parallel Execution
Concurrent Execution means that an application is making progress on more than one task at a time. This diagram illustrates how a single processor, handling one task at a time, can process them concurrently (i.e. with work being done in-order).
In this example, tasks 1 and 2 are being processed concurrently, and the single CPU is switching between them. Note that there is never a period of overlap where both are executing at the same time, but we have progress being made on both over the same time period.
Diagrams taken from http://tutorials.jenkov.com/java-concurrency/concurrency-vs-parallelism.html

Parallel Execution is where progress can be made on more than one task simultaneously. This is typically done by having multiple threads that can be addressed at the same time by the processor/cores involved.
In this example, both task 1 and task 2 can execute through to completion without interfering with one another, because the system has multiple processors or cores to support parallel execution.
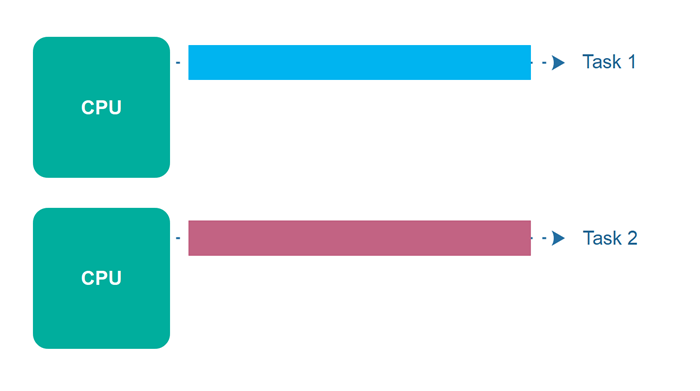
Finally, it is possible to have parallel and concurrent execution happening together. In this example, there are two processors/cores, each responsible for 2 tasks (i.e. CPU 1 handles task 1 and task 2, while CPU 2 handles task 3 and task 4). The CPU can slide up each task and alternate between them concurrently, while the other processor executes tasks in parallel.
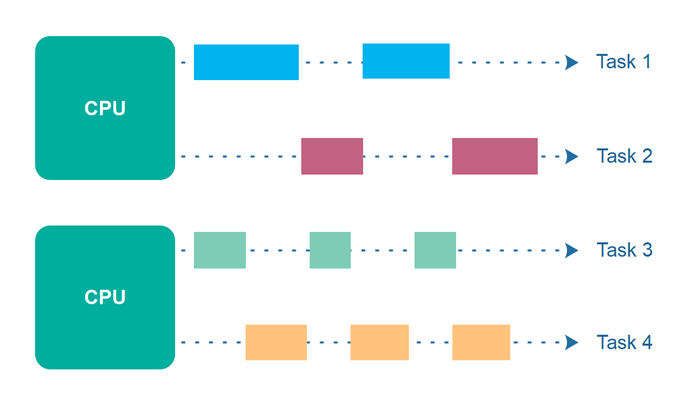
So which do we prefer? Both have their uses, depending on the nature of the computation, the processor capabilities and other factors.
Parallel operations happen at the same time, and the operations logically do not interfere with one another. Parallel execution is typically managed by using threads to split computation into different units of execution that the processor can manage them independently. Modern hardware is capable of executing many threads simultaneously, although doing this is very resource intensive, and it can be difficult to manage threads correctly.
Concurrent tasks can be much easier to manage, and make sense for tasks where you need to make progress, but the task isn’t impeded by being interrupted occasionally.
Managing Threads
Kotlin has native support for creating and managing threads. This is done by
- Creating a user thread (distinct from the main thread where your application code typically runs).
- Defining some task for it to perform.
- Starting the thread.
- Cleaning up when it completes.
In this way, threads can be used to provide asynchronous execution, typically running in parallel with the main thread (i.e. running “in the background” of the program).
val t = object : Thread() {
	override fun run() {
  	// define the task here
    // this method will run to completion
  }
}

t.start() // launch the thread, execution will continue here in the main thread
t.stop() // if we want to halt it from executing
Kotlin also provides a helper method that simplifies the syntax.
fun thread(
  start: Boolean = true,
  isDaemon: Boolean = false,
  contextClassLoader: ClassLoader? = null,
  name: String? = null,
  priority: Int = -1,
  block: () -> Unit
): Thread

// a thread can be instantiated quite simply.
thread(start = true) {
  // the thread will end when this block completes
  println("${Thread.currentThread()} has run.")
}
There are additional complexities of working with threads if they need to share mutable data: this a significant problem. If you cannot avoid having threads share access to data, then read the Kotlin docs on concurrency first.
Threads are also very resource-intensive to create and manage. It’s temping to spin up multiple threads as we need them, and delete them when we’re done, but that’s just not practical most of the time.
Threads consume roughly 2 MB of memory each. We can easily manage hundreds or thousands of threads, but it’s not unreasonable to picture building a large service that might require 100,000 concurrent operations (or 200 GB or RAM). We can’t reasonably handle that many threads on “regular” hardware.↩
Although threads are the underlying mechanism for many other solutions, they are too low-level to use directly much of the time. Instead, we rely on other abstractions that leverage threads safely behind-the-scenes. We’ll present a few of these next.
Callbacks
Another solution is to use a callback function. Essentially, you provide the long-running function with a reference to a function and let it run on a thread in the background. When it completes, it calls the callback function with any results to process.
The code would look something like this:
fun postItem(item: Item) {
    preparePostAsync { token ->
        submitPostAsync(token, item) { post ->
            processPost(post)
        }
    }
}

fun preparePostAsync(callback: (Token) -> Unit) {
    // make request and return immediately
    // arrange callback to be invoked later
}
This is still not an ideal solution.
- Difficulty of nested callbacks. Usually a function that is used as a callback, often ends up needing its own callback. This leads to a series of nested callbacks which lead to incomprehensible code.
- Error handling is complicated. The nesting model makes error handling and propagation of these more complicated.
Promises
Using a promise involves a long-running process, but instead of blocking it returns with a Promise - an object that we can reference immediately but which will be processed at a later time (conceptually like a data structure missing data).
The code would look something like this:
fun postItem(item: Item) {
    preparePostAsync()
        .thenCompose { token ->
            submitPostAsync(token, item)
        }
        .thenAccept { post ->
            processPost(post)
        }

}

fun preparePostAsync(): Promise<Token> {
    // makes request and returns a promise that is completed later
    return promise
}
This approach requires a series of changes in how we program:
- Different programming model. Similar to callbacks, the programming model moves away from a top-down imperative approach to a compositional model with chained calls. Traditional program structures such as loops, exception handling, etc. usually are no longer valid in this model.
- Different APIs. Usually there’s a need to learn a completely new API such as
thenComposeorthenAccept, which can also vary across platforms. - Specific return type. The return type moves away from the actual data that we need and instead returns a new type
Promisewhich has to be introspected. - Error handling can be complicated. The propagation and chaining of errors aren’t always straightforward.
Coroutines
Kotlin’s approach to working with asynchronous code is to use coroutines, which are suspendable computations, i.e. the idea that a function can suspend its execution at some point and resume later on. By default, coroutines are designed to mimic sequential behaviour and avoid by-default concurrency (i.e. it defaults to a simple case, and concurrency has to be explicitly declared).
Many of the explanations and examples were taken directly from the Coroutines documentation. It’s worth looking at the original source for more details.
The flight-data sample was taken from: Andrew Bailey, David Greenhalgh & Josh Skeen. 2021. Kotlin Programming: The Big Nerd Ranch Guide. 2nd Edition. Pearson. ISBN 978-0136891055.
Think of a coroutine as a light-weight thread. Like threads, coroutines can run in parallel, wait for each other and communicate. However, unlike threads, coroutines are not tied to one specific thread, and can be moved around as needed, making them very efficient. Also, compared to threads, coroutines are very cheap. We can easily create thousands of them with very little performance cost.
Coroutines are functions, but they behave differently than regular subroutines. Unlike subroutines which have a single point-of-entry, a coroutine may have multiple points-of-entry and may remember state between calls. This means that we can use coroutines to have cooperating functions, where control is passed back and forth between them. Coroutines can be suspended, or paused, while waiting on results, and the cooperating function can take over execution.
Here’s a quick-and-dirty example that spins up 1000 coroutines quite easily (don’t worry about the syntax yet).
import kotlinx.coroutines.*
fun main() = runBlocking {
repeat(1000) { // launch a lot of coroutines
launch {
delay(100L) // pause each coroutine for 100 ms
print(".") // print something to indicate that it's run
}
}
}
// ....................................................................................................
Kotlin provides the kotlinx.coroutines library with a number of high-level coroutine-enabled primitives. You will need to add the dependency to your build.gradle file, and then import the library.
// build.gradle
implementation 'org.jetbrains.kotlinx:kotlinx-coroutines-core:1.6.0'
// code
import kotlinx.coroutines.*
A simple coroutine
Here’s a simple coroutine that demonstrates their use. This example is taken from the Kotlin Docs.
import kotlinx.coroutines.*
fun main() = runBlocking { // this: CoroutineScope
launch { // launch a new coroutine and continue
delay(1000L) // non-blocking delay for 1 second (default time unit is ms)
println("World!") // print after delay
}
println("Hello") // main coroutine continues while a previous one is delayed
}
//output
Hello
World
The section of code within the launch { } scope is delayed for 1 second. The program runs through the last line, prints “Hello” and then prints “World” after a delay.
- runBlocking is a coroutine builder that bridges the non-coroutine world of a regular
fun main()and the code with coroutines inside therunBlocking { ... }curly braces. This is highlighted in an IDE bythis: CoroutineScopehint right after therunBlockingopening curly brace. - launch is also a coroutine builder. It launches a new coroutine concurrently with the rest of the code, which continues to work independently. That’s why
Hellohas been printed first. - delay is a special suspending function. It suspends the coroutine for a specific time. Suspending a coroutine does not block the underlying thread, but allows other coroutines to run and use the underlying thread for their code.
If you remove or forget
runBlockingin this code, you’ll get an error on the launch call, since launch is declared only in the CoroutineScope. “Error: Unresolved reference: launch”.
The use of runBlocking means that the thread that runs it (in this case — the main thread) gets blocked for the duration of the call, until all the coroutines inside runBlocking { ... } complete their execution. You will often see runBlocking used like that at the very top-level of the application and quite rarely inside the real code, as threads are expensive resources and blocking them is inefficient and rarely desirable.
Suspending functions
We can extract the block of code inside launch { ... } into a separate function. When you perform “Extract function” refactoring on this code, you get a new function with the suspend modifier. This is your first suspending function. Suspending functions can be used inside coroutines just like regular functions, but their additional feature is that they can, in turn, use other suspending functions (like delay in this example) to suspend execution of a coroutine.
fun main() = runBlocking { // this: CoroutineScope
launch { doWorld() }
println("Hello")
}
// this is your first suspending function
suspend fun doWorld() {
delay(1000L)
println("World!")
}
// output
Hello
World!
In this case, the main() method runs doWorld() asynchronously in the background, then prints “Hello” before pausing and waiting for the runBlocking context to complete. This is the same behaviour that we had above, but the code is cleaner.
Structured concurrency
Coroutines follow a principle of structured concurrency which means that new coroutines can be only launched in a specific CoroutineScope which delimits the lifetime of the coroutine. The above example shows that runBlocking establishes the corresponding scope and that is why the previous example waits until everything completes before exiting the program.
In a real application, you will be launching a lot of coroutines. Structured concurrency ensures that they are not lost and do not leak. An outer scope cannot complete until all its children coroutines complete.
Coroutine Builders
A coroutine builder is a function that creates a new coroutine. Most coroutine builders also start the coroutine immediately after creating it. The most commonly used coroutine builder is launch, which takes a lambda argument, representing the function that will be executed.
Launch
launch will launch a new coroutine concurrently with the rest of the code, which continues to work independently.
Here’s an example that attempts to fetch data from a remote URL, which takes a few seconds to complete.
import kotlinx.coroutines.*
import java.net.URL
val ENDPOINT = "http://kotlin-book.bignerdranch.com/2e/flight"
fun fetchData(): String = URL(ENDPOINT).readText()
@OptIn(DelicateCoroutinesApi::class)
fun main() {
println("Started")
GlobalScope.launch {
val data = fetchData()
println(data)
}
println("Finished")
}
// output
Started
Finished
However, when we run this program, it completes immediately. This is because after the fetchData() function is called, the program continues executing and completes.
This is due to how the launch builder is designed to behave. Unfortunately running the entire program asynchronously isn’t really what we want. We actually want the fetchData() task to run to completion in the background, and the program halt and wait until that function is complete. To do this, we need a different builder that behaves differently.
runBlocking
runBlocking is also a coroutine builder. The name of runBlocking means that the thread that runs it (in this case — the main thread) gets blocked for the duration of the call, until all the coroutines inside runBlocking { ... } complete their execution.
The runBlocking function is a coroutine builder that blocks its thread until execution of its coroutine is complete. You can use runBlocking to launch coroutines that must all complete before execution continues. As you can see, it reaches the “Finished” statement, but pauses at the end of the scope until the fetchData() completes and returns data.
You can see the difference in behaviour here:
val ENDPOINT = "http://kotlin-book.bignerdranch.com/2e/flight"
fun fetchData(): String = URL(ENDPOINT).readText()
fun main() {
runBlocking {
println("Started")
launch {
val data = fetchData()
println(data)
}
println("Finished")
}
}
// output
Started
Finished
BI0262,ATQ,MXF,Delayed,115
In this case, the launch {} coroutine runs in the background fetching data, while the program continues running. After println("Finished") executes, and it’s at the end of the runBlocking scope, it halts and waits for the launch coroutine to complete before exiting the program.
coroutineScope
In addition to the coroutine scope provided by different builders, it is possible to declare your own scope using the coroutineScope builder. It creates a coroutine scope and does not complete until all launched children complete.
runBlocking and coroutineScope builders may look similar because they both wait for their body and all its children to complete. The main difference is that the runBlocking method blocks the current thread for waiting, while coroutineScope just suspends, releasing the underlying thread for other usages.
You can use coroutineScope from any suspending function. For example, you can move the concurrent printing of Hello and World into a suspend fun doWorld() function:
fun main() = runBlocking {
doWorld()
}
suspend fun doWorld() = coroutineScope { // this: CoroutineScope
launch {
delay(1000L)
println("World!")
}
println("Hello")
}
// output
Hello
World!
A coroutineScope builder can be used inside any suspending function to perform multiple concurrent operations. Let’s launch two concurrent coroutines inside a doWorld suspending function:
// Sequentially executes doWorld followed by "Done"
fun main() = runBlocking {
doWorld()
println("Done")
}
// Concurrently executes both sections
suspend fun doWorld() = coroutineScope { // this: CoroutineScope
launch {
delay(2000L)
println("World 2")
}
launch {
delay(1000L)
println("World 1")
}
println("Hello")
}
// output
Hello
World 1
World 2
Done
Managing a coroutine
A launch coroutine builder returns a Job object that is a handle to the launched coroutine and can be used to explicitly wait for its completion. For example, you can wait for completion of the child coroutine and then print “Done” string:
val job = launch { // launch a new coroutine and keep a reference to its Job
delay(1000L)
println("World!")
}
println("Hello")
job.join() // wait until child coroutine completes
println("Done")
In a long-running application you might need fine-grained control on your background coroutines. For example, a user might have closed the page that launched a coroutine and now its result is no longer needed and its operation can be cancelled. The launch function returns a Job that can be used to cancel the running coroutine:
val job = launch {
repeat(1000) { i ->
println("job: I'm sleeping $i ...")
delay(500L)
}
}
delay(1300L) // delay a bit
println("main: I'm tired of waiting!")
job.cancel() // cancels the job
job.join() // waits for job's completion
println("main: Now I can quit.")
// output
job: I'm sleeping 0 ...
job: I'm sleeping 1 ...
job: I'm sleeping 2 ...
main: I'm tired of waiting!
main: Now I can quit.
As soon as main invokes job.cancel, we don’t see any output from the other coroutine because it was cancelled.
Composing suspending functions
Sequential (default)
Assume that we have two suspending functions defined elsewhere that do something useful like some kind of remote service call or computation. What do we do if we need them to be invoked sequentially — first doSomethingUsefulOne and then doSomethingUsefulTwo, and compute the sum of their results? We use a normal sequential invocation, because the code in the coroutine, just like in the regular code, is sequential by default.
suspend fun doSomethingUsefulOne(): Int {
delay(1000L) // pretend we are doing something useful here
return 13
}
suspend fun doSomethingUsefulTwo(): Int {
delay(1000L) // pretend we are doing something useful here, too
return 29
}
val time = measureTimeMillis {
val one = doSomethingUsefulOne()
val two = doSomethingUsefulTwo()
println("The answer is ${one + two}")
}
println("Completed in $time ms")
// output
The answer is 42
Completed in 2017 ms
Concurrent (async)
What if there are no dependencies between invocations of doSomethingUsefulOne and doSomethingUsefulTwo and we want to get the answer faster, by doing both concurrently? Use async, another builder.
Conceptually, async is just like launch. It starts a separate coroutine which is a light-weight thread that works concurrently with all the other coroutines. The difference is that launch returns a Joband does not carry any resulting value, while async returns a Deferred — a light-weight non-blocking future that represents a promise to provide a result later. You can use .await() on a deferred value to get its eventual result, but Deferred is also a Job, so you can cancel it if needed.
val time = measureTimeMillis {
val one = async { doSomethingUsefulOne() }
val two = async { doSomethingUsefulTwo() }
println("The answer is ${one.await() + two.await()}")
}
println("Completed in $time ms")
// output
The answer is 42
Completed in 1017 ms
For more examples, the Kotlin Docs Coroutine Tutorial is highly recommended!
Kotlin Multiplatform (KMP)
Imagine that you want to build an application that runs on multiple platforms. e.g., Windows and macOS, or Android and iOS. How should you do it?
The first thing you would probably try is to just build the application in your favorite language, and then compile it wherever you want to run it. If it was a simple application, and you were using a standard language that worked identically on platforms, you might be able to do this. e.g. the C++ 14 console applications that you built in CS 246 could probably build and run anywhere! You’re using a well-defined language supported across multiple platforms, so this probably works fine.
Unfortunately, it’s not always that simple. Imagine that you want to add graphics: you would quickly realize that the fastest and most sophisticated graphics libraries are platform-dependent. You can do some amazing things with DirectX, but it only runs on Windows, and doesn’t help you build for macOS or Linux (or iOS or Android).
This is a common problem. A lot of the functionality that you will want to use in your application is tied to the underlying platform—including UI, graphics, sound, networking and so on. This means that any libraries or frameworks that you want to use are also tied that platform. Microsoft C++ developers might have a rich ecosystem of Windows-specific libraries to use, but they aren’t portable to macOS or Linux. SwiftUI is incredible for building macOS applications, but doesn’t work for Windows.
So how to you write sophisticated cross-platform applications?
Option 1. Develop separately for each platform.
One solution is to not bother chasing cross-platform code. Use the best tools and libraries, often the native ones that the vendor provides, and create entirely different applications for each platform. This has the advantage of producing the highest-quality software, but you cannot reuse your code so it’s often a very expensive approach (i.e. hire n teams, where n is the number of platforms).
e.g. You design a mobile app, and have separate projects for Swift/iOS and Kotlin/Android builds.
Option 2: Use technologies that exist on every platform.
Instead of building for each platform, you build for a runtime environment that exists on each of your platforms. This is one of the major justifications for companies targeting the Java JVM: “Write once, run anywhere”, at least for some types of software. This is also one of the main benefits of targeting the web: as long as a compliant browser exists, your webpage, or web-based application can run on every platform.
e.g. Gmail, Netflix and Facebook for web applications; Kotlin applications using cross-platform UI toolkits.
This is an extremely successful strategy for reaching a wide audience, but it faces two main challenges:
- You are restricted to the capabilities that runtime platform offers you. Platform-specific features that require access to native libraries may not be available. This is the situation when writing JVM applications in Kotlin. The Java ecosystem contains a lot of intrinsic functionality, but you will be limited in your ability to access anything platform-specific. e.g. this is one of the reason why Java is rarely used to develop commercial quality games: the JVM does not provide low-level access to advanced graphics capabilities of the platform.
- The runtime environment may not exist on your target platform. This is rarely a case when talking about web applications, since browsers exist on most platforms. However, the JVM isn’t always available. e.g. Apple doesn’t directly support a JVM and Just-In-Time (JIT) compilation on iOS: everything needs to be Ahead-of-Time (AoT) compiled, which prevents us from directly deploying Kotlin JVM apps on iOS.
Kotlin/JVM helps to address cross-platform compatibility, but it suffers from both of these restrictions.
Kotlin Multiplatform (KMP) offers a solution to this problem, by allowing us to produce native binaries for multiple platforms from the same code base. It helps us organize our code into reusable sections, while supporting the ability to interoperate with native code on each platform when required. This drastically reduces the effort required to write and maintain code across different platforms, and lets us bypass the restrictions of other solutions like the JVM.
What is Kotlin Multiplatform?
Kotlin Multiplatform (KMP) is the Kotlin framework to support compilation on multiple platforms. As we’ve seen, Kotlin can already be used on any platform that has JVM support. KMP extends this to native builds on other platforms where a JVM is unavailable or undesireable for some reason. You use KMP to write native code using Kotlin for:
- Android
- iOS, WatchOS, TVOS
- macOS
- Windows
- Linux
- Web
Support for multiplatform programming is one of Kotlin’s key benefits. Kotlin provides common code that will run everywhere, plus native-platform capabilities.
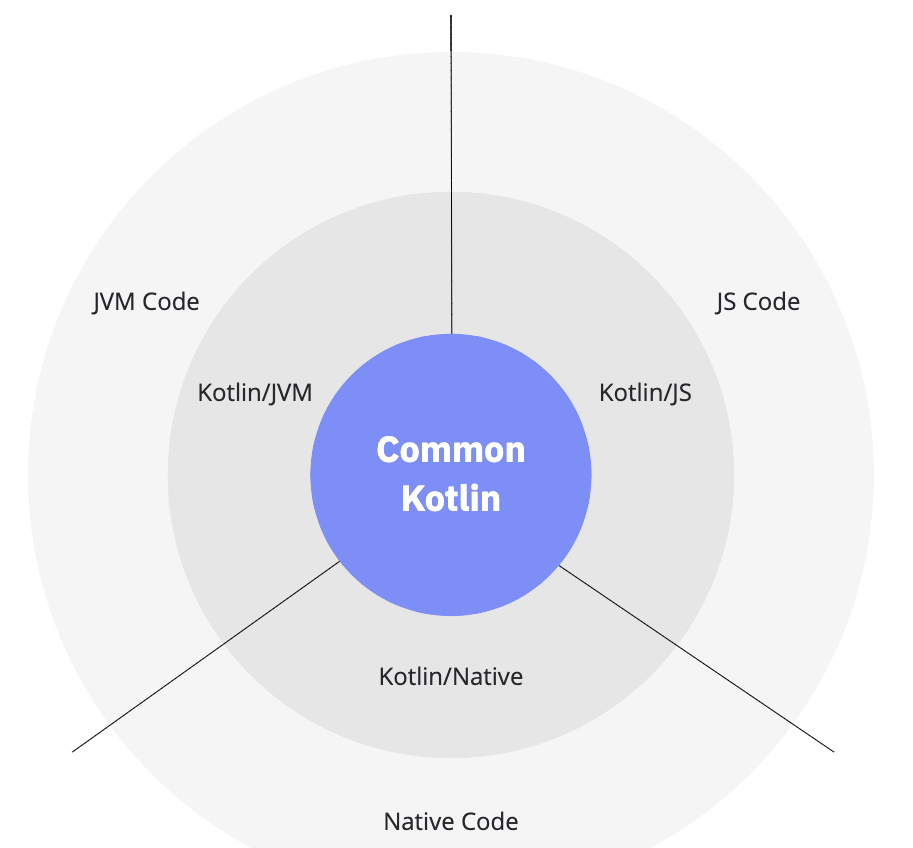
What does KMP include?
- Common Kotlin includes the language, core libraries, and basic tools. Code written in common Kotlin works everywhere on all supported platforms, including JVM, Native (iOS, Android, Windows, Linux, macOS), Web (JS). Common multiplatform libraries cover everyday tasks such as HTTP, serialization, and managing coroutines. These libraries can be used on any platform.
- Kotlin also includes platform-specific versions of Kotlin libraries and tools (Kotlin/JVM, Kotlin/JS, Kotlin/Native). This includes native compilers for each of these platforms that produce a suitable target (e.g. bytecode for Kotlin/JVM, JS for Kotlin/JS). Through these platforms you can access the platform native code (JVM, JS, and Native) and leverage all native capabilities.
“Platform-specific” functionality includes the user-interface. If you want a 100% “native-look-and-feel” to your application, you would want to build the application using the native UI toolkit for that platform. e.g. Swift and SwiftUI for iOS. Cross-platform toolkits that we’ve used in this course, like JavaFX and Compose solve the problem of cross-platform compatibiltiy by providing a UI framework that runs everywhere, at the cost of being somewhat “non-native” feeling.
KMP allows you to build projects that use a combination of common and native libraries, and which can build to any one of the supported platforms—from the same codebase.
Kotlin multi-platform organizes the source code in hierarchies, with common-code at the base, and branches representing platform-specific modules. All platform-specific source sets depend upon the common source set by default.
Common code can depend on many libraries that Kotlin provides for typical tasks like making HTTP calls, performing data serialization, and managing concurrency. Further, the platform-specific versions of Kotlin provide libraries we can use to can leverage the platform-specific capabilities of the target platforms.
Excerpts from https://www.baeldung.com/kotlin/multiplatform-programming.
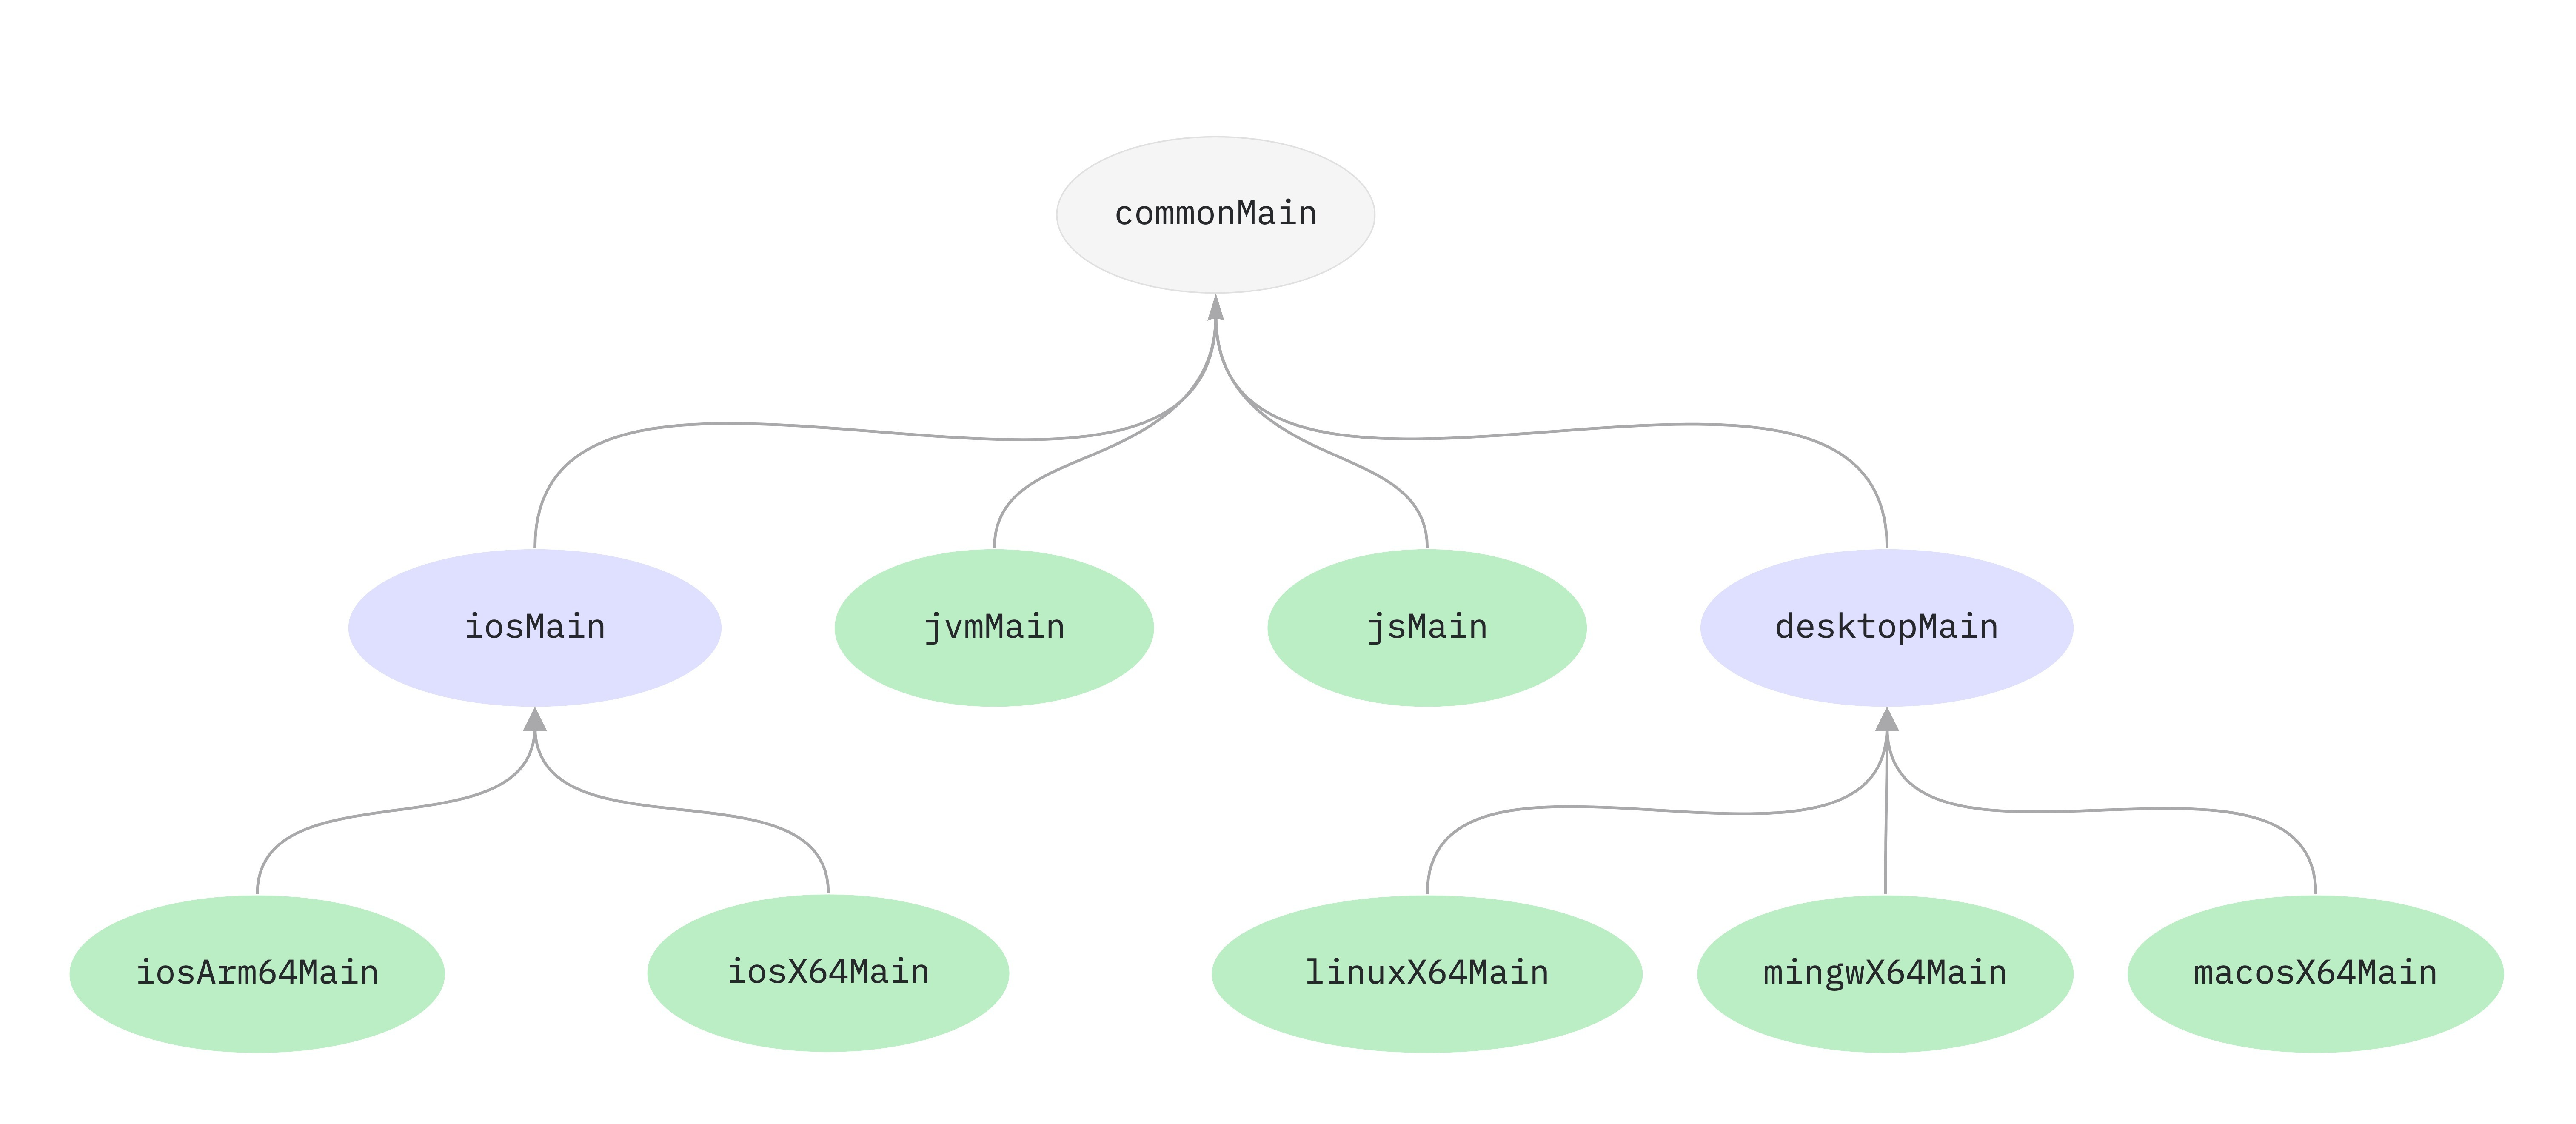
For example, in the diagram above, commonMain code is available to all platforms (leaf nodes). desktopMain code is available to the desktop targets (linuxX64Main, mingwX64Main and macosX64Main) but not the other platforms like iosArm64Main.
Platform-specific APIs
In some cases, it may be desirable to define and access platform-specific APIs in common. This is particularly useful for areas where certain common and reusable tasks are specialized for leveraging platform-specific capabilities.
Kotlin multi-platform provides the mechanism of expected and actual declarations to achieve this objective. For instance, the common source set can declare a function as expected and the platform-specific source sets will be required to provide a corresponding function with the actual declaration:
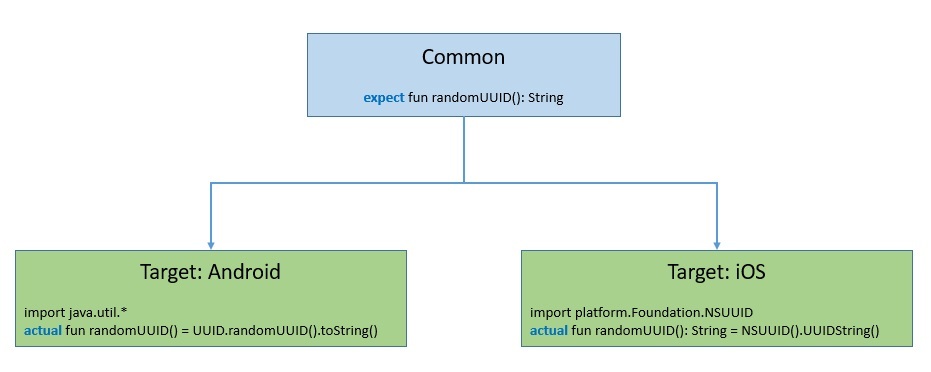
Diagram from Baeldung.com.
Here, as we can see, we are using a function declared as expected in the common source set. The common code does not care how it’s implemented. So far, the targets provide platform-specific implementations of this function.
We can use these declarations for functions, classes, interfaces, enumerations, properties, and annotations.
Creating a KMP Project
Use the online KMP Multiplatform Wizard to generate a project matching the platforms you wish to support.
This generates a project with the kotlin-multiplatform Gradle plugin. This plugin is added to our build.gradle file.
plugins {
kotlin("multiplatform") version "1.4.0"
}
This kotlin-multiplatform plugin configures the project for creating an application or library to work on multiple platforms.
Our project will contain shared, and native specific source folders.
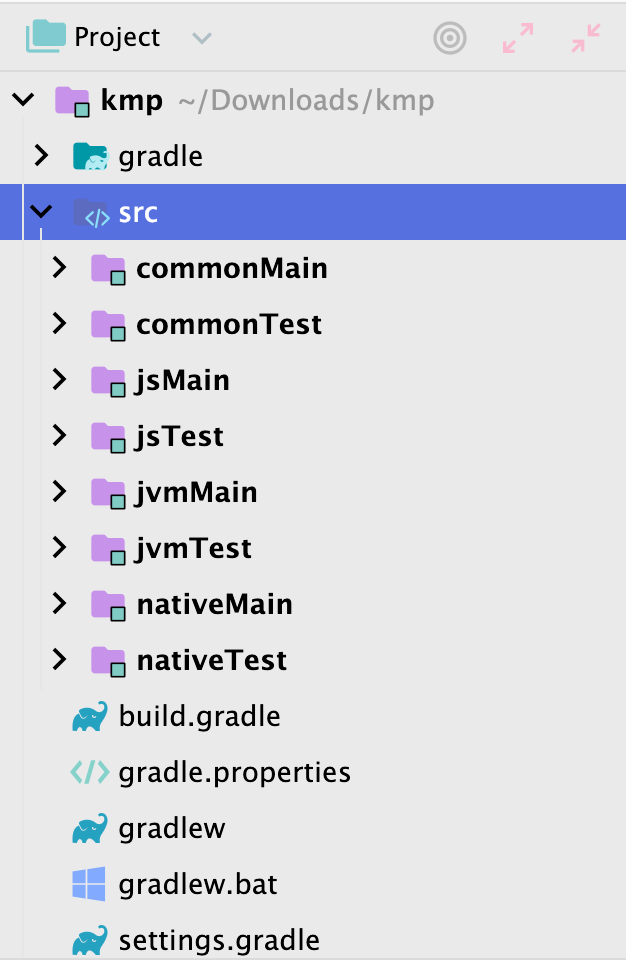
It also generates source sets and Gradle build targets for each platform.

Writing Common Code
Let’s write a cross-platform version of the calculator application that we used at the very start of the course. We’ll define some common code and place it in the commonMain folder. This will be available to all of our platforms. Notice that this is basic Kotlin code, with no platform specific code included.
fun add(num1: Double, num2: Double): Double {
val sum = num1 + num2
writeLogMessage("The sum of $num1 & $num2 is $sum", LogLevel.DEBUG)
return sum
}
fun subtract(num1: Double, num2: Double): Double {
val diff = num1 - num2
writeLogMessage("The difference of $num1 & $num2 is $diff", LogLevel.DEBUG)
return diff
}
fun multiply(num1: Double, num2: Double): Double {
val product = num1 * num2
writeLogMessage("The product of $num1 & $num2 is $product", LogLevel.DEBUG)
return product
}
fun divide(num1: Double, num2: Double): Double {
val division = num1 / num2
writeLogMessage("The division of $num1 & $num2 is $division", LogLevel.DEBUG)
return division
}
The writeLogMessage() function should be platform specific, since each OS wil handle this differently. We will add a top-level declaration to our common code defining how that function should look:
enum class LogLevel {
DEBUG, WARN, ERROR
}
internal expect fun writeLogMessage(message: String, logLevel: LogLevel)
The expect keyword tells the compiler that the definition will be handled at the platform level, in another module. For example, we can flesh this out in the jvmMain module for Kotlin/JVM platform. The build for that platform will use the platform-specific version of this function.
internal actual fun writeLogMessage(message: String, logLevel: LogLevel) {
println("Running in JVM: [$logLevel]: $message")
}
Our goal is to define as much functionality as we can in the commonMain module, but recognize that we sometimes need to use platform-specific code for the results that we want to achieve.
Writing Common Unit Tests
Let’s write a few tests for our common calculator functions:
@Test
fun testAdd() {
assertEquals(4.0, add(2.0, 2.0))
}
@Test
fun testSubtract() {
assertEquals(0.0, subtract(2.0, 2.0))
}
@Test
fun testMultiply() {
assertEquals(4.0, multiply(2.0, 2.0))
}
@Test
fun testDivide() {
assertEquals(1.0, divide(2.0, 2.0))
}
There’s nothing unusual—we can easily write unit tests against common code. However, when we run them, we get a new window asking us to select a target. Select one or more targets for your tests.
Shared Mobile Code
The most common requirement for KMP is to support both Android and iOS targets. Kotlin Multiplatform Mobile (KMM) leverages KMP to simplify the development of cross-platform mobile applications. You can share common code between iOS and Android apps and write platform-specific code only where it’s necessary, typically to support a native UI or when working with platform-specific APIs.
A basic KMP project consists of three components:
- Shared module – a Kotlin module that contains common logic for both Android and iOS applications. Builds into an Android library and an iOS framework. Uses Gradle as a build system.
- Android application – a Kotlin module that builds into the Android application. Uses Gradle as a build system.
- iOS application – an Xcode project that builds into the iOS application.
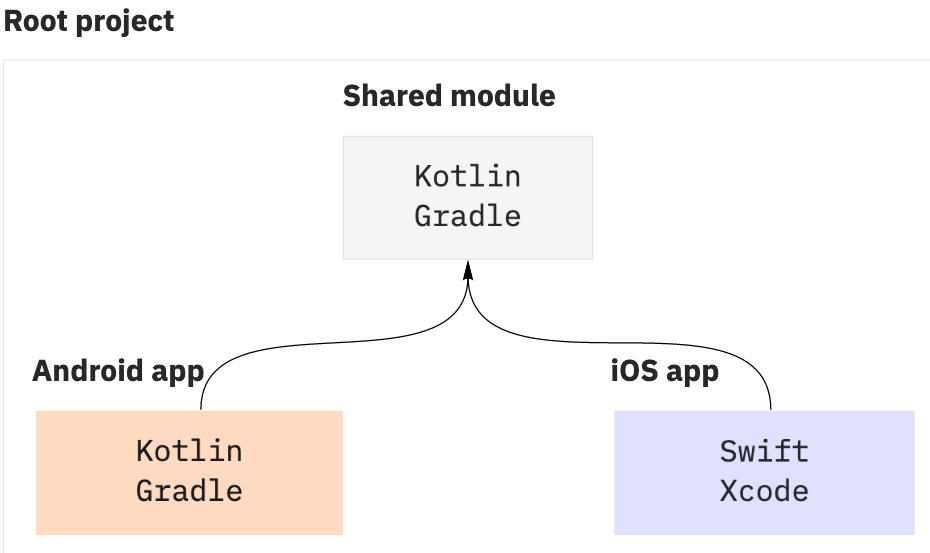
Kotlin supports two-way interop with iOS: Kotlin can call into iOS libraries, and vice-versa using the Objective-C bindings. (Swift bindings are being developed). Android is a native target for Kotlin, and is much easier to support.
KMP is exciting because we can use Kotlin for both targets, and share probably 50-75% of the code between platforms. The native code is just those modules that are very specific to each platform, typically the UI. A KMM application could potentially offer identical functionality on Android and iOS, while delivering a completely native UI experience with Jetpack Compose on Android, and SwiftUI on iOS.
For example, see the list of KMM Samples.
Styles
Console development
A console application (aka “command-line application”) is an application that is intended to run from within a shell, such as bash, zsh, or PowerShell, and uses text and block characters for input and output. This style of application dominated through the early days of computer science, until the 1980s when graphical user interfaces became much more common.
Console applications use text for both input and output: this can be as simple as plan text displayed in a window (e.g. bash), to systems that use text-based graphics and color to enhance their usability (e.g. Midnight Commander). This application style was really driven by the technical constraints of the time. Software was written for text-based terminals, often with very limited resources, and working over slow network connections. Text was faster to process, transmit and display than sophisticated graphics.
Some console applications remain popular, often due to powerful capabilities or features that are difficult to replicate in a graphical environment. Vim, for instance, is a text editor that originated as a console application, and is still used by many developers. Despite various attempts to build a “graphical vim”, the console version is often seen as more desireable due to the benefits of console applications i.e. faster, reduced latency, small memory footprint and ability to easily leverage other command-line tools.

Design
Typically, command-line applications should use this format, or something similar, when executed from the command-line:
$ program_name --option=value parameter
- program_name is the name of your program. It should be meaningful, and reflect what your program does.
- options represent a value that tells your program how to operate on the data. Typically options are prefixed with a dash (”-”) to distinguish them from parameters. If an option also requires a value (e.g. ”-bg=red”) then separate the option and value with a colon (”:”) or an equals sign (”=”).
- parameter represents input, or data that your program would act upon (e.g. the name of a file containing data). If multiple parameters are required, separate them with whitespace (e.g. ”program_name parameter1 parameter2”).
The order of options and parameters should not matter.
Running a program with insufficient arguments should display information on how to successfully execute it.
$ rename
Usage: rename [source] [dest]
Typical command-line interaction is shown below:
% exa --help
Usage:
exa [options] [files...]
META OPTIONS
-?, --help show list of command-line options
-v, --version show version of exa
DISPLAY OPTIONS
-1, --oneline display one entry per line
-l, --long display extended file metadata as a table
-G, --grid display entries as a grid (default)
-x, --across sort the grid across, rather than downwards
-R, --recurse recurse into directories
-T, --tree recurse into directories as a tree
-F, --classify display type indicator by file names
...
Although we tend to run graphical operating systems with graphical applications, console applications are still not uncommon. For expert users in particular, this style has some advantages.
Advantages:
- They can easily be scripted or automated to run without user intervention.
- Use standard I/O streams, to allow interaction with other console applications.
- Tend to be lightweight and performant, due to their relatively low-overhead (i.e. no graphics, sound).
Disadvantages:
- Lack of interactions standards,
- A steep learning curve (man pages and trial-and-error), and
- Lack of feature discoverability (i.e., you need to memorize commands/how to use the app).
Project Setup
Create a new project
In IntelliJ, use File > New > Project > Kotlin > Kotlin/JVM to create a new project. Standard Kotlin projects are JVM projects. (Note that Android Studio is NOT recommended for console projects).
Create a main method
Command-line applications require a single entry point, typically called main. This method is the first method that is executed when your program is launched.
fun main(args:Array<String>) {
// insert code here
System.exit(0)
}
When your program is launched it executes this method. When it reaches the end of the method, the program stops executing. It’s considered “good form” to call System.exit(0) where the 0 is an error code returned to the OS. In this case, 0 means no errors i.e. a normal execution.
- Input should be handled through either (a) arguments supplied on the command-line, or (b) values supplied through
stdin. Batch-style applications should be able to run to completion without prompting the user for more input. - Output should be directed to
stdout. You’re typically limited to textual output, or limited graphics (typically through the use of Unicode characters). - Errors should typically be directed to
stderr.
Compile and package
Use the Gradle menu (View > Tool Windows > Gradle).
| Command | What does it do? |
|---|---|
Tasks > build > clean | Removes temp files (deletes the /build directory) |
Tasks > build > build | Compiles your application |
Tasks > application > run | Executes your application (builds it first if necessary) |
Tasks > application > installDist | Creates a distribution package |
Tasks > application > distZip | Creates a distribution package |
Features
Processing arguments
The main() method can optionally accept an array of Strings containing the command-line arguments for your program. To process them, you can simply iterate over the array.
This is effectively the same approach that you would take in C/C++.
fun main(args: Array<String>) {
// args.size returns number of items
for (s in args) {
println("Argument: $s")
}
}
If you are writing this code yourself, this is a great place to use the command design pattern to abstract command-line options. I’ve also used the Clikt library, which is great for collecting and handling arguments. Clikt also provides built in support for common options like --help and --version.
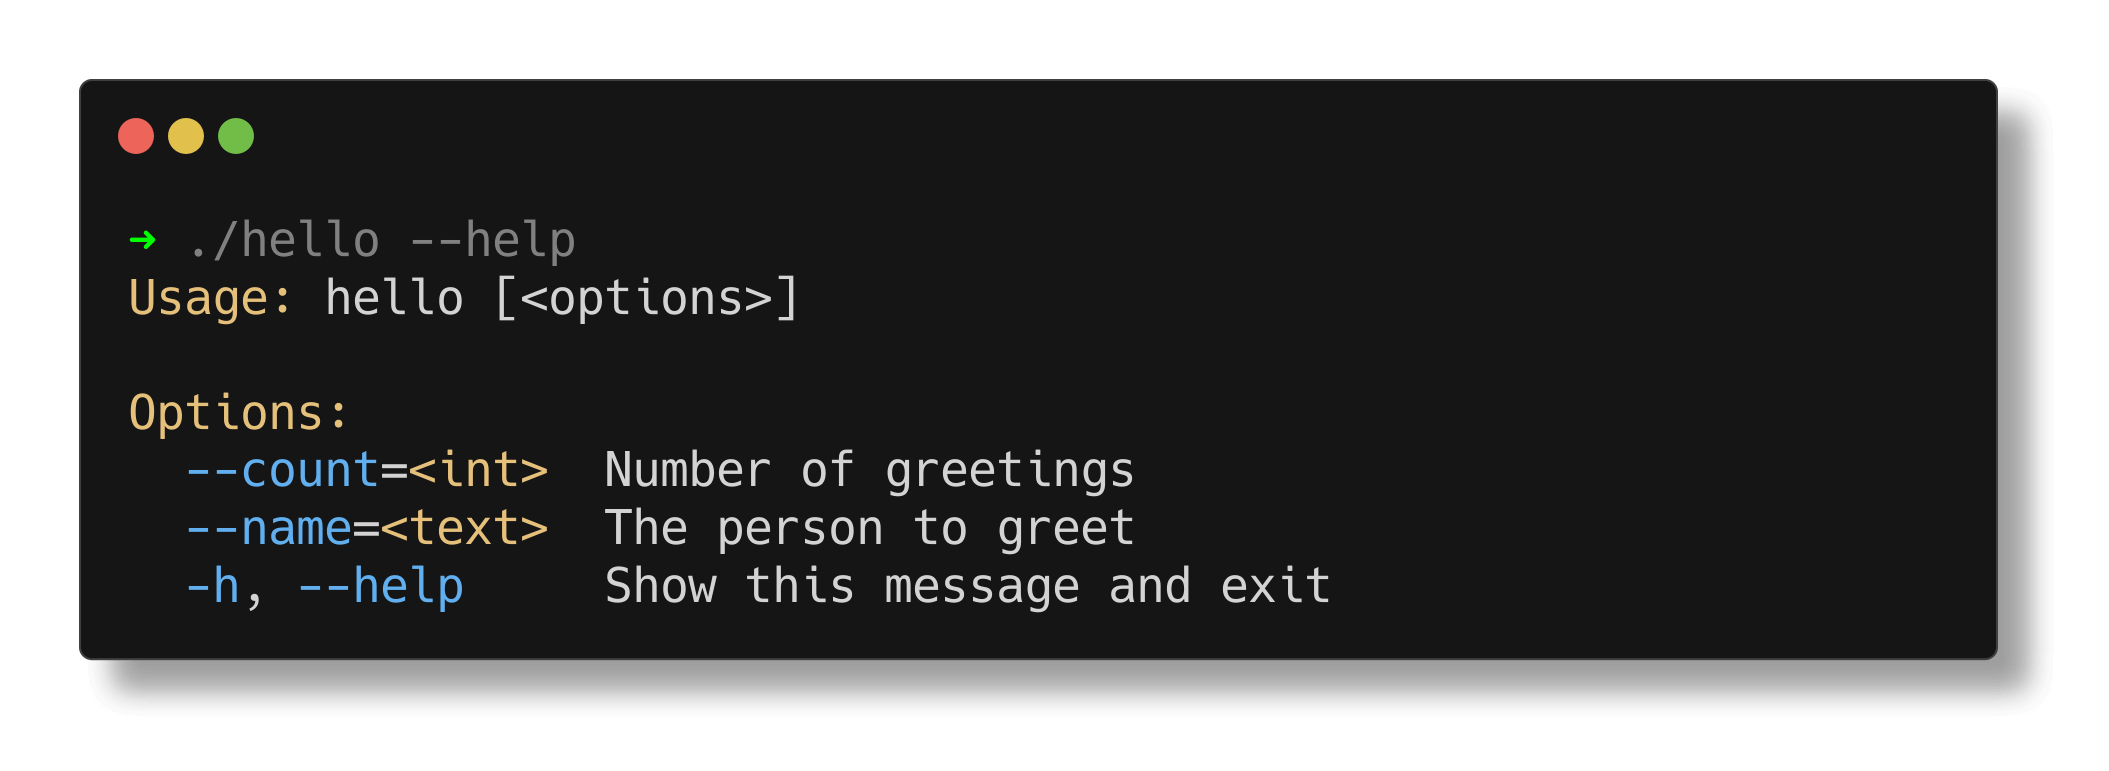
Reading/writing text
The Kotlin Standard Library (“kotlin-stdlib“) includes the standard IO functions for interacting with the console.
- readLine() reads a single value from “stdin“
- println() directs output to “stdout“
code/ucase.kts
// read single value from stdin
val str:String ?= readLine()
if (str != null) {
println(str.toUpperCase())
}
It also includes basic methods for reading from existing files.
import java.io.*
var filename = "transactions.txt"
// read up to 2GB as a string (incl. CRLF)
val contents = File(filename).readText(Charsets.UTF_8)
println(contents)
2020-06-06T14:35:44, 1001, 78.22, CDN
2020-06-06T14:38:18, 1002, 12.10, CDN
2020-06-06T14:42:51, 1003, 44.50, CDN
Example: rename utility
Let’s combine these ideas into a larger example.
Requirements: Write an interactive application that renames one or more files using options that the user provides. Options should support the following operations: add a prefix, add a suffix, or capitalize it.
We need to write a script that does the following:
- Extracts options and target filenames from the arguments.
- Checks that we have (a) valid arguments and (b) enough arguments to execute program properly (i.e. at least one filename and one rename option).
- For each file in the list, use the options to determine the new filename, and then rename the file.
Usage: rename.kts [option list] [filename]
For this example, we need to manipulate a file on the local file system. The Kotlin standard library offers a File class that supports this. (e.g. changing permissions, renaming the file).
Construct a ‘File‘ object by providing a filename, and it returns a reference to that file on disk.
fun main(args: Array<String>) {
val files = getFiles(args)
val options = getOptions(args)
// check minimum required arguments
if (files.size == 0 || options.size == 0) {
println("Usage: [options] [file]")
} else {
applyOptions(files, options)
}
fun getOptions(args:Array<String>): HashMap<String, String> {
var options = HashMap<String, String>()
for (arg in args) {
if (arg.contains(":")) {
val (key, value) = arg.split(":")
options.put(key, value)
}
}
return options
}
fun getFiles(args:Array<String>) : List<String> {
var files:MutableList<String> = mutableListOf()
for (arg in args) {
if (!arg.contains(":")) {
files.add(arg)
}
}
return files
}
fun applyOptions(files:List<String>,options:HashMap<String, String>) {
for (file in files) {
var rFile = file
// capitalize before adding prefix or suffix
if (options.contains("prefix")) rFile = options.get("prefix") + rFile
if (options.contains("suffix")) rFile = rFile + options.get("suffix")
File(file).renameTo(rFile)
println(file + " renamed to " + rFile)
}
}
Reading/writing binary data
These examples have all talked about reading/writing text data. What if I want to process binary data? Many binary data formats (e.g. JPEG) are defined by a standard, and will have library support for reading and writing them directly.
Kotlin also includes object-streams that support reading and writing binary data, including entire objects. You can, for instance, save an object and it’s state (serializing it) and then later load and restore it into memory (deserializing it).
class Emp(var name: String, var id:Int) : Serializable {}
var file = FileOutputStream("datafile")
var stream = ObjectOutputStream(file)
var ann = Emp(1001, "Anne Hathaway", "New York")
stream.writeObject(ann)
Cursor positioning
ANSI escape codes are specific codes that can be “printed” by the shell but will be interpreted as commands rather than output. Note that these are not standard across consoles, so you are encouraged to test with a specific console that you wish to support.
| ^ | C0 | Abbr | Name | Effect |
|---|---|---|---|---|
| ^G | 7 | BEL | Bell | Makes an audible noise. |
| ^H | 8 | BS | Backspace | Moves the cursor left (but may “backwards wrap” if cursor is at start of line). |
| ^I | 9 | HT | Tab | Moves the cursor right to next multiple of 8. |
| ^J | 0xA | LF | Line Feed | Moves to next line, scrolls the display up if at bottom of the screen. Usually does not move horizontally, though programs should not rely on this. |
| ^L | 0xC | FF | Form Feed | Move a printer to top of next page. Usually does not move horizontally, though programs should not rely on this. Effect on video terminals varies. |
| ^M | 0xD | CR | Carriage Return | Moves the cursor to column zero. |
| ^[ | 0x1B | ESC | Escape | Starts all the escape sequences |
These escape codes can be used to move the cursor around the console. All of these start with ESC plus a suffix.
| Cursor | ESC | Code | Effect |
|---|---|---|---|
| Left | \u001B | [1D | Move the cursor one position left |
| Right | \u001B | [1C | Move the cursor one position right |
| Up | \u001B | [1A | Move the cursor one row up |
| Down | \u001B | [1B | Move the cursor one row down |
| Startline | \u001B | [250D | Move the cursor to the start of the line |
| Home | \u001B | [H | Move the cursor to the home position |
| Clear | \u001B | [2J | Clear the screen |
| Reset | \u001B | Reset to default settings |
For instance, this progress bar example draws a line and updates the starting percentage in-place.
val ESC = "\u001B";
val STARTLINE = ESC + "[250D";
for (i in 1..100) {
print(STARTLINE);
print(i + "% " + BLOCK.repeat(i));
}
// output
100% ▋▋▋▋▋▋▋▋▋▋▋▋▋▋▋▋▋▋▋▋▋▋▋▋▋▋▋▋▋▋▋▋▋▋▋▋▋▋▋▋▋▋▋▋
Printing in colour
We can also use escape sequences to change the color that is displayed.
{.compact}
| Cursor | ESC | Code | Effect |
|---|---|---|---|
| Colour: Black | \u001B | [30m | Set colour Black for anything printed after this |
| Colour: Yellow | \u001B | [33m | Set colour Yellow for anything printed after this |
| Colour: White | \u001B | [37m | Set colour White for anything printed after this |
Below, we use ANSI colour codes to display colored output:
val ANSI_BLACK = "\u001B[30m"
val ANSI_YELLOW = "\u001B[33m"
val ANSI_WHITE = "\u001B[37m"
println(ANSI_WHITE + " ;)(; ");
println(ANSI_YELLOW + " :----: " + ANSI_BLACK + " Vendor: " + System.getProperty("java.vendor"));
println(ANSI_YELLOW + "C|" + ANSI_WHITE + "====" + ANSI_YELLOW + "| " + ANSI_BLACK + " JDK Name: " + System.getProperty("java.vm.name"));
println(ANSI_YELLOW + " | | " + ANSI_BLACK + " Version: " + System.getProperty("java.version"));
println(ANSI_YELLOW + " `----' ");
println();

Useful Libraries
There are some advanced toolkits that make working with console applications easier. They’re highly recommended for handling user-input, parsing command-line arguments, and building interactive console applications.
- Clickt: Multiplatform command-line interface framework.
- kotlin-inquirer: Building interactive console apps.
- Kotter: Declarative API for dynamic console applications.
Packaging & Installers
A console or command-line application is typically deployed as a JAR file, containing all classes and dependencies. The Gradle application plugin has the ability to generate a JAR file, and an associated script that can be used to launch your application.
In Gradle:
Tasks > distribution > distZip or distTar
This will produce a ZIP or TAR file in the build/distribution folder. If you uncompress it, you will find a lib directory of JAR file dependencies, and a bin directory with a script that will execute the program. To install this, you could place these contents into a folder, and add the bin to your $PATH.
Here’s an example of Kotlin programs that are “installed” on my computer1. For each program, I unzipped the distribution ZIP file into a directory named bin that I’ve placed in my PATH, and created symlinks from the program’s script to a top-level alias in the bin directory i.e. the symlinks are in the bin directory, which also places them in my PATH so that I can easily run them.
$ tree bin
bin
├── courses -> /Users/jaffe/bin/courses-1.1/bin/courses
├── courses-1.1
│ ├── bin
│ └── lib
├── roll -> /Users/jaffe/bin/roll-1.0/bin/roll
├── roll-1.0
│ ├── bin
│ └── lib
-
If you’re curious,
coursesprints out course calendar information, androllis a dice roller. No, I don’t use it for grading. ↩
Desktop development
Graphical applications arose in the early 80s as we moved from text-based terminals to more technically capable systems. This was part of the Personal Computer (PC) movement of that time, which aimed to put a “computer in every home”. Introduced in 1984, the Apple Macintosh introduced the first successful commercial graphical operating system; other vendors (e.g. Microsoft, Commodore, Sun) quickly followed suit with their own graphical operating systems. The conventions that were introduced on the Mac quickly became standard on other platforms.
Graphical User Interfaces (GUIs) were based on keyboard and mouse-input, and a graphical output (typically a CRT monitor). Such systems were seen as more “approachable” and “easy-to-use” for novice users, and were a major driver to the modern PC era.
Desktop applications refers to graphical applications designed for a notebook or desktop computer, typically running Windows, macOS or Linux. Users interact with these applications using a mouse and keyboard, although other devices may also be supported (e.g. camera, trackpad).
Modern graphical desktop applications closely resemble their earlier counterparts, and still rely heavily on point-and-click interaction. Modern operating systems have mostly been reduced to Linux, macOS and Windows.

Design
There are obvious benefits to a graphical display being able to display rich colours, graphics and multimedia. However, point-and-click interfaces also provide other benefits:
- The interface provides affordances: visual suggestions on how you might interact with the system. This can include hints like tooltips, or a graphical design that makes use of controls obvious (e.g. handles to show where to “grab” a window corner).
- Systems provide continuous feedback to users. This includes obvious feedback (e.g. dialog boxes, status lines) and more subtle, continuous feedback (e.g. widgets animating when pressed).
- Interfaces are explorable: users can use menus, and cues to discover new features.
- Low cost of errors: undo-redo, and the ability to rollback to previous state makes exploration low-risk.
- These environments encouraged developers to use consistent widgets and interactive elements. Standardization led to a common look-and-feel, and placement of common controls - which made software easier to learn, especially for novices. Many of the standard features that we take for granted are a direct result of this design standardization in the 80s1.
Project Setup
A desktop GUI project needs a GUI framework. We’ll use Compose Multiplatform for this purpose. We discuss Compose in great detail in the User Interface section. For now, we’ll just focus on getting a Compose project setup.
Create a new project
To create a Compose Multiplatform project, use the project wizard in IntelliJ IDEA, and select Compose for Desktop as your project. Fill in the relevant details:
- Name: a unique name for your project
- Location: top-level directory; a new directory will be created here.
- Group: top-level package name for your code; should be unique; typically reverse-DNS name.
- Artifact: leave default
- JDK: the version of JDK to use.
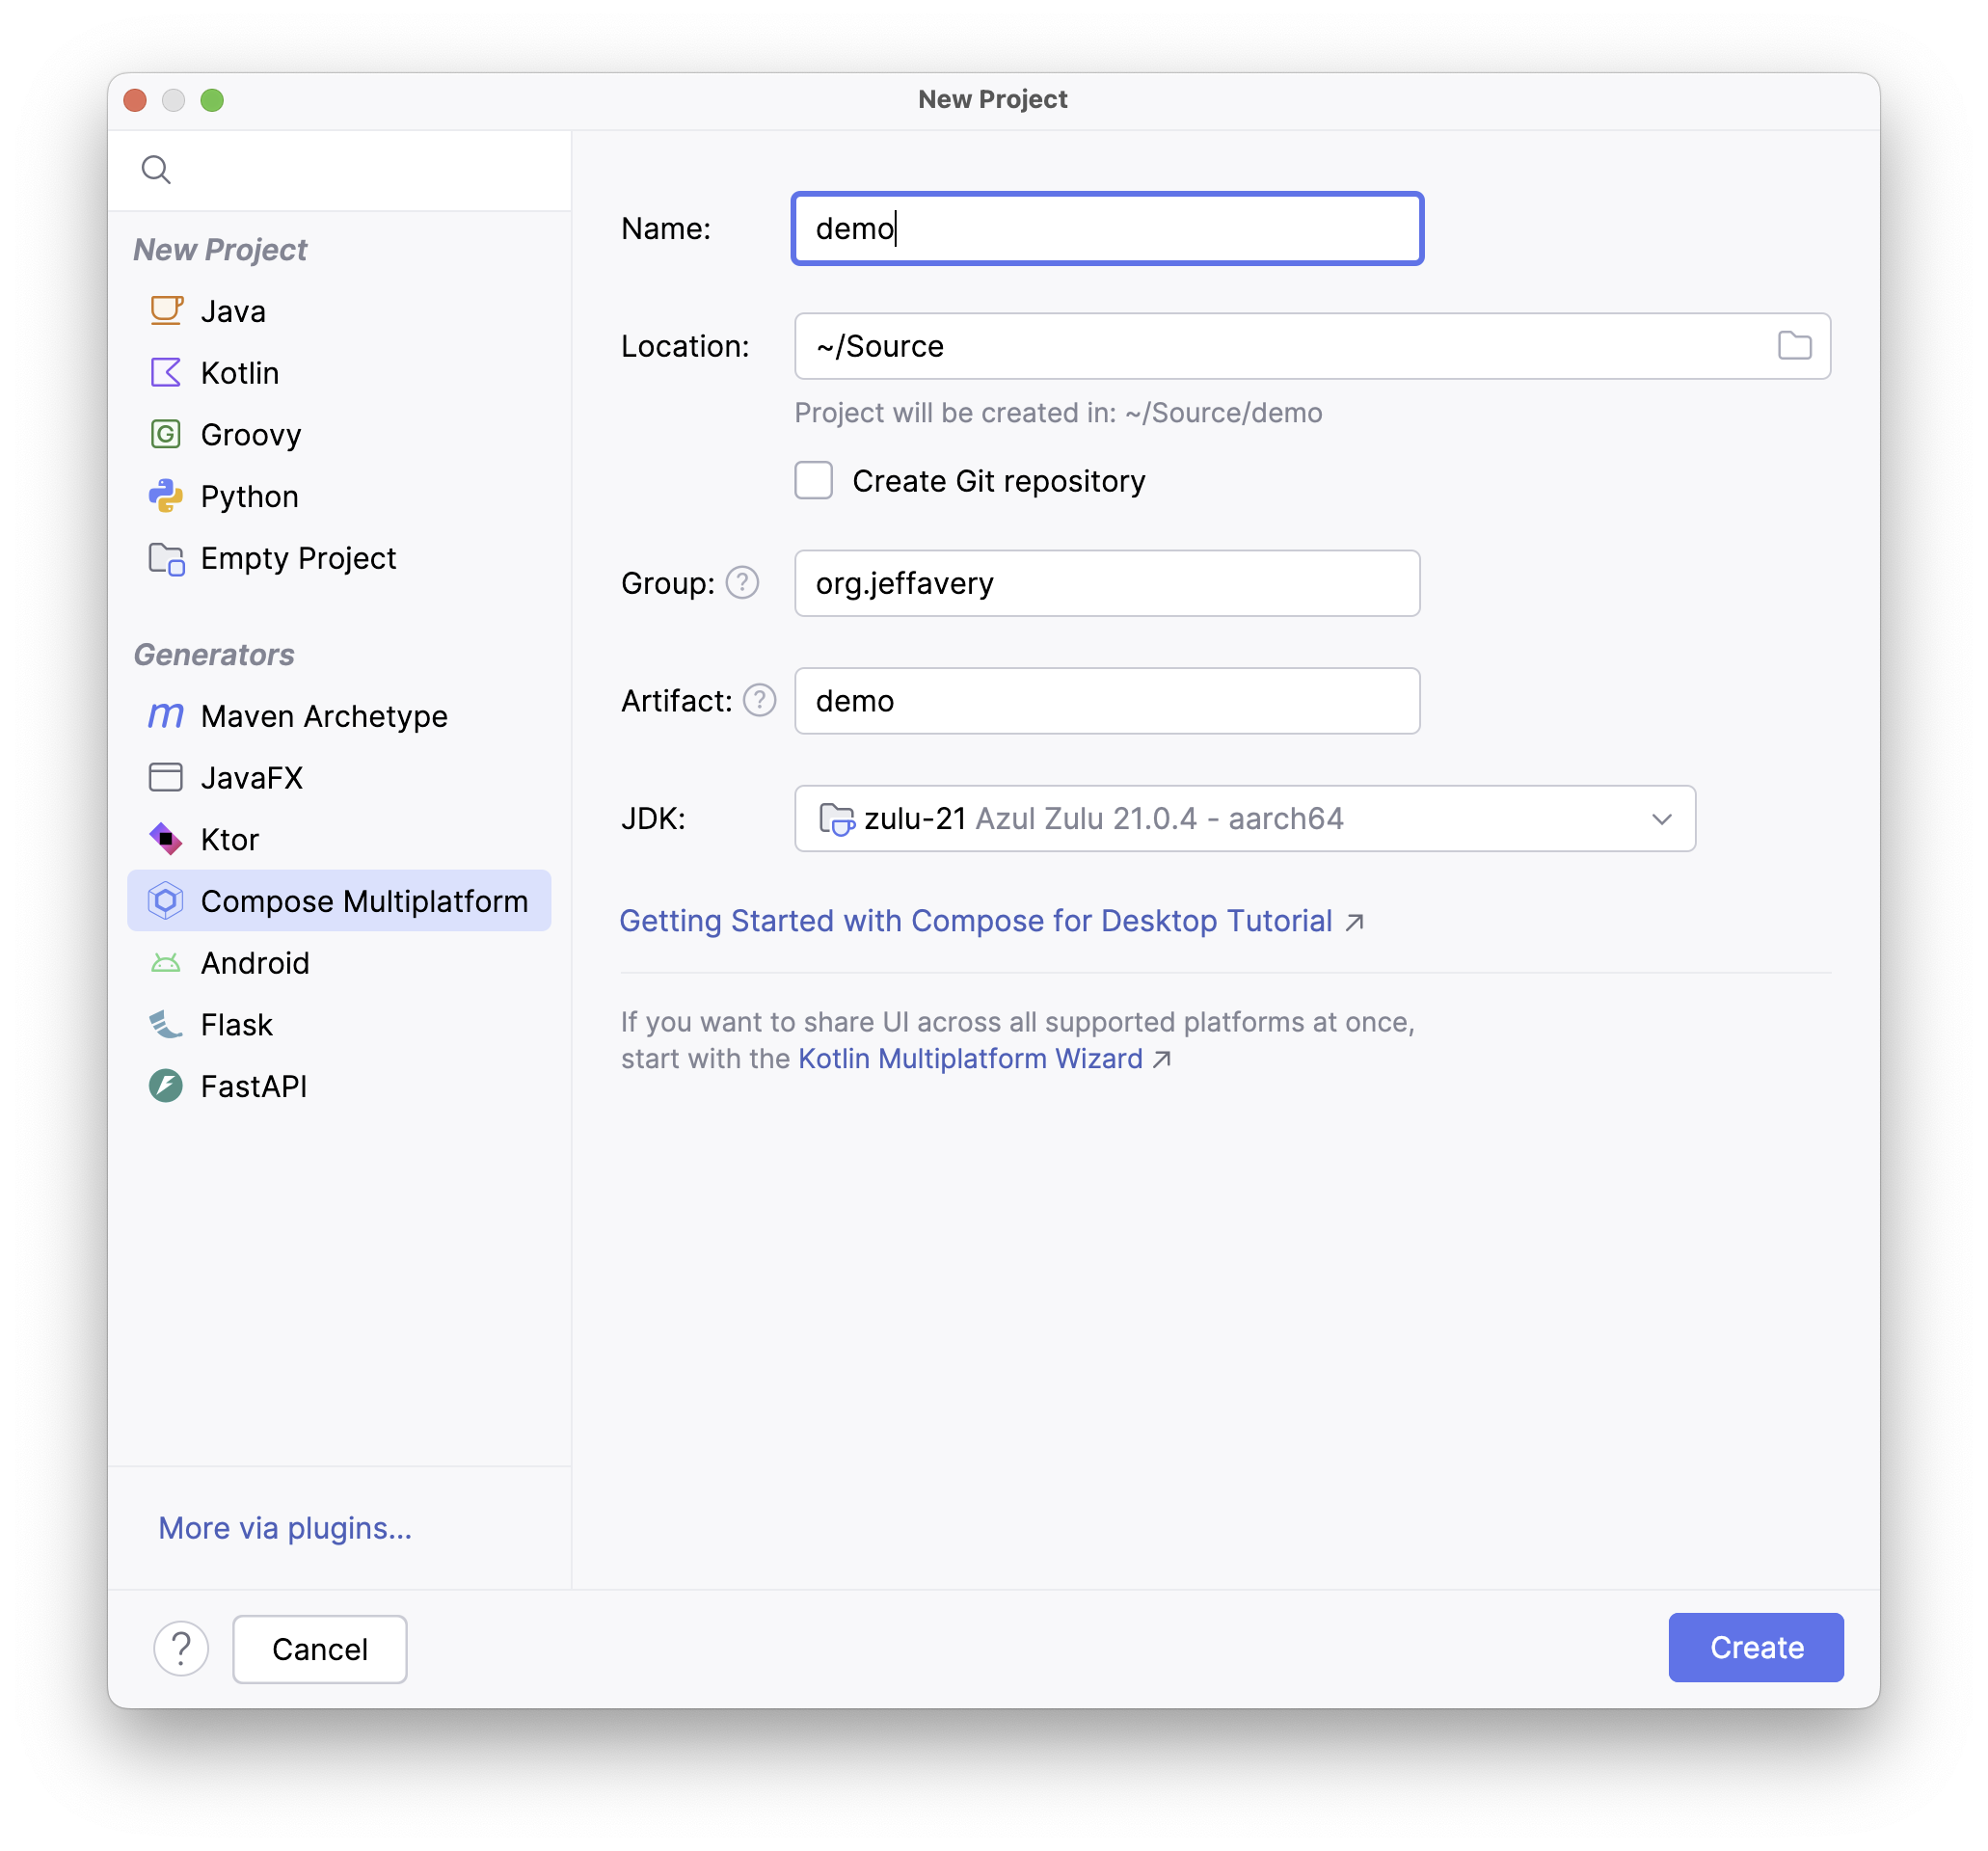
Add Compose to a project
If you already have a working project, you can add the Compose libraries to it. Extending your build.gradle.kts file to include the appropriate plugin and dependencies.
import org.jetbrains.compose.desktop.application.dsl.TargetFormat
plugins {
kotlin("jvm")
id("org.jetbrains.compose")
}
group = "com.example"
version = "1.0-SNAPSHOT"
repositories {
mavenCentral()
maven("https://maven.pkg.jetbrains.space/public/p/compose/dev")
google()
}
dependencies {
// Note, if you develop a library, you should use compose.desktop.common.
// compose.desktop.currentOs should be used in launcher-sourceSet
// (in a separate module for demo project and in testMain).
// With compose.desktop.common you will also lose @Preview functionality
implementation(compose.desktop.currentOs)
}
compose.desktop {
application {
mainClass = "MainKt"
nativeDistributions {
targetFormats(TargetFormat.Dmg, TargetFormat.Msi, TargetFormat.Deb)
packageName = "scratch-pad"
packageVersion = "1.0.0"
}
}
}
Compile and package
You can compile your project using gradlew or the Gradle menu (View > Tool Windows > Gradle).
| Command | What does it do? |
|---|---|
Tasks > build > clean | Removes temp files (deletes the /build directory) |
Tasks > build > build | Compiles your application |
Tasks > compose desktop > run | Executes your application (builds it first if necessary) |
Tasks > compose desktop > package | Create an installer for your platform! |
Architecture
Desktop applications have a main method (just like console applications).
Create a main method
Your entry point for a desktop application is the main method. For a Compose application, you need to:
- use a
mainmethod as its entry point, - declare a top-level
applicationscope, - declare one or more windows within that application scope.
Here is a simple application to display a window (in fact, it’s the simplest possible way to do this).
import androidx.compose.ui.window.singleWindowApplication
fun main() = singleWindowApplication(title = "Window Title", exitProcessOnExit = true) {
}
To make examples easier to read, we won’t include the import statements. If you copy-paste any samples into IntelliJ, you will need to add the imports back so that it will compile. To do this, use the Show Context Actions menu (ALT-ENTER) over any offending code:
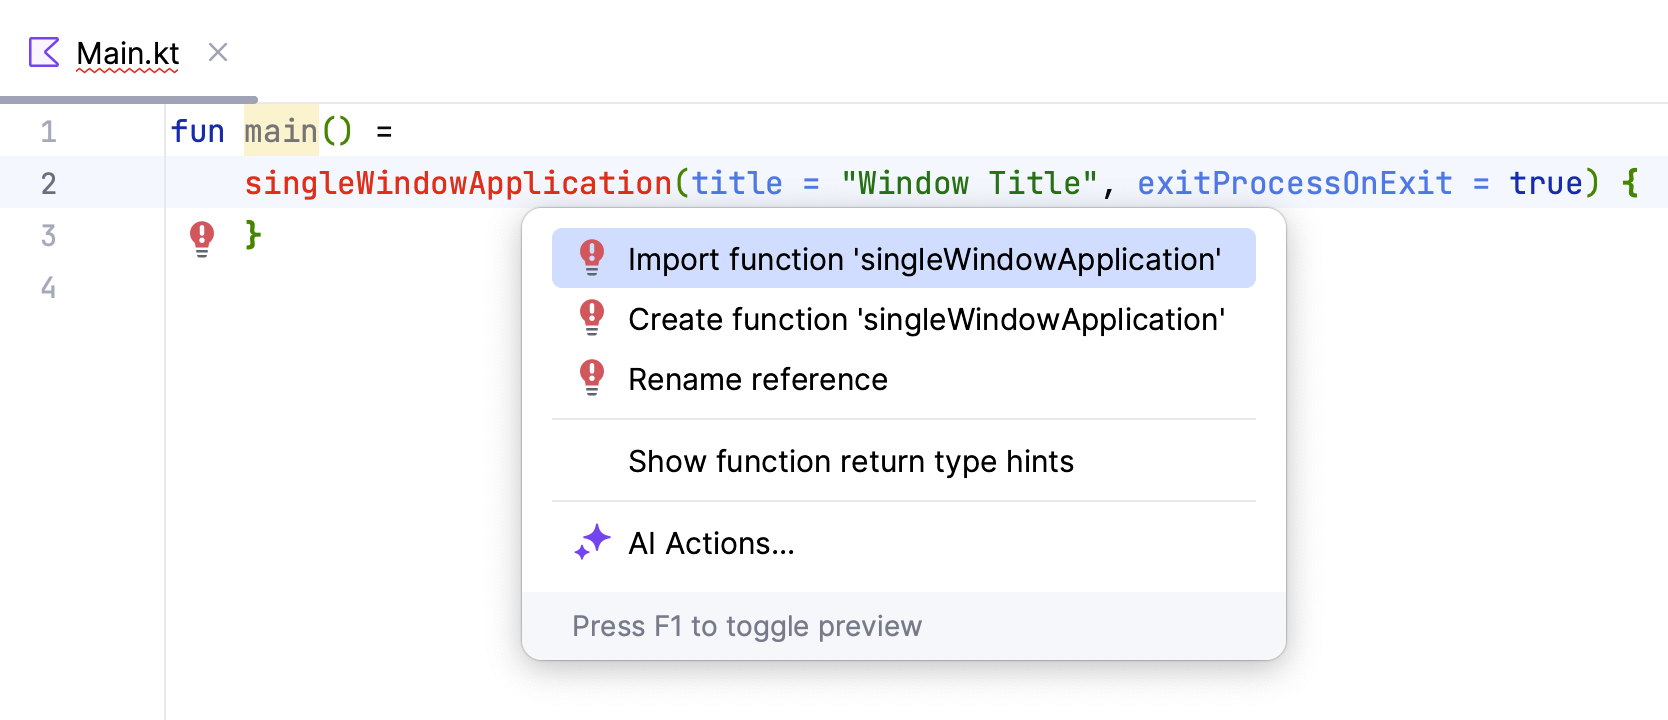
Window management
The example above limits us to a single windows, which isn’t always desireable. Graphical desktop applications also need to suuport the following:
- Multiple application windows. Most applications will often present their interface within a single, interactive window, but it can sometimes be useful to have multiple simultaneous windows controlled by a single application2.
- Full-screen and windowed interaction: although graphical applications tend to run windowed, they should usable full-screen as well. The window contents should scale or reposition themselves as the window size changes.
- Window decorations: Each window should have a titlebar, minimize/maximize/restore buttons (that work as expected).
A more flexible solution is to use an expanded syntax which allows us to create and manage multiple windows. Compose will create them with min/max/restore buttons based on the defaults for the existing operating system.
import androidx.compose.ui.window.Window
import androidx.compose.ui.window.application
fun main() =
application {
Window(title = "Window Title", onCloseRequest = ::exitApplication) { }
}
application and Window are top-level composables.
Window accepts a number of parameters, including title and onCloseRequest, which is an event handler that fires when the window closes (we’re calling the built-in exitApplication method to quit when the window closes).
Features
Set window position and size
You can set the initial position and size of the window using the WindowState parameter. Here’s an example of specifying a number of window characteristics.
fun main() = application {
Window(
title = "Simple Window",
onCloseRequest = ::exitApplication,
state = WindowState(
placement = WindowPlacement.Floating,
position = WindowPosition.PlatformDefault,
width = 300.dp,
height = 400.dp)
) {
Application()
}
}
@Composable
@Preview
fun Application() {
MaterialTheme {
// UI here
}
}
Create multiple windows
Using this expanded syntax, you can add multiple windows using the Window() composable!
fun main() {
application{
Window(
title = "Window 1",
state = WindowState(
position = WindowPosition(0.dp, 0.dp),
size = DpSize(300.dp, 200.dp)),
onCloseRequest = ::exitApplication
)
{
Text("This is the first window")
}
Window(
title = "Window 2",
state = WindowState(
position = WindowPosition(50.dp, 50.dp),
size = DpSize(300.dp, 200.dp)),
onCloseRequest = ::exitApplication
)
{
Text("This is the second window")
}
}
}

Navigation between screens
When working with Android, you typically present the user with one screen at a time. If you have a different screen to present, you would navigate to that screen i.e., replace the current contents with a completely new screen. Android has navigation classes to help you manage that transition.
However, desktop applications are structured differently. In a desktop environment, if you want to present more information, you typically just open another window. Most of the time, that is recommended.
However, you may want to think about using screen navigation on desktop for feature parity, or to reuse user interface code across platforms e.g., building both Android and desktop from the same codebase.
Although the Android navigation classes have been ported to Compose Multiplatform, they’re currently listed as experimental. If you really want to support this on desktop, I’d suggest looking at another library like Voyager. It’s a Kotlin multiplatform library, meaning that you could use the same code on Android, Desktop, iOS, Web…. anywhere that Kotlin executes.
Minimize to the system tray
fun main() = application {
var isVisible by remember { mutableStateOf(true) }
Window(
onCloseRequest = { isVisible = false },
state = WindowState(size = DpSize(250.dp, 150.dp)),
visible = isVisible,
title = "Counter",
) {
var counter by remember { mutableStateOf(0) }
LaunchedEffect(Unit) {
while (true) {
counter++
delay(1000)
}
}
Column(modifier = Modifier.fillMaxSize(),
verticalArrangement = Arrangement.Center,
horizontalAlignment = Alignment.CenterHorizontally)
{
Text(counter.toString())
}
}
if (!isVisible) {
Tray(
TrayIcon,
tooltip = "Counter",
onAction = { isVisible = true },
menu = {
Item("Exit", onClick = ::exitApplication)
},
)
}
}
object TrayIcon : Painter() {
override val intrinsicSize = Size(256f, 256f)
override fun DrawScope.onDraw() {
drawOval(Color(0xFFFFA500))
}
}
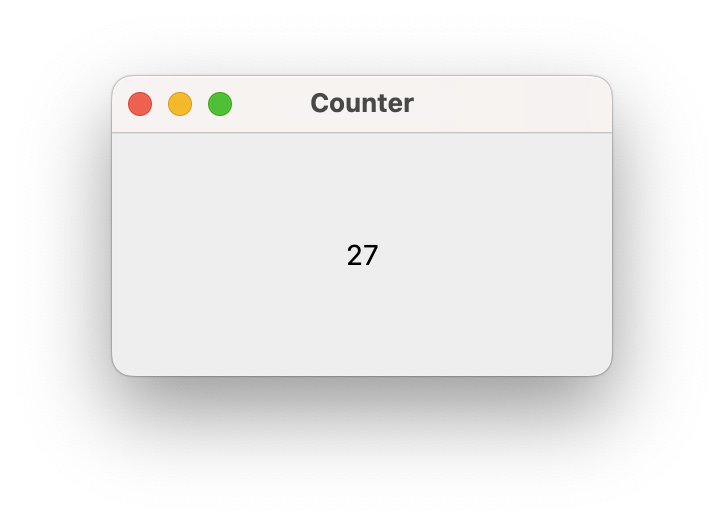
Keyboard and mouse input
We should be able to handle:
- Point-and-click interaction using a mouse.
- Keyboard input, leveraging OS support for different keyboards.
- Keyboard shortcuts, appropriate to the operating system 3. This is often combined with menubars and menu items. For example,
- Ctrl-N for File-New, Ctrl-O for File-Open, Ctrl-Q for Quit.
- Ctrl-X for Cut, Ctrl-C for Copy, Ctrl-V for Paste.
- F1 for Help.
Handle keyboard Input
fun main() = application {
Window(
title = "Key Events",
state = WindowState(width = 500.dp, height = 100.dp),
onCloseRequest = ::exitApplication,
onKeyEvent = {
if (it.type == KeyEventType.KeyUp) {
println("Window handler: " + it.key.toString())
}
false
}
) {
MaterialTheme {
Frame()
}
}
}
@Composable
fun Frame() {
Row(modifier = Modifier.fillMaxSize(),
horizontalArrangement = Arrangement.SpaceEvenly,
verticalAlignment = Alignment.CenterVertically
) {
KeyboardButton("1")
KeyboardButton("2")
KeyboardButton("3")
}
}
@Composable
fun KeyboardButton(caption: String) {
Button(
onClick = { println("Button $caption click") },
modifier = Modifier.onKeyEvent {
if (it.type == KeyEventType.KeyUp) {
println("Button $caption handler: " + it.key.toString());
}
false
}
) {
Text("Button $caption")
}
}
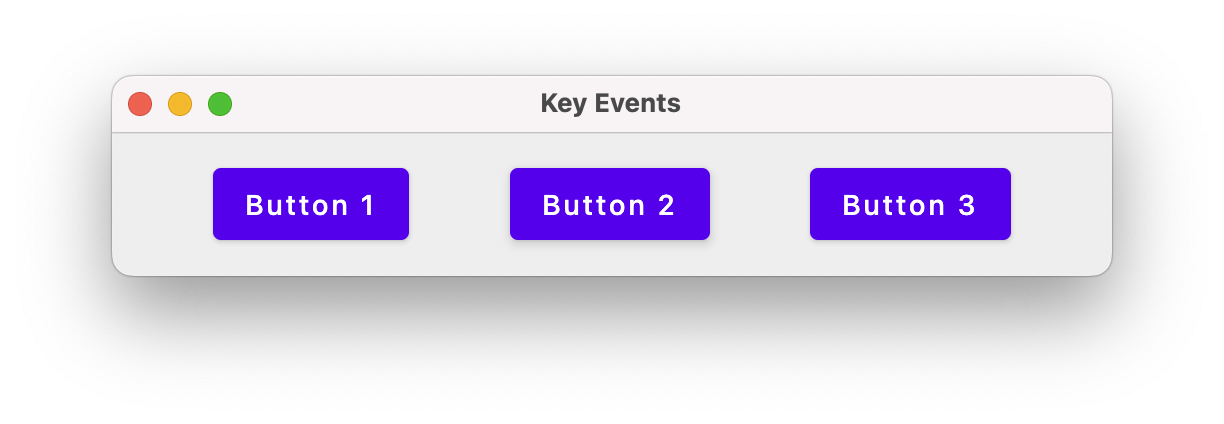
Handle mouse input
Composables have handlers for onClick (single-click), onDoubleClick and onLongClick (press). You can assign functions to each of these handlers, which are executed when the input is detected.
fun main() = singleWindowApplication (
title = "Mouse Events",
resizable = false,
state = WindowState(
position = WindowPosition(0.dp, 0.dp),
size = DpSize(500.dp, 250.dp)
)
)
{
var count by remember { mutableStateOf(0) }
Box(contentAlignment = Alignment.Center, modifier = Modifier.fillMaxWidth()) {
var text by remember { mutableStateOf("Click magenta box!") }
Column(
modifier = Modifier.fillMaxHeight(),
verticalArrangement = Arrangement.SpaceEvenly,
horizontalAlignment = Alignment.CenterHorizontally
) {
@OptIn(ExperimentalFoundationApi::class)
Box(
modifier = Modifier
.background(Color.Magenta)
.fillMaxWidth(0.9f)
.fillMaxHeight(0.2f)
.combinedClickable(
onClick = {
text = "Click! ${count++}"
},
onDoubleClick = {
text = "Double click! ${count++}"
},
onLongClick = {
text = "Long click! ${count++}"
}
)
)
Text(text = text,
modifier = Modifier.fillMaxWidth(0.9f),
fontSize = 24.sp)
Text("You can single-click, double-click or long-press the mouse button.",
modifier = Modifier.fillMaxWidth(0.9f),
fontSize = 24.sp
)
}
}
}
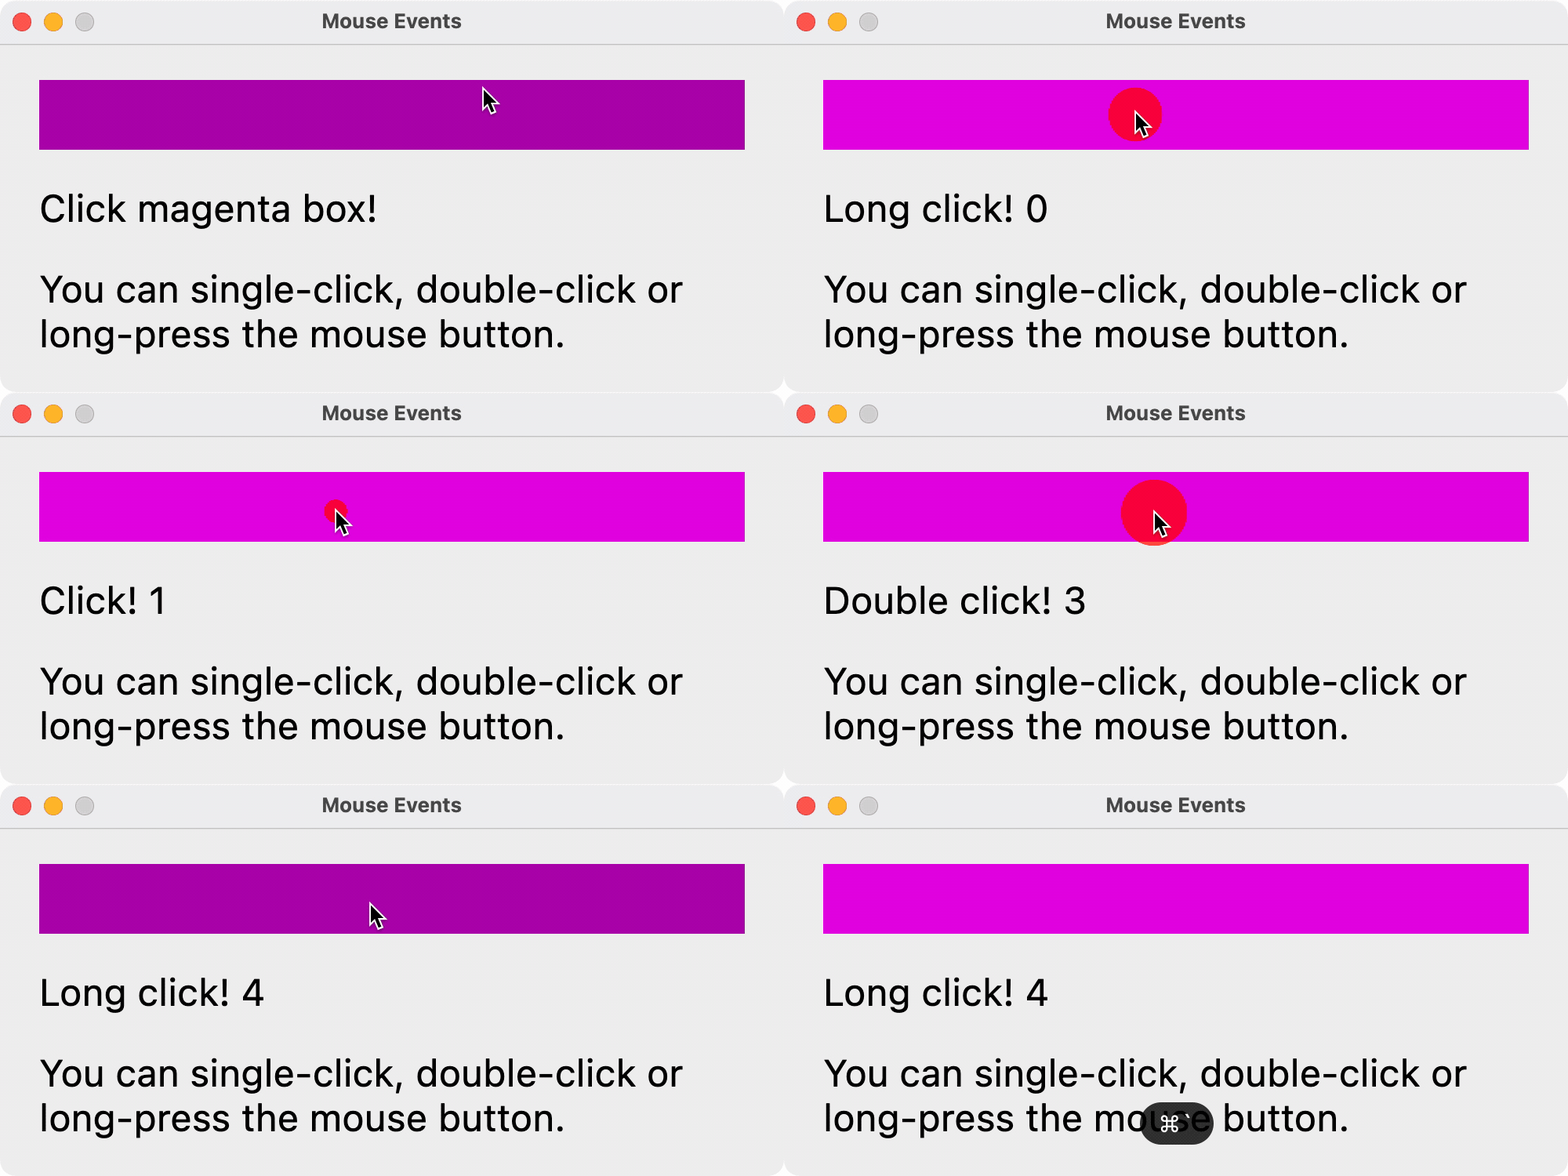
The following code demonstrates how to track mouse movement through x, y positions.
@OptIn(ExperimentalComposeUiApi::class)
fun main() = singleWindowApplication(
title = "Random window colour",
resizable = false
) {
var color by remember { mutableStateOf(Color(0, 0, 0)) }
Box(
modifier = Modifier
.wrapContentSize(Alignment.Center)
.fillMaxSize()
.background(color = color)
.onPointerEvent(PointerEventType.Move) {
val position = it.changes.first().position
color = Color(position.x.toInt() % 256, position.y.toInt() % 256, 0)
}
)
}
Creating menus
fun main() = application {
Window(onCloseRequest = ::exitApplication) {
App(this, this@application)
}
}
@OptIn(ExperimentalComposeUiApi::class)
@Composable
fun App(
windowScope: FrameWindowScope,
applicationScope: ApplicationScope
) {
windowScope.MenuBar {
Menu("File", mnemonic = 'F') {
val nextWindowState = rememberWindowState()
Item(
"Exit",
onClick = { applicationScope.exitApplication() },
shortcut = KeyShortcut(
Key.X, ctrl = false
)
)
}
}
}

Setting the icon
To change the application icon, you need to include an icon image file in your project resources, and then tell to Compose Desktop to use it when building installer images. For example:
compose.desktop {
application {
mainClass = "MainKt"
nativeDistributions {
targetFormats(TargetFormat.Dmg, TargetFormat.Msi, TargetFormat.Deb)
packageName = "ApplicationName"
packageVersion = "1.0.0"
macOS {
iconFile.set(project.file("src/main/resources/logo.icns"))
}
windows {
iconFile.set(project.file("src/main/resources/logo.ico"))
}
linux {
iconFile.set(project.file("src/main/resources/logo.png"))
}
}
}
}
Drawing on a canvas
We can draw primitive graphics on a canvas.
fun main() = application {
Window(
onCloseRequest = ::exitApplication,
state = WindowState(width = 250.dp, height = 300.dp),
title = "Drawing Canvas",
resizable = true
) {
Surface(color = Color.White) {
Canvas(modifier = Modifier.fillMaxSize()) {
drawCircle(
color = Color.Yellow,
radius = 125.0f,
center = Offset(250.0f, 250.0f)
)
drawRect(
color = Color.Blue,
style = Fill,
size = Size(150.0f, 150.0f),
topLeft = Offset(100.0f, 100.0f)
)
}
}
}
}
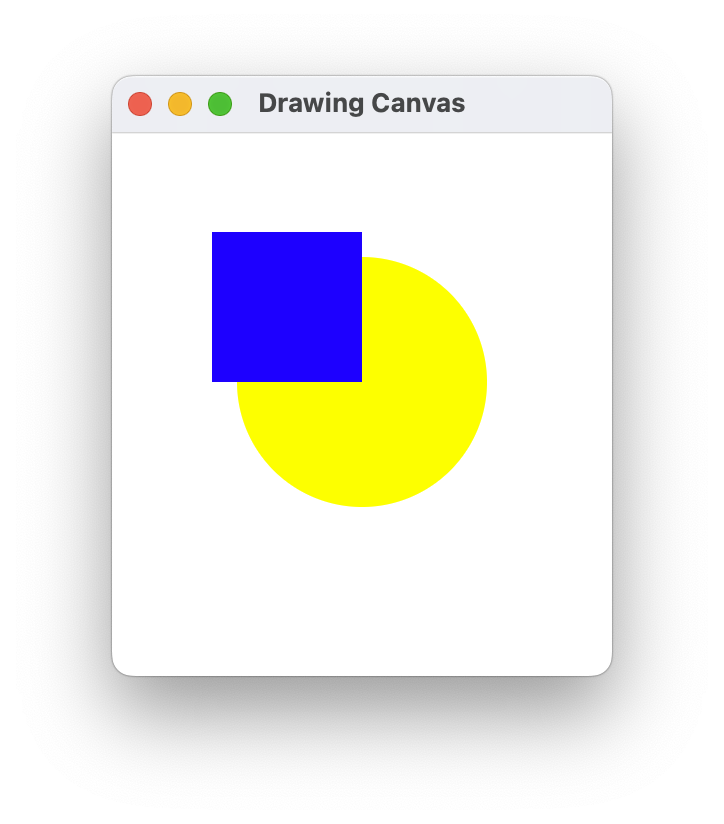
Show a dialog
We can show standard OS dialogs using the Dialog composable.
fun main() = application {
var isOpen by remember { mutableStateOf(true) }
var isAskingToClose by remember { mutableStateOf(false) }
if (isOpen) {
Window(
onCloseRequest = { isAskingToClose = true }
) {
if (isAskingToClose) {
Dialog(
onCloseRequest = { isAskingToClose = false },
title = "Close the document without saving?",
) {
Button(
onClick = { isOpen = false }
) {
Text("Yes")
}
}
}
}
}
}
Packaging & Installers
Distributing a GUI application is complex; you need to generate a platform specific executable, and install dependencies in specific locations. For that reason, you need a more complex installer than what we might use for a command-line application.
!!! info We use the term installer to refer to software that installs other software. For example, if you purchase and download a Windows application, it will typically be delivered as an MSI file; you execute that, and it will install the actual application in the appropriate location (after prompting you for installation location, showing license terms etc). !!!
Luckily, Compose Multiplatform includes tasks for generating platform-specific installers.
In Gradle:
Tasks > compose desktop > packageDistributionForCurrentOS
This task will produce an installer for the platform where you are executing it e.g., a PKG or DMG file on macOS, or an MSI installer on Windows.
You can only generate installers for your current platform i.e., you need a Windows system to generate a Windows MSI installer.
-
Notice that Windows, macOS, Linux all share a very common interaction paradigm, and a common look-and-feel! You can move between operating systems and be quite comfortable because of this. ↩
-
Photoshop, for instance, famously has multiple windows tiled over the desktop. It’s also a very, very complex program, so it needs to split up functionality like this. ↩
-
Ctrl on Windows and Linux, CMD on Mac. ↩
Mobile development
Design
Smartphones and tablets are considered to be mobile devices running a graphical user interface. There are some caveats when comparing desktop and mobile applications:
- Mobile applications are smaller, obviously, since they tend to be designed for hand-held devices (and not large computer screens).
- Mobile applications use multi-touch as a primary input mechanism. These applications might support keyboard input, but it’s secondary to touch.
- Applications are typically run full-screen, and most mobile operating systems do not support windowed applications.
Mobile devices often have similar graphical and processing capabilities and low-end notebook or desktop computers; the limits on these devices are often related to the challenge of interacting with a rich UI on a small screen.
You should expect most interaction to consist of multi-touch gestures or on-screen actions that you perform. The following are common gestures:
- Press: select the target under the point of contact and activate it (i.e. analogous to single-click with a mouse)
- Long-press: equivilent to right-clicking on an element.
- Swipe: move or translate content.
- Tap-swipe: move a chunk e.g. page up or page down.
- Pinch/zoom: change the scale of the content.
For text entry and manipulation, you should support a soft keyboard (i.e. on-screen). Do not assume that the user has a physical keyboard connected. When possible show a keyboard optimized for region and data that you’re collecting e.g. a numeric keyboard for entering phone numbers.
Do not assume mouse or stylus, except under very specific circumstances where you know they will exist. e.g. building a drawing application optimized for a stylus.
Challenges that are unique to mobile devices:
- Given the screen size issues, menus are a bad idea. Widgets should be considerably larger than they would be on desktop to support touch interaction.
- Keyboard support is limited. Mobile devices tend to rely on “soft” on-screen keyboards. On-screen keyboards lack tactile feedback, are slower and less accurate than physical keyboards.
- The configuration of a mobile device can change dynamically e.g. rotating the device from vertical to horizontal generally causes the screen to “rotate” to match the new configuration.
Project Setup
Android projects are complex; much of the framework is imported as libraries. With Android development, it’s highly recommended that you use the New Project wizard to create your starting project.
Create a new project
We’ll assume that you have Android Studio installed. See Toolchain installation for setup details.
In Android Studio, select File > New > New Project. This will launch the New Project Wizard. Choose the Empty Activity project, and keep default settings. This will generate a Hello World style application.
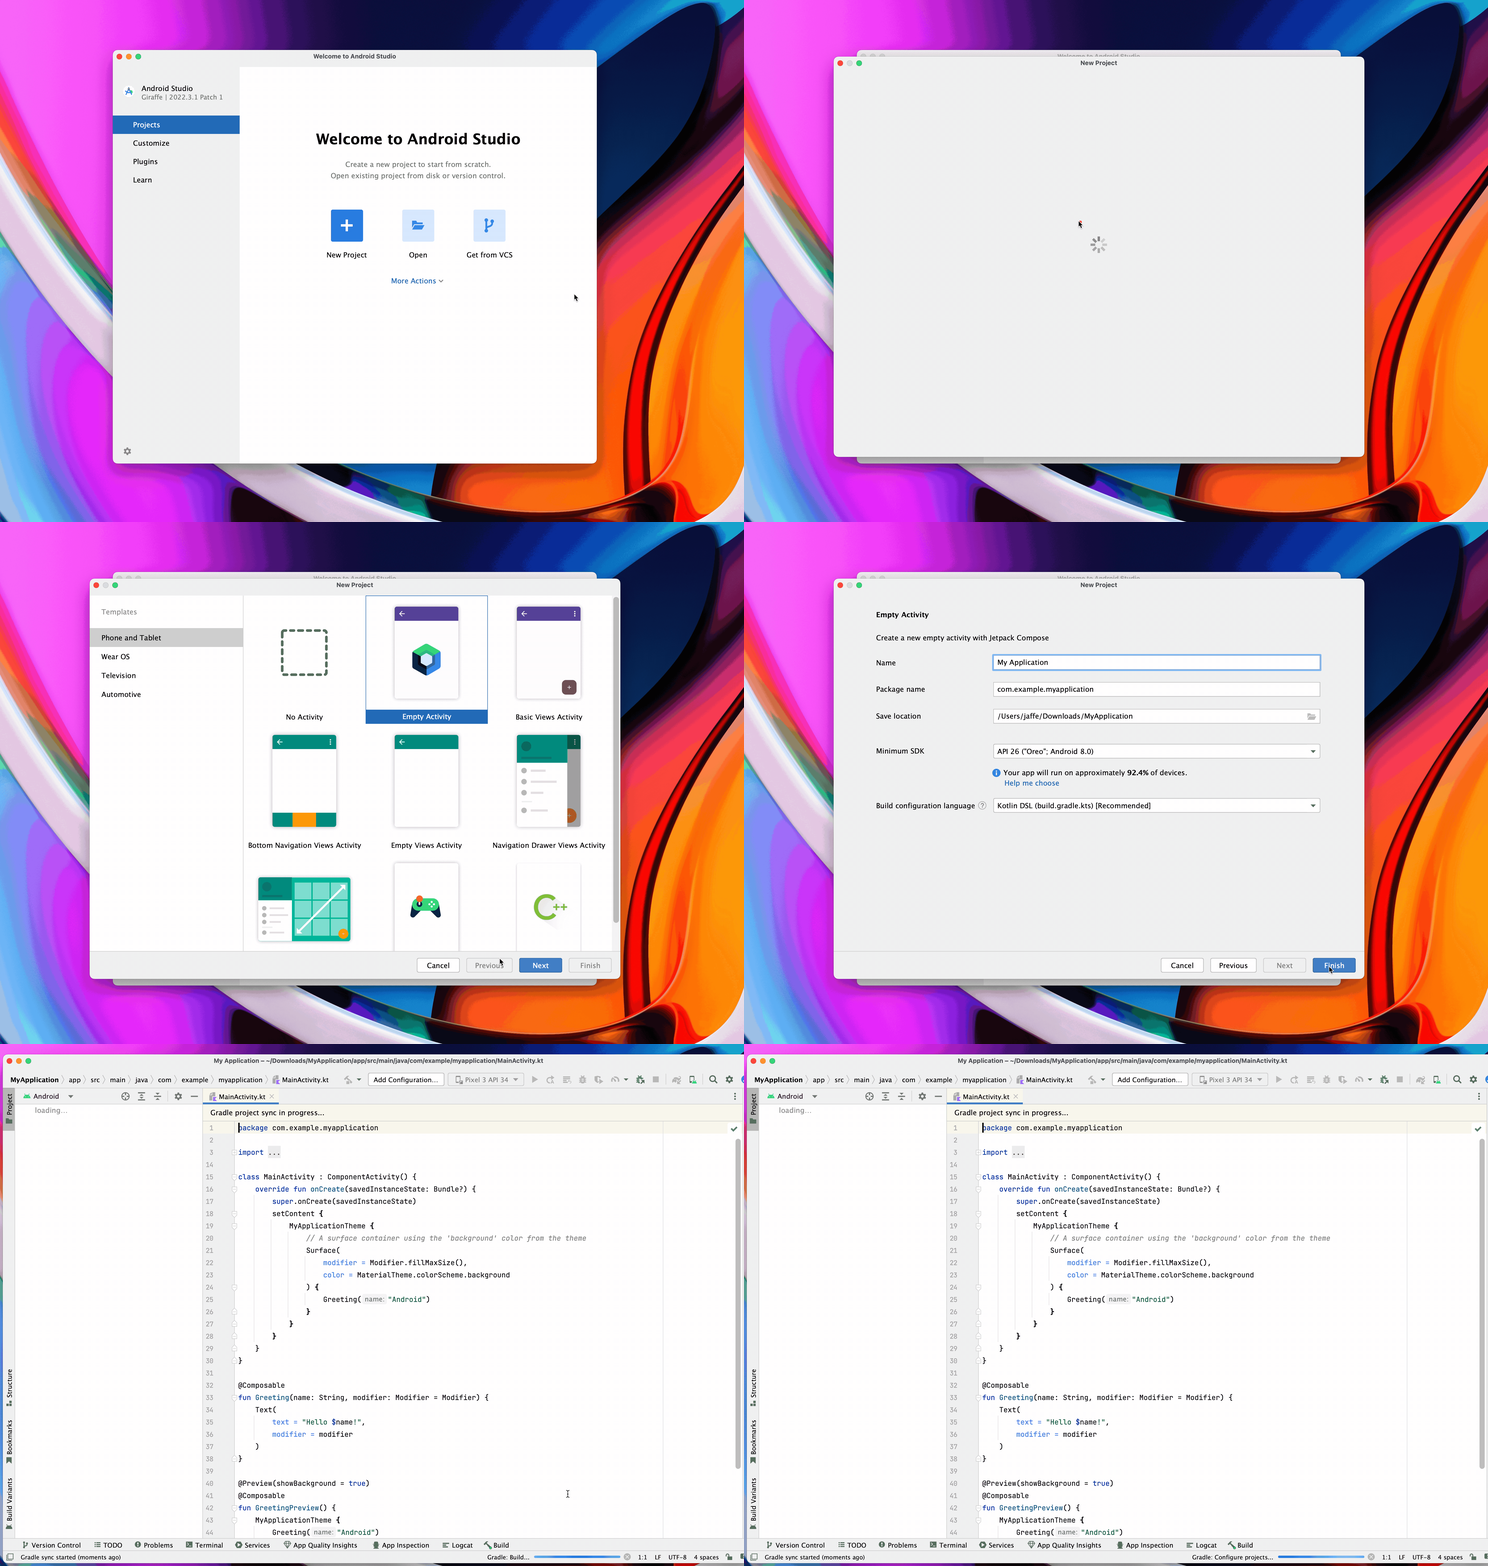
After the project finishes loading, continue to the next step.
Install a virtual device
With mobile development, it’s quite common to use virtual devices for testing instead of needing one or more physical phones.
You can setup a virtual device in the IDE under: Tools > Android > Device Manager.
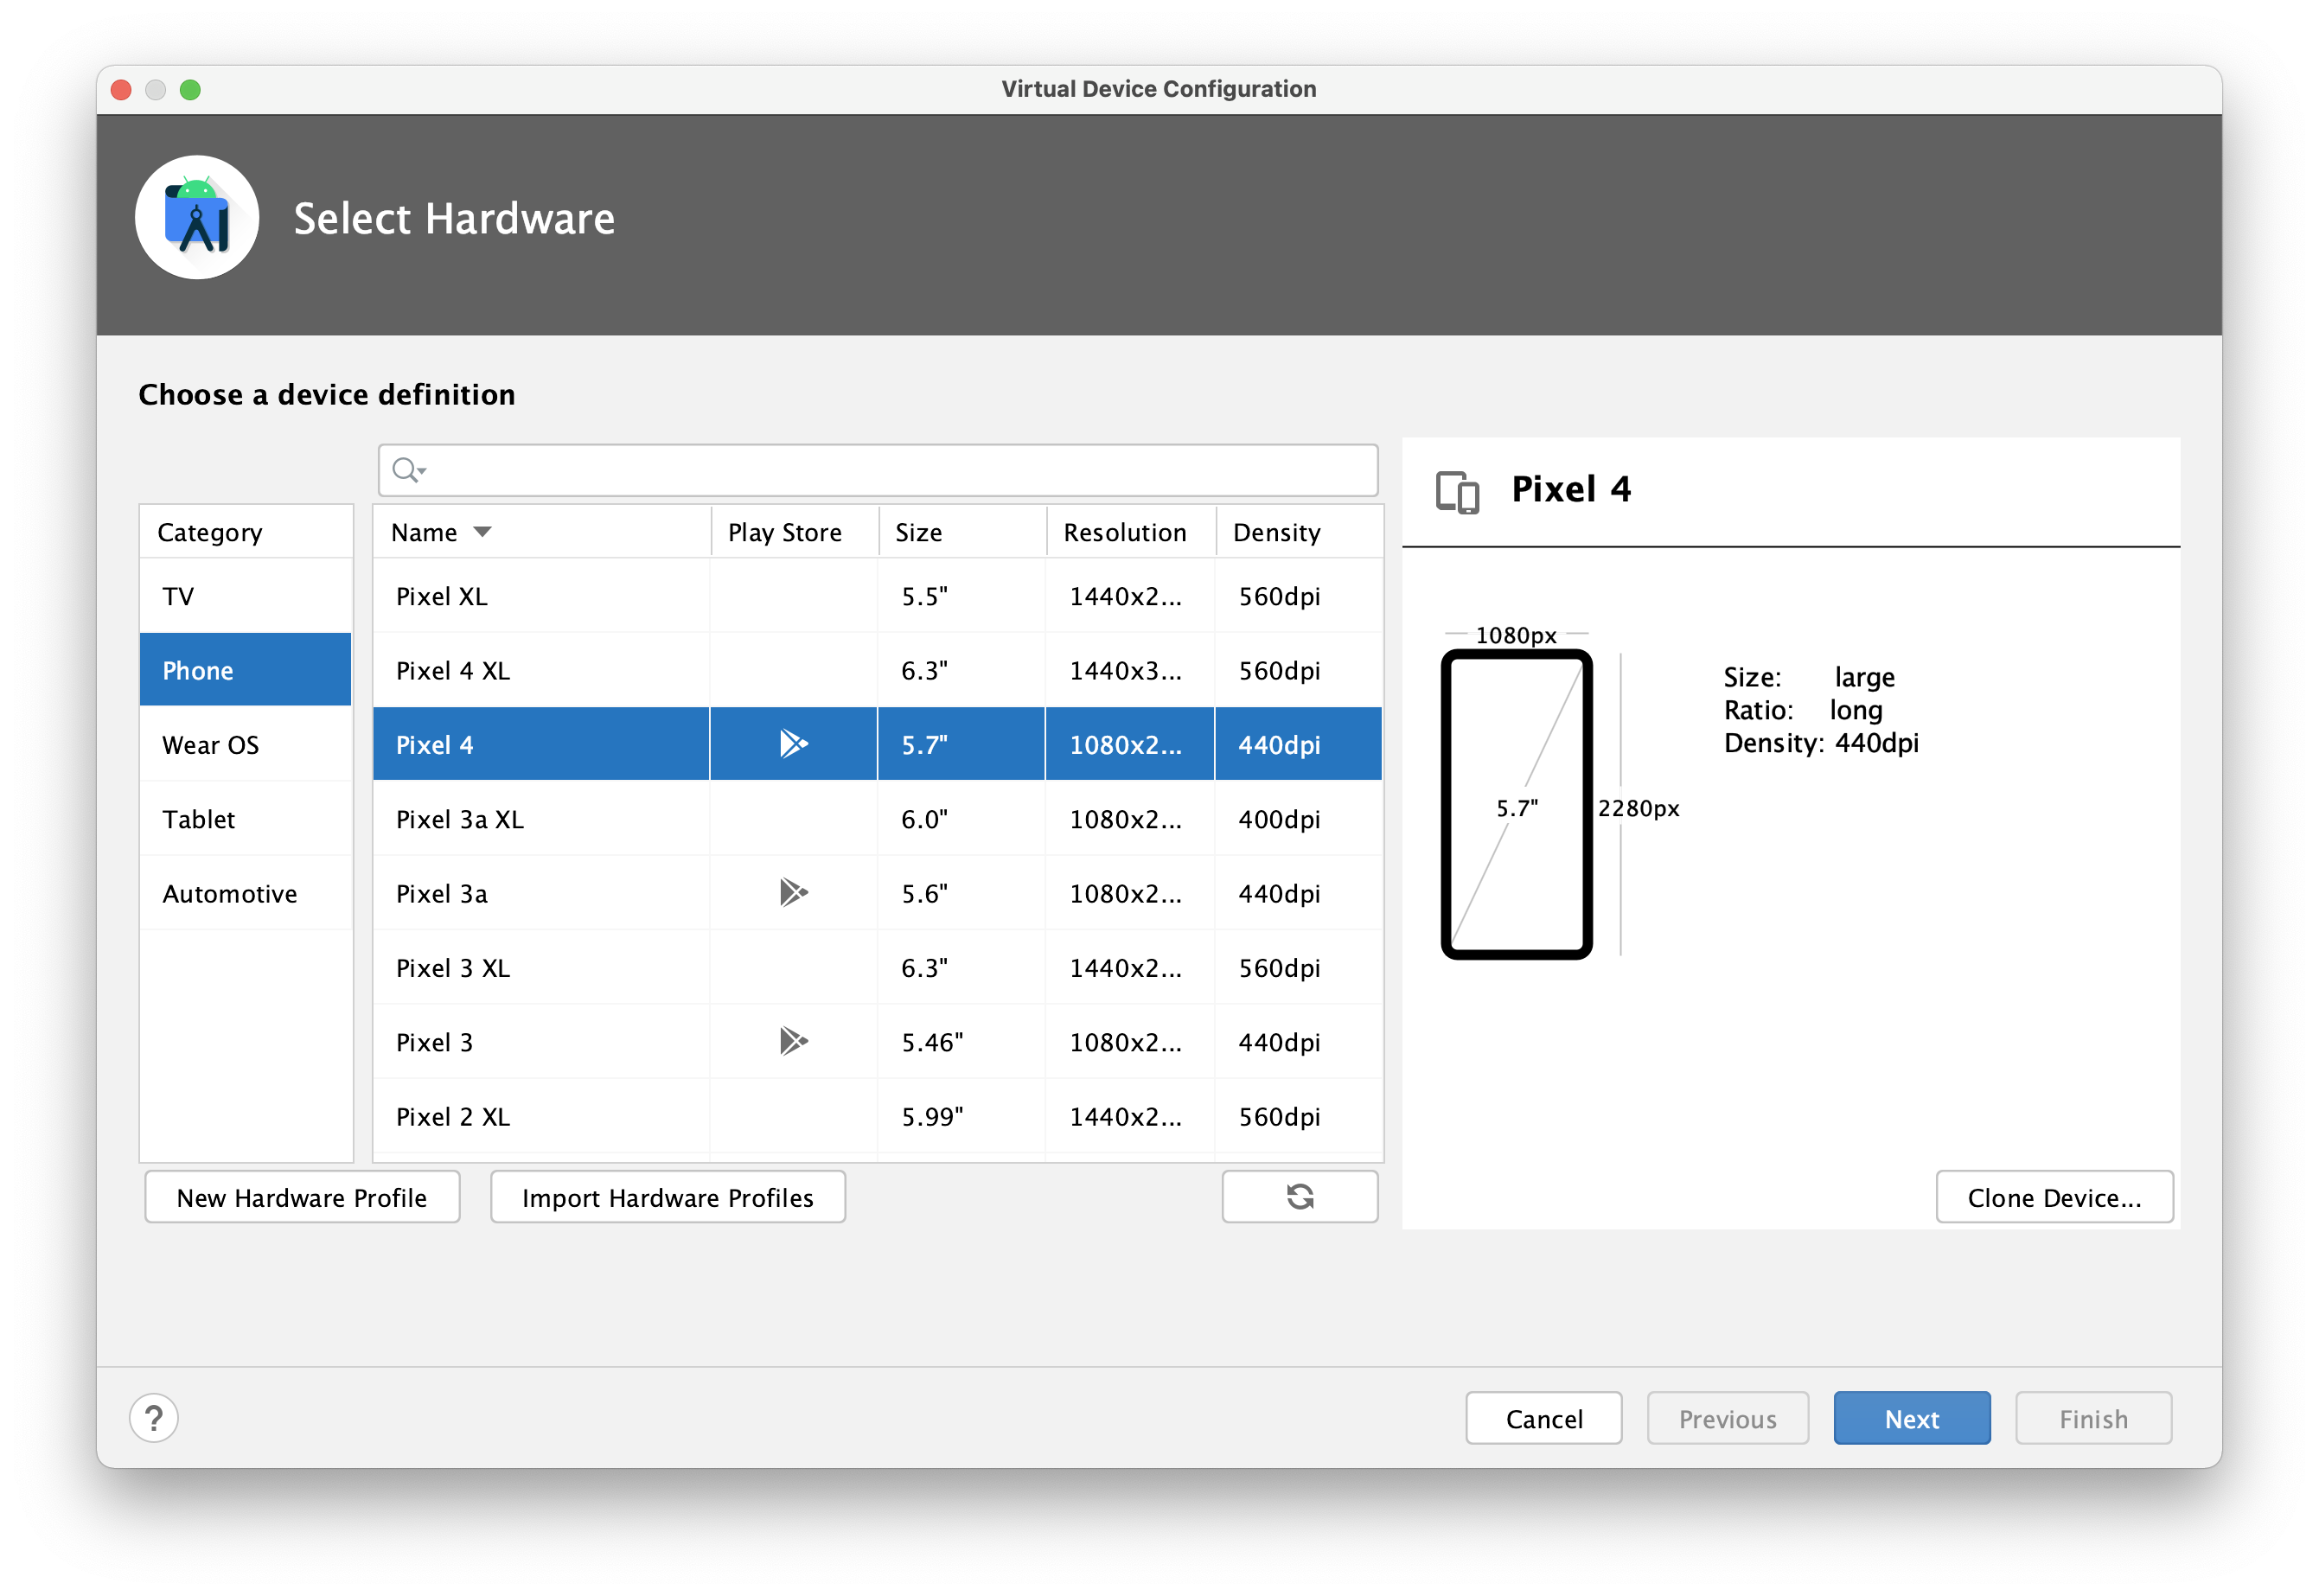
Choose a standard device1 and click Next through the dialog options, selecting defaults. Make sure to pick an image that your hardware supports (i.e. x86 or arm as appropriate).
To run the device, click on the Power button and it should power up! By default, the IDE will install and run your application on this virtual device. Below, you can see an example of us running the Chrome browser on the AVD.
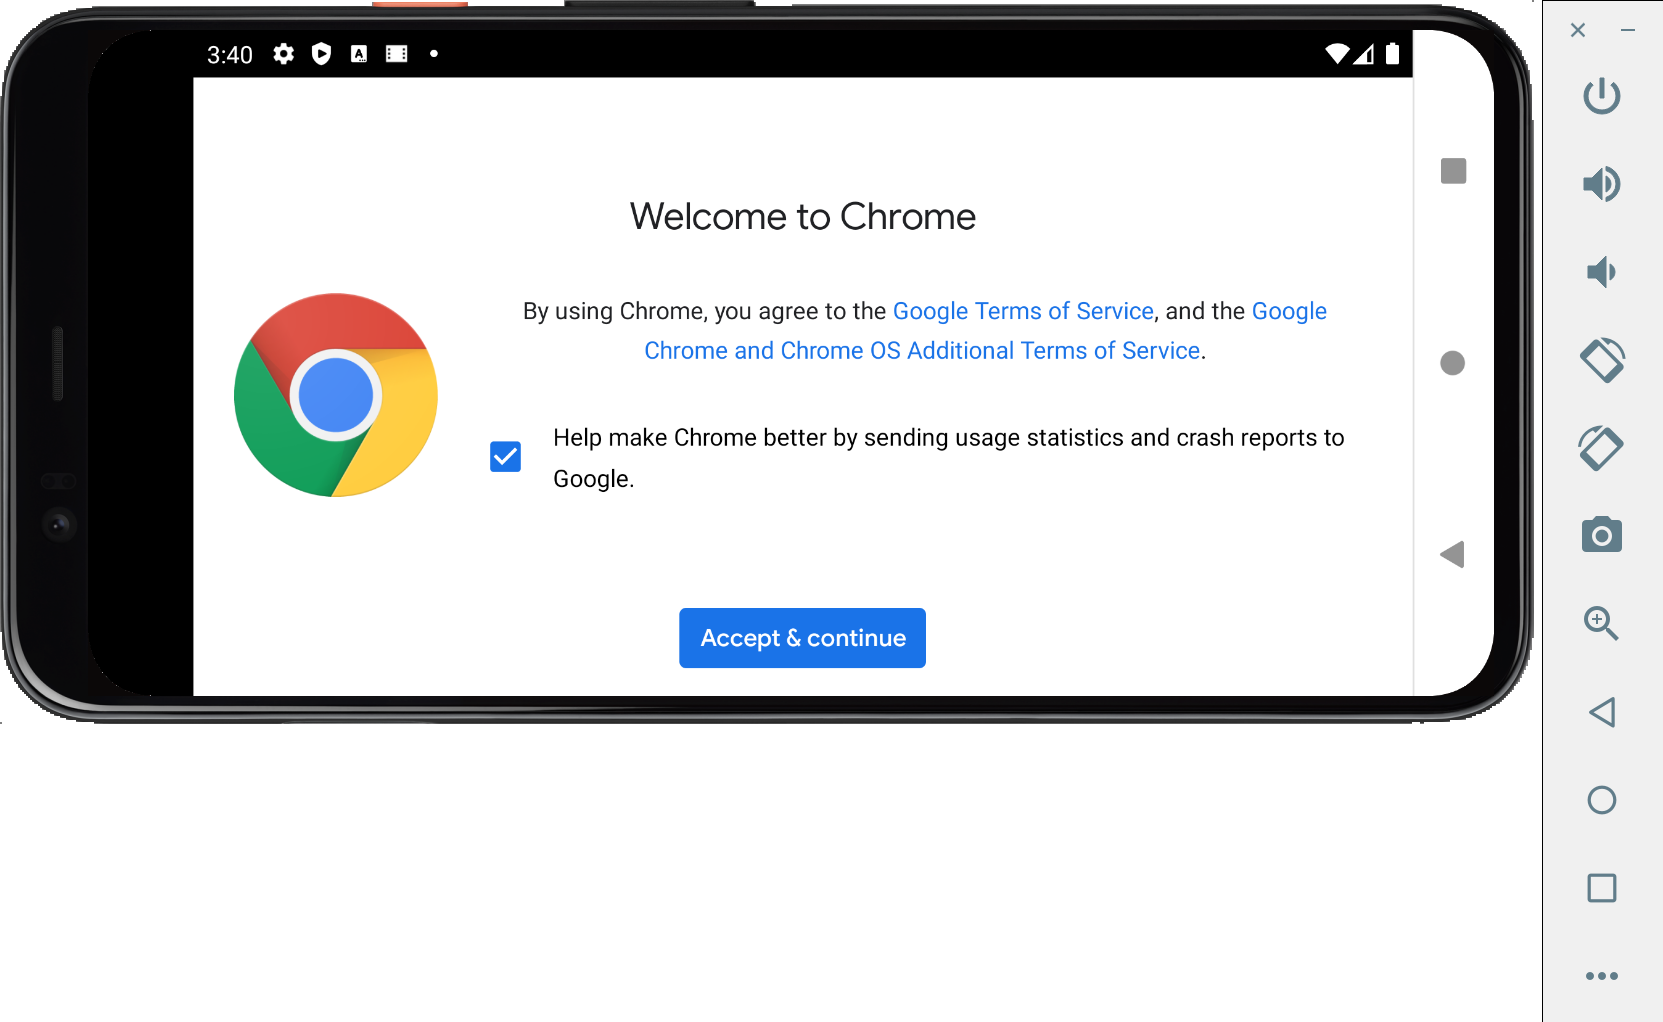
Compile and package
Android projects use Gradle, with the standard Gradle project configuration. However, for performance reasons, Android Studio doesn’t populate or update the Gradle tasks lists automatically. For that reason, the Gradle menu appears mostly empty.
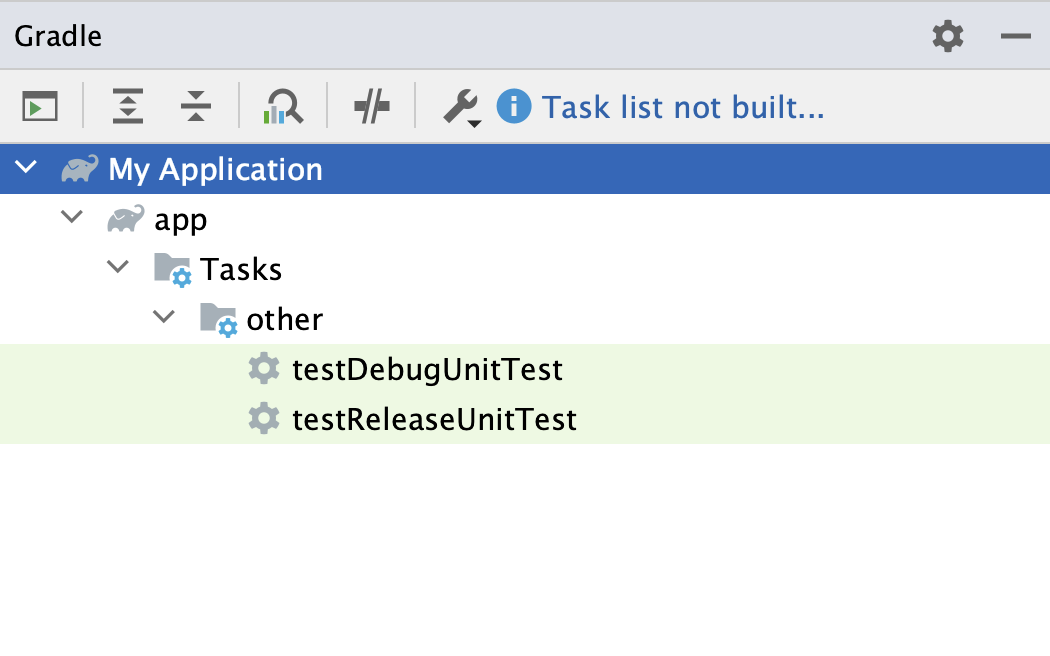
Instead of using the Gradle menu, rely instead on the Build and Run menus:
| Command | What does it do? |
|---|---|
Build > Make project | Builds your project (incrementally) |
Build > Clean project | Removes temp files (deletes the build directory) |
Build > Rebuild project | Completely rebuilds your project |
Run > Run app | Runs your application on either an attached device, or an emulator. |
tWhen you build an Android executable, it compiles your code along with any required data or resources files into an APK file, an archive file with an .apk suffix. This is installed on the device automatically by the IDE when you run the application.
Project structure
Android uses Gradle, so the project structure should look similiar to earlier projects. Expand the Project folder (CMD-1 or Ctrl-1) to see the contents of the project.
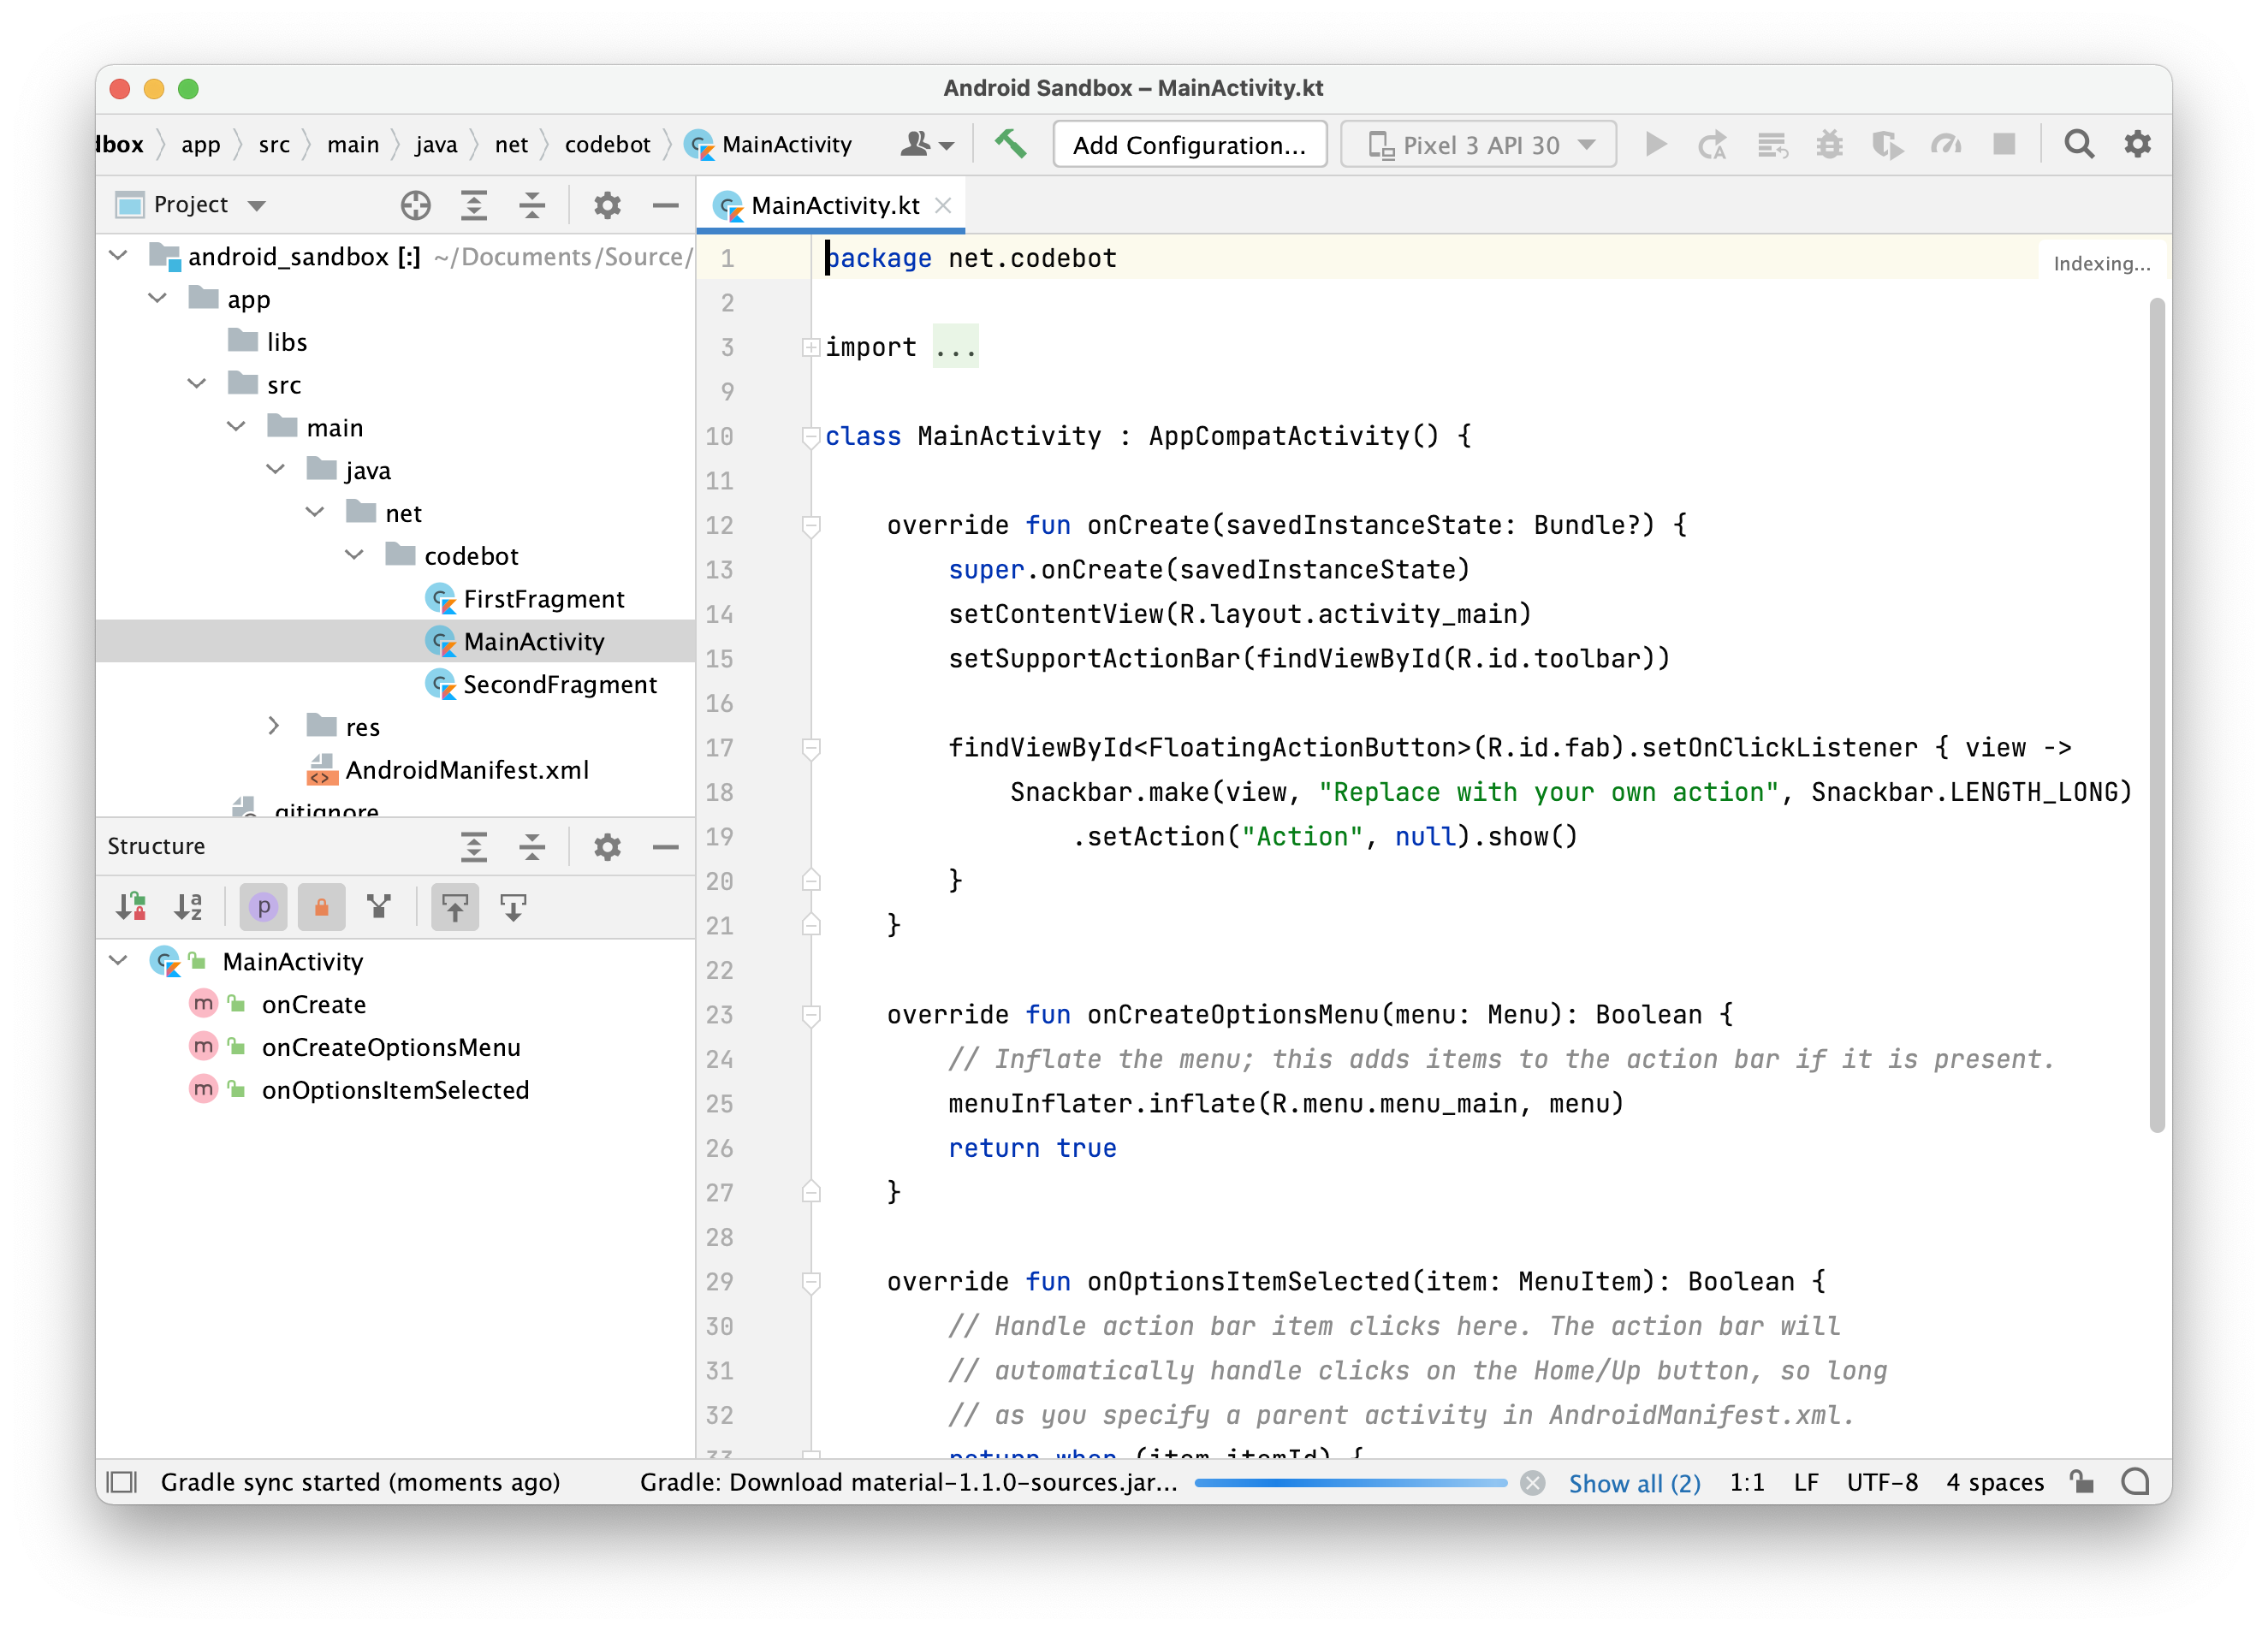
src folder (source code)
The src folder contains source code, nested into a directory structure that matches the package name of your classes. In the example above, src/main/java is the top level source code folder, and net.codebot is the package name. FirstFragment, MainActivity and SecondFragment are classes that exist in this project.
res folder (resources)
A resource in Android refers to any non-code assets that you project uses. This includes:
- icons and other image files that your application might use
- sound clips, or any other media asset
- configuration files, databases, or other file types
Android has a mechanism for deadling with resources in code that is extremely helpful. If you follow this process, Gradle can automatically bundle resources with your application when it’s packaged. This mechanism also removes the need for to interact with file system directly.
Resources are stored in a project until the /res folder. Here’s an example of a project structure with default resources.
src
└── main
├── AndroidManifest.xml
├── java
│ └── org
└── res
├── drawable
├── mipmap-anydpi
├── mipmap-hdpi
├── mipmap-mdpi
├── mipmap-xhdpi
├── mipmap-xxhdpi
├── mipmap-xxxhdpi
├── values
└── xml
The source code is under src/main/java/org, and the default resource directory structure is under src/main/res.
drawablewould typically contains images.mipmapis a set of folders containing the application icon, scaled to different resolutions (the OS will choose the suitable one at runtime based on device characteristics).valuescontains constants, defined in XML files.
For example, here’s the contents of values/strings.xml:
<resources>
<string name="app_name">Toast</string>
</resources>
On Android, all constants should be stored in XML files, in this directory structure. This isolated strings and other constant values and makes it easier to update them when doing localization or other customizations.
Layout XML files can also be placed in the res folder structure, to describe layouts for the old-style view classes. We don’t use layout files in Compose, so you can safely ignore those.
When you compile your application, resources are converted to unique IDs, which you can then reference in code to fetch the corresponding resource e.g., the “app_name” string from the strings.xml resource file would be referred to in code as R.string.app_name, and we can lookup that ID to find the corresponding resource
setContent {
ToastTheme {
Scaffold { padding ->
App(activity = this,
title=getResources().getString(R.string.app_name), // passing in the string resource
modifier = Modifier.padding(padding))
}
}
}
You can easily add resources to your application by just copying them into the res folder structure. Your also has a built-in library of vector images that you can use and customize. File > New > Vector Asset and click on the Clip art button to browse. (Images are all free to use and licensed under Apache license 2.0).
Manifest
The AndroidManifest.xml file is generated with your project; one is reproduced below. This file contains settings that tell the application how to present itself on Android e.g. icon, label, theme. The activity element tells is which class to launch when the application launches. Other permissions and settings can be added in here as-needed.
You should be very careful when modifying this file! If you remove critical settings, or break the formatting, your project may not build.
<?xml version="1.0" encoding="utf-8"?>
<manifest xmlns:android="http://schemas.android.com/apk/res/android"
package="net.codebot">
<application
android:allowBackup="true"
android:icon="@mipmap/ic_launcher"
android:label="@string/app_name"
android:roundIcon="@mipmap/ic_launcher_round"
android:supportsRtl="true"
android:theme="@style/Theme.AndroidSandbox">
<activity
android:name=".MainActivity"
android:label="@string/app_name"
android:theme="@style/Theme.AndroidSandbox.NoActionBar">
<intent-filter>
<action android:name="android.intent.action.MAIN"/>
<category android:name="android.intent.category.LAUNCHER"/>
</intent-filter>
</activity>
</application>
</manifest>
Architecture
Android is an open-source, Linux based operating system designed to run across a variety of devices and form-factors. It’s an example of a layered architecture, which increasing levels of abstraction as we move from the low-level hardware to higher-level application APIs. Mid-level components exist to provide services to components futher up the stack.
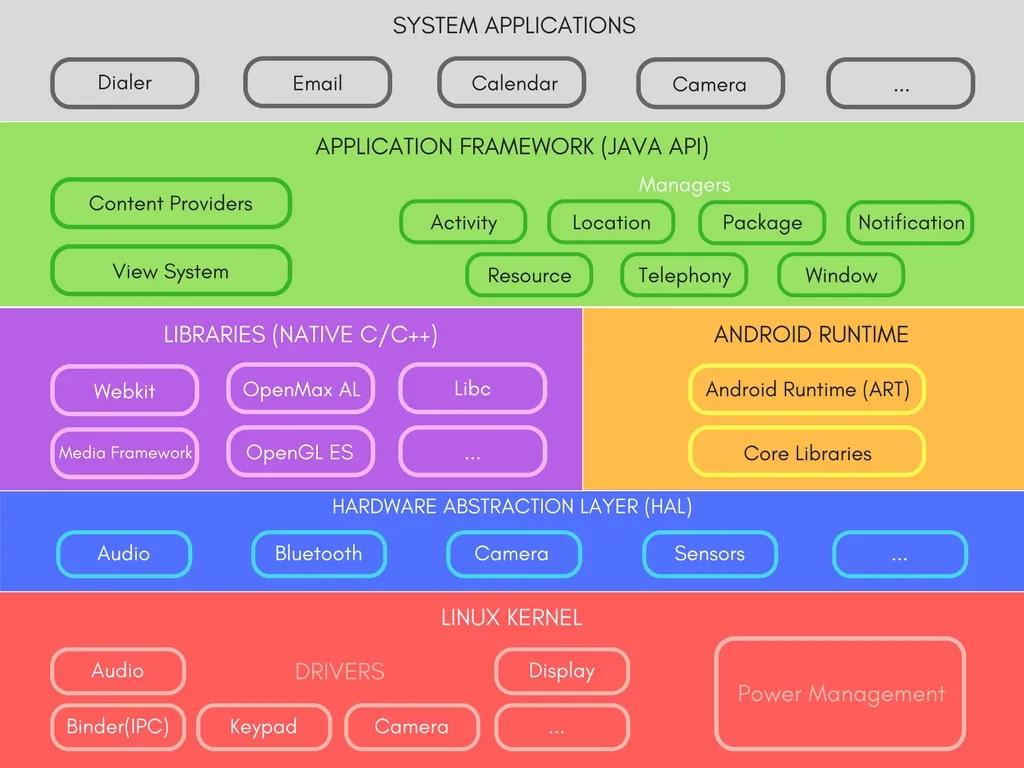
https://developer.android.com/guide/platform
As a developer, the entire feature-set of the Android OS is available to you through APIs written in Java and/or Kotlin2. These APIs form the building blocks you need to create Android apps by providing critical services: :
- A rich and extensible View System you can use to build an app’s UI, including lists, grids, text boxes, buttons, and even an embeddable web browser
- A Resource Manager, providing access to non-code resources such as localized strings, graphics, and layout files
- A Notification Manager that enables all apps to display custom alerts in the status bar
- An Activity Manager that manages the lifecycle of apps and provides a common navigation back stack
- Content Providers that enable apps to access data from other apps, such as the Contacts app, or to share their own data
Android also includes a set of core runtime libraries that provide most of the functionality of the Java programming language, including some Java 8 language features, that the Java API framework uses.
For devices running Android version 5.0 (API level 21) or higher, each app runs in its own process and with its own instance of the Android Runtime (ART). ART is written to run multiple virtual machines on low-memory devices by executing DEX files. ART provides Ahead-of-time (AOT) and just-in-time (JIT) compilation, and Optimized garbage collection (GC) to the platform3.
Components
There are four different types of core components that can be created in Android. Each represents a different style of application, with a different entry point and lifecycle.
These four component types exist in Android:
- An Activity is an Android class that represent a single screen. It handles drawing the user interface (UI) and managing input events. An application may include multiple activities, where one is the “entry point”.
- A Service is a general-purpose background service, representing some long-running operation that the OS should perform, which does not require a user-interface. e.g. a music playback service.
- Broadcast Receivers: A service that can launch itself in response to a system event, without the need to stay running in the background like a regular service. e.g. an application to pop up a reminder when the user arrives at a destination.
- Content Providers managed shared information that other services or applications can access. e.g. a shared contact database.
Activities
Activities are the most common type of component, since they include user interfaces and visible components.
Typically one activity will be the “main” activity that represents the entry point when your application launches.
There are a standard set of steps that occur when your Android application launches. The system uses the information in the AndroidManifest.xml to determine which activity to launch, and how to launch it. In this case, it’s a class named MainActivity:
<activity
android:name=".MainActivity"
android:label="@string/app_name"
android:theme="@style/Theme.AndroidSandbox.NoActionBar">
<intent-filter>
<action android:name="android.intent.action.MAIN"/>
<category android:name="android.intent.category.LAUNCHER"/>
</intent-filter>
</activity>
The MainActivity is a class that extends AppCompatActivity. This is a base class that supports all modern Android features while providing backward compatibility with older versions of Android. For compatibility with older version of Android, you should always use AppCompatActivity as a base class.
Our base class contains a number of methods. The onCreate() method is the first method that is called when the MainActivity is instantiated. Here’s a basic onCreate() method:
class MainActivity : AppCompatActivity() {
override fun onCreate(savedInstanceState: Bundle?) {
super.onCreate(savedInstanceState)
setContentView(R.layout.activity_main) // layout file using view classes
// ...
}
}
Activities typically have an associated layout file which describes their appearance. The activity and the layout are connected by a process known as layout inflation. When the activity starts, the views that are defined in the XML layout files are turned into (or “inflated” into) Kotlin view objects in memory. Once this happens, the activity can draw these objects to the screen and dynamically modify them.
R.layout.activity_main in this example corresponds to the layout/activity_main.xml file. That file contains the full layout for the screen, including the top toolbar. There are multiple pieces to this particular layout, so the line <include layout="@layout/content_main"/> is including the contents of a second layout file (just split up to make it easier to manage).
<?xml version="1.0" encoding="utf-8"?>
<androidx.coordinatorlayout.widget.CoordinatorLayout
xmlns:android="http://schemas.android.com/apk/res/android"
xmlns:app="http://schemas.android.com/apk/res-auto"
xmlns:tools="http://schemas.android.com/tools"
android:layout_width="match_parent"
android:layout_height="match_parent"
tools:context=".MainActivity">
<com.google.android.material.appbar.AppBarLayout
android:layout_height="wrap_content"
android:layout_width="match_parent"
android:theme="@style/Theme.AndroidSandbox.AppBarOverlay">
<androidx.appcompat.widget.Toolbar
android:id="@+id/toolbar"
android:layout_width="match_parent"
android:layout_height="?attr/actionBarSize"
android:background="?attr/colorPrimary"
app:popupTheme="@style/Theme.AndroidSandbox.PopupOverlay"/>
</com.google.android.material.appbar.AppBarLayout>
<include layout="@layout/content_main"/>
<com.google.android.material.floatingactionbutton.FloatingActionButton
android:id="@+id/fab"
android:layout_width="wrap_content"
android:layout_height="wrap_content"
android:layout_gravity="bottom|end"
android:layout_margin="@dimen/fab_margin"
app:srcCompat="@android:drawable/ic_dialog_email"/>
</androidx.coordinatorlayout.widget.CoordinatorLayout>
Lifecycle
Applications consist of one or more running activities, each one corresponding to a screen.
Activities in the system are managed as activity stacks. When a new activity is started, it is usually placed on the top of the current stack and becomes the running activity – the previous activity always remains below it in the stack, and will not come to the foreground again until the new activity exits.
An activity can be one of the following running states:
- The activity in the foreground, typically the one that user is able to interact with, is running.
- An activity that has lost focus but can still be seen is visible. It will remain active.
- An activity that is completely hidden, or minimized is stopped. It retains its state (it’s basically paused) BUT the OS may choose to terminate it to free up resources.
- The OS can choose to destroy an application to free up resources.
This diagram shows the Android activity lifecycle, with all potential activity states.
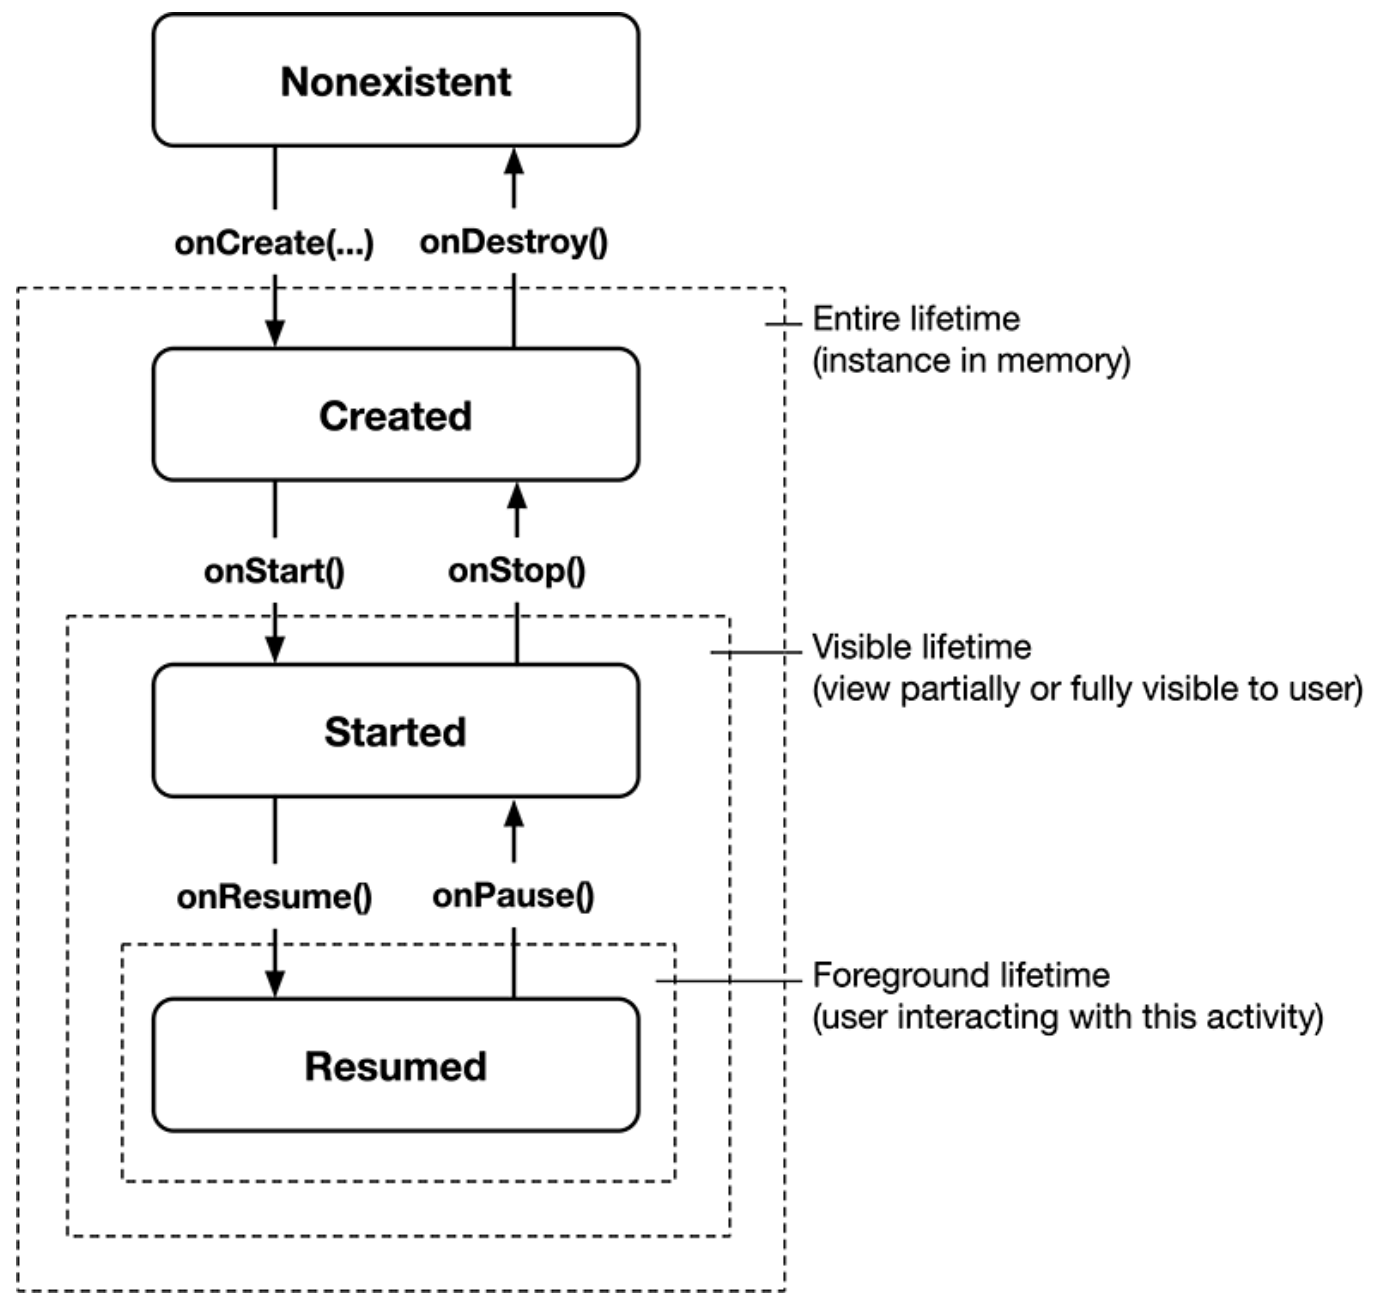
These phases each have corresponding callback methods that get called when the activity enters that state. You can override a method in your Activity to add code that will get executed at that time:
public class Activity extends ApplicationContext {
protected void onCreate(Bundle savedInstanceState);
protected void onStart();
protected void onRestart();
protected void onResume();
protected void onPause();
protected void onStop();
protected void onDestroy();
}
There are three key loops that these phases attempt to capture:
-
The entire lifetime of an activity happens between the first call to
onCreate(Bundle)through to a single final call toonDestroy(). An activity will do all setup of “global” state in onCreate(), and release all remaining resources in onDestroy(). For example, if it has a thread running in the background to download data from the network, it may create that thread in onCreate() and then stop the thread in onDestroy(). -
The visible lifetime of an activity happens between a call to
onStart()until a corresponding call toonStop(). During this time the user can see the activity on-screen, though it may not be in the foreground and interacting with the user. Between these two methods you can maintain resources that are needed to show the activity to the user. For example, you can register aBroadcastReceiverin onStart() to monitor for changes that impact your UI, and unregister it in onStop() when the user no longer sees what you are displaying. The onStart() and onStop() methods can be called multiple times, as the activity becomes visible and hidden to the user. -
The foreground lifetime of an activity happens between a call to
onResume()until a corresponding call toonPause(). During this time the activity is in visible, active and interacting with the user. An activity can frequently go between the resumed and paused states – for example when the device goes to sleep, when an activity result is delivered, when a new intent is delivered – so the code in these methods should be fairly lightweight.https://developer.android.com/reference/android/app/Activity#Fragments
Activity Stack
A task is a collection of activities that users interact with when performing a certain job. The activities are arranged in a stack — the back stack — in the order in which each activity is opened. For example, an email app might have one activity to show a list of new messages. When the user selects a message, a new activity opens to view that message. This new activity is added to the back stack. If the user presses the Back button, that new activity is finished and popped off the stack.
The device Home screen is the starting place for most tasks. When the user touches an icon in the app launcher (or a shortcut on the Home screen), that app’s task comes to the foreground. If no task exists for the app (the app has not been used recently), then a new task is created and the “main” activity for that app opens as the root activity in the stack.
The device Home screen is the starting place for most tasks. When the user touches an icon in the app launcher (or a shortcut on the Home screen), that app’s task comes to the foreground. If no task exists for the app (the app has not been used recently), then a new task is created and the “main” activity for that app opens as the root activity in the stack.
When the current activity starts another, the new activity is pushed on the top of the stack and takes focus. The previous activity remains in the stack, but is stopped. When an activity stops, the system retains the current state of its user interface. When the user presses the Back button, the current activity is popped from the top of the stack (the activity is destroyed) and the previous activity resumes (the previous state of its UI is restored). Activities in the stack are never rearranged, only pushed and popped from the stack—pushed onto the stack when started by the current activity and popped off when the user leaves it using the Back button. As such, the back stack operates as a “last in, first out” object structure.

If the user continues to press Back, then each activity in the stack is popped off to reveal the previous one, until the user returns to the Home screen (or to whichever activity was running when the task began). When all activities are removed from the stack, the task no longer exists.
This is standard behaviour for most applications. For unusual workflows, you can manually manage tasks.
Intents
An intent is an asynchronous message, that represents an an operation to be performed. This can include activating components, or activities. An intent is created with an Intent object, which defines a message to activate either a specific component (explicit intent) or a specific type of component (implicit intent).
Applications then, consist of a number of different component working together. Some of them you will create, and some are preexisting components that you can activate (e.g. you can create an intent requesting that the camera take a picture; you don’t need to write code to make that happen, you just need to use the intent to ask someone else to take it for you and return the data).
ViewModel
One major challenge with the Activity model is that activities lose state when they are unload. How can this possibly work? You don’t want to lose all of your data every time you need to change screens. There’s numerous ways to address this, including saving data to a bundle, or manually persisting to a data store. Jetpack Compose introduces classes to manage this for us.
The ViewModel class is designed to store and manage UI-related data in a lifecycle conscious way. The ViewModelclass allows data to survive configuration changes such as screen rotations.
Best-practice is to move your application data into ViewModels and use them as the main container classes. Not only will your data survive orientation changes and activity swapping, but the ViewModel works well with other Jetpack libraries like Compose (for user interfaces).
From the implementation notes
Architecture Components provides a ViewModel helper class for the UI controller that is responsible for preparing data for the UI. ViewModel objects are automatically retained during configuration changes so that data they hold is immediately available to the next activity or fragment instance. For example, if you need to display a list of users in your app, make sure to assign responsibility to acquire and keep the list of users to a ViewModel, instead of an activity or fragment.
class MyViewModel : ViewModel() {
private val users: MutableLiveData<List<User>> by lazy {
MutableLiveData<List<User>>().also {
loadUsers()
}
}
fun getUsers(): LiveData<List<User>> {
return users
}
private fun loadUsers() {
// Do an asynchronous operation to fetch users.
}
}
You can then access the list from an activity as follows:
class MyActivity : AppCompatActivity() {
override fun onCreate(savedInstanceState: Bundle?) {
// Create a ViewModel the first time the system calls an activity's onCreate() method.
// Re-created activities receive the same MyViewModel instance created by the first activity.
// Use the 'by viewModels()' Kotlin property delegate
// from the activity-ktx artifact
val model: MyViewModel by viewModels()
model.getUsers().observe(this, Observer<List<User>>{ users ->
// update UI
})
}
}
If the activity is re-created, it receives the same MyViewModel instance that was created by the first activity. When the owner activity is finished, the framework calls the ViewModel objects’s onCleared() method so that it can clean up resources.
Lifecycle
ViewModel objects are scoped to the Lifecycle passed to the ViewModelProvider when getting the ViewModel. The ViewModel remains in memory until the Lifecycle it’s scoped to goes away permanently: in the case of an activity, when it finishes, while in the case of a fragment, when it’s detached.
The figure below illustrates the various lifecycle states of an activity as it undergoes a rotation and then is finished. The illustration also shows the lifetime of the ViewModel next to the associated activity lifecycle. This particular diagram illustrates the states of an activity. The same basic states apply to the lifecycle of a fragment.
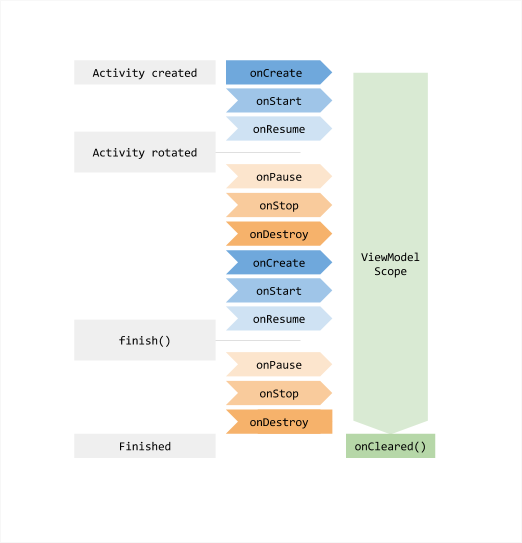
Features
Creating a main method
Android projects are structured differently from desktop projects. Instead of a main method, you have a main Activity class. Think of an activity as a single screen, and the main Activity is the screen that launches with the application. The onCreate() method is the entry point for your main Activity, and the method that we will override to set up our application.
Here is the starter code that is generated:
class MainActivity : ComponentActivity() {
override fun onCreate(savedInstanceState: Bundle?) {
super.onCreate(savedInstanceState)
setContent {
MyApplicationTheme {
// A surface container using the 'background' color from the theme
Surface(
modifier = Modifier.fillMaxSize(),
color = MaterialTheme.colorScheme.background
) {
Greeting("Android")
}
}
}
}
}
@Composable
fun Greeting(name: String, modifier: Modifier = Modifier) {
Text(
text = "Hello $name!",
modifier = modifier
)
}
This basic structure does the following:
class MainActivityis just defining the activity class that we’ll use.override fun onCreate()is the callback function that we’ll override. This gets called when the application is launched.setContent()is a scoping function that defines our composable scope! Composables can be called from within this function.MyApplicationThemeis just an override of theMaterialThemeclass (Android expects you to customize it by default).Surfaceis a composable layout that we can use to hold our other composables.
The rest of the structure should look familiar, since it’s all just Compose! You should be able to swap out everything in the setContent block with Compose code that you write.
Launching an activity
Intents can be used to activate an Activity. The startActivity(Intent) method is used to start a new activity, which will be placed at the top of the activity stack. It takes a single argument, an Intent, which describes the activity to be executed. To be of use with Context.startActivity(), all activity classes must have a corresponding <activity>declaration in their package’s AndroidManifest.xml.
Sometimes you want to get a result back from an activity when it ends. For example, you may start an activity that lets the user pick a person in a list of contacts; when it ends, it returns the person that was selected. To do this, you call the startActivityForResult(Intent, int) version with a second integer parameter identifying the call. The result will come back through your onActivityResult(int, int, Intent)method.
Building a user interface
Compose user interface code is typically invoked from your application’s MainActivity class. From your onCreate() method, you call setContent { } to setup your user interface.
We cover building and displaying user interfaces in the user interfaces section.
class MainActivity : ComponentActivity() {
override fun onCreate(savedInstanceState: Bundle?) {
super.onCreate(savedInstanceState)
setContent {
// user interface code goes here
Text("Hello World")
}
}
Navigating between activities
Navigation refers to the ability to move between screens or activities within an application. This includes simple scenarios e.g., click a button to navigate, to complex cases like the Android navigation drawer.
The Navigation classes were originally designed to work with fragments (you can think of them as pieces of a UI), which have since been superceded by Jetpack Compose. We’ll discuss using these classes on Android, assuming Jetpack Compose.
The built-in navigation classes are only fully supported on Android, not Compose Multiplatform/Desktop. If you are working with Compose Multiplatform, or want something that feels a little more “idiomatic”, you might consider a third-party navigation library instead e.g., Voyager.
There are three components that work together:
- Navigation graph - resource i.e. XML file that defines routes.
- NavHost - UI element that contains the current navigation destination.
- NavController - Coordinator for managing navigation.
Best practices for working within Compose is to create a single activity, and then use navigation components to tear-down and build-up the single activity to reflect how you want the screen to appear.
Here’s the steps you would take to use the Navigation components:
Step 1: Create a navigation controller
To create a NavController when using Jetpack Compose, call rememberNavController():
val navController = rememberNavController()
Step 2: Create a navigation graph
The nav graph is just a data structure that holds our routes between screens. Since this is Compose, we’ll create everything programatically.
@Serializable
object Profile
@Serializable
object FriendsList
val navController = rememberNavController()
NavHost(navController = navController, startDestination = Profile) {
composable<Profile> { ProfileScreen( /* ... */ ) }
composable<FriendsList> { FriendsListScreen( /* ... */ ) }
// Add more destinations similarly.
}
If you need to pass data to a destination, define the route with a class that has parameters. For example, the Profile route is a data class with a name parameter.
@Serializable
data class Profile(val name: String)
Step 3: Navigate to a destination
To navigate to a composable, you should use NavController.navigate<T>. With this overload, navigate() takes a single route argument for which you pass a type. It serves as the key to a destination.
@Serializable
object FriendsList
navController.navigate(route = FriendsList)
Android Developer Relations has published an excellent codelab, which will help you learn how to use Jetpack Navigation. See this page to get started.
Packaging & Installers
Mobile applications are typically distributed through an online store e.g., Google Play or the Apple App Store. As interesting as this is, it’s beyond the scope of what we can accomplish in this course.
For the purposes of this course, if you are developing for Android, you can product a local binary (an APK file) that can be installed in an emulator.
In IntelliJ or Android Studio:
Build > Generate App Bundle (APK) > Generate APK.
-
For your project, you and your team should agree on a “standard supported device” and list that in your project requirements. ↩
-
https://developer.android.com/guide/platform ↩
-
https://developer.android.com/guide/components/fundamentals ↩
Topics
User interfaces
Graphical applications aren’t restricted to desktop computing; graphical user interfaces exist on all modern computing devices, from smartwatches, to phones and tablets, to car entertainment systems.
Mobile and desktop toolkits solve similar problems for their respective platforms, while also addressing the unique challenges of each one (e.g. touch input is a major smartphone-specific feature, but almost irrelevant for desktop environments).
User Interface Toolkits
What is a UI toolkit?
A widget or UI toolkit is a framework that provides support for building applications. Essentially, toolkits provide an abstraction of underlying operating system functionality, with a focus on application features. e.g. graphics, sound, reusable widgets and events.
Common features include:
- Creating and managing application windows, with standard window functionality e.g. overlapping windows, depth, min/max buttons, resizing. This is more important on desktop than mobile, although mobile toolkits are expanding to include mobile-specific windowing functionality.
- Graphical output, including 2D graphics, animations, sound and other methods of communicating information to the user.
- Providing reusable components called widgets that can be used to assemble a typical applications. e.g. buttons, lists, toolbars, images, text views. Promoting common components ensures that applications on that platform have common interaction mechanisms i.e. that they “look and feel similar”, which is beneficial for users.
- Support for an event-driven architecture, where events (messages) can be published and circulated through your application. This is the primary mechanism that we use to intercept and handle user input, or other system messages e.g., indicating that your phone has changed orientation, or that a window has closed.
There are a large number of toolkits available! Deciding on a toolkit is often a matter of finding one that supports your target platform and preferred programming language. Popular toolkits include WTL (Windows, C++), Cocoa (macOS, C++) and GTK (multi-platform but common on Linux, using C).
There are also cross-platform toolkits, designed to work across different platforms. Examples include JavaFX and Swing for Java, Flutter, or Jetpack Compose, which we’ll be using in this course.
Toolkit Design
When building applications with toolkits and widgets, a developer needs to write code to control the appearance and position of these widgets, as well as code to handle user input. A lot of the complexity with this model is ensuring that application state is managed properly across UI components, business-objects, and models (e.g. if a user updates something on-screen, you need to make sure that the data is updated everywhere in your application, including possibly other windows that show that data).
This is how imperative toolkits like JavaFX and Qt work. The developer has to write the “glue code” that tells the system how to update the user interface in response to state changes, either from the user interacting with on-screen widgets, or from external events received by the application. This is the source of a lot of complexity in user interface development, and a frequent cause of errors.
By contrast, a declarative toolkit automatically manages how the UI reacts to state changes. The developer focuses on describing what state is required, and how state is used to initialize on-screen components, but doesn’t need to write any glue-code. As state changes occur in your application, the UI is automatically changed to reflect that state. This technique works by conceptually regenerating the entire screen from scratch, and then applying any changes that are required to reflect state. The result is a simpler conceptual model for developers.
Windowing systems
A window is simply a region of the screen that “belongs” to a specific application. Typically one application has one main window, but it may also own and control additional windows. These are overlayed on a “desktop”, which is really just the screen background.
To manage different windows across many different applications, a part of the operating system called a windowing system is responsible for creating, destroying and managing running windows. The windowing system provides an API to applications to support for all window-related functionality, including:
- provide an mechanism for applications to create, or destroy their own windows
- handle window movement automatically and invisibly to the application (i.e. when you drag a window, the windowing system moves it).
- handles overlapping windows across applications (e.g. so that your application window can be brought to the ““front” and overlap another application’s window).
Typically, the toolkit will provide an API that allows the developer to pass through requests to the windowing system to create and manage windows. Often, this includes window methods properties that can be manipulated to control window behaviour.
- Sample class:
Stage,Window. - Sample properties:
minWidth,prefWidth,maxWidth;minHeight,prefHeight,maxHeight;title;isFullScreen;isResizable - Sample methods:
close(),toFront(),toBack()
Graphical Output
Graphical output is a broad category that includes drawing and positioning elements on-screen. This can include adding arbitrary elements (e.g. circles, rectangles or other primitives), structured data (e.g. PNG or JPG images, MP4 video) or reusable widgets to the window.
We’ll briefly cover standard concepts before discussing specifics of any of these.
Coordinate systems
A computer screen uses a Cartesean coordinate system to track window position. By convention, the top-left is the origin, with x increasing as you move right, and y increasing as you move down the screen. The bottom-right corner of the screen is maximum x and y, which equals the resolution of the screen1.
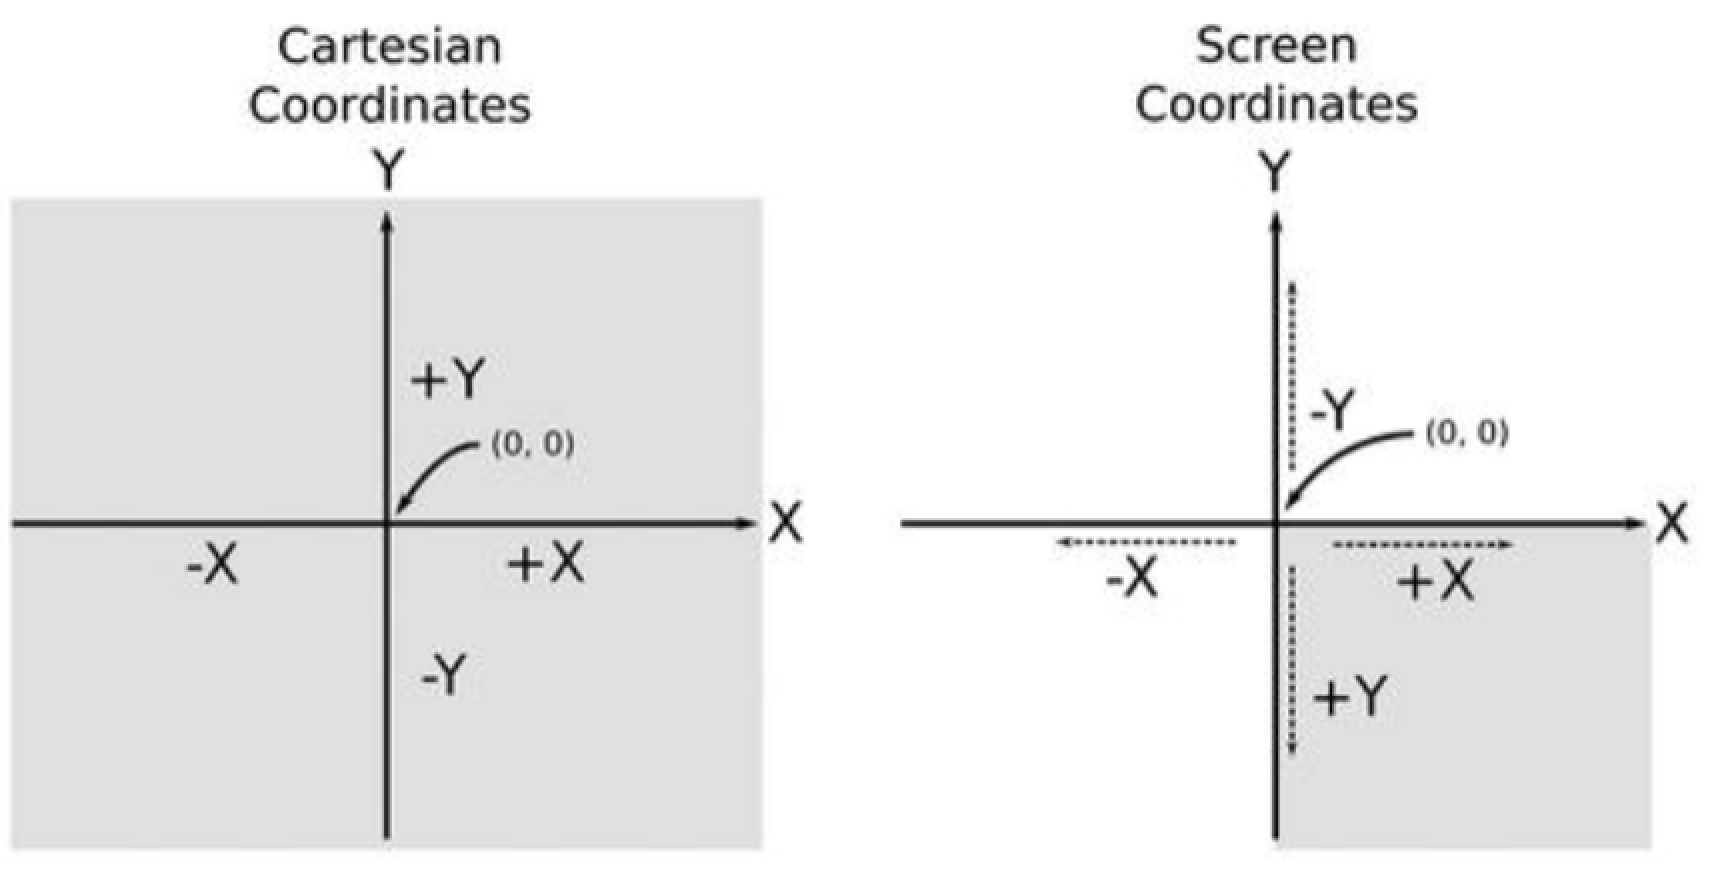
Note that its possible for screen contents to move moved out-of-bounds and made inaccessible. We typically don’t want to do this.
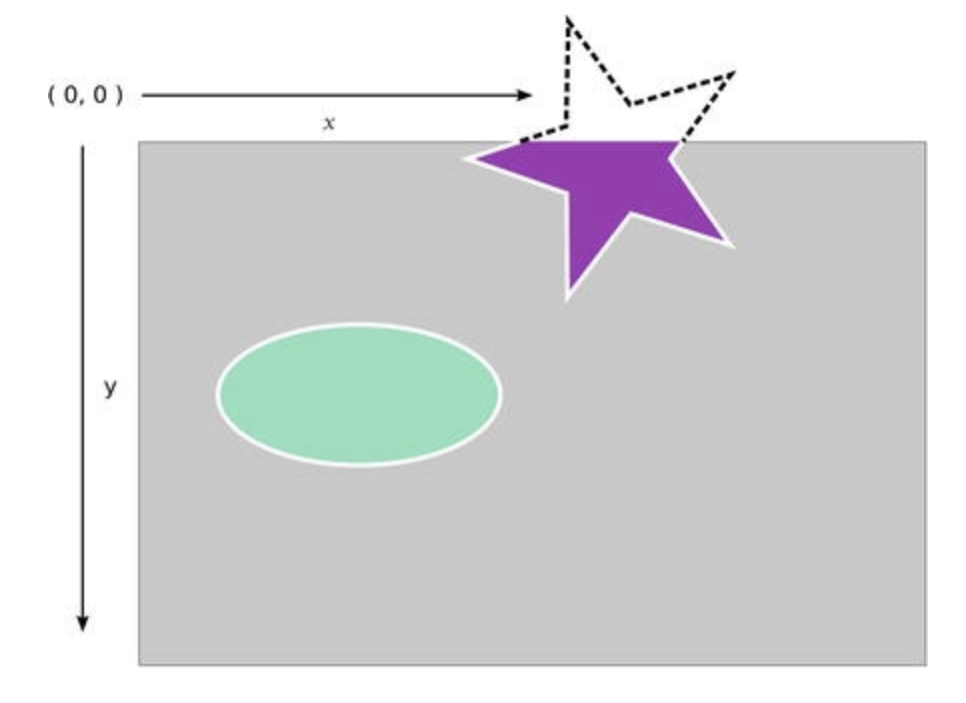
In the example below, you can see that this is a 1600x1200 resolution screen2, with the four corner positions marked. It contains a single 400x400 window, positioned at (500, 475) using these global coordinates.

Given that the windowing system manages movement and positioning of windows on-screen, an application window doesn’t actually know where it’s located on-screen! The application that “owns” the window above doesn’t have access to it’s global coordinates (i.e. where it resides on the screen). It does however, have access to it’s own internal, or local coordinates. For example, our window might contain other objects, and the application would know about their placement. In this local coordinate system, we use the top of the window as the origin, with the bottom-right coordinate being the (width, height) of the window. Objects within the window are referenced relative to the window’s origin.
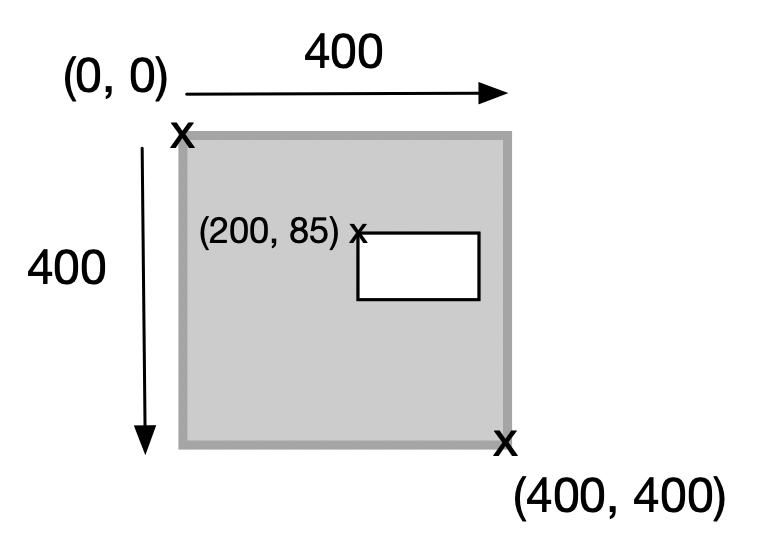
Widgets & layout
We’re going to refer to graphical on-screen elements as widgets. Most toolkits support a large number of similar widgets. The diagram below shows one desktop toolkit with drop-down lists, radio buttons, lists and so on. All of these elements are considered widgets.

Typically, using widgets us as simple as instantiating them, adding them to the window, and setting up a mechanism to detect when users interact with them so that appropriate actions can be taken.
Scene graph
It’s standard practice in graphical applications to represent the interface as a scene graph. This is a mechanism for modelling a graphical application as a tree of nodes (widgets), where each node has exactly one parent. Effects applied to the parent are applied to all of its children.
Toolkits support scene graphs directly. There is typically a distinction made between Container widgets and Node widgets. Containers are widgets that are meant to hold other widgets e.g. menus which hold menu_items, toolbars which can hold toolbar_buttons and so on. Nodes are widgets that are interactive and don’t have any children.
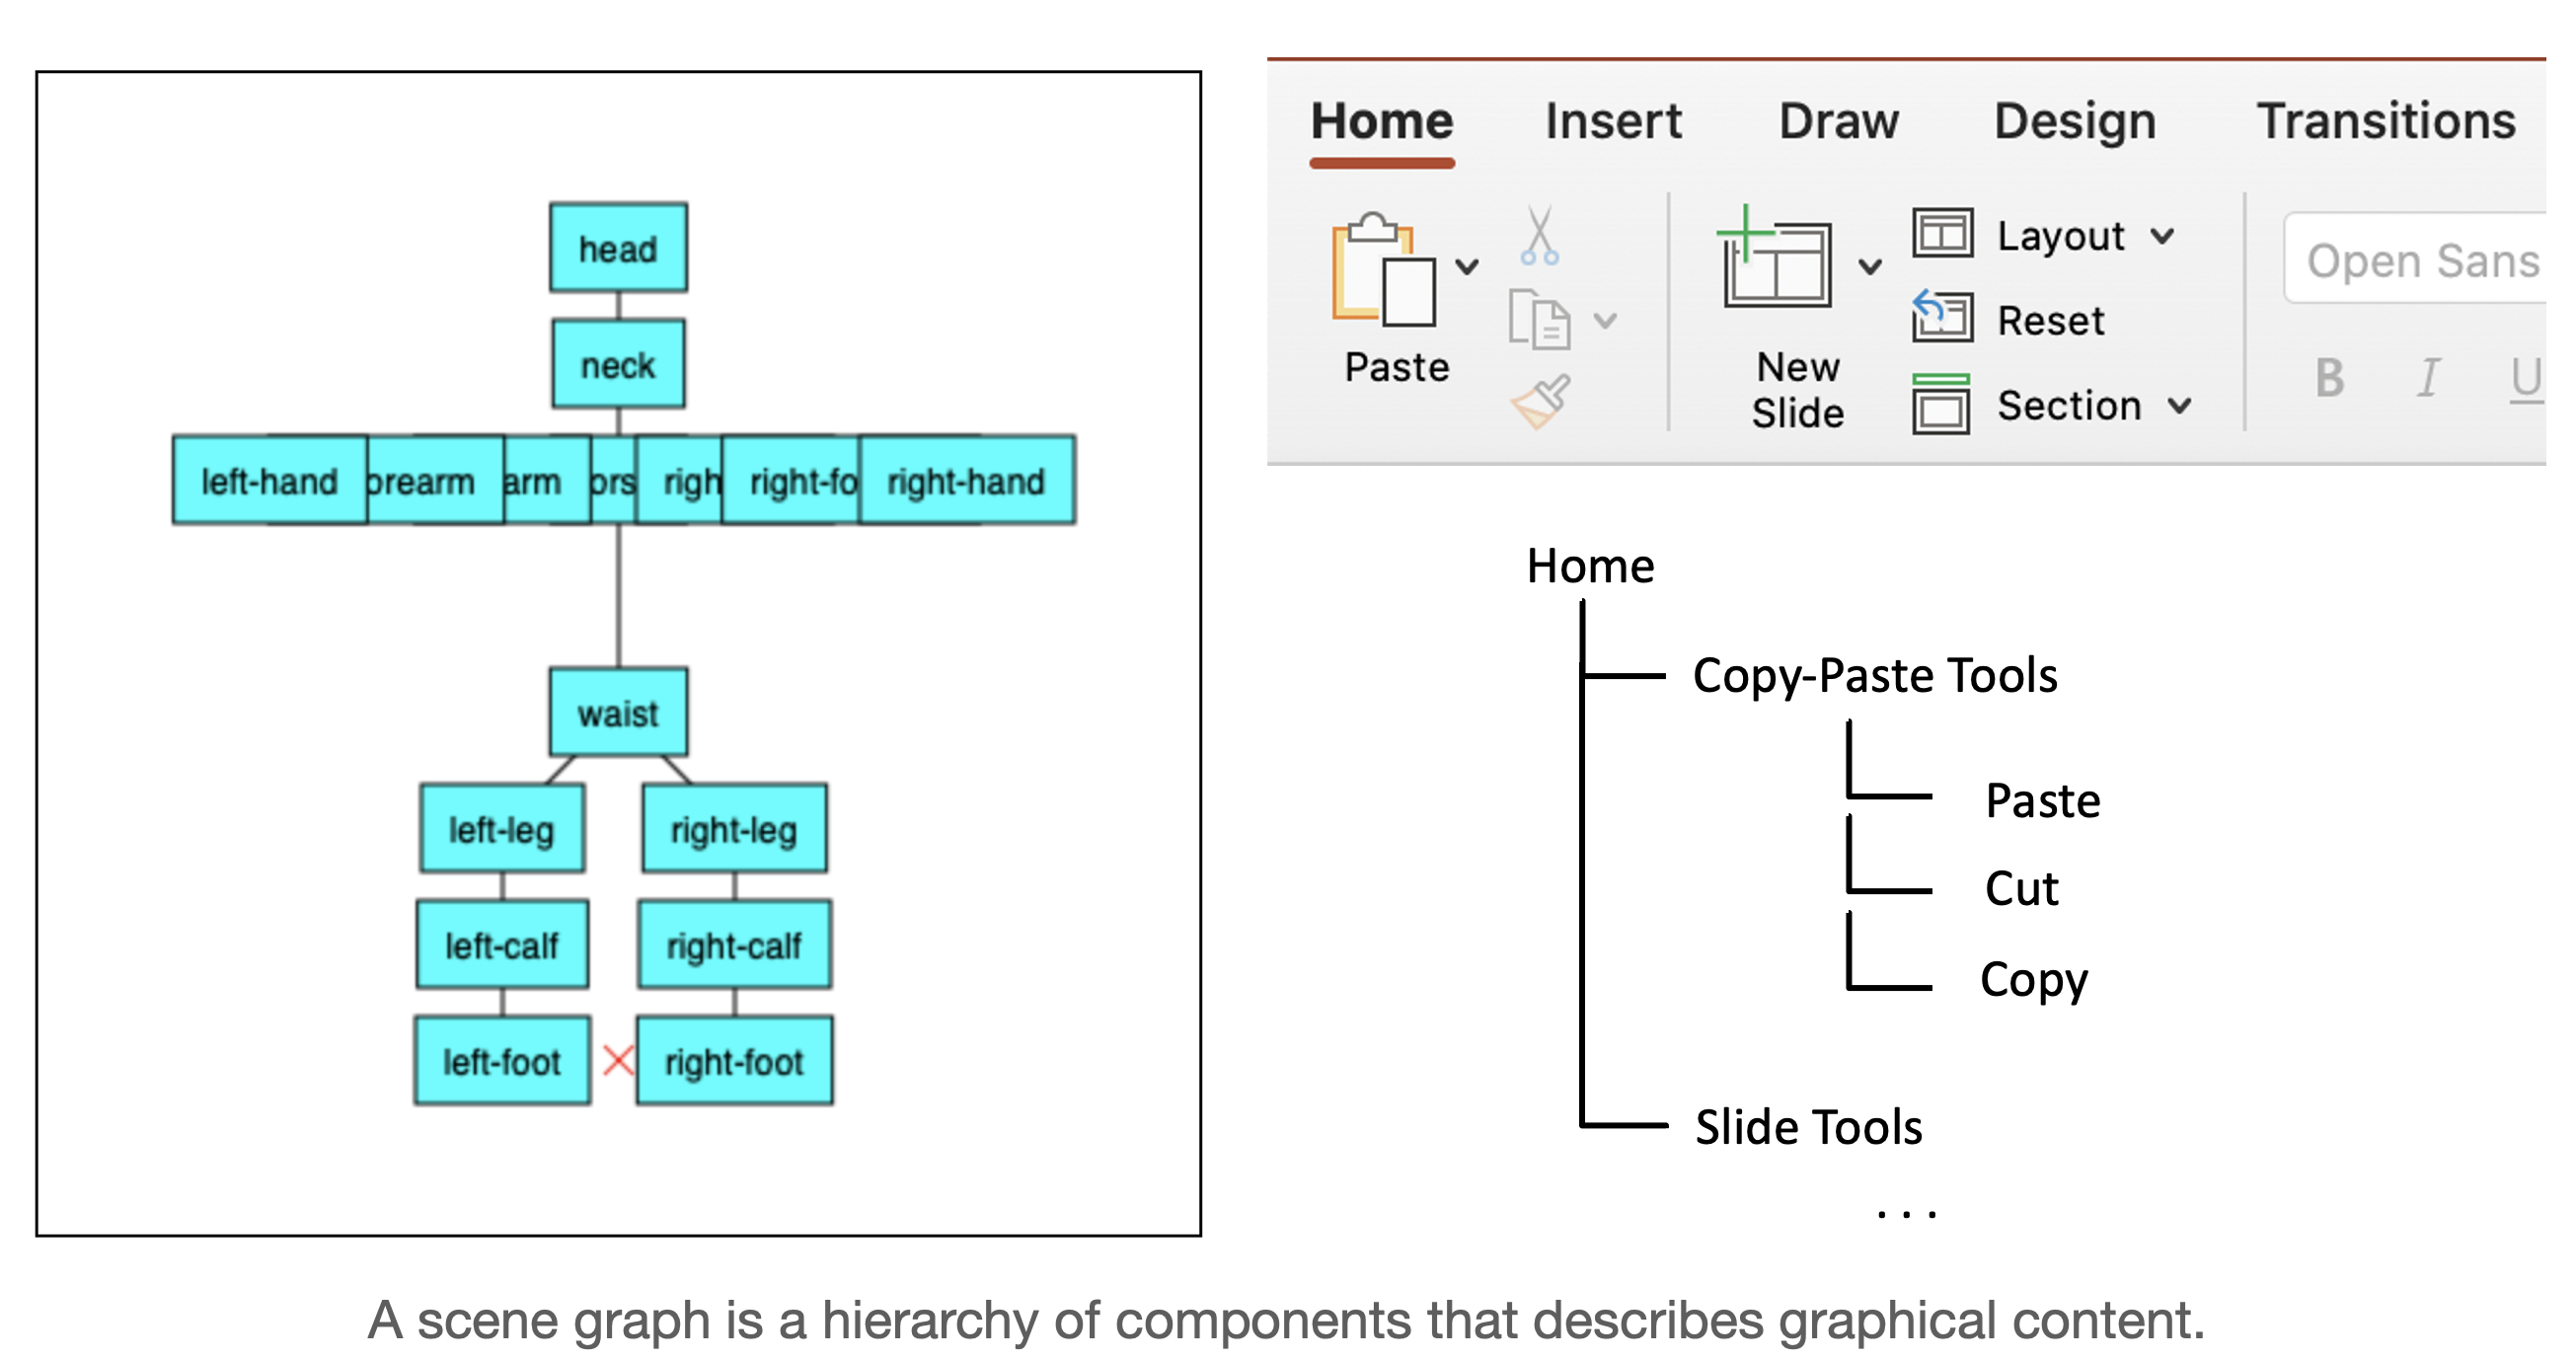
Building a UI involves explicitly setting up the scene graph by instantiating nodes, and adding them to containers to build a scene graph. (For this reason, containers will always have a list of children, and a mechanism for adding and removing children from their list).
Layout
Layout is the mechanism by which nodes in the scene graph are positioned on the screen, and managed if the window is resized.
- Fixed layout is a mechanism to place widgets in a static layout where the window will remain the same size. This is done by setting properties of the widgets to designate each one’s position, and ensuring that the containers do not attempt any dynamic layout.
- Relative layout delegates responsibility for widget position and size to their parents (i.e. containers). Typically this means setting up the scene graph in such a way that the appropriate container is used based on how it adjusts position. Typical containers include a vertical-box that aligns it’s children in a vertical line, or a grid that places children in a grid with fixed rows and columns.
Event management
Applications often handle multiple types of processing: asynchronous, such as when a user types a few keystrokes, or synchronous, such as when we want a computation to run non-stop to completion.
User interfaces are designed around the idea of using events or messages as a mechanism for components to indicate state changes to other interested entities. This works well, due to the asynchronous nature of user-driven interaction, where there can be relatively long delays between inputs (i.e. humans type slowly compared to the rate at which a computer can process the keystrokes).
This type of system, designed around the production, transmission and consumption of events between loosely-coupled components, is called an Event-Driven Architecture. It’s the foundation to most user-interface centric applications (desktop, mobile), which common use messages to signal a user’s interaction with a viewable component in the interface.
What’s an event? An event is any significant occurrence or change in state for system hardware or software.
The source of an event can be from internal or external inputs. Events can generate from a user, like a mouse click or keystroke, an external source, such as a sensor output, or come from the system, like loading a program.
How does event-driven architecture work? Event-driven architecture is made up of event producers and event consumers. An event producer detects or senses the conditions that indicate that something has happened, and creates an event.
The event is transmitted from the event producer to the event consumers through event channels, where an event processing platform processes the event asynchronously. Event consumers need to be informed when an event has occurred, and can choose to act on it.
Events be generated from user actions, like a mouse click or keystroke, an external source, such as a sensor output, or come from the system, like loading a program.
An event driven system typically runs an event loop, that keeps waiting for these events. The process is illustrated in the diagram below:
- An EventEmitter generates an event.
- The event is placed in an event queue.
- An event loop peels off events from the queue and dispatches them to event handlers (functions which have been registered to receive this specific type of event).
- The event handlers receive and process the event.
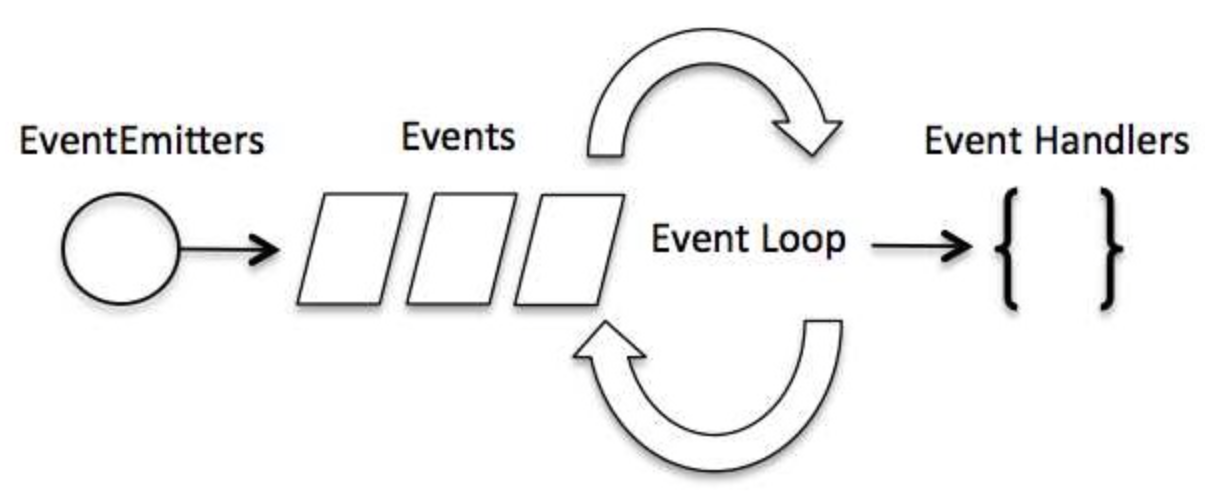
Event handlers are usually implemented as anonymous functions (lambdas) that represent the action we want to take in response to an event being generated. e.g., in the code below, we assign a lambda function to the onClick handler for this particular Button. When the button is pressed (aka “clicked”), the code fires.
All interactive composables have handlers like this. We’ll discuss this further in the coming sections.
Button(
modifier = modifier.padding(2.dp),
onClick = {
Toast.makeText(activity, "This is a short popup!", Toast.LENGTH_SHORT).show()
}
) {
Text("Short Toast")
}
Compose framework
JetPack Compose is a modern user-interface framework. Kotlin, Gradle, and Jetpack Compose together represent Google’s preferred toolchain for Android development.
JetBrains recently ported Jetpack Compose to desktop, and released it as Compose Multiplatform, which contains the complete port augmented with specific desktop composables (e.g., a window doesn’t exist on Android, but does exist on desktop).
The long-term vision of Kotlin and its ecosystem is to support code-sharing across all relevant platforms, at each layer of your application. This requires multiplatform support at each architectural layer, including multiplatform database libraries, networking libraries, user interface libraries, etc. A common GUI toolkit is a major step towards cross-platform development.

Compose Multiplatform Architecture (Droidcon 2023)
Compose is a declarative framework. As compared to traditional imperative toolkits, a declarative framework has two specific differences:
- It focuses on what you want to display on-screen, instead of how it should be created and managed. Imperative toolkits often expect the developer to use declarative syntax to describe the UI structure (e.g. Android and XML files), and then write the underlying glue-code to make that UI interactive. Declarative environments simplify this structure, so that UIs are defined completely in code. Declarative code is shorter and often simpler and easier to read.
- State-flow is handled differently. The framework itself manages state, and determines when and how to update and re-render components on-screen. This greatly simplifies the work that the developer has to do, and avoids a lot of the accidental complexity that creeps into large UIs.
A declarative structure is much simpler to read and maintain. Other modern toolkits like Swift UI and React are built around similar concepts, and have been extremely successful with this paradigm.
Compose is also cross-platform, so you can share code across platforms. This makes it easier to write a single application that can run on Android, iOS, desktop and even targets like WASM. Compose minimizes the amount of custom code that you need to write for each platform.
Finally, Compose is designed to be extremely fast. Under-the-covers, it uses skia, a high-performance Open Source graphics library, to draw on a native canvas on each target platform (the same library used by the Chrome browser). This enables it to achieve consistently high performance across all platforms, and makes it much “snappier” than early toolkits that relied on software renderers.
Composable functions
A key concept in Compose is the idea of a composable function, which is a particular kind of function that describes a small portion of your UI. You build your entire interface by defining a set of composable functions that take in data and emit UI elements.
Here’s an example of a simple composable function (aka composable) that takes in a String and displays it on-screen:
@Composable
fun Greeting(name: String) {
Text("Hello $name!")
}
Here is the corresponding scene graph for this composable function:
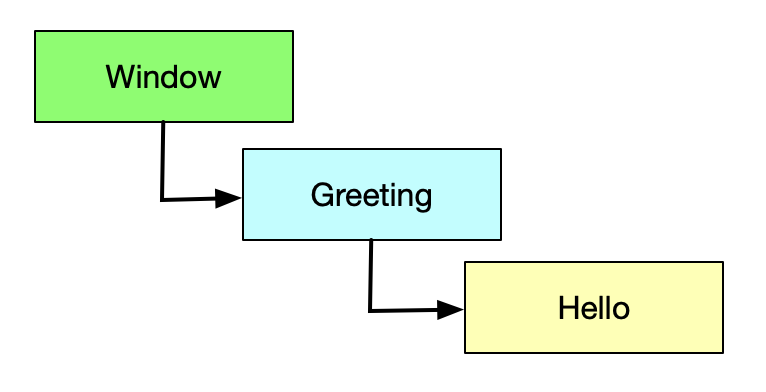
Here are some characteristics of a composable:
- The function is annotated with the
@Composableannotation. All Composable functions that we write must have this annotation. - Composable functions will often accept parameters, which are used to format the composable before displaying it.
- This function actually creates and displays the Text composable. We say that composables
emitUI. - The function doesn’t return anything. Compose functions that emit UI do not need to return anything, because they describe the desired screen state directly.
- This function is fast, idempotent, and free of side effects.
Composable scope
Let’s use this code snippet to display some text in an application window.
fun main() = application {
Window(
title = "Hello Window",
onCloseRequest = ::exitApplication
) {
Greeting("Compose")
}
}
@Composable
fun Greeting(name: String) {
Text("Hello $name!")
}
In this snippet, the application function defines a Composable Scope (think of a scope as the context in which our application runs). Within that scope, we use a Window composable to emit a window. We pass it two parameters:
- a title string that will be set for the window, and
- a lambda function that will be executed when an
onCloseRequestevent is received (i.e. when the window closes, we execute the build-inexitApplicationfunction).
In this case, the Window composable calls our Greeting composable, which emits the Text composable, which in turn displays our text.
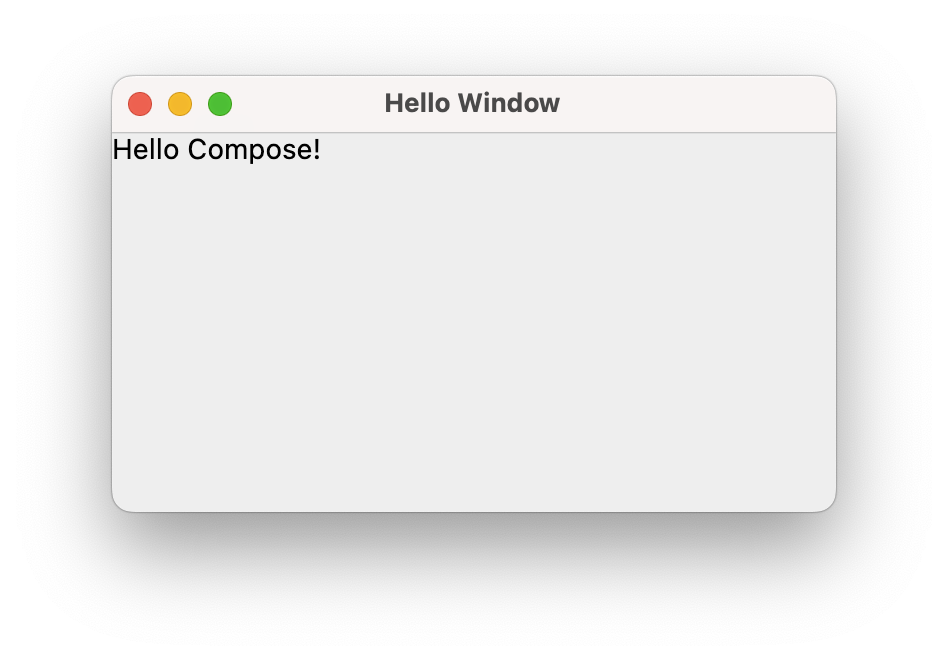
When Jetpack Compose runs your composables for the first time, during initial composition, it will keep track of the composables that you call to describe your UI in a Composition. Then, when the state of your app changes, Jetpack Compose schedules a recomposition.
Recomposition is when Jetpack Compose re-executes the composables that may have changed in response to state changes, and then updates the Composition to reflect any changes. A Composition can only be produced by an initial composition and updated by recomposition. The only way to modify a Composition is through recomposition.
See Lifecycle Overview for more details.
Let’s try and add some interactivity to this application. We’ll display our initial string on a button. When the user presses the button, it will change the value being displayed.
Our Button is yet-another composable. It requires us to set a parameter named onClick, which is assigned to the function (or lambda) that will be called when the button is clicked (for those familiar with other toolkits, we’re assigning the onClick event handler for that button).
Let’s start by just confirming that we can print something to the console when the button is pressed.
fun main() = application {
Window(
title = "Hello Window",
onCloseRequest = ::exitApplication
) {
Greeting("Unpressed")
}
}
@Composable
fun Greeting(name: String) {
Button(onClick = { println("Button pressed") }) {
Text("Hello $name")
}
}
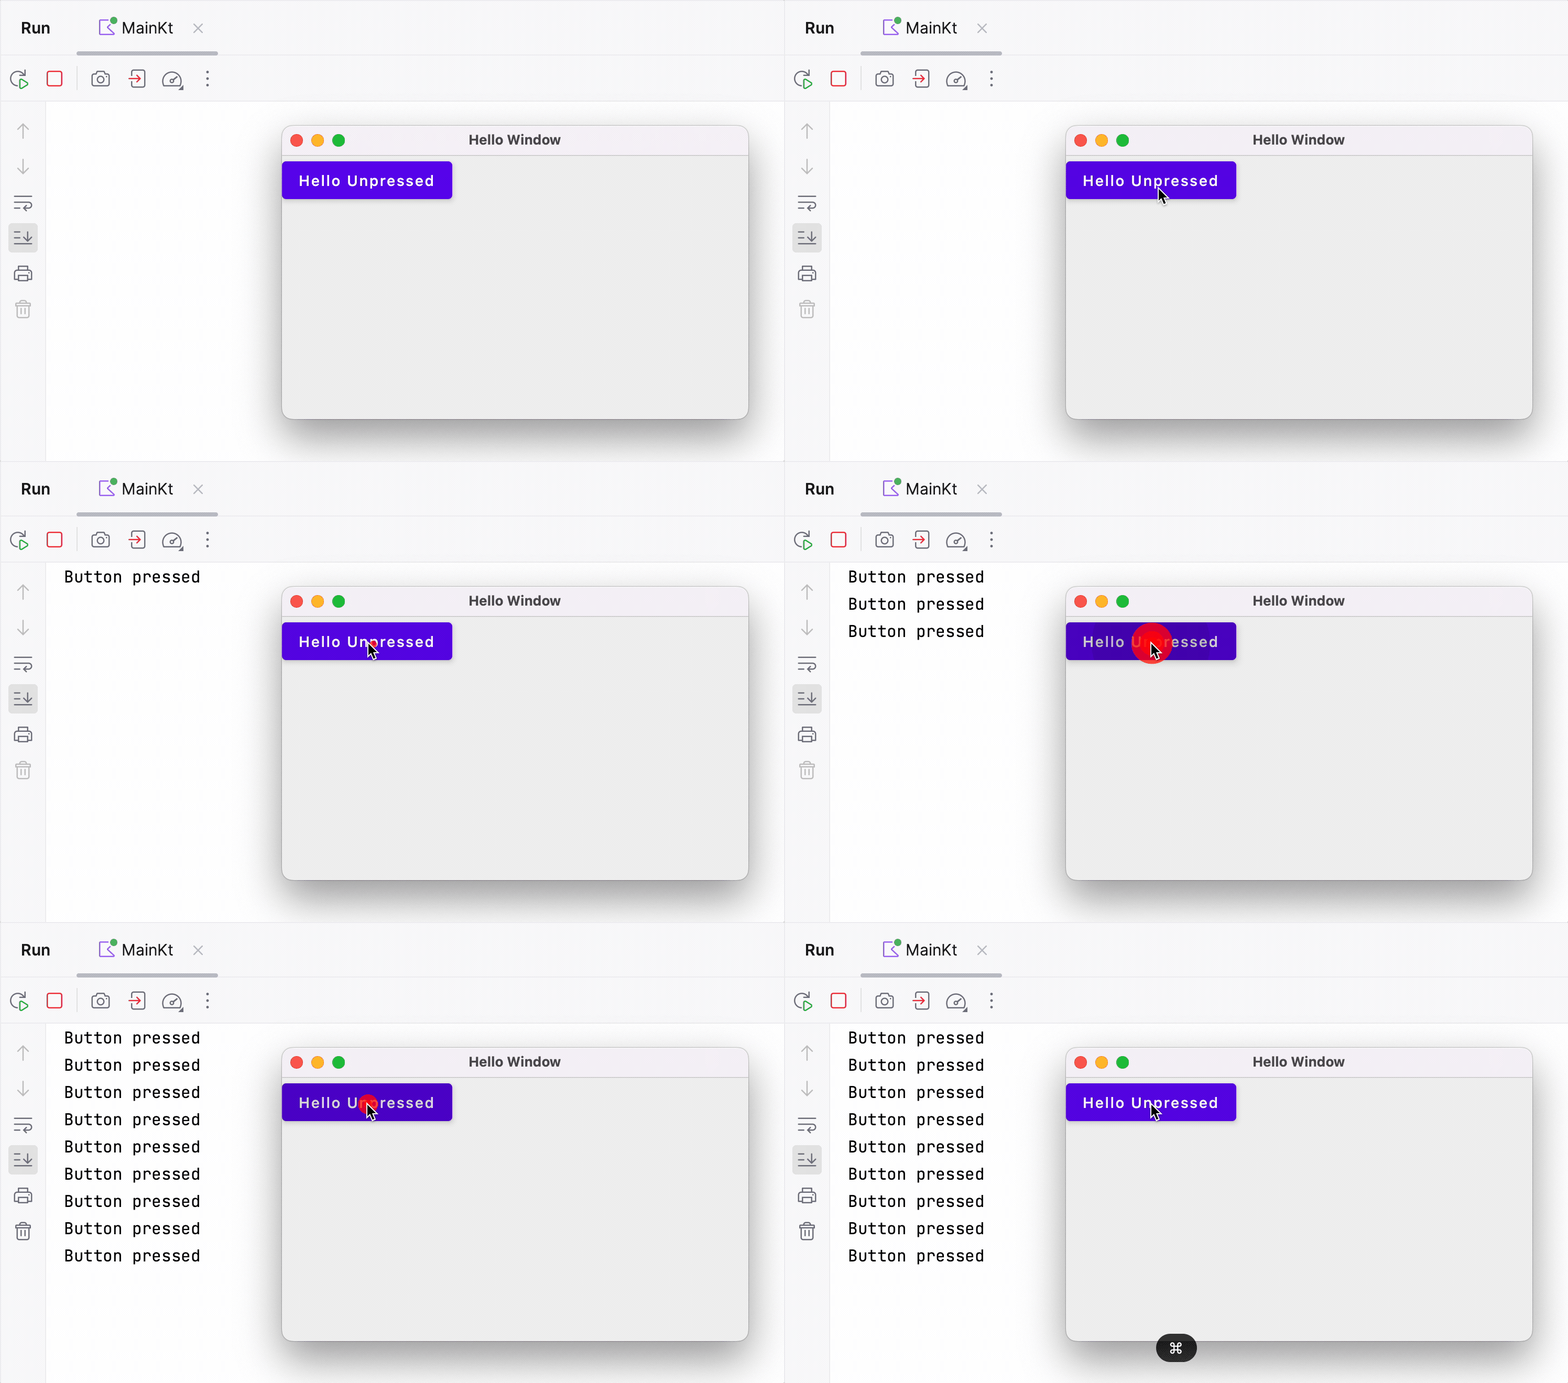
So far it works as we’d hoped! The button displays the string passed in, and our event handler prints to the console when the button is pressed. Let’s try and change our event handler so that we instead change the text on the button when it’s pressed.
It’s a little tricky because we cannot update the parameter directly, so we create a variable currentName to store our display value and then update that in the handler.
fun main() = application {
Window(
title = "Hello Window",
onCloseRequest = ::exitApplication
) {
Greeting("Unpressed")
}
}
@Composable
fun Greeting(name: String) {
var currentName = name
Button(onClick = { currentName = "Pressed" }) {
Text("Hello $currentName")
}
}
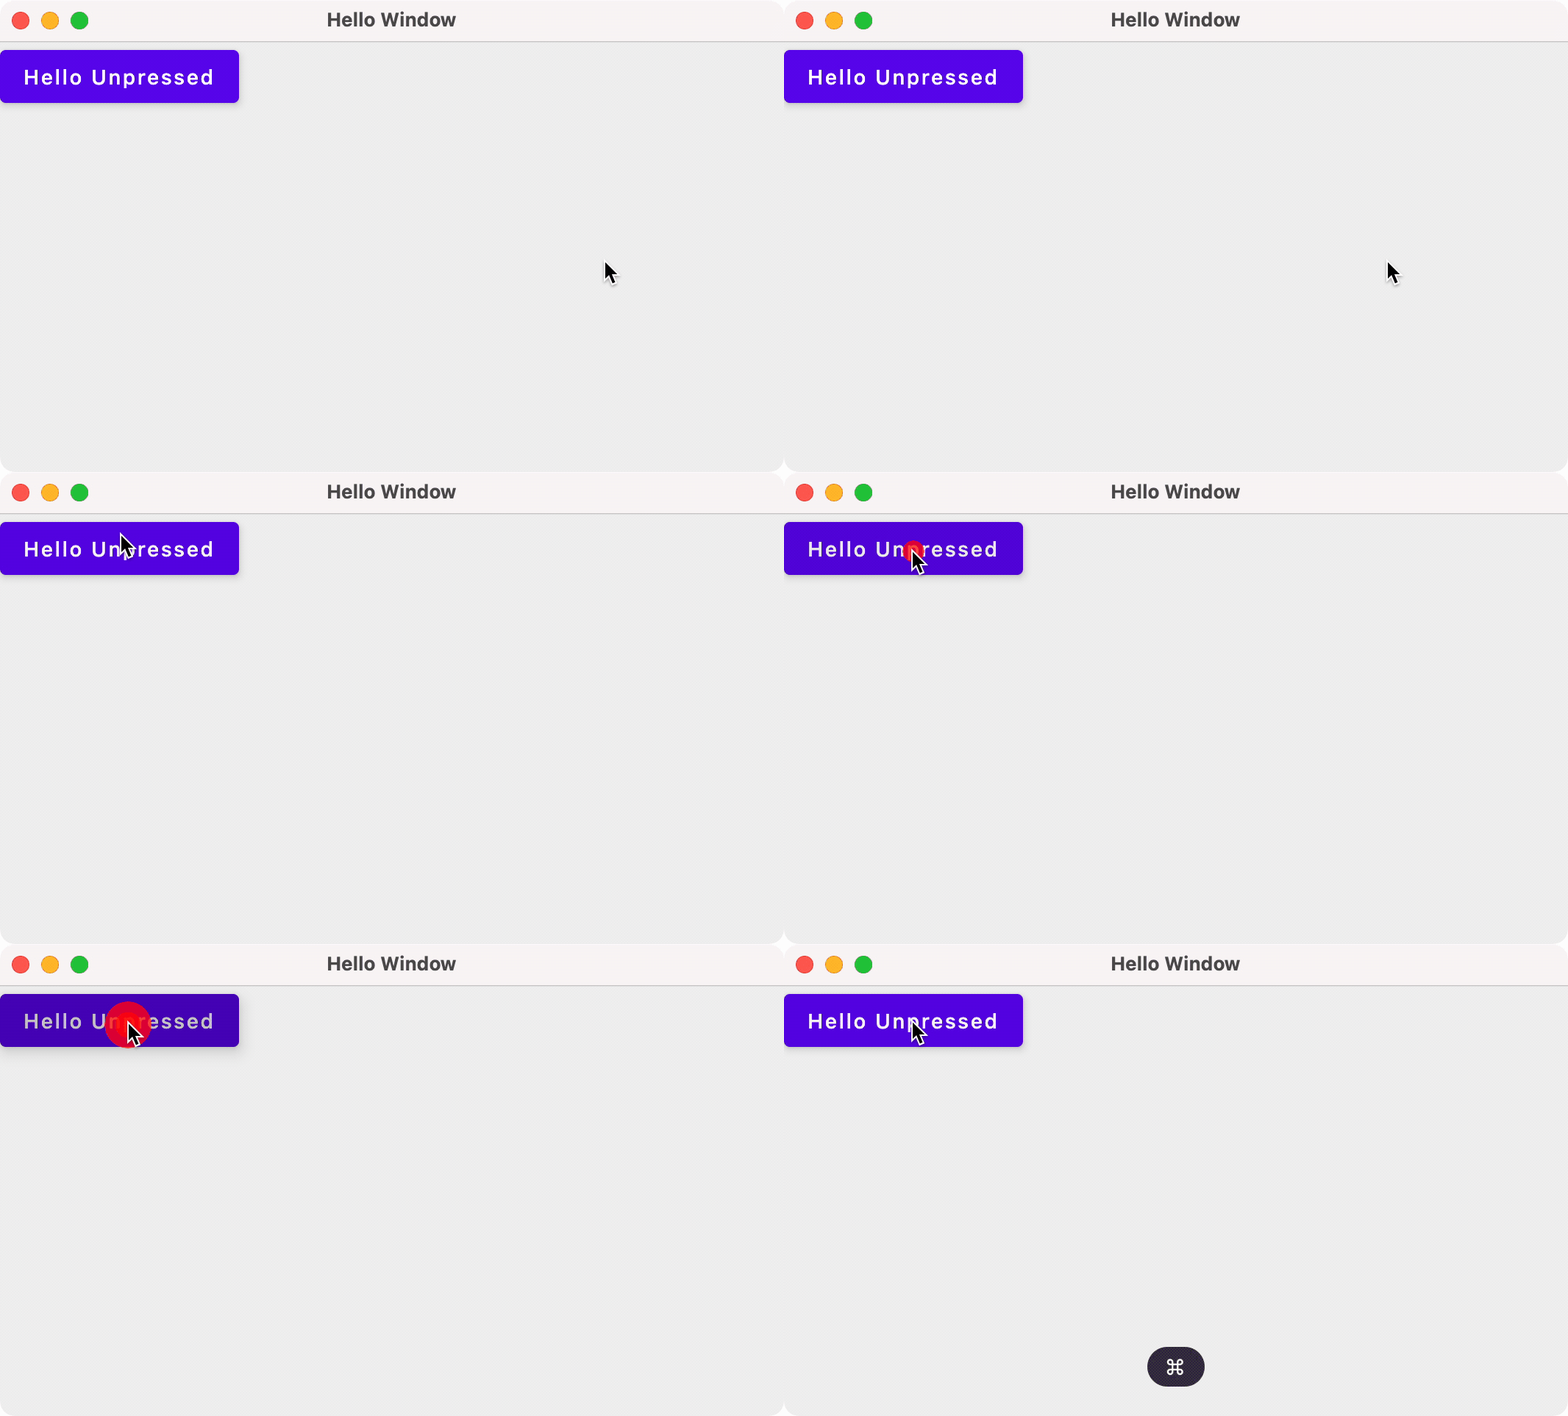
Nothing changed? Why didn’t that work?! It has to do with how Compose manages and reflects state changes.
Recomposition
The declarative design of Compose means that it draws the screen when the application launches, and then only redraws elements when their state changes. Compose is effectively doing this:
- Drawing the initial user interface.
- Monitoring your state (aka variables) directly.
- When a change is detected in state, the portion of the UI that relies on that state is updated.
Compose redraws affected components by calling their Composable functions. This process - detecting a change, and then redrawing the UI - is called recomposition and is the main design principle behind Compose.
Why doesn’t our example work? In our example above, the onClick handler attempts to change the text property of the Button. This triggers Compose to call the Window composable, which calls the Button composable, which initializes text to it’s initial value… Not what we intended.
We have 2 fundamental challenges to address:
- Storing state such that it is observable by Compose.
- Making sure that we persist state between calls to a Composable function, so that we’re not just re-initializing it each time.
Managing state
To make the state observable, we store it in instances of a MutableState class that Compose can directly monitor. In our example, we’ll use the mutableStateOf wrapper function to do this:
fun main() = application {
Window(
title = "Hello Window",
onCloseRequest = ::exitApplication
) {
Greeting("Unpressed")
}
}
@Composable
fun Greeting(name: String) {
var currentName = remember { mutableStateOf(name) }
Button(onClick = { currentName.value = "Pressed" }) {
Text("Hello ${currentName.value}")
}
}
It works! Compose detects when we have clicked on the Button(onClick), updates the text state (currentName.value), and then recomposes the Window and its children based on this new state.
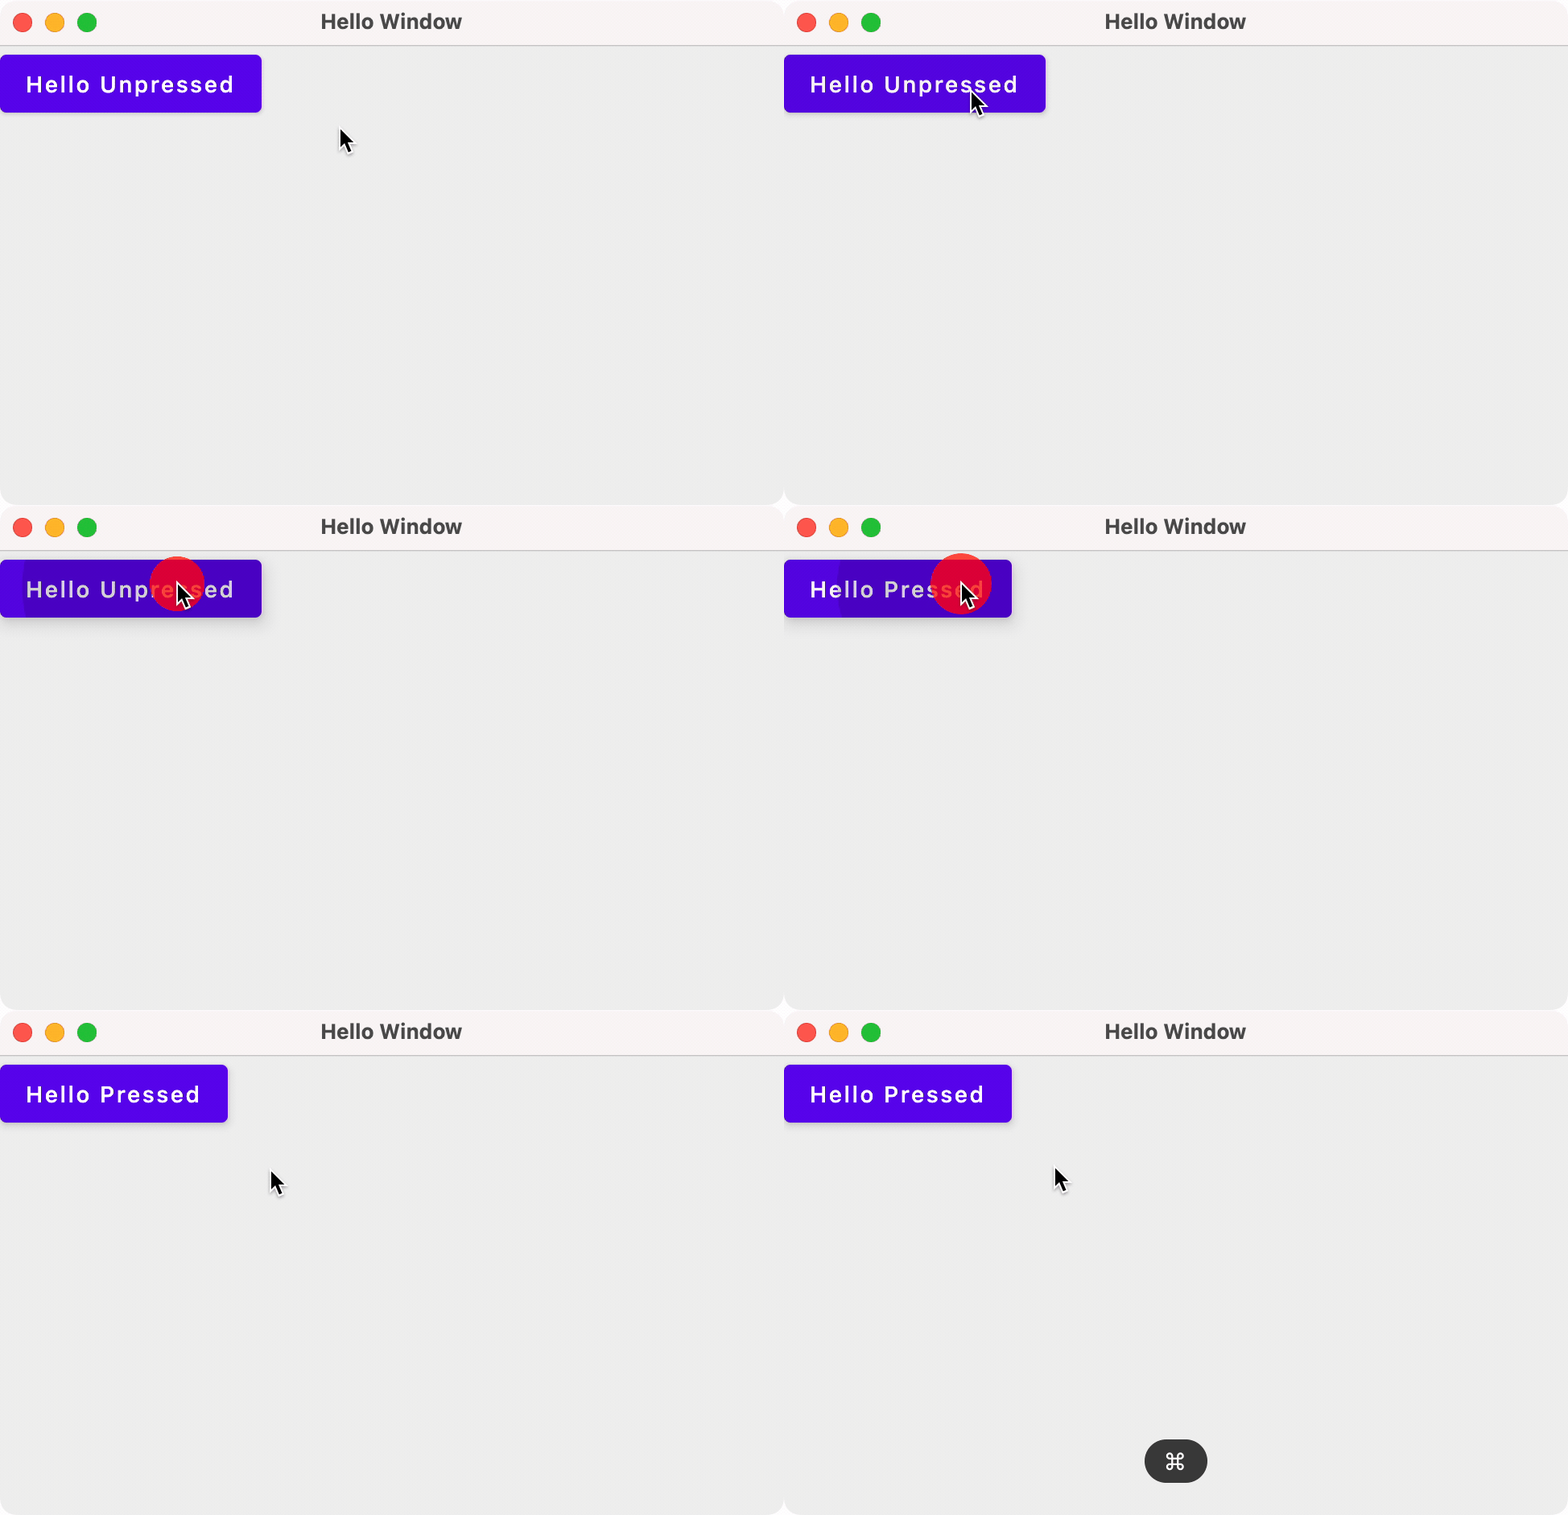
Note that since we changed the type of text from a String to a MutableState<String>, we had to change all variable references to text.value to retrieve the actual value from the state (since it is a class with more properties than just it’s state value).
We also added the remember { } keyword to ensure that the function remembers the state values from the last time it executed. This prevents the function from reinitializing state when it recomposes.
There are multiple classes to handle different types of State. Here’s a partial list—see the Compose documentation for an exhaustive list.
| Class | Helper Function | State that it represents |
|---|---|---|
| MutableState<T> | mutableStateOf() | Primitive <T> |
| MutableList<T> | mutableListOf | List<T> |
| MutableMap<K, V> | mutableMapOf(K, V) | Map<K, V> |
| WindowState | rememberWindowState() | Window parameters e.g. size, position |
| DialogState | rememberDialogState | Similar to WindowState |
We can use these other types of state in appropriate places in our code. For instance, we can add WindowState to the Window and use that to set the window size and position.
fun main() = application {
Window(
title = "Hello Window",
onCloseRequest = ::exitApplication,
state = WindowState(width=300.dp, height=200.dp, position = WindowPosition(50.dp, 50.dp))
) {
val text = remember { mutableStateOf("Press me") }
Button(onClick = {text.value = "Pressed!"}) {
Text(text.value)
}
}
}
This is a much more reasonable size!
State hoisting
A composable that uses remember is storing the internal state within that composable, making it stateful (e.g. our Greeting composable function above).
However, storing state in a function can make it difficult to test and reuse. It’s sometimes helpful to pull state out of a function into a higher-level, calling function. This process is called state hoisting.
Here’s an example from the JetPack Compose documentation. In the example below, our state is the name that the user is typing in the OutlinedTextField. Instead of storing that in our HelloContent composable, we keep our state variable in the calling class HelloScreen and pass in the callback function that will set that value. This allows us to reuse HelloContent by calling it from other composable functions, and keeping the state in the calling function in each case.
fun main() = application {
Window(
title = "Hello Window",
onCloseRequest = ::exitApplication
) {
HelloScreen()
}
}
@Composable
fun HelloScreen() {
var name by remember { mutableStateOf("") }
HelloContent(name = name, onNameChange = { name = it })
}
@Composable
fun HelloContent(name: String, onNameChange: (String) -> Unit) {
Column(modifier = Modifier.padding(16.dp)) {
Text(
text = "Hello, $name",
modifier = Modifier.padding(bottom = 8.dp),
style = MaterialTheme.typography.body1
)
OutlinedTextField(value = name, onValueChange = onNameChange, label = { Text("Name") })
}
}
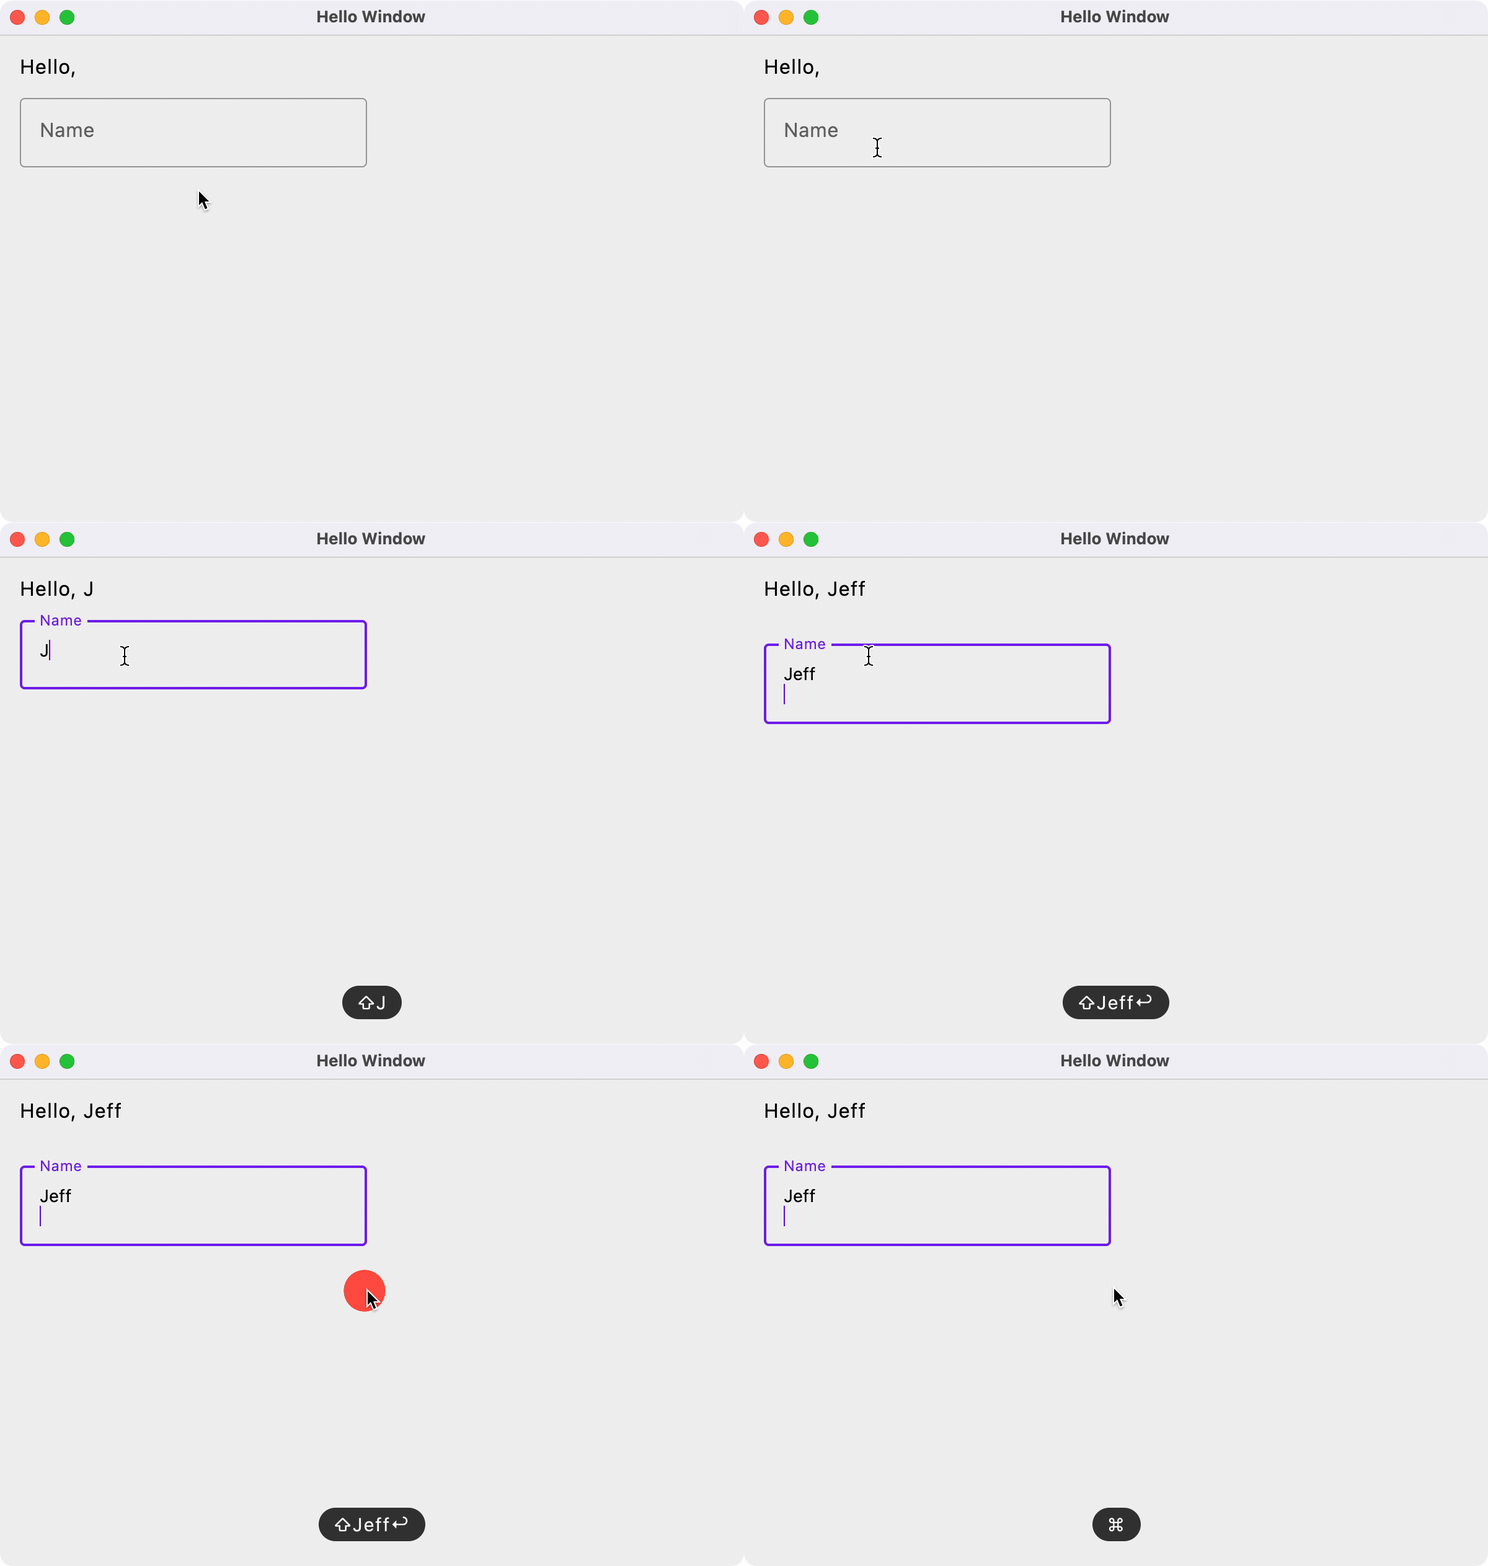
Layout
Let’s discuss using various @Composables that we can use to build our user interface!
For a detailed guide on layouts, refer to Compose Layouts.
There are three basic Composables that we can use to structure our UIs:
- Column, used to arrange widget elements vertically
- Row, used to arrange widget elements horizontally
- Box, used to arrange objects in layers
Column
A column is a vertical arrangement of composables.
fun main() = application {
Window(
title = "CS 346 Compose Layout Demo",
onCloseRequest = ::exitApplication
) {
SimpleColumn()
}
}
@Composable
fun SimpleColumn() {
Column(
modifier = Modifier.fillMaxSize(),
verticalArrangement = Arrangement.Center,
horizontalAlignment = Alignment.CenterHorizontally
) {
Text("One")
Text("Two")
Text("Three")
}
}
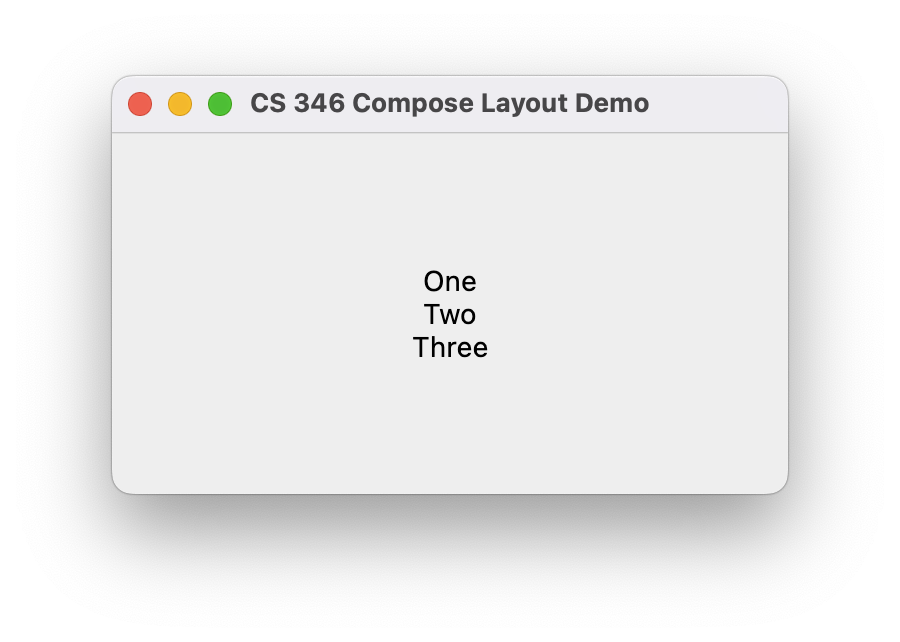
Row
A row is a horizontal arrangement of composables.
fun main() = application {
Window(
title = "CS 346 Compose Layout Demo",
onCloseRequest = ::exitApplication
) {
SimpleRow()
}
}
@Composable
fun SimpleRow() {
Row(
modifier = Modifier.fillMaxSize(),
verticalAlignment = Alignment.CenterVertically,
horizontalArrangement = Arrangement.SpaceEvenly
) {
Text("One")
Text("Two")
Text("Three")
}
}
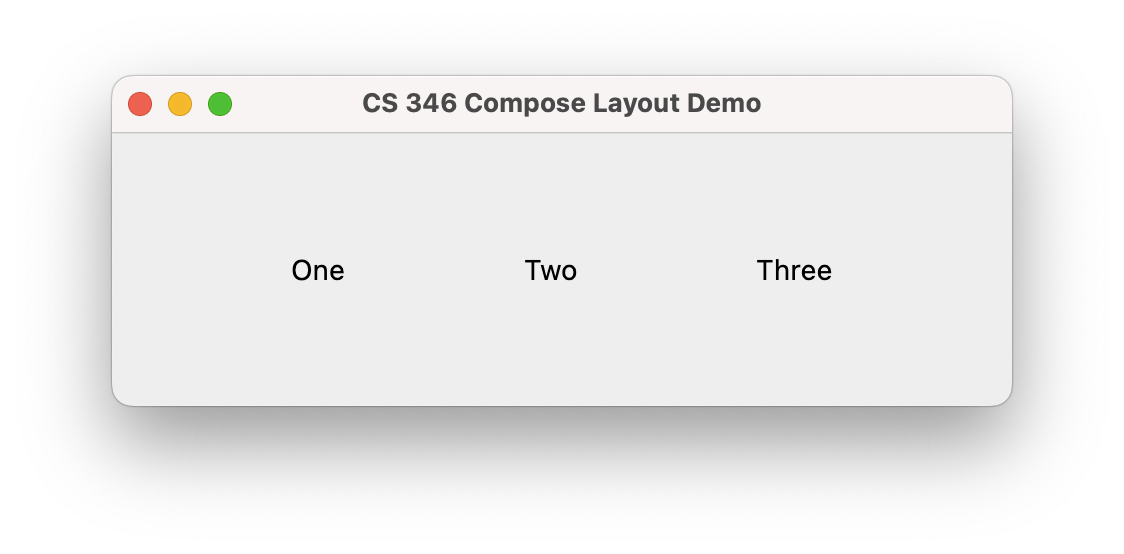
Box
A box is just a rectangular region. Use the composable alignment properties to place each of a Box’s children within its boundaries.
fun main() = application {
Window(
title = "Custom Theme",
onCloseRequest = ::exitApplication,
state = WindowState(width = 300.dp, height = 250.dp, position = WindowPosition(50.dp, 50.dp))
) {
SimpleBox()
}
}
@Composable
fun SimpleBox() {
Box(Modifier.fillMaxSize().padding(15.dp)) {
Text("Drawn first", modifier = Modifier.align(Alignment.TopCenter))
Text("Drawn second", modifier = Modifier.align(Alignment.CenterStart))
Text("Drawn third", modifier = Modifier.align(Alignment.CenterEnd))
FloatingActionButton(
modifier = Modifier.align(Alignment.BottomEnd),
onClick = {println("+ pressed")}
) {
Text("+")
}
}
}
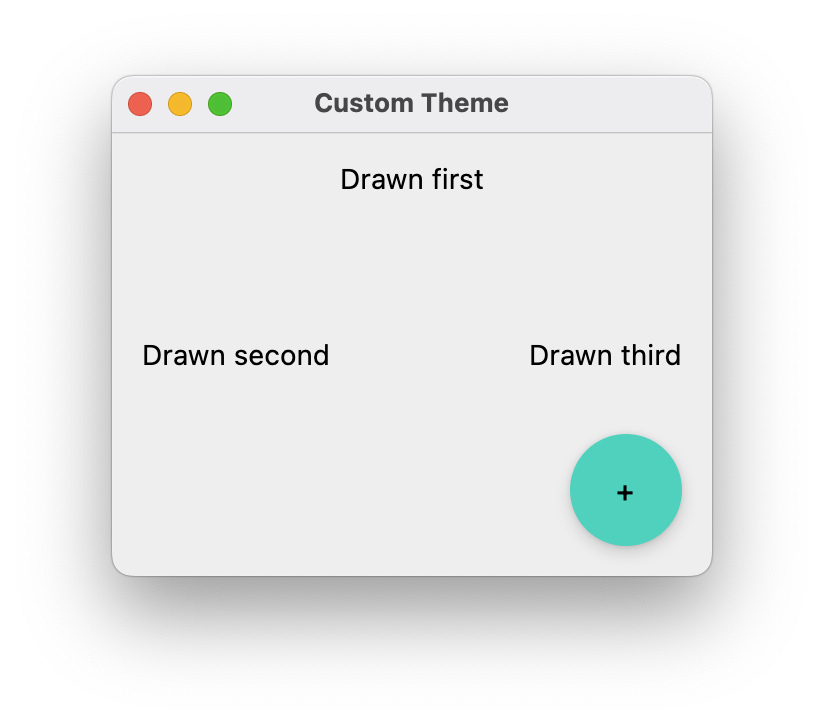
We often nest these layout composables together:
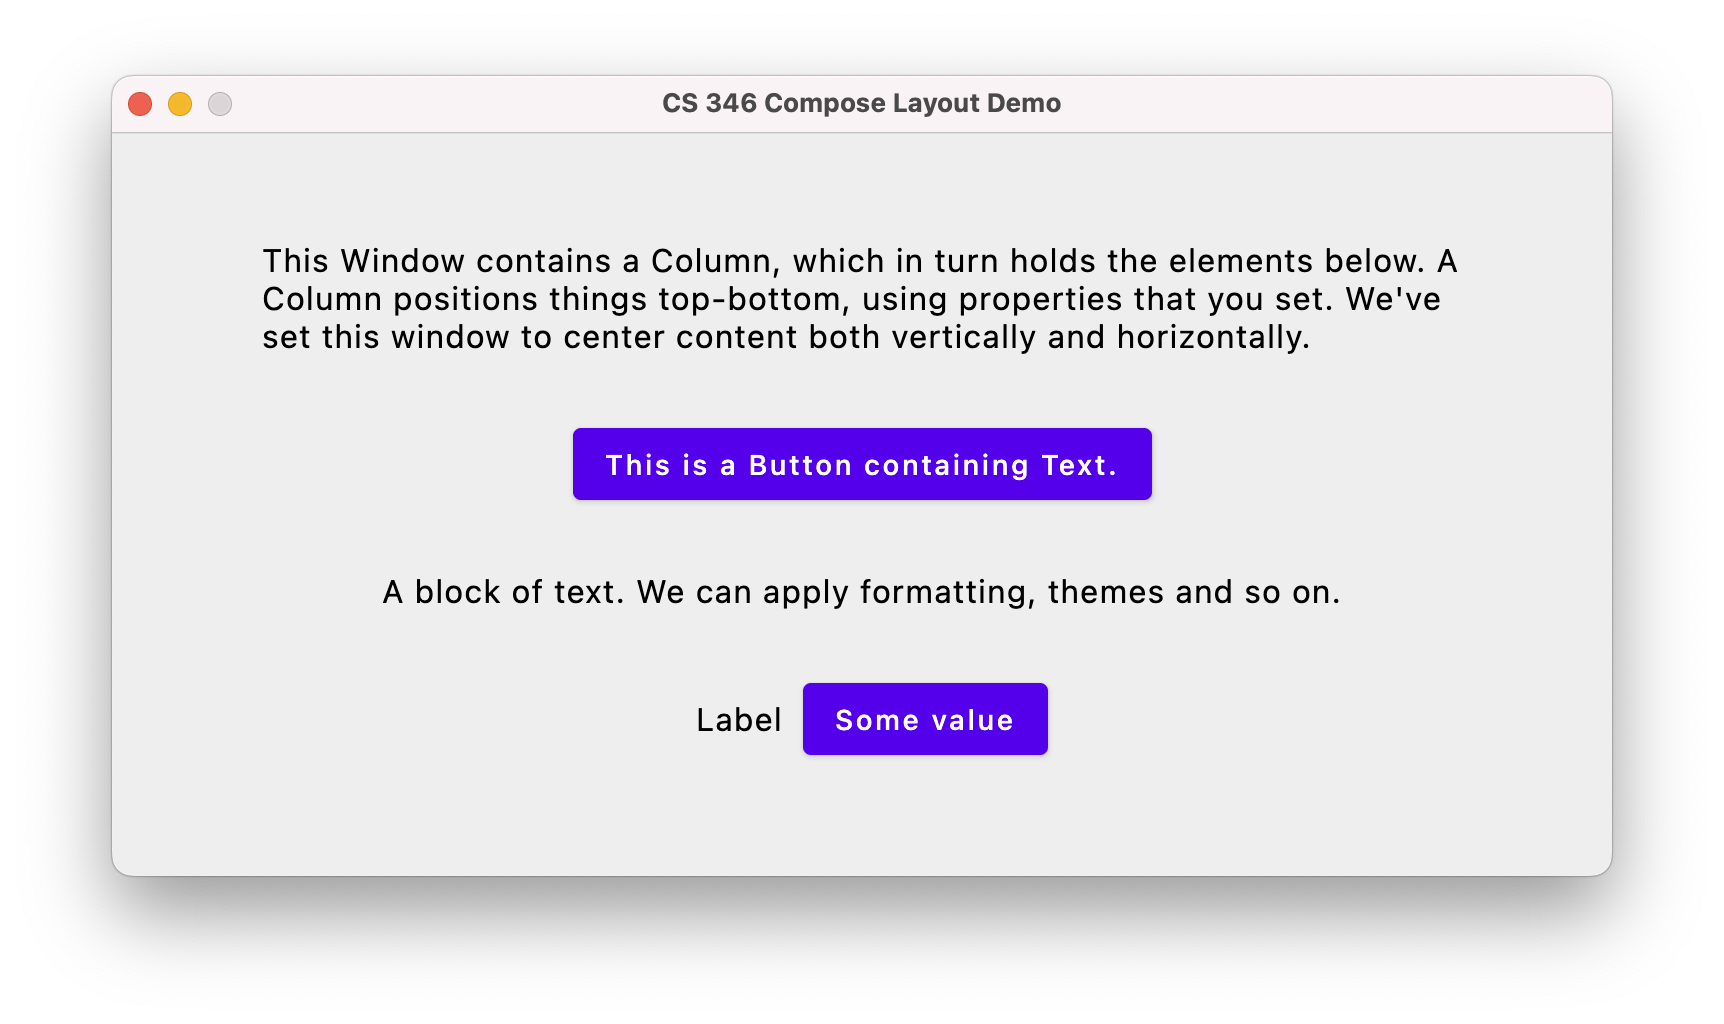
Here’s the code that builds this screen. It contains a Column as the top-level composable, and a Row at the bottom that contains Text and Button composables (which is how we have the layout flowing both top-bottom and left-right).
@Composable
fun CombinedDemo(modifier:Modifier = Modifier) {
Column(
modifier = modifier.fillMaxSize().padding(16.dp),
verticalArrangement = Arrangement.Center,
horizontalAlignment = Alignment.CenterHorizontally
) {
Text(
text = "This Window contains a Column, which in turn holds the elements below. A Column positions things top-bottom, using properties that you set. We've set this window to center content both vertically and horizontally.",
style = MaterialTheme.typography.body1,
modifier = modifier.width(600.dp)
)
Button(
modifier = modifier,
onClick = { println("Button clicked.") }
) {
Text(text = "This is a Button containing Text.")
}
Text(
text = "A block of text. We can apply formatting, themes and so on.",
style = MaterialTheme.typography.body1,
modifier = modifier
)
Row() {
Text(
text = "Label",
style = MaterialTheme.typography.body1,
modifier = modifier.align(alignment = Alignment.CenterVertically).padding(10.dp)
)
Button(
modifier = modifier,
onClick = { println("A different button clicked.") }
) {
Text("Some value")
}
}
}
Lazy Layouts
Columns and rows work fine for a small amount of data that fits on the screen. What do you do if you have large lists that might be longer or wider than the space that you have available? Ideally, we would like that content to be presented in a fixed region of the screen, and be scrollable - so that you can move up and down through the list. For performance reasons, we also want large amounts of data to be lazy loaded: only the data that is being displayed needs to be in-memory and other data is loaded only when it needs to be displayed.
Compose has a series of lazy components that work like this:
- LazyColumn
- LazyRow
- LazyVerticalGrid
- LazyHorizontalGrid
Here’s an example of using a LazyRow to present contents that are spread out horizontally, and will lazy-load.
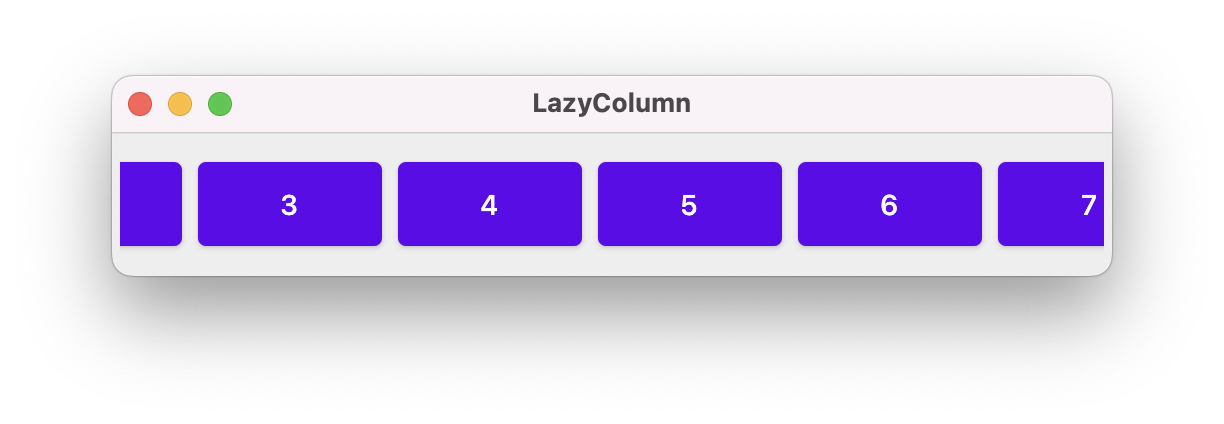
fun main() = application {
Window(
title = "LazyColumn",
state = WindowState(width = 500.dp, height = 100.dp),
onCloseRequest = ::exitApplication
) {
LazyRowDemo()
}
}
@Composable
fun LazyRowDemo(modifier: Modifier = Modifier) {
LazyRow(
modifier = modifier.padding(4.dp).fillMaxSize(),
verticalAlignment = Alignment.CenterVertically
) {
items(45) {
Button(
onClick = { },
modifier = Modifier
.size(100.dp, 50.dp)
.padding(4.dp)
) {
Text(it.toString())
}
}
}
}
We can do something similar to show a scrollable grid of data:
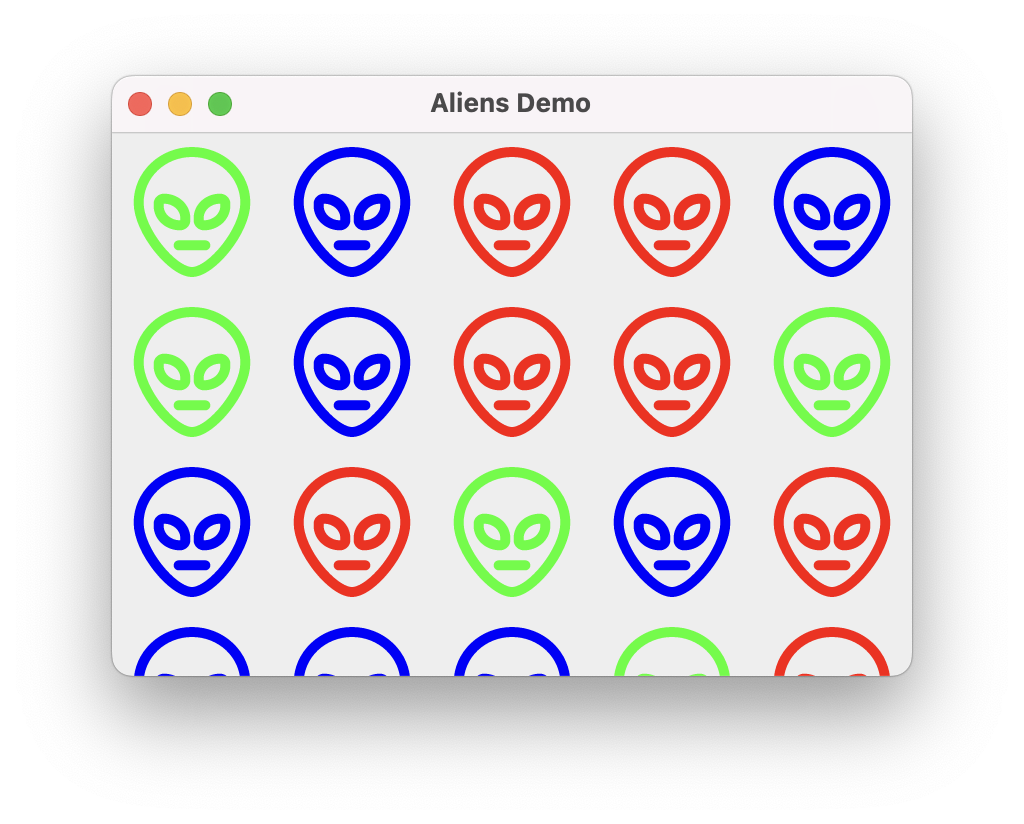
@Composable
fun AndroidLazyGrid(modifier: Modifier = Modifier) {
LazyVerticalGrid(modifier = modifier, columns = GridCells.Fixed(5)) {
val colors = listOf<Color>(Color.Blue, Color.Red, Color.Green)
items(45) {
AndroidAlien(color = colors.get(Random.nextInt(0,3)) )
}
}
}
Properties
Each class has its own parameters that can be supplied to affect its appearance and behaviour.
Arrangement
Arrangement specifies how elements are laid out by the class. e.g. Row has a horizontalArrangement since it lays elements out horizontally; Column has a verticalArrangement to control vertical layout. Arrangement must be one of these values:
- Arrangement.SpaceEvenly: Place children such that they are spaced evenly across the main axis,
- Arrangement.SpaceBetween: Place children such that they are spaced evenly across the main axis, without free space before the first child or after the last child.
- Arrangement.SpaceAround: Place children such that they are spaced evenly across the main axis, including free space before the first child and after the last child, but half the amount of space existing otherwise between two consecutive children.
- Arrangement.Center: Place children such that they are as close as possible to the middle of the main axis.
- Arrangement.Top: Place children vertically such that they are as close as possible to the top of the main axis
- Arrangement.Bottom: Place children vertically such that they are as close as possible to the bottom of the main axis
Alignment
Alignment specifies how elements are aligned along the dimension of this container class. e.g. top, bottom, or center. These are orthogonal to arrangement (e.g. a Row lays out elements in a horizontal path/arrangement but aligns elements vertically in that path). Alignment must be one of these values:
- Alignment.CenterHorizontally: Center across the horizontalAlignment (e.g. Column)
- Alignment.CenterVertically: Center across the verticalAlignment (e.g. Row).
Modifier
Modifier is a class that contains parameters that are commonly used across elements. This allows us to set a number of parameters within an instance of Modifier, and pass those options between functions in a hierarchy. This is very helpful when you want to set a value and have it cascade through the scene graph (e.g. set horizontalAlignment = Alignment.CenterHorizontally once and have it propagate).
You can see how this is used in the CombinedDemo below:
- an initial modifier is passed as a parameter to the CombinedDemo composable function. If one is not provided, it uses the default Modifier.
fun CombinedDemo(modifier:Modifier = Modifier)
- the Column composable uses the instance of the Modifier, and appends some new values to it. Column then inherits any values that were already set plus any new values that are initialized. In this case, we add
padding(16)to the column’s instance.modifier = modifier.fillMaxSize().padding(16.dp)
- Further composables that the Column calls can either use the modifier that is passed in (
modifier = modifier) or add additional values (modifier = modifier.width(600.dp))
Composables
There’s a very large number of widgets that you can use in Compose! Because it’s cross-platform, most composables and functions exist across all supported platforms.
The Jetpack Compose reference guide is the best source of information on the Composables that are included in the material theme.
Some of the code snippets below inspired by this article: Widgets in JetPack Compose. Others are taken from the Jetpack Compose Material Components list.
Text
A Text composable displays text.
@Composable
fun SimpleText() {
Text(
text = "Widget Demo",
color = Color.Blue,
fontSize = 30.sp,
style = MaterialTheme.typography.h2, maxLines = 1
)
}

Image
An image composable displays an image (by default, from your Resources folder in your project).
@Composable
fun SimpleImage() {
Image(
painter = painterResource("credo.jpg"),
contentDescription = null,
contentScale = ContentScale.Fit,
modifier = Modifier
.height(150.dp)
.fillMaxWidth()
.clip(shape = RoundedCornerShape(10.dp))
)
}
Button
There are three main types of Buttons:
- Button: A standard button with no caption. Used for primary input.
- OutlinedButton: A button with an outline. Intended to be used for secondary input (lesser importance).
- TextButton: A button with a caption.
The onClick function is called when the user pressed the button.
There are also OutlinedButton and TextButton composables
fun main() {
application{
Window(onCloseRequest = ::exitApplication, title = "Button Demo") {
Column(modifier = Modifier.fillMaxSize(), horizontalAlignment = Alignment.CenterHorizontally) {
Button(onClick = { println("Button clicked") }) { Text("Caption") }
OutlinedButton(onClick = { println("OutlinedButton clicked") }) { Text("Caption") }
TextButton(onClick = { println("TextButton clicked") }) { Text("Caption") }
}
}
}
}
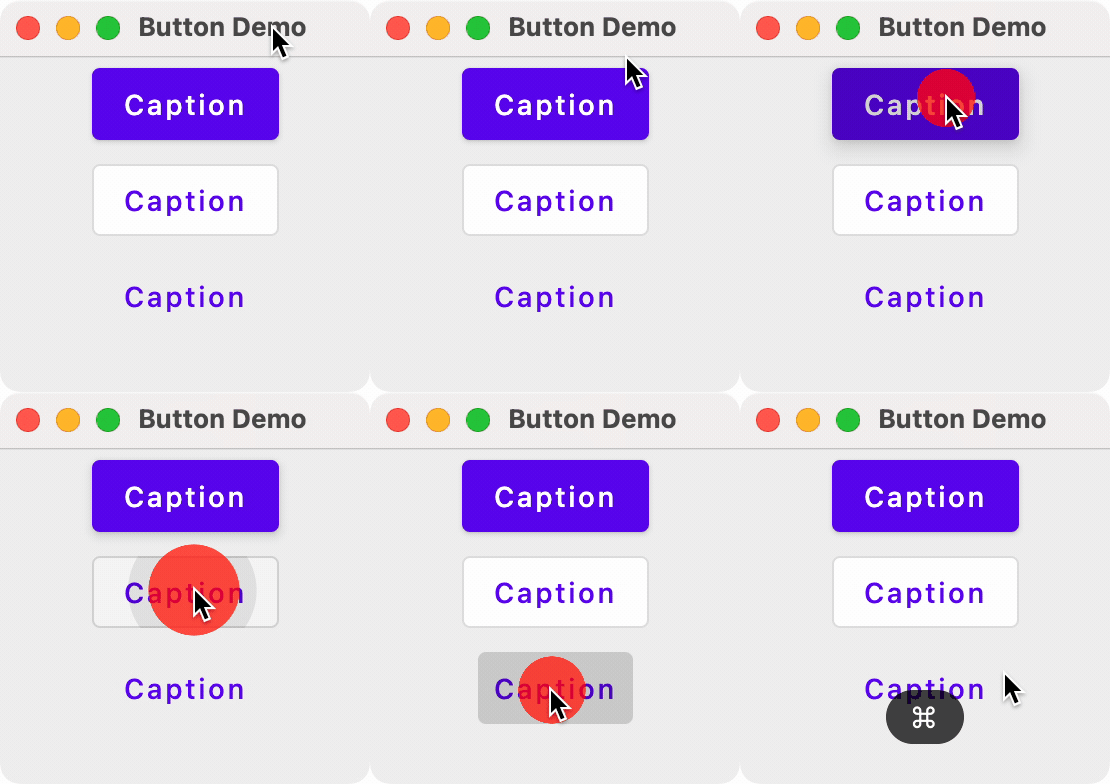
Card
The Card composable is a container for parts of your user-interface, intended to hold related content. e.g. a tweet, an email message, a new story in a new application and so on. It’s intended to be a smaller UI element in some larger container like a Column or Row.
Here’s an example from the Card composable documentation.
An elevated card populated with text and icons.
@Composable
fun CardMinimalExample() {
Card() {
Text(text = "Hello, world!")
}
}
Chip
A chip compact, interactive UI element, often with both an icon and text label. These often represent selectable or boolean values.
Here’s an example from the Chip composable documentation.
@Composable
fun AssistChipExample() {
AssistChip(
onClick = { Log.d("Assist chip", "hello world") },
label = { Text("Assist chip") },
leadingIcon = {
Icon(
Icons.Filled.Settings,
contentDescription = "Localized description",
Modifier.size(AssistChipDefaults.IconSize)
)
}
)
}
Checkbox
A checkbox is a toggleable control that presents true/false state. The OnCheckedChange function is called when the user interacts with it (and in this case, the state represented by it is stored in a MutableState variable named isChecked).
@Composable
fun SimpleCheckbox() {
val isChecked = remember { mutableStateOf(false) }
Checkbox(
checked = isChecked.value ,
enabled = true,
onCheckedChange = {
isChecked.value = it
}
)
}

Switch
A Switch is a toggle control similar to a checkbox, in that it represents a boolean state.
@Composable
fun SwitchMinimalExample() {
var checked by remember { mutableStateOf(true) }
Switch(
checked = checked,
onCheckedChange = {
checked = it
}
)
}
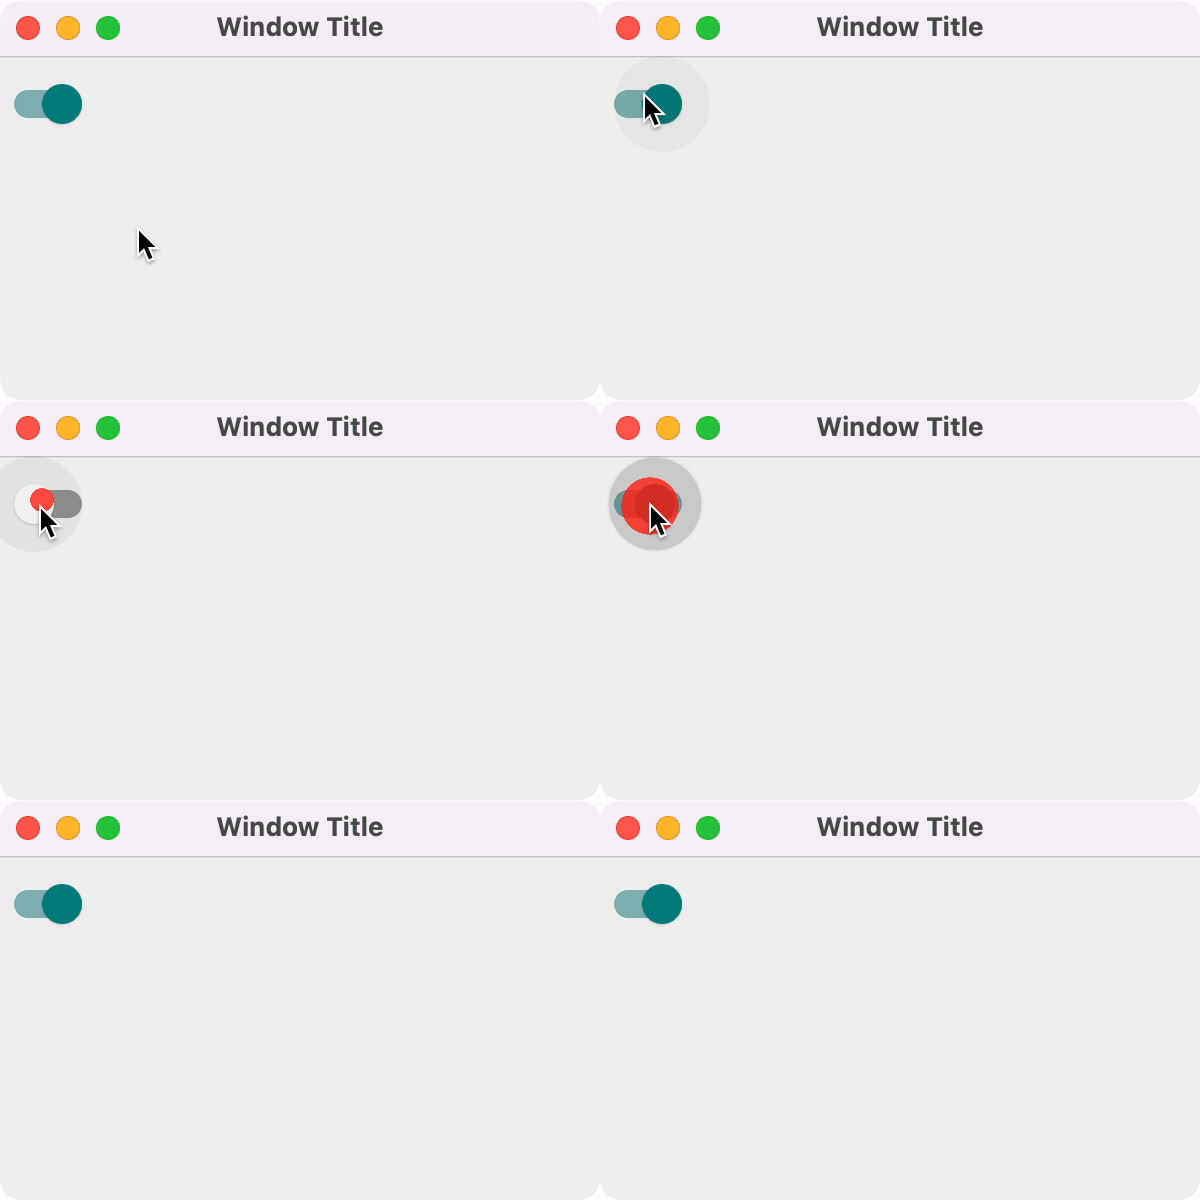
Slider
A slider lets the user make a selection from a continuous range of values. It’s useful for things like adjusting volume or brightness, or choosing from a wide range of values.
Here’s an example from the Slider compose documentation.
@Preview
@Composable
fun SliderMinimalExample() {
var sliderPosition by remember { mutableFloatStateOf(0f) }
Column {
Slider(
value = sliderPosition,
onValueChange = { sliderPosition = it }
)
Text(text = sliderPosition.toString())
}
}
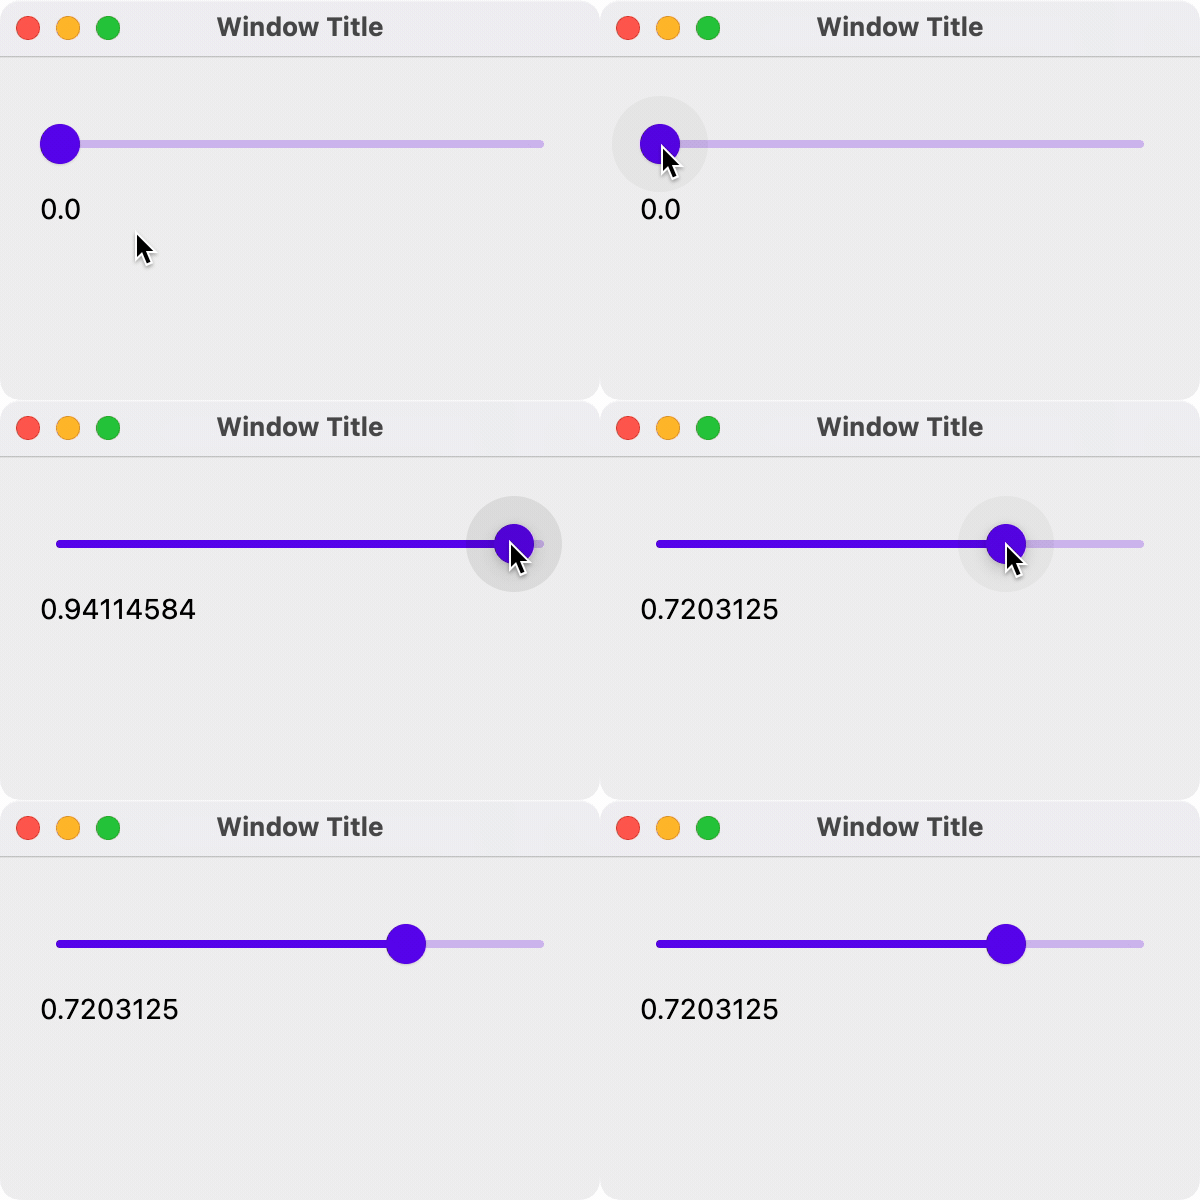
Spacer
A spacer just adds empty space. It’s useful when you only want to force space between elements.
@Composable
fun getExtraSpace() {
Spacer(modifier = Modifier.height(20.dp))
}
Scaffold
A scaffold makes it easy to build an Android-style application, with a top application bar, a bottom application bar, and elements like floating action buttons. Think of it as a pre-defined layout to help you get started with a commonly used structure.
class MainActivity : ComponentActivity() {
override fun onCreate(savedInstanceState: Bundle?) {
super.onCreate(savedInstanceState)
setContent {
MyApplicationTheme {
// A surface container using theme 'background' color
Surface(
modifier = Modifier.fillMaxSize(),
color = MaterialTheme.colorScheme.background
) {
ScaffoldExample()
}
}
}
}
}
@OptIn(ExperimentalMaterial3Api::class)
@Composable
fun ScaffoldExample() {
var presses by remember { mutableStateOf(0) }
Scaffold(
topBar = {
TopAppBar(title = { Text("Top app bar") })
},
bottomBar = {
BottomAppBar(
containerColor = MaterialTheme.colorScheme.primaryContainer,
contentColor = MaterialTheme.colorScheme.primary,
) {
Text(
modifier = Modifier.fillMaxWidth(),
textAlign = TextAlign.Center,
text = "Bottom app bar",
)
}
},
floatingActionButton = {
FloatingActionButton(onClick = { presses++ }) {
Icon(Icons.Default.Add, contentDescription = "Add")
}
}
) { innerPadding ->
Column(
modifier = Modifier.padding(innerPadding),
verticalArrangement = Arrangement.spacedBy(16.dp),
) {
Text(
modifier = Modifier.padding(8.dp),
text =
"""
This is an example of a scaffold. It uses the Scaffold composable's parameters to create a screen with a simple top app bar, bottom app bar, and floating action button.
It also contains some basic inner content, such as this text.
You have pressed the floating action button $presses times.
""".trimIndent(),
)
}
}
}
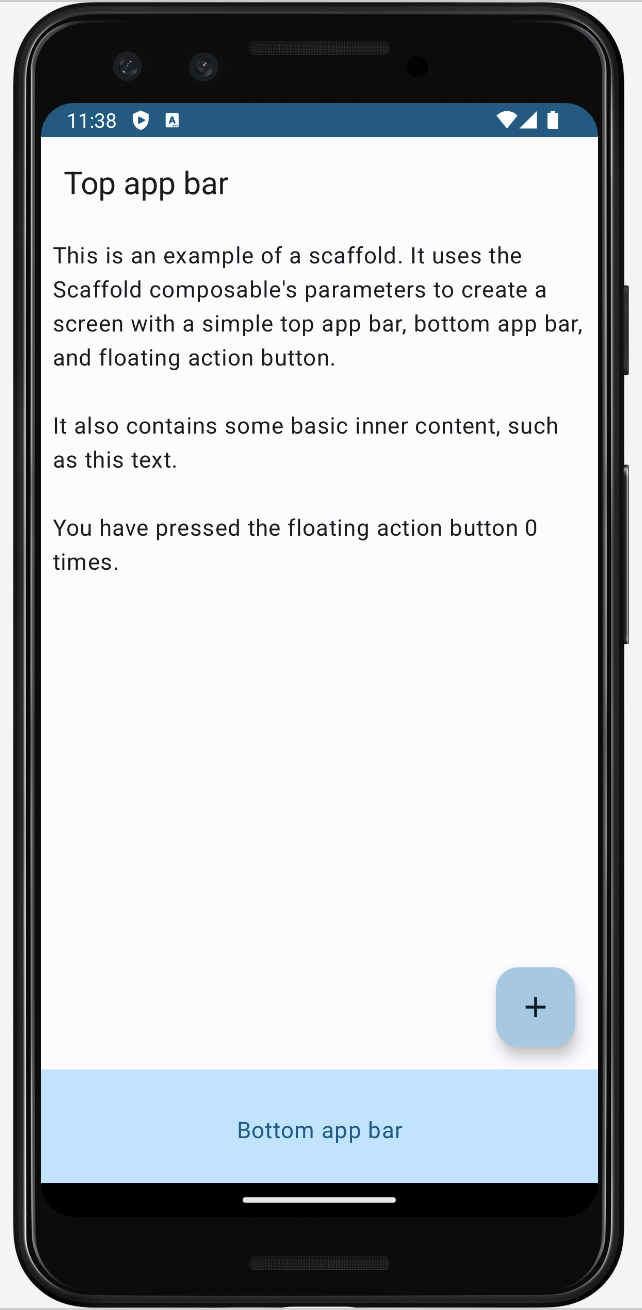
See the App Bar documentation for examples of how to customize top and bottom app bars further.
Other widgets
There are actually two sets of user-interface libraries in Android: the original view-based classes, and the newer Compose classes and functions. Jetpack Compose is relatively new, having been launched in 2017. It is meant to be the main UI toolkit going forward, but that doesn’t mean that the old classes are disappearing! Some of the older android classes are actually used as the foundation for Compose (they share a rendering pipeline for instance).
You can differentiate them based on their package names: android.* are the older classes, and androidx.* are the newer Compose classes.
import android.app.Activity
import android.widget.Toast
import androidx.compose.foundation.layout.Column
import androidx.compose.foundation.layout.Row
import androidx.compose.material3.Button
This is interesting because we can leverage a number of the older classes, that have no corresponding Compose replacement. These work perfectly fine with Compose and let you build some canonical Android behaviour.
Toast
A toast is a small notification floats above your current content. It can be used where you would normally use a short dialog (where you don’t need user feedback to proceed).
override fun onCreate(savedInstanceState: Bundle?) {
super.onCreate(savedInstanceState)
setContent {
ToastTheme {
Scaffold { padding ->
App(activity = this, modifier = Modifier.padding(padding))
}
}
}
}
@Composable
fun App(activity: Activity, modifier: Modifier = Modifier) {
Column(modifier = modifier.fillMaxSize(), horizontalAlignment = Alignment.CenterHorizontally) {
Text(modifier = modifier, text = "Press a button to see a toast!")
Row {
Button(
modifier = modifier.padding(2.dp),
onClick = { Toast.makeText(activity, "This is a short popup!", Toast.LENGTH_SHORT).show() }
) {
Text("Short Toast")
}
}
}
}
Here’s the result UI, and the popup.
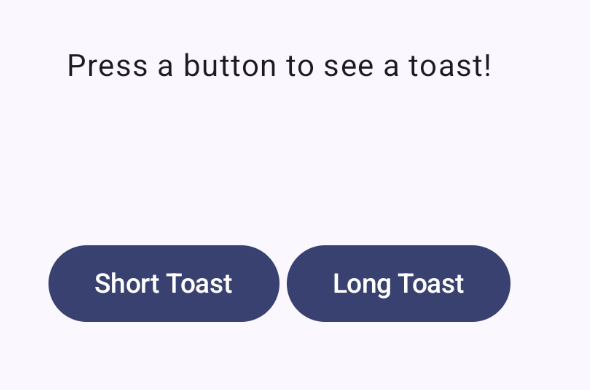

Using themes
A theme is a common look-and-feel that is used when building software. Google includes their Material Design theme in Compose, and by default, composables will be drawn using the Material look-and-feel. This includes colors, opacity, shadowing and other visual elements. Apps built using the Material design system have very specific look-and-feel (example below from the Material Getting-Started documentation):
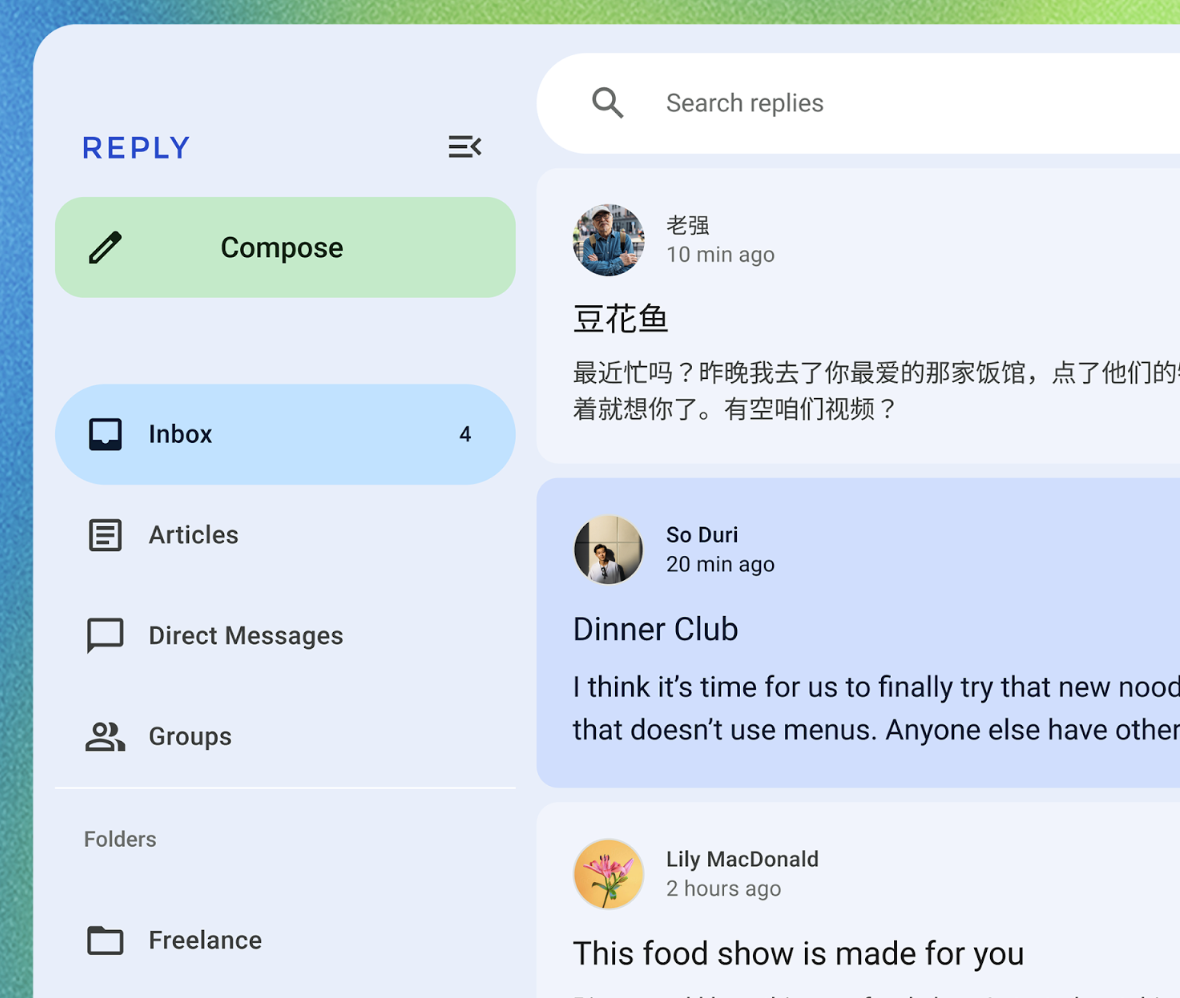
You might want to change the appearance of your application, either for product branding purposes, or to make it appear more “standard” for a specific platform. This can be done quite easily, by either extending and modifying the built-in theme, or replacing it completely.
Customization
To customize the default theme, we can just extend it and change its properties, and then set our application to use the modified theme. See The Color System for details on how colors are applied to Composables.
fun main() = application {
Window(
title = "Hello Window",
onCloseRequest = ::exitApplication,
state = WindowState(width=300.dp, height=250.dp, position = WindowPosition(50.dp, 50.dp))
) {
CustomTheme {
Column {
// primary color
val buttonText = remember { mutableStateOf("Press me") }
Button(onClick = { buttonText.value = "Pressed!" }) {
Text(buttonText.value)
}
val outlinedButtonText = remember { mutableStateOf("Press me") }
OutlinedButton(onClick = { outlinedButtonText.value = "Pressed!" }) {
Text(outlinedButtonText.value)
}
// secondary color
var switchState = remember { mutableStateOf(false) }
Switch(switchState.value, onCheckedChange = { switchState.value = !switchState.value })
}
}
}
}
@Composable
fun CustomTheme(
content: @Composable () -> Unit
) {
MaterialTheme(
// change main colors
colors = MaterialTheme.colors.copy(
primary = Color.Red,
secondary = Color.Magenta,
),
// square off corner of components
shapes = MaterialTheme.shapes.copy(
small = AbsoluteCutCornerShape(0.dp),
medium = AbsoluteCutCornerShape(0.dp),
large = AbsoluteCutCornerShape(0.dp)
)
) {
content()
}
}
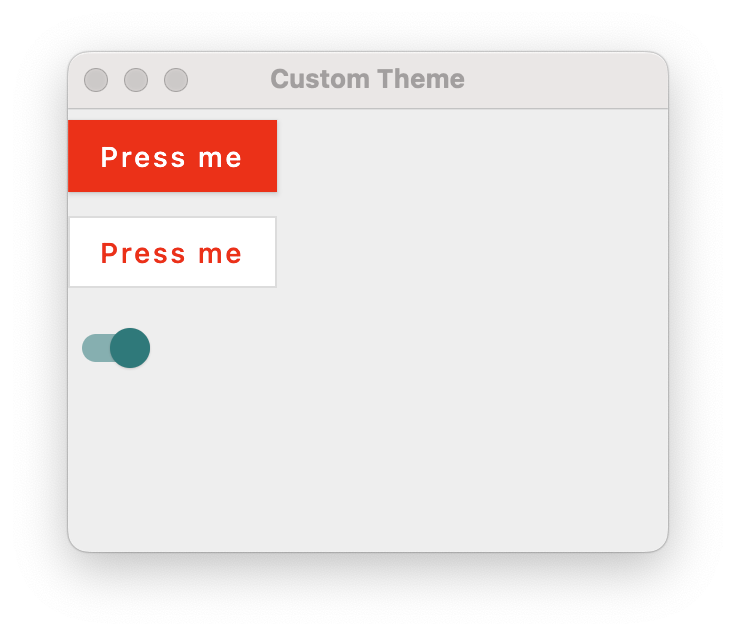
Third-party themes
There are third-party themes that you can include to replace the Material theme completely:
- Aurora library allows you to style Compose applications using the Ephemeral design theme.
- JetBrains Jewel changes the look-and-feel to match IntelliJ applications. e.g. IntelliJ IDEA.
- MacOS theme mimics the standard macOS-look-and-feel.
Importing from Figma
If you use Figma to build prototype user-interfaces, you can export the Compose code from Figma into your Composables directly!
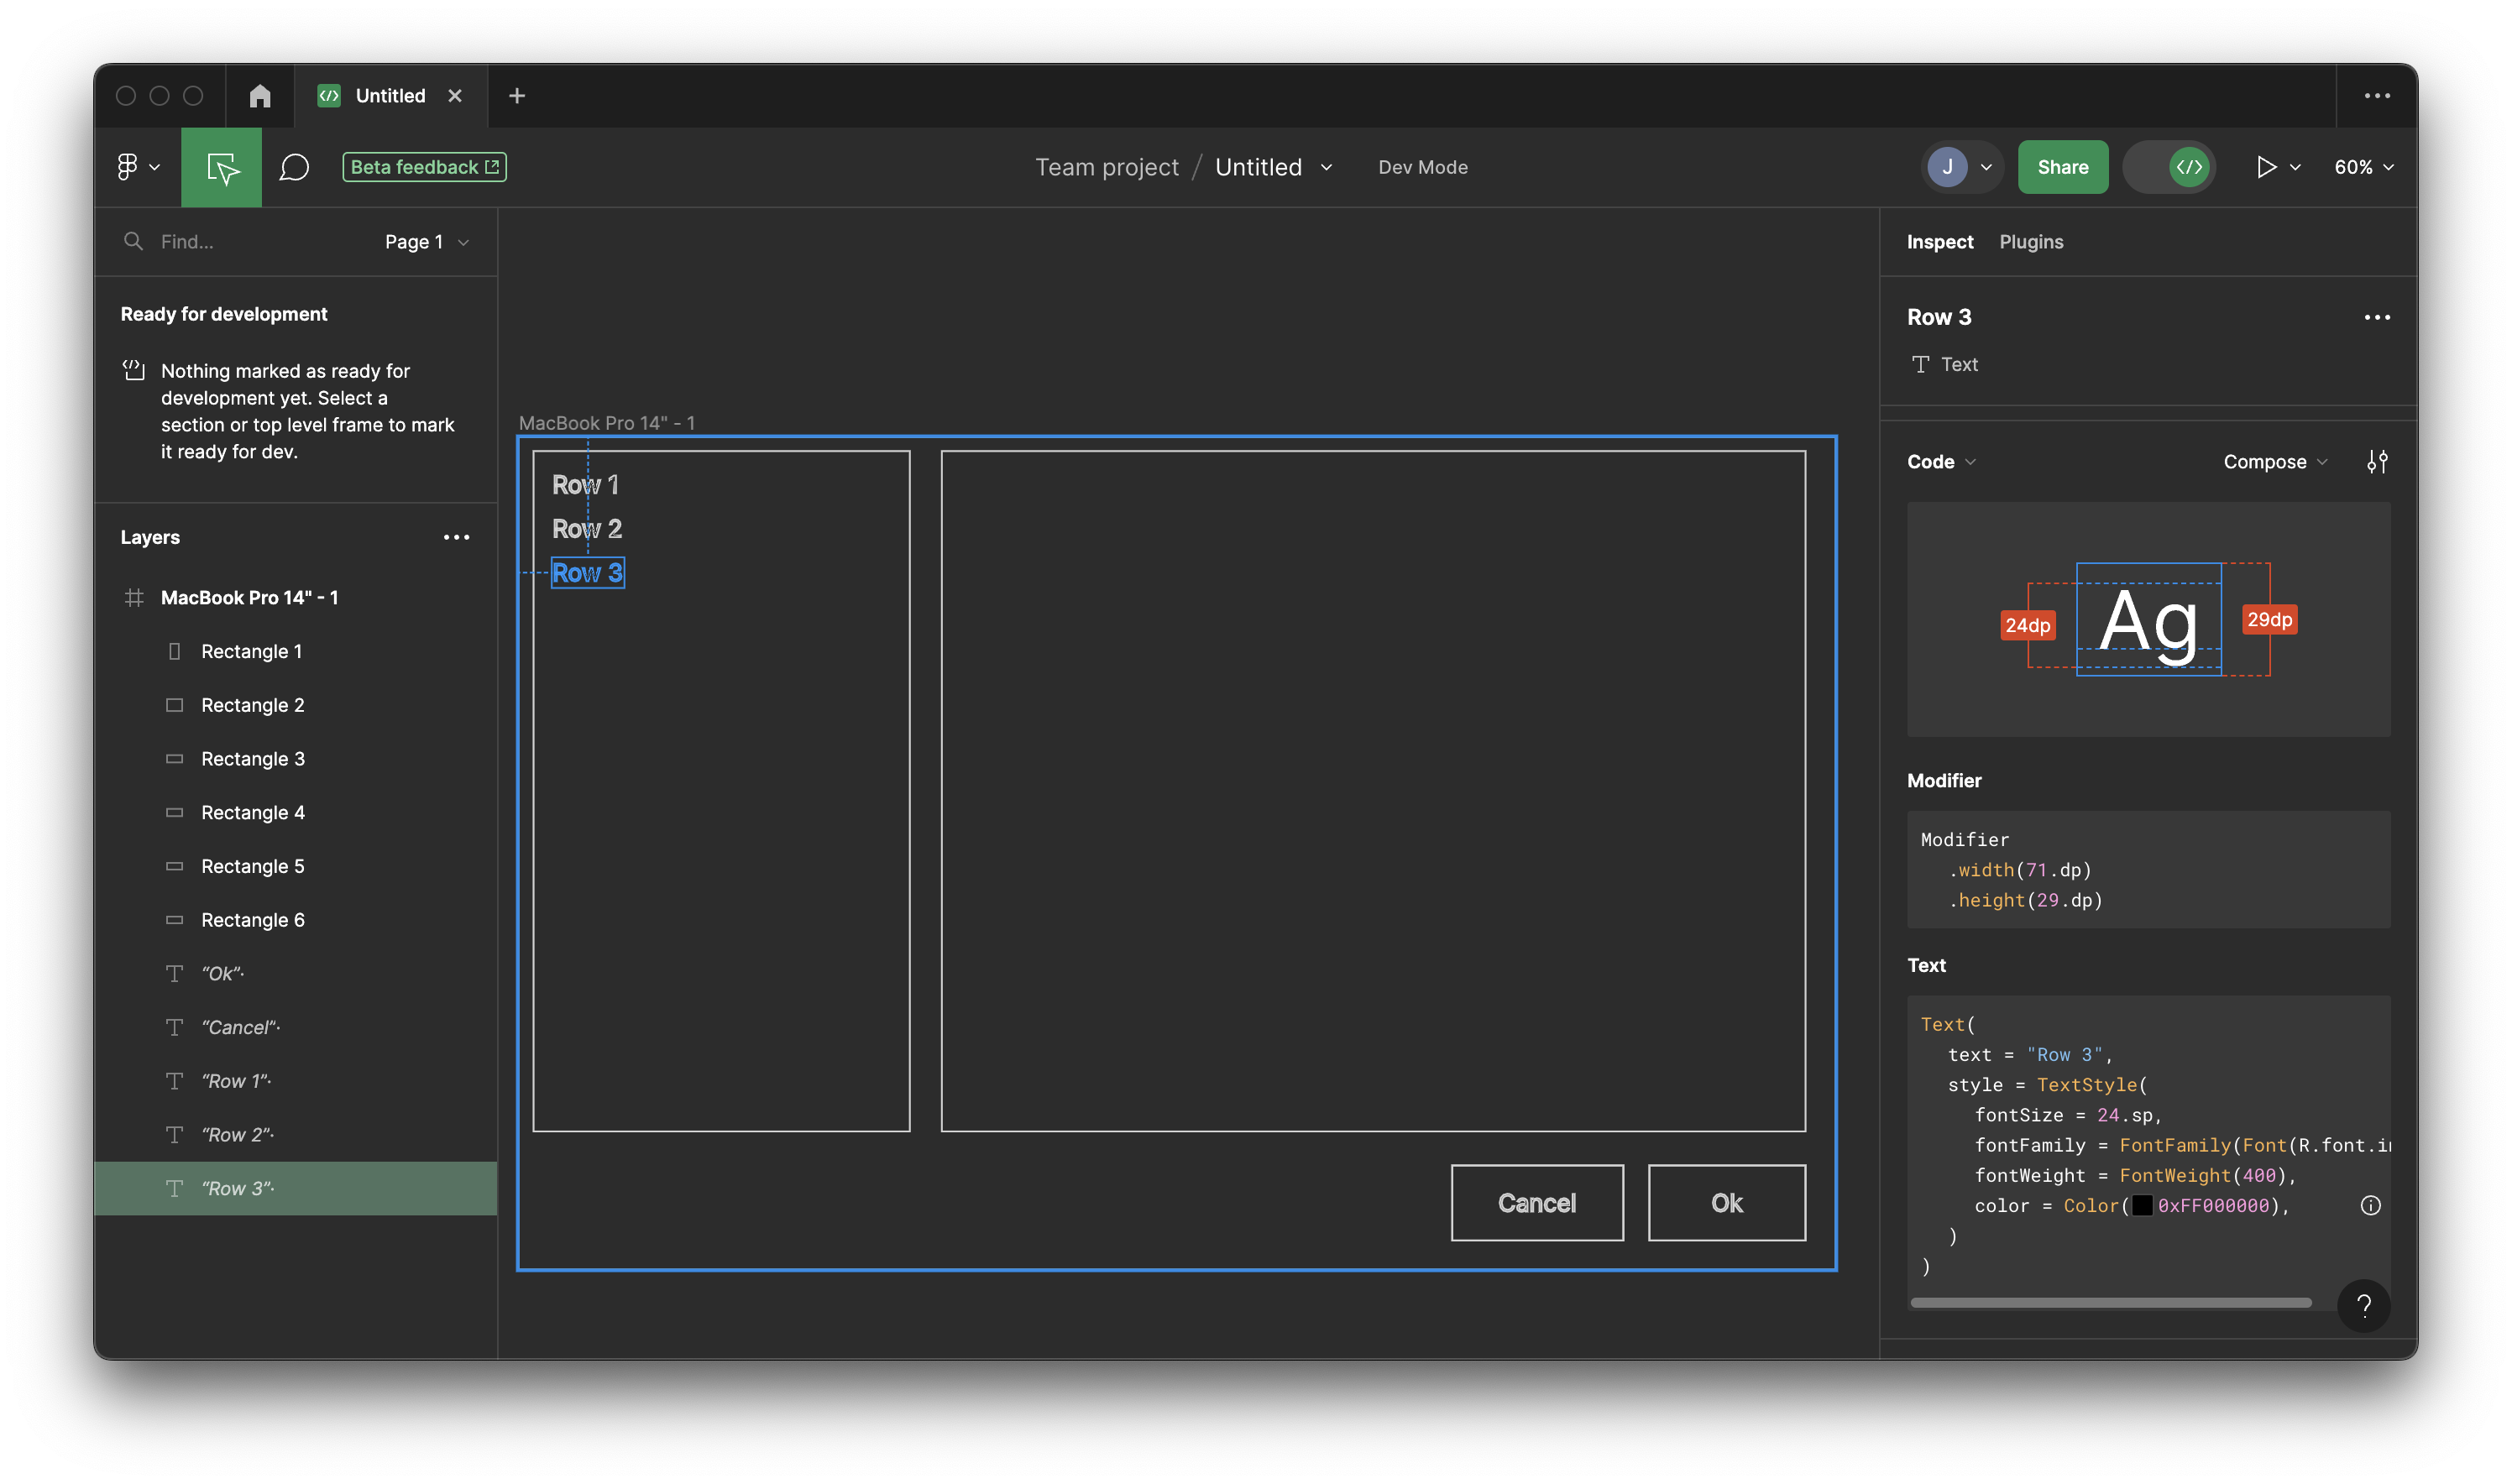
In this example, we have a Text field selected. Click on Dev mode on the right-hand toolbar, and you can see the Compose code displayed.
Text(
text = "Row 3",
style = TextStyle(
fontSize = 24.sp,
fontFamily = FontFamily(Font(R.font.inter)),
fontWeight = FontWeight(400),
color = Color(0xFF000000),
)
)
This makes it relatively easy to export your properties from your mockups and use them directly in your Compose theme!
-
Diagrams from Dea et al. JavaFX By Example. 2017. ↩
-
Note that this is the resolution that the screen is set to display, which may be different from the resolution that the screen natively supports. For example, my monitor is meant to run at 2880x1440, but I can set it to any desired resolution up to those values. ↩
Data formats
Review how to represent, store and manipulate user data.
Most software operates on data. This might be a primary function of your application (e.g. image editor) or a secondary function (e.g. user preferences). As a software developer, you need to give considerable thought to how you will handle user data.
Some examples of data that you might care about:
- The data that the user has captured and wishes to save e.g. an image that they have created in an image-editor, or the text from a note.
- The position and size of the application window, window size, or other settings that you might want to save and restore when the application is relaunched.
- User preferences that they might set in your application e.g. preferred font or font size.
- The public key to connect to a remote machine.
- The software license key for your application.
Operations you may need to do:
- Store data in a file so that you can load and restore it later.
- Transfer the data to another process that can use it, or to a completely different system e.g. over the internet.
- Filter it to a subset of your original data. Sort it. Modify it.
Let’s start by reviewing something we already know: data types.
Data Types
A type is a way of categorizing our data so that the computer knows how we intend to use it. There are many different kinds of types that you already know how to work with:
-
Primitive Types: these are intrinsically understood by a compiler, and will include boolean, and numeric data types. e.g. boolean, integer, float, double.
-
Strings: Any text representation which can include characters (char) or longer collections of characters (string). Strings are complicated to store and manipulate because there are a large number of potential values for each character, and the strings themselves are variable length e.g. they can span a few characters to many thousands of words in a single string!
-
Compound data types: A combination of primitive types. e.g. an Array of Integers.
-
Pointers: A data type whose value points to a location in memory. The underlying data may resemble a long Integer, but they are treated as a separate type to allow for specific behaviours to help protect our programs e.g. to prevent invalid memory access or invalid operations.
-
Abstract data type: We treat ADTs as different because they describe a structure, and do not actually hold any concrete data. We have a template for an ADT (e.g. class) and concrete realizations (e.g. objects). These can be singular, or stored as Compound types as well e.g. an Array of Objects.
You’re accustomed to working with most of these types – we declare variables in a programming language using the types for that language. For example, in Kotlin, we can assign the value 4 to different variables, each representing a different type. Note that we’ve had to make some adjustments to how we represent the value so that they match the expected type, and avoid compiler errors:
val a:Int = 4
val b:Double = 4.0
val c:String = "4"
By using different types, we’ve made it clear to the compiler that a and b do not represent the same value.
a==b
error: operator '==' cannot be applied to 'Int' and 'Double'
Types have properties and behaviours that are specific to that type. For example, we can determine the length of c, a String, but not the length of a, an Int. Similarly, we can perform mathematical operations on some types but not others.
c.length
res13: kotlin.Int = 1
a.length
error: unresolved reference: length
a.length
^
b/4
res15: kotlin.Double = 1.0
c/4
error: unresolved reference. None of the following candidates is applicable because of receiver type mismatch:
public inline operator fun BigDecimal.div(other: BigDecimal): BigDecimal defined in kotlin
public inline operator fun BigInteger.div(other: BigInteger): BigInteger defined in kotlin
c/4
^
In order for our programs to work with data, it needs to be stored in one of these types: either a series of primitives or strings, or a collection of these types, or an instance of an ADT (i.e. an Object).
Keep in mind that this is not the actual data representation, but the abstraction that we are using to describe our data. In memory, a string might be stored as a continuous number of bytes, or scattered through memory in chunks - for this discussion, that doesn’t matter. We’re relying on the programming language to hide away the underlying details.
Data can be simple, consisting of a single field (e.g. the user’s name), or complex, consisting of a number of related fields (e.g. a customer with a name, address, job title). Typically, we group related data into classes, and class instances are used to represent specific instances of that class.
data class Customer(id:Int, name:String, city:String)
val new_client = Customer(1001, "Jane Bond", "Waterloo")
Data items can be singular (e.g. one particular customer), or part of a collection (e.g. all of my customers). A singular example would be a custom record.
val new_client1 = Customer(1001, "Jane Bond", "Waterloo")
val new_client2 = Customer(1002, "Bruce Willis", "Kitchener")
A bank might also keep track of transactions that a customer makes, where each transaction represents the deposit or withdrawal, the date when it occurred, the amount and so on. (This date format is ISO 8601, a standard date/time representation.)
To represent this in memory, we might have a transaction data class, with individual transactions being stored in a collection.
data class Tx(id:Int, date:String, amount:Double, currency: String)
val transactions = mutableList()
transactions.add(Tx(1001, "2020-06-06T14:35:44", "78.22", "CDN"))
transactions.add(Tx(1001, "2020-06-06T14:38:18", "12.10", "USD"))
transactions.add(Tx(1002, "2020-06-06T14:42:51", "44.50", "CDN"))
These structures represent how we are storing this data in this particular case. Note that there may be multiple ways of representing the same data, we’ve just chosen one that makes sense to use.
Data Models
A data model is a abstraction of how our data is represented and how data elements relate to one another. We will often have a canonical data model, which we might then use as the basis for different representations of that data.
There are different forms of data models, including:
- Database model: describes how to structure data in a database (flat, hierarchical, relational).
- Data structure diagrams (DSD): describes data as entities (boxes) and their relationships (arrows connecting them).
- Entity-Relationship Model: Similar to DSDs, but with some notational differences. Don’t scale out very well.
Data structure diagrams aren’t commonly used to diagram a complete system, but can be used to show how entities relate to one another. They can range in complexity from very large and formals diagrams, to quick illustrative sketches that just show the relationships between different entities.
Here’s a data structure diagram, showing different entities. These would likely be converted to multiple classes, each one responsible for their own data.
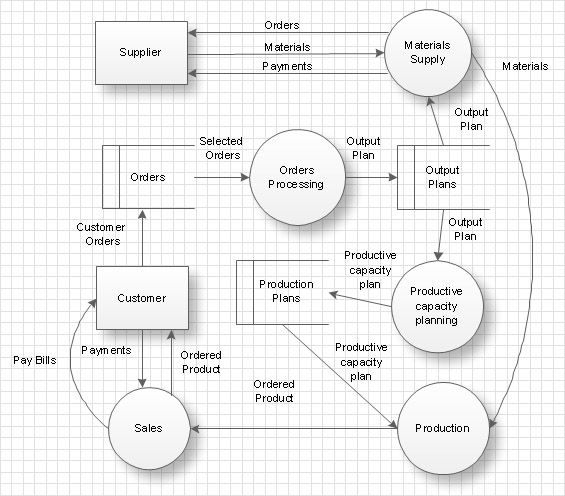
We also use these terms when referring to complex data structures:
- field: a particular piece of data, corresponding to variables in a program.
- record: a collection of fields that together comprise a single instance of a class or object.
Data Representation
One of the challenges is determining how to store our data for different purposes.
Let’s consider our customer data. We can represent this abstractly as a Customer class. In code, we can have instances of Customers. How do we store that data, or transfer it to a different system?
The “easy” answer would be to share the objects directly, but that’s often not realistic. The target system would need to be able to work with that object format directly, and it’s likely not a very robust (or safe) way of transmitting your data.
Often we need to convert our data into different representations of the same data model.
- We need to ensure that we don’t lose any data
- We need to maintain the relationships between data elements.
- We need to be able to “convert back” as needed.
In the diagram below, you can see this in action. We might want to save our customer data in a database, or into a data file for backup (or transmission to a different system).
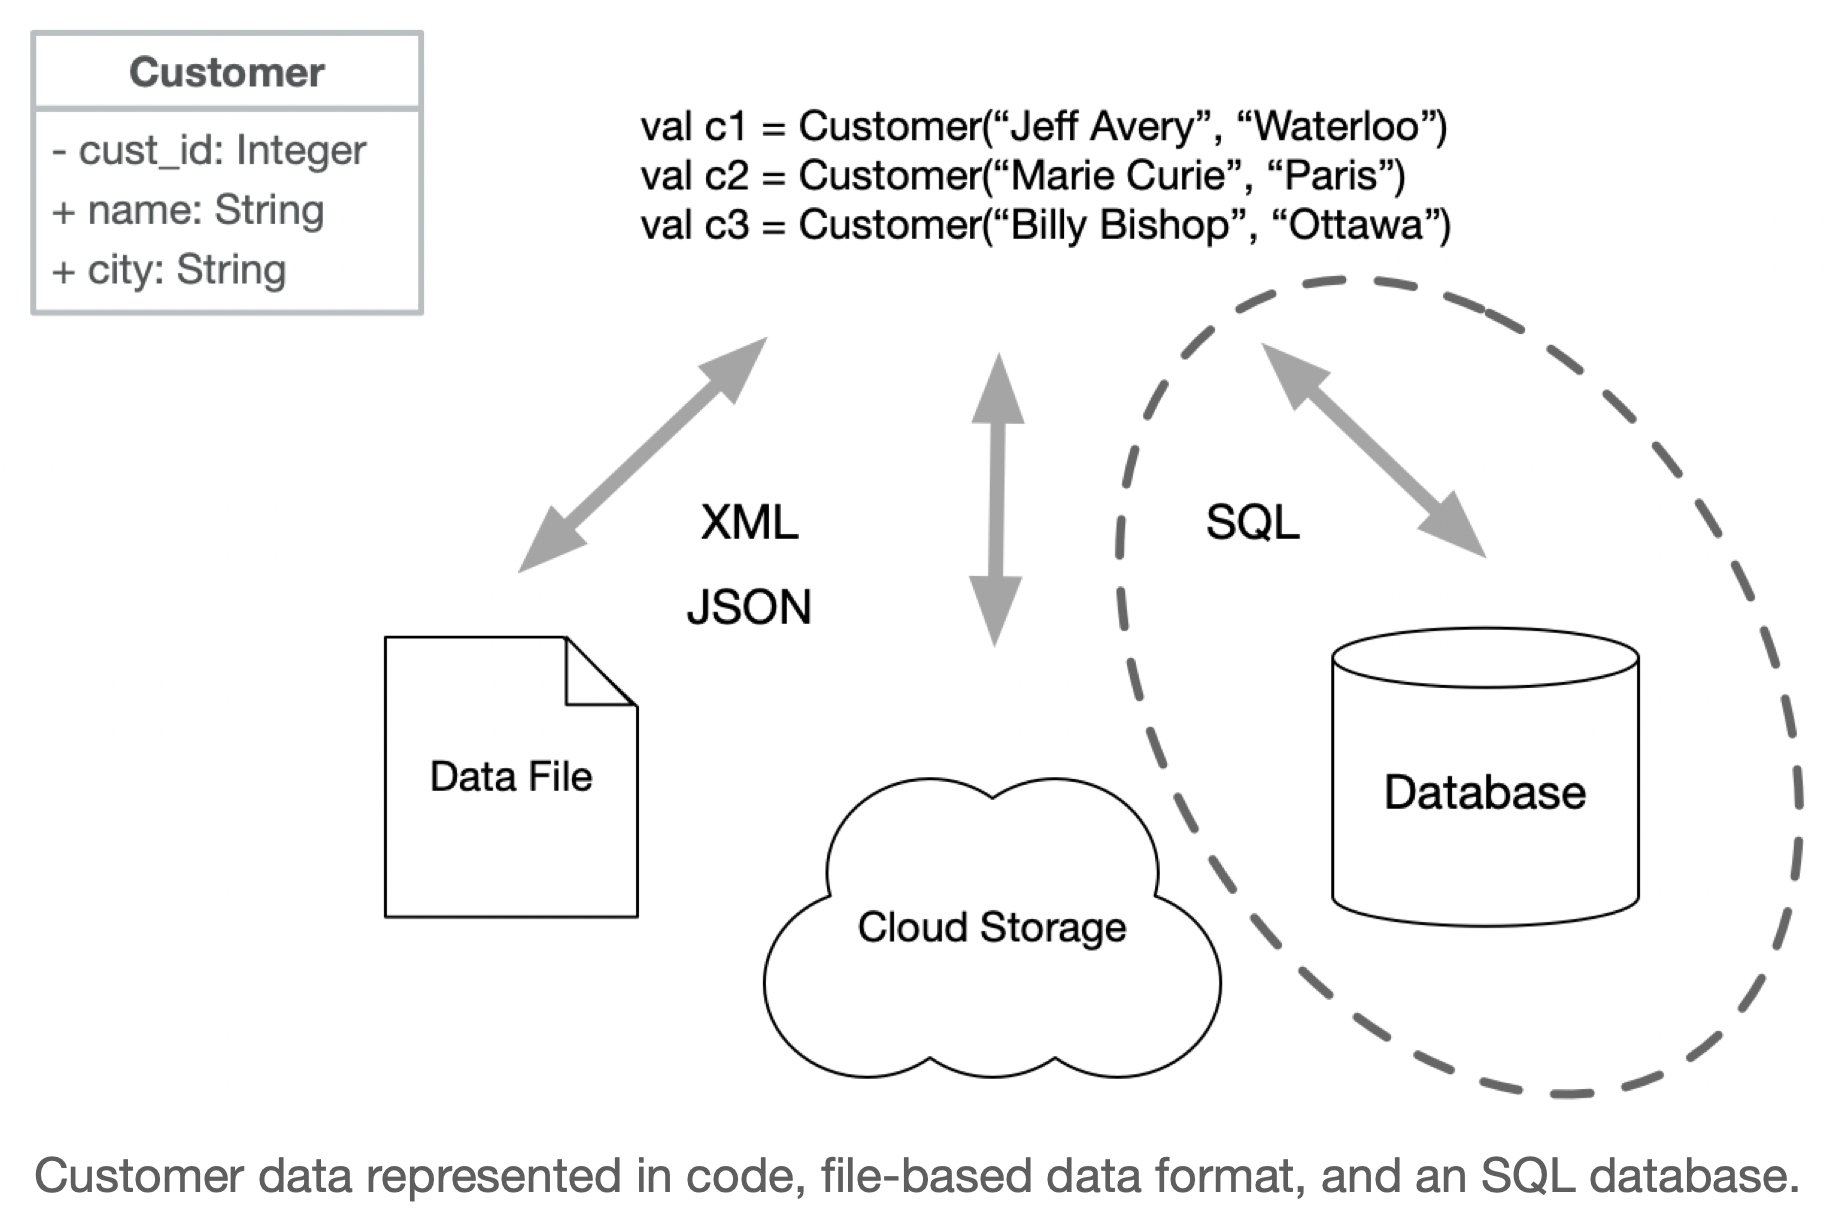
Part of the challenge in working with data is determining what you need to do with it, and what data representation will be appropriate for different situations. As we’ll see, it’s common to need to convert and manage data across these different representations.
Character Encoding
Writing text into a file isn’t as simple as it sounds. Like other data, characters in memory are stored as binary i.e. numeric values in a range. To display them, we need some agreement on what number represents each character. This sound like a simple problem, but it’s actually very tricky, due to the number of different characters that are in use around the world.
Our desire to be able to encode all characters in all language is balanced by our need to be efficient. i.e. we want to use the least number of bytes per character that we’re storing.
In the early days of computing, we used US-ASCII as a standard, which stored each character in 7 bits (range of 0-127). Although it was sufficient for “standard” English language typewriter symbols, this is rarely used anymore since it cannot handle languages other than English, nor can it handle very many extra symbols.
The Unicode standard is used for modern encoding. Every character known is represented in Unicode, and requires one or more bytes to store (i.e. it’s a multibyte format). UTF-8 refers to unicode encoding for those characters which only require a single byte (the 8 refers to 8-bit encoding). UTF-16 and UTF-32 are used for characters that require 2 and 4 bytes respectively.
UTF-8 is considered standard encoding unless the data format required additional complexity.
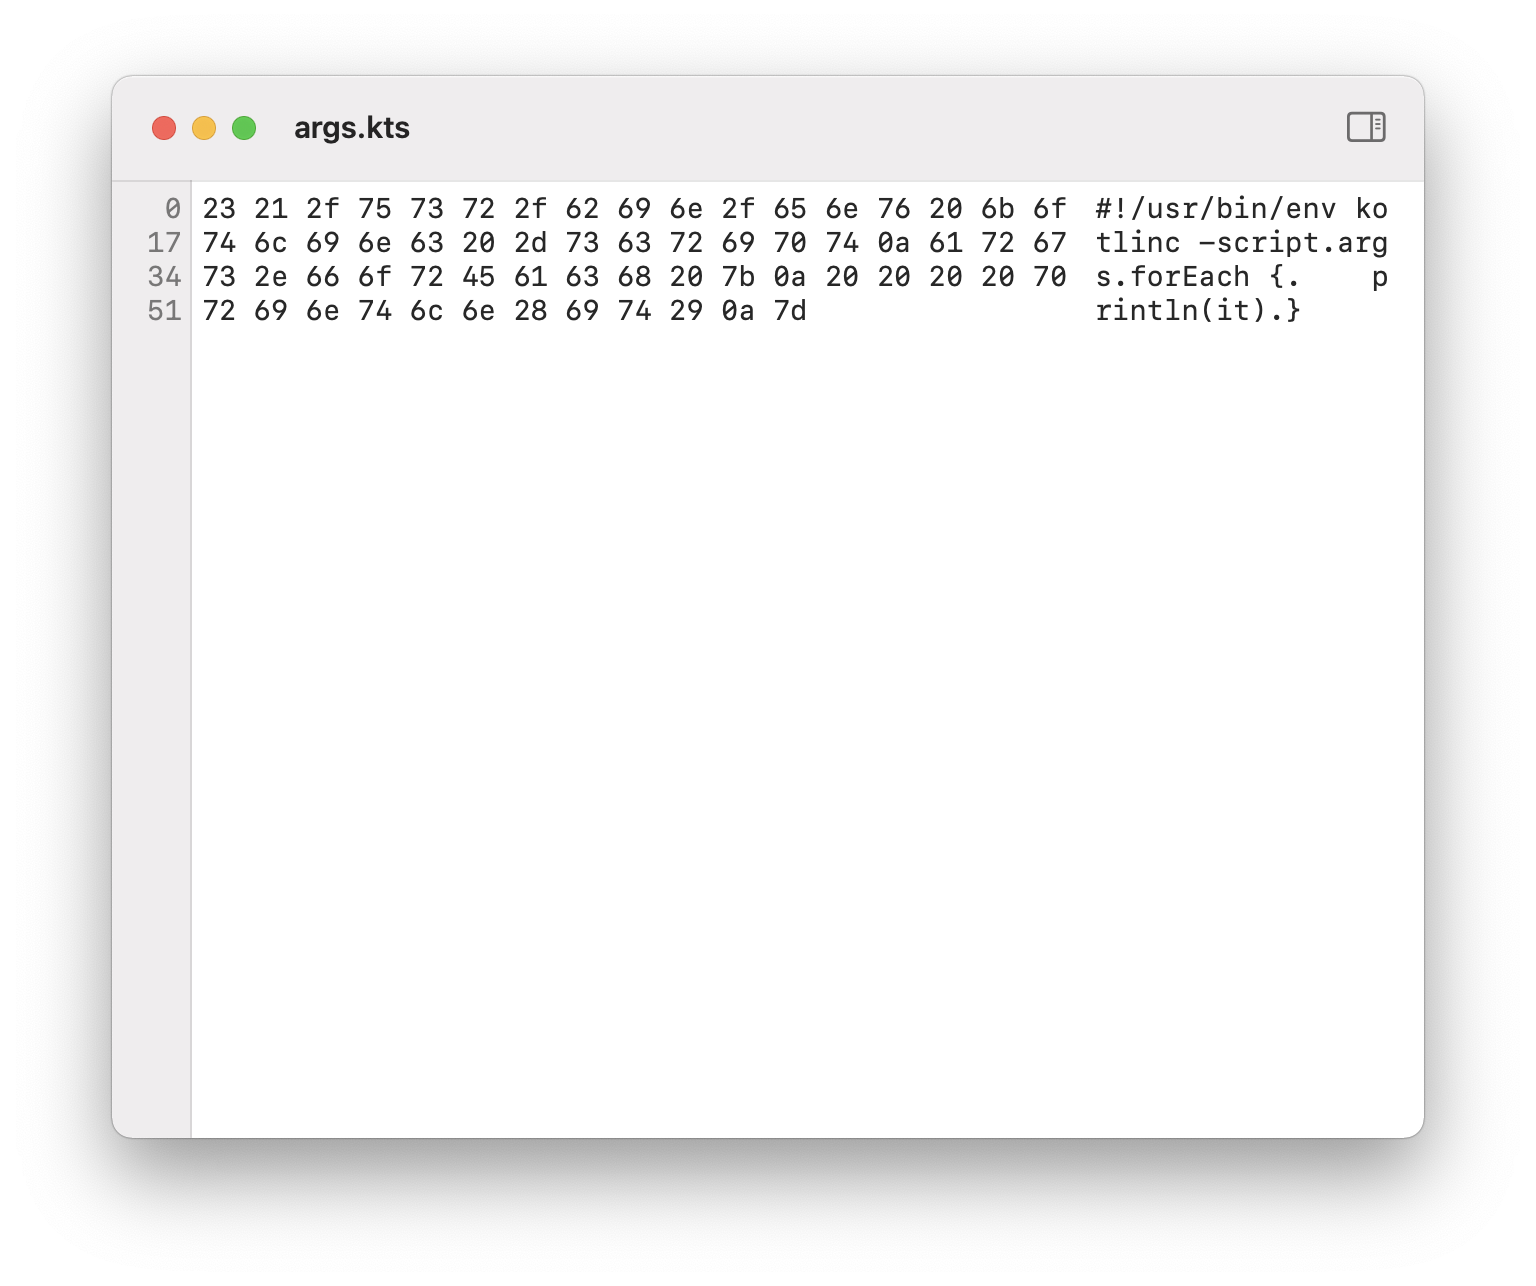
Working with Files
Text
The Kotlin Standard Library (“kotlin-stdlib“) includes the standard IO functions for interacting with the console.
- readLine() reads a single value from “stdin“
- println() directs output to “stdout“
code/ucase.kts
// read single value from stdin
val str:String ?= readLine()
if (str != null) {
println(str.toUpperCase())
}
It also includes basic methods for reading from existing files.
import java.io.*
var filename = "transactions.txt"
// read up to 2GB as a string (incl. CRLF)
val contents = File(filename).readText(Charsets.UTF_8)
println(contents)
2020-06-06T14:35:44, 1001, 78.22, CDN
2020-06-06T14:38:18, 1002, 12.10, CDN
2020-06-06T14:42:51, 1003, 44.50, CDN
Example: rename utility
Let’s combine these ideas into a larger example.
Requirements: Write an interactive application that renames one or more files using options that the user provides. Options should support the following operations: add a prefix, add a suffix, or capitalize it.
We need to write a script that does the following:
- Extracts options and target filenames from the arguments.
- Checks that we have (a) valid arguments and (b) enough arguments to execute program properly (i.e. at least one filename and one rename option).
- For each file in the list, use the options to determine the new filename, and then rename the file.
Usage: rename.kts [option list] [filename]
For this example, we need to manipulate a file on the local file system. The Kotlin standard library offers a File class that supports this. (e.g. changing permissions, renaming the file).
Construct a ‘File‘ object by providing a filename, and it returns a reference to that file on disk.
fun main(args: Array<String>) {
val files = getFiles(args)
val options = getOptions(args)
// check minimum required arguments
if (files.size == 0 || options.size == 0) {
println("Usage: [options] [file]")
} else {
applyOptions(files, options)
}
fun getOptions(args:Array<String>): HashMap<String, String> {
var options = HashMap<String, String>()
for (arg in args) {
if (arg.contains(":")) {
val (key, value) = arg.split(":")
options.put(key, value)
}
}
return options
}
fun getFiles(args:Array<String>) : List<String> {
var files:MutableList<String> = mutableListOf()
for (arg in args) {
if (!arg.contains(":")) {
files.add(arg)
}
}
return files
}
fun applyOptions(files:List<String>,options:HashMap<String, String>) {
for (file in files) {
var rFile = file
// capitalize before adding prefix or suffix
if (options.contains("prefix")) rFile = options.get("prefix") + rFile
if (options.contains("suffix")) rFile = rFile + options.get("suffix")
File(file).renameTo(rFile)
println(file + " renamed to " + rFile)
}
}
Binary
These examples have all talked about reading/writing text data. What if I want to process binary data? Many binary data formats (e.g. JPEG) are defined by a standard, and will have library support for reading and writing them directly.
Kotlin also includes object-streams that support reading and writing binary data, including entire objects. You can, for instance, save an object and it’s state (serializing it) and then later load and restore it into memory (deserializing it).
class Emp(var name: String, var id:Int) : Serializable {}
var file = FileOutputStream("datafile")
var stream = ObjectOutputStream(file)
var ann = Emp(1001, "Anne Hathaway", "New York")
stream.writeObject(ann)
File Formats
A file format is a standard way of encoding data in a file. There are a large number of predefined file formats that have been designed and maintained by different standards bodies. If you are working with data that matches a predefined format, then you should use the correct file format for that data! Examples of standard file formats include HTML, Scalable vector graphics (SVG), MPEG video files, JPEG images, PDF documents and so on.
If you are working with your own data (e.g. our Customer data), then you are free to define your own encoding.
A fundamental distinction is whether you want text or binary encoding:
- Text encoding is storing data as a stream of characters in a standard encoding scheme (e.g. UTF8). Text files have the advantage of being human-readable, and can be easy to process and debug. However, for large amounts of data, they can also be slow to process.
- Binary encoding allows you to store data in a completely open and arbitrary way. It won’t be human-readable, but you can more easily store non-textual data in an efficient manner e.g. images from a drawing program.
Kotlin has libraries to support both. You can easily write a stream of characters to a text file, or push a stream of bytes to a binary file. We will explore how to do both in the next section.
A “rule of thumb” is that non-private data, especially if relatively small, should often be stored in a text file. The ability to read the file for debugging purposes is invaluable, as is the ability to edit the file in a standard text editor. This is why Preferences files, Log files and other similar data files are stored in human-readable formats.
Private data, or data that is difficult to process is probably better served in a binary format. It’s not human-readable, but that’s probably what you want if the data is sensitive. As we will discover, it can also be easier to process.
We know that we will use UTF-8, but that only describes how the characters will be stored. We also need to determine how to structure our data in a way that reflects our data model. We’ll talk about three different data structure formats for managing text data, all of which will work with UTF-8.
CSV
The simplest way to store records might be to use a CSV (comma-separated values) file.
We use this structure:
- Each row corresponds to one record (i.e. one object)
- The values in the row are the fields separated by commas.
For example, our transaction data file stored in a comma-delimited file would look like this:
1001, 2020-06-06T14:35:44, 78.22, CDN
1001, 2020-06-06T14:38:18, 12.10, USD
1002, 2020-06-06T14:42:51, 44.50, CDN
CSV is literally the simplest possible thing that we can do, and sometimes it’s good enough.
It has some advantages:
- it’s extremely easy to work with, since you can write a class to read/write it in a few lines of code.
- it’s human-readable which makes testing/debugging much easier.
- its fairly space efficient.
However, this comes with some pretty big disadvantages too:
- It doesn’t work very well if your data contains a delimiter (e.g. a comma).
- It assumes a fixed structure and doesn’t handle variable length records.
- It doesn’t work very well with complex or multidimensional data. e.g. a Customer class.
// how do you store this as CSV? the list is variable length
data class Customer(id:Int, name:String, transactions:List<Transactions>)
Data streams are used to provide support for reading and writing “primitives” from streams. They are very commonly used.
- File:
FileInputStream,FileOutputStream - Data:
DataInputStream,DataOutputStream
var file = FileOutputStream("hello.txt")
var stream = DataOutputStream(file)
stream.writeInt(100)
stream.writeFloat(2.3f)
stream.writeChar('c')
stream.writeBoolean(true)
We can use streams to write our transaction data to a file quite easily.
val filename = "transactions.txt"
val delimiter = "," // comma-delimited values
// add a new record to the data file
fun append(txID:Int, amount:Float, curr:String = "CDN") {
val datetime = LocalDateTime.now()
File(filename).appendText("$txID $delimiter $datetime $delimiter $amount\n", Charsets.UTF_8)
}
XML
XML (Extensible Markup Language) is a human-readable markup language that designed for data storage and transmission.
Defined by the World Wide Web Consortium’s XML specification, it was the first major standard for markup languages. It’s structurally similar to HTML, with a focus on data transmission (vs. presentation).
- Structure consists of pairs of tags that enclose data elements:
<name>Jeff</name> - Attributes can extend an element:
<img src="madonna.jpg"></img>
Example of a music collection structured in XML. An album is a record, and each album contains fields for title, artist etc.
<catalog>
<album>
<title>Empire Burlesque</title>
<artist>Bob Dylan</artist>
<country>USA</country>
<company>Columbia</company>
<price>10.90</price>
<year>1985</year>
</album>
<album>
<title>Innervisions</title>
<artist>Stevie Wonder</artist>
<country>US</country>
<company>The Record Plant</company>
<price>9.90</price>
<year>1973</year>
</album>
</catalog>
XML is useful, but doesn’t handle repeating structured particularly well. It’s also verbose when working with large amount of data. Finally, although it’s human-readable, it’s not particularly easy to read.
We’ll talk about processing XML in a moment. First, let’s talk about JSON.
YAML
Yaml (Yet Another Markup Language) is a human-readable data serialization format that is often used for configuration files and data exchange. It is a superset of JSON, and is designed to be easy to read and write.
YAML is a great choice for configuration files, because it is easy to read and write, and can be used to represent complex data structures.
input: .
output: .retype
url: https://student.cs.uwaterloo.ca/~cs346/1249
branding:
title: CS 346
label: F24
links:
- text: GitLab
icon: git-branch
link: https://git.uwaterloo.ca/cs346/public
- text: Piazza
icon: people
link: https://piazza.com/class/lv5da9i739r1hs
- text: Learn
icon: book
link: https://learn.uwaterloo.ca
YAML doesn’t handle nested structures well, but is great for simple data structures and configuration files where users are expected to manually make edits.
One limitation to using YAML is that it isn’t supported natively in Kotlin. To read/write YAML (without writing your own parser), you’ll need to use a library like Kaml.
TOML
TOML is a configuration file format that’s easy to read due to its simple syntax. It’s designed to be easy to read and write, and is often used for configuration files.
# Primitive Values
enable = true
initial_value = "string"
value = 0
# Tables (Hash tables or dictionaries)
[check_ticket]
infer_ticket = true
title_position = "start"
# Arrays of Tables
[commit_scope]
[[commit_scope.options]]
value = "app"
label = "Application"
[[commit_scope.options]]
value = "share"
label = "Shared"
[[commit_scope.options]]
value = "tool"
label = "Tools"
Like YAML, TOML isn’t supported natively in Kotlin. To read/write TOML (without writing your own parser), you’ll need to use a library like KToml.
JSON
JSON (JavaScript Object Notation) is an open standard file and data interchange format that’s commonly used on the web. It’s based on JavaScript object notation, but is language independent. It was standardized in 2013 as ECMA-404.
JSON has become extremely popular due to its simpler syntax compared to XML and other formats.
- Data elements consist of name/value pairs
- Fields are separated by commas
- Curly braces hold objects
- Square brackets hold arrays
Here’s the music collection in JSON.
{ "catalog": {
"albums": [
{
"title":"Empire Burlesque",
"artist":"Bob Dylan",
"country":"USA",
"company":"Columbia",
"price":"10.90",
"year":"1988"
},
{
"title":"Innervision",
"artist":"Stevie Wonder",
"country":"US",
"company":"The Record Plant",
"price":"9.90",
"year":"1973"
}
]
}}
Advantages of JSON:
- Simplifying closing tags makes JSON easier to read.
{ "employees":[
{ "first":"John", "last":"Zhang", "dept":"Sales"},
{ "first":"Anna", "last":"Smith", "dept":"Engineering"}
]}
Compare this to the corresponding XML:
<employees>
<employee><first>John</first> <last>Zhang</last> <dept>Sales</dept></employee>
<employee><first>Anna</first> <last>Smith</last> <dept>Engineering</dept></employee>
</employees>
- JSON also handles arrays better.
Array in XML:
<record>
<name>Celia</name>
<age>30</age>
<cars>
<model>Ford</model>
<model>BMW</model>
<model>Fiat</model>
</cars>
</record>
Array in JSON:
{
"name":"Celia",
"age":30,
"cars":[ "Ford", "BMW", "Fiat" ]
}
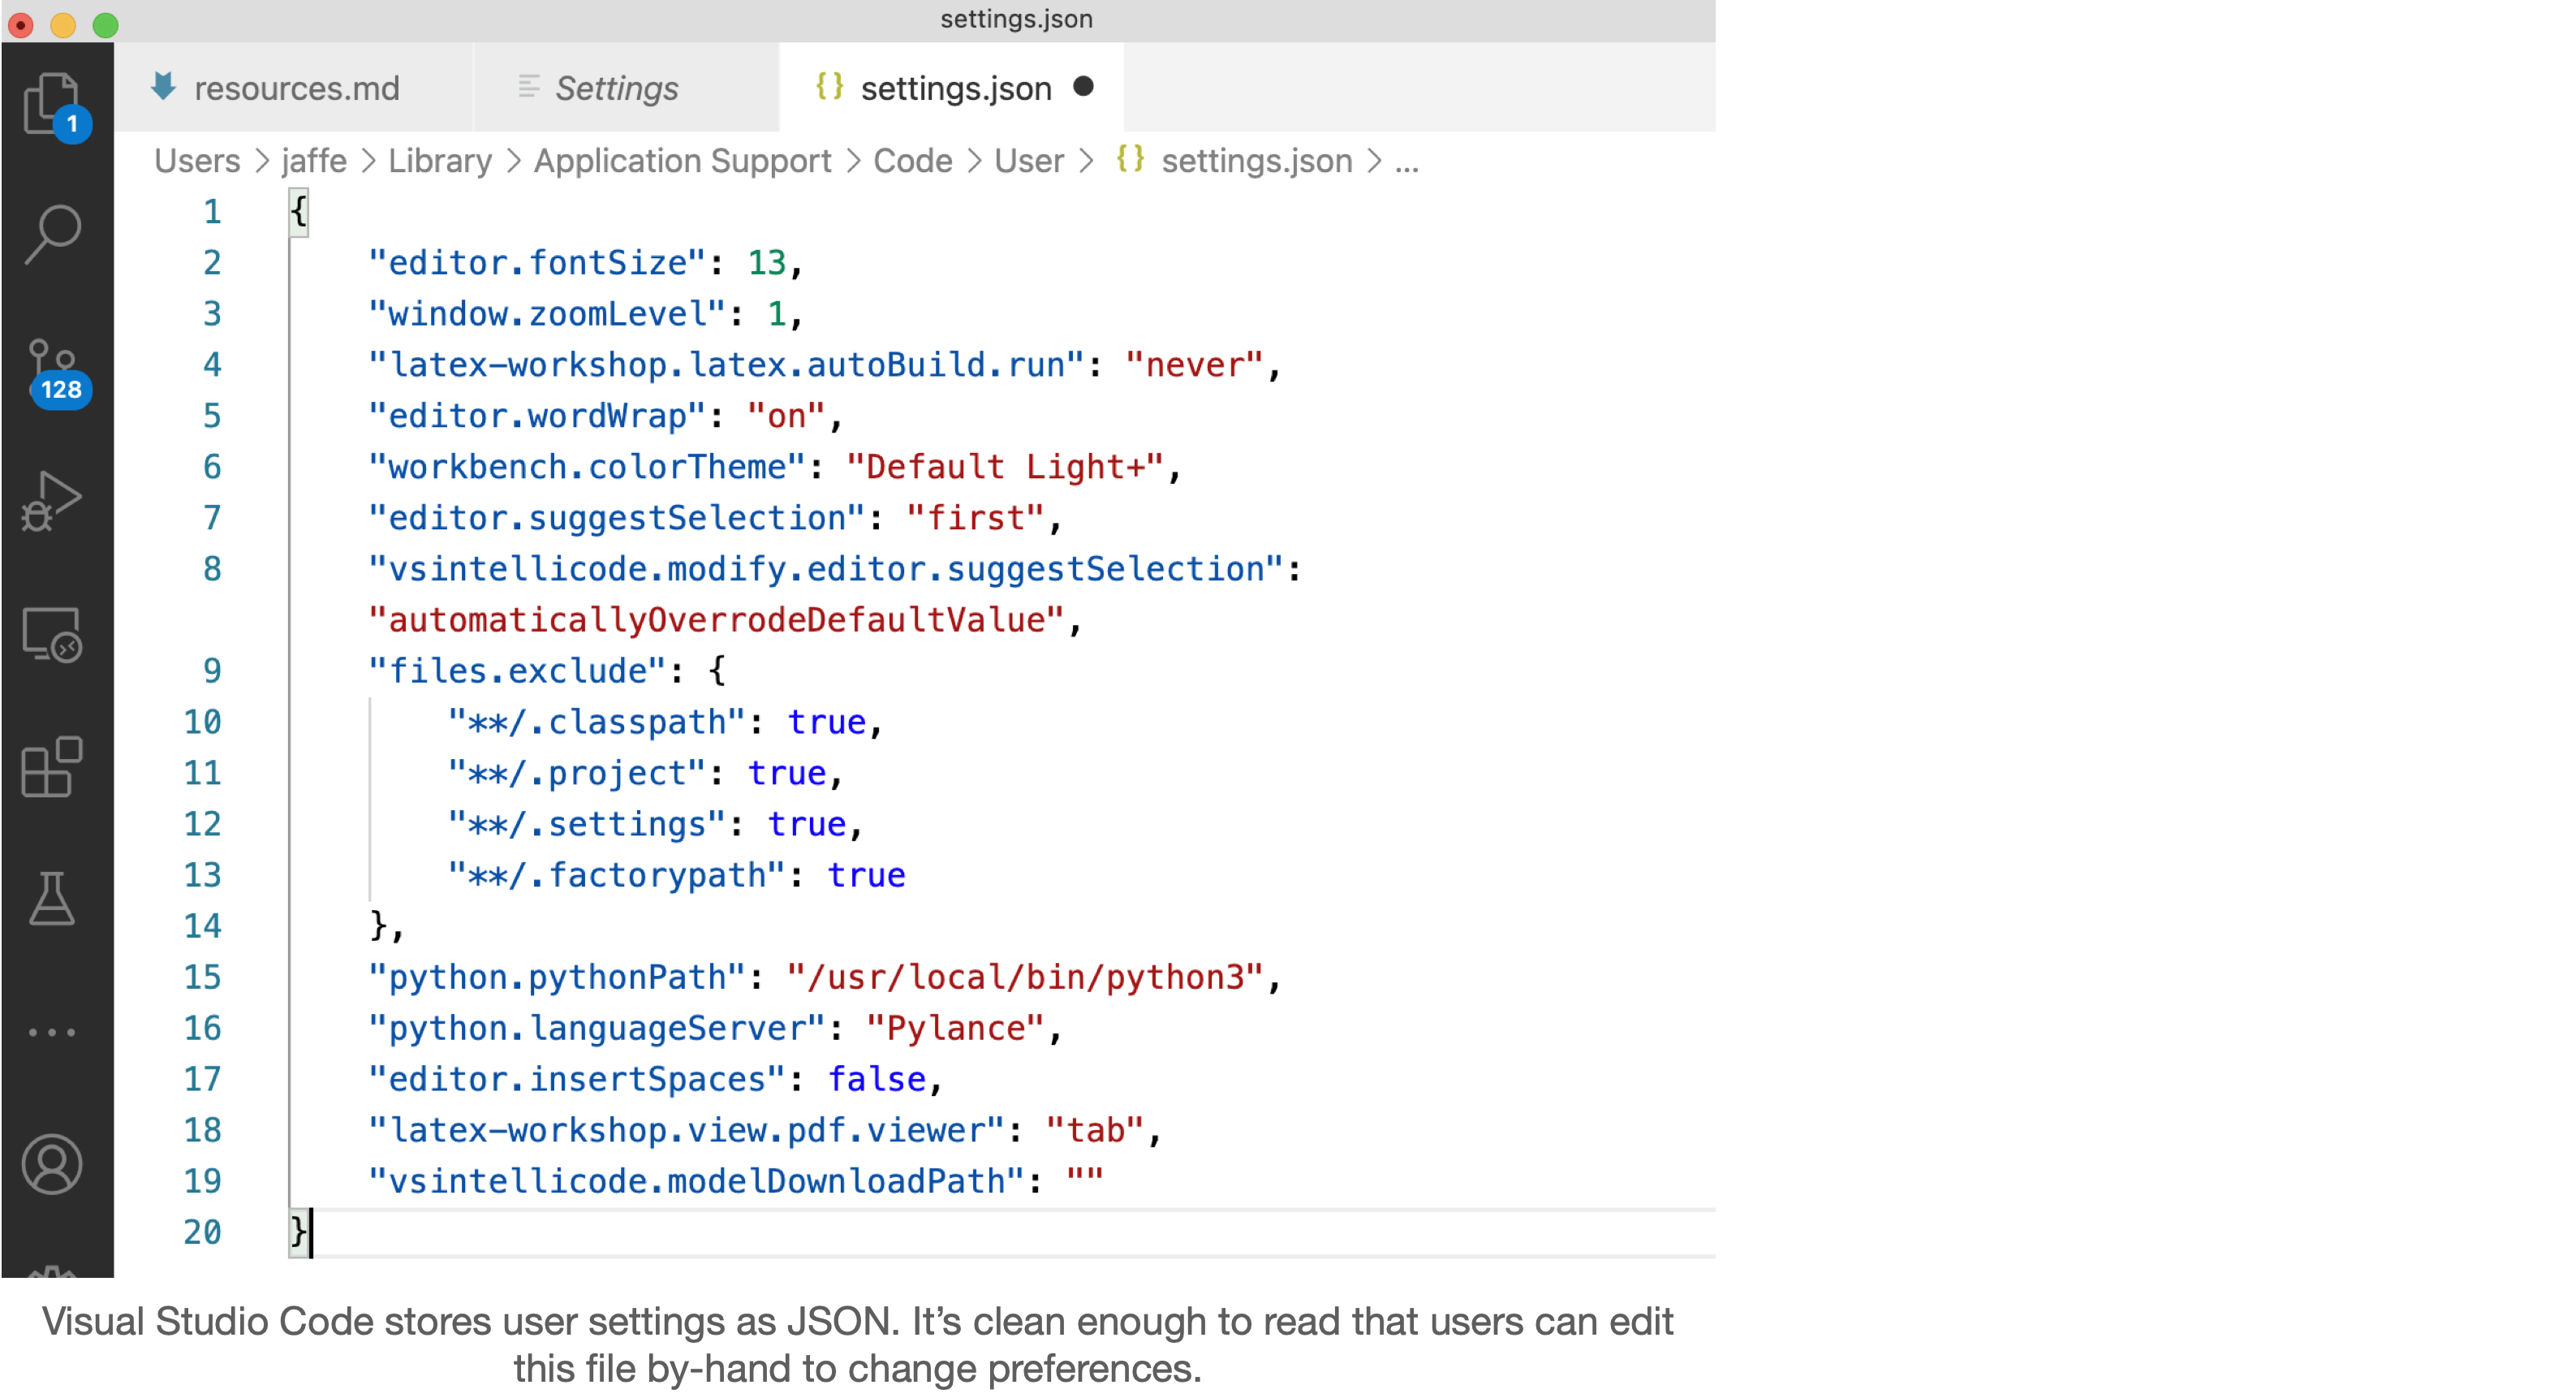
JSON is a great choice for data that is going to be shared between different systems, or for data that is going to be stored in a file. It’s easy to read, easy to write, and easy to parse.
Serialization
So, our application data resides in data structures, in memory. If we want to save them using these data formats, we need to convert objects to the appropriate format.
- To save: we convert objects into XML or JSON format, then save the raw XML or JSON in a data file.
- To restore: we load XML or JSON from our data files, and instantiate objects (records) based on the file contents.
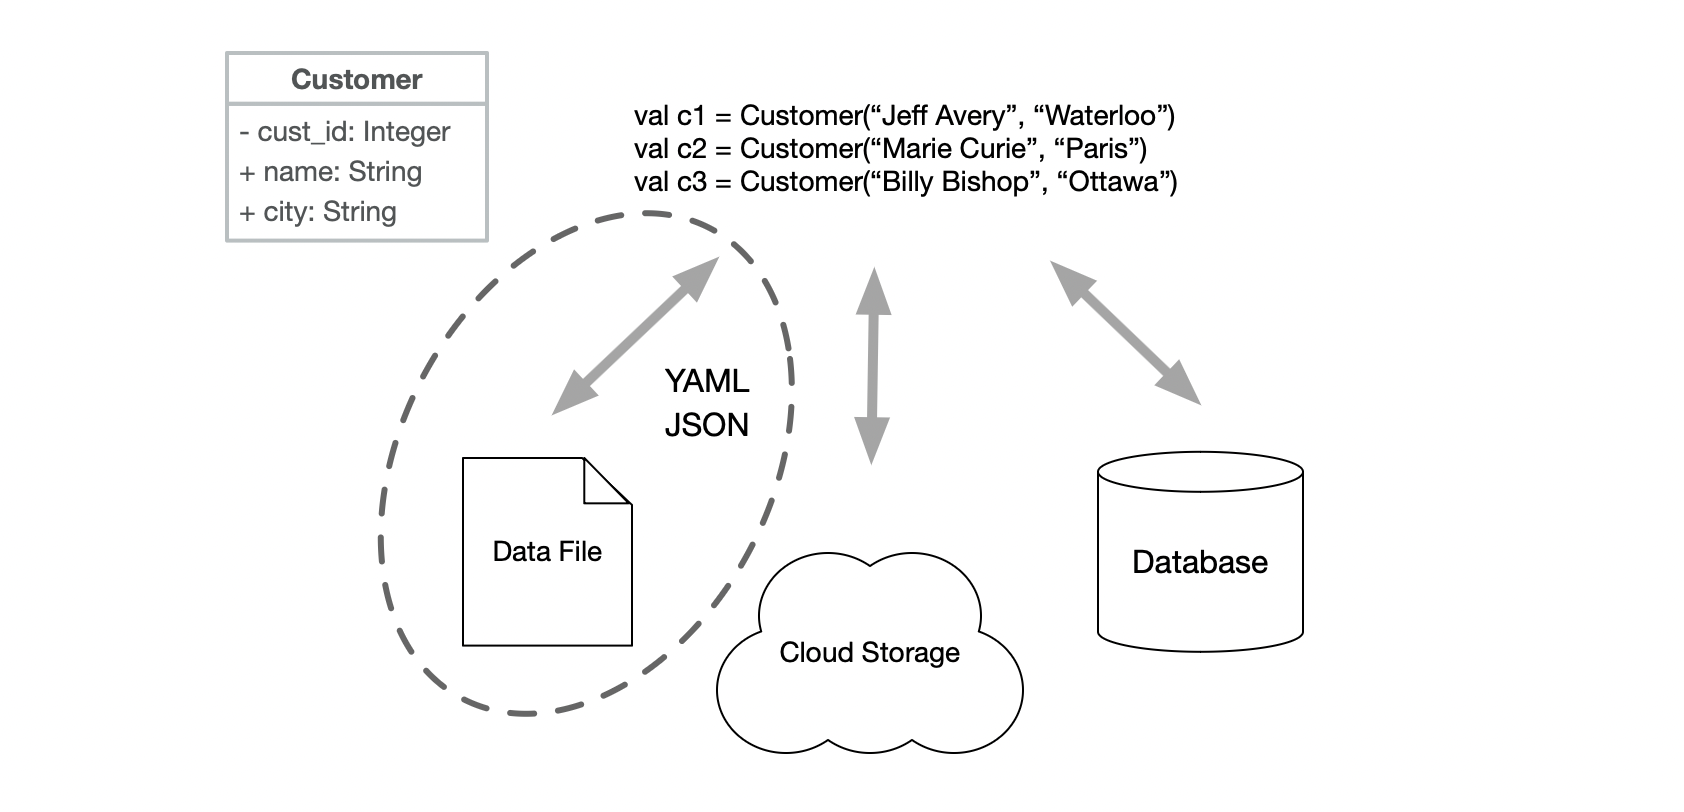
Although you could write your own conversion function/parser, there are a number of libraries out there than handle conversion to and from JSON quite easily.
We’ll focus on using Kotlin’s serialization libraries to convert our objects to and from JSON directly!
Serialization is the process of converting your program to a binary stream, so that you can transmit it, or persist it to a file or database. Deserialization is the process of converting the stream back into an object.
This is really cool technology that we can use to save our objects directly without trying to save the individual property values (like we would for a CSV file).
To include the serialization libraries in your project, add these dependencies to the build.gradle.kts file.
plugins {
id 'org.jetbrains.kotlin.multiplatform' version '1.6.10'
id 'org.jetbrains.kotlin.plugin.serialization' version '1.6.10'
}
Also make sure to add the dependency:
dependencies {
implementation "org.jetbrains.kotlinx:kotlinx-serialization-json:1.3.2"
}
You can then save your objects directly as a stream which you can save to a file, or a database. You can later use this stream to recreate your objects. See https://github.com/Kotlin/kotlinx.serialization for details.
Example from: https://blog.jetbrains.com/kotlin/2020/10/kotlinx-serialization-1-0-released/
@Serializable
data class Project(
val name: String,
val owner: Account,
val group: String = "R&D"
)
@Serializable
data class Account(val userName: String)
val moonshot = Project("Moonshot", Account("Jane"))
val cleanup = Project("Cleanup", Account("Mike"), "Maintenance")
fun main() {
val string = Json.encodeToString(listOf(moonshot, cleanup))
println(string)
// [{"name":"Moonshot","owner":{"userName":"Jane"}},{"name":"Cleanup","owner":
// {"userName":"Mike"},"group":"Maintenance"}]
val projectCollection = Json.decodeFromString<List<Project>>(string)
println(projectCollection)
// [Project(name=Moonshot, owner=Account(userName=Jane), group=R&D),
// Project(name=Cleanup, owner=Account(userName=Mike), group=Maintenance)]
}
Note that to make this work, you have to annotate your class as @Serializable. It also needs to contain data that can be converted to JSON.
Databases
Persisting data directly to files can be convenient, but it doesn’t scale well to large amounts of data. It’s also cumbersome to work with. A more robust solution is to store data in a database: a system designed for organizing and managing large amounts of data efficiently.
Databases range in size and complexity from simple file-based databases that run on your local computer, to large scalable databases that run on a server cluster. They are optimized for fetching text and numeric data, and performing operations like sorting, grouping and filtering on this data.
Databases also have the advantage of scaling really well in multiple dimensions. They’re optimized for efficient storage and retrieval of large amounts of data, but also for concurrent access by hundreds or thousands of users.
This is a huge and complex topic; we’re not even scratching the surface. I’d strongly encourage you to take a more comprehensive database course e.g. CS 348.
Types of Databases
Databases structure data as logical records. A record is a collection of related data, organized into fields. For example, a record might represent a customer, with fields for name, address, and phone number.
// name, address, phone
John Doe, 123 Main St, 555-1234
Jane Smith, 456 Elm St, 555-5678
Bob Johnson, 789 Oak St, 555-9012
Part of the challenge of working with databases is designing the structure to store your data. The data model defines the tables, fields, and relationships between records. A data model should support
- efficient storage of data, with minimal duplication,
- efficient retrieval of data, and
- easy modification of data.
Ideally, we also want to support translation of records between different representation formats (this will be a theme that we revisit later).

There are different types of databases, which differ in how they structure and organize data. The largest division is between SQL (relational) and NoSQL (non-relational) databases.
Relational (SQL) databases are based on the relational model, which organizes data into tables with rows and columns. Records are split across tables to avoid data duplication, and fetching records often requires queries that span multiple tables. Examples of relational databases include Oracle, MySQL, PostgreSQL, and SQLite.
No-SQL is a very broad category, which can either mean “Not Only SQL” or “No SQL”. These databases are designed to handle data that doesn’t fit well into the traditional relational model. Types of No-SQL databases include:
- Document databases (e.g. MongoDB)
- Key-value stores (e.g. Redis)
- Graph databases (e.g. Neo4j)
- Time-series databases (e.g. InfluxDB)
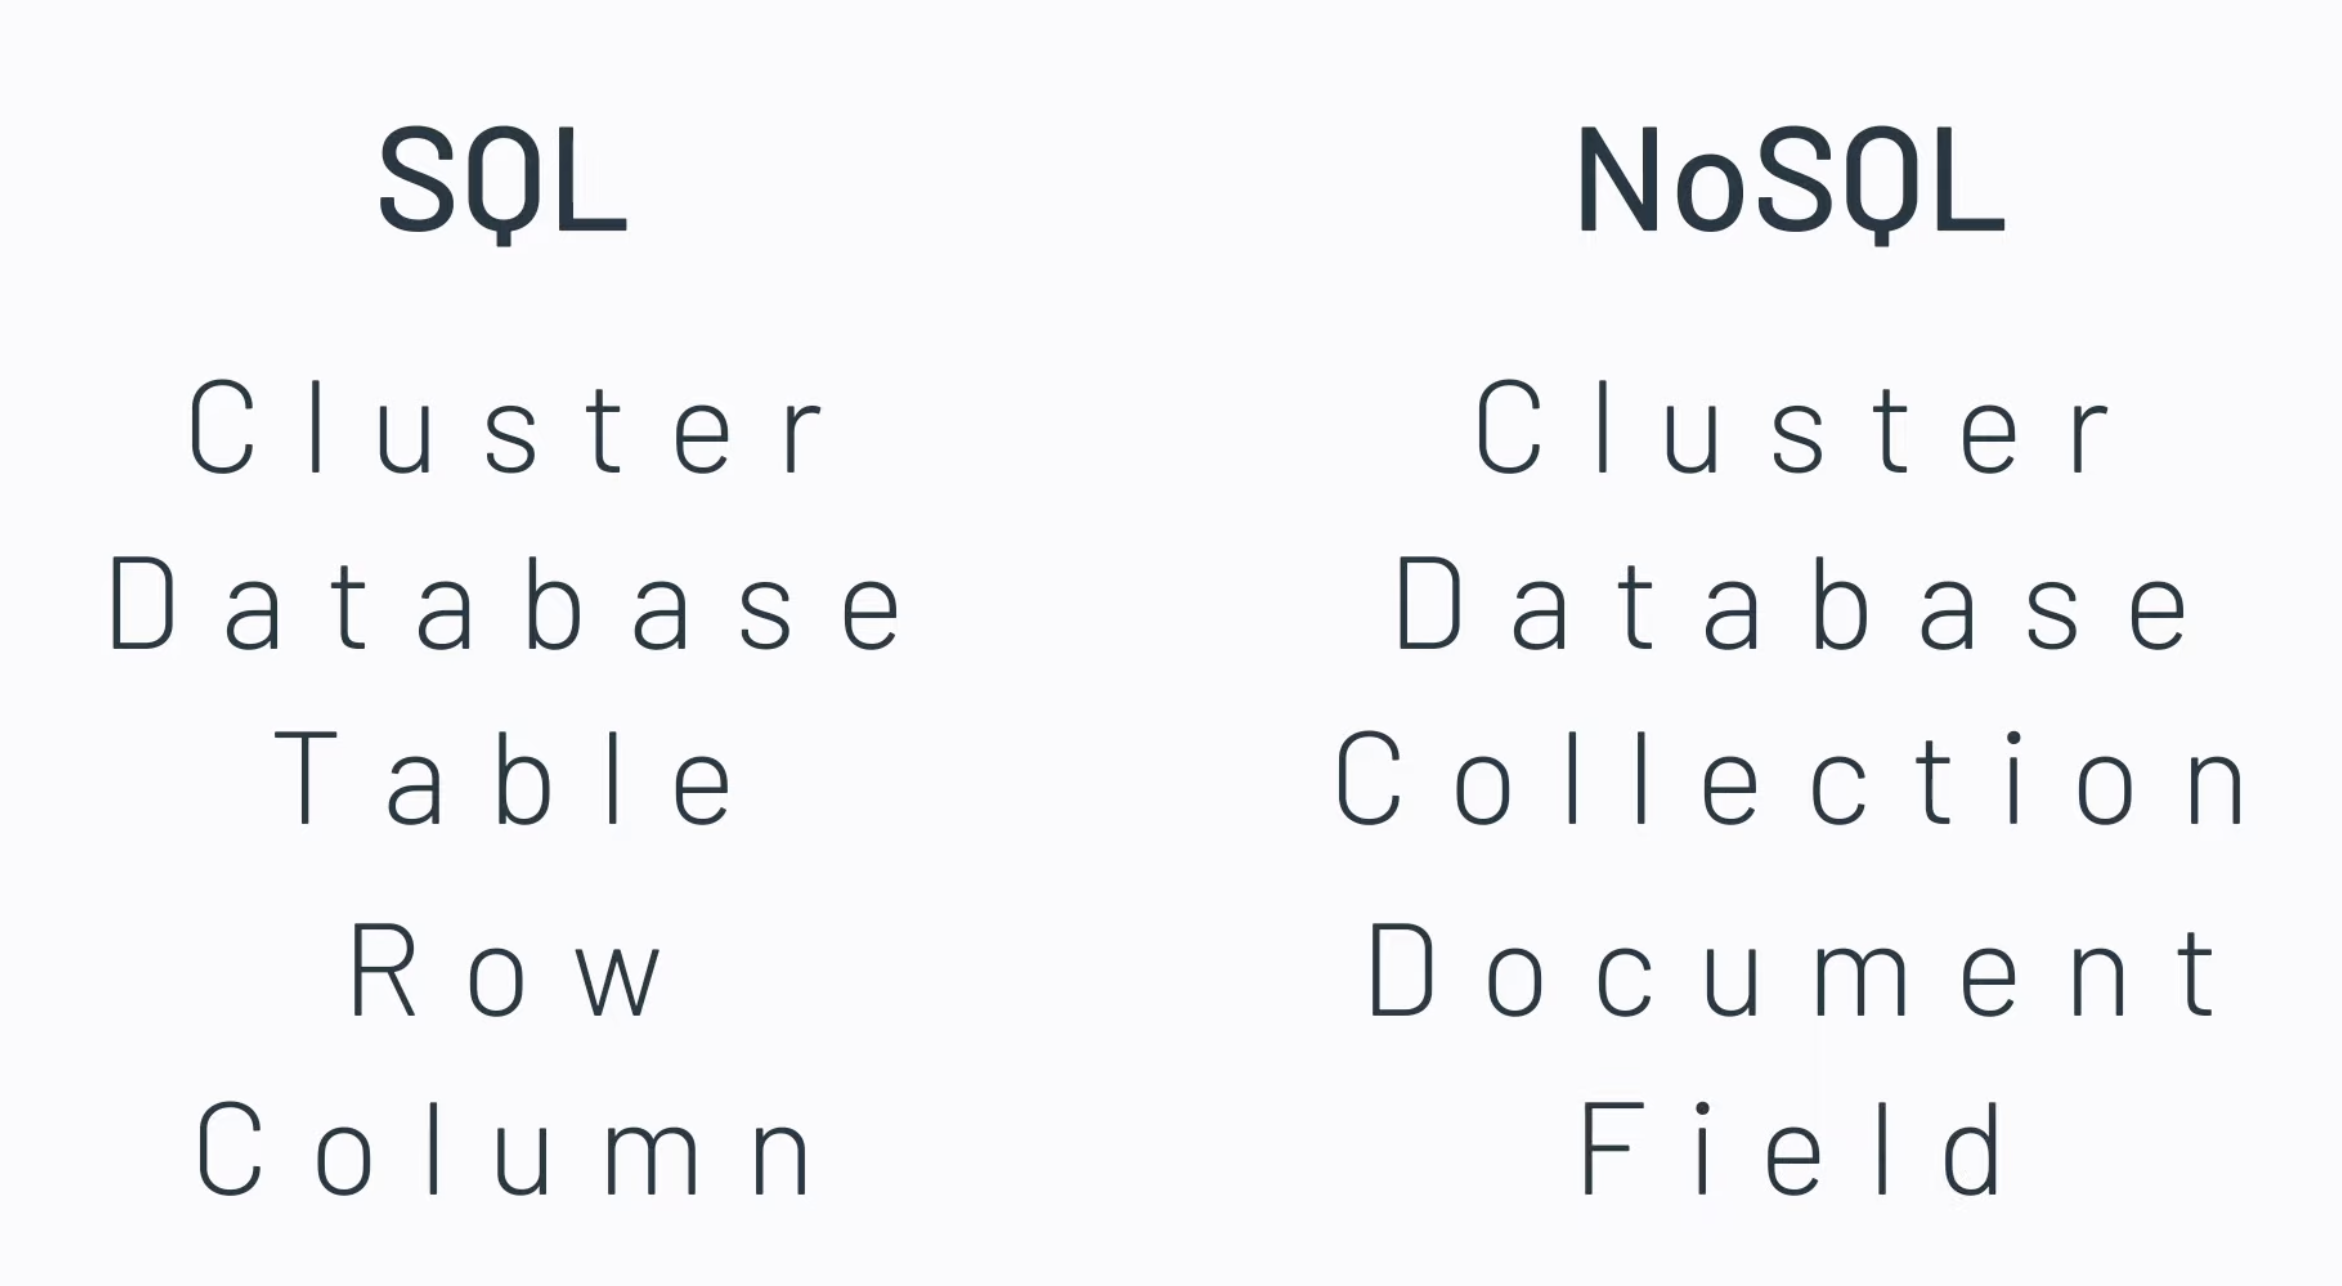
We’ll discuss two types of databases in this course: relational/SQL databases and document/NoSQL databases.
For the sake of simplicity in this section, we’ll focus on databases in isolation, rather than as part of a larger system. This is a little simplistic, since databases are usually managed as part of a larger system that includes a web server, application server, and other components.
To avoid the complexities of maintaining your own server infrastructure, you should probably use a hosted, cloud database for your project i.e. one that is hosted and managed by a third-party. We’ll discuss cloud computing in the next section.
Relational Databases
A relational database (sometimes referred to as a SQL database) is a database design that structures records as entries in one or more tables.
- A
tableis a two-dimensional grid, with rows and columns. Each row represents a records, and each row contains one or more columns which represent fields. Tables are meant to hold related data e.g. one table might hold Customer data, another might hold Order data. - A
rowis a single record, with each columns as a field in that record. For example, our customer record might have fields for name, address, and phone number. - A
columnis one of the fields in the row. e.g. name or address.
A simple relational table to store customer information might look something like this:
| Name | Address | City | Phone Number |
|---|---|---|---|
| John Doe | 123 Main St | Waterloo | 555-1234 |
| Jane Smith | 456 Elm St | Vancouver | 555-5678 |
| Bob Johnson | 123 Main St | Bancroft | 555-9012 |
Primary Keys
This structure isn’t very robust. What if we have two people with the same name? This isn’t unusual in a large city. For example, we might have two Jane Smiths, living at different addresses.
| Name | Address | City | Phone Number |
|---|---|---|---|
| John Doe | 123 Main St | Waterloo | 555-1234 |
| Jane Smith | 456 Elm St | Vancouver | 555-5678 |
| Bob Johnson | 123 Main St | Bancroft | 555-9012 |
| Jane Smith | 555 Pine Cres | Vancouver | 555-5309 |
When querying this data, we need some way to differentiate between the two Jane Smiths. We do this by adding a unique identifier to each record, called a primary key. This is a unique identifier for each record in the table - typically generated by the database itself when the record is created. We would consider this an artificial identifier, since we’re generating a unique key (as opposed to a natural identifier, like their name). Generating artificial identifiers is standard practice when working with large volumes of data.
A better table structure that includes a primary key would look like this:
| Cust_ID | Name | Address | City | Phone Number |
|---|---|---|---|---|
| 1001 | John Doe | 123 Main St | Waterloo | 555-1234 |
| 1002 | Jane Smith | 456 Elm St | Vancouver | 555-5678 |
| 1003 | Bob Johnson | 123 Main St | Bancroft | 555-1234 |
| 1004 | Jane Smith | 555 Pine Cres | Vancouver | 555-5309 |
Now we know that “Cust_ID=1002” is the Jane Smith on Elm Street, and “Cust_ID=1004” is the Jane Smith on Pine Crescent. There is no confusion!
Why are the keys so small?? Why not use a UUID or some other mechanism to generate a unique key? Smaller keys are faster to search and sort, and more space efficient. In a table of 4 records, it makes little difference, but you might eventually need to store millions of records.
Foreign Keys
To make our data storage more efficient, we can split our data across multiple tables. This is called normalization. For example, we might replace our single Customer table with a Customer table, an Address table and a Phone table.
Why would you want to do this?
- Your customer might have multiple phone numbers e.g., home, work, cell. A single table structure above doesn’t handle this i.e., you would need to add
PhoneandPhone2columns, which would then fail if a customer had a third phone number! - You might have multiple customers at the same address e.g, a family. Our earlier table structure doesn’t handle this very well either.
Here’s what a normalized schema might look like.
A customer table holds name only, and links to other tables.
| Cust_ID | Name | Address_ID | Phone_ID |
|---|---|---|---|
| 1 | John Doe | 1 | 1 |
| 2 | Jane Smith | 2 | 2 |
| 3 | Bob Johnson | 1 | 1 |
| 4 | Jane Smith | 3 | 3 |
Address is split out:
| Address_ID | Address | City |
|---|---|---|
| 1 | 123 Main St | Waterloo |
| 2 | 456 Elm St | Vancouver |
| 3 | 555 Pine Cres | Vancouver |
Phone number is split out:
| Phone_ID | Phone Number |
|---|---|
| 1 | 555-1234 |
| 2 | 555-5678 |
| 3 | 555-5309 |
Notice that in the Customer table, we’ve replaced address with Address_ID, the primary key on our Address table. This is called a foreign key - a reference in one table (Customer) to a primary key in another table (Address).
To reconstruct John Doe’s complete record, we need to pull the data from the Customer, Address and Phone tables.
- We look up John Doe (
Custom_ID=1) in theCustomertable. - Using the
Address_ID=1, we look up the record in theAddresstable. - Using the
Phone_ID=1, we look up the record in thePhonetable. - We use this data to reconstruct the complete record as:
John Doe, 123 Main St Waterloo, 555-1234.
We have duplicate keys i.e. “1” is the value of Cust_ID in one table, and Address_ID in another. This is a problem? No not at all! We only ever refer to the key value in the context of a table. i.e. PhoneID=1 or Address_ID=1. You cannot refer to a key’s value without also referencing the column where it is being used.
Data Models
Here’s our earlier example shown as a class, a set of records in a CSV file and as a set of relational database tables. Note that we’ve added a cust_id field, as a unique identifier for each record in the Custom table.
We refer to the cust_id field as a primary key or a unique identifier for each record in that table. We’ll return to this idea in the next section, when we start discussing SQL.
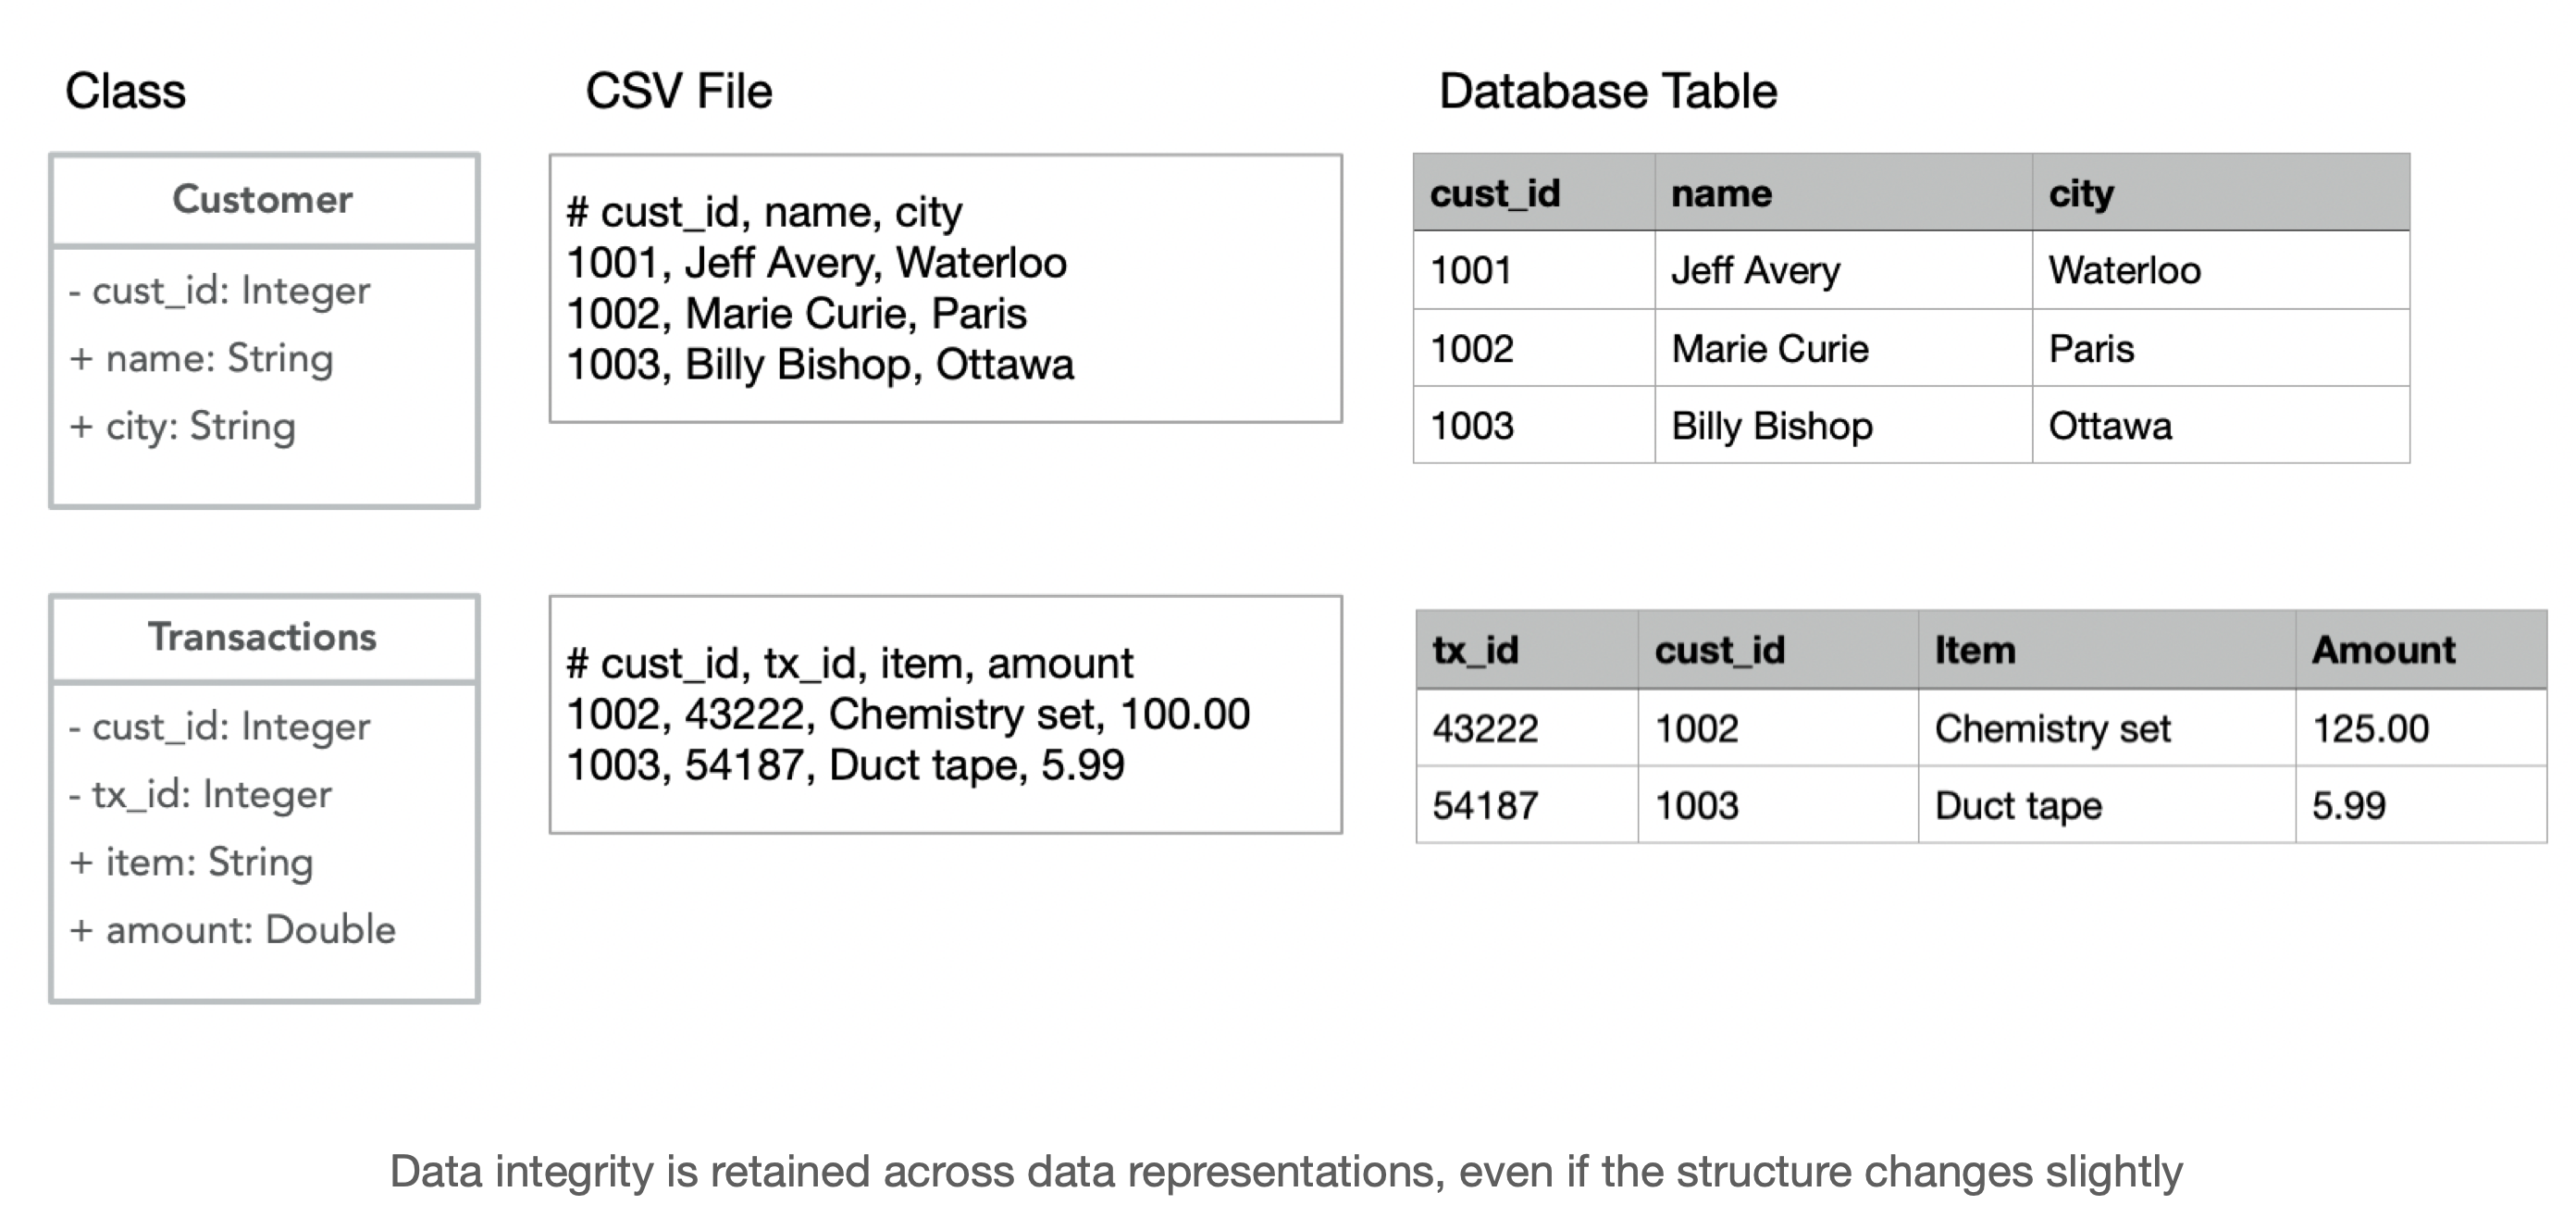
Why is the relational approach valuable? Relational databases can perform efficient operations on sets of records. For example:
- Return a list of all purchases greater than $100.
- Return a list of customers from “Paris”.
- Delete customers from “Ottawa”.
Our example is pretty trivial, but imagine useful queries like:
- “Find all transactions between 2:00 and 2:30”, or
- “Find out which salesperson sold the greatest amount during last Saturday’s sale”.
What is SQL?
SQL (“Ess-que-ell”) is a Domain-Specific Language (DSL) for describing your queries against a relational database. Using SQL, you write statements describing the operation to perform and which tables to use, and the database performs the operations for you.
SQL is a standard, so SQL commands work across different databases. SQL was adopted as a standard by ANSI in 1986 as SQL-86, and by ISO in 1987.
Using SQL, you can:
- Create new records
- Retrieve sets of existing records
- Update the fields in one or more records
- Delete one or more records
These are considered the basic functions for working with persistent storage. Yes, we use the acronym CRUD. You’ll occasionally trip over the term “CRUD applications” which just means an application whose primary purpose is to interact with an underlying database. An example would be something like a simple app for tracking a list of customers or sales data.
SQL has a specific syntax for managing sets of records:
<operation> FROM [table] [WHERE [condition]]
operations: SELECT, UPDATE, INSERT, DELETE, ...
conditions: WHERE [col] <operator> <value>
For example:
/* SELECT returns data from a table, or a set of tables.
* an asterix (*) means "all"
*/
SELECT * FROM customers
SELECT * FROM Customers WHERE city = "Ottawa"
SELECT name FROM Customers WHERE custid = 1001
/* UPDATE modifies one or more column values based on some criteria.*/
UPDATE Customer SET city = "Kitchener" WHERE cust_id = 1001
UPDATE Customer SET city = "Kitchener" // uh oh, what is wrong with this?
/* INSERT adds new records to your database. */
INSERT INTO Customer(cust_id, name, city)
VALUES ("1005", "Meredith Avery", "Kitchener")
INSERT INTO Customer(cust_id, name, city)
VALUES ("1005", "Brian Avery", "Kitchener") // uh oh, what have I done?
It’s common to have a record spread across multiple tables. A join describes how to relate data across tables.
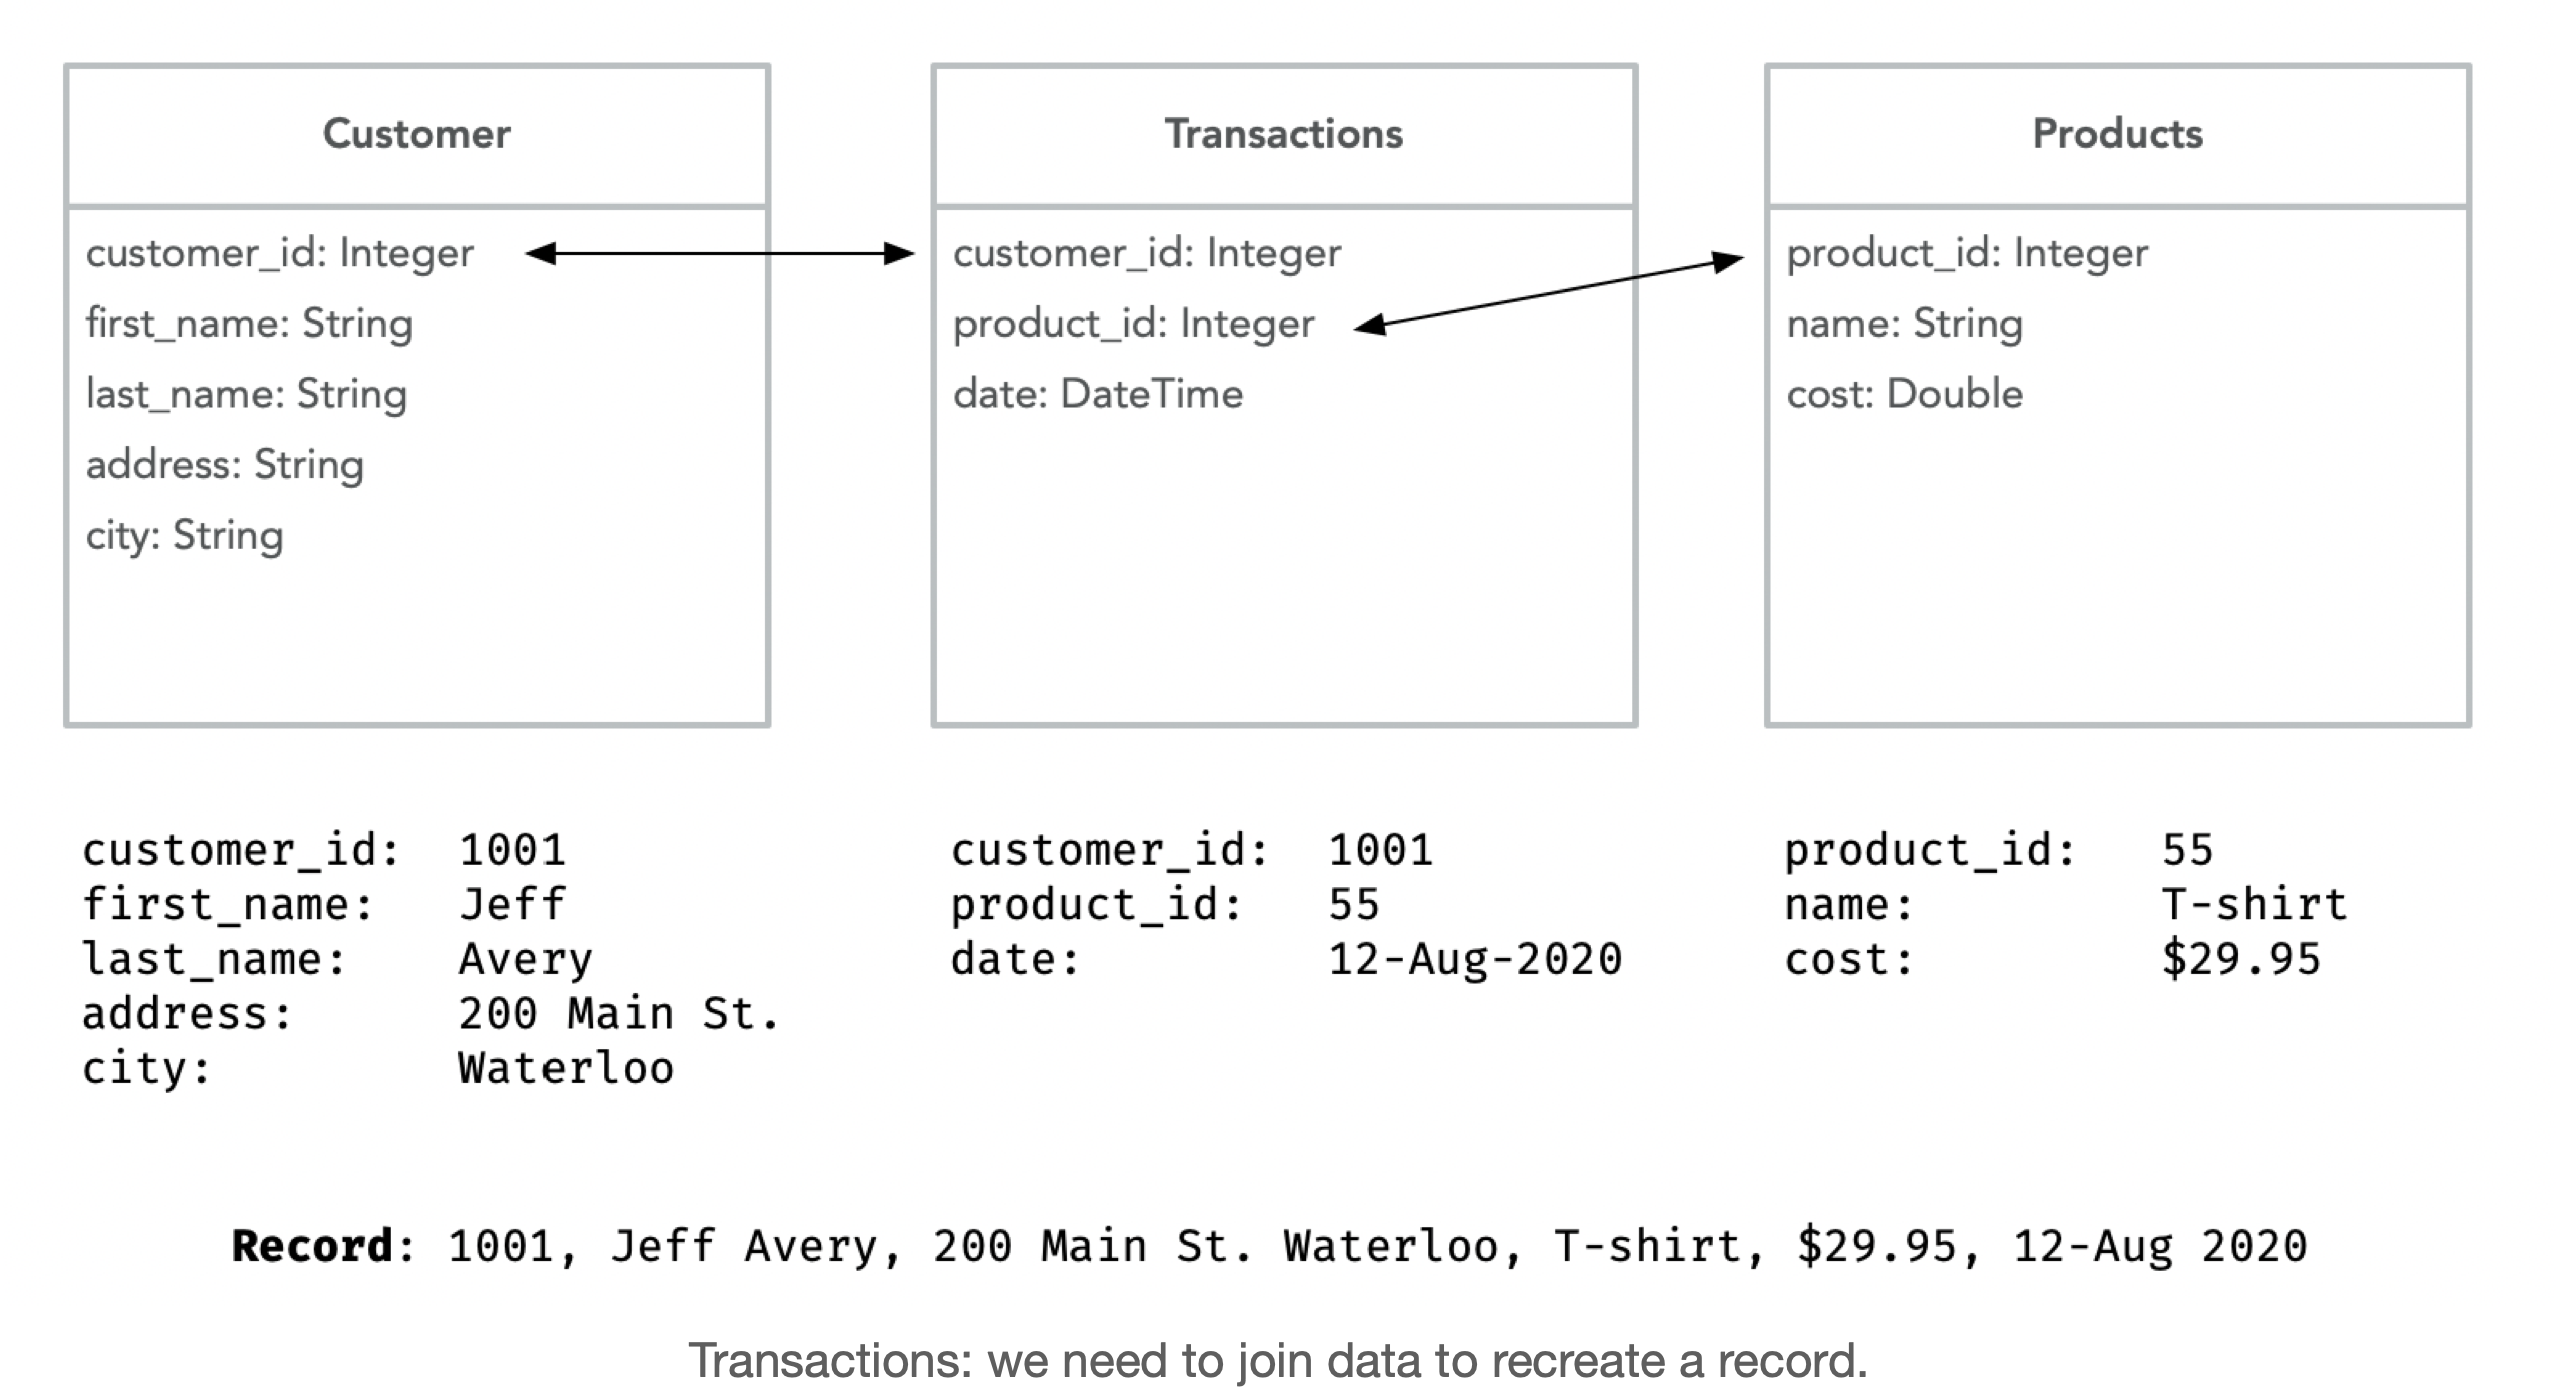
SELECT c.customer_id, c.first_name + “ “ + c.last_name, t.date, p.name, p.cost
FROM Customer c, Transactions t, Products p
WHERE c.customer_id = t.customer_id
AND t.product_id = p.product_id
Returns data that spans multiple tables:
$ 1001, Jeff Avery, 12-Aug-2020, T-shirt, 29.95
Using JDBC
Some online databases have their own libraries that you can use for connecting (see examples above). It’s also common to use a standard library called JDBC (Java Database Connectivity) to connect to a database. JDBC is a Java API that provides a standard way to connect to a database, issue SQL queries, and retrieve results.
To create a database project in IntelliJ using JDBC:
-
Create a Gradle/Kotlin project.
-
Modify the
build.gradleto include a dependency on the JDBC driver for your database.
// choose the driver for your particular database
implementation("org.xerial:sqlite-jdbc:3.42.0.0")
- Use the Java SQL package classes to connect and fetch data.
import java.sql.Connection
import java.sql.DriverManager
import java.sql.SQLException
Different databases require different JDBC drivers. You can typically find JDBC drivers (and the appropriate implementation statement) on maven.
Connecting with JDBC
To connect to a database, we use the Connection class with a connection string representing the details on how to connect.
Here’s how we connect to the SQLite driver.
// sqlite database (file-based)
val url = "jdbc:sqlite:chinook.db"
conn = DriverManager.getConnection(url)
The connection string contains these components:
- jdbc: the type of connection, this is a fixed string
- sqlite: the type of database
- chinook.db: the filename since this is a file-based database
This example uses a sample database from the official SQLite tutorial.
fun connect(): Connection? {
var connection: Connection? = null
try {
val url = "jdbc:sqlite:chinook.db"
connection = DriverManager.getConnection(url)
println("Connection is valid.")
} catch (e: SQLException) {
println(e.message)
}
return connection
}
We are using a samples database called
chinook.dbwhich is available for many different databases. You can download scripts to create it from here.
Querying Data Interacting with the database through an active connection involves preparing a query, executing it, and then iterating over the results.
!!!warning Make sure to close your results, query and connection when you are done with them! !!!
data class Artist(val id:Int, val name: String)
fun Connection.getArtists(): List<Artist> {
val artists = mutableListOf<Artist>()
val query = prepareStatement("SELECT * FROM artists")
val result = query.executeQuery()
while(result.next()) {
artists.add(
Artist(
result.getInt("ArtistID"),
result.getString("Name")
)
)
}
fun main() {
val connection = connect()
val artists = connection?.getArtists()
println("${artists?.size} records retrieved")
connection?.close()
}
Examples
SQLite (Local)
Relational databases are often large and complex systems. However, the relational approach can also be scaled-down.
SQLite (pronounced ESS-QUE-ELL-ITE) is a small-scale relational DBMS that supports SQL. It is small enough for local, standalone use.
SQLite is a C-language library that implements a small, fast, self-contained, high-reliability, full-featured, SQL database engine. SQLite is the most used database engine in the world. SQLite is built into all mobile phones and most computers… https://www.sqlite.org/index.html
You can install the SQLite database under Mac, Windows or Linux.
- Visit the SQLite Download Page.
- Download the binary for your platform.
- To test it, launch it from a shell.
$ sqlite3
SQLite version 3.28.0 2019-04-15 14:49:49
Enter ".help" for usage hints.
Connected to a transient in-memory database.
Use ".open FILENAME" to reopen on a persistent database.
sqlite> .exit
We will create a database from the command line. Optionally, you can install SQLite Studio, a GUI for managing databases.
You can download the SQLite Sample Database and confirm that SQLite is working. We can open and read from this database using the command-line tools:
$ sqlite3
SQLite version 3.32.3 2020-06-18 14:16:19
Enter ".help" for usage hints.
Connected to a transient in-memory database.
Use ".open FILENAME" to reopen on a persistent database.
sqlite> .help
.auth ON|OFF Show authorizer callbacks
.backup ?DB? FILE Backup DB (default "main") to FILE
.bail on|off Stop after hitting an error. Default OFF
.binary on|off Turn binary output on or off. Default OFF
.cd DIRECTORY Change the working directory to DIRECTORY
.changes on|off Show number of rows changed by SQL
.check GLOB Fail if output since .testcase does not match
.clone NEWDB Clone data into NEWDB from the existing database
.databases List names and files of attached databases
.dbconfig ?op? ?val? List or change sqlite3_db_config() options
.dbinfo ?DB? Show status information about the database
Commands
These commands are meta-commands that act on the database itself, and not the data that it contains (i.e. these are different from SQL and specific to SQLite). Some particularly useful commands:
{.compact}
| Command | Purpose |
|---|---|
.open filename | Open database filename. |
| .database | Show all connected databases. |
.log filename | Write console to log filename. |
.read filename | Read input from filename. |
| .tables | Show a list of tables in the open database. |
.schema tablename | SQL to create a particular tablename. |
| .fullschema | SQL to create the entire database structure. |
| .quit | Quit and close connections. |
We often use these meta-commands to change settings, and find information that we’ll need to structure queries e.g. table names.
$ sqlite3
SQLite version 3.28.0 2019-04-15 14:49:49
Enter ".help" for usage hints.
Connected to a transient in-memory database.
Use ".open FILENAME" to reopen on a persistent database.
sqlite> .open chinook.db // name of the file
sqlite> .mode column // lines up data in columns
sqlite> .headers on // shows column names at the top
// determine which tables to query
sqlite> .tables
albums employees invoices playlists
artists genres media_types tracks
customers invoice_items playlist_track
Queries Once we’ve identified what we want to do, we can just execute our queries. Examples of selecting from a single table at a time:
sqlite> SELECT * FROM albums WHERE albumid < 4;
AlbumId Title ArtistId
---------- ------------------------- ----------
1 For Those About To Rock 1
2 Restless and Wild 2
3 Let There Be Rock 1
sqlite> SELECT * FROM artists WHERE ArtistId = 1;
ArtistId Name
---------- ----------
1 AC/DC
We can also JOIN across two tables (based on a primary key, ArtistId). You often will have multiple WHERE clauses to join between multiple tables.
sqlite> SELECT albums.AlbumId, artists.Name, albums.Title
FROM albums, artists
WHERE albums.ArtistId = artists.ArtistId
AND albums.AlbumId < 4;
AlbumId Name Title
---------- ---------- ------------------------
1 AC/DC For Those About To Rock
2 Accept Restless and Wild
3 AC/DC Let There Be Rock
Supabase (Remote)
SQLite is a local, lightweight solution, suitable for standalone applications. What if you want a SQL database that can be shared? There are many solutions for hosting a database in the cloud.
Supabase is a new open-source project that provides a cloud-hosted relational database. It’s built on top of PostgreSQL, a powerful open-source SQL database. They also have a free tier, which is great for learning and small projects.
For details on using Supabase in your Android project, see the Kotlin Client Library. For other platforms, the community has produced a Kotlin Multiplatform Client for Supabase which we’ve used successfully in this course.
Document Databases
A document database typically stores data in a format called a document. A document is a JSON-like object that contains key-value pairs. In the case of MonboDB, these documents are are also stored in collections.
Comparing a document database to a relational database, you can think of a collection as comparable to a table, and a document as a record in a table, containing fields. Here’s an example of a customer document in a document database, with fields for name, address, and phone number:
{
"name": "John Doe",
"address": "123 Main St",
"city": "Waterloo",
"phone": "555-1234"
}
Unlike a relational database, a document database doesn’t require a fixed schema. This means that each document in a collection can have different fields. This flexibility can be useful when you have data that doesn’t fit neatly into a table. However, it can also make it more difficult to query the data.
The other major difference between document databases and relational databases is that document databases don’t support joins. Instead, you typically denormalize the data by embedding related data within a document. This can make it easier to retrieve the data, but it can also make it more difficult to update the data. Duplication of data is a common trade-off in document databases.
Advantages
- You do not need to join across tables to return a record, since the document is a self-contained record.
- You have the flexibility to structure your document as you see fit! It’s incredibly flexible.
- It can be high performance since data does not need to be heavily processed to be stored.
Disadvantages
- Since you can’t join across tables, you need to denormalize your data. This can lead to data duplication.
- Since you can’t count on a fixed structure, it is difficult to perform operations across multiple documents e.g., sorting records is challenging, and sometimes not possible.
Examples
MongoDB
MongoDB is a very popular document database. It stores data in a format called BSON (Binary JSON), which is a binary-encoded serialization of JSON-like documents. MongoDB is designed to be scalable and flexible, and it’s extremely well supported and documented.
It also includes a free-tier cloud service called MongoDB Atlas that you can use to host your databases.
For details on connecting to MongoDB, see the Kotlin Driver Quick Start. Unlike SQL, MongoDB uses a platform specific query language called MongoDB Query Language.
Choosing a Database
Your choice of database depends on a number of factors:
Do you want to run it locally (and keep it exclusive to your application) or run it in the cloud (where you can share access)? Most of the time, we want the benefits of sharing our data - that’s often why we have a database! However, it’s not uncommon for applications to ship with local databases e.g., SQLite for local configuration information, instead of saving data in a text file.
Also, the choice of SQL or NoSQL is a complex decision (well beyond the scope of this course). SQL databases are stable and extremely well supported, but do not scale well to large distributed applications. With the move to cloud-hosting services, NoSQL has become much more popular in recent years. It may be that you choose NoSQL simply because it’s so well supported by cloud vendors and suits a distributed environment much better.
We suggest working through the technical decisions in-order:
- Pick SQL or No-SQL.
- Pick local or hosted (cloud).
- Pick desktop or Android.
| SQL Databases | Local | Cloud |
|---|---|---|
| Android | SQLite | Supabase |
| Desktop | SQLite | Supabase |
| NoSQL Databases | Local | Cloud |
|---|---|---|
| Android | (ScyllaDB, Cassandra) | Firebase |
| Desktop | (ScyllaDB, Cassandra) | MongoDB |
Databases in italics are those that I’ve heard-of, and which seem well-suited to this combination, but which I’ve never actually used. Caveat emptor.
Networking
How do client and server communicate? They need agreed-upon rules for packaging, transmitting and interpreting information sent over a physical network.
Network protocols are a set of rules outlining how connected devices communicate across a network.
Protocols include:
- Communication protocols, for transferring data. These include HTTP for web traffic, FTP for sending files over a network, or TCP/IP for data packets.
- Security protocols are meant for establishing secure channels for the safe transmission of data. These include SFTP and SSH.
- Network management prototols are meant for controlling and managing devices on a network. These include SMNP and ICMP.
TCP/IP
TCP/IP stands for Transmission Control Protocol/Internet Protocol and is a suite of communication protocols used to interconnect network devices on the internet. TCP/IP is also used as a communications protocol in a private computer network. TCP/IP actually refers to two protocols that work together: Transmission Control Protocol (TCP) and Internet Protocol (IP).
TCP defines how applications can create channels of communication across a network. It also manages how a message is assembled into smaller packets before they are then transmitted over the internet and reassembled in the right order at the destination address.
IP defines how to address and route each packet to make sure it reaches the right destination. Each gateway computer on the network checks this IP address to determine where to forward the message.
How does TCP/IP work?
TCP/IP uses the client-server model of communication in which a user or machine (a client) is provided a service, like sending a webpage, by another computer (a server) in the network.
Every device on a network requires a unique identifier, also known as an Internet Protocol address or IP address. This is usually presented as a numerical label such as 192.0.2.1 (four digits from 0-255, dot separated).
Network addresses also include a port, which is an integer label assigned to a specific network channel on that receiving device. For example, port 80 is normally used when requesting web pages; port 21 is commonly used to send files using FTP.
A client connecting to a remote server needs to:
- Create a network connection to the specific IP address and port of the server,
- Send data to that address and port.
- Handle any errors that arise.
- Close the connection on completion.
Note that we commonly combine prototols. For example, a web browser connecting to a remote web server will make HTTP requests over a TCP/IP networking to port 80. We’ll use this in the next section when we discuss HTTP.
Networking in practice
Networking is a complex topic, but it’s essential for building modern applications. Here are some common networking tasks you might encounter:
- Sending data between devices. This is the most basic networking task, and it’s essential for building any kind of networked application.
- Handling errors. Networks are unreliable, so you need to be prepared for errors like dropped packets, slow connections, or network outages.
- Security. Networks are vulnerable to attacks, so you need to secure your applications against threats like
- Scaling. As your application grows, you’ll need to scale your network to handle more traffic and more users. This can involve load balancing, caching, and other techniques to improve performance.
- Monitoring. You need to monitor your network to detect problems and optimize performance. This can involve tools like Wireshark or Nagios.
- Optimizing performance. Networks can be slow, so you need to optimize your applications to minimize latency and maximize throughput. This can involve techniques like caching or compression.
- Debugging. When things go wrong, you need to be able to debug your network to find the problem. This can involve tools like ping or traceroute.
Creating network connections
There are multiple ways to create network connections. The most common are:
- Synchronous connections are blocking, meaning the client waits for the server to respond before continuing. This is the simplest way to create a connection, but it can be slow if the server is far away or slow to respond.
- Asynchronous connections are non-blocking, meaning the client can continue to do other things while waiting for the server to respond. This is more complex to implement, but can be faster and more efficient.
- Long polling is a technique where the client sends a request to the server and waits for a response. If the server has no new data, it waits a while before responding. This is useful for real-time applications like chat or notifications.
Kotlin is able to handle all of these connection types, but you’ll need to use different libraries and techniques depending on the type of connection you want to create.
Kotlin has built-in support for networkin using java.net classes:
import java.net.ServerSocket
import java.net.Socket
fun client() {
val client = Socket("127.0.0.1", 9999)
val output = PrintWriter(client.getOutputStream(), true)
val input = BufferedReader(InputStreamReader(client.inputStream))
println("Client sending [Hello]")
output.println("Hello")
println("Client receiving [${input.readLine()}]")
client.close()
}
You can also use third-party libraries like OkHttp or Retrofit to make networking easier. Here’s a similar example using Ktor, the official networking library maintained by JetBrains:
import io.ktor.client.HttpClient
suspend fun main() {
val client = HttpClient()
val response = client.get<String>("http://ktor.io")
println("Response: $response")
}
Full details are in the Ktor client documentation.
Web services
Using Kotlin and Ktor to build web services.
Why services?
Historically, many software applications were originally designed to be standalone, and much of the software that we use is still standalone. However, it can be useful to sometimes split processing across multiple systems. Here’s an incomplete list of the reasons why you might want to do this:
- Resource sharing. We often need to share resources across users. For example, storing our customer data in a shared databases that everyone in the company can access.
- Reliability. We might want to increase the reliability of our software by redundant copies running on different systems. This allows for fault tolerance - fail-over in case the first system fails. This is common with important resources like a web server.
- Performance. It can be more cost-effective to have one highly capable machine running the bulk of our processing, while cheaper/smaller systems can be used to access that shared machine. It can also be cheaper to spread computation across multiple systems, where tasks can be run in parallel. Distributed architectures provide flexibility to align the processing capabilities with the task to be performed.
- Scalability. Finally, if designed correctly, distributing our work across multiple systems can allow us to grow our system to meet high demand. Amazon for example, needs to ensure that their systems remain responsive, even in times of heavy load (e.g. holiday season).
- Openness. There is more flexibility, since we can mix systems from different vendors.
Earlier, we discussed a distributed application as a set of components, spread across more than one machine, and communicating with one another over a network. Each component has some capabilities that it provides to the other components, and many of them coordinate work to accomplish a specific task.
We have already described a number of different distributed architectures. These enforce the idea that distributed systems can take many different forms, each with its own advantages and disadvantages. When we’re considering building a service, we’re really focusing on a particular kind of distributed system, where our application is leveraging remote resources.
Web architecture
A web server and web browser are a great example of a client-server architecture.
A web server is effectively a service running on a server, listening for requests at a particular port over a network, and serving web documents (HTML, JSON, XML, images). The payload delivered to a web browser is the content, which the browser interprets and displays. When the user interacts with a web page, the web browser reacts by making requests for additional information to the web server.
Over time, both browser and web server have become more sophisticated, allowing servers to host additional content, run additional programs as needed, and work as part of a larger ecosystem that can distribute client requests across other systems.
We’ll discuss this in more detail, and examine how we can leverage web technologies to build more generalized web services.
The major underlying protocol used to deliver web content is the Hypertext Transfer Protocol (HTTP). This is an application layer protocol that supports serving documents, and processing links to related documents, from a remote service.
HTTP functions as a request–response protocol:
- A web browser is a typical client, which the user is accessing. A web server would be a typical server.
- The user requests content through the browser, which results in an HTTP request message being sent to the server.
- The server, which provides resources such as HTML files and other content or performs other functions on behalf of the client, returns a response message to the client. The response contains completion status information about the request and may also contain requested content in its message body.

HTTP defines methods to indicate the desired action to be performed on the identified resource.
What this resource represents, whether pre-existing data or data generated dynamically, depends on the implementation of the server. Often, the resource corresponds to a file or the output of an executable residing on the server. Method names are case-sensitive.
-
GET: The GET method requests that the target resource transfers a representation of its state. GET requests should only retrieve data and should have no other effect.
-
HEAD: The HEAD method requests that the target resource transfers a representation of its state, like for a GET request, but without the representation data enclosed in the response body. Uses include looking whether a page is available through the status code, and quickly finding out the size of a file (
Content-Length). -
POST: The POST method requests that the target resource processes the representation enclosed in the request according to the semantics of the target resource. For example, it is used for posting a message to an Internet forum, or completing an online shopping transaction.
-
PUT: The PUT method requests that the target resource creates or updates its state with the state defined by the representation enclosed in the request. A distinction to POST is that the client specifies the target location on the server.
-
DELETE: The DELETE method requests that the target resource deletes its state.
What is REST?
Representational State Transfer (REST) is a software architectural style that defines a set of constraints for how the architecture of an Internet-scale system, such as the Web, should behave.
- REST was created by Roy Fielding in his doctoral dissertation in 2000.
- It has been widely adopted and is considered the standard for managing stateless interfaces for service-based systems.
- The term “Restful Services” is commonly used to describe services built using standard web technologies that adheres to these design principles.
REST Principles
- Client-Server. By splitting responsibility into a client and service, we decouple our interface and allow for greater flexibility in how our service is deployed.
- Layered System. The client has no awareness of how the service is provided, and we may have multiple layers of responsibility on the server. i.e. we may have multiple servers behind the scenes.
- Cacheable. With stateless servers, the client has the ability to cache responses under certain circumstances which can improve performance.
- Code On-Demand. Clients can download code at runtime to extend their functionality (a property of the client architecture).
- Stateless. The service does not retain state i.e. it’s idempotent. Every request that is sent is handled independently of previous requests. That does not mean that we cannot store data in a backing database, it just means that we have consistency in our processing.
- Uniform Interface. Our interface is consistent and well-documented. Using the guidelines below, we can be assured of consistent behaviour.
API Endpoints
For your service, you define one or more HTTP endpoints (URLs). Think of an endpoint as a function - you interact with it to make a request to the server. Examples:
To use a service, you format a request using one of these request types and send that request to an endpoint.
- GET: Use the GET method to READ data. GET requests are safe and idempotent.
- POST: Use a POST request to STORE data i.e. create a new record in the database, or underlying data model. Use the request payload to include the information that you want to store. You have a choice of content types (e.g. multipart/form-data or x-www-form-urlencoded or raw application/json, text/plain…)
- PUT: A PUT request should be used to UPDATE existing data.
- DELETE: Use a DELETE request to delete existing data.
API Design
Here’s some guidelines on using REST to create a web service [Cindrić 2021].
- Use JSON for requests and responses
- It’s easier to use, read and write, and it’s faster than XML. Every meaningful programming language and toolkit already supports it.
- e.g. make a POST request with a JSON data structure as the payload.
- Use meaningful structures for your endpoint
- Use nouns instead of verbs and use plural instead of singular form. e.g.
- GET /customers should return a list of customers
- GET /customers/1 should return data for customer ID=1.
- Be Consistent
- If you define a JSON structure for a record, you should always use that structure: avoid doing things like omitting empty fields (instead, return them as named empty arrays).
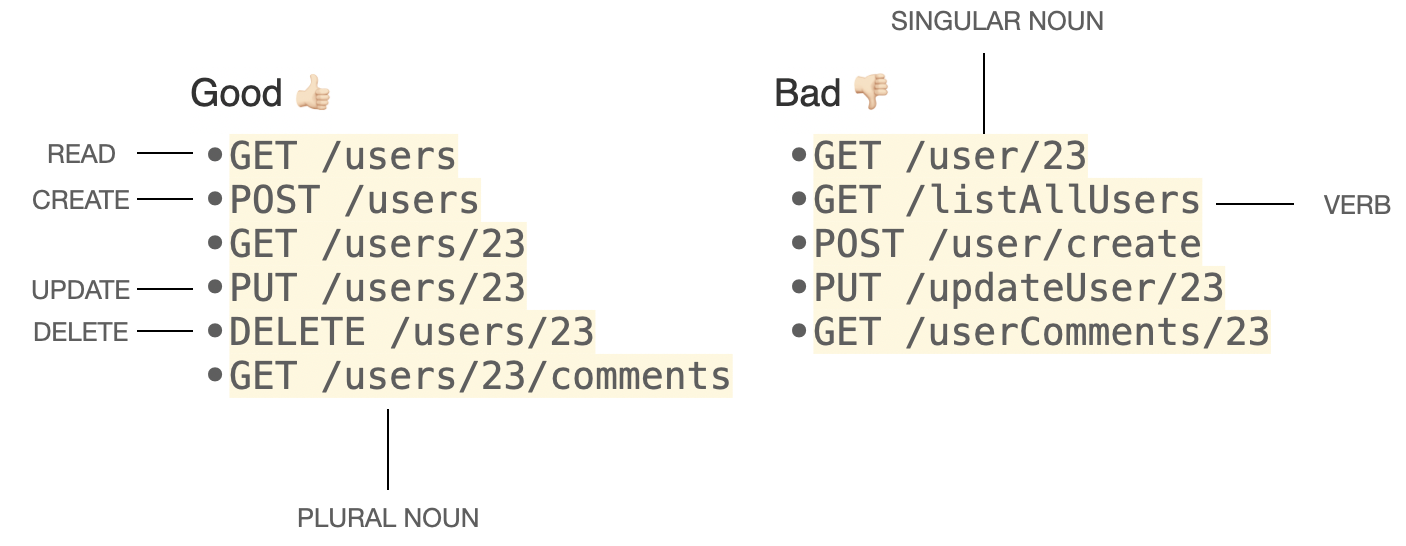
Ktor for Web Services
One challenge in using web services is that we are stuck with the inherent limits of that architecture. They are useful in situations where a REQUEST/RESPONSE model makes sense i.e. where the client can initiate all connections and query the server for information. We’ll focus on building that style of server first.
Building a scalable, high-performance server that can handle security, and other concerns is a significant undertaking. Luckily, there are a number of frameworks available that simplify the process. We’ll consider Ktor, a Kotlin-first framework. It’s designed as a multi-platform framework, meaning that you can deploy it anywhere. It’s lightweight, flexible and leverages other Kotlin features like coroutines.
Creating a Server
You can visit start.ktor.io to create and download a Ktor Kotlin project. IntelliJ Ultimate also ships with a Ktor plugin, and supports generating a new Ktor project from the project wizard.
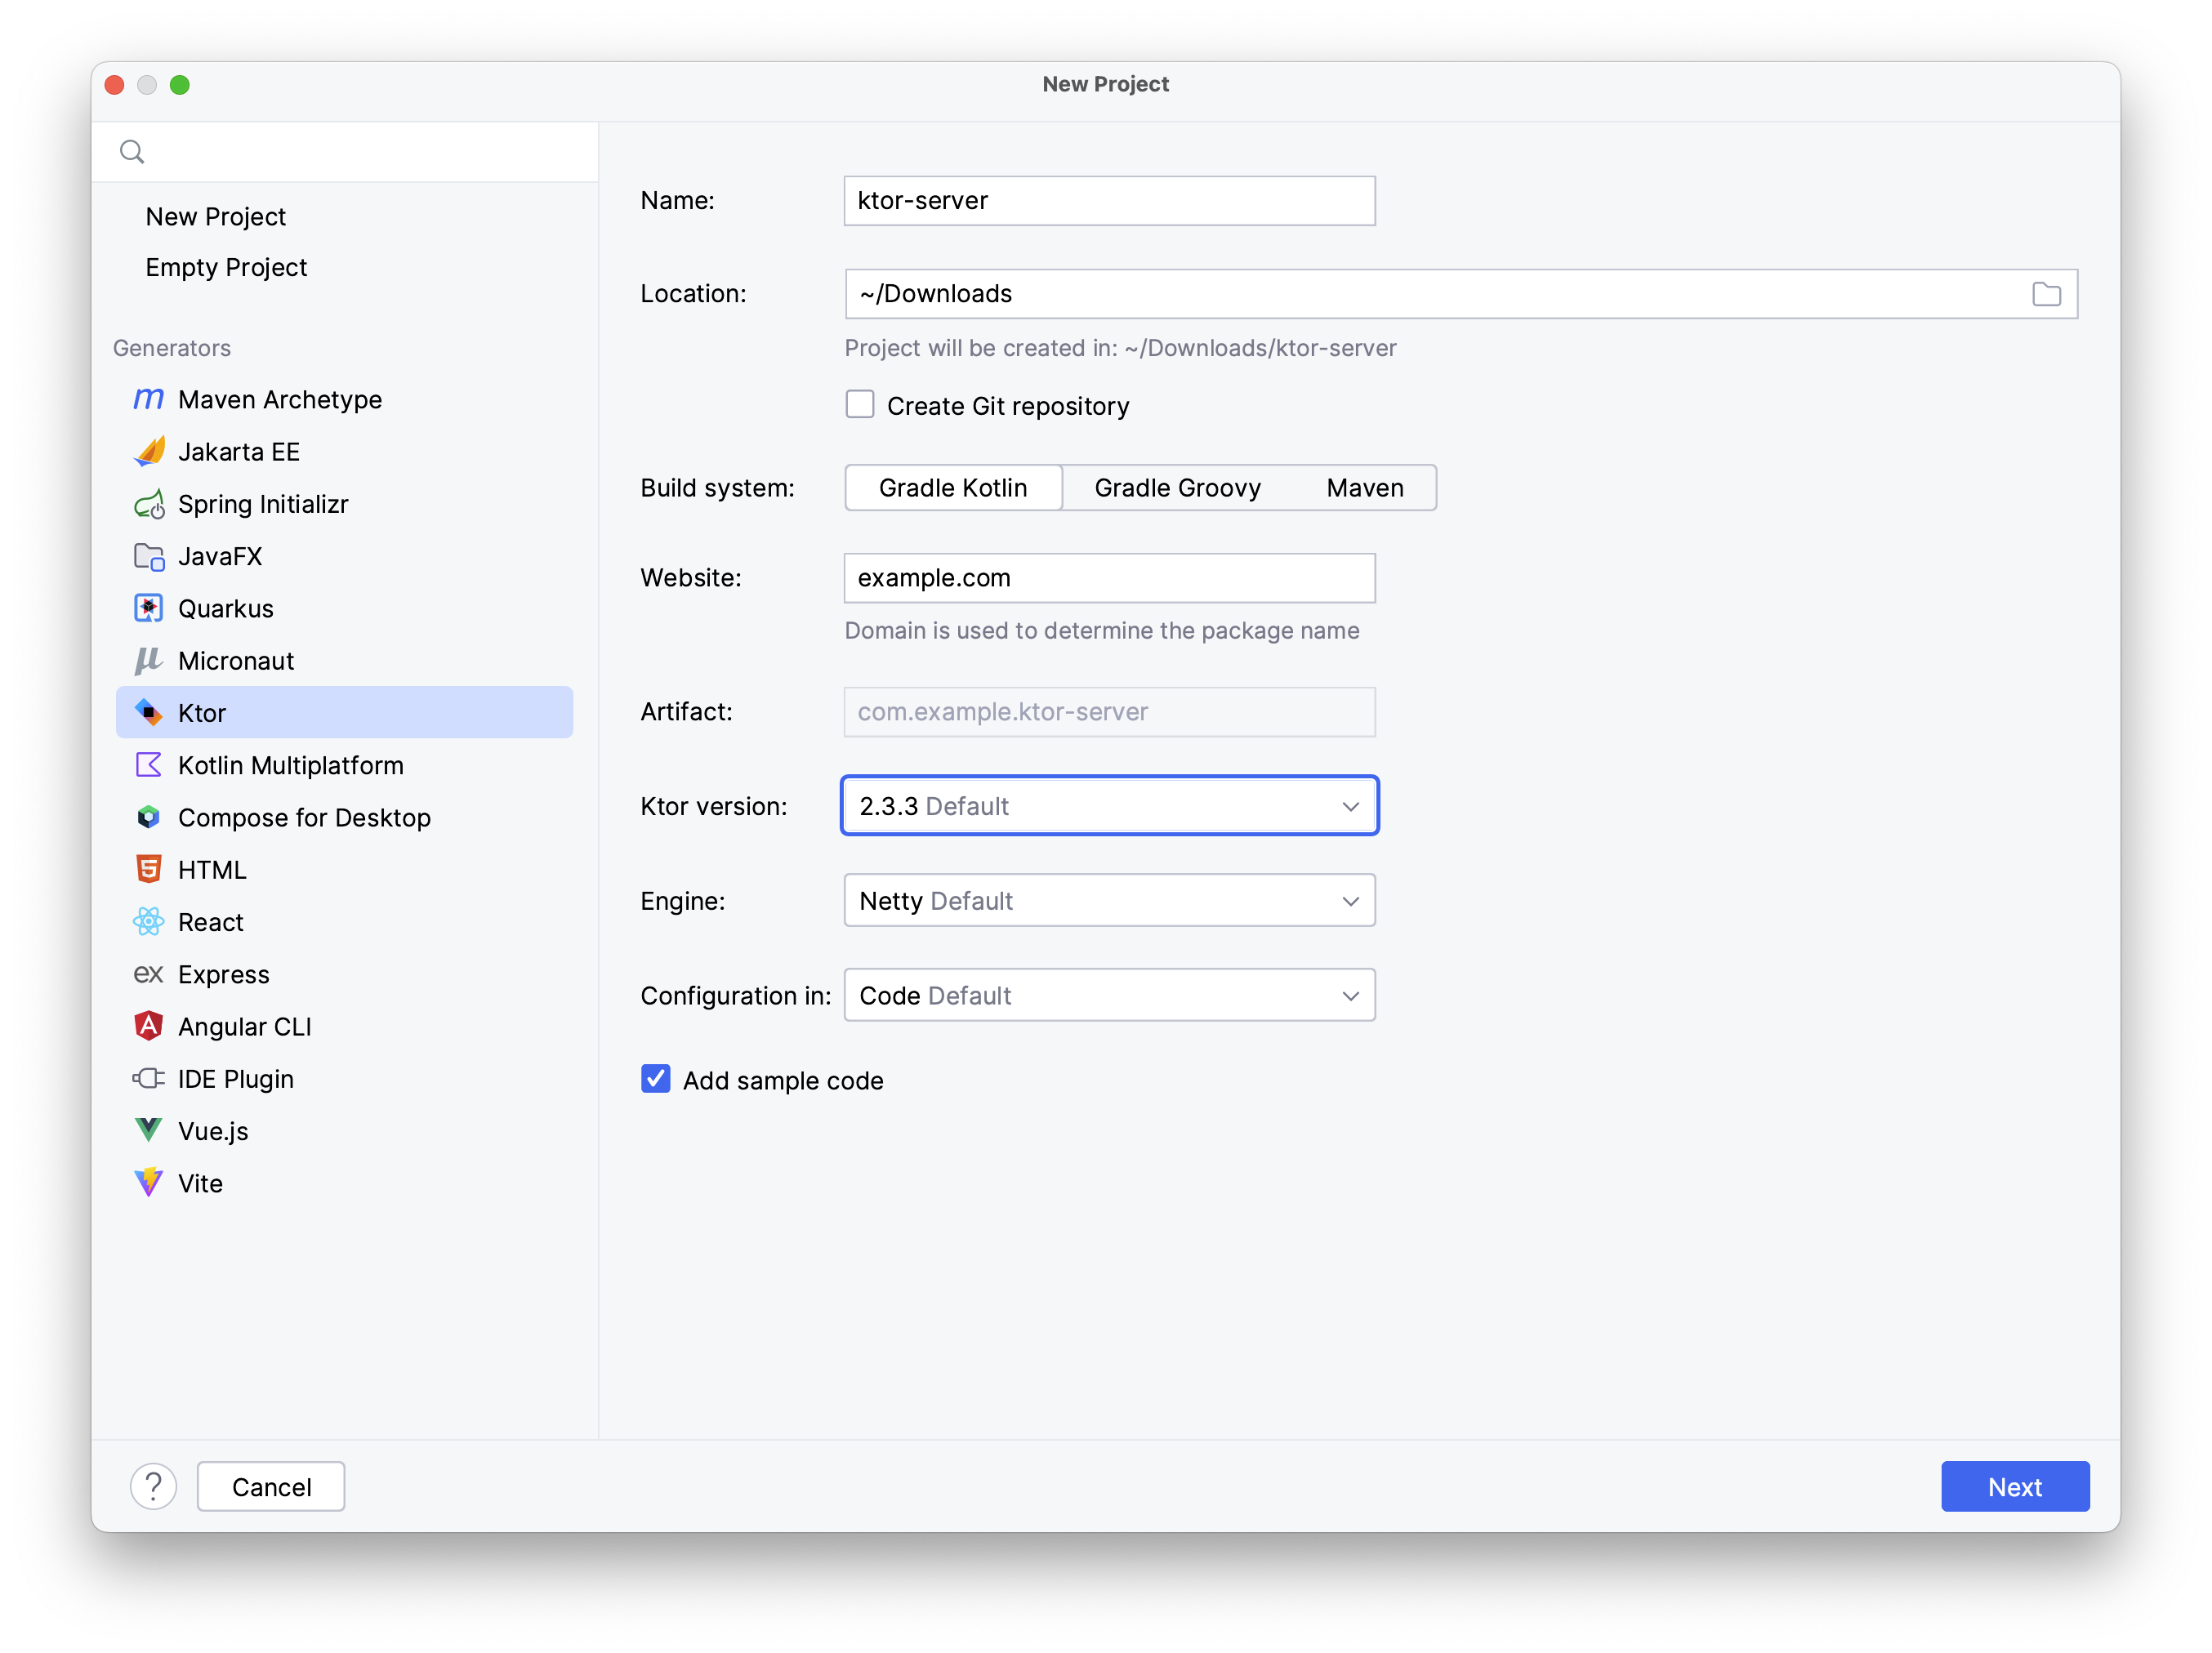
You should choose these settings:
- Build system: Gradle Kotlin (to be consistent with the rest of the course).
- Ktor version: The latest version (2.3.3 at this time).
- Engine: This is your web server which will host your application. Netty is lightweight and fine for testing.
You will next be prompted for plugins – extensions which define the capabilities of your web service. Ktor includes a number of types of plugins:
- Security: Authentication and authorization, integrated with common services (e.g. LDAP, OAuth).
- Routing: How to handle web requests: serve static content, or route to an application.
- HTTP: Options for handling HTTP requests.
- Serialization: How data will be shared to and from your web service (e.g. JSON).
- Databases: Are you leveraging any underlying database engine (e.g. Exposed, Postgres).
You should always add at-least Routing and Serialization so that you can handle incoming requests (ajd serialize to/from JSON). Other modules can be added as needed.
Project Structure
Your starting project will consist of:
Application.ktwith your basic code.Plugins/Routing.ktandPlugins/Serialization.ktwhich contain code for handling specific requests.
Here’s the Application.kt code:
fun main() {
embeddedServer(Netty, port = 8080, host = "0.0.0.0", module = Application::module)
.start(wait = true)
}
fun Application.module() {
configureSerialization()
configureRouting()
}
Gradle > Run will launch the server! You can see details in the Run log: this server runs on the localhost machine, and listens for HTTP traffic on port 8080:
> Task :run
2023-08-26 21:29:20.044 [main] INFO ktor.application - Autoreload is disabled because the development mode is off.
2023-08-26 21:29:20.223 [main] INFO ktor.application - Application started in 0.21 seconds.
2023-08-26 21:29:20.321 [DefaultDispatcher-worker-1] INFO ktor.application - Responding at http://0.0.0.0:8080
Launch a web browser against this address to test it.
Handling Requests
The server typically needs to listen for HTTP requests on specific end-points that you have defined. Your client will send HTTP requests (GET, POST, PUT, DEL) to those end-points, possibly with data included in the requests. Your server needs to accept the requests and process it accordingly.
For example, UW has an Open API that you can use to query course information:
- The base URL is: https://openapi.data.uwaterloo.ca/
- Subject information is at this end-point: https://openapi.data.uwaterloo.ca/v3/subjects
- You can make a GET request using a standard HTTP GET method to return subject information!
- Note that you need to include other information in the header e.g. authentication token.
Here’s an example of a server that just returns data from a GET request. It includes two source code files: the main application, and the Routing.kt file to handle the specific routing request.
// Application.kt
fun main() {
embeddedServer(Netty, port = 8080, host = "0.0.0.0", module = Application::module)
.start(wait = true)
}
fun Application.module() {
configureRouting()
}
// Routing.kt
fun Application.configureRouting() {
routing {
get("/") {
call.respondText("Hello World!")
}
}
}
Creating a Client
You can add Ktor support to any client application by adding the appropriate dependencies.
implementation("io.ktor:ktor-client-core:2.3.8") // or recent version
Full details are in the Ktor client documentation.
Making Requests
The client application needs to generate correctly formatted requests, and send them over the network.
You can use Ktor to add network capabilities to any Kotlin application.
Here’s an example of application code to make a GET requests. In this example, the query() function makes a GET request to fetch the contents of the Ktor website, and return the status code.
class Main : Application() {
override fun start(stage: Stage) {
var result: String = "empty"
runBlocking {
launch {
result = query()
}
}
stage.scene = Scene(StackPane(Label(result)), 250.0, 150.0)
stage.isResizable = false
stage.title = "Ktor-client-server"
stage.show()
}
}
suspend fun query(): String {
val client = HttpClient(CIO)
val response: HttpResponse = client.get("https://ktor.io/")
client.close()
return("${SysInfo.hostname}: ${response.status}")
}
Testing the API
It’s helpful to have a program that can generate HTTP requests for testing (vs. relying completely on the code that you write, or testing in a browser). Postman is one popular API client.
Ktor for Websockets
Web services are fantastic if you have a situation that suits a REQUEST/RESPONSE model, where the client is querying the server for data. However, this interaction model doesn’t work for every scenario.
For example, imagine that you are building a chat client where one or more clients can connect to a central server; when a person types a message, you want that message to be received by all of the clients promptly. Using a REST service, the server has no ability to initiate a connection to the client, or send a message, so the client would need to poll periodically to check for messages.
For this situation, we need a way to open a persistant connection between the client and server, so that either process can send messages to the other. In our chat client, for example, we would like
- the client to register with the server
- the client can then send messages to the server at any time
- the server can receive messages, and send them to other clients (i.e. it initiated the connection).
Websockets are the web browser technology that supports this style of persistant connection. Note that there are other ways to address this problem (including manually managing socket connections), but this is a standard way for web clients to handle this problem, which are useful for all applications. Ktor also provides extensive websocket support.
If you want websocket support in your project, you will need to modify the dependencies to include the appropriate libraries. If this is a new server project, you can specify
websocketsin the list of plugins that you include in your project. Websockets need to be enabled on both client and server.
See Creating a WebSocket chat for a lengthy explanation of how websockets work.
Hosting Services
Unlike applications, which are hosted by users on their own systems, services are typically deployed on servers. These can be physical systems, VMs or containers running in the cloud, or any combination of these targets.
Web services, the type that we’ve been considering, need to be deployed to a web server. When we were building Ktor projects, it quietly launched a web server in the background to support us testing our application. To deploy in a production environment though, we would need to install our application in an environment where a web server is already installed.
Ktor can produce a JAR file which you can install and host in a locally installed web server.
However, it’s more common to use a cloud service to host your database and application.
For details, see Cloud Hosting.
Cloud hosting
Although you can build and host your own server, it is more common to use large-scale hosted systems instead.
Cloud computing is the delivery of computing services—including servers, storage, databases, networking, software, analytics, and intelligence—over the internet (“the cloud”) to offer economies of scale (https://azure.microsoft.com). Cloud computing as a concept has been around since the 1960s, but it has only become popular since around 2007, when Amazon launched its Elastic Compute Cloud (EC2) service.
Rosenberg & Mateos (2014) define cloud computing as “a model for enabling ubiquitous, convenient, on-demand network access to a shared pool of configurable computing resources (e.g., networks, servers, storage, applications, and services) that can be rapidly provisioned and released with minimal management effort or service provider interaction” (https://en.wikipedia.org/wiki/Cloud_computing).

Cloud Computing Architecture (spiceworks.com)
Characteristics
They also define five essential characteristics of cloud computing:
- Pooled computing resources available to any subscribing users
- Virtualized computing resources to maximize hardware utilization
- Elastic scaling up or down according to need
- Automated creation of new virtual machines or deletion of existing ones
- Resource usage billed only as used
This represents a major shift away from previous models of computing, where companies would purchase and maintain their own servers, and instead rent resources from large-scale providers.
There are many advantages of using a hosted services, relative to building your own solution:
- Cost. You don’t need to purchase and setup hardware, but can instead allocate services as you need them. This allows you to just pay for what you need, and scale up if demand increases.
- Flexibility: You can allocate just the services that you need, and add different services as your needs change.
- Scalability: You can add more resources on-demand, as needed. Systems can even do this automatically, e.g. as more users login to your application, more servers are launched automatically to meet demand.
- Efficiency: These systems are extremely large-scale and finely tuned to provide excellent performance. You will likely not have the resources to design and build something comparable yourself.
Features
So what does a cloud service provide? Here are some common features:
-
Compute: Virtual machines, containers, serverless computing. Commonly, you can deploy code the cloud, and the cloud will run it for you. This is often called “serverless” computing, because you don’t need to worry about the server that runs your code. We will discuss this when we build services with Firebase.
-
Storage: Object storage, databases, file storage. Typically, some type of scalable database is provided, as well as storage for files and other binary objects. This will often be a NoSQL database, since these are easier to scale.
-
Networking: Content delivery networks, load balancing, virtual private networks. In the context of users accessing your services or databases, you will need to manage network traffic. This can be done through load balancing, or by using a content delivery network to cache data closer to users.
-
Security: Identity and access management, encryption, firewalls. These services will all have sophisticated user management and security features. You can control who has access to your services, and how they can interact with them.
-
Advanced Features: Machine learning, Big Data, Internet of Things. Platforms are increasingly offering advanced services, such as machine learning, that you can leverage directly in your cloud-based applications. This can be a huge advantage, as you can use these services without needing to build them yourself.
Service Providers
Today, there are many cloud solutions, each offering similar functionality, including Amazon Web Services (AWS), Google Cloud (GCP), Google Firebase, and Microsoft Azure.
The main questions you should ask when choosing a cloud provider are:
- What services do you need? Different providers offer different services, and you should choose the one that best fits your needs. In this course, you will need database support, and user authentication. You may also need compute i.e. the ability to deploy a service to the cloud.
- What platform are you developing for? Some services are better suited to mobile applications, others to web applications. Firebase, for instance, is a great choice for mobile applications, but doesn’t have official support for desktop (Kotlin Multiplatform) - at least at the time of writing.
We’ll review getting started with AWS and Firebase in the sections below. You are also welcome to use other services if you wish.
We’ll provide some basic usage information in the sections below. However, these are highly complex systems, and it’s strongly recommended that you review official documentation before you get too heavily invested in any of these platforms.
Amazon Web Services (AWS)
AWS consists of approximately 300 web services, each with distinct capabilities. Popular services include:
- Storage (S3)
- Compute (EC2, Lambda)
- Networking (Route53)
- Security (IAM)
- Big Data (DynamoDB)
- Machine Learning (SageMaker)
Developers can access AWS services through the AWS console (web page), CLI, or through a programmatic interface (SDK). There are native language SDKs for many different programming languages, including Java, Python and Kotlin.
AWS supports multiplatform development, and should work on Android, or desktop/JVM. It’s a great alternative to Firebase for desktop projects!
Kotlin SDK
The AWS SDK for Kotlin is meant to provide idiomatic Kotlin functionality for accessing AWS services.
- Kotlin syntax and conventions
- Kotlin types and null-safety
- Kotlin multiplatform (JVM, Android)
- Coroutine support
AWS dependencies can be added to any existing Kotlin project. AWS is huge, and you are expected to identify and import just what you require, based on your services.
- What is the AWS SDK for Kotlin? is a great starting point.
- The getting started instructions provides details on how to setup your project.
The following video also provides a great introduction to the SDK.
Google Firebase
Firebase is a mobile and web application development platform, built on top of Google Cloud (GCP). If offers several services, including authentication, a real-time database, object storage and push messaging.
We will demonstrate using Firebase in this course. There is a free-tier so you should be able to complete your project without significant cost. Your instructor may have educational credits if you need more than the free tier provides.
There are advantages of Firebase compared to other hosted solutions:
- Rapid implementation: you can get up and running very quickly.
- Cost efficient for small projects: free tier, and low cost for small projects.
- Cloud storage: storage for binaries e.g. images with API support.
- Real-time database: NoSQL database with an API.
- Great platform support for Android, iOS, Web, Flutter.
- Well-documented on the Firebase documentation site.
Disadvantages of Firebase:
- Vendor lock-in: it’s difficult to migrate to a different solution.
- Costly for large projects: it’s a managed solution, which makes it easy to setup and monitor, but costlier than GCP. You typically would migrate to GCP for larger projects.
- Database limits: the NoSQL database only allows queries on a single key value i.e. it returns full records only, and cannot process queries. It’s much less flexible than a SQL database in processing complex data.
This is a great introductory video for Firebase:
Definitions
A Firebase Project is a container for your applications, and resources or services that are provisioned for your use. All registered applications have access to the same resources and services.
For example, you could have both iOS and Android applications registered to your project, and provision access to authentication and storage for both of them.
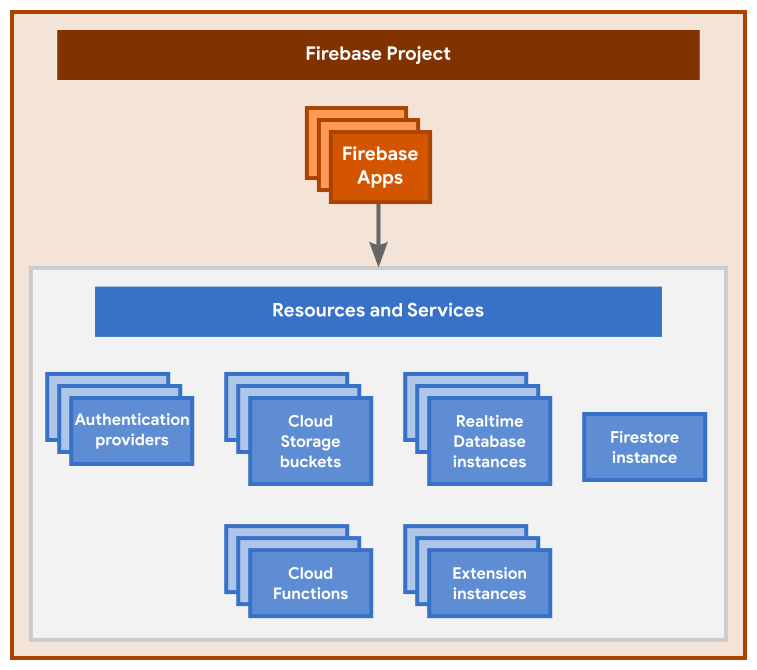
A Firebase project is actually just a Google Cloud project that has additional Firebase-specific configurations and services enabled for it. – FIrebase Documentation
This means that:
-
You can start with Firebase and migrate to a Google Cloud project later.
-
You can interact with a project in the Firebase console as well as in the Google Cloud console and in the Google APIs console.
-
You can use products and APIs from both Firebase and Google Cloud in a project.
-
Billing and permissions for a project are shared across Firebase and Google Cloud.
Creating a Project
You can setup a project in the Firebase Console. Define how users will authenticate, what applications exist and what services you will require.
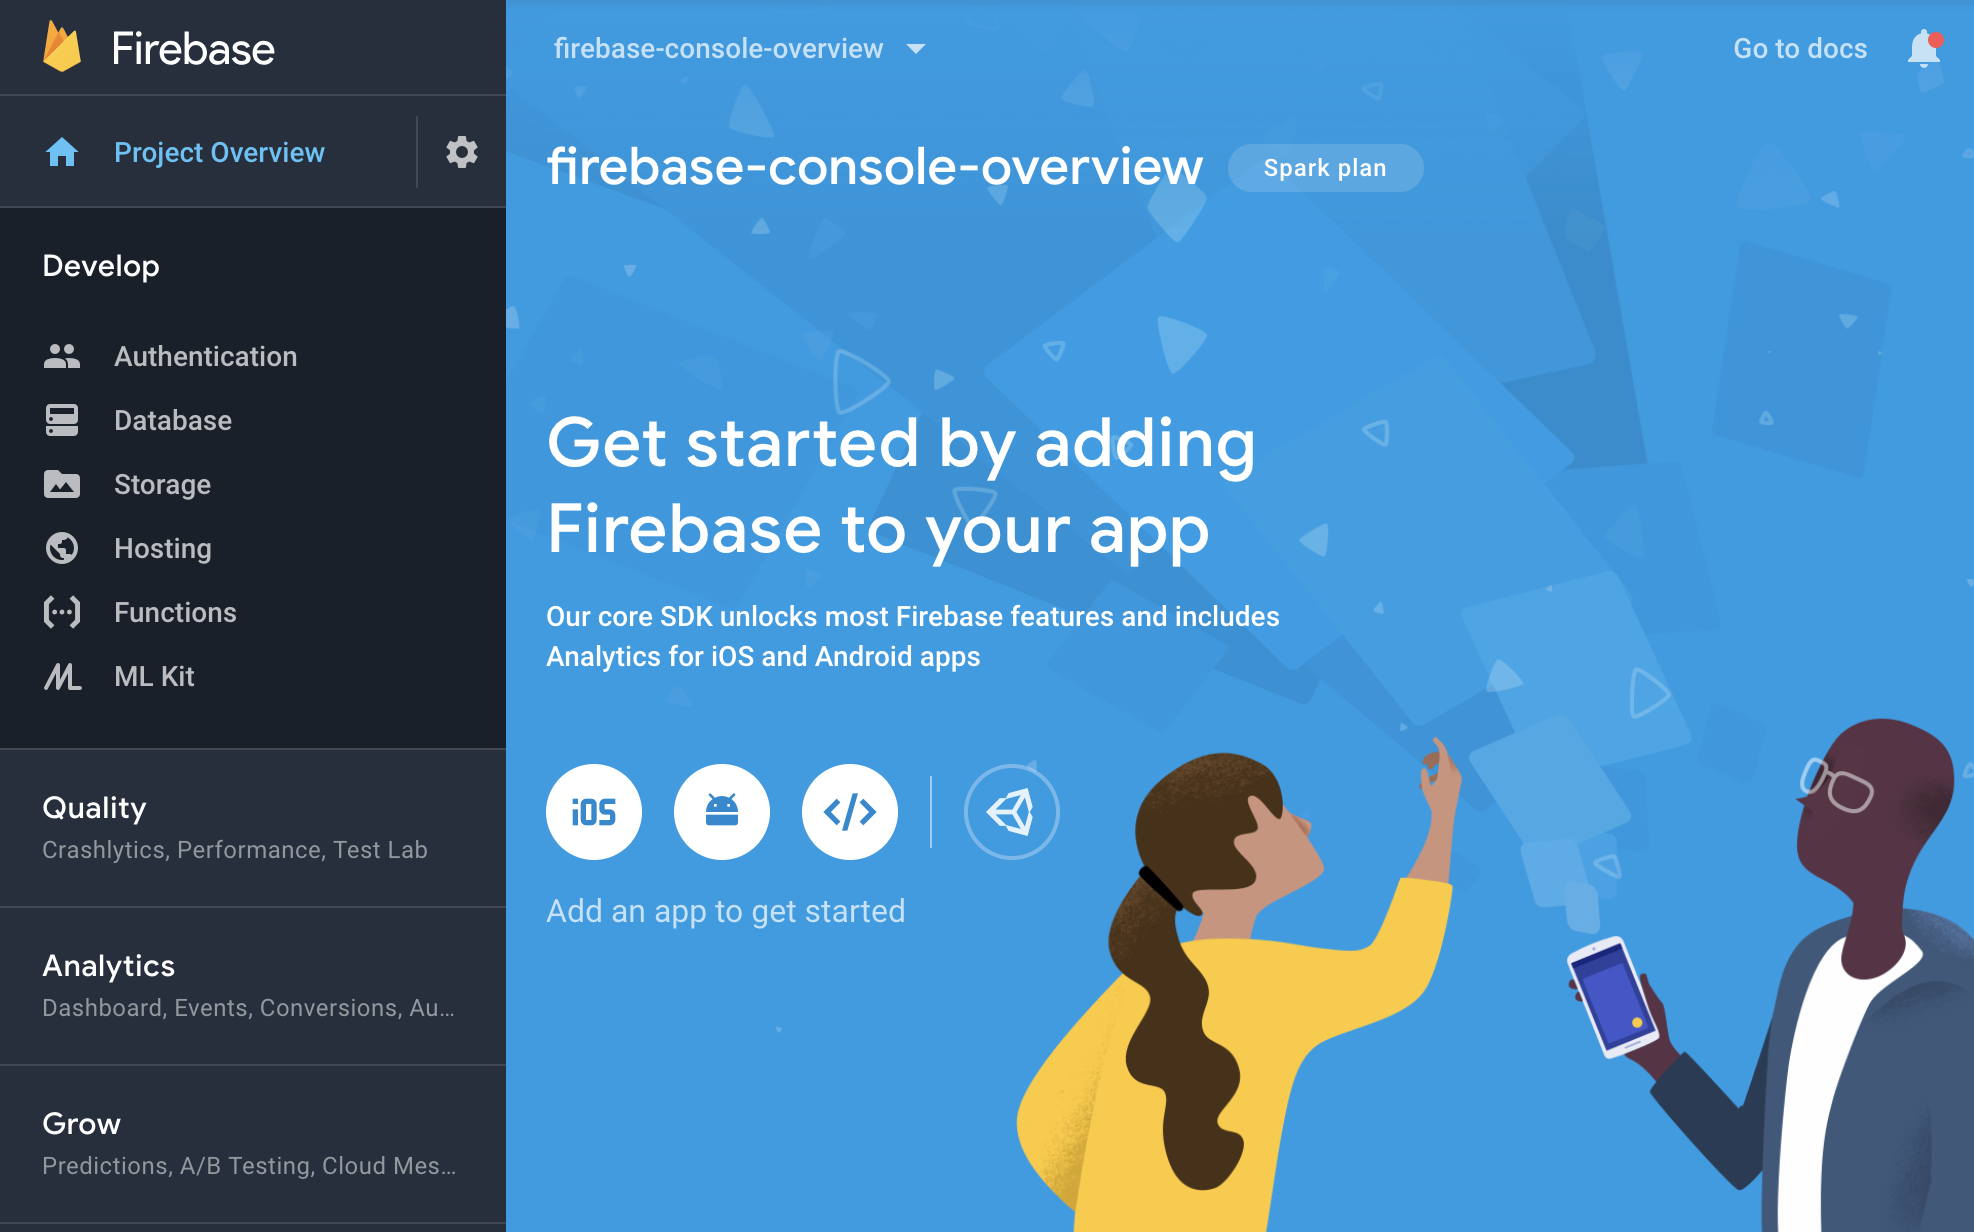
There are multiple billing options. The
Spark Planis a free-tier that is probably sufficient for what you’ll do in this course. You should probably select that to avoid getting billed!
Firebase project identifiers
A Firebase project can be identified in the Firebase backend and in various developer interfaces using different identifiers, including the project name, the project number, and the project ID.
- When you create a project, you provide a project name. This identifier is the internal-only name for a project in theFirebase console, the Google Cloud console, and the Firebase CLI.
- A Firebase project (and its associated Google Cloud project) has a project number. This is the Google-assigned globally unique canonical identifier for the project. Use this identifier when configuring integrations and/or making API calls to Firebase, Google, or third-party services.
- A Firebase project (and its associated Google Cloud project) has a project ID. This identifier should generally be treated as a convenience alias to reference the project.
Firebase config files and objects
When you register an app with a Firebase project, the Firebase console provides a Firebase configuration file (Apple/Android apps) or a configuration object (web apps) that you add directly to your local app directory.
- For Apple apps, you add a
GoogleService-Info.plistconfiguration file. - For Android apps, you add a
google-services.jsonconfiguration file. - For web apps, you add a Firebase configuration object.
A Firebase config file or object associates an app with a specific Firebase project and its resources (databases, storage buckets, etc.). The configuration includes “Firebase options”, which are parameters required by Firebase and Google services to communicate with Firebase server APIs:
- API key: a simple encrypted string used when calling certain APIs that don’t need to access private user data (example value:
AIzaSyDOCAbC123dEf456GhI789jKl012-MnO) - Project ID: a user-defined unique identifier for the project across all of Firebase and Google Cloud. This identifier may appear in URLs or names for some Firebase resources, but it should generally be treated as a convenience alias to reference the project. (example value:
myapp-project-123) - Application ID (“AppID”): the unique identifier for the Firebase app across all of Firebase with a platform-specific format:
- Firebase Apple apps:
GOOGLE_APP_ID(example value:1:1234567890:ios:321abc456def7890) This is not an Apple bundle ID. - Firebase Android apps:
mobilesdk_app_id(example value:1:1234567890:android:321abc456def7890) This is not an Android package name or Android application ID. - Firebase Web apps:
appId(example value:1:65211879909:web:3ae38ef1cdcb2e01fe5f0c)
- Firebase Apple apps:
Configuring your Project
Once your project is created, you need to register your application. The full instructions to setup your application are here.
From the Firebase Console, open your project, click on Add App and select your platform.

We’ll choose an Android application for this example. A wizard will walk you through each step.
Step 1: Register your application
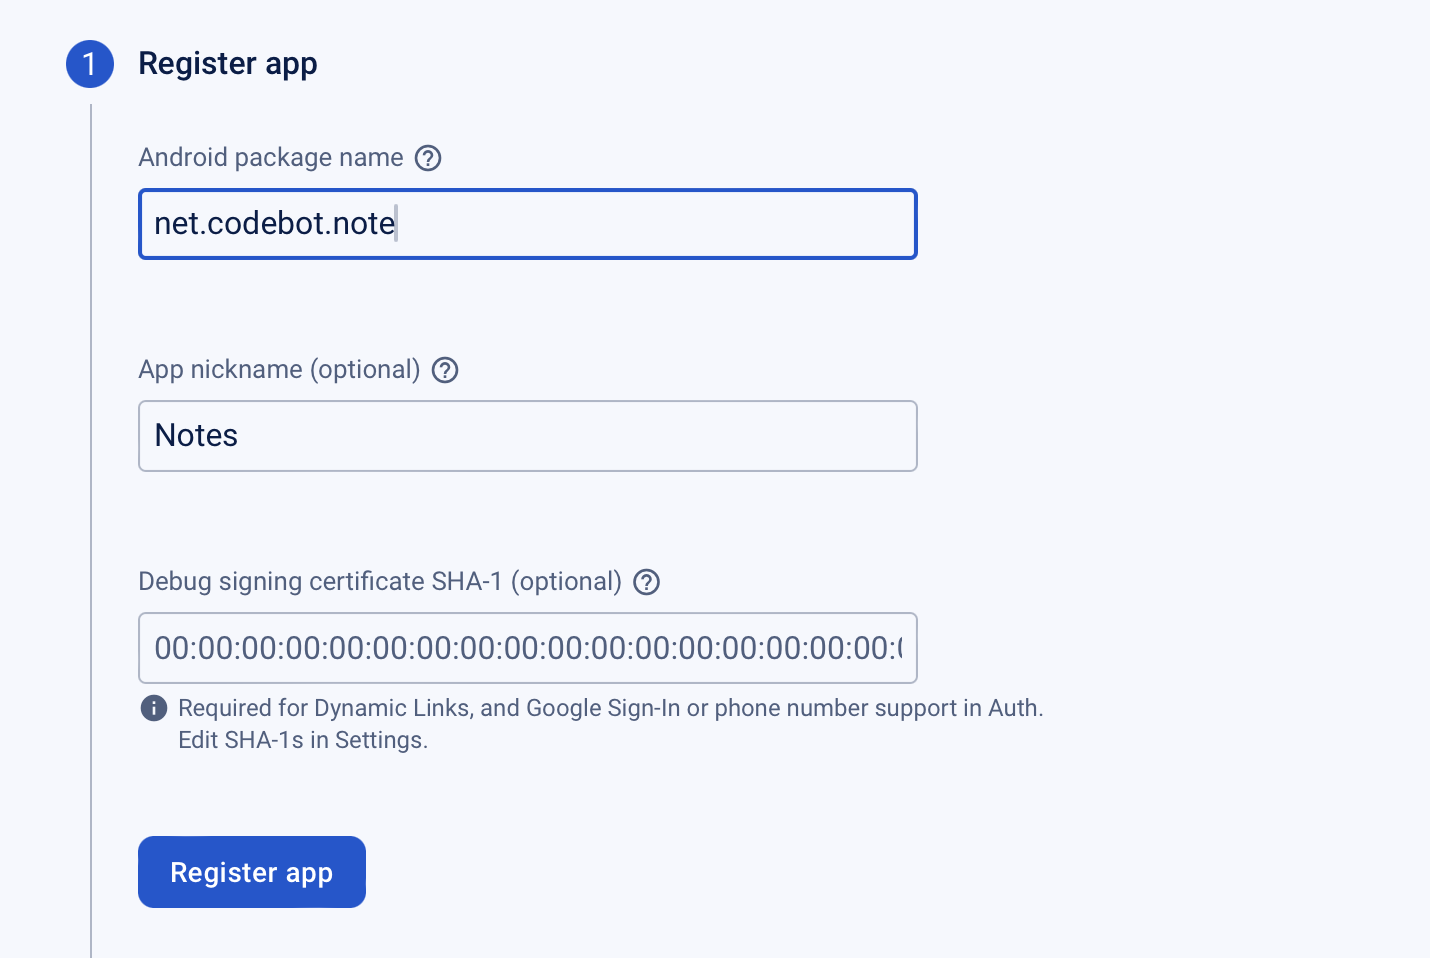
Step 2: Add the config file to your Gradle project
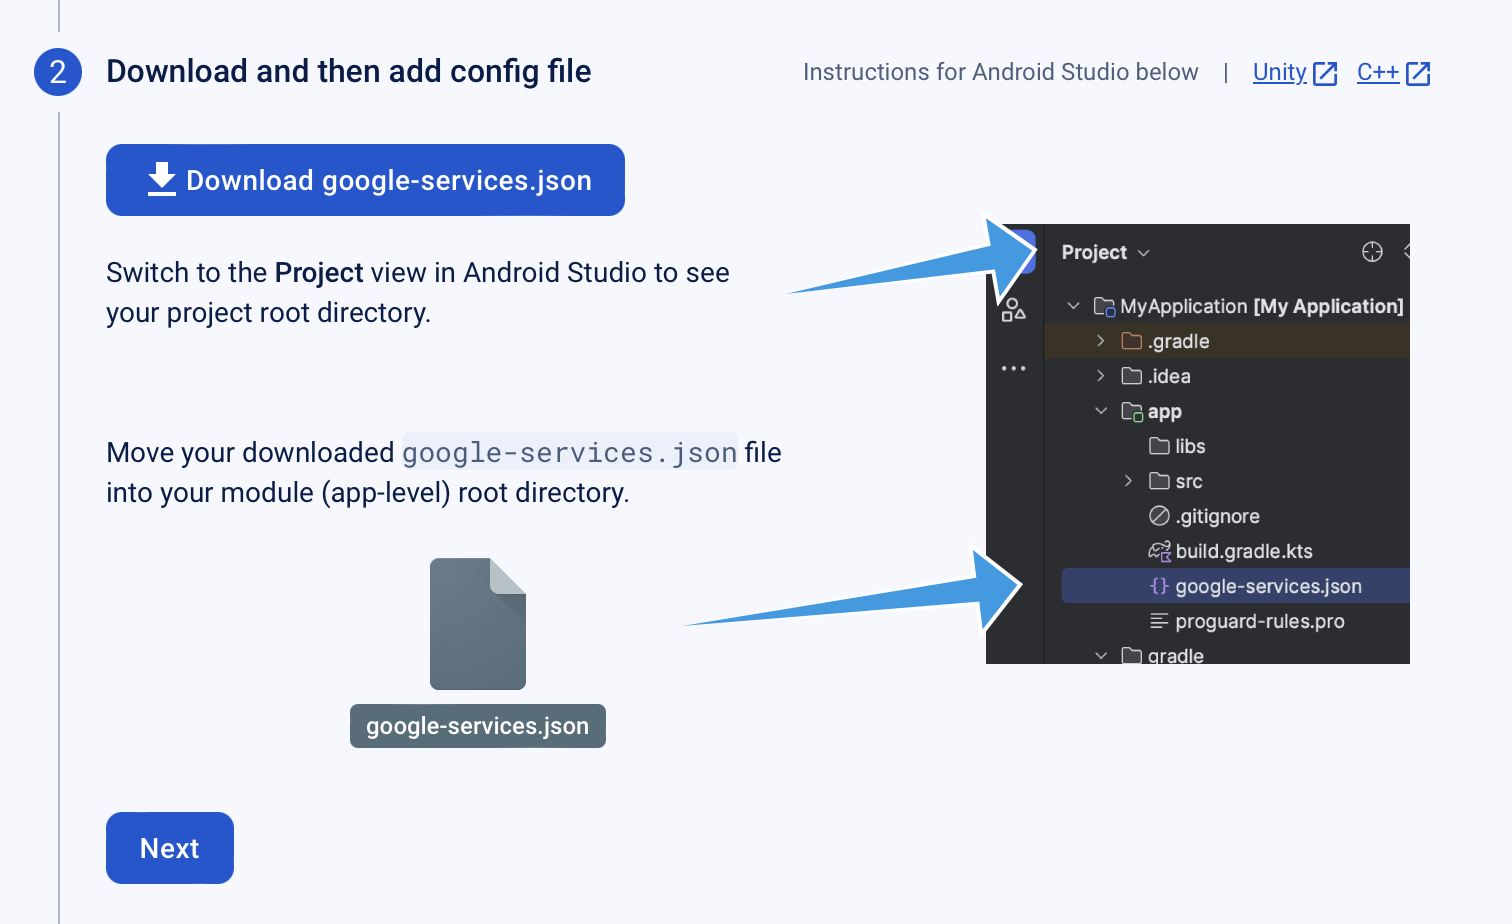
Step 3: Add the Firebase SDK dependencies to your Gradle project
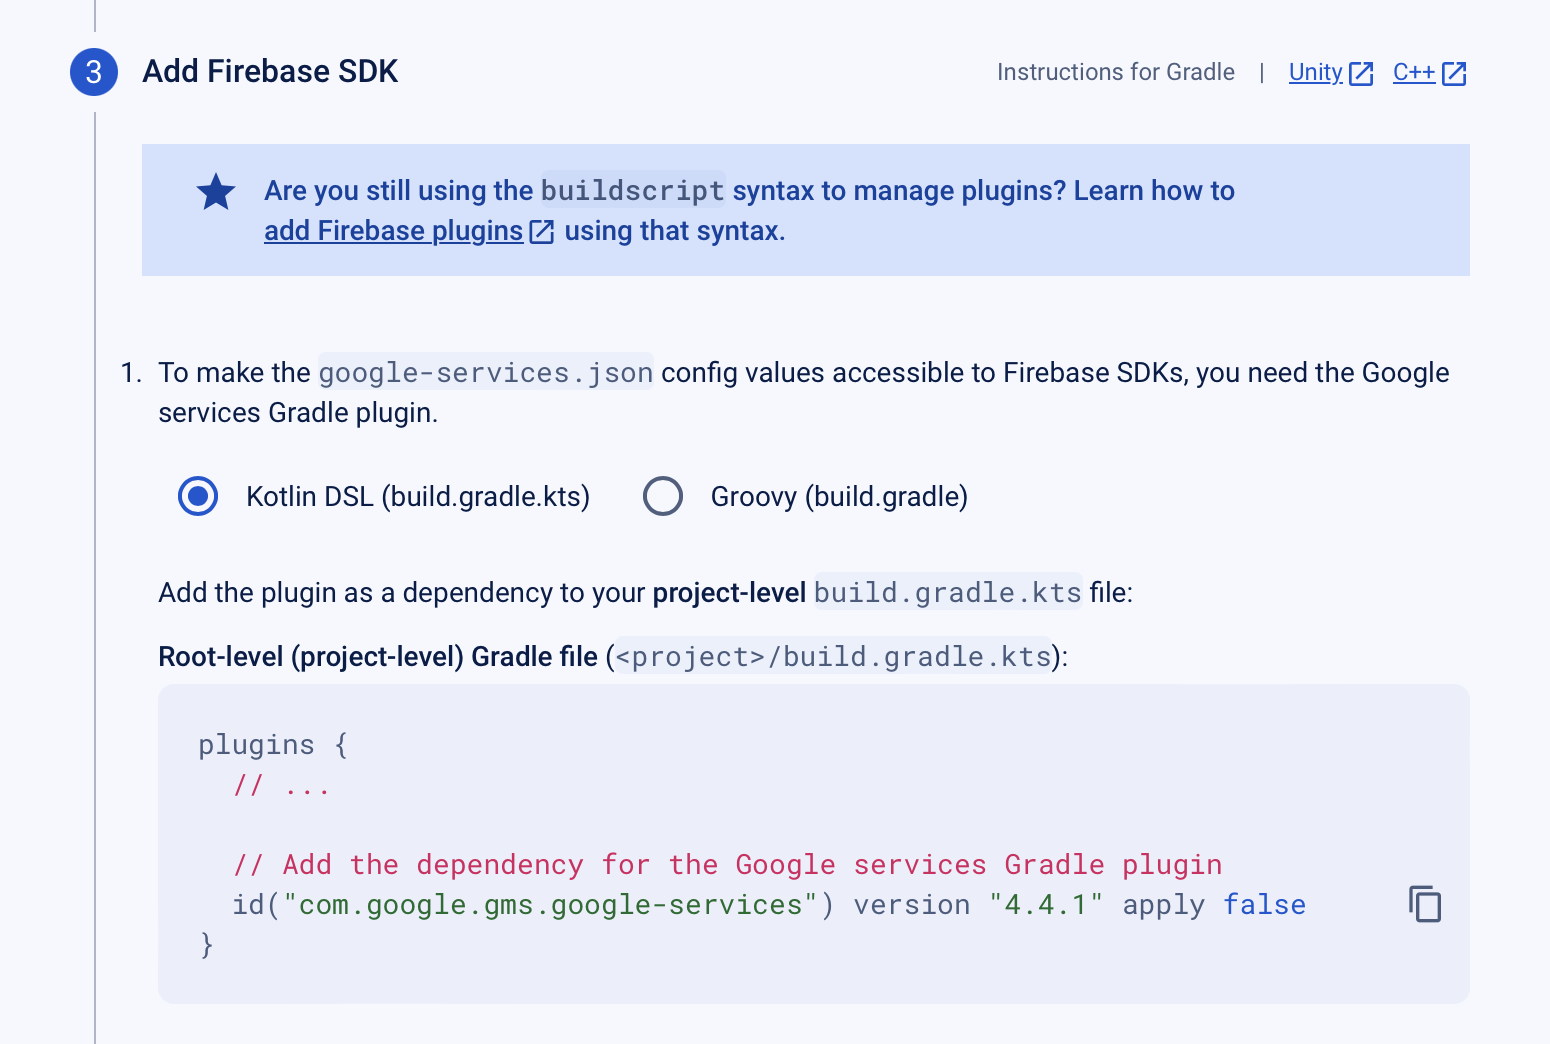
Step 4: Confirm registration in Firebase console
Make sure to click on the Gradle sync button to load your build.gradle.kts changes. Your Android project should now be able to connect to your Firebase project!
Detailed package and dependency information used to import Kotlin libraries can be found here.
Adding Authentication
- Make sure to include the appropriate dependencies. By using the Firebase Android BoM, your app will always use compatible versions of Firebase Android libraries.
dependencies {
// Import the BoM for the Firebase platform
implementation(platform("com.google.firebase:firebase-bom:32.7.4"))
// Add the dependency for the Firebase Authentication library
// When using the BoM, you don't specify versions in Firebase library dependencies
implementation("com.google.firebase:firebase-auth")
}
- Enable authentication in the Firebase Console (``Build
>Authentication>Sign in Method`). Minimally, you should allow email/password authentication; this will let users specify their own username and password, and supports functionality related to that.
You should now be able to use the Firebase classes to create accounts, or login using exisiting accounts. See the authentication documentation for specific examples.
Save Records
Cloud Firestore is a cloud-hosted, NoSQL database, that can be accessed through a REST API, or other client APIs.
Data is stored in documents that contain fields mapping to values. Documents support many different data types, from simple strings and numbers, to complex, nested objects. You can also create subcollections within documents and build hierarchical data structures (see documentation).
Although it doesn’t support the range of SQL operations, you can form simple queries against this data store, including sorting and filtering data. Firebase has real-time notifications that can be configured to let your application know when data has been updated or added to a collection.
The Cloud Firestore documentation contains a walkthrough on setting up this service.
Create a Cloud Firestore database
- Navigate to the
Cloud Firestoresection of the Firebase console. Select your Firebase project. Follow the database creation workflow. - Select a starting mode for your Cloud Firestore Security Rules: Test mode (allows full public access) or Locked mode (locked to your registered apps).
- Select a location for your database, or let it use the default storage location.
Set up your development environment
We assume you’ve already created the project, and added Firebase dependencies from the Configuring your project section.
Declare the dependency for the Cloud Firestore library for Android in your module (app-level) Gradle file (usually app/build.gradle.kts or app/build.gradle).
// Allow read/write access on all documents to any user signed in to the application
service cloud.firestore {
match /databases/{database}/documents {
match /{document=**} {
allow read, write: if request.auth != null;
}
}
}
You should now be able to perform common tasks from your project:
Other Services
- See storage docs for details on storing binary objects
- See hosting docs for details on running microservices from Firebase
Docker
Overview
Installers work fine for simple situations. However, they may not be sufficient when working with complex applications. Installers don’t manage things like:
- Complex configurations e.g., setting up network addresses, keys, security tokens, or other configuration details that are required by the installation.
- Ensuring that the target machine, where the software will be installed, is properly configured.
- Ensuring that the target machine meets the hardware and environmental specification to run properly.
Due to challenges like this,it’s not uncommon for software to be deployed using an installer, but then it doesn’t work properly when the user installs it. This is often due to some of these concerns; something in the user’s environment is intefering or causing issues.
How do we fix this? We control the deployment environment.
Virtualization
Virtualization is a common solution, where you build the environment that you need, and deploy both the software and the environment together. There are different flavors of this.
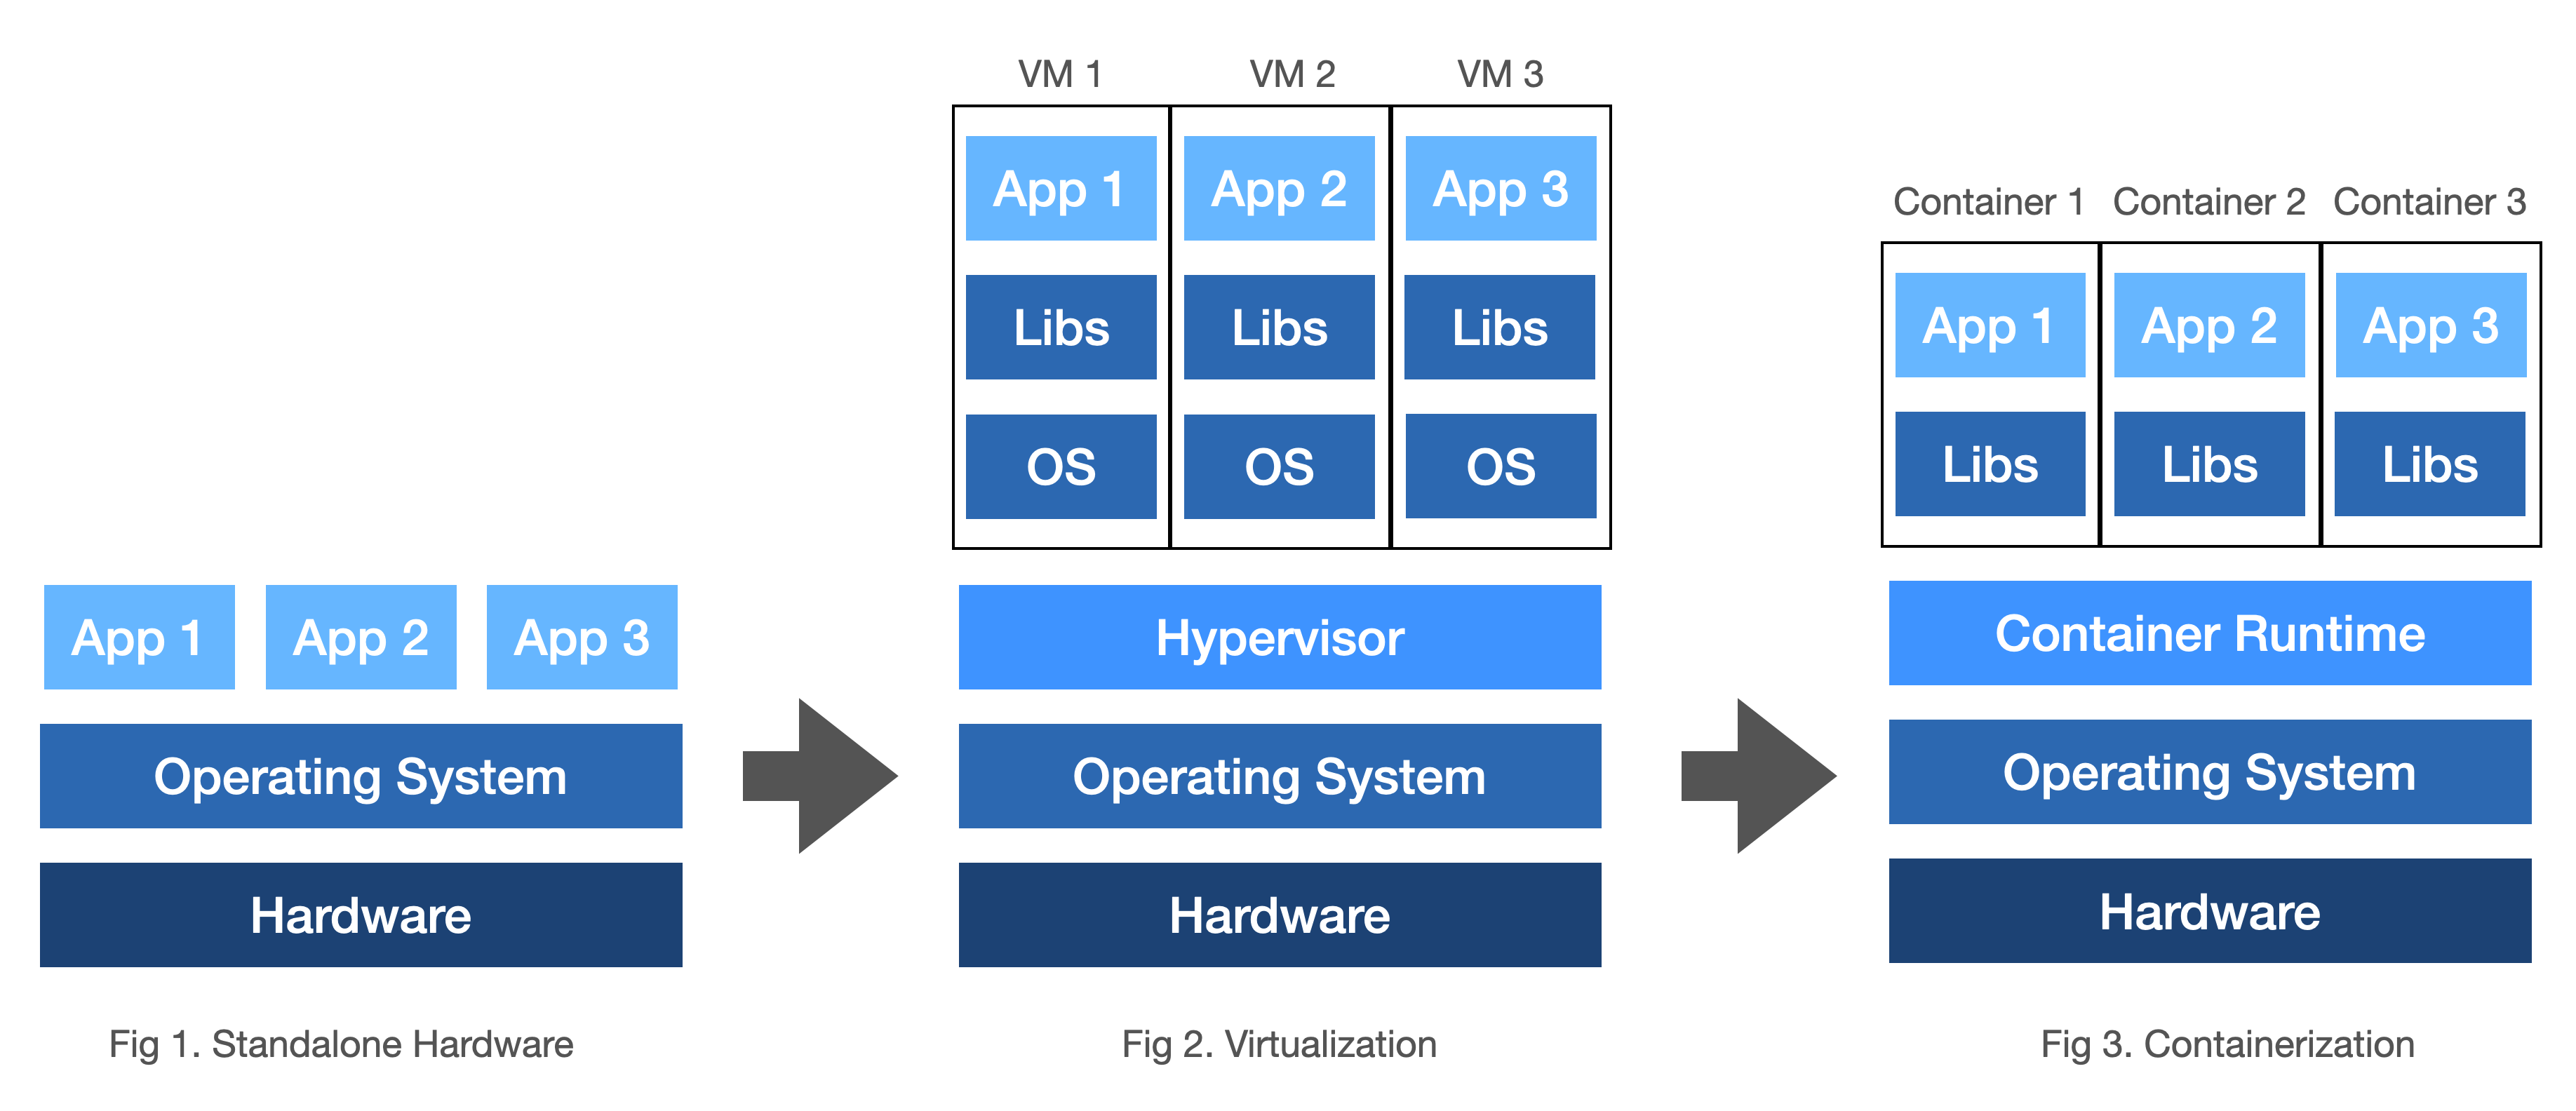
Standalone: For comparison, this represents standard installers. Software runs using the host environment.
- Application share resources, which the OS has to allocate and manage.
- Security concerns with applications installed together.
Virtualization: Multiple virtual machines can be run on the same hardware. Each one is an abstraction of a physical machine, with its own resources and dependencies.
- Each virtual machine is running a complete OS. Can be resource intensive, since each VM is allocated its own memory, CPU cycles etc.
- Provides the ability to adjust how physical resources are shared across VMs (e.g. if we had 128 GB of RAM, we could split it among VMs in any way that made sense).
- Provides isolation of each application into its own OS instance.
Container: an isolated environment for running an application.
- Run applications (not OS) in isolation.
- Containers are processes that use the OS of the host to run an
imagecontaining the application/ - Very lightweight, fast to startup containers compared to a VM.
There are significant advantages to using containers:
- Containers are significantly smaller than virtual machines, and use fewer hardware resources.
- You can deploy containers anywhere, on any physical and virtual machines and even on the cloud.
- Containers are lightweight and easy to start/stop and scale out.
Docker Containers
Docker is a containerization platform. We can use Docker to create a deployment container that contains the complete runtime environment, which can then be run anywhere that has Docker installed.
Installing Docker software provides you with the Containerization Runtime (above), plus the tools to create and deploy your own containers.
Docker helps you eliminate issues of "it works on my computer"... a container represents a fixed, reproducible environment everywhere that you deploy it.
Installation
Download and install directly from the Docker website, or your favorite package manager. Make sure to install the correct version for your system architecture (I’m looking at you, Apple ARM).

Check that it’s installed and available on your path.
$ docker version
Client: Docker Engine - Community
Version: 25.0.4
API version: 1.44
Go version: go1.22.1
Git commit: 1a576c50a9
Built: Wed Mar 6 16:08:42 2024
OS/Arch: darwin/arm64
Context: desktop-linux
Server: Docker Desktop 4.28.0 (139021)
Engine:
Version: 25.0.3
API version: 1.44 (minimum version 1.24)
Go version: go1.21.6
Git commit: f417435
Built: Tue Feb 6 21:14:22 2024
OS/Arch: linux/arm64
Experimental: false
containerd:
Version: 1.6.28
GitCommit: ae07eda36dd25f8a1b98dfbf587313b99c0190bb
runc:
Version: 1.1.12
GitCommit: v1.1.12-0-g51d5e94
docker-init:
Version: 0.19.0
GitCommit: de40ad0
Concepts
To use Docker, you create a Dockerfile – a configuration file that describes the runtime environment.
You can then use Docker to use that Dockerfile to create an image of your application + environment. You can think of an image as a template that you can use to create running instances of your application. You can upload Docker images to a registry so that other people can download and use them (not required, but supported).
DockerHub is Docker’s public registry. It’s simple to use Docker tools to upload your final image there, and for other people to pull and run your application through that image. You can think of DockerHub as GitHub for Docker images.
Finally, you run your image in a container. A container is a running instance of an image. You can run multiple containers from the same image, and each container is isolated from the others.
Workflow
This is the basic workflow to creating a Docker image for your application.
- Create an image, which includes both your application and a Dockerfile.
- Tell Docker to run this image in a container if you wish to run it locally.
- Upload the image to the Docker registry, which allows someone else to download and run it on a different system.
1. Creating an Image
A docker image contains everything that is needed to run an application:
- a cut-down OS
- a runtime environment e.g. jvm
- application files
- third-party libraries
- environment variables
Let’s build a simple application, and then turn it into a Docker image. e.g.
fun main() {
println("Hello Docker!")
}
$ kotlinc Hello.kt -include-runtime -d Hello.jar
$ java -jar Hello.jar
Hello Docker!
To bundle this application, create a Dockerfile i.e. a configuration file for your image that describes how to execute it.
# Dockerfile
# start with this image, which includes a Linux kernel running Java JDK 17
FROM openjdk:17
# import your Hello.jar file, and host in the app subdir.
COPY Hello.jar /app
# set /app as your working directory
WORKDIR /app
# run the application
CMD java -jar Hello.jar
You can find suitable Docker images on https://hub.docker.com. In this case, we’re using Tamurin JDK as our base image (Linux/Java installation).
2. Package your application
To create the image:
$ docker build -t hello-docker .
To see the image that we’ve created:
$ docker images
REPOSITORY TAG IMAGE ID CREATED SIZE
hello-docker latest a615e715b56d 7 seconds ago 455MB
To run our image:
$ docker run hello-docker
Hello Docker!
Keep in mind that you are publishing your directory contents, and then running the jar file that you packaged. Docker doesn’t recompile or rebuild anything! If you make changes to your source code, remember to recompile and rebuild the jar file, otherwise those changes won’t show up in your image.
3. Publish your image
To make this image available to other systems, you can publish it to the Docker Hub, and make it available to download. See Docker repos documentation for more details.
- Create an account on Docker Hub if you haven’t already. Login.
- Create a repository to hold your images.
- Tag your local image with your username/repository.
- Push your local image to that repository.
$ docker image ls
REPOSITORY TAG IMAGE ID CREATED SIZE
hello-docker latest f81c65fd07d3 3 minutes ago 455MB
$ docker tag f81c65fd07d3 jfavery/cs346
$ docker push jfavery/cs346:latest
The push refers to repository [docker.io/jfavery/cs346]
5f70bf18a086: Pushed
8768f51fa877: Pushed
5667ad7a3f9d: Pushed
6ea5779e9620: Pushed
fb4f3c9f2631: Pushed
12dae9600498: Pushed
latest: digest: sha256:6ddd868abde318f67fa50e372a47d4a04147d29722c4cd2a59c45b97a413ea22 size: 1578
4. Pull your image to a new machine
To pull (download) this image to a new machine, use docker pull.
$ docker pull jfavery/cs346
Using default tag: latest
latest: Pulling from jfavery/cs346
0509fae36eb0: Pull complete
6a8d9c230ad7: Pull complete
0dffb0eed171: Pull complete
77de63931da8: Pull complete
dc36babb139f: Pull complete
4f4fb700ef54: Pull complete
Digest: sha256:6ddd868abde318f67fa50e372a47d4a04147d29722c4cd2a59c45b97a413ea22
Status: Downloaded newer image for jfavery/cs346:latest
docker.io/jfavery/cs346:latest
$ docker run hello-docker
$ docker images
REPOSITORY TAG IMAGE ID CREATED SIZE
jfavery/cs346 latest f81c65fd07d3 10 minutes ago 455MB
$ docker run jfavery/cs346
Hello Docker!
To run a long-running program (that doesn’t halt after execution), use the -d flag.
$ docker run -d jfavery/cs346
Configuration
Persisting data
So what is happening is that when we launch a container, it creates a new environment from the image and sets up the container with its own mutable environment and data. This works great, until you stop the container - when you restart it, the environment is recreated, and you lose any previous data!
How do we avoid this? We can create a volume on the host OS, outside the scope of the container, and then provide the container access to the volume. For example, we can create a data file that will persist after container restarts.
# create a volume on the host
# we attach it at runtime below
$ docker volume create data-storage
# data-storage is the volume we created
# /data is a container directory that maps to the volume
$ docker run -v data-storage:/data jfavery/cs346
Managing web services
One common use case for container is as a way to deploy server applications, including web services. These have unique requirements compared to standard applications – namely the need to manage network requests that originate from outside the container. Docker can handle this, with some additional configuration.
The following example is a Spring Boot application from the public repo. The application listens on port 8080, and manages get and post requests for messages:
class Message(id: String, text: String)
postwill store a message that is sent in the post body.getwill return and display a list of the messages that have been stored.
Here’s an example of a Dockerfile for this web service:
# Dockerfile
FROM openjdk:17
VOLUME /tmp
EXPOSE 8080
ARG JAR_FILE=target/spring-boot-docker.jar
ADD ${JAR_FILE} app.jar
ENTRYPOINT ["java","-jar","/app.jar"]
- FROM: the starting image (Linux + JVM)
- VOLUME: mapping an external volume
- EXPOSE: port that our application we will listen on
- ARG: passing in JAR_FILE arguments pointing to our application’s JAR file
- ADD: remap our JAR file to a local/internal JAR file that will be executed
- ENTRYPOINT: how to run the JAR file
To build the Docker image:
$ docker build -t docker-spring-boot .
[+] Building 1.9s (8/8) FINISHED
=> [internal] load build definition from Dockerfile
=> => transferring dockerfile: 69B
=> [internal] load .dockerignore
=> => transferring context: 2B
=> [internal] load metadata for docker.io/library/openjdk:17
=> [auth] library/openjdk:pull token for registry-1.docker.io
=> [internal] load build context
=> => transferring context: 57.63MB
=> CACHED [1/2] FROM docker.io/library/openjdk:18@sha256:9b448de897d211c9e0ec635a485650aed6e28d4eca1efbc34940560a480b3f1f
=> [2/2] ADD build/libs/docker-spring-server-1.0.jar app.jar
=> exporting to image
=> => exporting layers
=> => writing image sha256:2593c79e75b19b36dd2b0ee16fca23753578fb6381fb6d14f5c5e44fc0162bb4
=> => naming to docker.io/library/docker-sprint-boot
When we run the container, we need to specify that we want to map port 8080 from the outside environment into the container. We can do this using the -p command-line option:
$ docker run -p 8080:8080 docker-spring-boot
. ____ _ __ _ _
/\\ / ___'_ __ _ _(_)_ __ __ _ \ \ \ \
( ( )\___ | '_ | '_| | '_ \/ _` | \ \ \ \
\\/ ___)| |_)| | | | | || (_| | ) ) ) )
' |____| .__|_| |_|_| |_\__, | / / / /
=========|_|==============|___/=/_/_/_/
:: Spring Boot :: (v2.7.4)
2023-03-26 16:31:11.453 INFO 1 --- [ main] com.example.demo.DemoApplicationKt : Starting DemoApplicationKt using Java 17.0.2 on d2a3849df55b with PID 1 (/app.jar started by root in /)
2023-03-26 16:31:11.455 INFO 1 --- [ main] com.example.demo.DemoApplicationKt : No active profile set, falling back to 1 default profile: "default"
...
...
...
Our web service is now running in a container! We can now access the web service as-if it was running locally on port 8080.
Frequently Asked Questions
Topics that don’t fit anywhere else.
Course FAQ
Organization of the course. Questions about course policies.
How does this course work?
You team up with other students, pick a project and execute on it! This means choosing requirements, designing a solution, and building a complete application, with unit tests, release notes, and an installer.
You are expected to iterate on a solution through the term, and submit your results every two weeks. See the schedule for details.
We provide lectures, readings, and resources to help you along the way. You will also have lots of opportunity to work on your project in-class and get help from the course staff.
Why a team? Can I just work alone?
Software is built by teams, and learning to work within a team - collaborating, helping one another out - is a critical skill for everyone to learn.
How do we submit our work?
All your work will be stored in a GitLab project which the course staff can access directly for grading. To submit for grading, you typically provide a link to your submission through Learn > Dropbox.
How can I track my grades?
Your grades are tracked in Learn under the Grades menu. Grades are usually available 4-5 days after your submit something.
How can I learn all of this material?
It’s completely manageable! Keep in mind that in this course, everything you do relates to your project. The course is designed so that the time you might spend on other things in a different course (e.g. midterms) will be spent here reading, tinkering, and working on your project. The lectures are focused, practical and designed to teach you what you specifically need to know at that time, so make sure to attend. There’s also reference material available online.
Project FAQ
What should I name my project in GitLab?
See project setup for details.
Does it matter which team member “owns” the project?
No. Just make sure that all team members have full access to the project (Manage > Members in the project settings), and that your TA and instructor have at least Developer access.
How do issues relate to requirements?
The requirements that you discussed as part of your project proposal should be addressed by the features that you include. Each feature should be represented by one or more GitLab issues, with the details of how you will implement that feature.
Another way to think about the relationship is that issues are a representation of the tasks required to address the requirements.
Issues is a terrible name for this concept, but it’s the term that GitLab uses (and which is commonly used in industry). You can also think of issues as tasks to be completed, that address your project’s requirements.
How should I structure my issues so that they make sense?
In an ideal system, we could model this relationship as an umbrella of issues (work to be done) grouped under a parent issue (requirement). e.g.,
flowchart TB
Requirement --> Issue1
Requirement --> Issue2
Requirement --> Issue3
Unfortunately, GitLab doesn’t support issue hierarchies like this. It’s recommended that instead you create separate issues and link related issues together (using the Link field in the issue).
flowchart LR
Issue1 --> Issue2
Issue2 --> Issue3
e.g. a requirement like “Create a user record” might break into multiple linked issues.
What information should I add to my issues? (i.e. what should they contain?)
You should decompose your tasks into half-day “chunks” of functionality that is (a) logically related, and (b) testable. The issue should describe what you need to do to implement this functionality.
e.g. the “Create a user record” example above might decompose into two or more related issues.
Gradle FAQ
How to setup and use Gradle. Also see the Gradle notes
How can I tell Gradle what version of the JDK to use?
Gradle will use the JDK in the class path on your system to execute tasks. If you are using IntelliJ IDEA, you can also specify the version to use in the IDE settings: Settings > Build Tools > Gradle.
Often you want to tell Gradle to compile your code with a specific JDK version. You can specify this in your project configuration files. For example, here’s how you specify JDK 21.
// add this to your build.gradle.kts
java {
toolchain {
languageVersion.set(JavaLanguageVersion.of(21))
}
}
// add this to your settings.gradle.kts so that Gradle can download the JDK if needed
plugins {
id("org.gradle.toolchains.foojay-resolver-convention") version("0.4.0")
}
How do I create an installer for my program?
For a Compose desktop application, there is a set of Gradle packaging tasks: Gradle > application > Tasks > compose desktop > package. You probably want to packageDistributionForCurrentOS which will build a regular installer for the OS that you’re currently using.
For Android, it’s acceptable to build an APK file (Build > Generate APK) instead of a full installer. This file can be drag-dropped onto a running AVD to run the program.
There are also third-party installation tools if you want something more sophisticated. e.g. Conveyor.
How can I fix an installer that fails?
Here are some common errors to watch out for (all related to the build.gradle.kts configuration file):
- You need to specify that you want to include all modules in the installer.
nativeDistributions {
includeAllModules = true
targetFormats(TargetFormat.Dmg, TargetFormat.Msi, TargetFormat.Deb)
packageName = "cs346-project"
packageVersion = "1.0.0"
}
- The version property defaults to “1.0-SNAPSHOT”. You MUST change this to the format “1.0.0” - see Semantic Versioning. You should probably be incrementing this with each software release/demo.
group = "com.example"
version = "1.0.0"
- All libraries don’t fully support JDK 20 and later, so you should probably use an older version of the JDK (see required software). Make sure to set in the project settings (
File>Project Structure>Project) and the Gradle project settings (IntelliJ>Settings>Build>Gradle)
If your installer fails when you execute it, try checking some of the other related tasks in the Gradle Menu in IntelliJ. e.g. compose desktop > runDistributable. The Gradle tasks in this section represent the subtasks that the installer builds and if you run them in the IDE, you will get more detailed feedback than you would from running the installer manually.
Reference
Optional materials for this course.
Books & Videos
Reading materials relevant to this course, including all cites references. ⭐️ denotes a source that I would recommend as a great starting point.
Software Practices
- Atlassian. 2024. User stories with examples and a template
- Kent Beck. 2004. Extreme Programming Explained: Embrace Change. Addison-Wesley. ISBN 978-0321278654.
- Ivar Jacobson. 1992. Object-Oriented Software Engineering: A Use Case Driven Approach. Addison-Wesley. ISBN 978-0201544350.
- Kumama & Dickinson. 2014. Agile and User-Centered Design.
- Robert C. Martin. 2003. Agile Software Development: Principles, Patterns and Practices. Pearson. ISBN 978-0135974445.
- Steve McConnell. 2004. Code Complete. 2nd Ed. Microsoft Press. ISBN 978-0735619678.
- Pressman & Maxim. 2014. Software Engineering: A Practitioner’s Approach.
- Schwaber & Sutherland. 2020. The Scrum Guide.
Design
- IDF. 2024. What is Design Thinking (DT)?
- Sprouts. 2024. The Design Thinking Process
Interface Design
- Apple Inc. 2023. Apple Human Interface Guidelines.
- Figma Inc. 2023. Figma Learn.
- Google Inc. 2024. Material Design.
- Karishma Babu. 2022. Translate Figma Properties to Jetpack Compose.
- Microsoft Inc. 2023. User Interface Principles.
Architecture & Design
- Alexander Shvets. 2019. Dive Into Design Patterns.
- Alexander Shvets. 2021. Refactoring Guru: Design Patterns. ⭐️
- Eric Gamma et al. 1994. Design Patterns: Elements of Reusable Object-Oriented Software. Addison-Wesley Professional. ISBN 978-0201633610.
- Ezra Kanake. 2023. Clean Architecture with Kotlin.
- Ian Cooper. 2023. Clean Architecture.
- Jimmy Bogard. 2018. Vertical Slice Architecture
- John Ousterhout. 2018. A Philosophy of Software Design. Yaknyam Press. ISBN 978-1732102200.
- Lieven Doclo. 2017. Using Kotlin to implement Clean Architecture.
- Mark Richards & Neal Ford. 2020. Fundamentals of Software Architecture: An Engineering Approach. O’Reilly. ISBN 978-1492043454. ⭐️
- Martin Fowler. 2002. Patterns of Enterprise Application Architecture. Addison-Wesley. ISBN 978-0321127426.
- Martin Fowler. 2003. UML Distilled: A Brief Guide to the Standard Object Modeling Language. Addison-Wesley. ISBN: 978-0321193681.
- Philipp Lackner. The Ultimate Beginner’s Roadmap to Android App Architecture
- Robert C. Martin. 2017. Clean Architecture. Prentice Hall. ISBN 978-0134494166.
- Ugonna Thelma. 2020. The S.O.L.I.D. Principles in Pictures.
- Visual Paradigm. 2021. What is Unified Modeling Language (UML)?.
Git & Branching Models
- Atlassian. 2024. Getting Git Right.
- Unknown. 2024. Learn Git Branching. ⭐️
- Unknown. 2024. Git Essentials: A Comprehensive Guide
Kotlin Programming
- baeldung. 2023. Getting Started with Kotlin/Native.
- Daniel Ciocîrlan. 2023. Kotlin Coroutines - A Comprehensive Introduction.
- Dave Leeds. 2023. Kotlin: An Illustrated Guide. ⭐️
- Gabriel Shanahan. 2024. The Kotlin Primer
- JetBrains. 2023. Four Videos on Kotlin Multiplatform Development.
- JetBrains. 2023. Kotlin by JetBrains YouTube Channel.
- JetBrains. 2023. Kotlin Language Site.
- JetBrains. 2023. KotlinConf Talks 2023.
- Jetbrains. 2024. KotlinConf Talks 2024
- Marcin Moskala. 2022. Kotlin Essentials. Packt. ISBN 978-8396684721.
- Roman Elizarov, et al. 2024. Kotlin in Action. 2nd edition. Manning Publications. ISBN 9781617299605. ⭐️
Compose (General)
- Google. 2023. List of Composables in Android.
- Zach Klippenstein. 2023. remember { mutableStateOf() } – A cheat sheet.
Compose Multiplatform
- JetBrains. 2023. Build an iOS & Android app in 100% Kotlin with Compose Multiplatform.
- JetBrains. 2023. Compose Multiplatform on iOS.
- JetBrains. 2023. JetBrains Style UI Kit for Compose.
- JetBrains. 2024. Compose Multiplatform Documentation.
- Kirill Grouchnikov. 2022. Aurora UI Libraries.
- Phillip Lackner. 2024. KMP vs. Flutter - Who Will Win The Cross-Platform Battle?.
- Phillip Lackner. 2024. The Compose Multiplatform Crash Course for 2025
Jetpack Compose
- Google. 2023. Composable Lifecycle. ⭐️
- Google. 2023. Jetpack Compose Basics Codelab.
- Google. 2023. Jetpack Compose Code-Along.
- Google. 2024. Jetpack Compose Documentation. ⭐️
- Google. 2023. Jetpack Compose for Android Developers Course.
- Google. 2023. Modern Android Development (MAD) Skills Playlist.
- Google. 2024. Thinking in Compose.
- Jake Wharton. 2020. A Jetpack Compose by any other name.
- Leland Richardson. 2020. Understanding JetPack Compose - Part 1 of 2.
- Leland Richardson. 2020. Understanding JetPack Compose - Part 2 of 2.
- Mohammed Akram Hussain. 2024. Understanding Jetpack Compose.
- Philipp Lackner. 2024. Android Basics 2024 Playlist
Databases
- Alessio Stalla. 2023. Guide to the Kotlin Exposed Framework.
- JetBrains. 2023. Exposed Wiki.
- Nilanjan. 2023. How to Access Database with Kotlin JDBC: The Fundamentals.
- Anton Putra. 2024. Types of Databases: Relational vs. Columnar vs. Document…
- SQLite. 2023. SQLite Documentation.
- W3Schools. 2023. Introduction to SQL.
Cloud Computing
- Alexander Obregon. 2023. Using Kotlin with Firebase: A Guide for Android App Developers.
- Anton Arhipov (Jetbrains). 2024. Ktor 101: Efficient JVM HTTP Toolkit.
- Garth Gilmour. 2024. Using Ktor 3.0 with All the Shiny Things.
- Google. 2023. What is Firebase and how to use it.
- Google. 2023. Kotlin on Google Cloud.
- Kodeco. 2024. Serverless Kotlin on Google Cloud Run.
- Jothy Rosenberg & Arthur Matheos. 2010. The Cloud at Your Service. Manning. ISBN 9781935182528.
- Supabase. 2023. Supabase Documentation.
- Supabase. 2024. Getting started with Android and Supabase
- Supabase. 2024. Implement Authorization using Row Level Security (RLS) with Supabase
Concurrency
- Florina Muntenescu & Manuel Vivo. 2019. Coroutines! Gotta catch ’em all!.
- JetBrains. 2024. Coroutines Guide.
- Kumar Chandrakant. 2024. Light-Weight Concurrency in Java and Kotlin. ⭐️
- Roman Elizarov. 2019. Structured concurrency.
- Roman Elizarov. 2019. The reason to avoid GlobalScope.
- Alejandro Serrano Mena. 2024. Lifecycles, Coroutines and Scopes.
- Nathaniel J. Smith. 2018. Notes on structured concurrency, or: Go statement considered harmful.
Gradle
- Google. 2024. Migrate your build to version catalogs
- Gradle.org. 2022. Structuring and Building a Software Component with Gradle.
- Gradle.org. 2024. Gradle User Manual.
- Gradle.org. 2024. Introduction to Gradle for Developers. ⭐️
- Jendrick Johannes. 2023. Understanding Gradle Playlist (videos).
- JetBrains. 2023. Configure a Gradle Project: Compatible Versions. ⭐️
- Philipp Lackner. 2024. The Ultimate Gradle Kotlin Beginner’s Crash Course For 2025
- Tom Gregory. 2022. Get Going With Gradle Course.
- Tom Gregory. 2024. Gradle Build Bible.
Code Samples
This is a mix of tutorial links, exercises and sample code.
The CS 346 Public Repository has a number of small samples. Also, Jeff (the instructor) has a couple of Kotlin projects in his GitLab repository that you are welcome to use for reference.
- MasterMind: desktop TODO application, stored to Supabase.
- Courses: course enrolment application, used for advising.
Gradle
- Introduction to Gradle for Developers. Free introductory course. Recommended!
Kotlin Code
- Atomic Kotlin Exercises: Exercises to accompany the Atomic Kotlin book.
- Kotlin Onboarding. Free introductory course.
- Kotlin Koans. Free intermediate-level exercises.
- Kotlin Programming Language. GitHub repo for the Kotlin project.
- Kotlin-Algorithms-and-Design-Patterns. Algorithms and design patterns.
Kotlin Multiplatform Code
- kmm-basic-sample. Cross-platform mobile application.
- my-bird-app. Cross-platform mobile with Compose.
- John O’Reilly’s KMP samples. Many samples, some of which are included in the official Kotlin KMP repo.
- Ktor codeSnippets. Networking with Ktor.
- Exposed Samples. Databases with Exposed.
Compose Code
- Composables. Every Jetpack Compose component listed in one place.
- Compose Multiplatform Repo. Desktop applications for macOS, Windows, Linux.
- Compose Charts Desktop. Simple plots.
- Compose Color Picker. Graphical colour chooser.
- Jetpack Compose for Android Developers. Google code path.
- Jetpack Compose Repo. Mobile applications for Android.
- State in Jetpack Compose. Advanced code lab.
Cloud Computing
- Google Cloud Platform Kotlin Samples. Official samples.
- How to Publish a Ktor Docker Image to Container Registry Using the Ktor Plugin. Publish from your IDE.
- Serverless Kotlin on Google Cloud Run. Getting a Ktor service running in the cloud.
Libraries & Plugins
This list includes libraries I have used, libraries that I have seen used in previous offerings of this course, and libraries that I have seen recommended by others online.
Apart from the list here, there are also maintained lists:
- JetBrains Package Search is the semi-official JetBrains package index.
- JetBrains KLibs.io is an experimental search platform for KMP libraries specifically (multiplatform libs).
- Awesome KMM is a curated list of community-contributed libraries.
Please read documentation carefully and make sure to use the most recent version of a library. I strongly recommend testing a library against a small sample project before fully committing to it.
Libraries
Official Libraries
These official libraries supported by JetBrains.
- Exposed is a DSL/DAO database framework. SQLDelight is more common for Android.
- Kandy is a plotting library, for displaying charts and graphs. Beta IIRC.
- Kotlinx datetime is the official datetime library.
- Kotlinx is the official serialization library.
- Ktor is a library for building networked clients and services.
- Markdown is a parsing library and markdown component.
Third-Party Libraries
These libraries are released and supported by the community. We only list libraries that claim to be multiplatform, meaning that they will run on Android, Desktop, or any supported platform.
- Appdirs: Find special folders for your platform e.g., Windows Pictures folder.
- Clickt: Command-line interface framework. Used for console apps only.
- Coil: Image loading library, uses coroutines. Competes with Kamel.
- File Picker: Compose multiplatform file picker. Strangely absent from Compose.
- Keval: A Kotlin mini library for math expression string evaluation.
- Kamel: An image loading library. Competes with Coil.
- Kotter: Declarative API for dynamic console applications.
- Ksoup: Kotlin multiplatform HTML/XML parser. Port of Jsoup to Kotlin.
- Kweb: Kotlin web framework. Manipulate DOM elements in Kotlin.
- Odyssey: Multiplatform navigation library. Alternative to Voyager.
- Okio: Multiplatform IO library. Useful for working with byte streams.
- SQLDelight: Database integration. Alternative to Exposed to Android.
- Voyager: Navigation library. Alternative to Odyssey. See Meet Voyager.
Plugins
Core Plugins
These are included with with Gradle. See Gradle documentation.
- java: Base plugin for many JVM projects. Adds Java compilation.
- application: Extends Java plugin to create a runnable application. Use this for console applications.
- java-library: Extends Java plugin to support building a Java library. Use this if you are building a shared module in a multi-project build.
Community Plugins
Community plugins that can extend your build’s functionality. Search the Gradle plugin portal.
- Dependency Analysis can analyze your dependencies and locate errors in config files. Use this if you get strange dependency errors!
- Shadow is a plugin for creating fat/uber JARs. Useful for creating standalone console applications. This is not recommended for Android or Compose projects.
About This Site
This website is generated from Markdown files by mdbook, a static site generator.
mdbook competes with similar tools like Retype, Jekyll and Hugo. They are all excellent tools in their own right, but mdbook is slightly more customizable, and can be extended with plugins.
Using this site
The site includes these features:
- Use the toolbar to collapse the TOC, change the theme, or search site contents.
- The sidebar on the left provides a list of chapters. Click on a chapter to load it.
- Click on the page header to jump to the top of that page.
- Use the arrow buttons on the side of the page to navigate to the previous or next chapter.
The following keyboard shortcuts are supported:
Arrow-Left: Navigate to the previous page.Arrow-Right: Navigate to the next page.s: Jump to the search bar (ESCto cancel).
Site configuration
This is a standard mdbook installation with the following third party plugins installed.
Plugins in-use:
- mdbook-admonish - admonishments/callouts (examples)
- mdbook-embedify - embed videos, content inline
- mdbook-hide - hide chapters before publishing
- mdbook-image-size - resize and/or align images
- mdbook-mermaid - draw Mermaid diagrams
- mdbook-toc - add an inline TOC
- mdbook-variables - variable substition e.g., instructor name


