Download current version:
marmoset-vscode-0.2.0.vsix
All versions
|
Changelog
VSCode Marmoset Extension Instructions
Installing or updating extension
- Download the extension from the downloads page. Save the VSIX file somewhere on your computer.
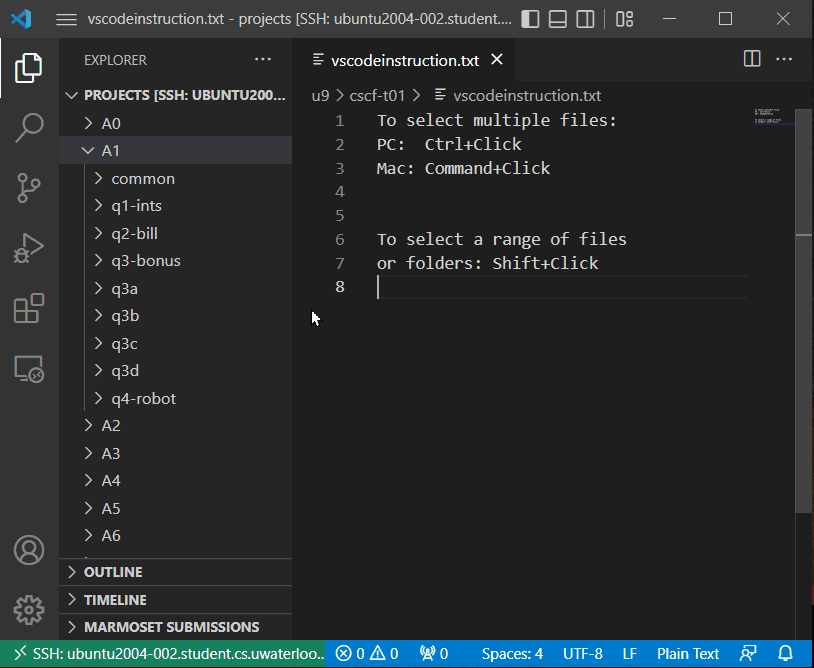
- Open VSCode and update VSCode if needed. Connect to one of the
linux.student.cs.uwaterloo.ca servers using VSCode's Remote SSH extension. The Marmoset extension only works when connected to a CS teaching Linux server.
- Open the Extension sidebar, then click the three dots (⋯) at the top, and choose "Install from VSIX". Alternatively, open the Command Palette and search for "Install from VSIX".
- Click "Show Local", then select the VSIX file downloaded from first step.
- The Marmoset extension should now appear under the SSH list of extensions, and NOT the local list.
- Reload VSCode if VSCode tells you to.

Submitting
- Open the workspace containing the files and folders to submit.
- In the Explorer, select all the files and folders to submit.
- Right-click your selection (control-click on Mac) and select "Submit to Marmoset".
- Choose the project to submit to. You may also be asked to select the course to submit to.
- Check the notification message to see if your submission succeeded or not.
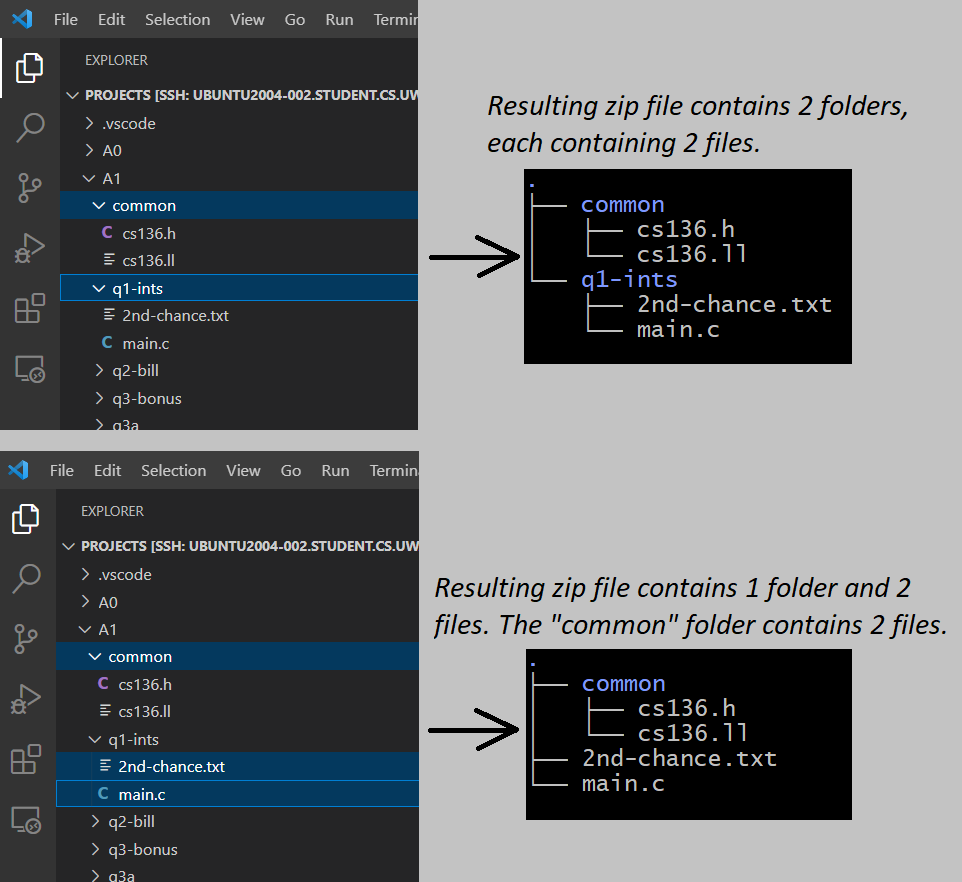
Making the right selection when submitting
Be careful about how you select files for submission. For example, selecting a folder will submit a zip file containing that whole folder; selecting the files in that folder will instead create a zip file containing those files at the root. This is similar to creating zip files with Mac or Windows's built-in compress tool.
Viewing Test Results
- After submitting, you can see your submission in the Explorer sidebar, in the Marmoset submissions view.
- Click the Refresh button to reload the list of submissions. If you just submitted, click Refresh to check if your submission has finished testing yet.
- Click a submission to expand it and see the individual test cases. Click a test case to see any available feedback in the output panel.
- If you want to view test results for a different assignment or project, click the Open button next to the Refresh button. Then choose a project.
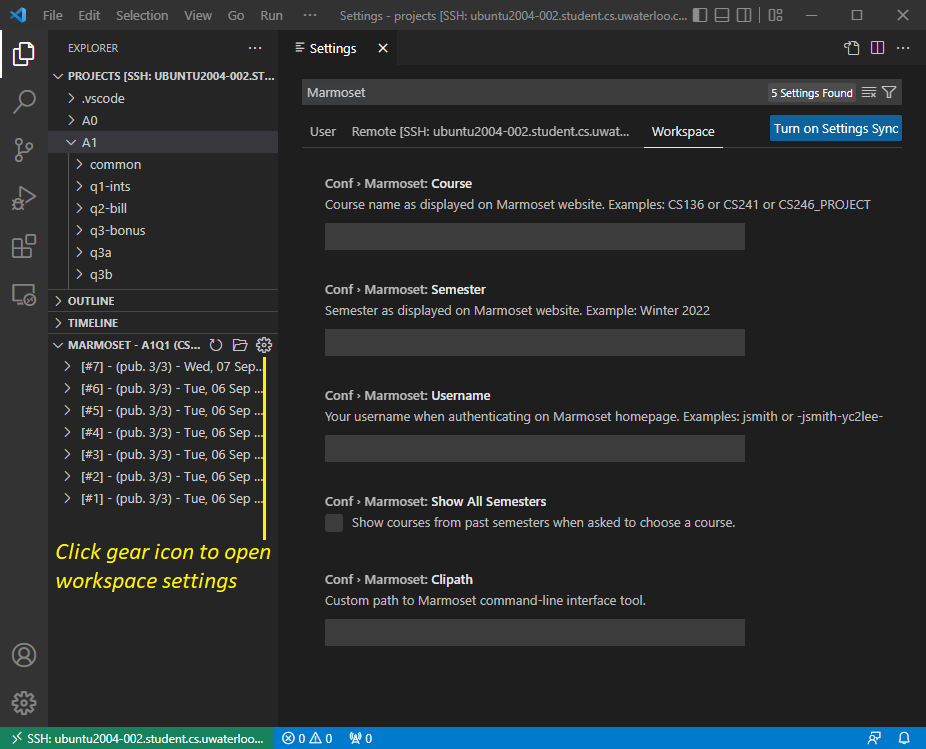
Settings
When a workspace is open, you can open the extension workspace settings
by clicking the gear icon beside the Refresh button. The settings are automatically updated when you submit, but you can manually edit the settings in the workspace settings window.
Note that settings in the User or Remote tab will apply to different workspaces. Generally you'll want to edit the settings in the Workspace tab.
Problems
- Q: I submitted but nothing happened.
A: Check the bottom-right of your VSCode window. It should say "Submitting...". If it's stuck like that, it may be because you submitted files that are too large. You can try waiting or restart your VSCode window.
- Q: I cannot submit to the course I'm in.
A: If you recently joined a course, it can take a couple days for the course staff to add you. You can ask them to add you sooner if the issue is urgent, like when an assignment is due soon.
- Q: The extension won't let me choose a course to submit to.
A: Check the course and semester in the settings. You can delete the course and semester settings to be prompted for a course the next time you submit.
- Q: The extension keeps asking me to choose a course.
A: You can save the course name and semester in the settings. When using workspace settings, the settings only apply to the opened workspace. If you open a different workspace, your settings will be gone. Successfully submitting will automatically update the settings for the opened workspace.
- Q: How do I spend release tokens to see release test results?
A: Release tests and tokens are currently not supported but will hopefully be added soon. In the
meantime, you will have to use the Marmoset website.
- Q: How do I disable the extension when I'm working on code that does not use Marmoset?
A: See how to manage extensions in VSCode.