Design thinking
How do we work through the initial design decisions for our project?
We all want to produce exceptional products. What does that mean?
Of course, our product should be useful: it should satisfy a need or desire for our users. We should be able to articulate what that need is, and specifically how our product will address it.
However, that is not enough for it to be successfully adopted. We don’t want an adequate user experience, we want an outstanding user experience, both as designers and consumers.
The first requirement for an exemplary user experience is to meet the exact needs of the customer, without fuss or bother. Next comes simplicity and elegance that produce products that are a joy to own, a joy to use. True user experience goes far beyond giving customers what they say they want, or providing checklist features. – Norman & Nielsen, The Definition of User Experience (UX). 1998.
Our product needs to be approachable, easy to learn, simple to use, and ultimately satisfying to our users. In a world of competing solutions, it’s not enough for a product to just be “good enough”, it has to be outstanding and that means designing for all of our users wants and needs.
Design thinking provides a framework for doing exactly this.
The design thinking ideology asserts that a hands-on, user-centric approach to problem solving can lead to innovation, and innovation can lead to differentiation and a competitive advantage. – NNGroup, 2024.
Design thinking is a way of thinking about how to approach the problem of building something suitable for people. It’s both an ideology (designs should be human-focused and consider human-factors), and a process (how to do this efficiently and effectively by iterating over potential solutions).
Design ideology
Design thinking is a way to think about designing for people. It can be used to describe a process for building anything, from a clock-radio, to an electric vehicle, to an software application. It is commonly used when designing complex, human-centred software systems and is particularly effective when you want to solve a problem in a new and interesting way.
Don Norman characterizes design-thinking in this way:
- It’s fundamentally people-centred.
- The goal is always to solve the right problems and address the root cause.
- It considers everything as a system. You can’t solve one little piece, because everything is interconnected. You really have to look at the nature of the system altogether.
- It focuses on small and simple interventions. With complex systems, we probably won’t get everything right, so we focus on a small and simple interventions, check the results, change what we’re doing and continually improve.
Design process
The design thinking process involves these steps, all of which are done before you start implementation. As a team, you work through these steps together.
This is an iterative process; teams will often revisit earlier decisions as they progress through this process.
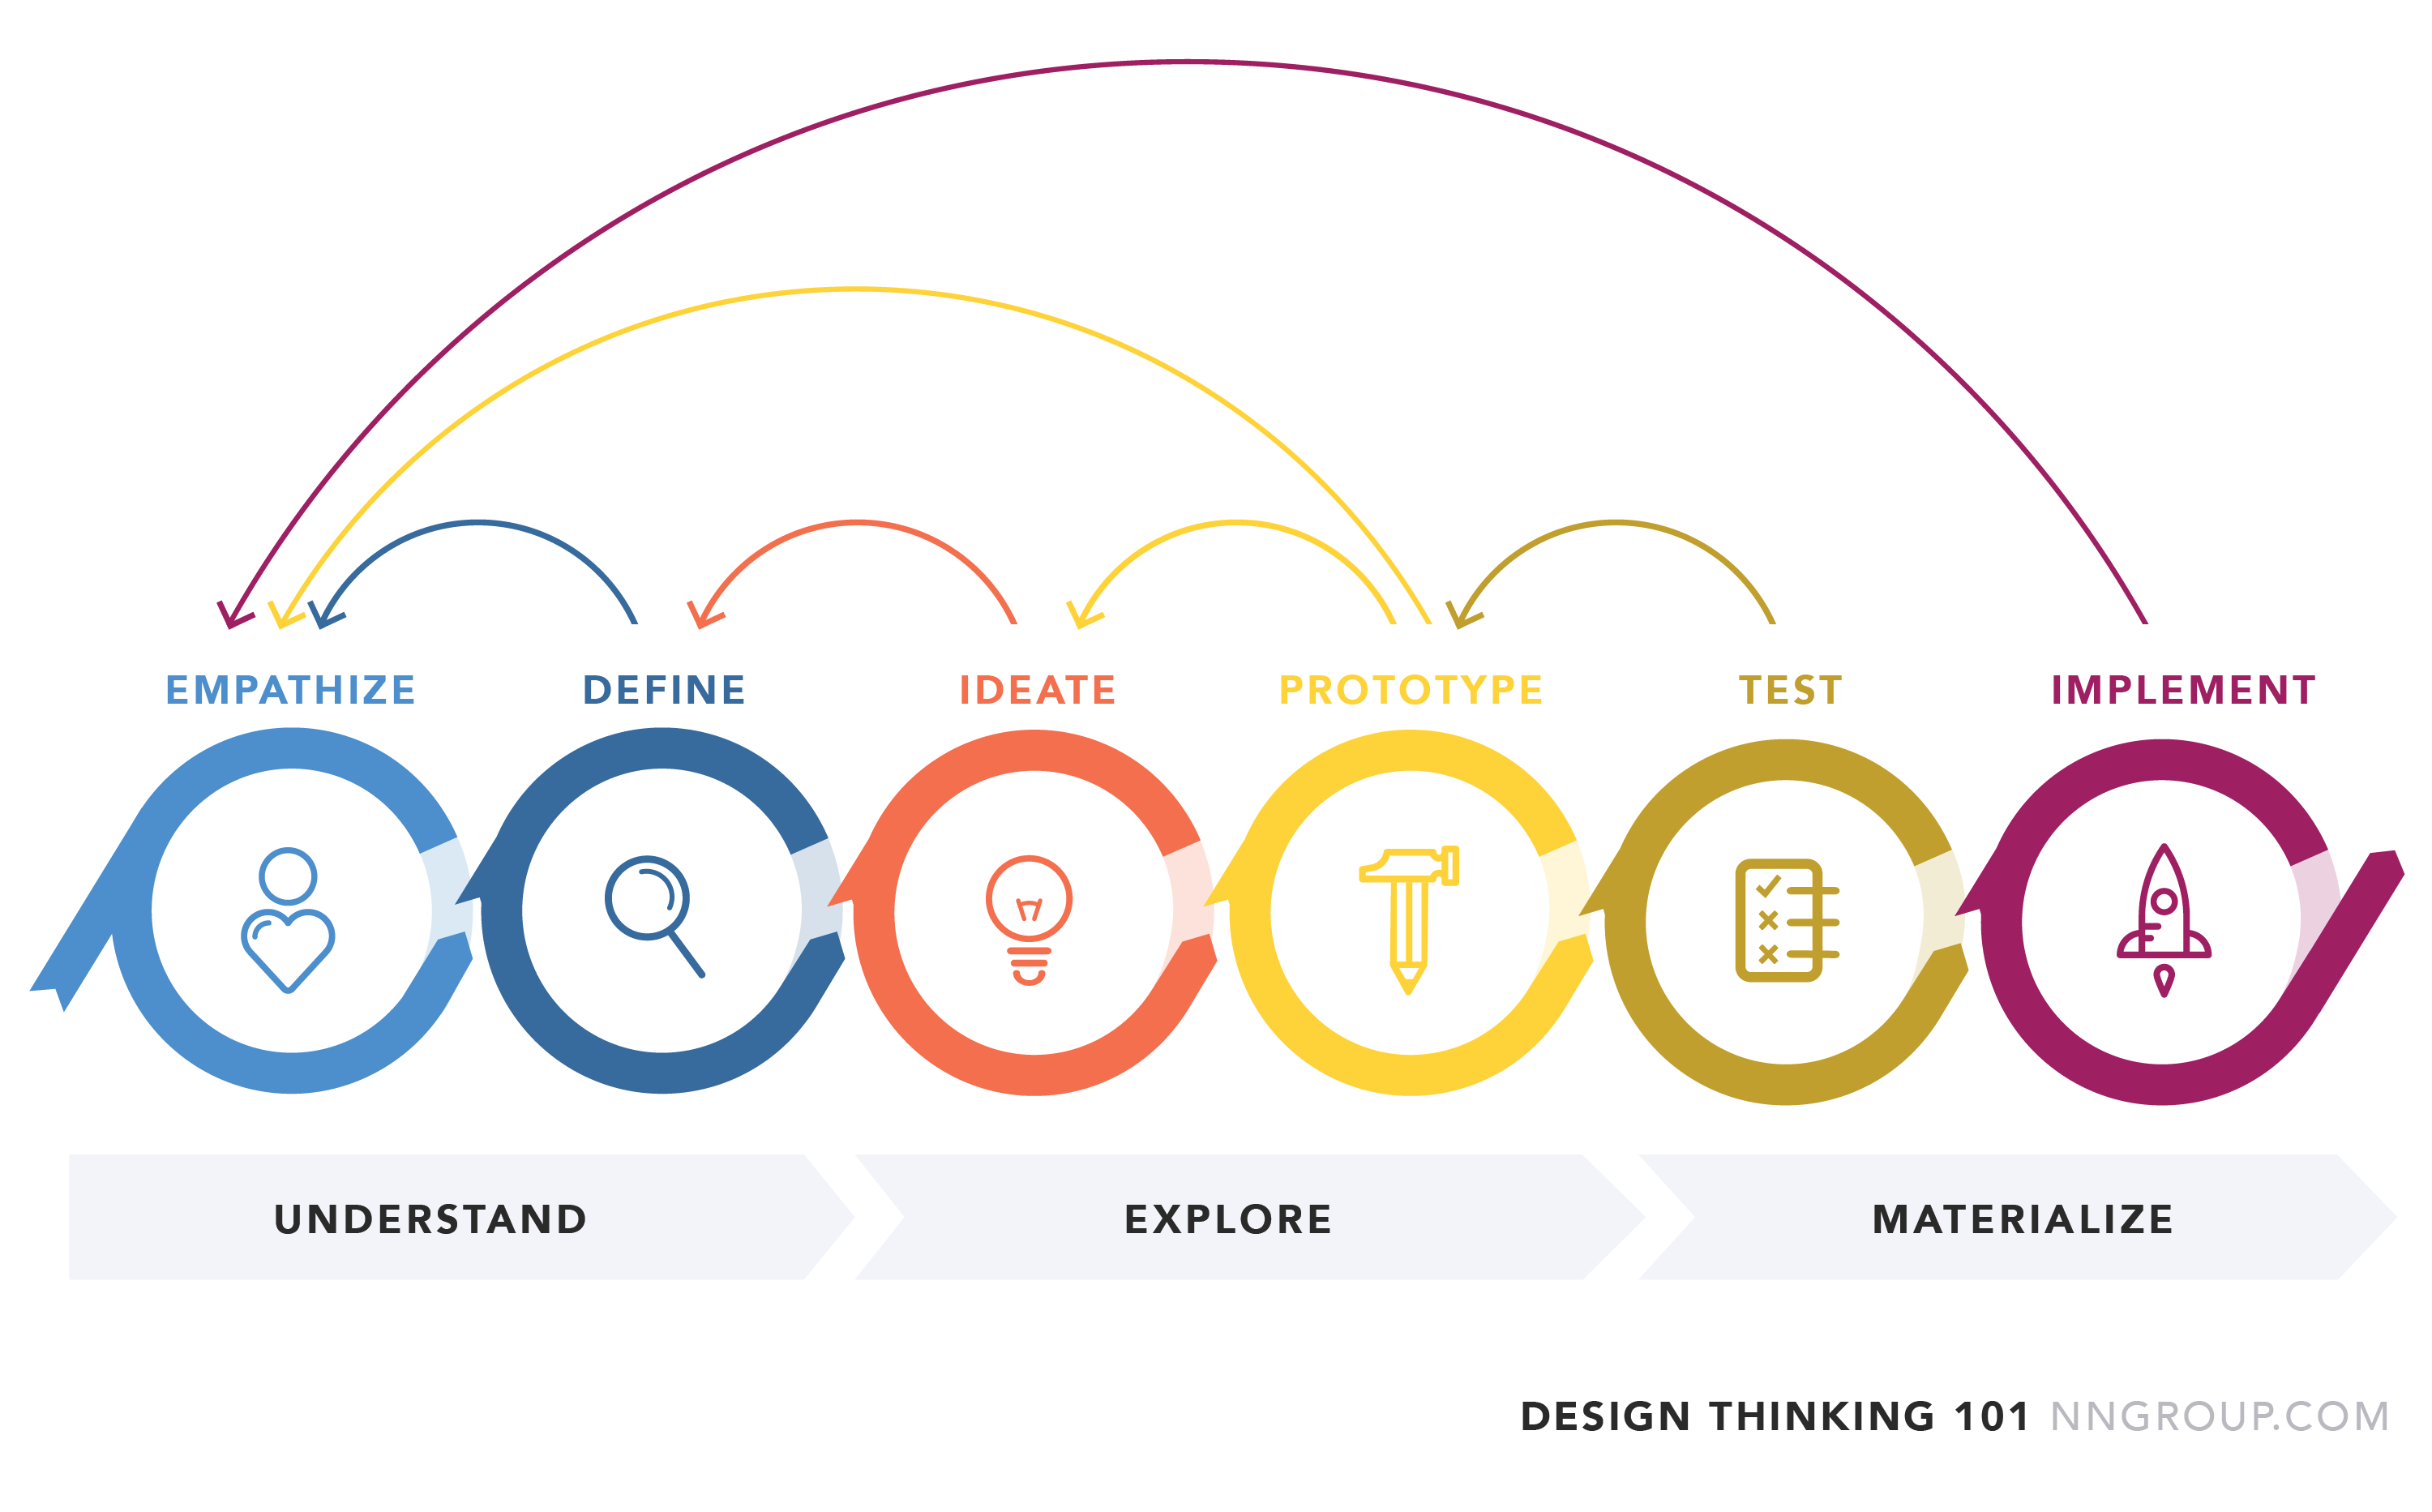
UNDERSTAND phase: We take steps to understand the user, their context and potential problems that they might be experiencing.
-
Empathize: Develop knowledge about your users, and their context. You goal is to gather enough information that you understand your users, how they work, and what motivates them.
-
Define. Look at the information that you’ve gathered, and observe where your user problems exist. Look for opportunities.
EXPLORE phase: Brainstorm ways to solve their problems. Consider alternative solutions.
-
Ideate. Brainstorm ideas to solve the problem! You want lots of ideas, from any source (including competing products, things that “sound like a good idea”, or direct suggestions from users). Discuss them all and narrow down to the ones that work best.
-
Prototype. Work together to build mockups of your “best attempt” at a solution. Use the process to determine which components of your solution work and which ones need further refinement. Some ideas might not work together, and need to be rejected - that’s ok too.
MATERIALIZE phase. Iterate over potential solutions with your users, and collect their feedback.
- Test. Test with users by showing them the prototype and collect their feedback. Identify problems and areas to improve. Iterate on your designs!
- Implement. Implement your final design solution.
We’ll explore each of these steps in further detail below.
Phase I: Understand
1. Empathize
The first step to building a solution for someone is to understand who they are, what challenges and constraints they face. You want to be able to clearly state:
- “Who are my users?”
- “What are they trying to accomplish?”
- “What motivates them?”
- “What discourages them?”
Your goal is to understand and empathize with your users and their perspectives.
There is no right/wrong answer on who you should target; just pick a group of people that (a) you have access to, and (b) you want to help in some way.
- Is your Mom a lawyer? Maybe you can build software to help her track her billable hours for clients.
- Do you know a lot of CS students? Maybe you can build something to help them in their course planning!
Just pick a group that will be interesting to you to target, and to think about. You will need to actually speak with users to figure out what they actually need.
Action: Conducting interviews
The best way to understand a set of users is to talk to them! You need to interview people to understand them, their perspective (how they work, what they like, what they dislike and so on).
You want your interview to be open-ended: you should be approaching this group without assumptions. Your goal is to gain understanding of the the role that you are targeting, and their situation (e.g., lawyers who practice family law; students who work-out after class; elementary school teachers in the classroom. The ideal outcome from interviews is an understanding of their context, what the actually need to do in that role, and problem areas you can identify and help address.
Interview guidelines
- You typically want to interview 5–6 users (Nielsen 2000). This will give you 80%+ of the expected feedback. If you have extra time, you are better off doing multiple rounds with interviewees (with increasing levels of depth).
- Ask open-ended questions to understand what they do, how they work, what motivates them. The interviewees should be doing most of the talking.
- Ask questions to clarify issues or challenges that they might have.
- Use followup questions to make sure that you understand their goals and motivations.
Good interview questions:
- Describe a problem that you have.
- How would you accomplish X?
- What do you like about this system? What do you dislike?
- How would you expect (some feature) to work?“
The outcome from interviews should be detailed interview notes! It is critical that you write down everything that the user says, so that you can analyze it in the next step.
It can also be helpful at this stage to characterize your users by creating personas.
Action: Generating personas
A persona is an archetypal description of a user of your product. Personas are often based on “real people” but are meant to be generalized descriptions that represent a category of people that share similar characteristics. We use personas a stand-ins when discussing product goals and features.
You may have multiple personas, each “type” representing users with different roles, or who you think are distinct. It’s not uncommon to have two or three personas even for a small solution.
There are some basic elements that your user persona should include:
- Personal info: Present personal information first, including (fictional) name, job title, company, job description, family status, and more. Include any details that can help your team understand the persona better.
- Demographic info: Other demographic information, such as age, gender, income, education, location, and other background information can help you create a more authentic character.
- Image: A vivid image, sketch, or cartoon can help your team picture your users clearly, and help you establish a consistent understanding of the target users. Use a photo that reminds you of this user.
- Goals: You should also make it clear what your audience wants to get or to do with your product. List all possible goals and motivations that you’ve found from your user research.
Here’s some examples:
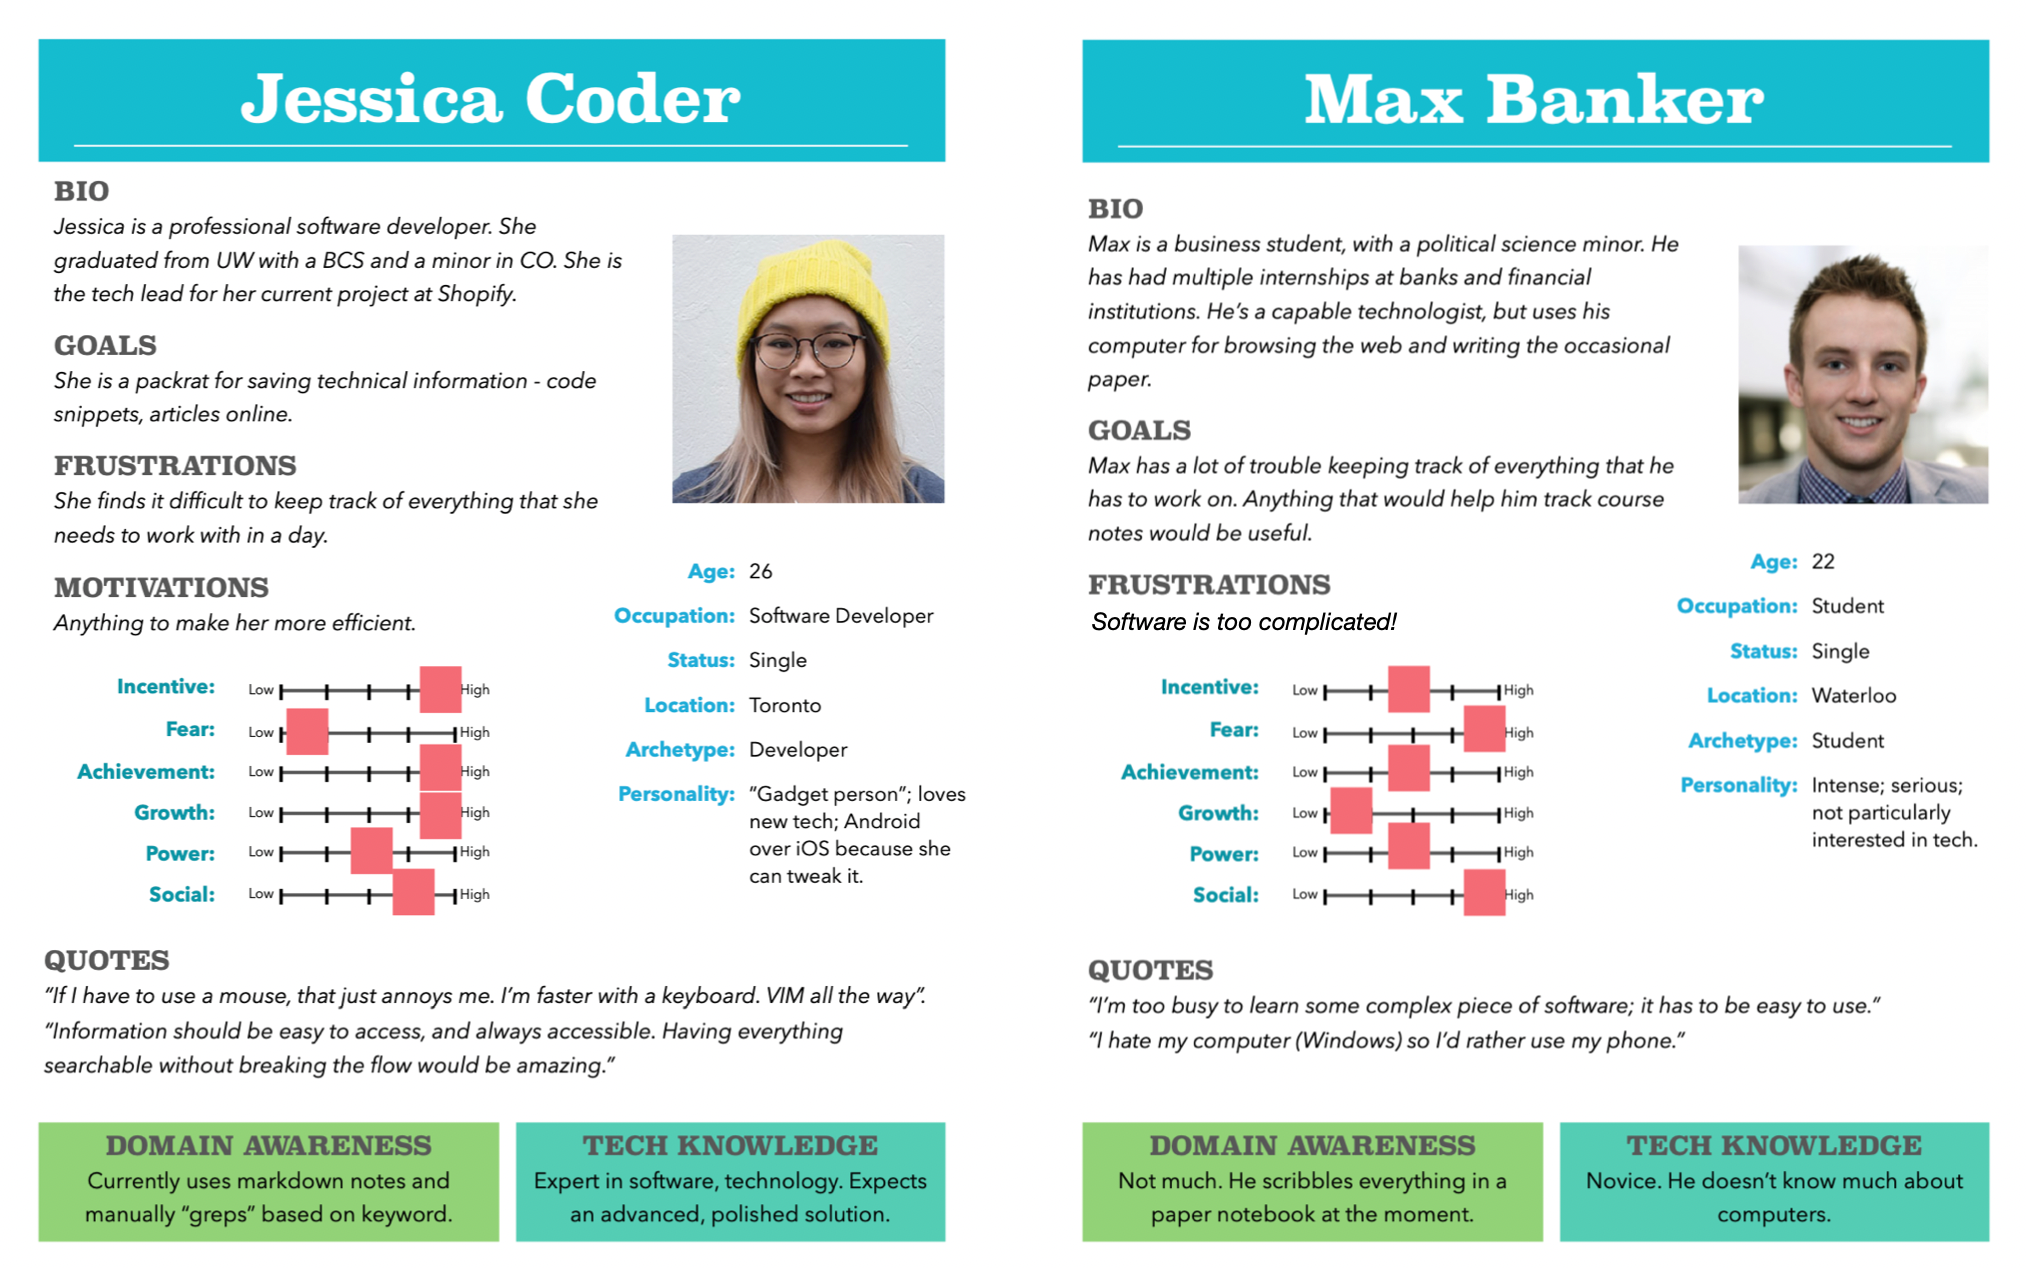
These personas were created in Microsoft Word. You can find the templates we used in the GitLab public repository. However, you might also consider using Figma for your diagrams. It has templates for all diagram types, including personas.
2. Define
This step involves identifying problems or “needs” that your users may have disclosed in the interview.
- One way to do that is to underline verbs in the interview notes. These represent activities that your user is attempting to perform. Pay attention to how they describe these actions - are they difficult or challenging to perform?
- Watch out for detailed stories that describe a software feature i.e. something that a user was trying to accomplish.
Users will often discuss their problems and desired outcomes with stories (we all do this when we try and give examples!). We call these user stories: informal explanations of a problem and the user’s desired outcome. These are incredible useful – they are basically the user telling you from their perspective, how you can solve their problem.
Action: capture user stories
Make sure you capture user stories as part of your interview process. They are the broadest expression of the problem that we want to solve from the user’s perspective.
User stories can literally be short-paragraphs of 2-3 sentences each. They should be expressed in the user’s language.
We will use these user stories later in our process to write requirements (i.e. what our software should do) and guide the features that we design (i.e. how they should work for these users). Along with personas, we can even use our user stories to check that we’ve solve the right problem. e.g., “Would Max be happy with this design as a solution to problem X that he identified in the interview?”
“As the HR manager, I want to use a screening quiz so that I can understand whether to send possible recruits to the functional manager.”
“As a user [of this backup software], I should be able to indicate folders not to back up so that my backup drive isn’t filled up with things I don’t need.”
“When I’m working out, I’d like to have a list of all of the exercises in my set, that I can use as a reference.”
“I’d love to keep track of my TODO list, but I some way to add things on-the-fly, without interrupting whatever else I’m working on. I have a program that I use now, but it takes so many steps that by the time I’ve added my new TODO item, I’ve forgotten what else I was working on.”
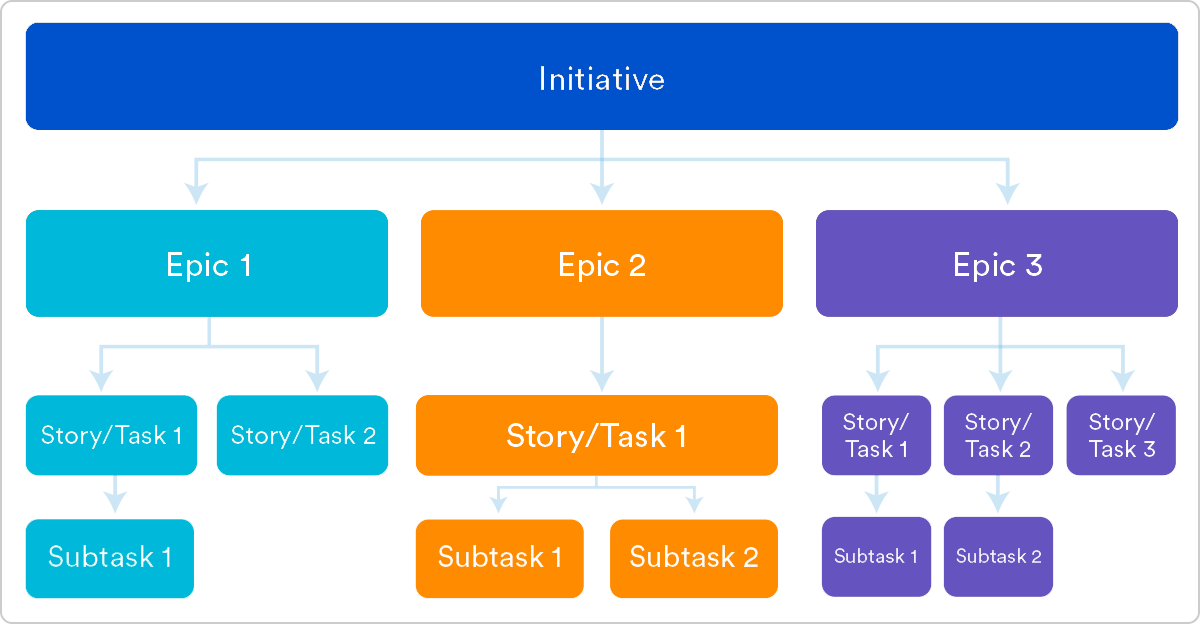
We will often group user stories together if they relate to performing similar tasks, or address a common problem. We do this so that we can develop and/or release them as a set of related functionality.
- Stories, also called “user stories,” are short requirements or requests written from the perspective of an end user. This is the lowest level that we think of them.
- Epics are large bodies of work that can be broken down into a number of smaller tasks (i.e. many user stories).
- Initiatives are collections of epics that drive toward a common goal.
Action: Define a problem statement
You should be able to produce a detailed problem description, which matches your user with a particular problem that they need to have addressed. This should follow directly from your interviews, and is the logical output from the define stage.
This represents the problem that you are going to address. Include as much detail as you can, with a focus on the problem description, benefit for users and motivation behind this idea.
“Students at UW who workout frequently often find it challenging to use the machines in the PAC. There is no simple way for them to figure out who is waiting for which machine. We propose to address a number of related scheduling challenges for them by developing a scheduling application that specifically targets students in the PAC, and uses existing login information, while respecting their privacy concerns. “
“Knowledge workers that primarily work in front of a computer find it challenging to remember to take breaks from their work. This results in health concerns from sitting too long. From extensive interviews, some of these users would find it helpful if they had a system that would keep track of their schedule, and gently suggest breaks at suitable times e.g., between meetings, at regular intervals. We will develop an application to facilitate this.”
Phase II: Explore
3. Ideate
This is all about brainstorming solutions! Bring your team together and brainstorm all of the crazy ideas you have that could contribute towards a solution.
No idea is too far-fetched! Your (initial) goal is quantity over quality, and to uncover some unique and interesting ideas. Share ideas with one another, mixing and remixing, building on others’ ideas.
You will want to document these ideas. One option is to create an affinity diagram to collect everything.
The output from this step should be a set of features that represent your “best solution at this point”.
Action: Affinity diagrams
One popular method to collect ideas when brainstorming is to build a large affinity diagram.
- Write down each idea that the group comes up with on a sticky note.
- Put them on a whiteboard or large wall.
- Organize them into clusters of related ideas. This can help you create hierarchies, or figure out dependencies e.g., “this feature would have to be implemented first before all of these others”, or “these two features work really well together!”.
This doesn’t need to be a physical board. There are many online software platforms that let you create collaborative diagrams together. e.g., invision Freehand.
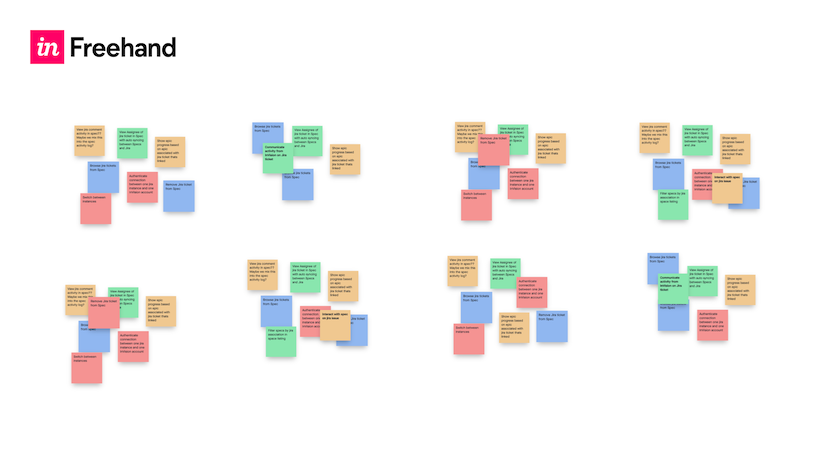
Do not throw out your Affinity diagram, or any of your notes! You might find that you want to revise your solution (it’s probably not perfect) and will need these notes later.
It’s easy to get mixed up in terminology here. To recap:
- You have user stories that reflect problems + solutions from the user’s point of view.
- You have a problem statement that summaries all of these problems, or tries to consider them as part of a larger problem to address.
- Your brainstorming is an attempt to systematically think of ways to address each problem.
Each of these should lead to the next one logically. i.e. we identify the problems first, focus in on the ones that seem most important, and then try to think of ways to address them.
4. Prototype
Next, you will build a prototype of your solution. A prototype is essentially a mockup of your solution, that is built to demonstrate functionality and elicit feedback from your users.
The goal of this phase is to understand what components of your ideas work, and which do not! In an ideal world, everything would work perfectly, but you probably will need to iterate a few times.
Note that a prototype is NOT an “early version” of release software, but an early demonstration of functionality. Compared to the full implementation, a prototype should require significantly less time to build. This makes it much easier to discard or modify as you work through design iterations.
We often characterize prototypes based on their complexity:
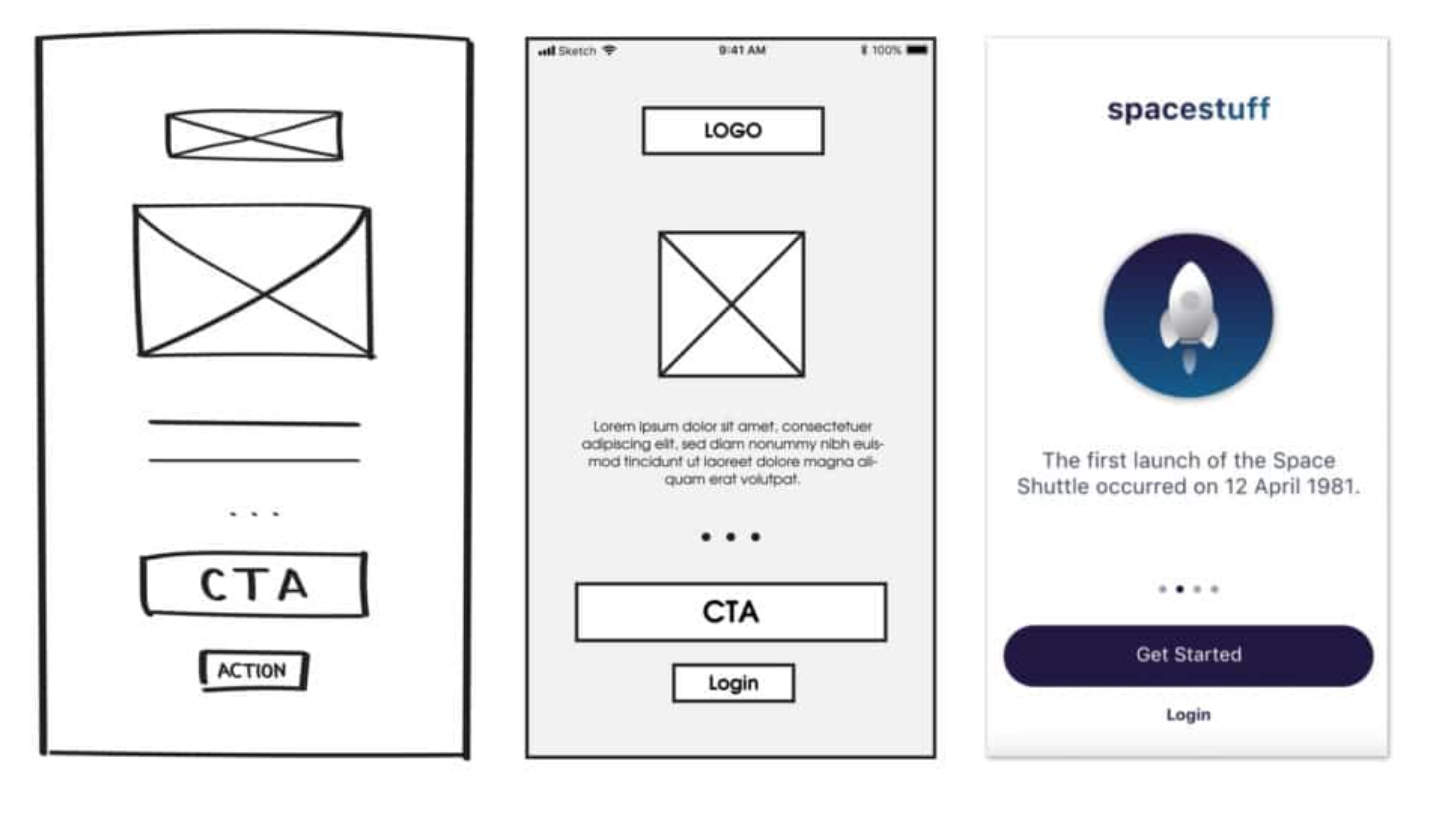
- A low-fidelity prototype is deliberately simple, low-tech, and represents a minimal investment of time and effort. They are shown to users to elicit early feedback on layout, navigation, and other high-level features. Low-fidelity prototypes can be sketches on paper, or non-interactive wireframe diagrams.
- A high-fidelity prototype represents a more significant effort and is intended to be close to the final product. They are suitable for demonstrating complex functionality with a high degree of interaction. Commercial products exist for this purpose, e.g., Figma, Miro or Sketch that allow you to “mock up” a user-interface in much less time that it would take to build the final product. These tools provide collaboration features, so that a designer can build up prototypes quickly, demo them to elicit feedback and even make changes on-the-fly.
This diagram shows the progression from low to high fidelity. It’s not required to build at different dimensions like this! You want to build at the lowest level that you can for maximum benefit.
Suggestions for building prototypes:
- Create static mockups of all of your screens. Make them low-fidelity to start, but include sufficient information to identify their purpose.
- Define the relationship between screens, so that it’s clear to a user how navigation through screens will work.
- Include enough visual clues to suggest how functionality is activated. The user should be able to tell how to perform major tasks.
Action: Prototyping in Figma
Figma is a collaborative design tool that allows designers to build a range of interactive prototypes. We’ll use it to build UI prototypes, and then we can show these to potential users and stakeholders (including our team members) for feedback before we implement features.
Figma is primarily an interactive website (although it also has client applications you can install). Figma has free and paid plans. As a student, you can sign up for a Figma for Education plan for free, which provides paid functionality. Highly recommended while you are still in school!
A design in Figma is meant to encompass all interactions for a product. It consists of:
- a
frame, representing a single UI window (e.g. Android Pixel C screen, or 14“ MacBook Pro Desktop). - UI elements, represented by customizable
shapes.
Figma presents itself like a vector drawing application, letting you “build” a user interface much like you would in any drawing application. However, unlike drawing applications, it also supports adding interaction e.g. clicking buttons.
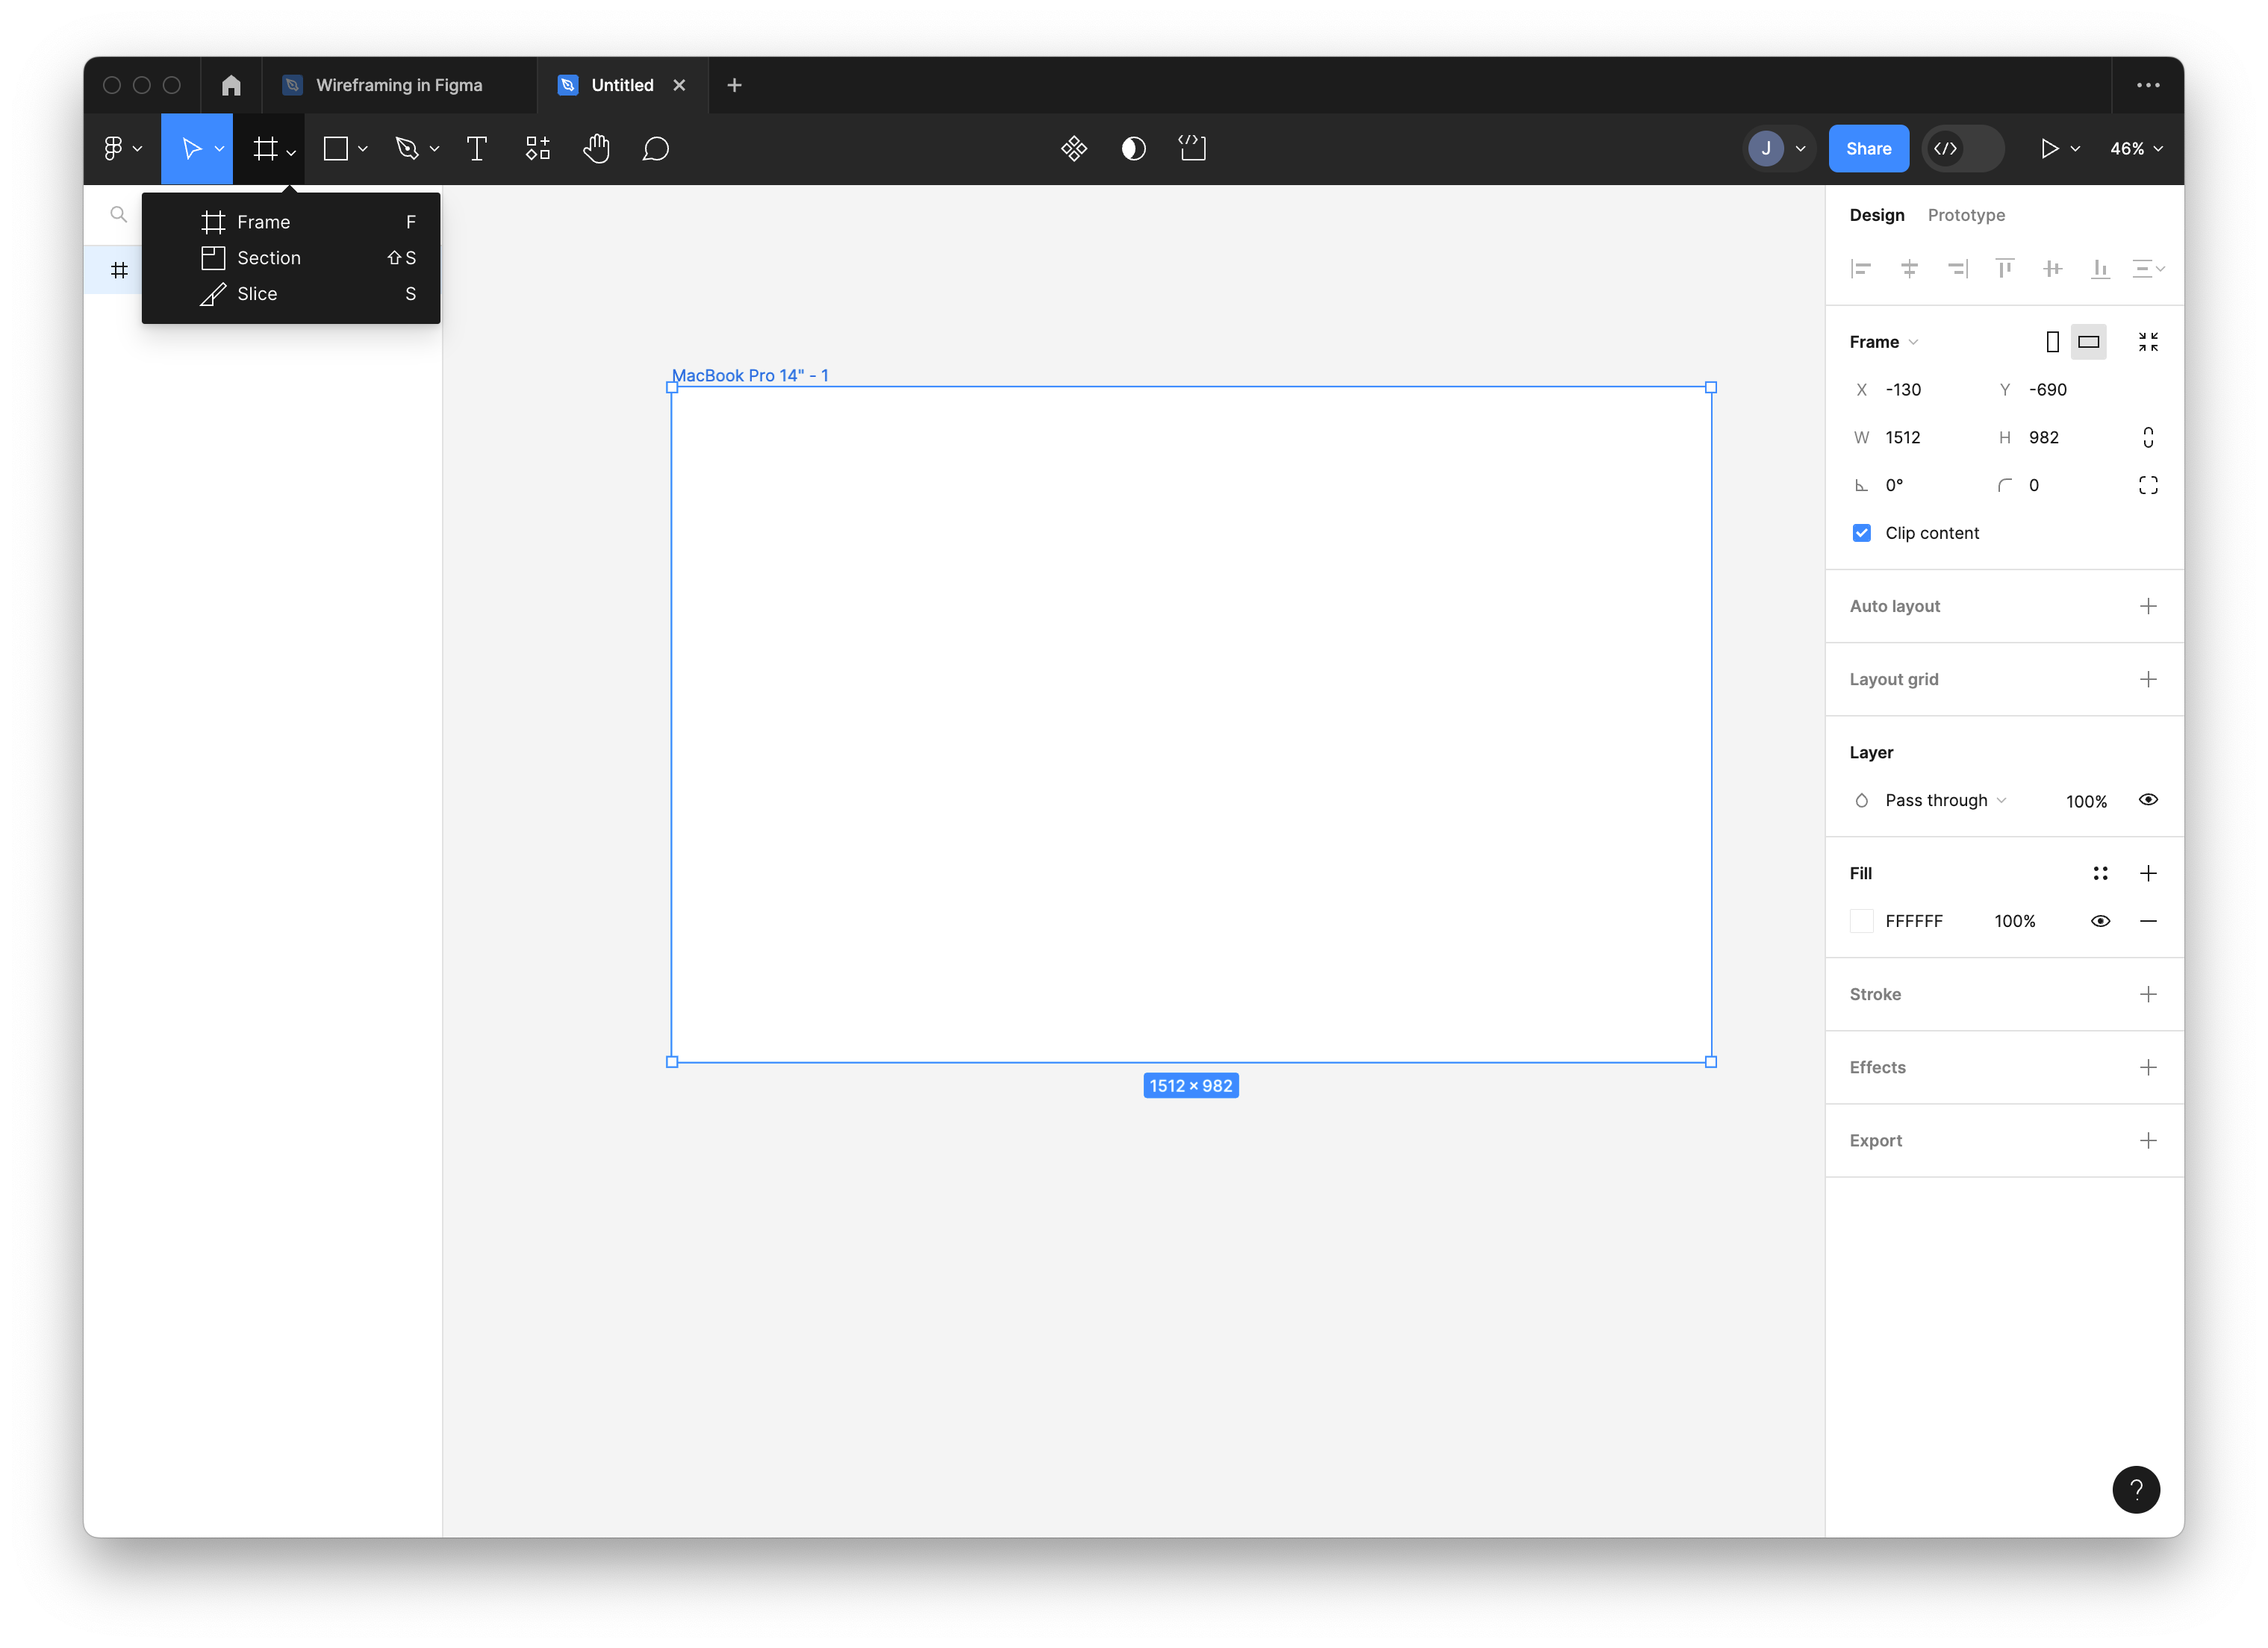
You can build your UI screen by
- Adding a frame,
- Adding primitive shapes (rectangles, circles) to represent UI elements. Use the property sheet on the right-hand side to align, change properties, and so on.
This is slow; you can also import and use Component Libraries that the Figma community has made available. In a browser, navigate to the Figma Community page. From this page, you can search and import libraries directly into your Figma account.
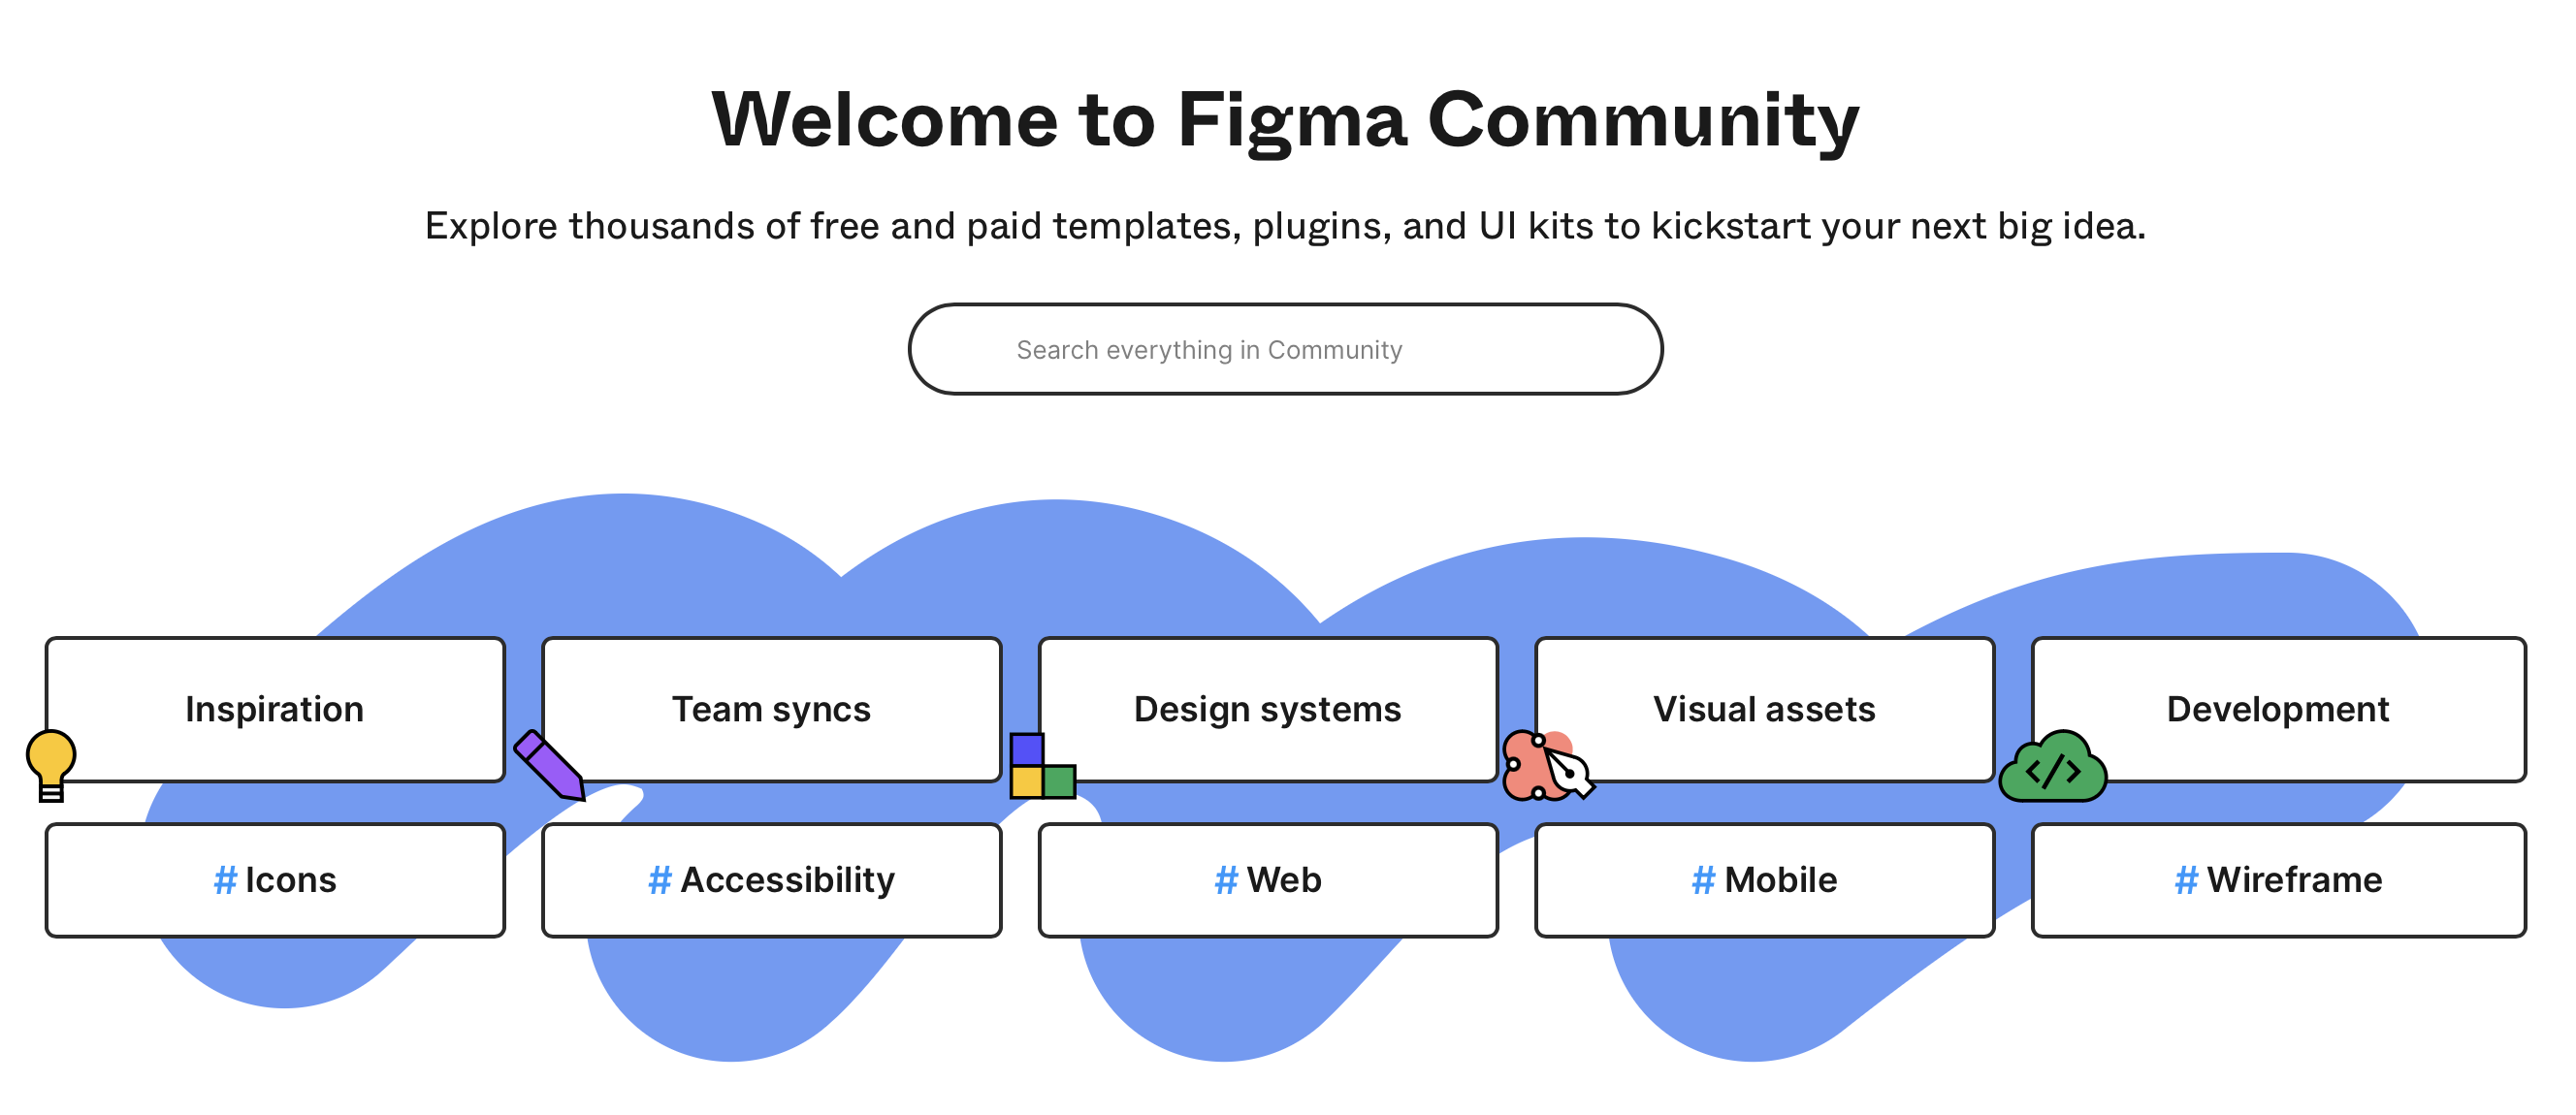
A library is just a set of predefined components. Using a library instead of designing your own has some advantages:
- You can save a lot of time!
- The components in a library will have a similar look-and-feel.
- You can use libraries to mimic the appearance of standard platforms e.g., iOS.
For example, here’s a sheet from the Mobile Wireframe library, which includes iOS, Android components.
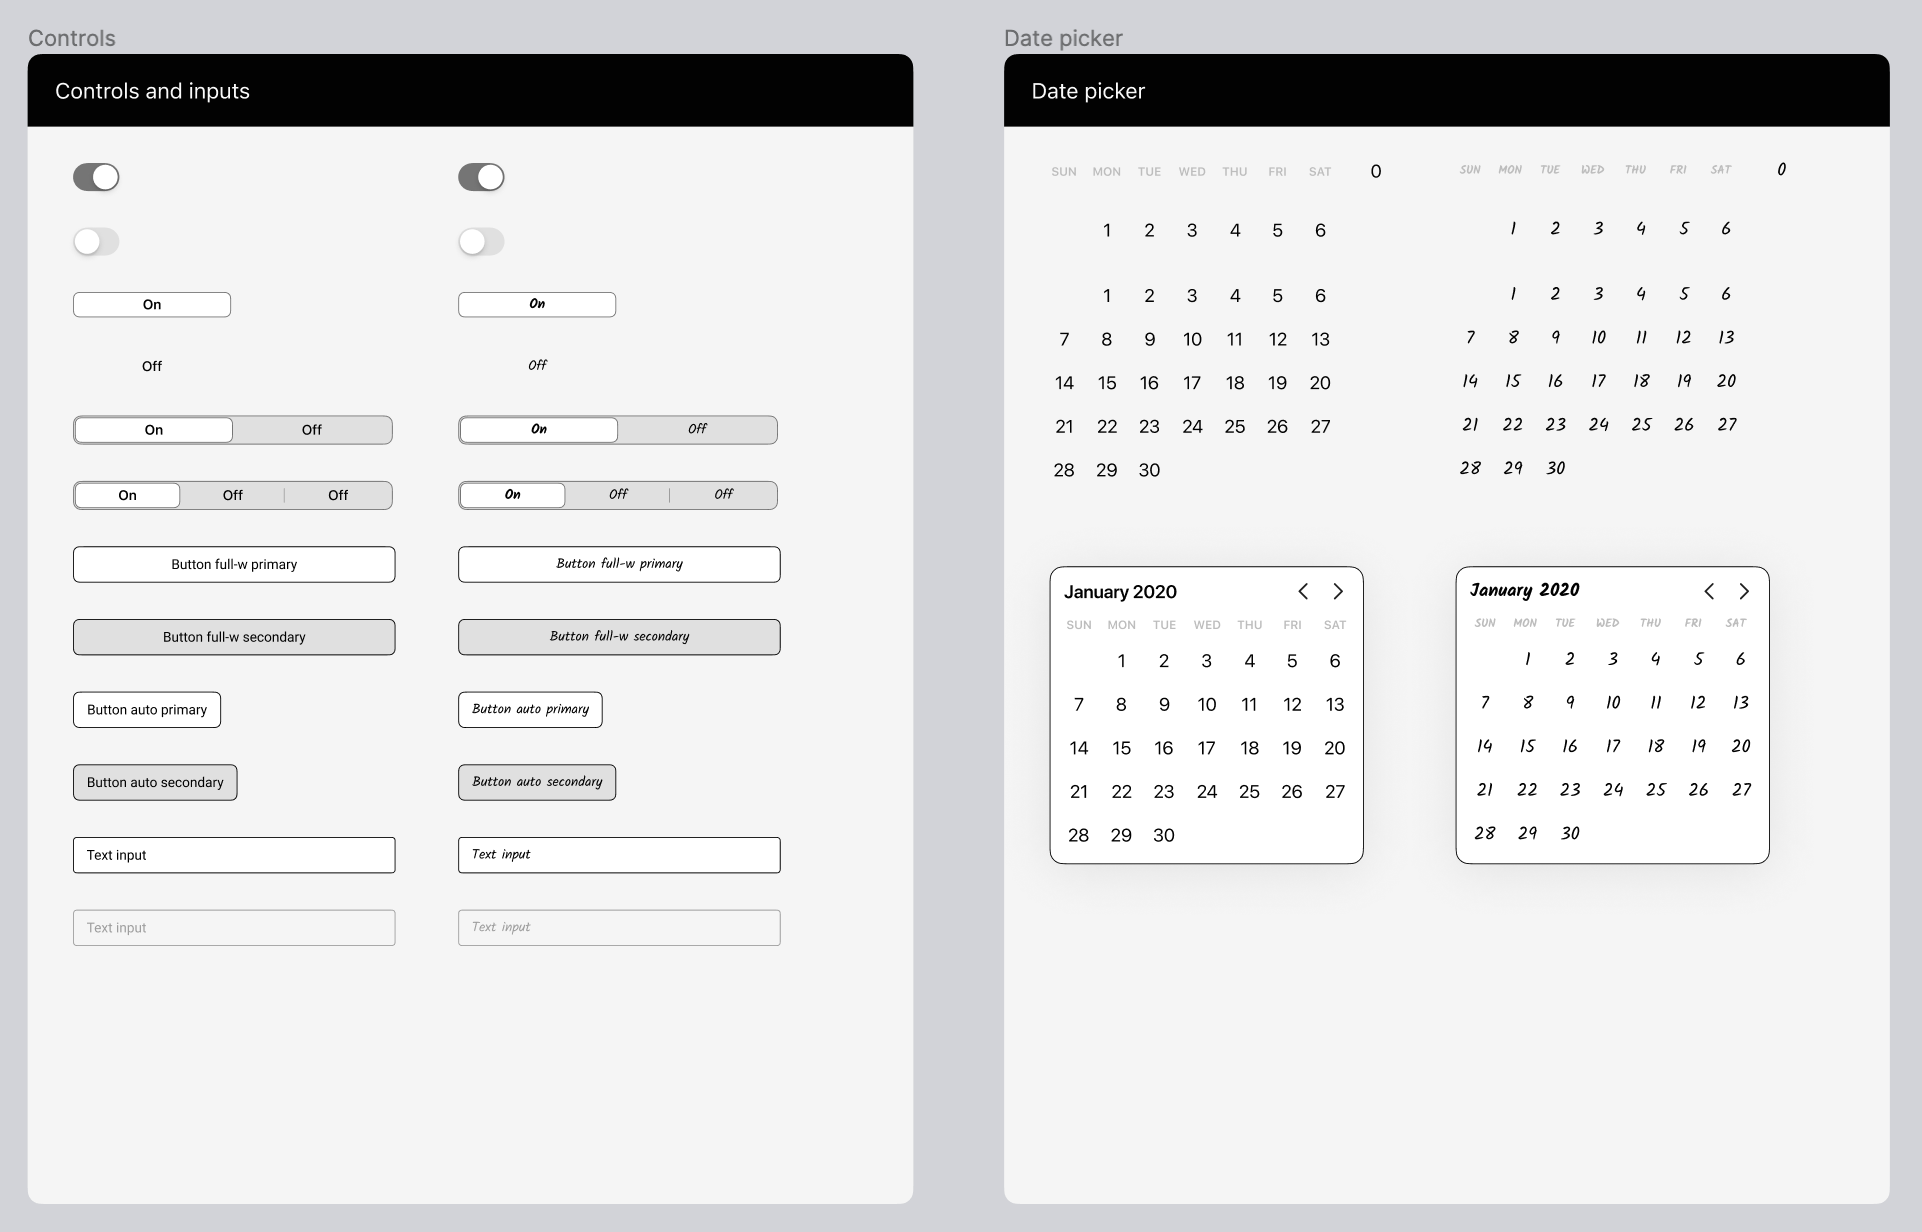
You can create a new diagram, and copy-paste these components into your screens. Minimally, your initial prototypes should include labelled wireframe diagrams for every screen (displaying the structure of your application and each of the screens).
To do anything more complicated, it’s recommended that you review the Figma Documentation or watch some introductory videos.
Phase III: Materialize
5. Test
This step involves taking your prototype back to your users, and allowing them to walk through it. Your goal is to collect their feedback! You want to address questions like:
- Does this solve your problem?
- Is it easy to understand? To use?
- Does (this functionality) make sense to you?
- What would you change?
Action: Collect feedback
Write down feedback and take it back to your team. Iterate!
6. Implement
At some point, you will have enough feedback to be able to proceed with the actual implementation. You should still demo occasionally to users, but you have enough information to proceed.
We’ll cover implementation in the development section.
Last Word
