GitLab projects
We want our software to be effective, useful, and long-lived. This means tracking all of the details of the project for both our own use, and for people that will maintain the project after us.
It’s normal to use Project Management Software to keep track of this information.
Typical responsibilities of this software include:
- Tracking progress: tracking the project details e.g., items in-progress, items that are complete.
- Resource management: who is on the project, what are they working on.
- Scheduling: when will items be completed.
- Information: project documents, user documentation.
GitLab
In this course, we’ll use GitLab. GitLab is a very “developer-focused” tool, which also provides support for:
- Tracking your source code in an associated Git repository.
- Storing project documents e.g., requirements, design documents, work in-progress, test results.
- Storing user documents e.g,. how to install and use it, features that are implemented.
Everything that you produce should be stored in GitLab! This includes your project proposal, design documents, meeting minutes from your sprints, software releases that you produce and any other documentation that is required.
GitLab and other development tools are capable of rendering Markdown. When possible your documents should be created in Markdown and diagrams should be done inline using Mermaid.js. FWIW, this website is created in Markdown, and includes a number of Mermaid diagrams.
Project tracking
We track the work to be done as issues, and assign groups of issues to project milestones (or deadlines).
Establish milestones
A milestone is a deadline that you are working towards. This could be a customer demo, or a product release, or any other deadline. In our course, sprints represent two-weeks worth of work, and each sprint ends with a demo. Each demo is considered a milestone in your project.
To setup your project to track milestones:
Plan>Milestones, create milestonesSprint 1throughSprint 4. Make sure to assign starting and ending dates to each of them - see the schedule for dates.
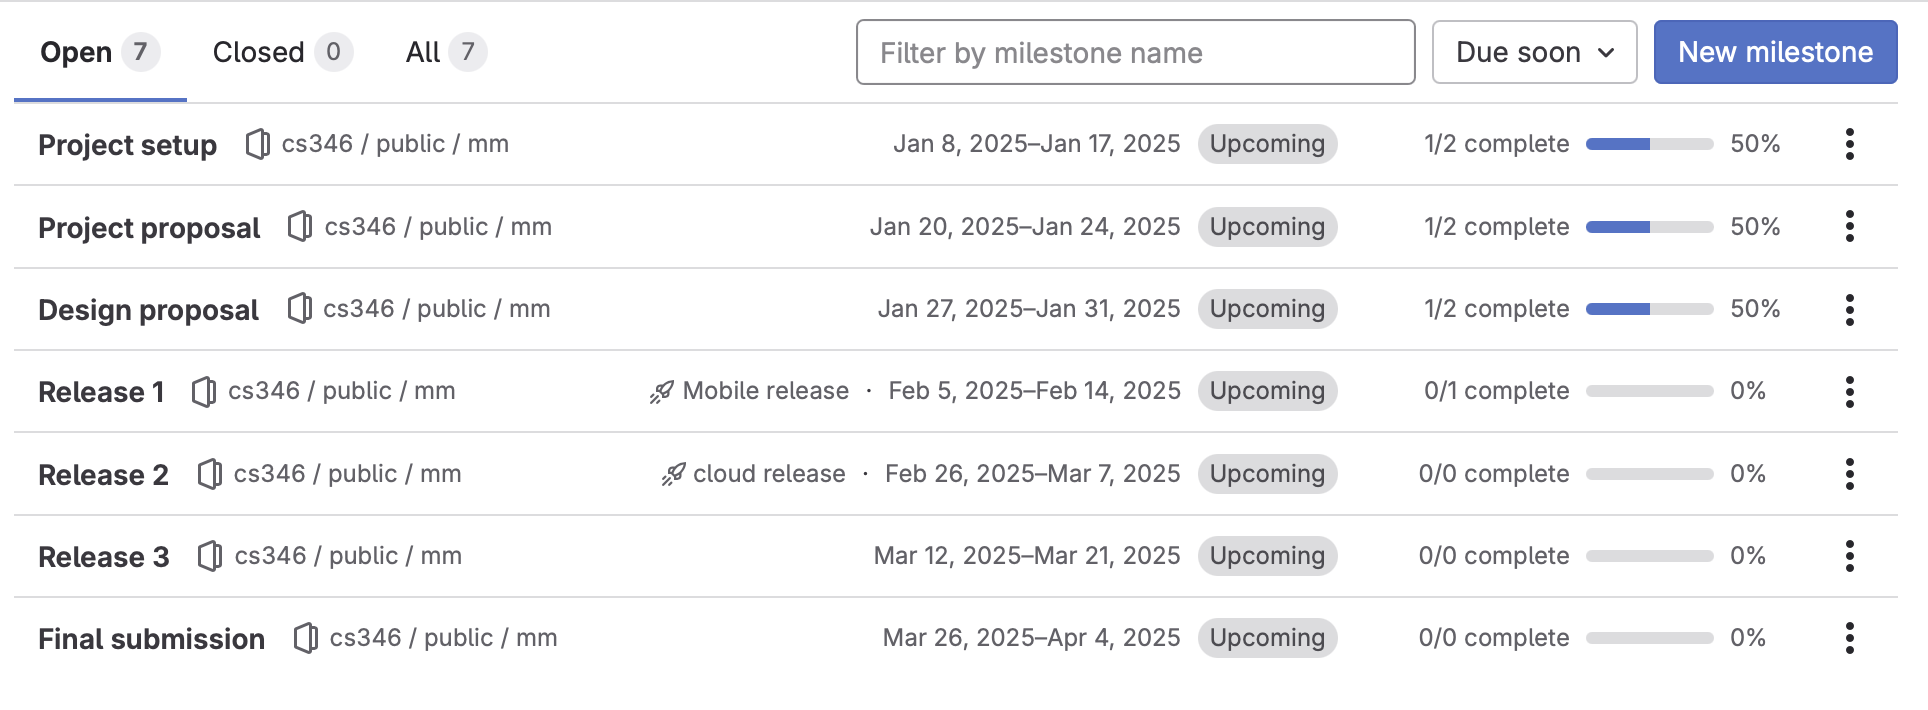
Here’s an example of milestones that have been created for a course project. Milestones are important because they allow us to track work against a particular goal. This reflects a similar structure to what you should use in this course.

Create issues
To manage work in a project, we first define a list of activities that we need to perform (i.e. the actual “work” that needs to be done). We refer to items of work as issues in GitLab.
An issue:
- Represents one meaningful “unit of work” that needs to be performed for our project.
- Can be anything that needs to be done e.g., programming, writing unit tests.
- Should represent a complete feature (or if the requirement is complex, one of a set of related features).
- Can be completed in less than one day.
To create an issue in GitLab:
Plan>Issues,New Issue

An issue will typically have the following fields. You should make a best-effort attempt to fill these in when you create the issue:
- Title: A descriptive title that descibes the work, e.g., “Move model into shared project”.
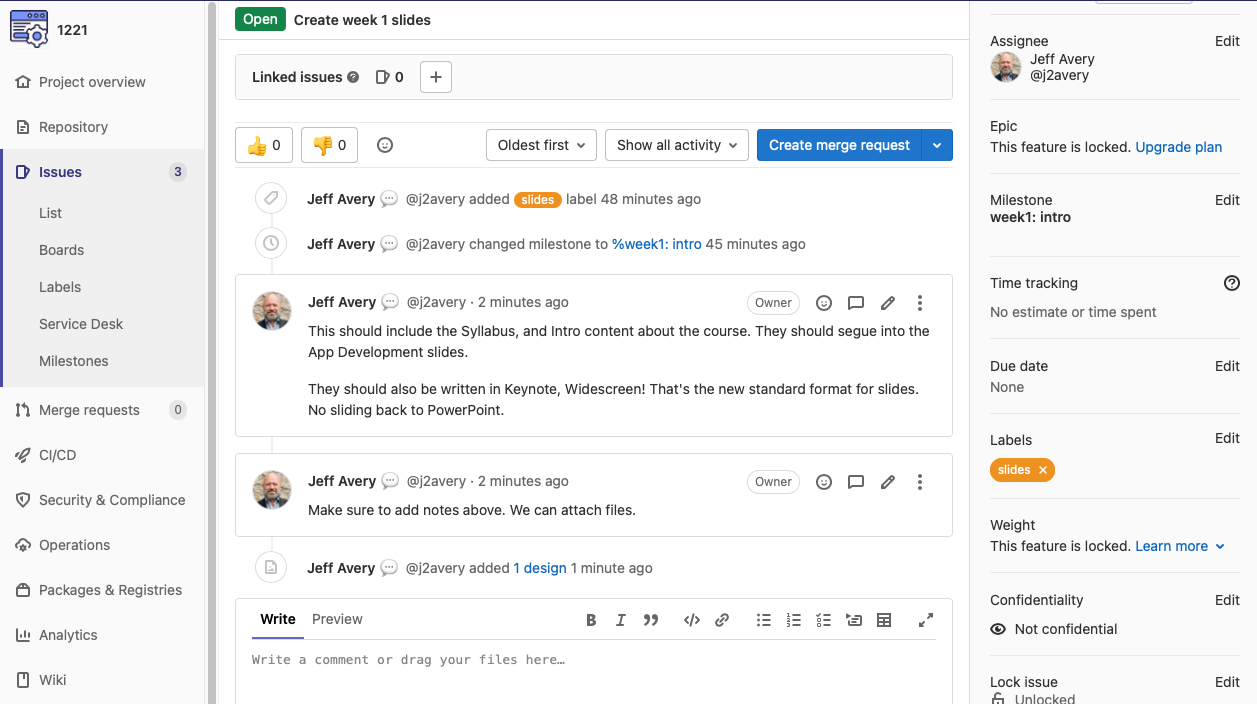
- Comment: When you create a new issue, you are prompted to type a lengthier description. This will show as a comment in your issue at the bottom of the Activity pane. You can add additional comments as the issue unfolds, e.g., notes to yourself, or from teammates.
- Assignee: The person responsible for the work. Typically unassigned for new issues.
- Milestone: The milestone that this issue is assigned to. Typically blank for new issues.
- Due date: Can be left blank, since we’ll rely on milestone dates.
Additionally, you can link this issue to other related issues, e.g., multiple changes towards the same requirement. You can also choose to attach external files, e.g., log files for debugging, config files required to test the issue and so on.
Most issue tracking systems support the idea of a priority - some indicator of how urgent an issue is. This isn’t available with our current GitLab license, but we can add it!
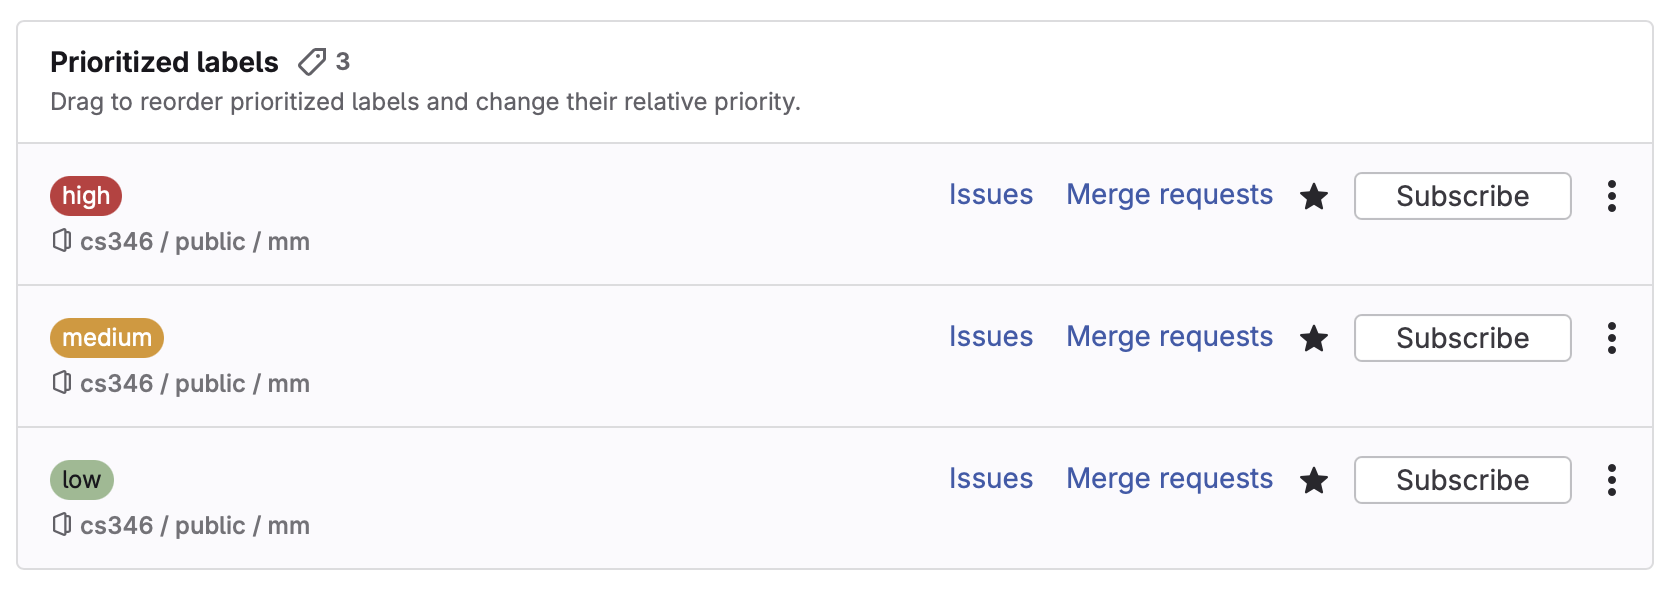
Under Manage > Labels, create keywords that will help you organize your issues. We usually recommend high, medium, low as useful keywords for setting priorities. Once defined, you can set these directly in the label section of your issue.

Your project will have many issues associated with it! Typically you assign issues to a milestone, and then update them as you work on them.
Updating issues
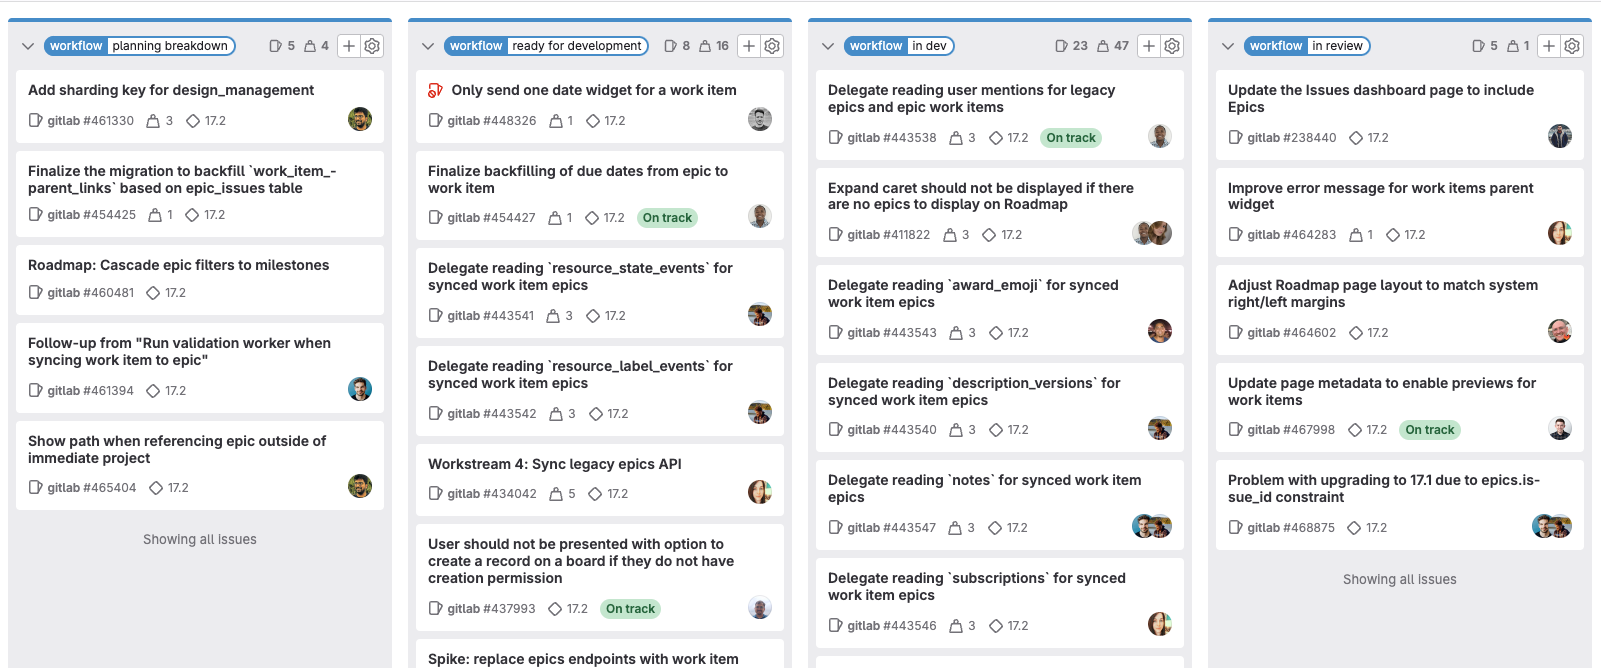
To review and update issues together, the team can use a scrum board to visualize all the work being towards a milestone. Scrum boards can have multiple steps visible in the workflow, like To Do, In Progress, and Done. This can be very helpful in planning.

See Software development > Scrum for details on how and when you should manage your issues.
Tracking progress
Finally, you might want to use a Gantt chart to visually show your project’s progress.
A Gantt chart is a visual bar chart used to plan and track a project’s progress. It acts as a timeline that shows the list of tasks involved, their start and end dates, milestones, dependencies between tasks, and assignees. Gantt Charts typically include two sections, the left side outlines a list of tasks, while the right side shows a project timeline with schedule bars that visualize work.
From https://www.atlassian.com/agile/project-management/gantt-chart
GitLab does not support generating Gantt charts, but you can manually create them in Mermaid.js and add to your documentation.
gantt
    title A Gantt Diagram
    dateFormat  YYYY-MM-DD
    section Section
    A task           :a1, 2014-01-01, 30d
    Another task     :after a1  , 20d
    section Another
    Task in sec      :2014-01-12  , 12d
    another task      : 24d