Create a Project#
Make sure that you first complete install tools so that you have the development toolchain installed.
In building our application, we are going to use the Kotlin Toolchain, to manage our project builds. It can perform a number of useful tasks for us, including:
- compiling and running our code
- managing builds for multiple platforms
- running our unit tests and reporting results
- creating installers and executables
This is a relatively new build tool, which replaces other common build tools like Gradle or Maven (for Java) or Bazel (for C++). It runs from the command-line, but is also integrates into IntelliJ IDEA and can be used directly within the IDE.
Installation#
How you install the toolchain depends on how you intend to run it. I recommend doing both of these steps so that you have some flexibililty.
Install the kotlin command-line tool from the Kotlin Toolchain site. This gives you the ability to perform all actions directly from the command-line. It’s also the best way to work with your Kotlin code if you intend to use a minimal editor e.g., VS code, Zed, Vim.
Install the Kotlin Toolchain plugin in IntelliJ. This will add full IDE support. See the Install Tools page for instructions on installing plugins.
Creating a Project#
Similarly, you have two methods for creating a new source code project. Both of these methods will produce an identical project structure, so it doesn’t matter which one you use.
From the CLI:
- Create and
cdinto a new, empty directory. - Run
kotlin initand choose the type of project you wish to create. - Done! You can run
kotlin buildto make sure it builds correctly.
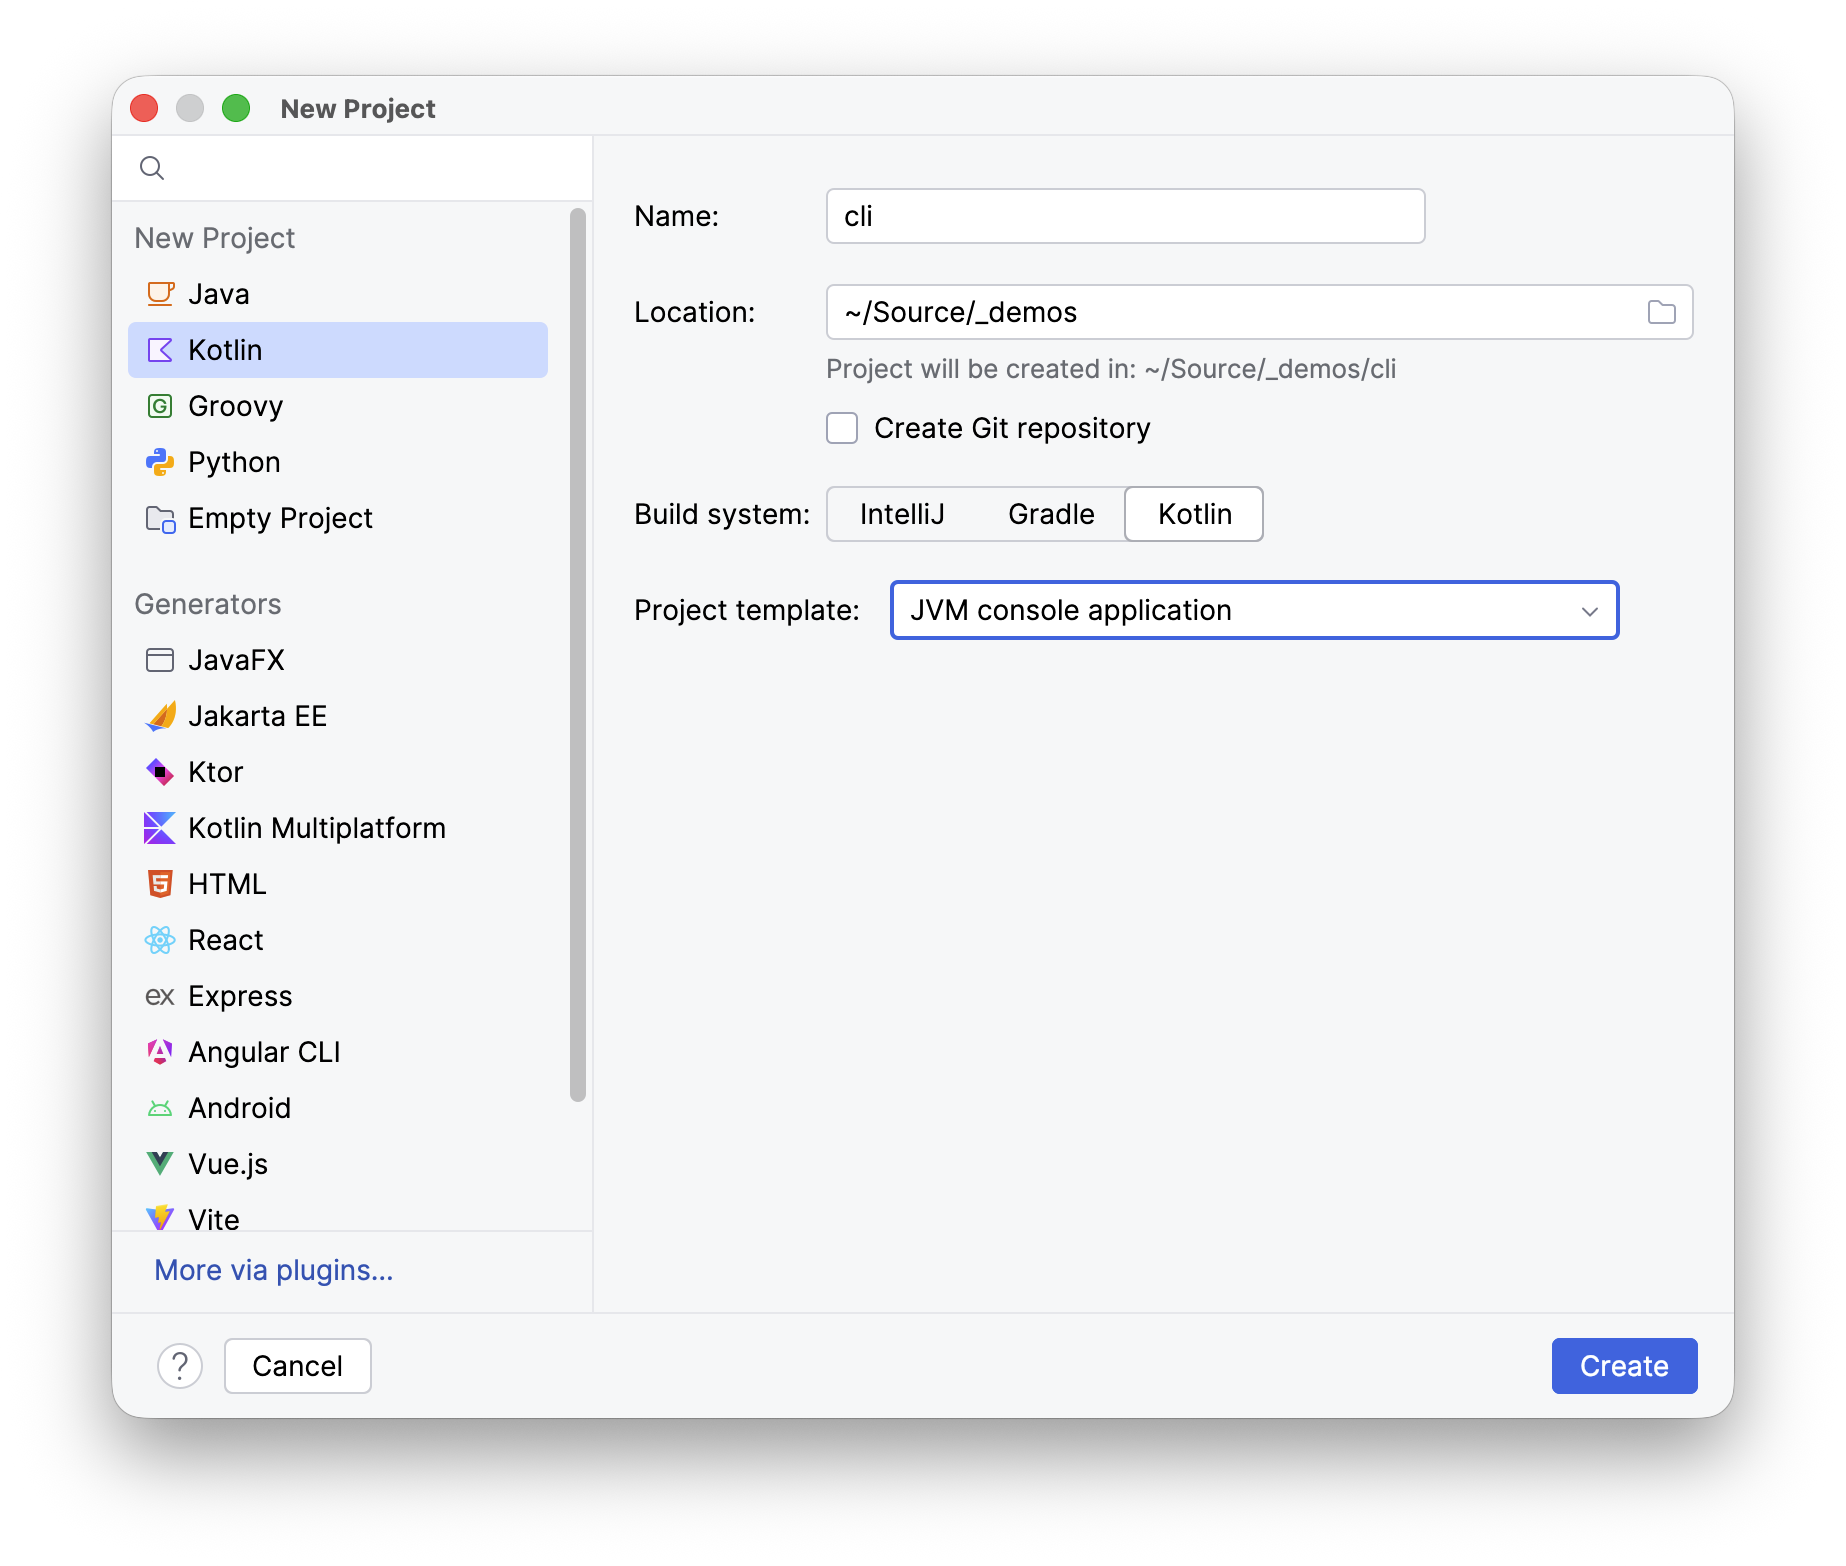
If the Kotlin Toolchain plugin is installed in IntelliJ IDEA, you can do this:
- File - New - Project from IntelliJ to open the New Project wizard.
- Choose
Kotlinfrom the left-hand side. On the right0hand side,- Enter a unique project name and location,
- Choose
Kotlinas the build system, - Select your project type from the
Project templatedropdown,
- Press
Createand it will generated for you.