Deliverables#
Deliverables represent things you are expected to produce as part of your project.
The most obvious deliverable is a working product, but along the way you will accumulate documentation, project artifacts and other items that help you keep track of your progress. All of these deliverables need to be stored in your GitLab project.
This page details what needs to be complete at the end of the term. You are expected to demonstrate progress on these for each milestone.
README file#
Your Git source tree must have a single README.md file at the root level. This is the page that is displayed when you open your project, and it serves as a landing page for your project contents. It should have the following sections.
DESCRIPTION
- The product name.
- A one or two line product description.
- A screenshot of your main screen (when available, see final submission).
- A link to a YouTube video (when available, see final submission).
TEAM INFORMATION
- Team names and contact info.
- Meeting minutes (see run team meetings).
DESIGN DOCUMENTS
- Proposal presentation (see prepare for demos).
- Class diagram (when available).
- ER diagram (when available).
SOFTWARE RELEASES
- One page per software release (see release software).
- Each software release page should include:
- Date and version number.
- A list of issues addressed
- Acknowledgement of libraries and external source code
- Link to an installer (desktop, or mobile as appropriate).
Documentation#
Welcome Video#
You need to create a video walkthrough of your application and post it on YouTube. This video should serve as a brief introduction to your features for a new user, and should be 1-3 minutes in length.
It’s recommended that you wait until the end of the term to record this video, so that it reflects your completed product.
User Guide#
You are required to write a guide for new users, which supplements the introductory video that you created (above). This should be one or more Wiki pages, and include:
- A title, and introductory paragraph.
- Details on what platform and/or device is supported.
- Instructions on how to install your product. A bulleted list is accepted as long as it’s clear.
- A list of the main features, and how they work.
This section should be sufficient to explain to a new user how to use your product.
Team Reflections#
At the end of the term, you and your team need to product a Team Reflections document. Generating this should be a team activity, and it should be a maximum of 1 page.
Answer the following questions:
- What features did you not complete?
- Why did you drop them? How did you choose which features to drop?
Discuss the software engineering practices that you used:
- What “best practices” did you adopt? Which ones were effective? Which ones were not effective?
- Did you as a team adapt or change as the project progressed? If so, how and why?
- In your next project, what would you do differently?
Discuss technical/design challenges:
- What design/solution are you particularly proud of, and why?
- What was the most difficult technical challenge you faced as a team, and how did you overcome it?
Software Releases#
A software release is a “frozen” version of your product, containing a known list of changed, that you track in source control.
- You should produce a software release for each demo. Each release should have a date and version number.
- Have a link to each software release from your README file. Users should be able to see a list of all releases.
- Each release should include
release notes(describing what has changed) and a set of installers for supported platforms.
See the software release process for details.
GitLab#
Milestones#
Each of your demos is a milestone, and should be tracked as such in GitLab.
- Each milestone has a unique name e.g.,
Demo 1,Demo 2and so on. - Milestones have start and end dates corresponding to the schedule.
- Each milestone ends with a demo.
Issues#
A user story is a description of a feature from the perspective of a user. Issues are meant to capture all of the work that you perform for a user story.
- Issues should be initially unassigned. You assign them to a person and a milestone during your planning activities.
- Issues should be updated as work progresses. Ideally, you should be able to understand the state of the project by reviewing the state of the issues attached to the current milestone.
- When you complete the work, you
close the issue.
Code branches should be used to stage work-in-progress, and code commits should be coordinated with the issues associated with that commit.
Make use of the issue and milestone views:
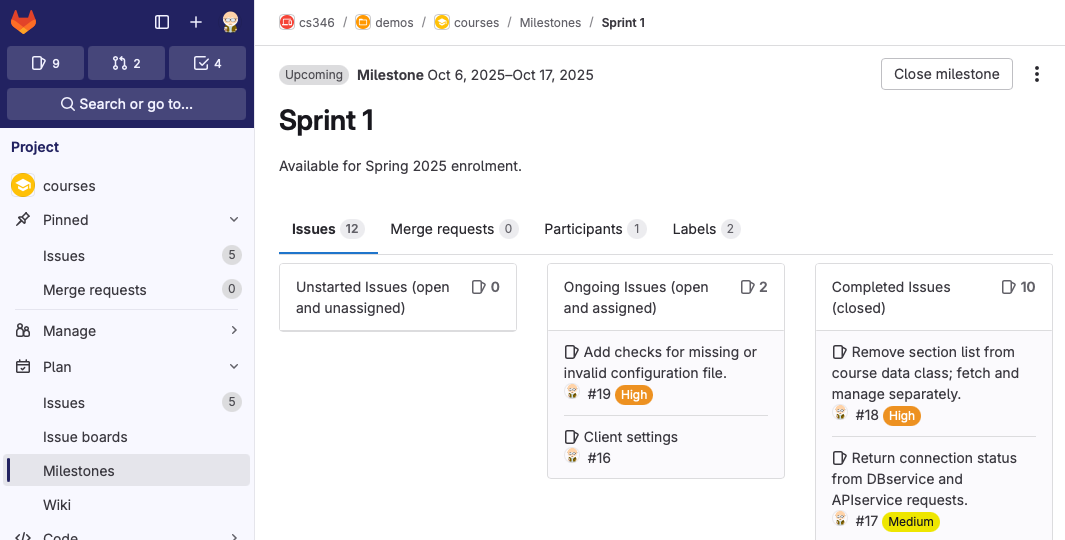
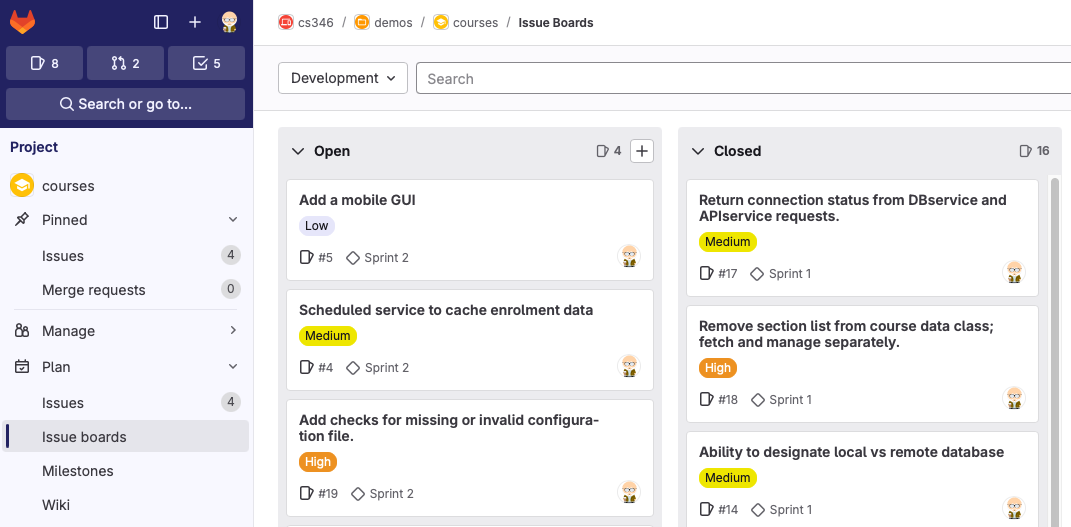
Plan>Issue Boardsis useful for planning in team meetings, since it shows you all of your open work for the rest of the project.Plan>Milestonesis really useful to check the status of the current sprint. You should use this view when discussing your progress with your TA in demos.
Source Tree#
Finally, you need to have your source code up-to-date, with all changes committed. For each demo, you need to have:
- Passing unit tests for your code.
- Feature branches merged to
main. - All features included in your build should have corresponding code in Git.
- Software releases need to be built from
main.
The final release should include all code changes that are relevant to the final features.
The structure of your source tree will vary based on the type of project that you created, but it should resemble a standard KT project configuration. e.g.,
.
├── amper
├── amper.bat
├── android-app
│   ├── module.yaml
│   └── src
├── ios-app
│   ├── module.xcodeproj
│   ├── module.yaml
│   └── src
├── jvm-app
│   ├── module.yaml
│   └── src
├── project.yaml
├── README.md
└── shared
    ├── module.yaml
    ├── src
    ├── src@android
    ├── src@ios
    ├── src@jvm
    ├── test
    ├── test@android
    ├── test@ios
    └── test@jvm