Work with Git#
Make sure that you complete Create a Project before proceeding, since this step assumes that your Git repository is setup properly.
You will be using Git for version control. We’ll discuss the various operations you need to perform.
Get a local working copy#
This is your first step after GitLab is setup: clone a local, working copy of the repository to your computer.
Fetch the URL#
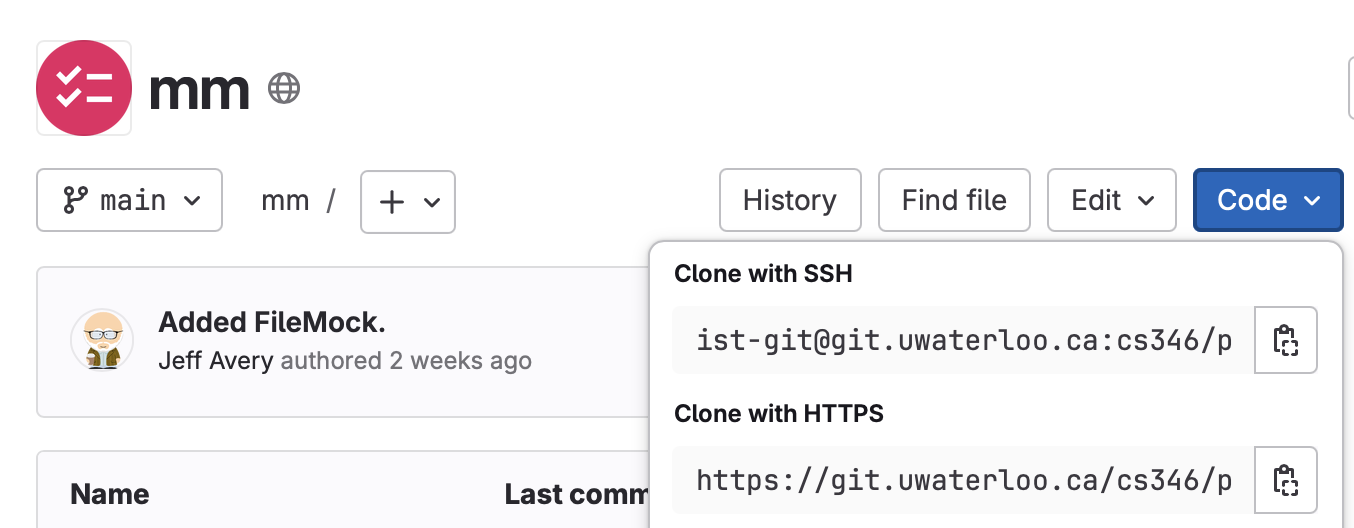
Open the web page for your GitLab project. Click on the Code button, and copy the URL from Clone with HTTPS.
Clone a working copy#
In a terminal, on your computer, cd to the location where you want to keep your source code. git clone the URL.
$ git clone https://git.uwaterloo.ca/cs346/public/mm.gitIn this example, we would have a folder named mm that contains the contents of the Git repository.
Configure Git#
You can make local changes to your Git configuration. You typically only need to do this once when you are setting up the project.
Add a .gitignore file#
You should add a .gitignore file to the root of your working directory (see previous step).
$ cd working_directory
$ vim .gitignore
Your .gitignore should include at a minimum .idea and build/ folders.
*.class
.idea/
build/
Update your git properties#
You should update your local working copy to use your UW email and username.
$ cd working_directory
$ git config user.email "your_email@example.com"
$ git config user.name "Your Name"
Save and push your changes#
Save and push these changes once complete.
$ git add .gitignore
$ git commit -m "Adding gitignore file"
$ git push
Making changes#
You will be making a lot of changes to your repository: adding a README file (see organize GitLab), reviewing your team’s changes, or making changes to source code.
Your workflow should be the same in all cases:
git pull#
Run this command, either from your IDE or command-line, to get the latest updates from the server to your local working copy. This is typically done to get your teammates changes.
make local changes#
Make any changes you want to your local copy e.g., add a .gitignore file, or modify a source file. Save them locally in your IDE ir editor.
git add/commit/push#
Add changes, and them commit them locally.
$ git add *
$ git commit -m "Comment about what I changed"
$ git push
Add lets you stage the files that you want to commit (which is usually everything you’ve changed). Commit saves those changes, and Push sends updates to the server.
Using feature branches#
You should avoid making changes directly on the main branch as much as possible. Instead, you should be using feature branches so that your work is isolated from your teammates.
A feature branch is simply a branch created for your work. You use this as a “safe” staging area, and merge back to main when your code is complete and tested.
The steps include:
- Creating a branch for a feature,
- Working on that feature until complete,
- Merging back to the main branch,
- Checking that all tests pass on main,
- Commiting your changes and pushing changes.
GitLab has a built-in workflow that automates the process of creating a feature branch! Clicking on the Create Merge Request button in an open issue will automate creating a feature branch and associating it to the issue.
Commit guidelines#
You are expected to regularly commit your code to git. It’s a good practice to write your code incrementally:
- Write a unit test for the code you are going to write. This helps define your interfaces.
- Write code to achieve what you wanted and which also makes your test pass.
- Add more tests to cover a reasonable number of inputs.
- Commit to git, with comments!
- Document your work items in GitLab.
Your Git commit history should reflect the work that you did during the sprint, and a TA should easily be able to see what commit belongs to which issue. A good practice is to put your issue number in the commit message to make it easy to find later!
Do not delete branches and do not squash commits. We need to see your complete commit history.
Final Word#
