
Creating a JavaFX Project
The instructions below help you set up a JavaFX project in IntelliJ IDEA. If you wish to run sample code instead, see Running Samples.
Launch IntelliJ IDEA. From the Welcome screen, select New Project to be taken to the project wizard. From here, you can choose one of many different types of project to create.
To create a JavaFX application, choose JavaFX as your project type and fill in these values:
- Name: Pick a project name (
HelloFXin the example below) - Location: Choose a directory to save the project.
- Language: Kotlin
- Build System: Gradle
- Group: up to you
- Artifact: leave as it is
- JDK: “temurin-17”, or “Download JDK…” if you have not installed a JDK yet.

Click Next to proceed to the next screen and then Create to create your new project.
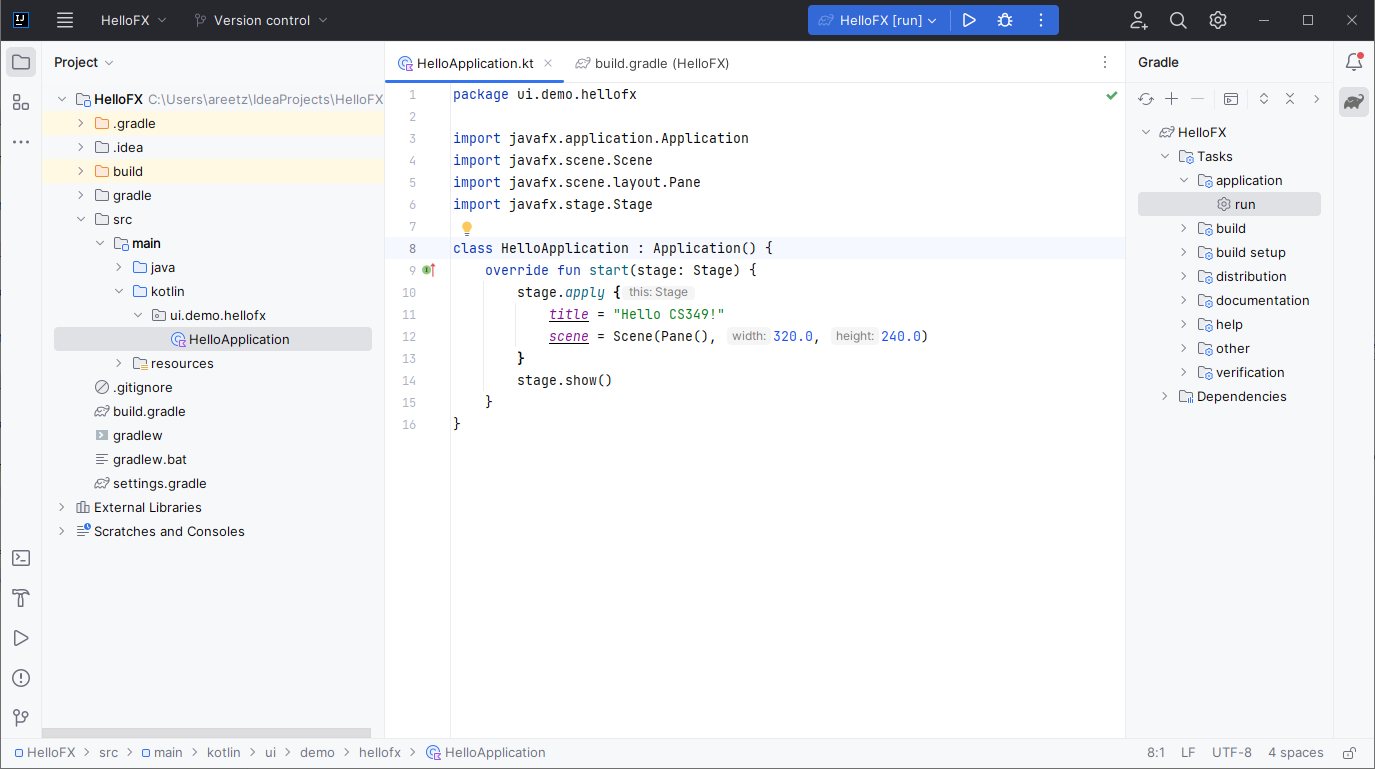
IntelliJ should open the main project view, showing the project files on the left hand side and code in the middle. We have also clicked on the Gradle button on the right-hand side to show the gradle tasks. Depending on your computer and network connection, this might take a few minutes.
We have cleaned up the program by removing all references to FXML.
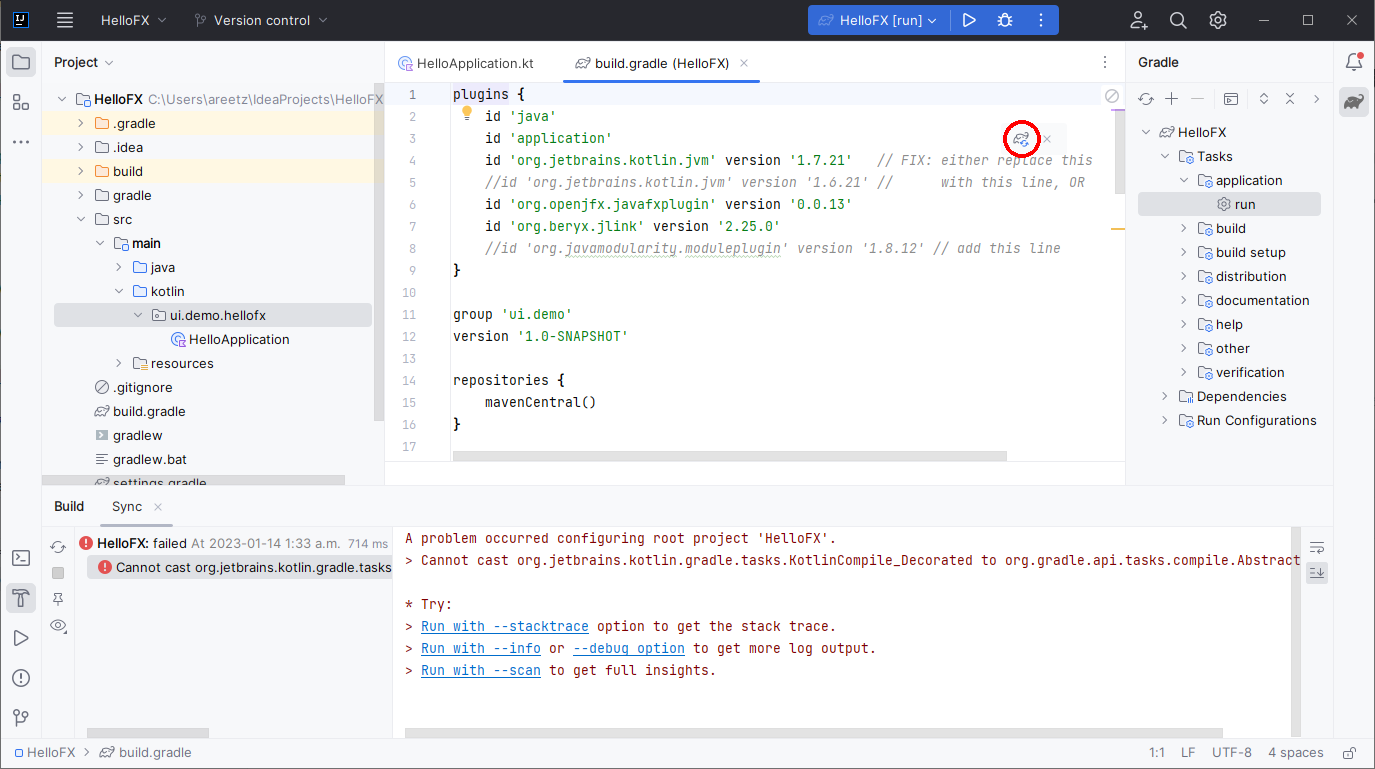
Please be aware that JavaFX programs might not compile out of the box! When compiling your program, you might receive the following error:
Cannot cast org.jetbrains.kotlin.gradle.tasks.KotlinCompile_Decorated to org.gradle.api.tasks.compile.AbstractCompileThis remains a known issue caused by the combination of Kotlin 1.7+, Gradle, and JavaFX. To fix this problem, open
build.gradleand either:
- downgrade your Kotlin version to 1.6.21 by replacing
id 'org.jetbrains.kotlin.jvm' version '1.7.20'withid 'org.jetbrains.kotlin.jvm' version '1.6.21', or- use the Java Platform Module System by adding
id 'org.javamodularity.moduleplugin' version '1.8.12'Make sure to reload your Gradle configuration after saving
build.gradleby clicking on the elephant icon (circled in red, see below).
You can now run your program in the same way as a command line project.
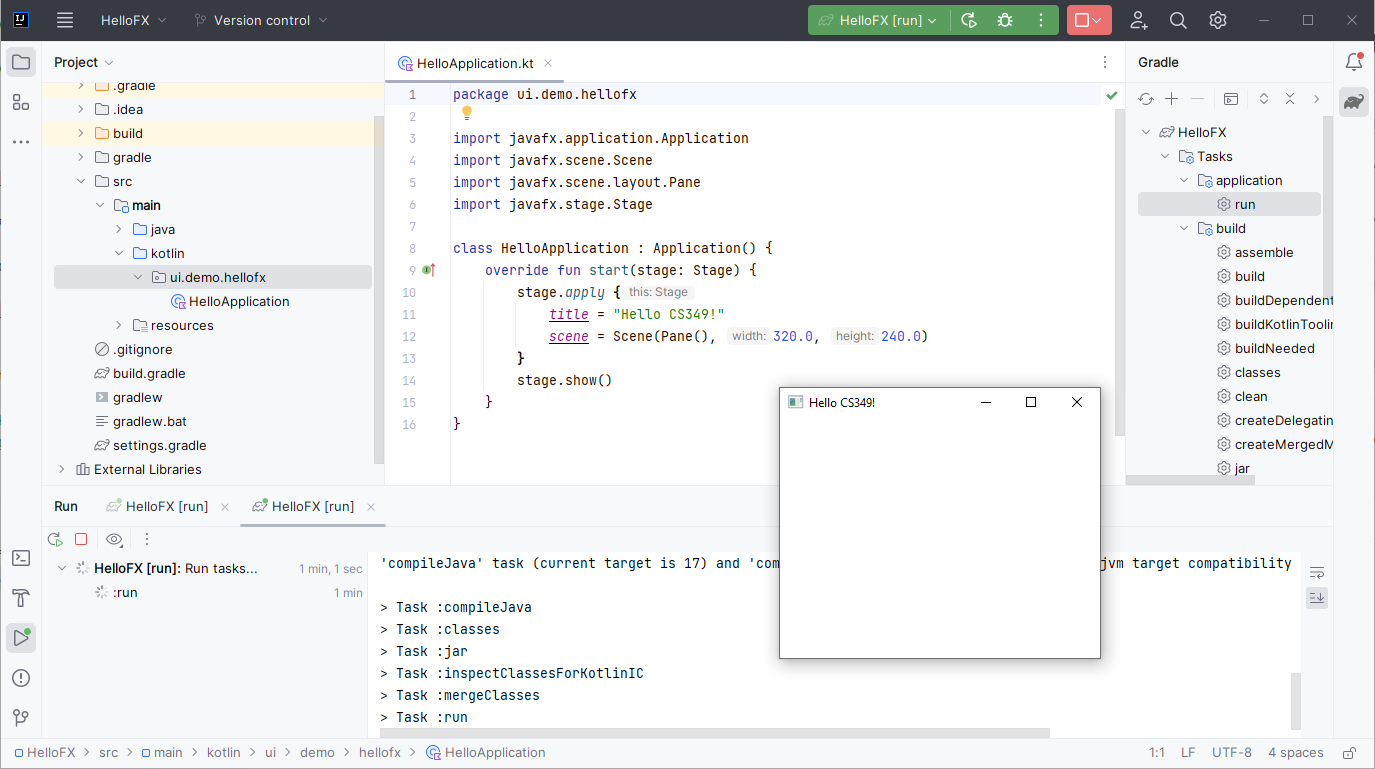
After compiling your program, you might receive the following warning:
'compileJava' task (current target is 17) and 'compileKotlin' task (current target is 11) jvm target compatibility should be set to the same Java versionWhile this does not cause any issues, you can prevent the warning by changing
jvmTarget = '11'tojvmTarget = '17'inbuild.gradle.