Creating a Kotlin Project
- New Project Wizard
- Run Program (via IntelliJ)
- Run Program (via Command Line)
- Adding Classes (and Other Artifacts)
The instructions below help you set up a Kotlin / Gradle project in IntelliJ IDEA. If you wish to run sample code instead, see Running Samples.
Gradle is a build tool that helps manage dependencies for complex projects. We’ll let IntelliJ create a compatible Gradle project for all of our projects. For those new to Gradle, here’s a Gradle walkthrough video that discusses the reasons we use Gradle, and how it works (and here’s the slides).
The following steps will set up a Kotlin command-line project that uses Gradle.
Launch IntelliJ IDEA. From the Welcome screen, select New Project to be taken to the project wizard. From here, you can choose one of many different types of project to create.
To create a Kotlin command-line application, choose New Project as your project type and fill in these values:
- Name: Pick a project name (
HelloWorldin the example below) - Location: Choose a directory to save the project.
- Language: Kotlin
- Build System: Gradle
- JDK: “temurin-17”, or “Download JDK…” if you have not installed a JDK yet.
- Gradle DSL: Kotlin
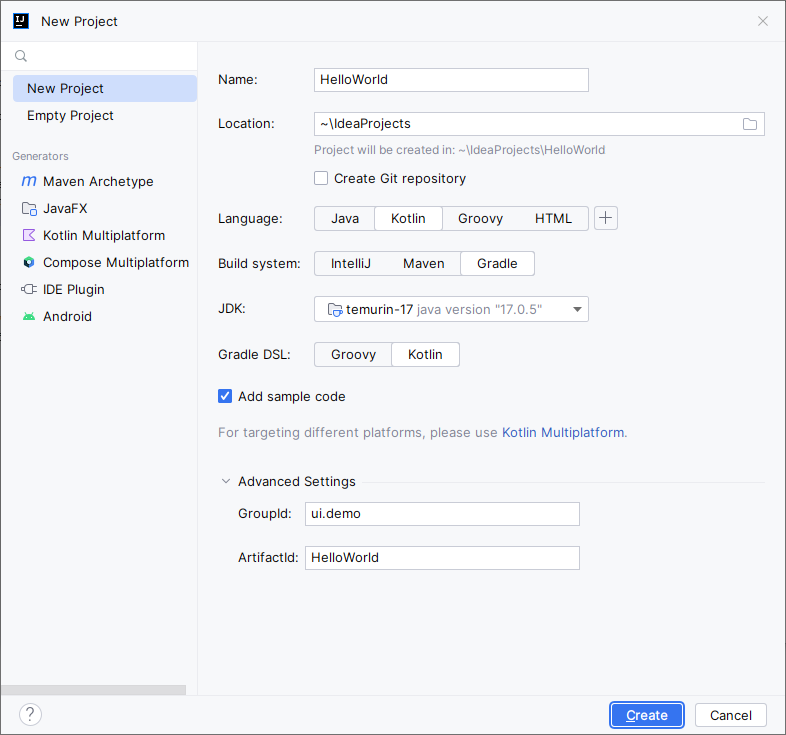
Click Create to create your new project.
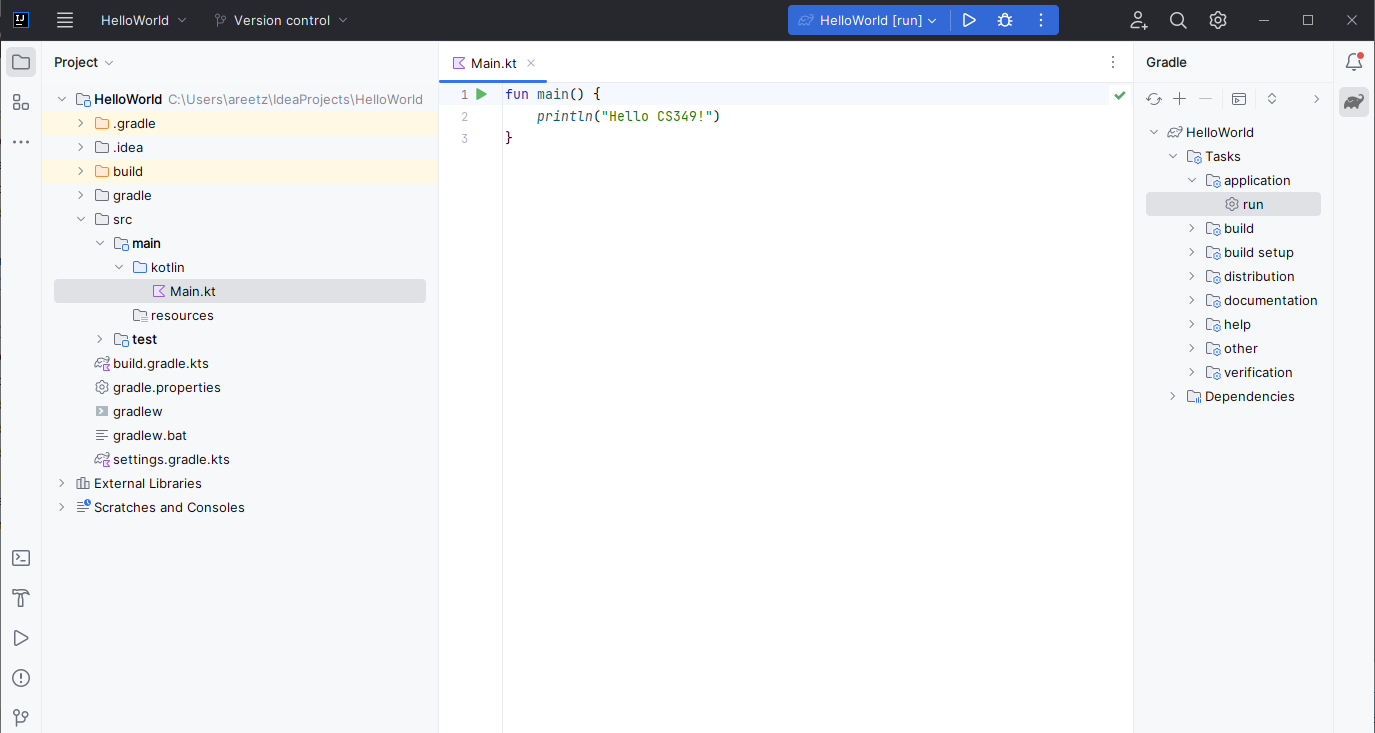
IntelliJ should open the main project view, showing the project files on the left hand side and code in the middle. We have also clicked on the Gradle button on the right-hand side to show the gradle tasks. Depending on your computer and network connection, this might take a few minutes.
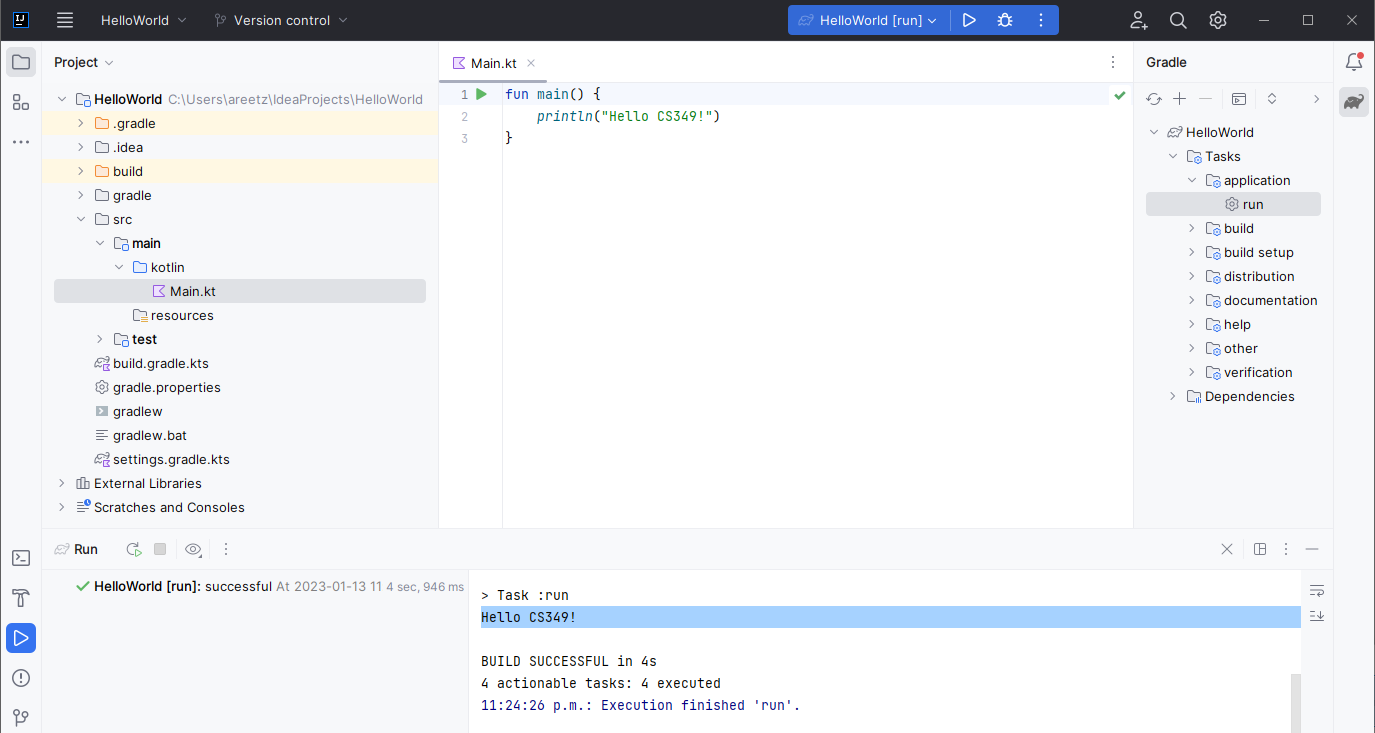
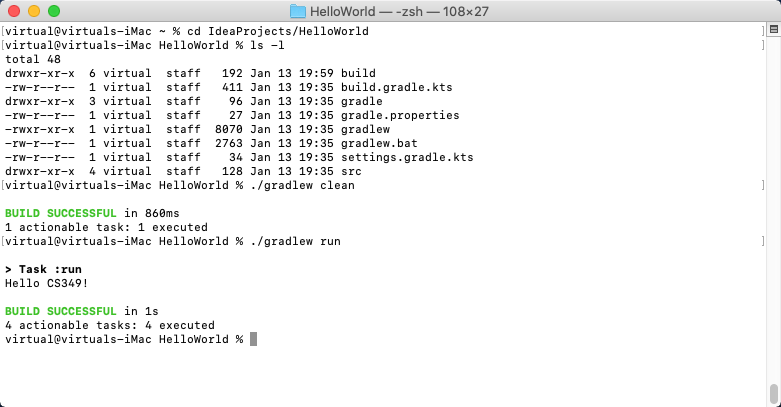
In the Gradle tasks window, double-click on Tasks/application/run to build and run your application. You will see the following output in the Run-window:
Alternatively to running your program from within IntelliJ, you may also (compile and) run your program from the command line.
On macOS, all you have to do is opening a Terminal window, navigating to your project root folder (by default in ~/IdeaProjects/) and execute Gradle with the desired script, for example, ./gradlew run for compiling and running your program.
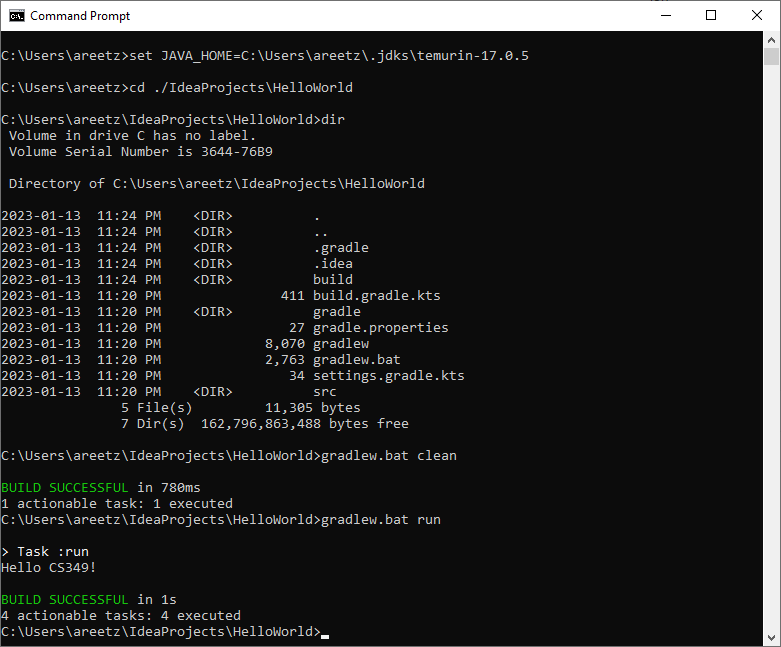
On Windows, the overall procedure is the same, i.e., executing gradlew.bat run in the project root folder. Before doing so, however, you need to set up your JAVA_HOME-environmental variable. You can do that either via System Properties -> Environment Variables, which is persistent, or in the command prompt via set JAVA_HOME=..., which is not persistent. IntelliJ installs all JDKs in C:\Users\[your user name]\.jdks\[your JDK version], for example, C:\Users\areetz\.jdks\temurin-17.0.5.
Congratulations, you are done! You can use this as a starting point for exploring Kotlin! The only other thing we want to point out is how to add classes (and other artifacts) to your project.
To add a new class (or other artifact) to your project, right-click on the desired folder and select New\Kotlin Class/File (or New\Package for packages).
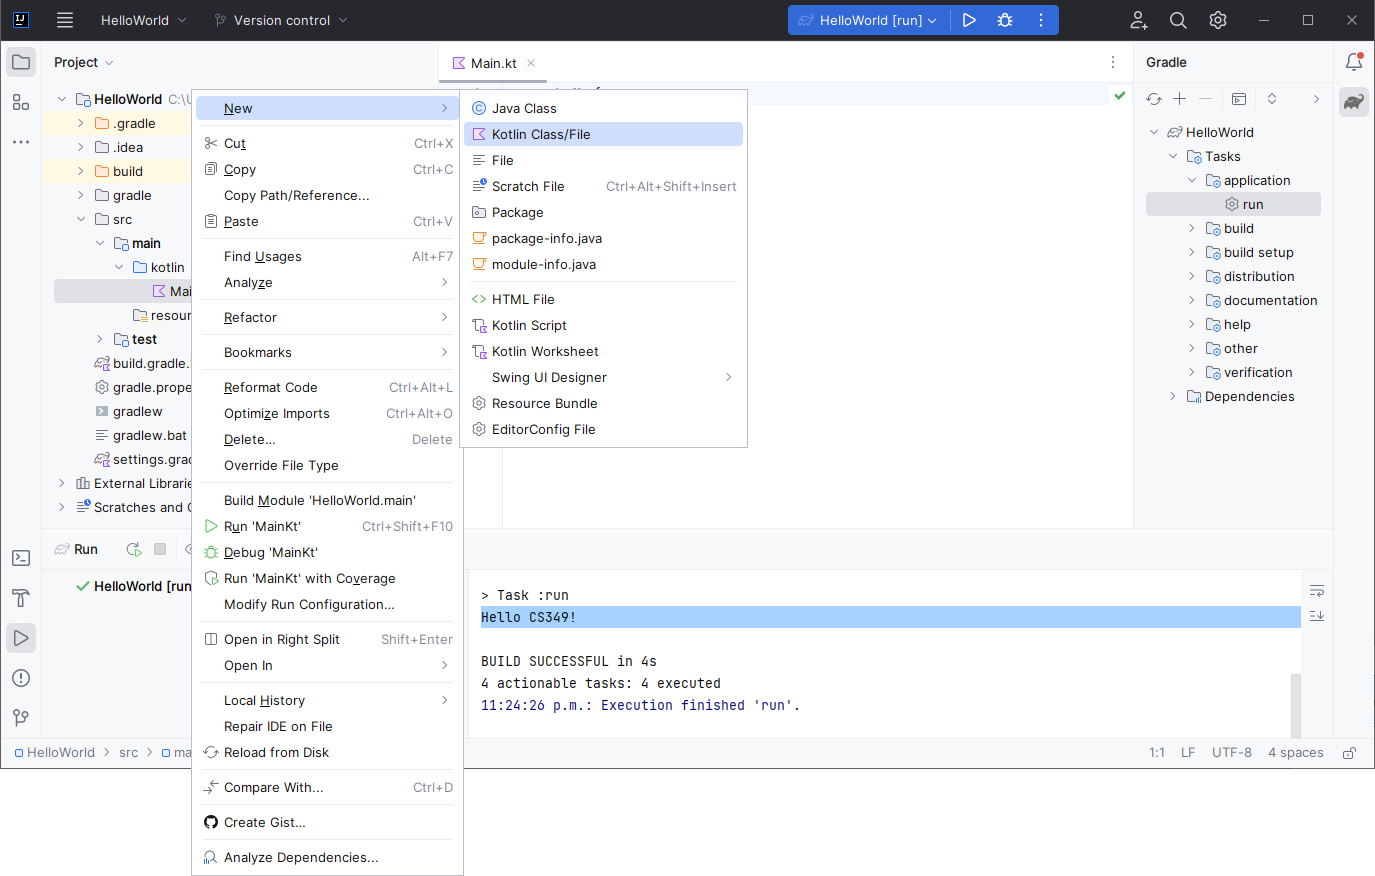
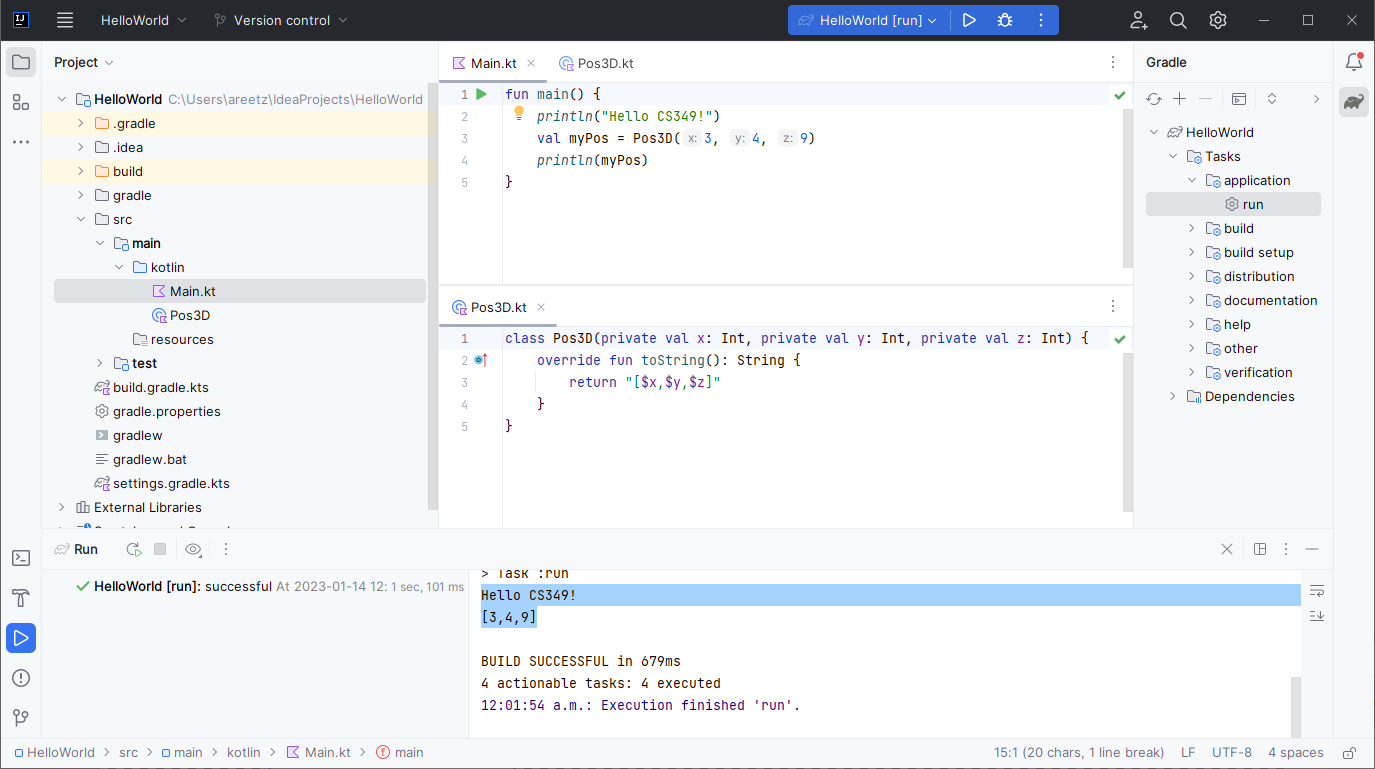
In the next window, you must choose a name and a type (e.g., Class, Interface, or Data class) for the new artifact. In the example below, we created a new Class of name Pos3D and used it in the project’s Main file.