
Creating an Android Project
The instructions below help you set up an Android project in IntelliJ IDEA.
Launch IntelliJ IDEA. From the Welcome screen, select New Project to be taken to the project wizard. From here, you can choose one of many different types of projects to create.
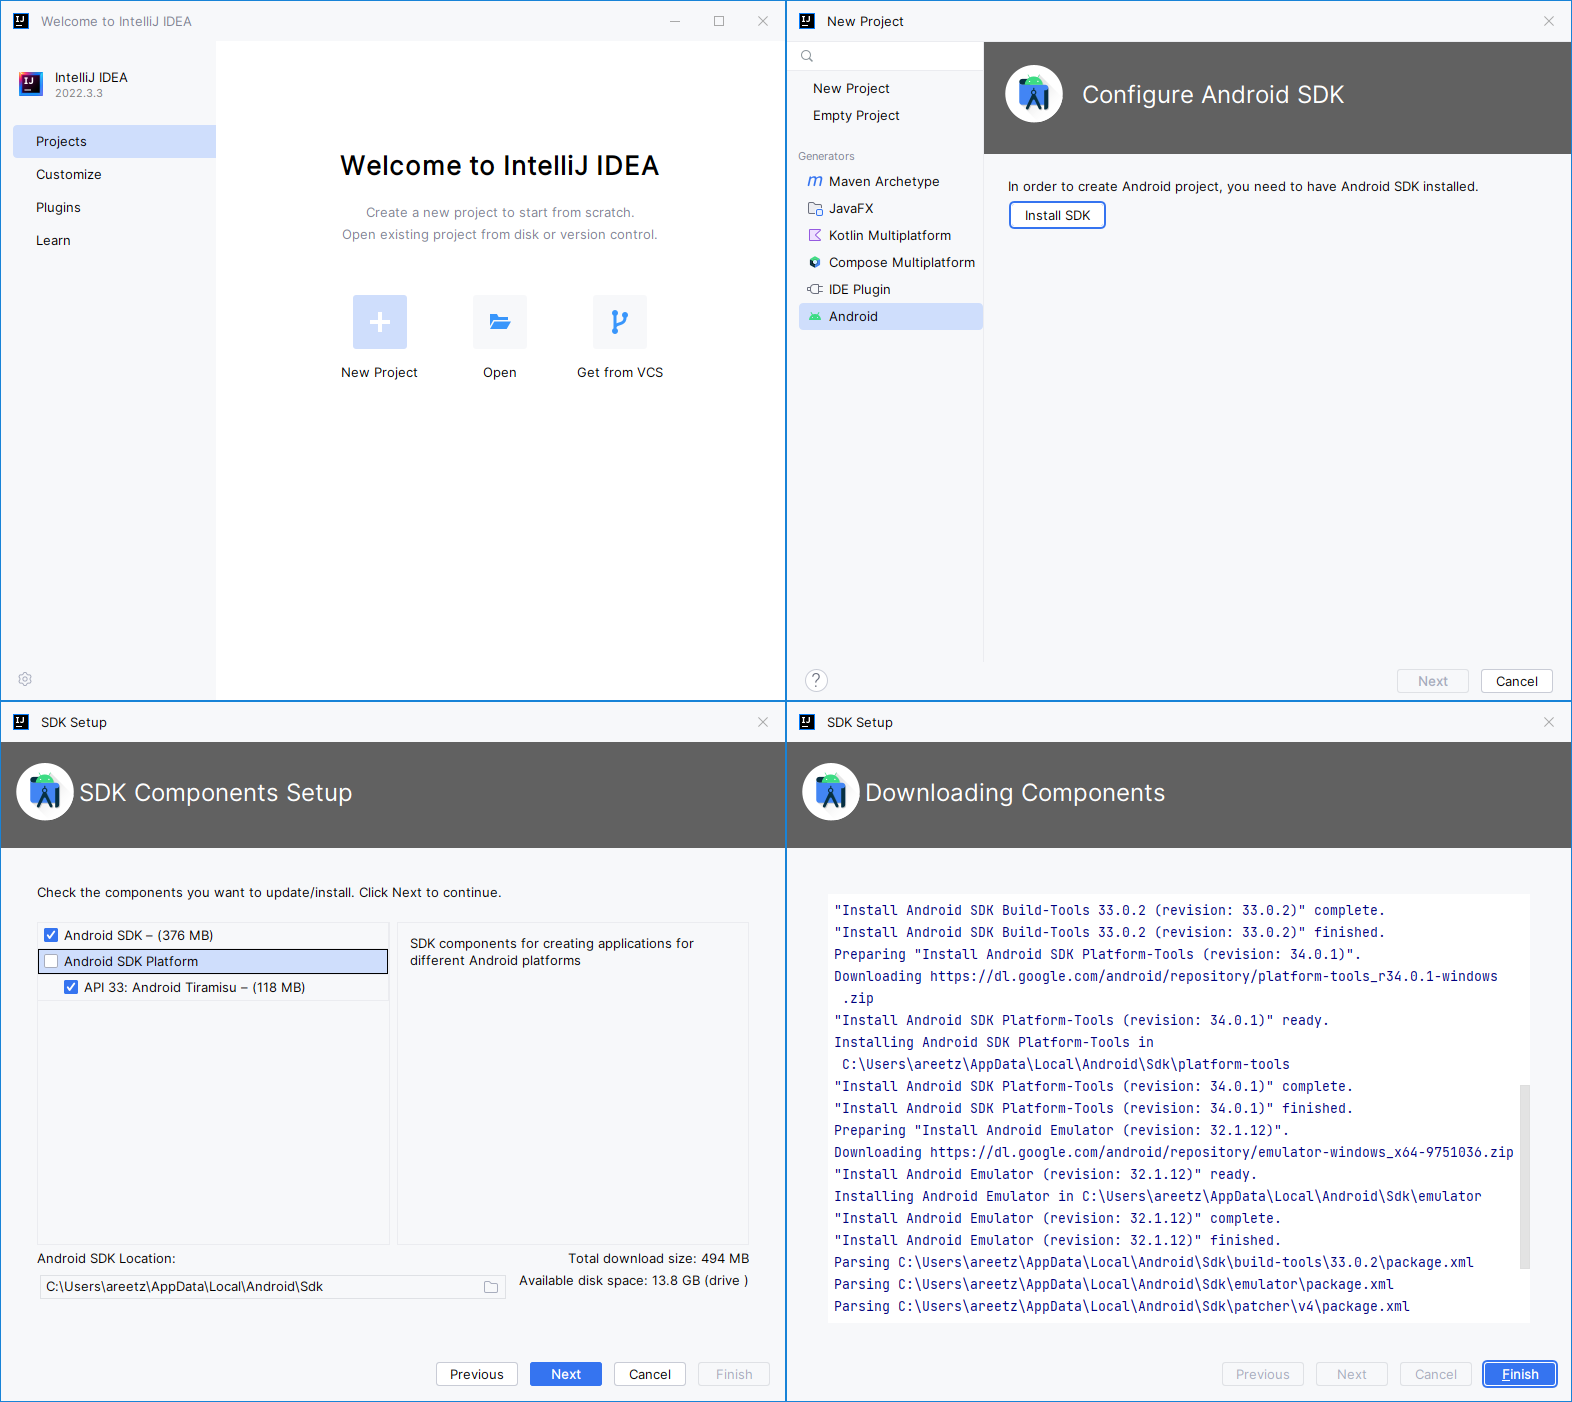
To create an Android application, you must first install the Android SDK. Start the process by choosing Android as your project type and proceed through the following steps:
- Install SDK
- SDK Components Setup: Make sure that
API 33: Android Tiramisuis selected. - Downloading Components: This step can take several minutes, depending on your computer and internet connection.
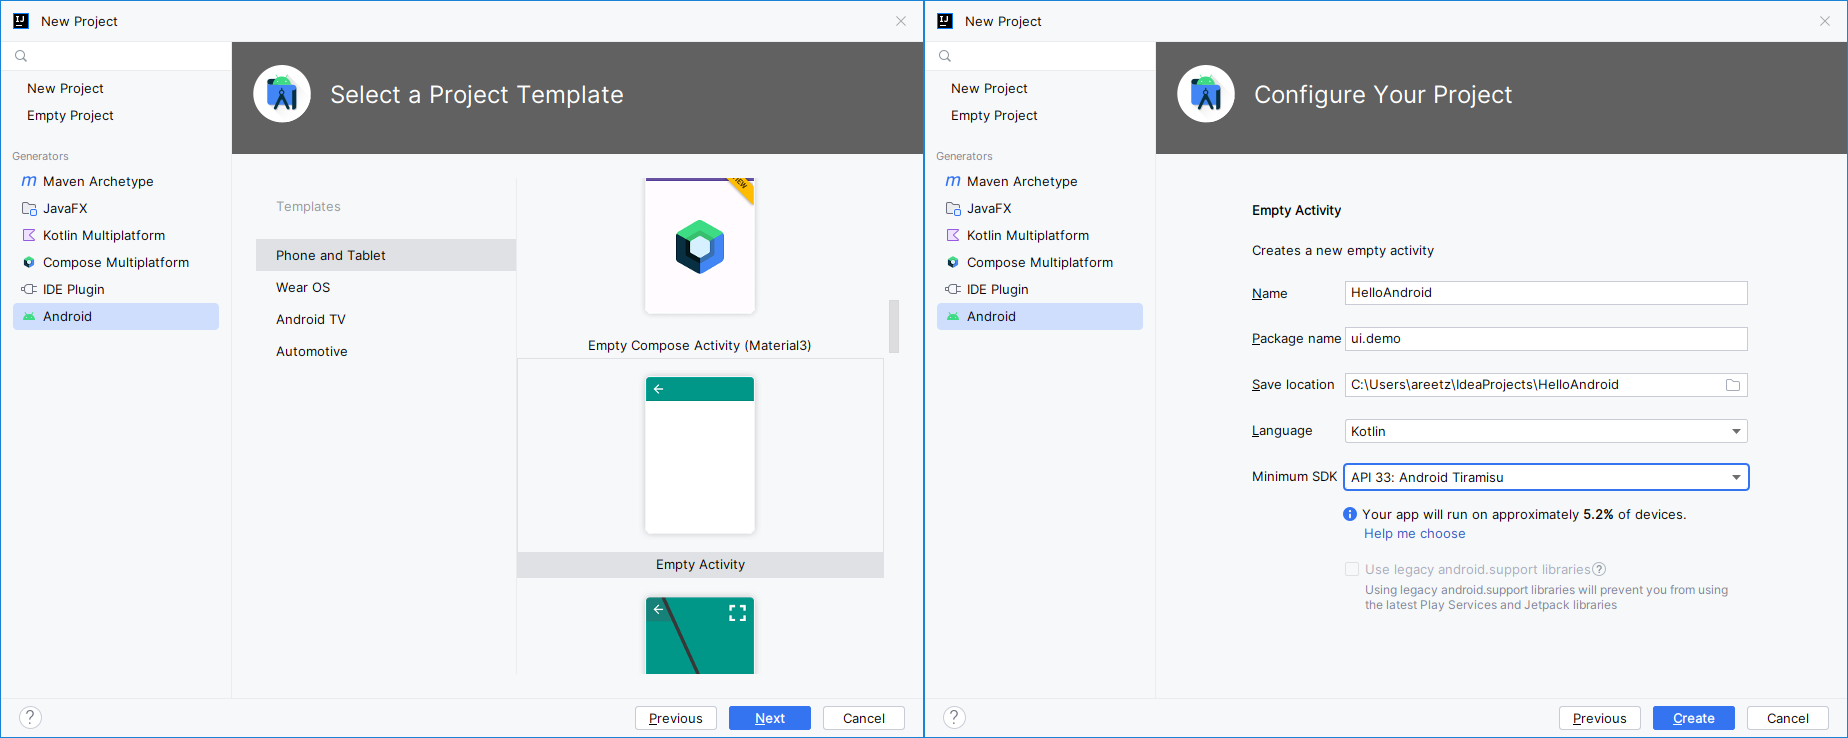
With the Android SDK installed, you can now create your first Android App. On the first screen, select Phone and Tablet -> Empty Activity as your project template. On the second screen, make sure to select Kotlin as language and API 33: Android Tiramisu as Minimum SDK.
Gradle will not be able to build the newly created project because it is missing a compatible JDK, i.e., a JDK of version 11 or lower. (We have been using JDK 17 for JavaFX.)
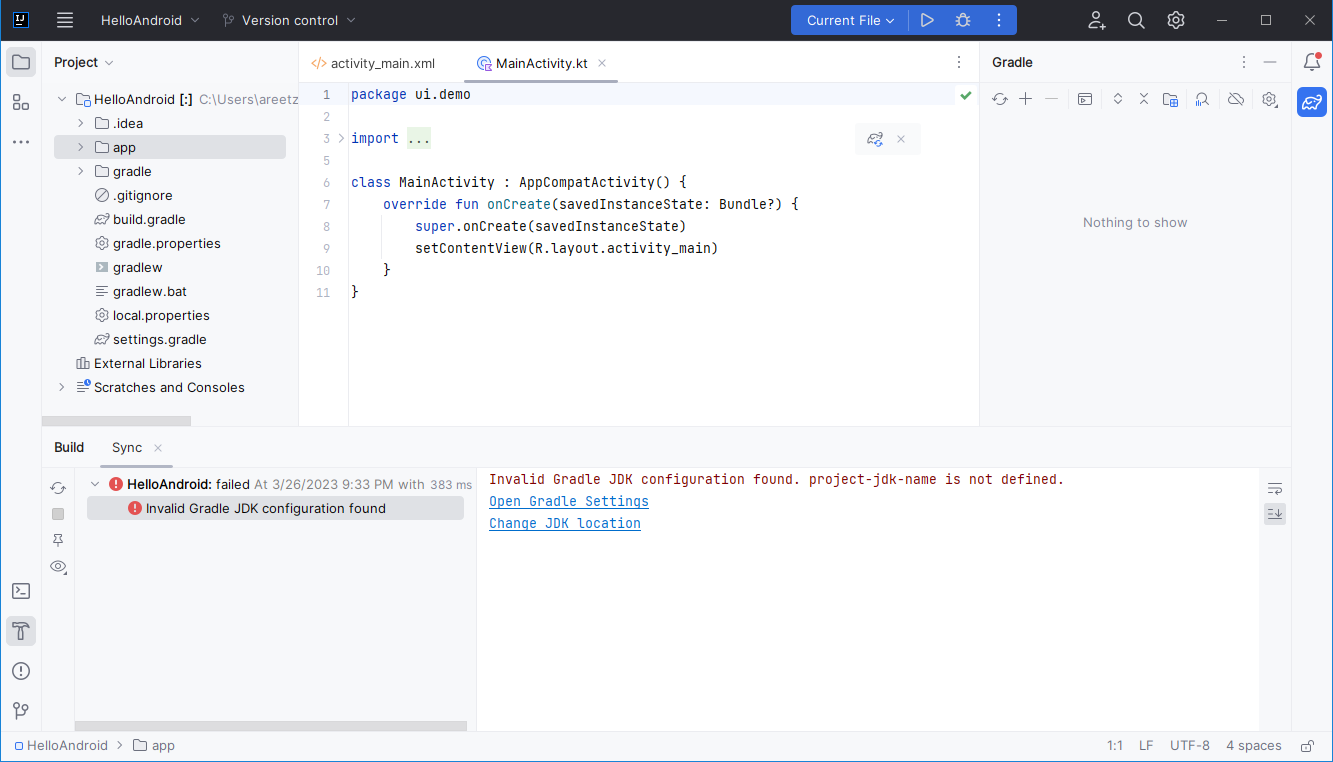
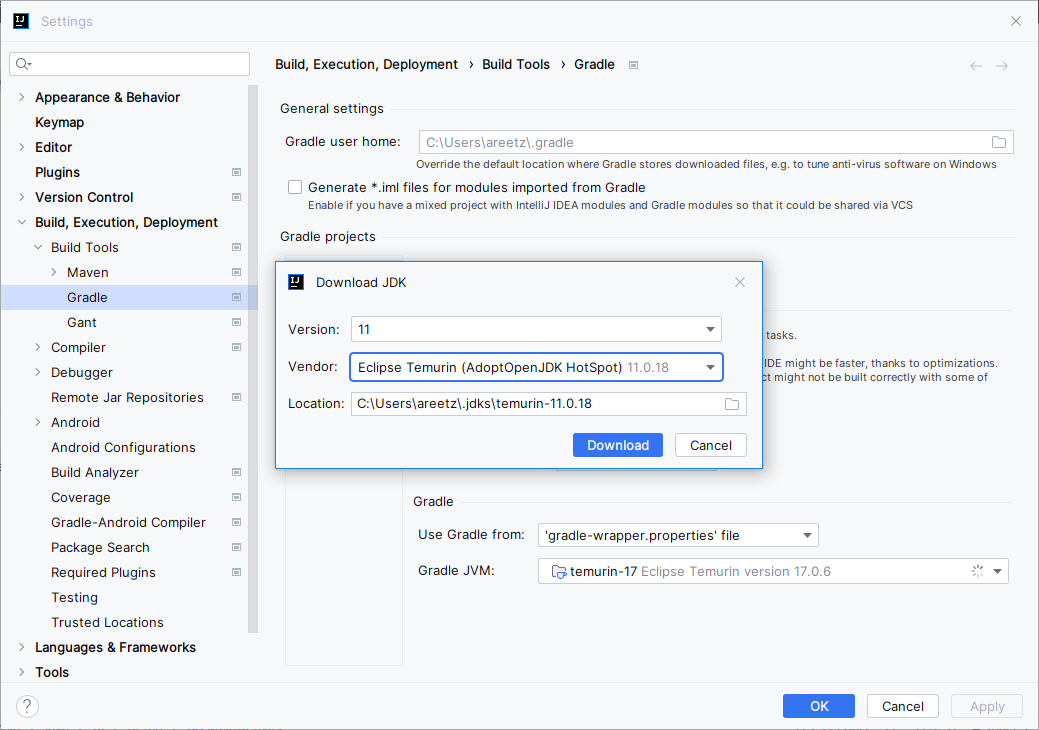
To install a lower-version SDK, click on Open Gradle Settings, download the latest JDK 11 under Gradle JVM, and verify that, after the download has completed, Gradle JVM is indeed set to JDK 11. After applying the change and returning to the Main Window, IntelliJ will start downloading more packages. This step can take several minutes, depending on your computer and internet connection. Once Gradle has finished, you should be able to build your app.
If you are attempting to use JDK 17, you will get the following error message:
Could not find compile target android-33 for modules :appTo fix this problem, follow the steps above.
To run your app, you must install a Android Virtual Device (AVD), i.e., an Android emulator. Go to Tools -> Android -> Device Manager to open the AVD Device Manager.

Create a new device of Model Pixel 4a with Android Tiramisu (API Level 33) as system image.

IntelliJ will now download the device image, which can take several minutes, depending on your computer and internet connection.
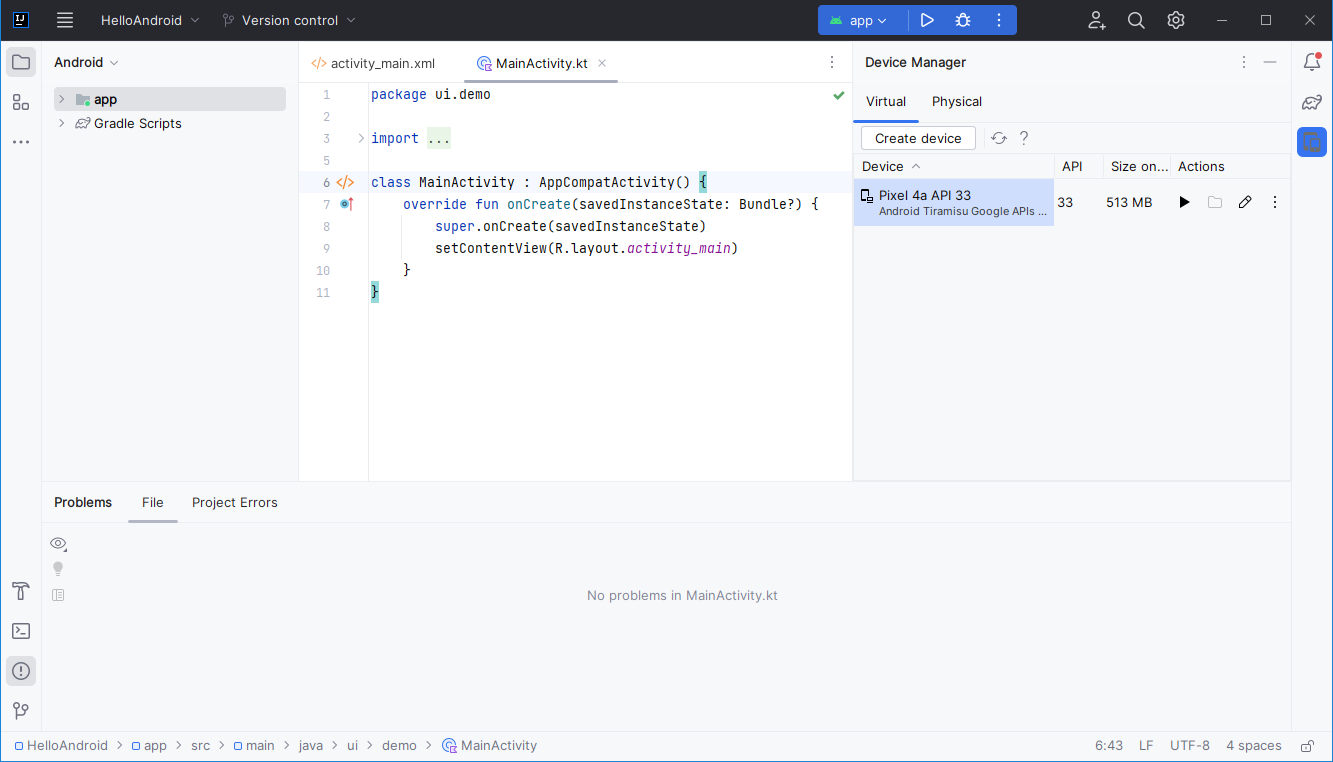
Once this step is completed, you can now compile and run your App, either by clicking the white Play-icon next to app or by pressing Shift+F10. This will also start up the AVD, which might take a few minutes. Alternatively, you run the Gradle task Tasks -> install -> installDebug, which compiles and install your app on the AVD; after that, you have to launch your app from within the AVD manually.